Home Blog Page 190

Crosman Optimus Review

0

If you have a pest problem in your backyard

And are looking for an inexpensive air gun in the $100 range to solve the problem

You have to dig very deep as there is only a small number of quality guns that pack a heavy punch at this price range.

The Crosman Optimus is one of them.

This economical rifle has a quality beyond its cheap price tag, and you will find out why in this review.

Crosman Optimus – Guntype

This is a spring-piston gun.

For more on the 5 types of air rifles, you need to know before buying, see this post.

The Crosman Optimus is a break barrel gun which means that you have to cock it each time you want to shoot.

Break barrel guns are the easiest of all air guns to load because the breach is exposed when it breaks open.

Besides, it gives you an unlimited shooting capacity and is easy to repair because of its simple mechanism.

Finally, a break barrel gun is easy to clean since you have direct access to the barrel .

This is a single-shot gun.

Single-shot guns give you control over ammunition and make you a better shooter because you know you have to make your first shot count.

The rifled barrel has a caliber (the internal diameter of the bore, measured in inches) of .177 (4.5 millimeters) and .22 (5.5 millimeters).

While .177 is popular for target shooting, .22 is a go-to caliber for hunters and pest eliminators because it delivers lethal knockdown power for small game, something that .177 cannot guarantee.

(For more on how to choose the right air gun caliber for your game, see this post.)

Check Price on amazon

Stock

The stock is made of hardwood so it can withstand stress, shocks, load, impact, and abrasion in daily life.

For more on the in-depth comparison between synthetic and wood stock, see this post.

Moreover, the stock is ambidextrous so you will have the same shooting experience whether you are left-handed or right-handed.

Additionally, this stock has a rubber recoil pad to absorb recoil when you shoot.

Ammo

The Crosman Optimus uses .177 and .22 pellets as its source of ammunition.

.22 pellets are heavier and have a larger diameter than .177.

It doesn’t have as much velocity as the .177 pellet but it is more stable in its direction.

Besides, it also has lots of takedown power to finish an animal in one quick, clean shot, so .22 is your best choice to protect your garden from pests.

(For more on the differences between .177 & .22 and which jobs they do best, see this post)

Cocking and loading

Cocking the gun: Hold the pistol grip with one hand, place the stock on your hip, and break the barrel all the way down to its limit.

Loading the pellet:

  • With the breech open after you cock the gun,
  • Put the pellet into the chamber (with the pellet’s nose lying forward)
  • Pull the barrel up to its original position and you are ready to shoot.

Sight

If you are a fan of open sights you’re going to love the Optimus’s sight.

The front sight is fiber optic and the rear sight is fiber optic, too. It is fully adjustable for windage and elevation.

(For more on how many types of air gun sights are out there and which one is suitable for you, see this post.)

As if the fiber optic sight is not enough, Crosman has installed 4×32 scope in case you grow bored of shooting with iron sights.

32 is the diameter of the front lens, measured in millimeters.

4 is the magnification ability of the scope: It magnifies the real picture 4 times.

This scope is good enough for backyard shooting or for pest control but I suggest you upgrade to a better one if you want to go hunting.

Velocity, accuracy and power

The manufacturer claims that the Crosman Optimus 0.177 air rifle achieves a velocity of 1,200 feet per second (FPS) with an alloy pellet and 1,000 FPS with a traditional lead pellet.

And the .22 Crosman Optimus can deliver up to 950 FPS with alloy pellets.

This is a high velocity compared with other .177 – .22 air guns on the market and we can expect a serious hitting power at this level of velocity.

Chrony tests give us results as follows:

In .177:

.177 PelletsFPSFPE
8.3 grains RWS superdome93015.94 
10.2 grains JSB Exact dome pellet80714.75 
8.4 grains JSB exact dome87714.35 
Crosman premier 7.9 grains92314.95 
10.5 grains Crosman Priemier75913.43 

In .22:

.22 PelletFPSFPE
Gamo PBA 9.8 gr85415.91
RWS Hobby 11.9 gr70713.23
Crosman Premiere Hollow Point 14.3 gr71816.37

The actual velocities are nowhere near the advertised number,

But remember that the average muzzle energy is more than 13 FPE which is more than enough to deal with birds, ducks, squirrels, chipmunks, rats, etc.

Bro Wild Outdoors took out the Crosman Optimus .22 Pellet Gun for some Crow Hunting pest control here:

https://www.youtube.com/watch?v=8qNaE0IhZoo

Accuracy for Crosman Optimus .177:

Distance in yards:< 30305060100
1 ?   
2 ?   
3 ?   
A quarter ?   
Tin Can (open sight)?   ?
Woodpecker  ?  

For Optimus .22, the common shooting groups are:

  • 0.509” at 10 yards with RWS Super H-point 14.2 grains
  • 0.44” at 10 yards with RWS Super H-point 142. gr
  • hit bull’s eye at 10 meters
  • dime size at 25 yards
  • quarter size at 15 yards
  • 1” at 25 meters
  • 1” at 50 meters with Crosman Premiere Hollow Point pellet
  • 1.25” at 20 yards
  • 2” at 50 yards.

Furthermore, it can:

  • pack a good punch clearing through 6/8” plywood at 20 yards
  • kill pigeon in 30 yards
  • shoot bird at 60-70 yards
  • kill bird at 75 yards
  • shoot through 1/2″ plybacker
  • put the pellet through 1” wood board
  • kill a crow at 25 yards with the pellet exit animal’s body completely,
  • penetrate a piece of a quarter inch plywood
  • penetrate a 55-gallon barrel at 27 yards
  • kill duck at 40 yards
  • punch through a license plate at 100 feet
  • shoot through 5/8” plywood at 50 feet. 

To sum up, this air rifle is extremely accurate up to 50 yards and gives you lethal stopping power to solve pest problems in your garden.

(For more on everything you need to know about air rifle accuracy, see this post)

Loudness

The audibility test shows that this gun has 100 Decibels of noise output, making it a relatively loud break barrel gun compared to other Nitro Piston guns.

Some customers say this gun is loud, too.

One shooter asked a local law enforcement officer if there would be a problem shooting it in his fence in the backyard and was told it would not be a problem.

Therefore, you ought not to get into any trouble with the police.

For the neighbors, it depends on how sensitive they are

If they are easy-going and kind then you can take it outside and have fun on your property.

Trigger

With the pull weight of 4 lbs 10 oz., the trigger of Optimus is quite heavy and there is a long pull required in the second stage.

However, given the price of this gun, it’s adequate.

Specifications

  • Caliber: .177 – .22
  • Velocity: 1200 (.177) – 950 FPS (.22)
  • Loudness : 3- Medium
  • Overall Length: 43.0”
  • Shot Capacity:
  • Cocking Effort: 30 lbs
  • Barrel: Rifled
  • Front Sight: Fiber Optic
  • Rear Sight: Adjustable for windage and elevation
  • Scopeable: 11mm dovetail
  • Buttplate: Rubber
  • Suggested for: Small game hunting/plinking
  • Action: Break barrel
  • Safety: Manual
  • Powerplant: Spring-piston
  • Function: Single-shot
  • Body Type: Rifle
  • Weight: 6.5 lbs
  • One thing I found interesting is this gun only weights 6.5 lbs, a lot lighter than other adult-size guns so you can carry it around all day long without feeling fatigue.

Customer review

There are lots of customer reviews on this Optimus.

Positive reviews show that people love its cheap price, say its great value for a solid break barrel rifle, accurate and hard-hitting.

The main problem with this gun is the scope: plenty of negative reviews complain that the scope is junk and not screwed tightly.

The manual is very specific about mounting the scope, so make sure you mount the scope properly and use Locktite on the screw to stabilize the gun.

The only complaint that this gun deserves is the trigger.

There are so many guns at this price range that have better triggers like the Beeman series with RS2 trigger or Ruger Air Hawk.

Overall, customers find that this gun is a great gun for the price.

The scope and the trigger could be better but for the price range, they couldn’t ask for a better gun.

Many buyers believe this is one of the best guns under $150.

Price

The price for Crosman Optimus is just slightly more than 100 dollars.

It’s a damn cheap price for a gun that gives you small shooting groups, hits very hard, and can handle common pests such as squirrels, crows, chipmunks, etc.

Pros and Cons

ProsCons
  • Handsome hardwood stock
  • Fantastic fiber optic sight
  • Hit like a tank
  • Superb accuracy
  • High-end velocity
  • Heavy trigger with long pull on second stage
  • Loud but it cannot get you into trouble with local laws
  • Scope is not screwed tightly but you can fix it the ways I said earlier in this review

Check Price on amazon

Conclusion

The Crosman Optimus is a straightforward air rifle.

It doesn’t have anything fancy, but it wasn’t built to be fancy – it’s built for high quality at the lowest price possible.

This rifle is the best solution for your backyard problem. And don’t forget to have fun in the varmint-controlling process!

Grizzly Bear Attacks, Kills Bison in Yellowstone as Visitor Rolls Camera

0

Everyone who visits Yellowstone National Park, especially these days, considers themselves an amateur photographer. They’ve all got a high quality camera attached to the phone in their pocket, and any instance of wildlife needs to be captured.

When a single grizzly bear 200 yards off the side of the road can be enough to stop traffic, then an interaction between a young bear and a young bison is definitely going to get noticed.

That was the case for Michael Daus, who was enjoying a day in Yellowstone with his family and came across this scene. In what ends up being a five-minute filmed ordeal, the bear and bison go at it, fighting mere feet from parked cars, crossing a bridge, and eventually splashing into a river.

Daus allowed the video to be used and published by Jackson Hole EcoTour Adventures, who added some interesting and educational commentary to the clip.

Grizzly Bear versus Bison Filmed at Yellowstone National Park

The incident took place near the Grand Prismatic Overlook trail, which is a particularly popular, and therefore typically crowded, part of Yellowstone Park.

This snippet, taken from the YouTube caption Daus added to the video, gives some more context:

“We knew the bear was in the area, as we saw it near the road, less than a mile before turning into the parking lot for the grand Prismatic Overlook hike. While there was a steady flow of walkers, we carried bear spray and remained on the lookout for the bear the entire time.

“We weren’t crazy about returning to find the bear so close, just beyond the opposite side of the small parking area. We didn’t even see it until we were at our vehicle. I was particularly relieved that the bear seemed more interested in the bison, so while very close to the car, we simply maintained what felt like a safe distance.

“Having lived nearby for decades not minutes, we certainly don’t want our actions or the appearance of our proximity to the animals to set any kind of bad example about approaching wildlife. The camera on this phone boasts a pretty amazing lens and zoom capabilities. So I was able to get all the shots from further than it may appear. The kids enjoyed watching safely from the sunroof of the car. Thanks for the concern, just the same.”

A fight of this magnitude, between two wild animals so revered across the United States and the rest of North America, made it that much more special to capture via video. And honestly, it’s also special because there aren’t 40 alternate angles shot and uploaded to the internet from the crowd that would have certainly been gathered if it were peak season.

In fact, for those who’ve visited Yellowstone and are familiar with the area, like our own Travis Smola, this clip came as a shock.

“I’ve been there a bunch of times, it’s one of the busiest parts of the park,” Smola said when he saw the video. “I can’t believe there weren’t 2,000 people there watching this unfold.”

Yellowstone grizzly bears have been known to prey on bison, as well as elk calves or other ungulates. Yellowstone’s wolf and bear populations are the bison’s only large predators in the Park.

READ MORE: CAT FIGHTS OFF ATTACK FROM THREE COYOTES IN SECURITY CAM FOOTAGE

Maven B1.2 Binocular Review: ‘Lighter & Brighter’

0

The newly upgraded Maven B1.2 binocular is now lighter, brighter, and more compact than the previous B.1. Better yet, it has improved coatings and a larger Schmidt-Pechan prism that delivers a wider field of view.

To get us a closer look, Maven sent Man Makes Fire a review unit. After testing the Maven B1.2 in 10×42, as well as putting it to work while archery elk hunting in Idaho, this is what we learned:

Maven B1.2 Review

I very much liked the original B.1, which I hunted with for two years (full original B.1 review here). Still, I have to tell you: The new Maven 10×42 B1.2 is much better.

How is that possible?

For me, the B1.2 delivers two major improvements in usability. First, the new B1.2 is smaller so it’s easier to handle. It’s .5″ shorter than the B.1 and it weighs 2.7 oz less than the B.1.

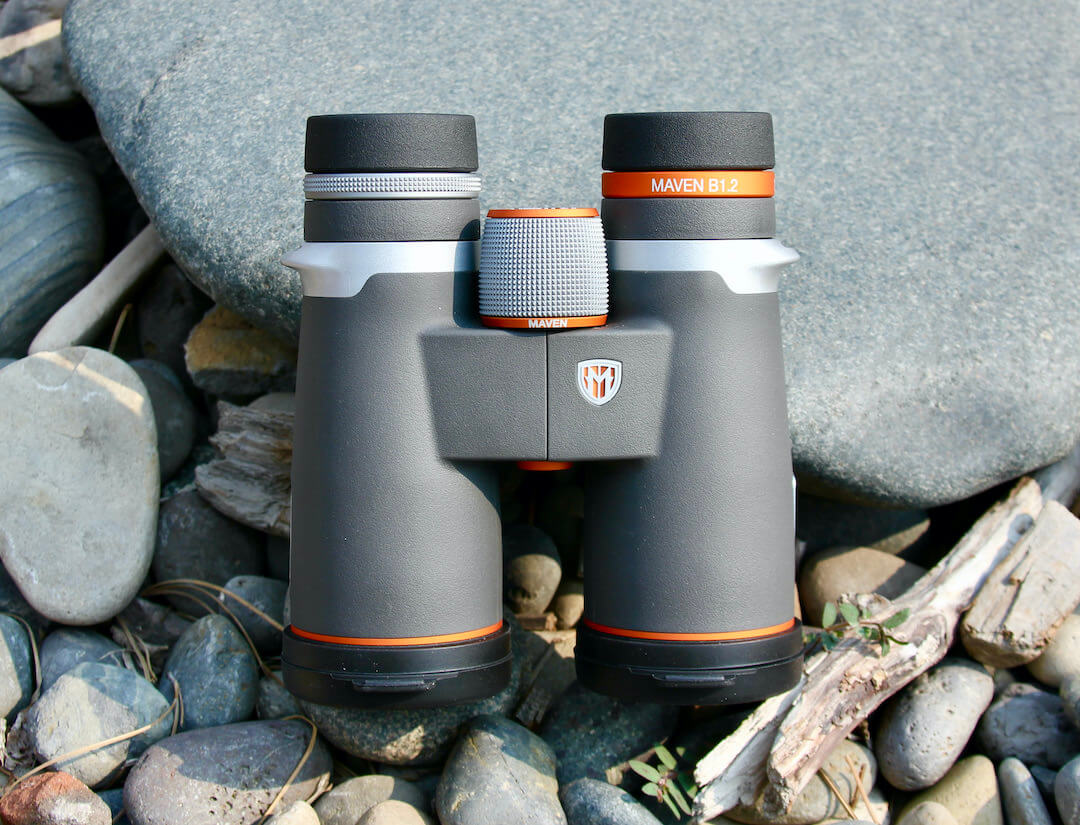
This review photo shows the new Maven B1.2 10x42 binoculars during the testing process.
The new Maven B1.2 binoculars now have a more compact frame that delivers a wider, more immersive Field of View.

These differences might seem like relatively minor changes, but in the field, they’re not. When you need to use one hand to grab your binoculars and take a quick look at what you hope is an elk or deer, the lighter and more compact B1.2 binoculars make this much easier. In addition, when I’m standing up and looking through the B1.2, I can hold it steadier for longer periods of time. That leads to an in-the-field information boost, and when I’m trying to find an elk, I’ll take any edge I can get.

To put this in perspective, consider this: Last year, on big-mile days I found myself thinking about taking the lighter (but not as crisp) Maven C.1 10×42 binoculars — just to save weight and gain some one-handed agility. This year with the B1.2 in 10×42, that’s no longer a question at all.

Bigger Field of View

The new B1.2 now includes a wider field of view. The new FOV is 362′ — which is just 21′ wider than the previous FOV.

How is 21 feet a big deal?

While the edge-to-edge clarity of the B1.2 binoculars is very good, having a wider field of view can help increase the perceived sweet spot as you’re looking through the binoculars. This lets your brain process more information and maybe see movement or an object that you might not otherwise notice. For me, technically getting a wider view isn’t that big of a deal when I’m trying to examine a hillside piece-by-piece . . . but how I feel when I do this, which can sometimes get tedious, makes a difference. This FOV boost makes the Maven B1.2 binoculars feel quite a bit more immersive than the B.1s.

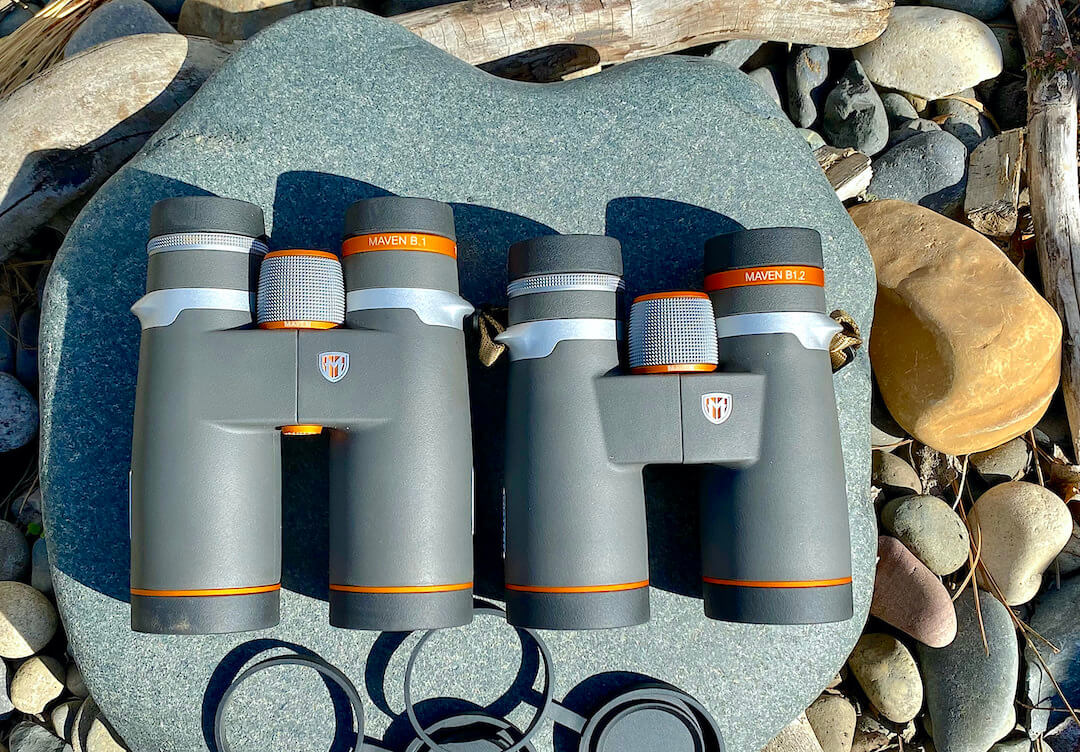
This review photo shows the previous generation Maven B.1 binoculars next to the new
In photos the previous ‘B.1’ version (left) doesn’t seem much larger than the new ‘B1.2’ version (right). In person, though, the difference is a great usability improvement.

To be fair, the B.1s are already very good. If you already have a set of B.1s, the overall specifications mean you don’t have to upgrade. At the same time, here’s a warning: If you suffer from gear lust, don’t look through the new Maven B1.2 binoculars.

Check out Maven’s Customization Builder to see cool camo and color patterns!

Improved Coatings, Better Light Transmission

The biggest B1.2 surprise to me is that Maven found a way to improve its fully-multicoated ED glass. In case you’re wondering, optics manufacturers coat their lenses with secret sauces and ions and use techniques that reduce light refraction so that more light passes correctly through each piece of glass.

The glass itself is ED glass made in Japan and assembled in Wyoming — just like all the glass in Maven’s high-end optics. ED stands for extra-low dispersion, and it’s basically high-end glass that improves the delivery of wavelengths of light to reduce chromatic aberration (which I’ll get to below).

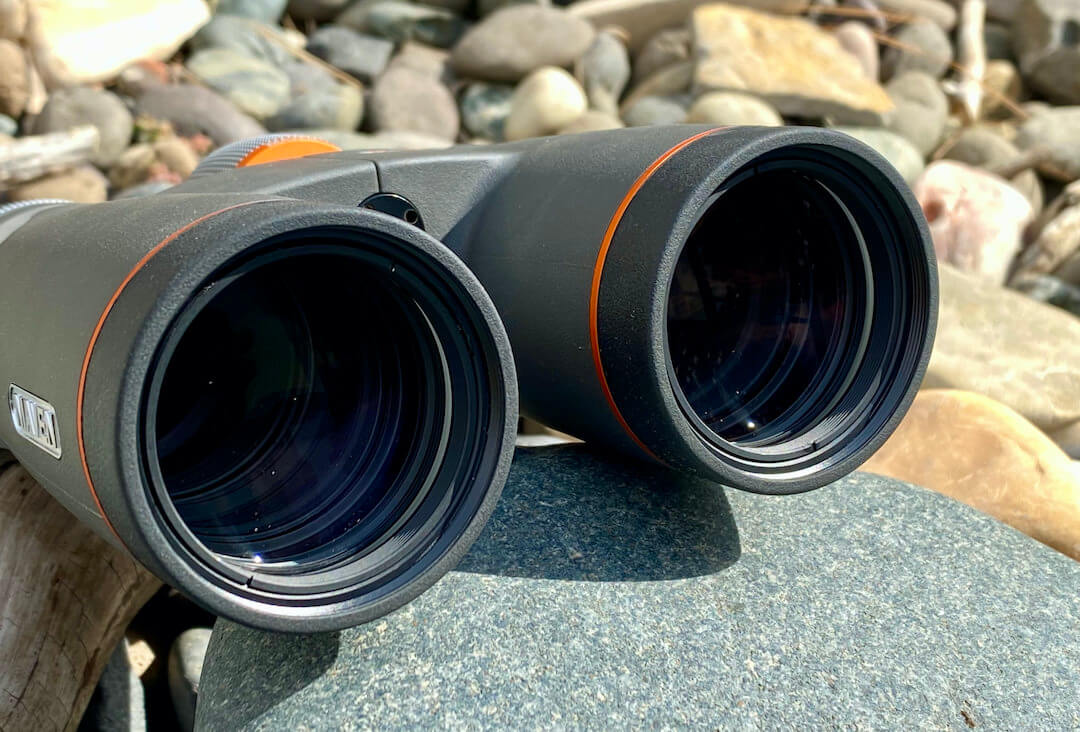
This photo shows the lenses on the Maven B1.2 10x42 binoculars.
Hard to see here, the but interior of the barrels is pristine.

However, the new coatings, in combination with the new construction of the prism, has somehow resulted in a 3.6% boost of light transmission — up from 90.9% to 94.5%. That’s a very impressive gain. Incidentally, many optics companies don’t publish this sort of data, but Maven publishes a massive binocular comparison chart that shows key specifications across its entire line. So cool.

But wait, there’s more to this story: The new Maven B1.2 10×42 binocular now competes very closely, and sometimes beats, the light transmission percentages delivered by Maven binoculars with Abbe-Koenig type prisms. In general, Abbe-Koenig prisms deliver the best light transmission but they are heavier, longer, harder to manufacture, and cost more. The fact that the relatively short B1.2 with Schmidt-Pechan prisms can compete here is, again, impressive.

Chromatic Aberration

What is a chromatic aberration? In general, when you can see an outline of translucent color tracing an object’s edges in a high-contrast situation, you’re seeing a chromatic aberration. It occurs when different wavelengths of color don’t converge at exactly the same spot after passing through a lens. It’s more noticeable at higher magnifications.

I can spot a small bit of chromatic aberration with the Maven B1.2. In side-by-side testing with the B.1, the chromatic aberration effect is very similar — and quite small.

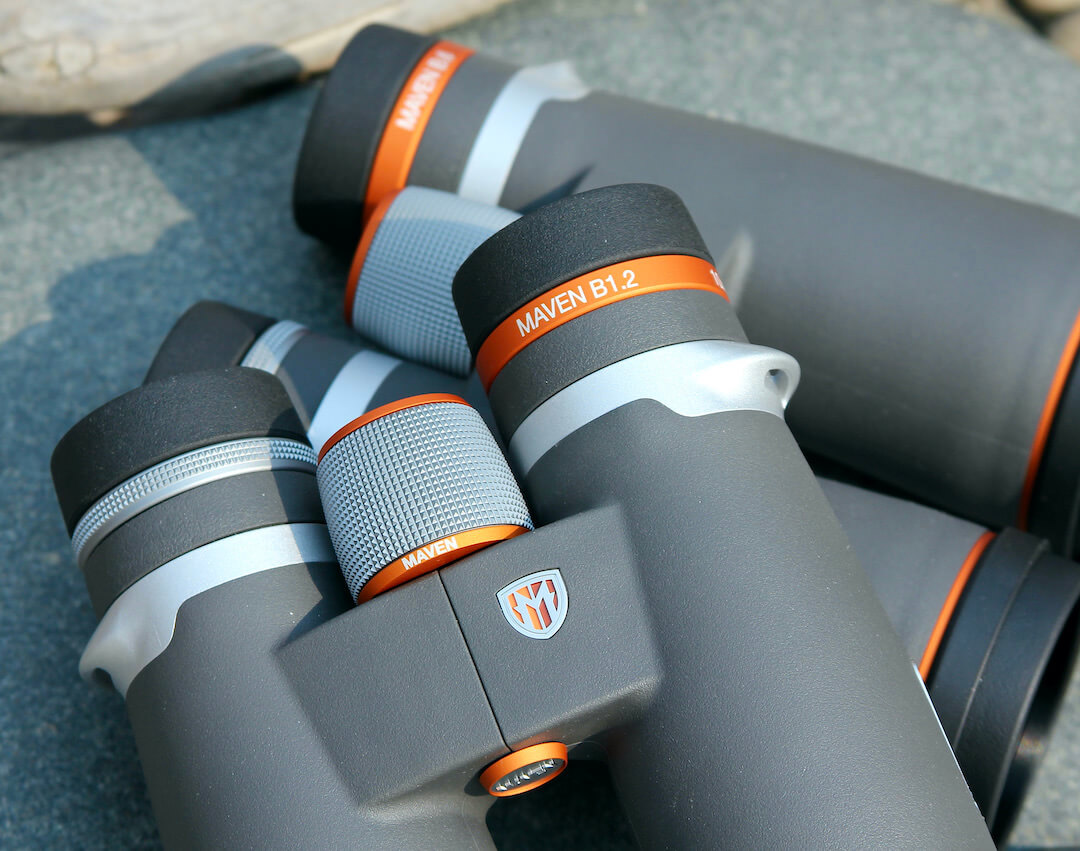
This photo shows a closeup of the Maven B1.2 on top of a Maven B6 in the background.
The fit-and-finish of the Maven B-series binoculars is excellent.

To test for chromatic aberrations, you can look through binoculars at a U.S. Air Force black-and-white test chart . . . or you can find a non-moving high-contrast subject in the sky. For example, if you look at a dark part of a tree branch against a bright sky, you can usually see some color fringing. In the Maven B1.2, it’s a very thin purplish hue. (Your brain has a tendency to ignore this, so with good glass you have to look hard to find it.)

At home, there’s a tree I use for this purpose — in addition to a U.S. Air Force test chart taped to my garage door when I’m more serious.

So, is this a problem?

For the vast majority of people it’s not. First, the color fringing effect is very small. Second, most people’s brains tend to filter it out as they process images. My recommendation? You won’t notice it unless you work very hard to find it. So don’t worry about it. Everything else is so rich and vibrant you won’t care.

Shop the new B.12 direct from Maven!

Maven B1.2 Specifications:

Magnification 8x 10x Obj. Lens Diameter 42mm 42mm Exit Pupil 5.25mm 4.2mm Field of View @1,000 yds 420′ 362′ Brightness 27.6 17.6 Light Transmission % 93.95% 94.50% Twilight Factor 18.3 20.5 Weight 26.8 oz 26.8 oz Dimension WxHxD 5.2″ x 5.7″ x 2.2″ 5.2″ x 5.7″ x 2.2″ Eye Relief 18.1mm 17.8mm Near Focus 4.9′ 4.9′ Prisms Type Wide Angle Schmidt-Pechan Wide Angle Schmidt-Pechan Prism Reflective Coating Dielectric Coating Dielectric Coating ED Glass Yes Yes Diopter Correction (DPT) +/-3 +/-5 Waterproof/Pressure Testing IPX7 (1m for 30 minutes) IPX7 (1m for 30 minutes) Functional Temp Range -13°~140°F -13°~140°F Frame Material Magnesium Magnesium Internal Gas Purge Nitrogen Nitrogen Tripod Adaptable Yes Yes Country of Origin Japanese components, assembled in the U.S. Japanese components, assembled in the U.S.

Price-to-Value Ratio

This photo shows the adjustable eye cups extended on the Maven B1.2 binoculars.
The three-position eye cups are easily removable for those times you need to clean out debris.

Maven is a relatively small Wyoming-based optics company. A key part of its business model and competitive nature comes from its direct-to-consumer business model. By cutting out the middle man, so to speak, Maven can deliver great optics that cost less than the competition.

The Maven model also lets the company avoid negotiating with retailers over price points and stock levels — which can affect product ingenuity, quality and consumer pricing.

The drawback to Maven’s model is that you can’t walk into a Cabela’s or Bass Pro Shops brick-and-mortar store and look through a Maven optic. You have to order it online.

Maven’s Customization Program

Speaking of ordering online, Maven has a cool customization program. For an additional charge, you can customize the body color with a camo pattern. In addition, you can customize the color of the neck strap rings, focus wheel, ocular lens rings, objective lens rings, tripod/hinge cap, and labeling. And then you can even have the bino engraved with up to 30 characters — which might turn the Maven B1.2 binoculars into a great hunting gift idea. And the kind of optic you’ll eventually pass down to your kids.

Unconditional Lifetime Warranty

The Maven warranty competes with the very best optics warranties in the business: If a Maven optic ever fails — or gets broken — for any reason, you can return it to Maven for a replacement.

But it gets better. Maven will also stand behind a Maven optic as long as it bears their name. This means that if your Maven binoculars fail your son or daughter in 30 years, Maven will still repair or replace them.

Competition & Alternative Options

There are many great binoculars to choose from these days. For the most part, any binocular that’s priced more than $900 or so will be very good. In fact, most midrange binoculars in the $500 price range will be so good that the vast majority of people will never have a need to upgrade. Case in point? The Maven C.1 10×42 and C.3 10×50 are pretty great. At $900-950, the direct-to-consumer pricing of the Maven B1.2 binoculars sets them up to compete well against binoculars that cost twice as much. Here are several other can’t-go-wrong competitive options you might consider:

Vortex Razor HD — The most widely known competitor to the Maven B1.2 is the Vortex Razor HD binocular. Vortex has generated a loyal following over the years by investing heavily in marketing and its customer service department, which also backs a no-questions-asked lifetime warranty. The Razor HDs in 10×42 are slightly taller, slightly lighter, and deliver the same FOV as the B1.2s. The key benefit is that you can find the Razor HD binoculars in brick-and-mortar stores. The key drawback is the increased price. Note: The term “HD” in relation to binoculars tends to be more about marketing a term that consumers have associations with rather than identifying a specific type of glass. When comparing one binocular to another among different manufacturers, “HD” doesn’t actually pinpoint any agreed upon difference. (The Razor HDs do use ED glass, in case you’re wondering.)

Swarovski EL with Swarovision — Pretty much everyone who has ever looked through Swarovski EL Binoculars can appreciate the build quality and optical fidelity. The main benefit of Swarovski EL series is the industry-leading quality. The main drawback is the very high price point.

Zeiss Victory SF — Aside from fantastic glass and overall quality, Zeiss fans appreciate the balance and weight.

Leica Noctivid — The Leica Noctivid in 10×42 rounds out the ultra high-end competition. At 30.3 ounces, they’re a bit heavy compared to the similar binoculars in this class, but the 376′ FOV leads the pack.

Maven B1.2 10×42 Review: The Verdict

All-in-all, the new Maven B1.2 is a worthy upgrade to its B.1 predecessor. If you already have a B.1, the B1.2 will deliver a slight optical boost, but that likely won’t lead to a logical decision to upgrade. If, however, the previous weight and size of the B.1 turned you off, the lighter B1.2 with its more expansive Field of View makes it far more packable and easier to hold steady. The bottom line is, the B1.2 delivers competitive specs, has an excellent price-to-value ratio, and is a delight to use. Very highly recommended.

Get the Gear:

  • Maven B1.2 Binoculars — 8×42 & 10×42

How To Cook A Pig In The Ground Southern Style

0

How To Cook A Pig In The Ground Southern Style

When it comes to traditional Southern cooking, few things beat the rich flavors and succulent tenderness of a whole pig cooked in the ground. This age-old cooking method, known as “pig roasting” or “hog roasting,” brings together an entire community for a hearty feast. In this article, we will take you through the step-by-step process of cooking a pig in the ground like a true Southerner.

1. Choose the Right Pig

The key to a successful pig roast is selecting the right pig. Look for a young pig, preferably weighing between 60 and 100 pounds. It’s important to choose a pig that is fresh and sourced from a reputable butcher or farm.

2. Prepare the Pit

Prepare a pit in your backyard or designated cooking area. The pit should be large enough to accommodate the pig and have sufficient depth for hot coals or wood. Line the pit with bricks or rocks for insulation.

3. Build the Fire

Start by building a fire in the pit. Use hardwood such as oak, hickory, or mesquite for a traditional smoky flavor. Allow the fire to burn until you have a good bed of hot coals. You can also add some soaked wood chips for additional flavor.

4. Season the Pig

While the fire is burning, it’s time to season the pig. Generously rub a mixture of salt, pepper, garlic powder, and your favorite dry rub all over the pig, both inside and out. This will help to enhance the flavor and ensure a crispy, flavorful skin.

5. Secure the Pig

Place the pig on a large wire mesh or grill grate and securely attach it to a metal rod or rebar. This will make it easier to handle and rotate the pig during the cooking process. Make sure it is properly positioned above the hot coals.

6. Lower the Pig into the Pit

Using heat-resistant gloves or hooks, carefully lower the pig into the pit, positioning it directly above the hot coals. Ensure that it is centered and not touching the sides of the pit to facilitate even cooking.

7. Cover and Cook

Once the pig is securely in the pit, cover it with a layer of burlap or wet banana leaves. This will help to retain moisture and create a steaming effect during the cooking process. Then, cover the pit with a layer of dirt or sand to seal in the heat.

8. Monitor the Cooking

Allow the pig to cook slowly over the hot coals for approximately 12 hours. It’s crucial to monitor the cooking temperature, maintaining it around 225-250°F. Rotate the pig every few hours to ensure even cooking and baste it with a mixture of vinegar and water or your desired marinade.

9. Test for Doneness

To test for doneness, insert a meat thermometer into the thickest part of the pig without touching the bone. The internal temperature should read 160°F for the meat to be safely cooked. Additionally, the skin should be crispy and golden brown.

10. Carve and Serve

Once the pig is fully cooked, carefully remove it from the pit and allow it to rest for about 30 minutes. Use a sharp knife or cleaver to carve the pig into succulent pieces, including the crispy skin. Serve alongside traditional Southern sides like coleslaw, cornbread, and barbecue sauce.

There you have it – the ultimate guide to cooking a pig in the ground Southern Style. Whether you’re hosting a backyard party or a festive gathering, this traditional method is sure to impress your guests and leave them craving for more of that smoky, tender goodness. So gather your friends and family, and celebrate the rich culinary heritage of the South with a mouthwatering pig roast!

What do points mean in regard to hunting deer?

0

Understanding the Significance of Points in Deer Hunting: Unveiling the Secrets behind these Markers

Understanding the Significance of Points in Deer Hunting

Understanding the Significance of Points in Deer Hunting

Deer hunting is a popular sport in many parts of the world, and one aspect that hunters often pay attention to is the number of points on a deer’s antlers. Points refer to the tines or branches on the antlers, and they are used as a way to gauge the size and maturity of the deer.

In some regions, such as Montana, hunters may use different terminology when describing the number of points on a buck. For example, instead of saying “there is a ten point buck,” they might say “Look, there is a 4 by 4.” This means that the deer has four points on each side of its head. In other words, it could be called a 4 point buck.

However, in other parts of the United States, a “10 point buck” would refer to a deer with ten total antler points on its entire head. The way points are described can vary depending on location.

There are two different ways of counting points: eastern count and western count. Eastern count includes the eye guards and totals the points in both antlers. So if someone says they bagged a 10 point buck using eastern count, it probably means a buck with five points on each side, including the eye guards.

On the other hand, western count does not include the eye guards and only counts the points on one side. Therefore, what would be called a 4 point buck in western count would be referred to as a 10 point using eastern count.

For simplicity, most whitetail deer are described using eastern count while most mule deer and elk are described using western count.

In conclusion, when referring to points on a buck’s antlers in hunting terminology, it generally means an “antler point.” However, it’s important to note that how these points are described can differ based on location and the counting system used.

Decoding the Meaning of Points in Deer Hunting Terminology

Decoding the Meaning of Points in Deer Hunting Terminology

When it comes to deer hunting, the term “points” refers to the number of tines or branches on a deer’s antlers. For example, if someone says they spotted a ten point buck, they are referring to a deer with ten tines on its antlers. The number of points is often used as a way to gauge the size and maturity of the deer, with more points typically indicating a more mature and larger animal.

However, it’s important to note that the way points are described can differ depending on the location. In Montana, for example, if someone were to say there is a ten point buck, it would mean that the deer has ten different antler points on each side of its head. In other words, it would be referred to as a 4 by 4 in Montana, indicating four points on each side of its head.

In other parts of the US, a “10 point buck” would refer to a deer with ten total antler points on the entire head. So while the term “point” always refers to an antler point, how they are described varies based on location.

There are also two different ways of counting points: eastern count and western count. Eastern count includes the eye guards and totals the points in both antlers. Western count does not include eye guards and only counts the points on one side. For example, a 4 point buck using western count would be called a 10 point using eastern count.

To summarize, when it comes to deer hunting terminology, a point refers to an individual antler point. However, how they are described and counted can vary based on location and counting method used.

The Role of Points in Assessing Deer Size and Maturity in Hunting

The Role of Points in Assessing Deer Size and Maturity in Hunting

In hunting, “points” refer to the number of tines or branches on a deer’s antlers. When someone says they “spotted a ten point buck,” they are referring to a deer with ten tines on its antlers. The number of points is often used as a way to gauge the size and maturity of the deer, with more points typically indicating a more mature and larger animal.

It is important to note that the way points are described can vary depending on the location. For example, in Montana, someone might say “Look, there is a 4 by 4,” which means that the deer has 4 points (antler branches) on each side of its head. In other places across the US, a “10 point buck” would refer to a deer with ten total antler points on the entire head.

There are also different methods of counting points in hunting. Eastern count totals the points in both antlers, including the eye guards. Western count, on the other hand, does not count the eye guards and only counts the points on one side. So a 4 point buck in western count would be called a 10 point using eastern count.

To summarize, when it comes to assessing deer size and maturity in hunting, points play an important role. They refer to the number of individual points on the antler tines and can vary in how they are described and counted depending on location and counting method used.

Exploring the Different Ways Points are Counted in Deer Hunting

Exploring the Different Ways Points are Counted in Deer Hunting

Eastern Count vs Western Count

In deer hunting, the term “points” refers to the number of tines or branches on a deer’s antlers. However, the way these points are counted can vary depending on the location and counting method used. The two main counting methods are Eastern count and Western count.

Eastern count involves totaling the points in both antlers, including the eye guards. For example, if someone says they bagged a 10 point buck using Eastern count, it means that the deer has 5 points on each side, including the eye guards.

On the other hand, Western count only counts the points on one side of the antlers and does not include the eye guards. So a 4 point buck in Western count would be called a 10 point using Eastern count.

The Boone and Crockett Scoring System

To determine whether a projection on an antler qualifies as a point, hunters often refer to the Boone and Crockett scoring system. According to this system, each tip of an antler protrusion is considered one point.

However, there are specific criteria that must be met for a projection to be counted as a point. The projection must be at least one inch long and longer than it is wide at that length. This means that small nubs just starting to grow may not be counted as points.

Additionally, broken off antlers may not count if the stump is short and wide or broken at the base under 1 inch.

The Boone and Crockett Club, founded by Theodore Roosevelt, is a nonprofit hunting and conservation organization that sets standards for measuring native North American game animals. They also keep records of notable specimens based on their scoring system.

In conclusion, when it comes to counting points in deer hunting, there are different methods and criteria used. Eastern count and Western count refer to whether the points are counted on both antlers or just one side. The Boone and Crockett scoring system provides guidelines for determining what qualifies as a point based on length and width criteria.

Unraveling the Mystery: What Points Really Mean in Deer Hunting

Unraveling the Mystery: What Points Really Mean in Deer Hunting

Deer hunting enthusiasts often use the term “points” to refer to the number of tines or branches on a deer’s antlers. When someone says they “spotted a ten point buck,” they are indicating that the deer has ten tines on its antlers. The number of points is commonly used as a way to gauge the size and maturity of the deer, with more points typically suggesting a larger and more mature animal.

However, it is important to note that the way points are described can vary depending on the location. For example, in Montana, someone might say “Look, there is a 4 by 4,” which means that the deer has four points on each side of its head. In other words, it could be called a 4 point buck. On the other hand, in some regions across the US, a “10 point buck” would refer to a deer with ten total antler points on its entire head.

There are also two different ways of counting points: eastern count and western count. Eastern count includes all the points in both antlers, including the eye guards. So if someone says they bagged a 10 point buck using eastern count, it probably means a buck with five points on each side, including the eye guards. Western count only counts the points on one side and does not include the eye guards. Therefore, a 4 point buck in western count would be called a 10 point using eastern count.

To simplify matters, most whitetail deer are described using eastern count, while most mule deer and elk are described using western count.

In conclusion, when referring to points on a buck’s antlers in hunting terminology, it signifies an individual antler point. However, how these points are described can differ based on location and counting method used.

The Importance of Points: A Guide to Interpreting Deer Antler Size in Hunting

The Importance of Points: A Guide to Interpreting Deer Antler Size in Hunting

Deer antlers are a significant aspect of hunting, and the number of points on a buck’s antlers can provide valuable information about its size and maturity. When someone mentions a “ten point buck,” they are referring to a deer with ten tines or branches on its antlers. In different regions, the way these points are described may vary.

In Montana, for example, if someone says there is a “ten point buck,” it means that the deer has ten different antler points on each side of its head. However, in other parts of the US, a “ten point buck” would refer to a deer with ten total antler points on the entire head. The terminology used to describe the number of points differs based on location.

To simplify things, most whitetail deer are described using an eastern count method. This count includes all points in both antlers, including the eye guards. So when someone claims to have bagged a “ten point,” it likely means they shot a buck with five points on each side, including the eye guards.

On the other hand, there is also a western count method that does not consider the eye guards and only counts the points on one side. For instance, what would be called a “four point buck” using western count would be referred to as a “ten point” using eastern count.

The Boone and Crockett Club, founded by Theodore Roosevelt, has established standards for measuring native North American game animals and keeps records of notable specimens. According to their scoring system, each tip of an antler protrusion is considered one point. To be counted as a point, the projection must be at least one inch long and longer than it is wide at that length.

It’s important to note that small nubs just starting to grow or broken off antlers with short and wide stumps may not count as points. The Boone and Crockett Club’s scoring system helps ensure consistency in assessing deer antler size.

Understanding the number of points on a buck’s antlers can provide hunters with insights into the animal’s maturity and size. Whether using eastern or western count methods, these points serve as a valuable gauge in hunting and contribute to the overall excitement and challenge of the sport.

In conclusion, the number of points on a buck’s antlers refers to the individual tines or branches present. The way these points are described can vary based on location, with different counting methods used in different regions. By understanding the significance of points, hunters can better interpret deer antler size and make informed decisions during their hunting endeavors.

In conclusion, points are a measurement system used to assess the age and size of deer during hunting. They provide valuable information for hunters in terms of trophy quality and herd management. However, it’s important to remember that points alone don’t define the overall hunting experience or the ethicality of the practice. Ultimately, responsible hunting should prioritize conservation efforts and respect for wildlife.

The 7 Best Rimfire Scopes for .22LR

0

Shooting a rimfire rifle is a favorite pastime of mine. But beyond just plinking for fun, there’s hunting and a competitive rimfire field.

The type of shooting you do with your Ruger 10/22, M&P 15-22, or Henry AR-7 will determine which is the best rimfire scope for your 22LR.

Since the .22LR is a plinking, hunting, and competition round, there’s a lot that it can do, but it also has its limitations.

With that said, I consider scope features that address parallax, close ranges, reticle type, focal plane, and of course, cost.

Let’s dig in!

The Best Rimfire Scopes for 22LR in 2024

1. Vortex Crossfire II 2-7×32 Rimfire – Best Overall

One of the most popular scopes rated by the masses is the Vortex Crossfire II. This particular model is the 2-7×32 Rimfire scope with the V-Plex (MOA) reticle. Simple, affordable, and accurate. It’s why it’s a heavy hitter in the rimfire scope market.

Pros:

  • Cost
  • V-Plex reticle
  • SFP reticle
  • Resettable turrets
  • Fog/waterproof

Cons:

  • No illumination

Not having illumination isn’t necessarily a bad thing, but come low light or dark targets in shaded areas (think squirrels), having a red aiming dot can be a great boon. The only reticle available in the Rimfire model for this configuration is the V-Plex.

Now the V-Plex is a great and simple hunting reticle. Whether you’re popping off cans or nailing jack rabbits, the V-Plex is easy to employ. The posts are 0.57 MOA in size with the center crosshairs 0.17 MOA in size. So, they’re small enough not to cover up vitals on rodents. With the reticle located in the second focal plane, you’ll always have a full-size view of the crosshairs even at minimum 2x magnification.

Having been outfitted for the rimfire cartridge, the parallax setting is fixed at 50 yards. This will be perfect for close quarter shots as well as some reach out to 100 yards.

With 0.25 MOA adjustments, resettable to zero turrets, and caps to set-‘em-and-forget-‘em, the Crossfire is accurate and couldn’t be simpler to sight-in and employ right away.

At under $150 street price (approx.), the Crossfire II riflescope is a quality buy for plinkers and hunters. With its high ratings across the board, the masses have spoken.

2. Maven CRS.1 3-12×40 – Best for Hunting

The Maven CRS.1 was made for hunters by hunters. It’s an excellent rifle scope that I mounted to a Ruger 10/22 just because I could. It meets cost, reticle, and magnification requirements I have for a hunting scope on a .22LR rifle.

Pros:

  • Excellent glass
  • 4x zoom magnification
  • Fixed parallax
  • 0.25 MOA adjustments
  • CSHR SFP reticle

Cons:

  • Clarity at 25 yards

The CRS.1 has fixed parallax at 100 yards, and the .22LR round can and will go that far. However, at 25 yards, the clarity is just shy of sharp – it’s marginally soft. Obviously, it’s strengths are at 50+ yards, but I also think it’s just fine for 25-50 yards too.

As a C-series optic, it has excellent glass quality – it’s something Maven is pretty good at. I wouldn’t hesitate to use this as a hunting scope on my .22 or elk rifles. During field-testing, I did just that by mounting it to my Ruger 10/22 and .270. I also put it on my AR-15. Just so you know, the bundle package includes rings!

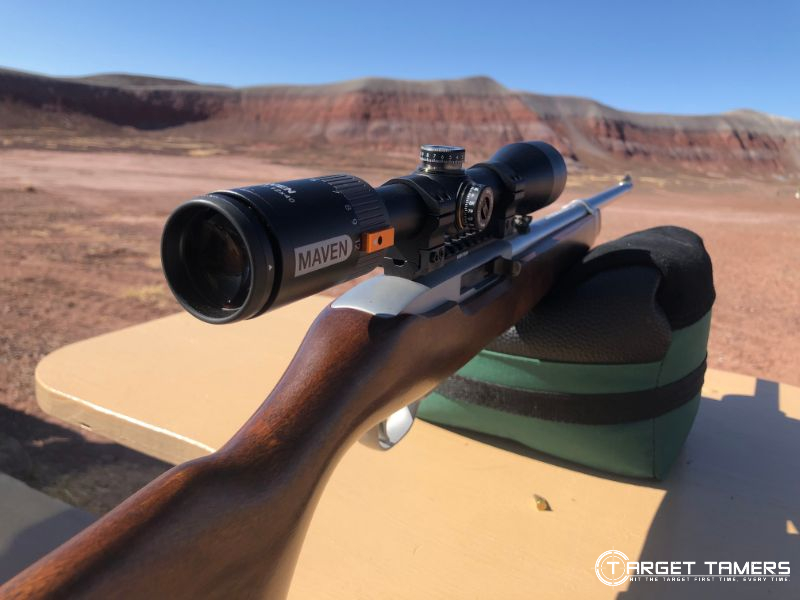
CRS1 Mounted on Ruger Rifle
Ruger 10/22
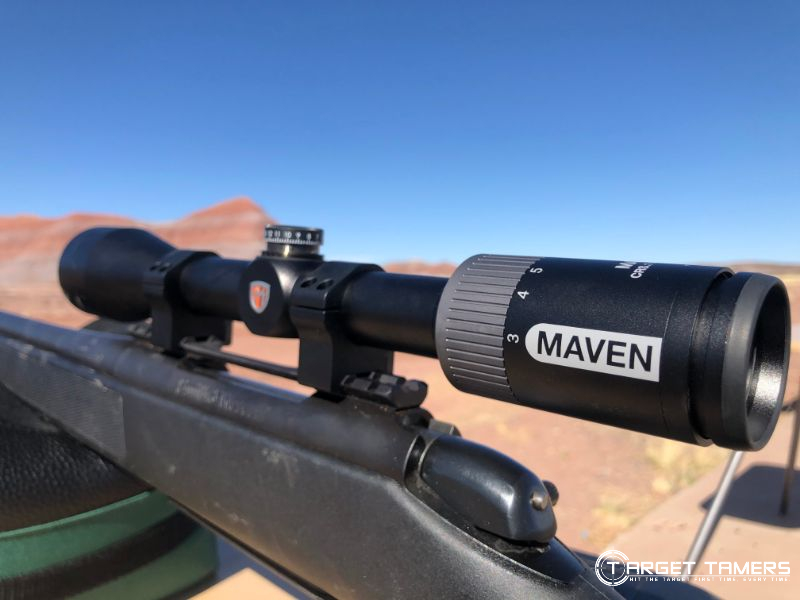
CRS1 Mounted on S&W 270
S&W .270 iBolt
Images by Tina Fa’apoi (Own Work) for Target Tamers

The CRS.1 riflescope has 0.25 MOA adjustments, it tracks excellently, and I was extremely happy with my groupings and 100-yard zero.

The CSHR reticle is a simplified version of the SHR reticle. This one is made of wire, is bold and visible, and is in the second focal plane. This is something that hunters like because it’s highly visible at every magnification. Holdover values are 5, 10, and 20 MOA at 12x magnification.

If you wanted to put this scope on a different rifle, there’s nothing stopping you from doing so. The build quality is solid. The warranty is proven. The CRS.1 would be a high-quality scope for a .22LR.

3. Burris FastFire 3 – Best Pistol Sight for .22LR

Compact, fast, and convenient. The Burris FastFire 3 is a micro red dot sight ideal for the pistol in .22LR. Even though it mounts to handgun slides, it also comes with a Picatinny base in the box for mounting to a rifle rail.

Pros:

  • 8 MOA dot
  • Dynamic illumination
  • Manual illumination
  • Sunshade cover
  • Picatinny rail mount

Cons:

  • Battery compartment lid

First time shooting with the Burris FF3, I had an oopsie kind of moment. I didn’t secure the battery compartment lid properly, and it came off when I shot a round. That was an epic user fail in my books, and fortunately, I’m more aware of that now.

Burris FF3 with cover
Cover attached & mounted to Sig P320 X Carry
Burris FF3 Sensor VS Low illumination
Sensor VS Low manual illumination
Burris FF3 box opening
What’s in the Box?
Images by Tina Fa’apoi (Own Work) for Target Tamers

I really like the compact size of the pistol sight. It’s around 1.9” in length and weighs a mere 1.5 oz. Though it’s tiny, it’s built like a tank. I racked the slide multiple times against a wooden bench leaving the Burris FastFire sight no worse for wear.

It has an 8 MOA dot powered by a CR1632 battery, defaults to dynamic (ambient) illumination, but it does have a manual 3-setting illumination override.

Range testing Burris FF3 mounted to MP1522
Battery compartment of the Sig Sauer Romeo 5
Mounted to 15/22 via included Pic mount – Images by Tina Fa’apoi (Own Work) for Target Tamers

What makes this great for both .22 pistols and rifles is that it also comes with a Pic rail in the box. Yes, I’ve mounted it to a .22 rifle and had a blast. The large dot makes it easy to see and acquire in the field.

When it comes to cost, it’s cheaper than the field-tested Leupold DeltaPoint Pro (check out our comparison of the Fastfire 3 and the Deltapoint Pro here) and other alternatives from Trijicon and Sig Sauer. As a versatile red dot sight with no perceivable parallax issues, and it’s ideal for close-range work, it’s a winner.

4. Sig Sauer Romeo 5 – Best Red Dot Sight for .22LR

The Sig Sauer Romeo 5 is one of the most highly-rated and popular red dot sights in the market. It’s affordable, has MOTAC, and it’s just as good for the .22LR round as it is for the 5.56mm and more.

Pros:

  • Price
  • Red dot sight
  • 2 MOA dot
  • Multi-height mounting system
  • Long battery life

Cons:

  • Non-adjustable MOTAC

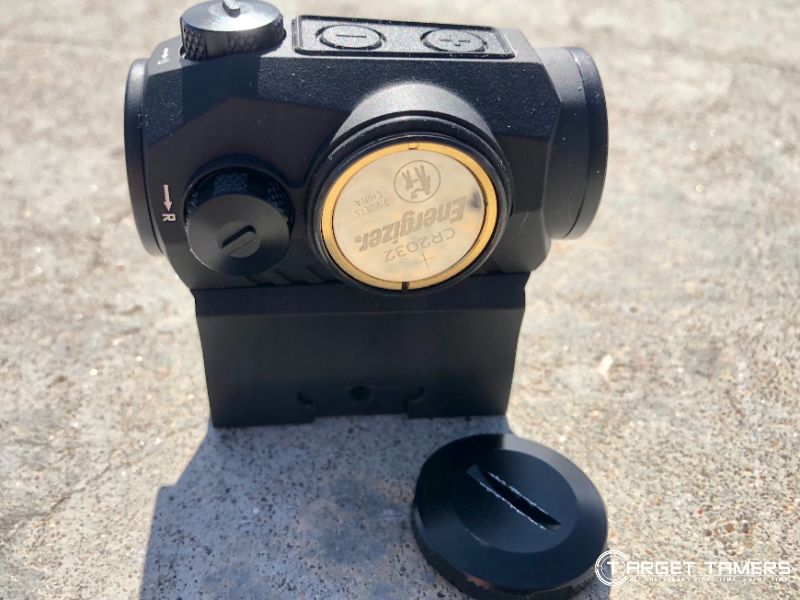
Since it’s a red dot sight, the Romeo 5 is often shot from my AR-15 rifles. It’s seen a lot of action on top a S&W M&P 15-22. My most recent complaint is that it somehow got stuck to my 5.56mm rifle rail. Long story short – a screw extractor set was necessary. So, don’t over-torque the tension!

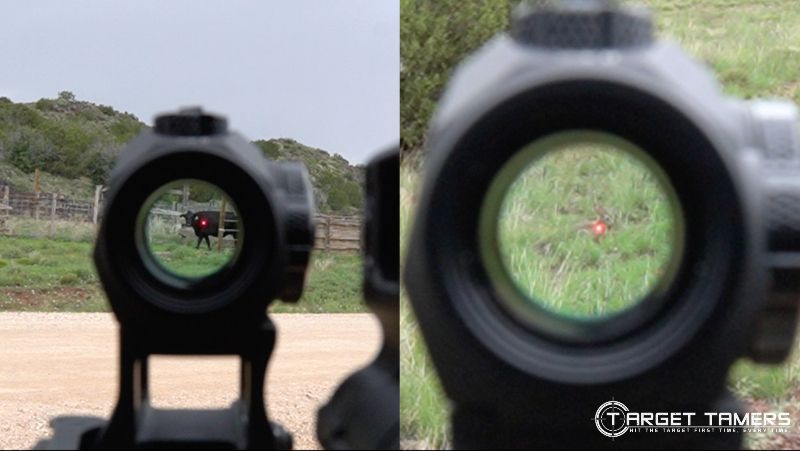
What makes the Romeo 5 so popular is its motion-sensor feature, MOTAC. It automatically goes into stand-by mode after 120 seconds of non-use. When motion is detected, the illumination kicks on and the dot is ready and waiting for use by the time you get rifle to shoulder.

Viewing through the Romeo 5 LEFT Cow RIGHT Rabbit
CR2032 battery
The 7 Best Rimfire Scopes for .22LR in 2024
R5 on cow & rabbit
Images by Tina Fa’apoi (Own Work) for Target Tamers

It has a 2 MOA dot which is great for close-range work as well as stretching the distance to say 175 yards for long shots with the .22LR round.

With a CR2032 battery powering the Sig sight, it has a 40,000+ hour battery runtime. After well over a year, I still haven’t changed it out yet.

Considering its low price point under $150, it’s one of the top red dot sights for the money. How could it not be a great pairing for a .22LR rifle?

5. Simmons .22 MAG 3-9×32 – Best Budget Scope

If you’re looking for a quality scope under $50 for a rimfire rifle, you must consider the Simmons .22 MAG 3-9×32. It’s about as basic as it gets as evident from its Truplex (duplex style) reticle to its fully coated lenses. But it’s a cheap scope that’s worth buying when the budget is limited.

Pros:

  • Truplex reticle
  • Rings included
  • QTA eyepiece
  • Lightweight
  • Fog/waterproof

Cons:

  • Included scope rings

It’s nice for a manufacturer to attempt to include all the components needed to get shooting out of the box, but unfortunately, it seems the included rings require a little work. This usually means some shimming or lapping them. Most people end up buying different rings.

With that out of the way, the .22 MAG scope is obviously made for rimfire rifles. Even with its 3-9×32 configuration, it’s one of the lightest riflescopes in this lot at 10 oz (approx.).

The 0.25 MOA turrets are finger adjustable and capped. There is a total of 60 MOA in adjustment travel for both the elevation and windage turrets.

Simmons highlights the QTA (Quick Target Acquisition) eyepiece that seems to be comparable to a quick focus eyepiece. Though you can adjust for your vision, the optics only have a fully coated treatment, so brightness and resolution will just be acceptable – not exquisite. However, I really like that it has a HydroShield lens coating for as cheap as this scope is.

The 7 Best Rimfire Scopes for .22LR in 2024
Shooting @ 25 yards
The 7 Best Rimfire Scopes for .22LR in 2024
Shooting @ 200 yards
Images Credit: SGT Johnny USMC

Though you might hear of the .22 MAG scope having an AO or adjustable parallax feature – it does not! It has a fixed parallax setting for 50 yards.

Based on the optics and overall quality, it will be a standard performer for recreational applications. I’d say the Simmons scope will be a reasonable optic for plinking and maybe some small game hunting. For 50 bucks, it really can’t be beat.

6. Vortex Diamondback 2-7×35 Rimfire – Best for Close-Range

The Diamondback 2-7×35 Rimfire scope mightn’t seem like a far stretch from the Crossfire II 2-7×32 Rimfire. However, there are differences that could justify the jump up in price for the Diamondback.

Pros:

  • Cost
  • V-Plex reticle
  • SFP reticle
  • Resettable turrets
  • Fog/waterproof

Cons:

  • No illumination

As you can tell, the pros and cons are the same between the Diamondback and Crossfire II riflescopes. However, the differences are in the details. The Diamondback has a larger objective lens, wider FOV, and more adjustment travel with no consequence to size and weight. The real consequence is the increase in cost for these upgrades.

Like the Crossfire II, the Rimfire model has the V-Plex reticle. However, the Diamondback V-Plex Rimfire reticle is excellent in drawing the eye to the center with 1 MOA size posts and even thinner 0.3 MOA center crosshairs. This V-Plex is thicker than the Crossfire II V-Plex!

This is great especially for those with aging vision. However, without an option for illumination, there’s only so much you can do in low-light and against dark, shaded terrains.

For most people, this is not always an issue. The benefits of having a simple reticle, resettable to zero turrets, finger adjustments, and a Vortex-tough build are worth it. Focus should not be an issue from 0-100 yards as parallax is set to 50 yards – the perfect middle-ground for all things rimfire.

With the famous VIP warranty to back the scope, there’s little to dislike about the Vortex rimfire scope.

7. Leupold VX-Freedom 3-9×40 Rimfire MOA – Best for Long-Range

The Leupold VX-Freedom series is a well-known and affordable line of scopes from Leupold. The 3-9×40 model incorporates a traditional configuration but adds a unique touch with the Rimfire MOA reticle to hit long-range targets with 3x zoom.

Pros:

  • Rimfire MOA reticle
  • Finger-click adjustments
  • 0.25 MOA adjustments
  • 60-yard fixed parallax
  • Fog/waterproof

Cons:

  • No illumination

The bold lines of the reticle are 1 MOA while the hashmarks are 0.25 MOA in size. This is good for minimal subtension on targets, and should be easy for old eyes to see – even in low light though it lacks illumination.

Apparently, the VX-Freedom series of riflescopes are designed, machined, and assembled in the USA. Short way of saying it, it’s made in the USA. It’s fog, shock, and waterproof, and although it’s going to be excellent for the 22LR, it’ll certainly handle recoil from sitting on a centerfire rifle.

The 7 Best Rimfire Scopes for .22LR in 2024
Rimfire MOA reticle (right) – Image Credit: OzzieReviews

What makes it perfect for the .22 is the unique Rimfire MOA reticle. Sitting in the second focal plane, subtension is only accurate at max 9x power. The 3:1 ratio zoom (3X) provides 3-9x variable magnification that used to be the standard for most applications. Now, the 4x 3-12x configuration is replacing the one-time standard. I’d consider the 3-9x a traditional platform that has proven its worth time and time again.

Though simple in design and application, the VX Freedom scope has finger-click adjustments in 0.25 MOA increments. It has fixed parallax of 60 yards which is a great setting considering the average distance shots for a .22.

Made to be ideal for the .22 in reticle, focus, and ease of use, the Leupold VX-Freedom could be a top scope for competition and long-range shots.

A Guide to Choosing the Best Rimfire Scope for 22LR

Cost

On average, any riflescope can be used on a rimfire rifle. Rimfire scope features include reticle type, close-range focus, and usually an overall theme of simplicity. This generally results in a scope that is affordable with low to mid-range magnification, and fixed parallax of 50 or 60 yards.

ProductKey FeatureConfigurationPrice Range
Rimfire Scope Feature, Configuration & Price Range Comparisons

Scope Type for 22LR

Overall, there is a plethora of .22LR firearms from handguns to carbine pistols, flat-top ARs, and bolt and lever action rifles. This provides a wide variety of optic options to mount to a firearm with the .22LR cartridge.

The nice thing about these types of scopes is that they can be used on 17 HMR to even some or all centerfire cartridge firearms too (depending on quality and application of course).

Some of the best types of optics to mount to your 22 may depend on the firearm. For example, a red dot sight could be best for an AR-15 while a scope would be fantastic for the bolt-action rifle.

ProductOptic TypeMounting Type
Rimfire Scopes Optic & Mounting Type Comparisons

Reticle

In general, most shooters are not concerned with bullet drop and may just hold over for distances that they’ve memorized. Most scopes designed for the rimfire cartridge will have a simple, duplex reticle. More complex rimfire reticles offer BDC features for drop and wind holdovers.

The BDC (Bullet Drop Compensation) reticles are nice to have for those that are taking long shots out to 200 yards or sometimes more.

Additionally, most scopes are set in the SFP (Second Focal Plane). The reticle and crosshairs remain at full size throughout the entire magnification range.

For more info on reticle types, check out our reticles guide. For more info on FFP VS SFP, we have a guide on focal planes too!

ProductReticleReticle TypeFocal Plane
Rimfire Scopes Reticle, Reticle Type & Focal Plane Comparisons

Focus/Parallax

Many centerfire riflescopes that have fixed parallax will have the focus set at around 100-150 yards. Since this is usually the max distance when shooting .22LR rounds, this can make it slightly inconvenient when shooting inside 100 yards and as close as 10 yards.

As a result, most rimfire scopes have a parallax setting of between 10-100 yards with the average at 50 and 60 yards. This provides clarity throughout the entire magnification range and minimizes the effects of parallax.

Of course, you can always practice a consistent cheekweld to peer down the optical axis of the scope to eliminate parallax completely, but you can read more about that in this scope parallax guide.

ProductParallax/Focus Setting
Rimfire Scope Parallax Setting Comparison

Warranty

Not all riflescope warranties are equal. Some manufacturers have a warranty that precedes them for their unconditional coverage while others have limitations that can prevent cost-free repairs or resale. Regardless of how much is spent on a riflescope, a good warranty is always worth looking into.

ProductWarrantyKey Features
Rimfire Scope Warranty Comparisons

FAQ’s

Top Rimfire .22LR Scope: Which is Best?

There are a lot of rimfire scopes that are perfect for the .22 LR. Setting the budget would help to narrow down the list, and from there, other features can be determined to be suitable and appropriate or unnecessary.

The takeaway is that a rimfire scope has features suited to a rimfire firearm. Sure, you can put a Vortex Razor or NightForce ATACR on there, but I’d say it’s overkill.

Usually, the best scope for a .22 is the one that will get used, maximizes fun in the field or at the range, and doesn’t cost you an arm and a leg.

Further Reading

  • Ozark Armament Rhino 4x Prism Sight Review (Range Tested)
  • Ozark Armament Rhino Red Dot Sight Review (Range Tested)
  • How to Measure Scope Ring Height (With Pics & Calculations)
  • How to Adjust a Rifle Scope: 6 Scope Adjustments Explained!
  • How to Level a Scope on a Rifle [Step-by-Step With Pics]

I Wore This Layer Every Day for 2 Months: Free Fly Bamboo Sun Hoodie Review

0

When I hiked the Pacific Crest Trail in 2019, I wanted a sun shirt for the heat. I’d heard bamboo has a lot of the same properties as wool but doesn’t get as hot. Wool was my go-to choice for long-distance adventures for its anti-stink and warm-when-wet insulating properties, but I wanted something cooler. So I got to researching.

I typed “bamboo sun hoodie” into Google and ended up on Free Fly Apparel’s website. I had never heard of this fishing brand, and they definitely were not marketing to hikers. The anglers all over the site looked cool in more ways than one, but were they secretly overheating under that full-coverage hood?

I decided to give this unknown-to-me brand a shot. I bought the Bamboo Lightweight Hoodie, put it on, and started my PCT thru-hike. And after 2 months of wearing this shirt in conditions ranging from 100 degrees under the blazing desert sun to late-season snowstorms, I was sold. The lightweight sun hoodie had become my favorite trail top. Right up until I lost it.

In short: The Bamboo Lightweight Hoodie from Free Fly Apparel is a must-have for hot summertime pursuits in the sun. Like wool, it doesn’t stink as polyester shirts do, but it keeps you cooler than wool. Plus, it’s buttery-soft, so you’ll be happy to wear it for days on end. Nothing I’ve found hits the sweet spot between comfort and durability like this shirt.

Free Fly Bamboo Lightweight Hoodie: Review

Unfortunately, after weeks of endless rain and snow, I picked up a thin polyester shirt in hopes of staying drier. That was a mistake. The sun came out one glorious afternoon, and I changed into that new dry shirt.

That ill-fated afternoon, I forgot my Free Fly Hoodie on the side of a mountain along the PCT. I suspect if I hadn’t lost the shirt, it would’ve lasted the entire 2,650-mile thru-hike.

I recently got another Free Fly Bamboo Lightweight Hoodie. Between that first hoodie and now, 4 years later, I’ve abused the crap out of countless other sun shirts. I should’ve bought a replacement Bamboo Lightweight Hoodie much sooner.

One Shirt Every Day, for 2 Months

testing the Free Fly Bamboo Lightweight Hoodie sun protection
(Photo/Sam Schild)

I legitimately wore this sun hoodie every day for 2 months. I washed it occasionally, about once a week, but only when I could conveniently access laundry. Really, I never felt like this hoodie needed to be washed, unlike most polyester shirts I’ve worn since (or my socks, which were always the reason for doing laundry).

Much like wool, bamboo has natural antibacterial properties. If the smell is any indicator, this fabric doesn’t seem to let microorganisms proliferate. Thanks to an antimicrobial agent called “bamboo kun,” bacteria have a hard time sticking to bamboo fabric. I didn’t perform any scientific testing on the freshness of this shirt. But, I definitely monitored whether or not it smelled bad — and it didn’t.

You may have been able to find me in a laundromat somewhere in California, wearing only raingear, sniffing the armpits as I loaded the Bamboo Lightweight Hoodie into a washing machine.

Bamboo Fabric: Cooler Than Wool and Fresher Than Polyester

(Photo/Sam Schild)

This sun hoodie’s fabric is the reason I could wear it every day for so long. It’s made of a knit material that’s 70% viscose from bamboo and 30% polyester. The bamboo makes this material incredibly soft and keeps you cool while staying fresh longer.

This shirt kept me the coolest in hot, sunny conditions of any hooded sun shirt I’ve worn. An ultrathin polyester shirt also does a pretty good job of protecting from the sun without building up heat, but I find bamboo does a better job.

Beyond its temperature-regulating properties, this fabric is just plain comfortable. It feels downright luxurious, nothing like the slippery feeling of synthetic fabrics. This fabric is buttery soft, and quite a joy to put on every day (or never take off).

Sun Protection on Par With the Best

Free Fly Bamboo Lightweight Hoodie Review - Breathability
(Photo/Sam Schild)

Every shirt that claims to be a sun hoodie must protect you from the sun, but the Free Fly Bamboo Hoodie does this better than most. It has an awesome hood that overlaps under your chin to cover your entire neck. This hood fits so well that I use it to keep my hat from blowing off my head in windy conditions.

I hiked tons of long, hot stretches of the PCT with the hood pulled over my head and hands covered up to my fingers (yes, it has thumbholes). Even with temperatures in the triple digits, I never felt like I needed to roll up my sleeves or take off the hood to cool off. And when I did roll up the sleeves and remove the hood, I didn’t feel any cooler. This fabric breathes that well.

Trail-Tested Durability

(Photo/Sam Schild)

After 2 months of wearing it daily, the Bamboo Lightweight Hoodie showed no signs of wear. I’d rely on this as my only shirt for months, without hesitation. (And I did.)

Polyester is definitely the most durable material for a sun shirt. It’s more abrasion-resistant and doesn’t degrade in the sun like natural fibers. However, I’ve never been able to wear a polyester shirt for months at a time because it gets that old polyester smell, and the stink doesn’t even go away when you wash it.

I’ve also beaten the crap out of wool sun shirts in the past, and they all developed holes on the shoulders and back after about 2 months of wearing them with a pack. I expect this would happen eventually with bamboo as well, but in my experience, it doesn’t seem to happen as fast as with wool.

Free Fly Bamboo Lightweight Hoodie: Final Thoughts

Free Fly Bamboo Hoodie Review
(Photo/Sam Schild)

Bamboo fabric isn’t a panacea. It’s definitely cooler than wool and less stinky than polyester. It also dries faster than cotton, and still insulates when wet, unlike cotton.

But, bamboo fabric doesn’t seem to keep you as warm when wet as wool does. If I expect to be hiking in cold rain, sleet, or snow, I’m still going to reach for a wool hoodie. But for hot and exposed under the blazing sun, it’s hard to beat bamboo.

And 4 years after buying my first Bamboo Lightweight Hoodie from Free Fly Apparel, they’re still the best game in town for bamboo. This time, I’m not going to take it off.

High Velocity Air Rifle

0

Introducing the High Velocity Air Rifle: Unlocking Precision and Power. Experience unrivaled accuracy and impressive speed with our cutting-edge air rifle. Engineered to deliver maximum performance, this advanced firearm pushes boundaries, propelling pellets at incredible velocities. Perfect for target practice or small game hunting, it guarantees unmatched precision and an exceptional shooting experience. Elevate your shooting skills with the high velocity air rifle – a true game-changer in the world of firearms.

high velocity air rifle

high velocity air rifle

A high velocity air rifle is a type of air gun that propels pellets or bullets at a significantly higher speed compared to traditional air rifles. These rifles are designed for various purposes, such as hunting, target shooting, or pest control. With their increased velocity, they offer improved accuracy and greater range, making them popular among enthusiasts and professionals alike.

One of the key advantages of a high velocity air rifle is its ability to deliver exceptional power while still being relatively quiet and recoil-free. This makes it an ideal choice for hunters who want to minimize noise and disturbance in their surroundings. Additionally, the high velocity allows for a flatter trajectory, meaning the bullet or pellet maintains its path over longer distances, improving accuracy and reducing the need for frequent adjustments.

When choosing a high velocity air rifle, it’s important to consider factors such as caliber size, power source (spring or gas), and overall build quality. Different calibers offer varying levels of power and versatility, catering to different shooting needs. It’s also crucial to ensure that the chosen rifle complies with local regulations and safety guidelines to ensure responsible use.

In conclusion, high velocity air rifles offer a powerful and accurate alternative to traditional firearms. With their advanced technology and precision, these rifles provide an effective means for target shooting and pest control. Additionally, their quiet operation and affordability make them a popular choice among enthusiasts. Whether for recreational purposes or practical use, high velocity air rifles are a reliable option worth considering.

700 Captivating Rifle Names for Every Gun Lover

0

Welcome to our blog article on the intriguing topic of “700 rifle Names”! If you’re looking for some creative and captivating names for rifles, you’ve come to the right place. As firearm enthusiasts ourselves, we understand the importance of finding the perfect name that reflects the character and spirit of your weapon. As the renowned novelist Stephen King once said, “Fiction is the truth inside the lie.” In this case, these rifle names serve as an extension of the story you want to tell with your firearm.

As a Naming Specialist with three years of experience, I have delved into the fascinating world of naming various entities, including fantasy characters. The process of naming is an art that requires careful consideration of the qualities and characteristics you want to convey. It involves exploring the depths of imagination, drawing inspiration from various sources, and ultimately creating a name that resonates with its intended audience. With my expertise in this field, I am thrilled to share my knowledge and offer you a plethora of rifle names that will surely ignite your imagination.

In this article, you can expect to find a wide array of rifle names that are both distinctive and captivating. Whether you’re searching for a name that exudes strength and power, evokes a sense of history and tradition, or embodies a futuristic and technological vibe, we’ve got you covered. Our curated collection of 700 rifle names is designed to provide you with ample options, ensuring that you find a name that truly stands out from the crowd. Get ready to embark on an exciting journey of exploration and discovery as we unveil an assortment of unique names that will give your rifle the character it deserves.

Rifle Names

Rifle Names

  • Crimson Fury
  • Vanguard
  • Dominator
  • Stormbringer
  • Eclipse
  • Venomstrike
  • Thunderstorm
  • Havoc’s End
  • Silent Reaper
  • Ironsight
  • Valkyrie’s Grace
  • Phoenix Rising
  • Nightfall
  • Shadowhunter
  • Thunderclap
  • Serpent’s Bite
  • Death’s Whisper
  • Annihilator
  • Ghostwalker
  • Warbringer
  • Cyclone
  • Sentinel
  • Wrathbringer
  • Midnight Reaper
  • Seraph’s Wings
  • Thunderbolt
  • Steelstorm
  • Maelstrom
  • Hellfire
  • Frostbite
  • Viper’s Kiss
  • Celestial Guardian
  • Stormchaser
  • Harbinger
  • Ironsoul
  • Wraithwalker
  • Thunderstrike
  • Phantom’s Veil
  • Grim Reaper
  • Eclipse
  • Shadowstrike
  • Venomous Vengeance
  • Searing Sunfire
  • Nightshade
  • Frostfang
  • Obsidian Sentinel
  • Thunderous Roar
  • Reaper’s Embrace
  • Ashen Fury
  • Stormrider
  • Ironheart
  • Silent Stalker
  • Serpent’s Wrath
  • Oblivion’s Call
  • Cyclone Fury
  • Twilight’s Shadow
  • Ghostwalker
  • Vortex
  • Thunderclash
  • Whispering Death
  • Ravager
  • Phoenix’s Flight
  • Abyssal Abyss
  • Lunar Eclipse
  • Venomous Fury
  • Silverstrike
  • Voidwalker
  • Frostfire
  • Nightstalker
  • Seraph’s Salvation
  • Thunderous Echo
  • Ironclad
  • Shadow’s Embrace
  • Venomfang
  • Inferno
  • Frostwind
  • Midnight Howl
  • Serpent’s Scales
  • Annihilation
  • Stormbringer

20 Rifle Names With Meanings

Rifle Names

  1. Shadowsteel – Forged in darkness, strikes unseen.
  2. Valkyrie’s Resolve – Empowers warriors with determination.
  3. Thunderclash – Unleashes a deafening storm of power.
  4. Seraph’s Salvation – Protects and delivers divine justice.
  5. Nightshade – Conceals the user in shadows, deadly.
  6. Phoenix’s Retribution – Rises from ashes, avenges with fire.
  7. Ironsight Guardian – Ensures unwavering accuracy and protection.
  8. Glacier’s Embrace – Freezes enemies with icy precision.
  9. Cyclone Fury – Sweeps through foes with unstoppable rage.
  10. Abyssal Devastator – Plunges enemies into eternal darkness.
  11. Razorwind – Cuts through opposition with razor-sharp precision.
  12. Elysian Vanguard – Radiates heavenly strength and unwavering defense.
  13. Eclipse Requiem – Darkens the world, sings the dirge.
  14. Midnight Serenade – Engages enemies with haunting elegance.
  15. Astral Valkyrie – Soars above, guiding warriors to victory.
  16. Thunderstrike Dominator – Overwhelms foes with thunderous might.
  17. Wraith’s Whisper – Echoes through the void, bringing silent death.
  18. Enigma’s Enforcer – Unravels mysteries, enforces unyielding justice.
  19. Bloodmoon Avenger – Embodies the fury of the crimson moon.
  20. Twilight’s Salvation – Shields allies with the gentle embrace of dusk.

Old Rifle Names

Rifle Names

  • Thunderstrike – Impressive and formidable weapon.
  • Ironsoul – A rifle with enduring strength.
  • Whisperwind – Silent but deadly.
  • Shadowbane – Strikes fear into enemies’ hearts.
  • Thunderclap – Packs a powerful punch.
  • Vortexfire – Unleashes a whirlwind of destruction.
  • Grimshot – Brings doom to its targets.
  • Stormbringer – Controls the battlefield with its might.
  • Ghostfire – Hauntingly accurate and deadly.
  • Warhammer – A weapon of war’s fury.
  • Valkyrie’s Breath – Sends foes to the afterlife.
  • Grimjaw – Devours enemies without mercy.
  • Silverstrike – Shines brightly in battle.
  • Nightfall – Darkness falls upon the enemy.
  • Thunderbolt – Strikes with lightning speed.
  • Hellfire – Engulfs enemies in flames.
  • Dragon’s Roar – A rifle of mythical power.
  • Blackthorn – Pierces through armor effortlessly.
  • Hailstorm – Unleashes a torrent of bullets.
  • Wraithblade – Cuts through defenses like a ghost.
  • Bonecrusher – Crushes all opposition.
  • Grimshot – Sends foes to their graves.
  • Widowmaker – Leaves no survivors.
  • Crimson Fury – Bathes in the blood of foes.
  • Deathwhisper – Brings doom from the shadows.
  • Thunderstrike – Strikes fear into hearts.
  • Ironsoul – Unyielding and unstoppable.
  • Shadowbane – Cuts through darkness and enemies.
  • Stormbringer – Controls the winds of battle.
  • Vortexfire – Creates a whirlwind of destruction.

Sniper Rifle Names

Sniper Rifle Names

  • Serpent’s Gaze – Lethal precision from afar.
  • Widow’s Kiss – Strikes with deadly accuracy.
  • Silent Stalker – Virtually undetectable, a hunter’s delight.
  • Moonshadow – Strikes under cover of darkness.
  • Eagle Eye – Sees what others can’t.
  • Whisperwind – A silent breeze that brings death.
  • Frostbite – Freezes enemies in its sights.
  • Phantom’s Embrace – Envelops targets in a deadly grip.
  • Spectre’s Touch – Leaves no trace, only destruction.
  • Aurora Borealis – A dazzling display of lethal skill.
  • Obsidian Shard – Pierces the heart of the enemy.
  • Nightstrike – Strikes fear into the night.
  • Viper’s Fang – Deadly venom from a distance.
  • Silent Thunder – Kills without a sound.
  • Shadowshot – Destroys hope in a single shot.
  • Storm’s Eye – Sees through the chaos.
  • Vanquisher – Overcomes any obstacle with precision.
  • Frostfire – Freezes the soul before the body.
  • Valkyrie’s Whisper – Guides warriors to their fate.
  • Death’s Gaze – Foretells the end of life.
  • Silent Reaper – Claims lives without warning.
  • Celestial Archer – A divine force of destruction.
  • Ashen Wind – Burns everything in its path.
  • Maelstrom’s Fury – Unleashes chaos upon the target.
  • Lightning Strike – Strikes with unmatched speed.
  • Stargazer – Maps the path of destruction.
  • Stormcaller – Summons the wrath of nature.
  • Dreadshot – Inspires fear with each shot.
  • Mirage – Creates illusions of safety before the kill.
  • Glacier’s Breath – Freezes time in its tracks.

Cool Sniper Rifle Names

  • Enigma – Mysterious and deadly.
  • Shadowstrike – Strikes from the shadows.
  • Phantom’s Touch – Leaves no trace behind.
  • Frostbite – Freezes enemies with fear.
  • Eclipse – Darkens the enemy’s future.
  • Spectral Fury – Haunts the battlefield.
  • Nova – Explodes with unstoppable force.
  • Thunderbolt – Strikes fear with lightning precision.
  • Cyclone – Whirls through enemies with grace.
  • Vortex – Devours all in its path.
  • Venomous Serpent – Injects death from afar.
  • Obsidian Reaper – Harvests souls from a distance.
  • Arctic Gale – Blows away all resistance.
  • Ragnarok – Brings about the end of worlds.
  • Zenith – Reaches the pinnacle of lethality.
  • Phoenix’s Wing – Rises from the ashes of battle.
  • Voidwalker – Steps between dimensions to deliver death.
  • Solstice – Brings light to the darkest of shadows.
  • Thunderstrike – Shakes the earth with its power.
  • Enigma – Unravels the enemy’s defenses.
  • Shadowstrike – Lurks in the darkness, ready to strike.
  • Phantom’s Touch – Ghostly accuracy from a distance.
  • Frostbite – Freezes enemies to the bone.
  • Eclipse – Engulfs the target in darkness.
  • Spectral Fury – Unleashes a ghostly storm.
  • Nova – Explodes with devastating force.
  • Thunderbolt – Strikes with lightning speed.
  • Cyclone – Whirls through enemies with ease.
  • Vortex – Swallows enemies without mercy.
  • Venomous Serpent – Injects lethal venom.

Assault Rifle Names

  • Annihilator – Obliterates all opposition.
  • Inferno – Burns enemies to ashes.
  • Thunderclap – Unleashes a deafening roar.
  • Havoc – Wreaks havoc on the battlefield.
  • Viper’s Bite – Strikes with deadly precision.
  • Warbringer – Brings destruction to the enemy.
  • Stormbreaker – Shatters defenses like a storm.
  • Ironsight – Locks onto targets with deadly accuracy.
  • Grim Reaper – Claims souls without remorse.
  • Omega – The ultimate weapon of war.
  • Rapture – Sends enemies into a trance of destruction.
  • Titanfall – Crushes all opposition under its might.
  • Venomstrike – Injects lethal venom into foes.
  • Obliterator – Erases enemies from existence.
  • Blackout – Plunges enemies into darkness.
  • Ravager – Leaves a trail of destruction.
  • Firestorm – Engulfs the battlefield in flames.
  • Sentinel – Guards the frontlines with unwavering resolve.
  • Ironsoul – Indomitable spirit in the face of danger.
  • Punisher – Dispenses justice with each bullet.
  • Annihilator – Eradicates all traces of resistance.
  • Inferno – Burns away enemies’ hopes.
  • Thunderclap – Unleashes thunderous destruction.
  • Havoc – Creates chaos in its wake.
  • Viper’s Bite – Delivers a venomous strike.
  • Warbringer – Brings war to the enemy’s doorstep.
  • Stormbreaker – Breaks through defenses like a storm.
  • Ironsight – Locks onto targets with precision.
  • Grim Reaper – Claims lives without mercy.
  • Omega – The end of all resistance.

Gun Rifle Names

Thunderstrike – Strikes with earth-shattering force.

Executioner – Dispenses swift and final justice.

Shadowfire – Burns enemies to cinders.

Warhawk – Dominates the battlefield with unwavering ferocity.

Nightbringer – Casts darkness upon its victims.

Tempest – Unleashes a storm of destruction.

Ironclad – A fortress of unstoppable firepower.

Venomfang – Inflicts deadly poison on its targets.

Hellstorm – Rains down chaos and devastation.

Grimshot – Strikes fear into the hearts of foes.

Thunderstrike – Unleashes a thunderous assault.

Executioner – Ends lives with ruthless efficiency.

Shadowfire – Consumes enemies in its flames.

Warhawk – Reigns supreme in the chaos of war.

Nightbringer – Shrouds the battlefield in darkness.

Tempest – Whirls through enemies with unstoppable force.

Ironclad – Invulnerable to opposition’s feeble attempts.

Venomfang – Inflicts lethal venom on its victims.

Hellstorm – Engulfs enemies in a fiery inferno.

Grimshot – Sends foes to their graves.

Thunderstrike – Shakes the very foundation of battle.

Executioner – Renders justice swiftly and mercilessly.

Shadowfire – Engulfs enemies in shadows.

Warhawk – Dominates the skies of war.

Nightbringer – Brings eternal darkness to the battlefield.

Tempest – Unleashes a relentless storm.

Ironclad – Invincible against all opposition.

Venomfang – Injects lethal poison into its targets.

Hellstorm – Unleashes a torrent of fiery destruction.

Grimshot – Strikes fear into the hearts of all.

Rifle Bullet Names

Thunderbolt – Strikes with electrifying speed.

Ironpiercer – Pierces through armor effortlessly.

Soulshatter – Shatters souls with each impact.

Annihilation Round – Erases enemies from existence.

Venomstrike – Delivers lethal poison on impact.

Shadowwhisper – Silent but deadly.

Reaper’s Kiss – Claims lives without mercy.

Maelstrom Round – Unleashes chaos upon the target.

Inferno Bullet – Engulfs enemies in flames.

Cyclone Round – Creates a whirlwind of destruction.

Thunderbolt – Strikes with lightning precision.

Ironpiercer – Pierces through defenses with ease.

Soulshatter – Destroys souls with each hit.

Annihilation Round – Obliterates all in its path.

Venomstrike – Injects deadly venom on impact.

Shadowwhisper – Silent but lethal.

Reaper’s Kiss – Seals the fate of its targets.

Maelstrom Round – Unleashes a storm of devastation.

Inferno Bullet – Sets enemies ablaze.

Cyclone Round – Sweeps away opposition effortlessly.

Thunderbolt – Strikes with electrifying accuracy.

Ironpiercer – Penetrates armor with ease.

Soulshatter – Crushes souls upon impact.

Annihilation Round – Eradicates all in its wake.

Venomstrike – Spreads lethal poison with each hit.

Shadowwhisper – Silently eliminates targets.

Reaper’s Kiss – Claims lives swiftly and mercilessly.

Maelstrom Round – Unleashes a whirlwind of destruction.

Inferno Bullet – Engulfs enemies in a raging fire.

Cyclone Round – Creates chaos in its path.

Rifle Scope Names

Hawkeye – Provides unparalleled vision and accuracy.

Thunderstorm – Enhances precision in the storm.

Shadowstrike – Brings enemies into focus from darkness.

Spectral Sight – Sees through obstacles and illusions.

Nightfall – Embraces the darkness to expose the enemy.

Valkyrie’s Gaze – Guides warriors to victory.

Guardian’s Eye – Watches over allies with unwavering vigilance.

Ghostwalker – Allows stealthy observation without detection.

Eclipse – Darkens the target, highlighting vulnerabilities.

Silent Serpent – Camouflages the user’s presence for a lethal strike.

Hawkeye – Unmatched vision and accuracy.

Thunderstorm – Sees through the chaos of battle.

Shadowstrike – Illuminates targets in darkness.

Spectral Sight – Peers into the ethereal realm.

Nightfall – Sees through the shroud of night.

Valkyrie’s Gaze – Guides warriors to their fate.

Guardian’s Eye – Keeps watch over allies.

Ghostwalker – Moves undetected through the shadows.

Eclipse – Darkens the enemy’s future.

Silent Serpent – Strikes without warning.

Hawkeye – Targets with unparalleled precision.

Thunderstorm – Cuts through the storm with clarity.

Shadowstrike – Strikes from the shadows with accuracy.

Spectral Sight – Sees what others cannot.

Nightfall – Reveals the enemy in the darkest hour.

Valkyrie’s Gaze – Leads warriors to glory.

Guardian’s Eye – Protects allies with unwavering vision.

Ghostwalker – Steps silently through the realm of shadows.

Eclipse – Veils the enemy’s path.

Silent Serpent – Strikes with deadly silence.

Famous Rifle Names

Winchester – A legend of the Wild West.

Mauser – Synonymous with precision and reliability.

Mosin-Nagant – A symbol of Russian firepower.

M1 Garand – Iconic American rifle of World War II.

AK-47 – The most widely recognized assault rifle.

Lee-Enfield – British marksmanship at its finest.

Remington 700 – Renowned for its accuracy.

Springfield 1903 –S. military staple of the early 20th century.

Barrett M82 – The mighty .50 caliber sniper rifle.

Henry Repeating Rifle – Revolutionary lever-action design.

Winchester – The Wild West’s most trusted companion.

Mauser – A testament to precision and reliability.

Mosin-Nagant – The pride of Russian firepower.

M1 Garand – America’s rifle of choice in WWII.

AK-47 – The iconic symbol of warfare.

Lee-Enfield – British marksmanship at its peak.

Remington 700 – Synonymous with accuracy.

Springfield 1903 – A staple of the U.S. military.

Barrett M82 – The king of .50 caliber sniping.

Henry Repeating Rifle – Revolutionized lever-action technology.

Winchester – A legend that defined the West.

Mauser – Precision engineering at its best.

Mosin-Nagant – The rifle that changed history.

M1 Garand – The rifle that won the war.

AK-47 – The rifle that conquered the world.

Lee-Enfield – A testament to British marksmanship.

Remington 700 – The embodiment of precision.

Springfield 1903 – A classic rifle of the early 20th century.

Barrett M82 – The epitome of long-range power.

Henry Repeating Rifle – An icon of innovation.

Cool Rifle Names

Havoc’s Wrath – Unleashes chaos on foes.

Serpent’s Fang – Strikes with lethal precision.

Stormbringer – Commands the power of nature.

Vengeance – Retribution with deadly force.

Eclipse – Engulfs enemies in darkness.

Thunderstrike – Electrifies the battlefield with power.

Phantom’s Whisper – Silently eliminates targets.

Ragnarok – Brings about the end of battles.

Venomstrike – Delivers deadly poison to foes.

Havoc’s Wrath – Unleashes unrelenting chaos.

Serpent’s Fang – Delivers a lethal strike.

Stormbringer – Controls the power of storms.

Vengeance – Strikes with unforgiving force.

Eclipse – Shrouds enemies in darkness.

Thunderstrike – Electrifies the battlefield with fury.

Phantom’s Whisper – Eliminates targets without a sound.

Ragnarok – Signals the end of conflicts.

Venomstrike – Inflicts lethal poison on foes.

Havoc’s Wrath – Unleashes devastation without mercy.

Serpent’s Fang – Pierces through defenses with precision.

Stormbringer – Commands the tempest of war.

Vengeance – Delivers retribution with deadly accuracy.

Eclipse – Casts a shadow over enemies’ hopes.

Thunderstrike – Sends shockwaves through the battlefield.

Phantom’s Whisper – Eliminates targets unnoticed.

Ragnarok – Brings about the apocalypse of battle.

Venomstrike – Injects lethal venom into its victims.

Havoc’s Wrath – Unleashes chaos with devastating force.

Serpent’s Fang – Strikes with deadly accuracy.

Stormbringer – Wields the power of nature’s fury.

Rifle Names

How To Choose A Good Rifle Name

When it comes to firearms, choosing the right name for your rifle can be a deeply personal and meaningful process. A good rifle name goes beyond mere identification; it becomes an integral part of the rifle’s identity. As enthusiasts, we understand the significance of finding a name that reflects the essence and character of your firearm, creating a connection that goes beyond the physical. In this article, we will explore the art of choosing a good rifle name and provide you with insights and guidelines to assist you in this creative endeavor.

Understanding the Purpose

Before diving into the world of rifle names, it is essential to understand the purpose behind your firearm. Is it a hunting rifle, a target shooting rifle, or a self-defense firearm? Recognizing the role of your rifle will help you determine the direction for naming. Each purpose carries distinct connotations and emotions, which can be effectively conveyed through the right name. Take a moment to reflect on the intended use and the feelings you want your rifle to evoke.

Reflecting the Rifle’s Characteristics

Every rifle possesses its own unique set of characteristics, which can range from power and precision to elegance and craftsmanship. By analyzing these attributes, you can narrow down the qualities you wish to highlight in the name. For example, if your rifle is known for its exceptional accuracy, a name that signifies precision and focus would be fitting. Consider the materials, design, and performance of your firearm, and let these elements guide you in choosing a name that accurately reflects its essence.

Drawing Inspiration

Inspiration for rifle names can be found in a multitude of sources. History offers a treasure trove of ideas, with significant events, legendary figures, and iconic battles providing a rich tapestry of possibilities. Literature and mythology are also excellent sources, offering names that carry deep symbolism and cultural significance. Delve into these realms, exploring stories, legends, and epics to discover names that resonate with your rifle’s identity. By drawing inspiration from the past, you can infuse your firearm with a sense of heritage and significance.

Considering Personal Preference

Ultimately, the decision of a rifle name rests with you as the owner. Consider your personal preferences and style when choosing a name. Does a classic and timeless name appeal to you, or are you drawn to more modern and innovative choices? Your rifle’s name should reflect your taste and resonate with your own identity. After all, it is a reflection of your connection to the firearm and the story you want to tell.

Engaging Creativity

Naming a rifle is an opportunity to let your creativity soar. Brainstorm a list of potential names, allowing yourself to explore various themes, languages, and concepts. Experiment with wordplay, alliteration, or even combining different words to create a unique and memorable name. Push the boundaries of your imagination and challenge conventional naming conventions. This is your chance to give your rifle a name that stands out from the crowd.

Seeking Feedback

Sometimes, an outside perspective can provide valuable insights and suggestions. Share your list of potential names with fellow firearm enthusiasts or experts, seeking their opinions and feedback. They may offer fresh perspectives or point out nuances that you may have overlooked. Engaging in conversations and discussions can enhance your understanding of how others perceive the names and help you make an informed decision.

Testing the Name

Once you have selected a name that resonates with you, visualize your rifle with its chosen name. Imagine how it will look engraved or inscribed on the firearm. Consider how well the name aligns with the rifle’s overall identity and the emotions you intend to evoke. Testing the name in this manner allows you to evaluate its compatibility and determine whether it truly captures the essence of your firearm.

Conclusion

In conclusion, we hope this article has served as a valuable resource for those in search of the perfect name for their rifles. With our collection of 700 rifle names, we aimed to provide a diverse range of options to suit different preferences and styles. Remember, the name you choose for your firearm is not merely a label, but an opportunity to infuse it with personality and meaning.

Naming a rifle is a personal and creative endeavor, and we encourage you to explore your imagination and draw inspiration from various sources. Consider the purpose, history, and unique features of your rifle as you make your selection. Whether you prefer a name that reflects its power, pays homage to historical figures or events, or simply resonates with your own personal taste, there is a name waiting to be discovered within our extensive list.

We hope that the names we’ve shared in this article have sparked your creativity and provided you with a starting point in your quest for the perfect rifle name. Remember, the name you choose should make you feel a sense of pride and connection to your firearm. So go ahead, select a name that resonates with you, and let it become an integral part of your rifle’s story.

Related:

Army Names

Why We No Longer Refill Our 1 LB Propane Bottles

0

It wasn’t long after we first got into camping that we realized there must be a better solution for carrying propane for our Coleman stove than in the disposable one-pound cylinders. After finding out that fifty million of the steel canisters are disposed of each year by campers like us, and that a quarter-million of them simply become litter, we decided it was time for a better solution.

Full Disclosure: This post includes affiliate links to the adapters we use. Our readers never pay any extra when using these links and we may earn a small commission.

Thinking that we were doing the environmentally responsible thing, we bought a small brass adapter on eBay and began refilling our own 1 lb propane bottles, only to learn later that doing so makes them illegal to transport. One-time use, disposable propane cylinders aren’t designed to the same specifications as refillable ones, and thus aren’t lawfully transportable, according to the Department of Transportation. Thankfully, we never had any accidents while transporting our refilled bottles, yet if we had, we might have been liable for any damages and paid a hefty fine.

One Incident in 10 Years Was Enough

After about a decade of refilling used one-pound Coleman and Bernzomatic propane bottles, we only had one of them develop a leaking valve, after it had been re-used about ten times. About halfway down Old Monarch Pass, west of Salida, CO, we smelled propane wafting from our cooking gear box in the back of the Jeep and had to pull over to deal with a leaking 1 lb Coleman bottle. Gas wasn’t leaking from the small relief valve on the side of the cylinder (as sometimes happens with abrupt temperature changes) but rather from its main valve, which had probably began to wear out with reuse.

This incident was enough to convince us that (in addition to being illegal to transport) refilling our used one-pound propane canisters probably wasn’t the safest alternative.

From the DOT Website:

dot refill one pound cylinders
From the DOT’s website. At least one fatality has resulted from refilling DOT 39 cylinders (disposable 1 lb. type)
one lb propane to tank adapter
Adapter for one lb. propane cylinder to 20 lb. tank.

Refilling 1 lb Propane Cylinders (For Emergency Use Only)

If a situation ever arises where you really need to re-fill a Coleman or other one-pound disposable propane cylinder (for use in a Mr. Buddy portable heater during a blackout, for example) the simple process we used does work. However, there’s even a better way than this, which we’ll get to later.

Whichever method you use, always remember that propane is a dangerous, flammable gas, so performing this process carefully and safely is very important. The photos above show some of the steps we used to refill our disposable Coleman one-pound propane bottles.

There are many videos showing how to do this and our post isn’t meant to be a tutorial on how to do so, but we’ll explain the basic principle of how it works.

Turning to the left to tighten the bottle adapter onto the 20 lb. tank.

How We Once Refilled Our One-Pound Disposable Propane Canisters

Disclaimer: The following is not to be used as instructions and is for illustrative purposes only.

Back when we used to refill our used Coleman propane cylinders using the old method, we’d find a clear spot outside on a cool day when there was some breeze blowing. After purging the remaining gas from our one-pound cylinder, we attached it to an inverted 20 lb. tank, and slowly opened the main valve. After about thirty minutes, we’d close the main valve, return the tank to its normal upright position and unscrew the 1 lb. canister. A better description of the whole process can be found here, on a website that sells a tank adapter similar to the one we used.

(Some people chill their 1 lb. propane canisters in a small bucket of ice water, etc. This condenses the gas and lowers the pressure so you can refill with a bit more propane. Careful not to overfill!)

To make sure we hadn’t overfilled them, we’d always perform a quick check using an old postal scale to see that our newly refilled 1 lb. propane bottles wasn’t any heavier than a new store-bought one, as well as to check for leaks before storing it away.

Downsides of This Method

  • You typically can’t ever fill a 1 lb. bottle to the same level as when it was new. *
  • Unless you’re using a special stand, the upturned tank is awkward and can tip over.
  • Disposable 1 lb. bottles and their internal valves aren’t made to same standards as refillable ones.
  • DOT-39 cylinders (disposable type like Coleman, Bernzomatic) are illegal to transport if refilled.

* There is a way do get more gas into a cylinder, but it requires loosening the pressure-relief valve and/or chilling the bottle.

The Flame King kit includes this easy to use valve system, which is much simpler to work with than the one-piece brass fitting that we had been using – no wrench needed.

Two Better Alternatives To Refilling Used 1 Pound Propane Bottles.

Option 1 – Flame King 1 lb. Refillable Cylinders

Since learning that owner-refilled disposable cylinders aren’t legal to transport, and that they’re not made to the same specifications as refillable ones are, we switched to carrying a couple of DOT approved refillable one-pound propane cylinders, made by Flame King. This simple system uses a special filling valve with a long extension, along with an optional propane tank stand, which solved the problem we once had of inverting the 20 lb. tank during the refilling process.

Option 2 – 5 lb Refillable Mini Tanks

The Gas Growler holds lbs of propane, lasting that much longer than a one lb bottle.

A five pound refillable propane cylinder also works very well for fueling camping stoves, with the added benefit of lasing five times longer than 1 lb. bottles, and being refillable anywhere larger tanks are filled. The Gas Growler is one example of a five pound mini-tank that is easily stored in the back of a vehicle in it’s padded carrying case. Many in the overlanding community like to carry this size propane tank since one can last as long as a month, depending on how many meals you cook a day.

The Bottom Line: Should You Ever Refill a 1. lb Propane Cylinder?

Coleman, Bernzomatic and other brands of disposable propane cylinders don’t feature heavy-duty brass tank fittings or long-life internal valves. Disposable cylinders aren’t made with the same thickness of steel (just pick one up and you’ll feel the difference) nor do they have the DOT seal of approval for reuse which would make them legal for transport. However, when making the decision to refill a cylinder, the real reason you should avoid this practice is for your own safety and that of others, not for fear of being caught by the DOT.

Benefits of Refilling Your Disposable 1 lb Propane Bottles With a Flame King or Similar System

When it comes to saving money, using some kind of reusable, refillable propane cylinder for your Coleman stove is really a no-brainier. There are the environmental benefits as well, plus not having to deal with properly disposing of all the empty canisters at the end of the camping season. In terms of savings, it currently costs about $20 to fill a 20 lb tank, while a 1 lb bottle costs us around $5 at Walmart. It’s easy math, and you can clearly see that refilling an approved tank can save a lot of money over the long run.

This 5′ extension hose features an adapter that allows you to use a 20 lb. bottle to fuel your Coleman or other camping stove which uses 1 lb. bottles.

In addition to sometimes running our Coleman camping stove directly from a 20 lb. tank, using a 5′ propane adapter hose, we’ve also been using two 16.4 ounce Flame King propane cylinders. Because these are so easy to refill, we normally don’t bring a 20 lb bottle unless we plan on being gone for more than a week.

At about $52 for the Flame King Refill Kit, which includes one refillable cylinder, we estimate that we’ve saved enough this camping season so far to pay for it already.

Disclaimer: We don’t advocate refilling used disposable propane bottles. This article does not constitute instruction. When using any approved system to refill a re-usable 1 lb cylinder, be sure to follow all of the manufacturer’s instructions to the letter. Full Disclosure: This post may include affiliate links to products we recommend. Our readers never pay any extra when using those links.

Sources:

https://www.phmsa.dot.gov/regulatory-compliance/phmsa-guidance/stop-never-refill-1-lb-propane-bottles-0

Best Air Rifle Deals

Popular Posts

How to choose the right Air Gun Caliber for your game?

0
A story is told of three Native American hunters. Two are smart, the other somewhat ignorant. On the first day of the hunting season, one of...

PCP vs Gas Piston: Which One is Better?

0
The perfect airgun is a difficult pick when you are new to gun-hunting. There are a lot of things to keep in mind, starting...

Gas vs Spring Piston: Which One is Better?

0
Today, you can find 5 different types of air rifles available in the industry. They are: spring pistons, gas pistons, PCP air rifles, variable...