The .270 Winchester and .30-06 Springfield are both great cartridges, but have different strengths and weaknesses. So, the question central to the 270 vs 30-06 debate remains: which one should you be hunting with?
Most hunters and shooters probably agree that the .270 Winchester and .30-06 Springfield are both quite versatile and effective cartridges. After all, there is a reason why they are the two most popular centerfire rifle cartridges used by hunters in the United States.
While there is an overlap in their capabilities, the two cartridges are best suited to different tasks and represent two different ways of thinking. This is part of the reason why each cartridge has such a dedicated and loyal following and why the 270 vs 30-06 debate continues to rage on after so many years.
In today’s post, I’m going to discuss the merits of the 270 vs 30-06 and provide some insight into which cartridge you should be using in various situations.
Before we get started, I have two administrative notes:
Some of the links below are affiliate links. This means I will earn a small commission (at no extra cost to you) if you make a purchase. This helps support the blog and allows me to continue to create free content that’s useful to hunters like yourself. Thanks for your support.
Additionally, I recorded an entire podcast episode on this exact subject. If you’d rather listen than read, click the appropriate link below to listen to this episode on your preferred podcasting service.
Be sure to hit that “Subscribe” button in your podcast player!
30-06 vs 270 Podcast
Apple | Google | iHeart | Spotify | Stitcher
270 vs 30-06: Similarities
First, lets start with the areas where the .270 Winchester and .30-06 Springfield are similar.
Both the .270 Winchester and the .30-06 Springfield are descended from the .30-03 Springfield cartridge, which was itself heavily influenced by the 7mm Mauser. Both the .270 and .30-06 are great cartridges for hunting medium to large sized game all over the world ranging from roe deer to moose under the right circumstances. They also have great reputations for accuracy and performance at extended range.
They are also very popular cartridges among hunters and shooters all over the world. Indeed, those two cartridges are among the most commonly used centerfire cartridges in the United States.
For that reason, just about every gun manufacturer produces rifles chambered in .270 Winchester and .30-06 Springfield. The same goes for ammunition, so users of these cartridges have plenty of choices when it comes to good quality guns and ammo.
So, we’ve covered how the .270 and .30-06 are similar, but how are they different?
270 vs 30-06: Cartridge Sizes
The U.S. Army designed the .30-06 Springfield for use in the bolt action 1903 Springfield rifle in 1906 as an improvement on the .30-03 Springfield cartridge. The Army was just coming off the heels of a sobering lesson regarding the effectiveness of the 7mm Mauser in the hands of Spanish troops in Cuba in 1898 and wanted a cartridge and rifle that could compete with the revolutionary new Mauser.
Using smokeless powder and a new 150gr pointed bullet fired at a muzzle velocity of 2,700fps, the .30-06 Springfield was a significant improvement over previous cartridges the military used during that era like the .30-40 Krag and the .45-70 Government.
It didn’t take long for the .30-06 Springfield cartridge to catch on with the hunting and shooting communities and it was soon an extremely popular cartridge in the United States and in North America as a whole.
As good as the .30-06 Springfield was, not everyone was completely satisfied with it and wildcatters quickly started modifying the cartridge for more specialized tasks.
Around the same time gun designers were necking up the .30-06 to develop the .35 Whelen cartridge, engineers at Winchester decided to go the opposite route and neck down the .30-06 to use .277″ instead of .308″ bullets. The resulting .270 Winchester cartridge (also known as the .270 Win for short) was formally released in 1925 for the Winchester Model 54 rifle.
The original .270 Winchester load shot a 130 grain bullet at a blazing fast velocity (for 1925 anyway) of 3,140 feet per second (2,846 ft-lbs of energy).
Though the .270 Winchester was not an immediate success, American hunters appreciated the flat shooting characteristics of the round and the fact that it was so effective on thin skinned game. The cartridge gradually became more and more popular, which was helped by Jack O’Connor and his famous affinity for the cartridge that he expressed in countless Outdoor Life articles over the years.
That’s not to say that the cartridge only became the incredibly popular because of O’Connor. While O’Connor did indeed love the .270 Winchester and used it extensively on hunts all over the world, it was far from the only cartridge he used. The .270 Winchester was also a good enough cartridge and filled a big enough niche that it probably would have been successful even without any help from Jack O’Connor.
The .270 Winchester is something of an oddity when it comes to bullet diameter though. Unlike all the other popular 7mm cartridges like the 7mm Mauser, 7mm-08, 7mm Remington Magnum and the .280 Remington that use .284″ bullets, the .270 Winchester uses .277″ bullets.
It’s unclear exactly why Winchester decided to go with .277″ instead of .284″ bullets with the .270 Winchester. One theory is they choose that particular bullet size based on the obscure 6.8x57mm Chinese Mauser cartridge. It’s also possible they wanted to create a distinctly American bullet size and avoid the 6.5mm and 7mm bullets popular in Europe by building a new brand new bullet diameter 10% smaller than the one used in the .30-06 (.9 multiplied by .308 is .277).
Regardless of their reasons, the design team at Winchester went with a .277″ bullet diameter and the rest is history. Interestingly enough, while the .270 Winchester turned out to be a smashing commercial success for the company, .277″ bullets never really caught on. The 270 Winchester Short Magnum (270 WSM) and the .270 Weatherby Magnum are the only other two mass produced cartridges that utilize bullets of that size.
You can see the heritage of the .270 and .30-06 cartridges on display in the photos below.
The .270 Winchester has a slightly longer case length (2.54″ vs 2.494″), but the two cartridges are identical up to the shoulder.
Though the .30-06 Springfield cartridge in the photo is slightly shorter than the .270 Winchester cartridge, the SAAMI specifications for the two cartridges overlap and the .270 Winchester and .30-06 Springfield have the same maximum authorized overall length of 3.34″ (84.84mm).
Since the .270 Winchester and .30-06 Springfield have the same maximum overall length of 3.34″, both cartridges are used in long-action rifles.
Due to the fact that the .270 Winchester basically just uses a necked down .30-03 Springfield case (which is also the parent cartridge for the .30-06), both cartridges also have the exact same case diameter and virtually the same case capacity.
Note: while the case capacity figures listed below do give a good indication of the differences between the two cartridges, exact case capacities vary slightly according to the brand of brass used.
270 vs 30-06 Ballistics
The .30-06 Springfield is certainly no slouch in terms of velocity or trajectory, but the .270 Winchester has a clear advantage in both of those areas. Similar to the difference between the 7-30 Waters and the .30-30 Winchester, by necking down the .30-06 case to shoot smaller diameter bullets, the designers of the .270 Winchester were successful in building a cartridge with a higher velocity, flatter trajectory, and less recoil than the .30-06 Springfield.
This is because, when compared to the .30-06 Springfield, the smaller diameter .270 Winchester shoots lighter weight bullets.
For instance, the vast majority of .270 Winchester factory loads shoot bullets in the 120-150 grain range. Of these, 130 grain and 150 grain bullets are by far the most common. On the other hand, though it’s possible to find .30-06 ammo shooting bullets weighing as little as 110 grains and as heavy as 220 grains, most .30-06 Springfield factory loads use bullets in the 150-180 grain range. 150 grain, 165 grain, 168 grain, and 180 grain bullets are the most common these days.
The table below compares the 130gr Nosler AccuBond (.435 BC) in .270 Winchester to 150gr Nosler Partition (.387 BC), 165gr Nosler AccuBond (.475 BC), and 180gr Nosler AccuBond (.507 BC) loads in .30-06 Springfield. As you can see, there is a significant difference in the bullet trajectories between the two cartridges.
Though two of the .30-06 loads utilize bullets with a higher ballistic coefficient and have as much or slightly more energy remaining at 500 yards, the .270 Winchester load still hits 4-8″ higher than all three .30-06 loads.
Not only does the .270 Winchester have a noticeably flatter trajectory, but that particular load generates 22-36% less free recoil energy than those three .30-06 Springfield loads when used in the same rifle. Felt recoil will vary from shooter to shooter and rifle to rifle, but free recoil energy is still a useful way to compare the two cartridges.
It’s tough to pick a winner when it comes to accuracy of the 270 vs 30-06 because it’s something of an apples to oranges comparison. Most people agree that both cartridges are capable of excellent accuracy, but the .270 Winchester is used almost exclusively as a hunting cartridge while match shooters, military and police snipers, and hunters have all used the .30-06 Springfield extensively over the years.
That’s not to say the .270 Winchester isn’t an accurate cartridge. It most certainly is, but it just doesn’t have the same pedigree as the .30-06 Springfield in that regard and for that reason, there are very few choices available for .270 Winchester match ammo.
All that being said, both cartridges have the potential for excellent accuracy in the right hands.
270 vs 30-06: Ammunition Selection
The .270 Winchester and .30-06 Springfield are two of the most popular cartridges for hunters in the United States. For that reason, virtually every ammunition manufacturer of note like Barnes, Browning, Federal Premium, Hornady, Nosler, PPU, Remington, Swift, Weatherby, and Winchester (just to name a few) produce a wide variety of good quality ammo in various bullet weights for both cartridges. So regardless of whether you want lighter or heavier bullets for either cartridge, you should be able to find what you’re looking for.
Just about every major style of bullet is available in those cartridges as well like the Barnes TTSX, the Hornady GMX, InterBond, and SST, the Nosler AccuBond and Partition, the Remington Core Lokt, the Swift Scirocco and A-Frame, and the Winchester Power Point (just to name a few).
Prices and availability for each cartridge vary from region to region, but ammunition for both cartridges is widely available. In fact, if a sporting goods store only carried ammo for two different centerfire rifle cartridges, I’d bet money they’d have .270 and .30-06 ammo. Ammunition for both cartridges is similarily priced as well.
BUY SOME QUALITY 270 WINCHESTER AMMO HERE
BUY SOME EXCELLENT 30-06 SPRINGFIELD AMMO HERE
Read the articles below if you’d like to learn more details about some of the various hunting ammunition choices for the 270 or the 30-06.
Best 270 Ammunition For Hunting Deer, Bear, Hogs & Other Big Game
Best 30-06 Ammunition For Hunting Elk, Deer, Bear, & Other Game
If you’re into hand loading, then you’re also in luck because reloading components for both cartridges are widely available. There are also lots of good quality .277 and .308 caliber bullets to choose from, so you shouldn’t have much trouble working up a custom load that shoots very accurately in your chosen rifle.
270 vs 30-06: Rifle Selection
Since the .270 and .30-06 are such popular cartridges, there are lots and lots of rifles to choose from and virtually every firearms manufacturer produces rifles chambered in both cartridges. Additionally, because the cartridges are the same length and have the same rim diameter, rifles of the same model chambered in each cartridge are virtually identical to each other.
Among others, the Browning X-Bolt, CZ-550, Mossberg Patriot, Remington Model 700 and 783, Ruger American and M77 Hawkeye, Savage 11/111, Thompson Center Compass, Tikka T3X, Weatherby Mark V and Vanguard, and (of course) the Winchester Model 70 are all available in .270 Winchester and .30-06 Springfield.
As anyone who has read a few of his articles in Outdoor Life would know, Jack O’Connor’s favorite rifle was a Winchester Model 70 rifle chambered in .270 Winchester. Even though the Model 70s has been chambered in many other cartridges (including .30-06), and even though many other rifles are available in .270 Winchester, the Model 70 and the .270 Winchester remain irrevocably linked in the minds of many hunters due to O’Connor’s work.
By the way, O’Connor’s Model 70 is currently on display at the Jack O’Connor Museum in Lewiston, Idaho
The description reads:
Jack O’Connor’s Favorite Rifle: The Winchester Model 70 Featherweight .270 was purchased in Lewiston in 1959. It was custom-stocked by Al Biesen of Spokane who also fitted an engraved trap-door buttplate and grip cap. It was used by Jack from Botswana to British Columbia on a variety of game, including his last Stone ram in 1973.
BUY AN OUTSTANDING 270 WINCHESTER RIFLE HERE
BUY A DEPENDABLE 30-06 SPRINGFIELD RIFLE HERE
Read the article below if you’d like to learn more details about some of the various hunting rifle choices for the .270 Winchester.
Best 270 Rifles For Hunting – Ultimate Guide
270 vs 30-06: Which Is Right For You?
When using the right bullets and with good shot placement, both cartridges are excellent for hunting medium to large sized game. Indeed, both the .270 Winchester and .30-06 Springfield are great choices if you’re looking for a really versatile cartridge.
They are both extremely effective (and popular) deer hunting cartridges. Indeed, whitetail deer probably make up well over half of the game harvested by those two cartridges each year. The .270 and .30-06 also work really well for feral hogs and black bear hunting. The same goes for exotic game like sika, axis, and fallow deer.
However, this is where the strengths and weaknesses of each cartridge start to diverge.
The flat trajectory of the .270 Winchester makes it great for animals that are more likely to require longer range shots like mule deer or pronghorn. By the same token, the fact that the .270 also has a relatively mild recoil also makes it a great cartridge for mountain hunts where a lightweight rifle is really desirable. After all, there’s a reason why Jack O’Connor liked his .270 so much for hunting sheep why it’s also still such an effective cartridge for mountain goat, Himalayan Tahr, and chamois hunting.
On the other hand, since it shoots heavier and larger diameter bullets, the .30-06 Springfield has a clear advantage when hunting larger species like caribou, elk, and moose. When using a 180 grain bullet, the .30-06 also has a clear advantage when hunting most species of African plains game.
That doesn’t mean that you can hunt elk, moose, or plains game with a .270. After all, lots of hunters have killed untold numbers of those animals with a .270 over the years. If anything, the .270 Winchester is even more effective on really large game (elk hunting in particular) now than it was even 20 years ago because hunters have access to much better quality bullets these days.
For instance, the 150gr Nosler Partition below really did a number on a big kudu bull in South Africa.
There’s also nothing saying the .30-06 isn’t suitable for long range shots or that can’t also be a great rifle for a mountain hunt.
Like I said earlier, they’re both quite versatile, but that each cartridge is just a better choice for certain applications.
Do you primarily hunt deer, hogs, or bears in an area where long distance shots past 200 yards are uncommon and bullet drop is less of a concern? Both cartridges will work just fine under these circumstances and there isn’t much of a difference between them ballistically inside of 300 yards.
Are you very sensitive to recoil? Do you do a lot of mountain or backcountry hunts where it’s really nice to have a lightweight rifle? Consider going with the .270 Winchester, which has a lighter recoil that’s more manageable in a small and light rifle. With good shot placement and quality ammunition, the .270 Winchester is a wonderful choice for mountain goat, sheep, or tahr hunting.
Do you want to hunt larger game animals like elk, moose, red stag, and eland? Both cartridges will work, but the .30-06 Springfield offers a clear advantage since it can use heavier 180 grain bullets that are much better suited for extremely large and/or tough animals.
As I’ve stated before: the .270 Winchester and the .30-06 Springfield are both great rifle cartridges. While each one may be better suited to specific situations than the others, they are both very solid performers overall. The difference between them (270 vs 30-06) is not as great as it is sometimes made out to be and the animal will never know the difference if your shot is placed in the right spot.
Want to take a rifle chambered in one of these cartridges on a hunt?
Book an excellent black bear hunt here.
Book an outstanding African hunting safari here.
For a more detailed discussion on the .30-06 Springfield and how it compares to some other popular .30 caliber cartridges, or to learn about how the .270 compares to the .308 Winchester, or to learn about other cartridges specifically designed to improve upon the performance of the .30-06, read the articles below:
308 vs 30-06 vs 300 Win Mag: Which Cartridge Should You Be Hunting With?
7mm Rem Mag vs 300 Win Mag: What You Know May Be Wrong
25-06 vs 6.5 Creedmoor vs 270 Winchester: The Results Might Surprise You
270 vs 308: Which One Should You Hunt With?
Enjoy this article about the .270 vs .30-06 debate? Please share it with your friends on Facebook and Twitter.
Nosler provided the load data used to compare recoil for the cartridges (here and here). Cartridge case capacities were obtained from Chuck Hawks. The Lyman 50th Edition (p197-198 & 246-250) and Hornady 10th Edition (p351-355, 510-522) reloading manuals were also used as references for this article. Maximum pressure obtained from SAAMI (p28 and p29). I used the Hornady Ballistic calculator and Handloads.com to compare wind drift, the range each bullet goes subsonic, and recoil for the cartridges.
Make sure you follow The Big Game Hunting Blog on Facebook, Instagram, Twitter, and YouTube.
NEXT: BEST 6.5 CREEDMOOR AMMO FOR HUNTING DEER AND ELK
NEXT: 101 BEST GIFTS FOR HUNTERS
NEXT: 11 BEST HUNTING EAR PROTECTION OPTIONS FOR SPORTSMEN
")
")
")
")
")


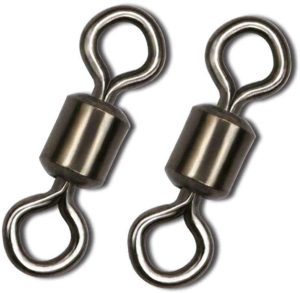 The barrel swivel is the original fishing swivel, and simply consists of a pivoting joint with two rings attached to either end. The joint in the middle is usually round, or sometimes a small barrel.
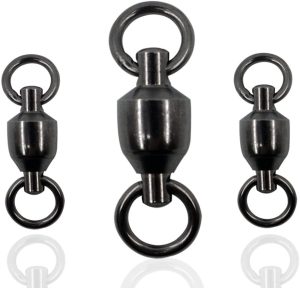 A ball-bearing swivel is an improved version of the barrel swivel, and comes with a ball bearing inside the pivoting joint. Due to this ball bearing, the rings of the swivel rotate much more freely than those of a standard barrel swivel, and thus prevent line twist more effectively.
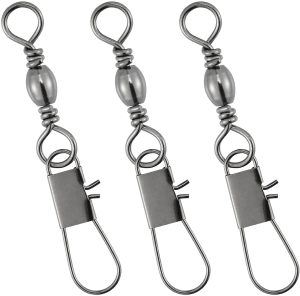 A snap swivel is an improved version of the barrel swivel that comes with a snap attached to one end, instead of the regular ring. The most common way to use a snap swivel is to tie your main fishing line to the ring of the swivel, and then use the snap to attach to the ring of a lure.
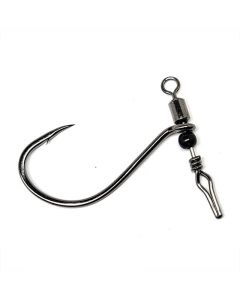 The finesse swivel is a relatively new swivel type that’s used for fishing with a drop shot rig. It consists of a hook that is directly attached to the swivel, and can rotate around the axis of the swivel.


 Looking for an World Class Whitetail Deer Hunting Trip in the Louisiana area? Because at Rocky Fork Whitetails, we offer the biggest and best World Class Whitetail Deer Hunting Trip just up the road in Ohio. If fact we deliver on your World Class Whitetail Deer Hunting Trip you have always dreamed about.
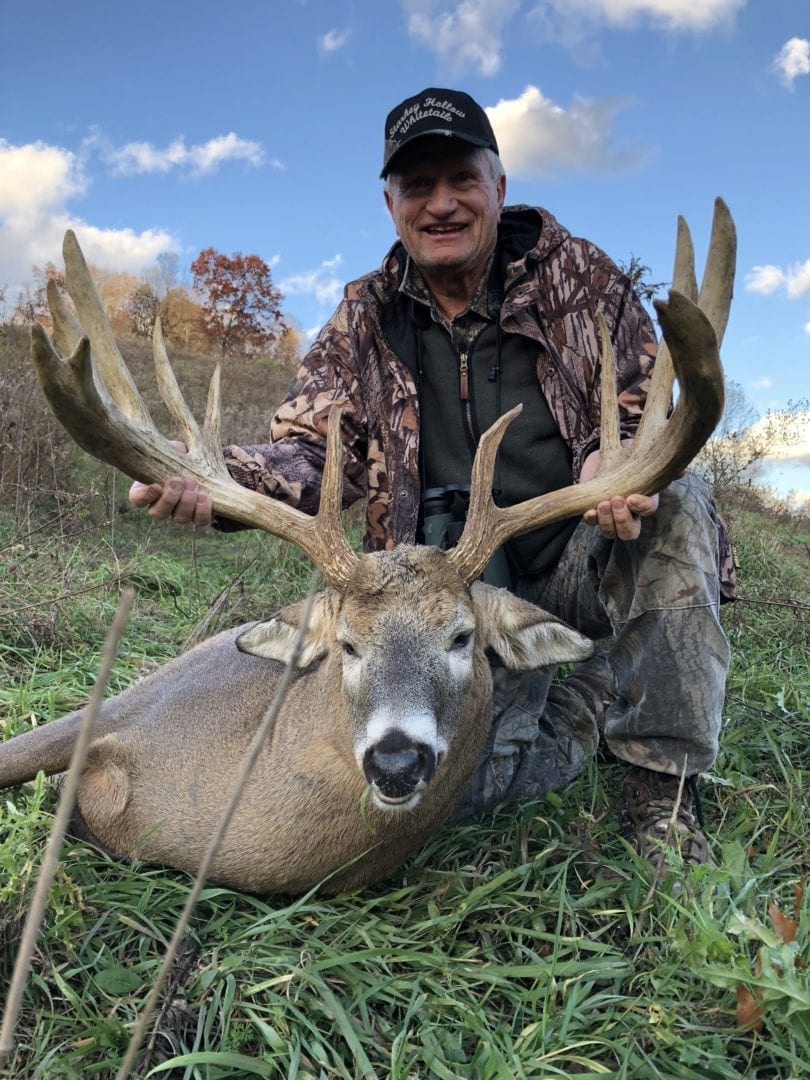 Premium World Class Whitetail Deer Hunting Trip for Louisiana Outfitters looking for adventure in Ohio
 Attracting hunters and enthusiasts from Louisiana and beyond, a World Class Whitetail Deer Hunting Trip at Rocky Fork Whitetails is the ultimate location for the most insane World Class Whitetail Deer Hunting Trip in Ohio; or anywhere else.
 When you journey from Louisiana to Rocky Fork Whitetails in Ohio, every World Class Whitetail Deer Hunting Trip is ALL INCLUSIVE:
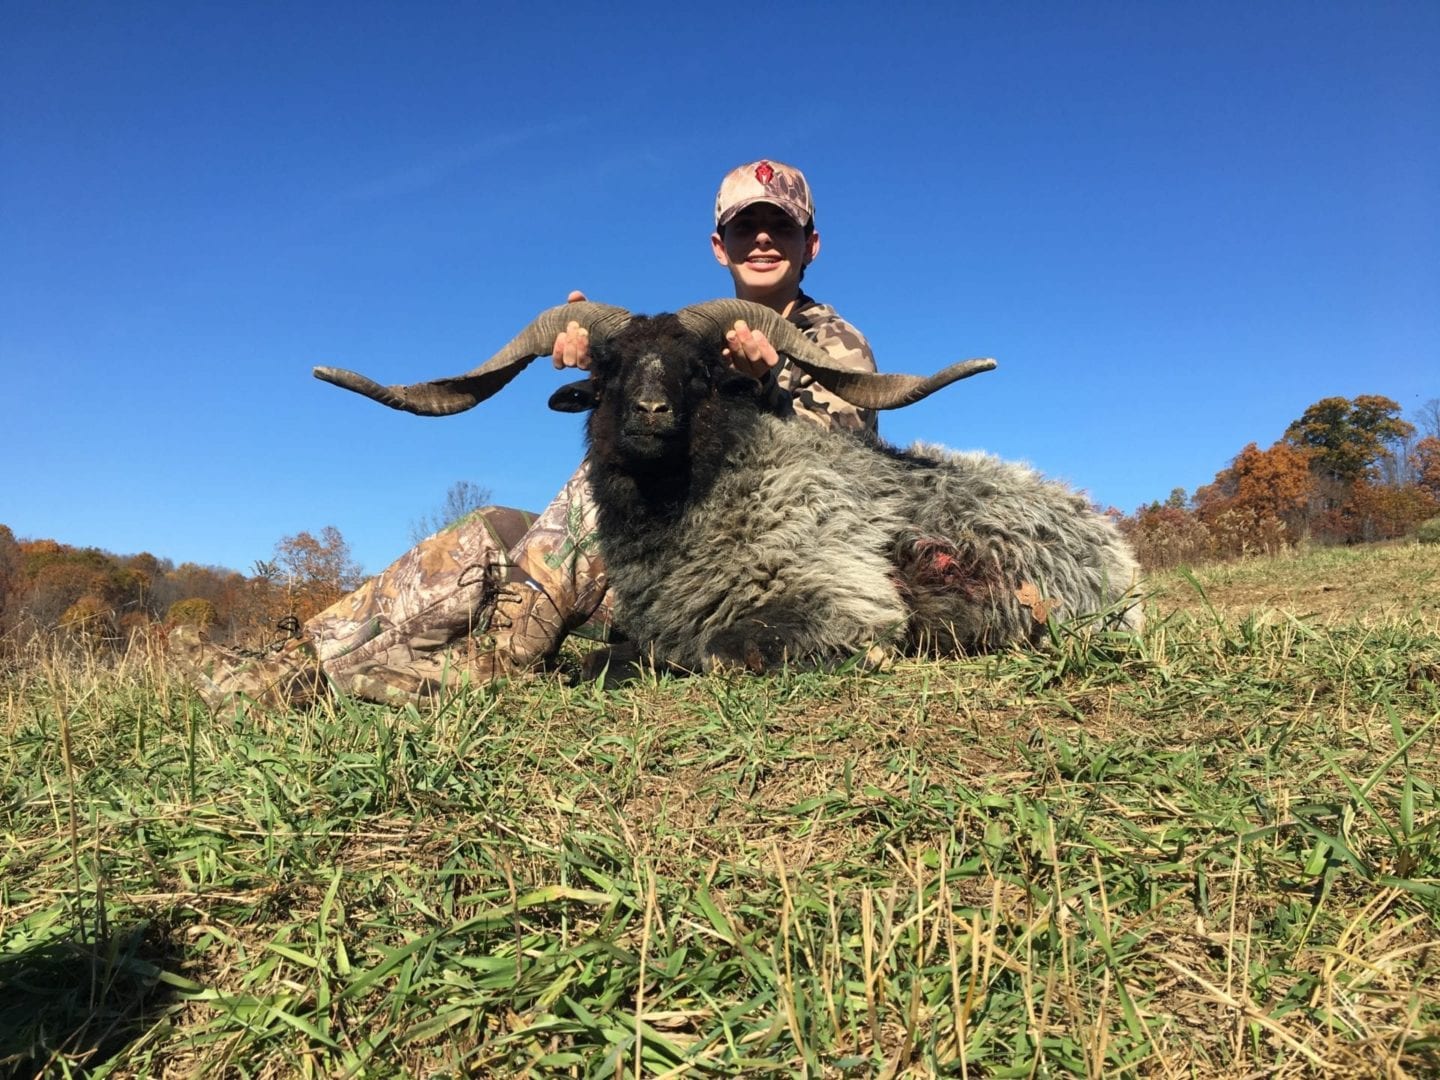 Another of the things that makes our World Class Whitetail Deer Hunting Trip so exciting, for those coming from Louisiana to our expansive 283 acre ranch in Ohio, is whether you are a beginner or a pro; Rocky Fork Whitetails diverse and expansive ranch always makes it unforgettable. Our highly skilled guides make sure to custom curtail your Ohio World Class Whitetail Deer Hunting Trip adventure to make sure you experience the thrill of the hunt. Followed by the peace and relaxation that only our 5 star lodge nestled in the hills of Ohio can offer.
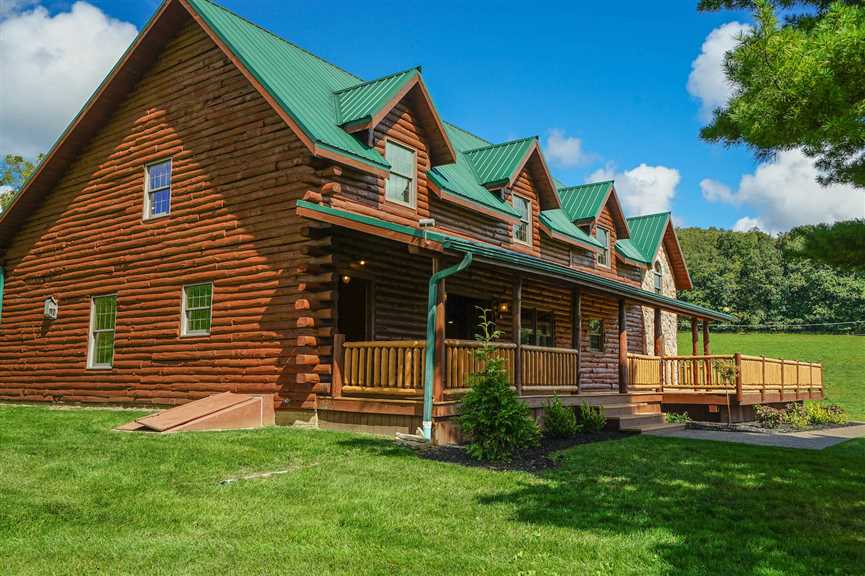 Experience the most awesome Lodging in Ohio for your extreme World Class Whitetail Deer Hunting Trip!


