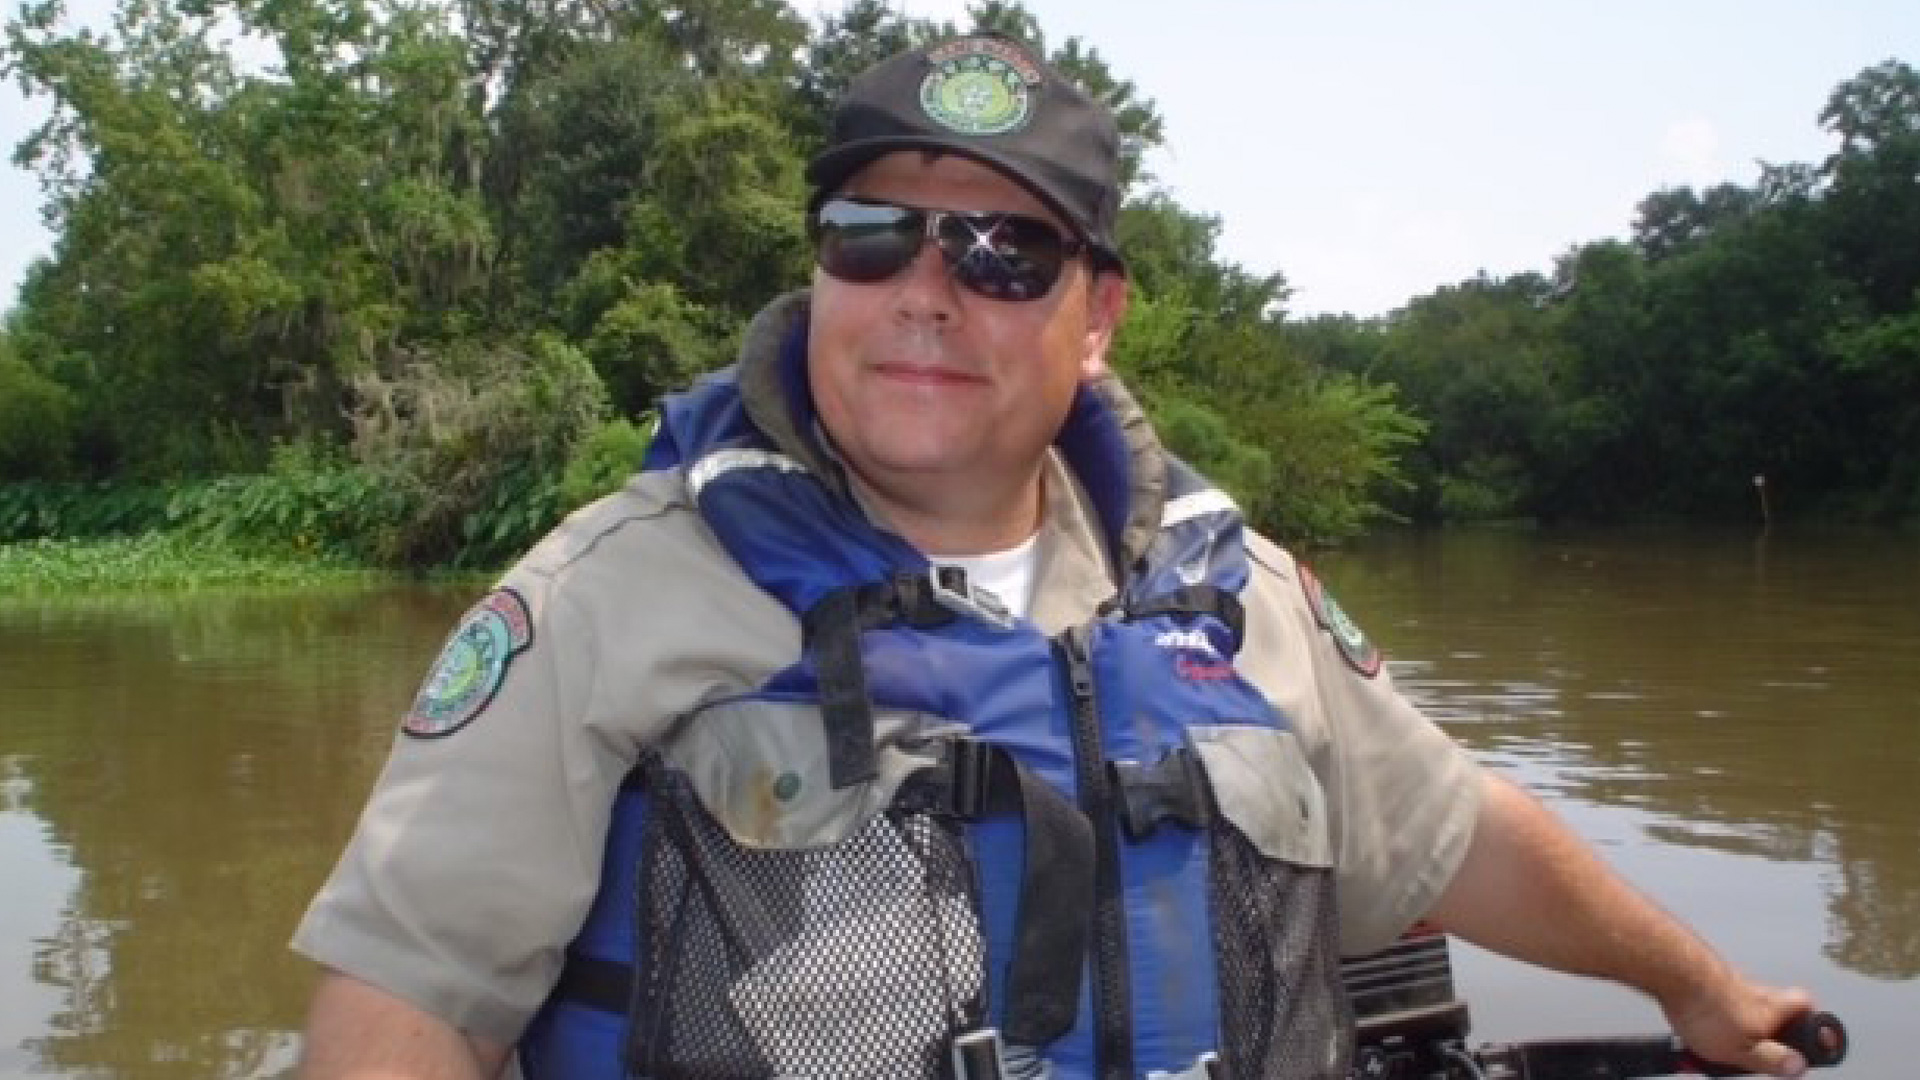
Home Blog Page 18

How to Make Homemade Sausage

0

If you are interested in making homemade sausage, you are in the right place. I have been making sausage for decades, and I’d like to share with you my comprehensive tutorial on how to make sausage at home.

A platter of hot Italian sausages.
Photo by Holly A. Heyser

I’ve learned a lot in the decade-plus since I first wrote instructions on how to make sausage. Each year I learn a new tip or trick, a bit more about meat science, how to get a better bind, which casings are better than others, etc.

This will be a fairly comprehensive article on homemade sausage, meant to get you started, with a sample sausage recipe at the bottom. But understand that making sausage is a process, one you will not perfect the first time out. Perfection comes with practice, precision, plus a little luck.

Why Make Homemade Sausage?

Fair question. After all, even small supermarkets sell several kinds of sausages. The reason is that making your own gives you control. Control over the meat and fat, control over the seasonings, control over the grind, the size and thickness of the links, control over whether your homemade sausages are smoked or fresh.

Anyone reading this who hunts or raises livestock will also want to learn how to make sausage. After all, it’s a wonderful thing to make when you bring home a deer, or some ducks, a mess of pheasants, or after your annual hog slaughter.

Making sausage can be as easy or as hard as you want. Whipping together a batch of homemade sausage without casings is as easy as making meatloaf, which is very similar actually.

Casing links is a little trickier, but it ain’t rocket science. Oh, and yes, there is a little science to know about sausage making.

Basics

At it’s core, sausage is meat + fat + salt, kneaded until it binds to itself. That’s it.

Obviously most of us want to add more seasonings, or maybe stuff the sausage into casings. Or smoke it. We’ll get to all of that below. Let’s break the magic equation above down to its components.

Meat for Homemade Sausage

Any meat will do. I’ve made sausage with lots of weird things, from woodcock and beaver to standards like pork, beef and chicken. I’ve even made fish sausages. My collection of sausage recipes is broken down by general meat type, so that should help you choose one after reading this tutorial.

Unfrozen meat binds to itself better than thawed meat, and pork binds to itself better than other meats. A good compromise is to use your thawed game meats and some never-frozen pork shoulder or belly.

The gnarlier the meat in terms of connective tissue, the more times you will want to grind it. Most sausages I make are ground twice. More on that in a moment.

Fat in Making Sausage

Let’s talk fat. Homemade sausage almost always has pork fat in it, because, well, it’s superior to other fats in terms of melting point, availability and flavor. The best pork fat is fatback, off the back of the hog. Belly is OK, but a little soft. Shoulder is a nice compromise and easy to get.

Leaf lard, or any fat from the interior of any animal, will be harder than fat on the outside of the animal. It’s so hard — meaning it has a higher melting point — that I won’t use it from lambs, goats or cattle, whose fat has a higher melting point to begin with.

Oh, and if you want to use fat from deer, elk, moose or any other cervid, read my article on cooking deer fat here. Short version: Use very little in homemade sausage. Note: pronghorn aren’t cervids, so their fat is fine to use.

Hank Shaw holding a bowl of freshly made sausages.
Photo by Holly A. Heyser

Beef fat, or that from other bovids like bison, nilgai, oryx, yak or musk ox, is perfectly fine when harvested from the outside of the body cavity. It can be too hard when taken from the inside, but it does depend on the animal’s diet.

Bird fat is too soft for making sausage, unless you are making an emulsified sausage, like a hot dog.

Never use lard. Previously rendered fat won’t work in normal homemade sausage.

In terms of percentage, you will want no less than about 15 percent, and no more than about 35 percent. I shoot for about 20 to 25 percent normally.

Salt and Curing Salt

You need salt to make sausage. Period. The very word sausage comes from the Latin salsus, meaning “salted.” My recipes use kosher salt because it’s readily available and lacks additives like anti-caking agents, which can mar the flavor of your links.

I use Diamond Crystal kosher salt. If you use it too, my volume measurements will be the same. Morton’s kosher salt is cut differently, so volumetric measurements won’t be the same — you’ll have to go by weight.

Which is why salting by weight is way, way, way better. When you do that, you can use whatever salt you want in homemade sausage. I really like using salt I’ve harvested from the Pacific Ocean for this, because, well, I am weird like that.

Five links of pheasant sausage on a platter.
Photo by Holly A. Heyser

Along those lines, avoid weird salt. Like those black and bright red Hawaiian salts. Or flavored salts. Also avoid salt with really big crystals because it won’t mix evenly in your sausages.

A general rule for fresh homemade sausage is to use between 1 and 2 percent salt by total weight of the meat and fat. So for a standard 5-pound batch, which is 2268 grams, at minimum, I’d use about 23 grams of salt, which is about 5 1/2 teaspoons. In reality, I prefer my sausage saltier, so I add about 1.5 percent by weight.

Curing salt is not evil. There, I said it.

For the purposes of this discussion we’re talking about sodium nitrite, which is used in smoked sausages. It is there for food safety — it can prevent listeria and botulism — as well as flavor. It’s why hams, pastrami and corned beef have that rosy, hammy flavor.

And for everyone who thinks they’re not getting nitrites by eating “uncured” products, know that the manufacturers are lying to you. There’s a loophole in the regulations that says if you use celery powder, you can say you aren’t curing meats. Well, celery powder is loaded with sodium nitrite, so there you go.

Anyway, rant over. Use one or the other when you are making smoked sausages.

Additives

Not all additives are bad in sausage. I’ve used a lot of them, rejected most, and a few I have turned to repeatedly because they give you a better link. What I am talking about are things like vegetable fibers, dry milk, binders, etc. that can improve the texture of homemade sausage.

Dry milk and a product called C-bind, from The Sausage Maker (it’s carrot fiber) will both help your links retain more moisture. Not usually a problem with fresh sausages, but very useful for smoked sausages.

Butcher and Packer has a “special meat binder” that is really good, and you only need tiny amounts to improve the bind of your sausage. They don’t say what it is, but I imagine it’s ground up fairy wings or gold dust or something…

Holding a slice of venison summer sausage
Photo by Holly A. Heyser

Equipment for Homemade Sausage

Alas, you cannot make homemade sausage without equipment. At the very least you need a grinder. I will not condone making sausage with a food processor any more. I used to, and you might see it as an option in some old recipes here, but it’s gross. Don’t.

Can you make homemade sausage without a grinder? Um, you can, but it’s a terrible process. You need to hand mince pounds of meat and fat without it heating up, then jam it into casings through a wide funnel. I’ve done it, and it sucks.

Grinders

At the very least you need the KitchenAid grinder attachment, which is fine for very small batches. I have used mine, off and on, since the early 2000s. But it’s not for anyone serious about things.

I use a Weston 1/2 horsepower commercial grade grinder. I like it a lot because it’s sturdy and it’s all steel. Some cheap grinders have plastic innards that will die if, say, you get a piece of bird shot jammed in the blade; good grinders have an emergency shut off that prevents the motor from seizing.

Another good grinder I’ve used is a LEM grinder. I recommend the 1/2 horsepower and the 0.35 horsepower models. Don’t bother with dual grind grinders. They jam easier and are hard to clean.

Homemade sausage links, tied off.
Photo by Holly A. Heyser

Stuffers

For the love of all that’s holy, don’t use your grinder as a stuffer! Running finished sausage that you worked so hard to get a good bind through an augur that shears apart that bind is crazy. Buy a stuffer or just make uncased sausage.

I hate the Weston stuffers because they leave too much meat in them when the plunger is all the way down. A few other companies use this design, and it’s silly. Butcher & Packer, the Sausage Maker and LEM make good stuffers.

Yes, it’s a few hundred bucks, but they last forever, are easy to clean and they make really good links.

Casings

I only use natural casings. I don’t like collagen casings because they are barely edible, if at all, and when they are they taste nasty. But you do you.

Hog casings are the norm, and they come in a variety of widths, which have some traditional recipes associated with them. Bockwurst, for example, needs a wide casing. Weisswurst needs a skinny one, or even a sheep casing.

Sheep casings are awesome when you are done making sausage with them, but they rip easily and will cause you to swear while trying to fill them. Consider getting “pre-tubed” sheep casings, which are easir to put on the stuffer.

Beef casings are very wide and are only really used in fresh sausages for recipes where the eater can’t eat pork. They’re mostly used in salami.

The gold standard of casing companies is Butcher and Packer. No one else comes close.

Three links of weisswurst on a plate
Photo by Hank Shaw

Other Random Stuff

I like to have a big needle or a sausage pricker (cue Beavis and Butthead laughter) to pierce the casings of the finished sausage to remove air pockets.

You’ll want something to hang your links from. I use a wooden clothes drying rack.

Spice grinders are useful for, well, grinding spices. Freshly ground spices make a difference.

Actually Making Homemade Sausage

OK, you’re all set. Now what?

A really short tutorial on how to make sausage would look something like this:

  • Cut meat and fat into pieces that fit into the grinder.
  • Add the required salt and/or sugar, mix then put in the fridge overnight
  • Grind once coarsely
  • Grind a second time with lots of seasonings.
  • Chill the meat well, then add liquid, whatever seasonings you didn’t want all ground up, and mix really well for a couple minutes. You’re done if you are making uncased sausage.
  • Put the mix into the stuffer, put the casings on the stuffer, then make a big coil.
  • Make the links from the coil. Tie them off. Hang for a while to “bloom.” Cook and eat.

Before we get into the basic recipe below, I’ll walk you through it in pictures.

Start with meat and fat. Usually with game, the meat is super lean, so I will go something like 3 pounds of this lean meat (venison, duck, pheasant, etc.) with 2 pounds of something fatty, like pork shoulder. Another good option is 4 pounds of lean and 1 pound of pure fatback.

Cut this into chunks that will fit in your grinder, then add the salt and mix. Set this in the fridge overnight. It will change color and get sticky.

Ingredients for making homemade sausage: casings, meat and fat, seasonings and some bread cubes.
Photo by Holly A. Heyser

Soak some casings in warm water and get your seasonings ready. I like to freeze my blade, dies, augur and hopper for an hour or more before grinding, to keep things cold — more on that in a bit.

Grind through a very coarse die; I prefer a 10 mm die, but you could go higher if you have one.

Grinding meat and fat for homemade sausages through a very coarse die.
Photo by Holly A. Heyser

Mix all the spices you want fully integrated into the sausage with the meat and fat. Do this carefully, and don’t squash the mix.

Mixing spices into coarsely ground sausage in a plastic tub.
Photo by Holly A. Heyser

If the mixture is still cold, as in less than about 37F or so, you can grind it again immediately. I do this a lot because I am fast and I start with cold gear.

Beginners with homemade sausage should play it safe and freeze the mixture for 20 minutes or so while you clean up and get ready to grind again.

It is vital for everything to stay cold in this whole process to prevent “smear,” which is when the fat partially melts and coats the meat, breaking its ability to bind to itself. You see this when your sausage comes out crumbly.

When you’re ready, grind again.

Making sausages: This is the second grind of the meat, into a plastic tub.
Photo by Holly A. Heyser

Have a couple pieces of bread, a hamburger roll or something similar handy to finish out your grind; skip this if you are celiac.

The reason is that the bread pushes every last bit of meat through the grinder, so you don’t waste any.

Dropping bread cubes into the grinder to push out every bit of meat left in it.
Photo by Holly A. Heyser

Once you’re all ground, chill the mixture while you clean up. This is important not only to have cold meat and fat, but also because you really do want to clean your grinder right away, or it becomes a nasty, sticky mess. Ask me how I know…

Now you are ready to create the bind in your homemade sausage.

This is when you add ice cold liquid, usually water. Wine, beer, juice, cream are all common in various recipes. Be aware that acidic things will break your bind, so go easy on vinegar if you want a tight, snappy sausage; this is called knacken in German.

Adding ice water to the ground sausage mixture.
Photo by Holly A. Heyser

You’ll also add any herbs or spices you want the eater to see, like cracked peppercorns or parsley or fennel seeds.

Mix, mix, mix! I do this with my (clean) hands for about 2 minutes. Knead like bread. As it so happens, you are creating the same sort of protein bind that exists in bread. It’s gluten in bread, myosin in meat.

This is the moment in making sausage where meat temperature is most critical. If the fat warms and smears here, you’re cooked. Crumbly sausage. What you’re doing is making myosin that forms a network around the fat, and that won’t work well above 40F.

Holding properly mixed sausage, which stays in one piece.
Photo by Holly A. Heyser

You’re done when you see white streaks on the bowl, and when you can pick up the whole shebang in one piece.

Now put the mix in the fridge and clean up again.

If you are not casing your sausage, you’re done! Portion out your sausage into blocks or make patties.

Casing Homemade Sausage

On to casing, which gives people fits until they figure it out. Casing is arguably the hardest part of making sausage, because you need the casings to be tight, but not to burst when cooking. Oh, and by the way, the most common reason your sausage bursts while cooking is high heat, not an over-stuffed sausage.

As I mentioned above, I prefer natural casings, usually hog casings. They’re versatile for most styles of sausage, and are by far the easiest to find. Many supermarkets have them (you’ll have to ask the meat counter people), and all butcher shops will have them.

First off, you will need to soak your casings in warm water to loosen them up; they’re usually stored heavily salted, and often frozen.

If you want, you can run water through your casings to check for leaks. I used to do this when I bought cheap casings, but I’ve never had a leak in any I’ve bought from Butcher and Packer.

Thread a long length of casing on the stuffer tube; they come in different sizes for different casings. Most are fine for hog casings, but if you work with narrow sheep casings, you’ll need a narrow tube.

Threading hog casings on a sausage stuffing tube.
Photo by Holly A. Heyser

Leave a long “tail” on the end of the casing; this is so you can tie it off easily later. Get the condom jokes out of your system for a while, then crank the stuffer down until you see the end of the sausage come out the tube. Cue scatological jokes, which will remain funny for a half hour or so…

Stuffing homemade sausage with a hand stuffer.
Photo by Holly A. Heyser

Crank out a full coil, fully but not overly tight — you’ll need to twist off links in a moment. Stuff everything before you make links.

There are a few ways to make links, from tying them off with twine to elaborate twisting tricks. The method I use is simple and it works. The end of the coil is one link. Then you pinch off the next link, spinning it so it will hold.

Pinching off a link of homemade sausage from the coil.
Photo by Holly A. Heyser

You move down the coil and spin that one the opposite way; this keeps the links from unwinding too easily.

Spinning a link of sausage to tighten it.
Photo by Holly A. Heyser

If this is confusing, I made a short video on making sausage links.

Work all the way down the coil until you get to the end, then tie off both ends after gently compressing the meat within those final links.

Now you need to compress the meat in each link, looking for air pockets. This is important for a proper bind and snap in homemade sausage, as well as to prevent boiling fat from spraying you when you slice into a link.

Pointing out an air pocket in a sausage link.
Photo by Holly A. Heyser

When you find air pockets, use a needle or the awesomely named sausage pricker to remove them. Pierce the casing, then gently compress the meat in the link to fill it.

Piercing a sausage casing to remove air pockets.
Photo by Holly A. Heyser

Now, hang your homemade sausage so it can “bloom,” which is the word we use when the links change color a bit, tighten in their skins and dry out just a little.

It’s a good idea to wait a day after making sausage before eating them, as this blooming process really improves the links.

Storing Homemade Sausage

Once made, homemade sausage will keep a week in the fridge. I like to let them sit there a couple days, then I’ll separate the links and vacuum seal them in packets I plan on eating.

I do not recommend pressure canning or pickling sausages, although people do. Just not a fan of the results.

The Recipe

Buckshot vs Birdshot: What’s the Difference?

0

Buckshot vs BirdshotThe terms “buckshot” and “birdshot” are often used a lot when discussing the different types of shotgun ammo. Many new shooters are confused about the difference between them, and that’s OK because we were all a little confused the first time we stepped up to the ammo counter.

In this article, we will explain the differences between birdshot vs buckshot so that you know exactly which shotgun loads to get for your shooting needs.

The Difference Between Buckshot and Birdshot Explained

The difference between birdshot and buckshot is the size of projectiles (shot/pellets) loaded into the shotgun shell and their penetration ability. Buckshot shells have larger pellets in lower numbers while birdshot shells have smaller pellets in much higher quantities. Buckshot loads have high penetration while birdshot typically has lower penetration ability.

Understanding Birdshot

Of these two shotgun shells, birdshot is the smaller of the two. Birdshot loads fire smaller pellets, but this allows ammo manufacturers to jam a lot more of them into the shell. When you pull the trigger on your Remington 870 or any other shotgun, the shot from the shell leaves the barrel and begins to separate and move outward from each other.

As its name implies, birdshot is primarily designed for hunting birds like quail, grouse, pheasant, duck, goose, and even turkey. However, birdshot is capable of small game hunting and is quite capable against rabbits, squirrels, and even snakes.

Although primarily developed for bird and small game hunting, birdshot is also used for shotgun shooting competitions such as skeet, trap, and sporting clays.

As small game animals and birds like quail and pheasants do not require a lot of stopping power to fell, birdshot loads are designed to give the hunter the highest probability of a successful harvest. This is why smaller pellets are used, as they create a wider pattern, and increase the chance of a successful hit.

birdshot pellet chart

Pellet shot size works on an inverse scale, just like shotgun gauge, meaning that the larger the shot number, the smaller the pellet size. For example, #5 shot is larger than #8 shot. The most common birdshot sizes you’ll see at the ammo counter are 7, 7 ½, 8, and 9 which can be used for bird hunting and sporting clays.

Although some birdshot loads can carry well over 500 pellets, these lightweight projectiles don’t carry a lot of kinetic energy. Although perfect for felling birds or bursting clay pigeons, they are less effective on large game or in self-defense.

For that you’ll need something with a bit more oomph behind it…like buckshot.

Understanding Buckshot

Buckshot, like its name suggests, was designed for hunting medium to larger game. As a “buck” is a term for a male deer, buckshot was primarily designed for whitetail hunting.

Buckshot fires larger pellets but fewer of them. Furthermore, they are often loaded with more powder than birdshot, giving them higher recoil but increased penetration and range. Just like birdshot, when you pull the trigger on that Winchester SXP 12-gauge shotgun, the pellets exit the barrel and begin to separate. However, unlike birdshot, buckshot typically has a tighter pattern as you want all that stopping power put into a smaller area to harvest big game.

Just like with birdshot, buckshot gauge is measured in reverse. This means that No. 4 Buck will be smaller than No. 1 Buck.

The most common buckshot load is 00 Buck. Pronounced “double-aught buck”, 2.75” shotgun shells carry around 8 pellets while 3” magnum shells can hold around 12 pellets. 00 Buck pellets measure 0.33” in diameter, almost the same size as a 9mm Luger handgun bullet.

Buckshot is typically not used on birds or small game due to the amount of kinetic energy it carries. Using buckshot on a bird is considered, by many, unethical and typically renders the majority of the meat inedible.

Although buckshot might not be the best choice for bird hunting, it’s widespread use by law enforcement has led many homeowners rely on a home defense shotgun loaded with 00 buckshot shells for protection.

buckshot pellet chart

Pattern/Spread

The way a shotgun shell disperses its shot on a target is referred to as its pattern or spread. The type of pattern a shell has is typically tailored to its intended purpose.

However, there are other factors that will affect pattern as well. Certain shotgun barrels are designed to constrict near the muzzle, thereby tightening the pattern of the shot as it exits the barrel. This is known as a choke.

Some shotgun barrels have the ability to have chokes screwed into them from the muzzle while others have a choke integral to the barrel itself. It is not advisable to fire shotgun slugs from a barrel with a choke.

However, when it comes to buckshot vs birdshot, buckshot will generally have a tighter pattern while birdshot will have a wider pattern.

This trend directly reflects what each shotgun shell is designed to do.

As birdshot is meant to be fired a fast-moving targets like pheasants or clay pigeons, shooters want a wider spread of shot to increase their chances of a hit. On the other hand, buckshot loads are designed to deliver all its power into a smaller, more localized area to ethically harvest larger game or for self-defense.

choke type

Effective Range

Shotguns are typically considered close range firearms, and neither buckshot nor birdshot is intended for long range shooting.

As spheres are not very aerodynamic, buckshot and birdshot will quickly lose velocity and kinetic energy as they exit the barrel and begin to spread. Birdshot is especially susceptible to this, as the small pellets don’t have much kinetic energy to begin with and are more affected by air resistance than heavier buckshot loads. However, as buckshot is heavier, it will be affected more severely by gravitational forces.

Effective range is highly dependent upon the pattern a shotgun load has in your firearm. Although there are some brands of shotgun shells specifically designed for longer range shooting, the general effective range for both buckshot and birdshot is around 40 yards.

Stopping Power/Penetration

A 12-gauge shotgun is highly regarded by military, law enforcement, and civilian shooters for being an incredibly powerful firearm for close range defensive situations or hunting.

Although buckshot and birdshot both generally have the same effective range, buckshot will have deeper penetration as it is firing a larger shot size with heavier pellets.

As the amount of kinetic energy needed to effectively harvest a bird is considerably less than what is needed for deer or home defense, birdshot is generally loaded lighter. On the other hand, buckshot is loaded hotter as it requires more penetration and kinetic energy to take down a deer or a bad guy.

Without question, buckshot will have deeper penetration and stopping power in most situations.

Price/Availability

Birdshot is more often less expensive than buckshot.

Shotgun ammunition is very affordable to the point that only extremely high-volume competitive shooters even consider reloading shotgun hulls.

For 12 gauge shells, target loads suitable for sporting clays or small game hunting, like Winchester Super Target, can be had for around $0.60/round. While a 00 Buck defense rounds, like Hornady Critical Defense, will generally cost upwards of $1/round or more.

The difference in price is often attributed to the difference in materials cost between the two types of shotgun ammo. Buckshot pellets are typically made from solid lead, while birdshot is typically made from a steel-core with only a coating of lead. Furthermore, buckshot is loaded with more powder and requires high-brass shotgun hulls to accommodate the higher pressure the shell creates. On the other hand, birdshot uses low-brass shotgun shells as less powder is needed to achieve the desired muzzle velocities for the smaller shot size.

Hunting

The best shotgun ammo for hunting primarily depends on what game animals a hunter plans on harvesting.

Birdshot is the ideal choice for upland game, quail, pheasant, ducks, geese, and turkey, while buckshot is better for hogs, coyotes, and deer or other larger game animals.

The simple truth is that buckshot is not needed for small game animals, as these thin-skinned critters don’t require a lot of kinetic energy to humanely harvest. Furthermore, birdshot increases the probability of a clean kill as it fires considerably more pellets in a wider pattern than buckshot.

On the flip side, birdshot is not powerful enough to harvest large game animals and lacks the penetration needed to reach the vital organs. The wide pattern of birdshot means that large game hit with it will likely only be wounded and endure inhumane suffering. This is where buckshot is the better option, as its deeper penetration and tighter pattern have the power needed to humanely harvest large game.

Make sure to follow all of your local laws regarding hunting deer with buckshot, as some states and territories prohibit their use and only allow the use of shotgun slugs for deer.

Home Defense

The 12-gauge shotgun is highly respected as an incredibly effective home defense tool. Many homeowners rely on the stopping power that 12 gauge shells offer, however there is quite the debate raging over the effectiveness of birdshot for home defense.

The major point of contention centers around over-penetration. As buckshot is more powerful, there is the potential that a round could pass through drywall and injure one of your family members. There is some merit to this point, as birdshot loses a lot of its kinetic energy at range, it is less likely to punch through drywall. However, do not fool yourself into thinking that drywall is impenetrable to birdshot, as a close range shot will punch through sheet rock with little issue.

It is this author’s opinion that a homeowner should NOT use birdshot for home defense, and instead use buckshot for its overwhelming stopping power.

When in a home defense situation, a responsible citizen should bring enough power to bear to stop a bad guy in a single shot. The truth is, unless you are at close range (around 10 feet or less), birdshot lacks the penetration needed for self-defense.

To illustrate this one need only recall a hunting accident in 2006 when then Vice President Dick Cheney accidentally shot Texas attorney Harry Whittington in the neck and chest with birdshot. Whittington’s injuries were non-fatal and he made a full recovery. However, this would have been a different story had Cheney been using buckshot.

Buckshot provides the penetration needed to stop a threat quickly, which is the goal of any home defense situation. Although there is the potential for over-penetration when using buckshot, the advantages buckshot provides far outweigh this. Following the cardinal rules of gun safety and knowing what lies behind your target is the key to protecting you and your family members in any home defense scenario.

Many shotgun ammo manufacturers like Remington, Hornady, and Winchester currently offer buckshot defense loads specifically tailored for home defense. These loads maximize the penetration capability of buckshot while minimizing the potential for over-penetration making them ideal for protecting your loved ones from harm.

Conclusion: Birdshot vs Buckshot

Buckshot and birdshot are two different types of shotgun ammo that have drastically different intended uses.

Birdshot fires a lot of smaller projectiles in a wide pattern that is ideal for hunting upland game, waterfowl, and for use in sporting clays competitions. Capable of firing hundreds of small pellets at a time, birdshot gives shooters a higher probability of scoring a hit on their target but lacks the penetration needed for self-defense.

Buckshot fires larger pellets in smaller quantities and tighter patterns to maximize penetration and stopping power. It is ideal for hunting medium to large game as well as for protecting the lives of yourself and your family members in a home defense situation. Although more powerful, buckshot does have the potential to over-penetrate, so care needs to be exercised when firing buckshot loads in self-defense.

Selecting the best shotgun ammo for you depends primarily on your needs as a shooter, just make sure that you get all of your shotgun ammo here at Ammo.com and be ready for any situation!

Understanding Air Rifle Suppressors: Legal Guidelines & Regulations Explored

0

“Exploring the Legality of Air Rifle Suppressors: A Comprehensive Guide to Understanding the Rules and Regulations Surrounding Suppressor Use for Air Rifles.”

air rifle suppressors legal

air rifle suppressors legal

The legality of air rifle suppressors varies from country to country and even within different states or regions. In some places, owning and using a suppressor on an air rifle may be completely legal and regulated similarly to firearms suppressors. This is often the case in countries with more relaxed gun laws, where suppressors are seen as a tool for reducing noise pollution and protecting hearing. However, in other jurisdictions, the use of suppressors on air rifles may be heavily restricted or even illegal.

It is important for individuals interested in using air rifle suppressors to thoroughly research the laws and regulations specific to their location before purchasing or using one. In countries where suppressors are legal, owners may need to obtain a permit or license to possess and use them. Additionally, specific restrictions such as maximum noise reduction levels or caliber limitations may apply. Understanding the legal requirements surrounding air rifle suppressors will help ensure compliance with the law and prevent any potential legal issues.

In conclusion, the legality of air rifle suppressors varies across jurisdictions. While some countries allow their use for recreational purposes, others strictly prohibit them. It is crucial for individuals to thoroughly research and comply with local laws before purchasing or using such accessories.

Hammerli 850 Review – A CO2 Rifle with PCP Accuracy

0

Umarex may be the new name but the old title of Hammerli remains just as popular.

This air rifle was introduced as high power CO2 option for game hunters!

The name situation makes things a bit hard to follow, but know this –

The Hammerli 850 goes under the name Umarex in the US market. 

They’re one and the same. 

German company Umarex are experts at CO2 power

(For more on the best air rifle brands, see this post)

They introduced the world to the first mass-produced, affordable and full-power 12 ft/lb CO2 hunting rifle, the Hammerli 850 AirMagnum.

It is powered by liquid gas, and made up of synthetic material, making it light in weight and economical.

The Hammerli 850 AirMagnum has been the solution for those seeking an accurate rifle with a real firearm feel but cannot afford the real deal.

Hammerli / RWS are well known for standing behind their guns, whatever they claim, and they do deliver!

Their warranty has always been the best in the market.

Therefore, Umarex Hammerli 850 is another trusted name in the community.

The Hammerli 850 AirMagnum is popular with pest controllers in particular.

(For more on the best air rifle for squirrels, see this post)

The rifle comes with smooth blacked-steel cocking and a generous bolt.

It’s a lot of fun to shoot with, so you will have a hard time putting it down.

The Hammerli 850 AirMagnum wood stock is synthetic though, known as an all-weather stock.

You can take the gun anywhere and not be worried about the finish as it is made of durable polymer with a Monte Carlo stock!

The Hammerli 850 AirMagnum uses an 88-gram air source cartridge,

Which allows you to have 200 – 250 shots before you need to change the cartridge. 

The rifle comes with a fiber-optic sight to help you acquire your target.

You can feel free to mount a scope on the 11mm dovetail rail.

Based on the German quality, Umarex makes a dovetail–to-weaver mount. 

This rifle is ideal for plinking, recreational target shooting, and competition.

The wooden stock is robust and reliable.

The Hammerli 850 AirMagnum not only has the look of a firearm, but it works like a firearm in terms of accuracy.

If you wish to have the experience of a military firearm, but cannot buy one, then the Hammerli 850 AirMagnum is the best choice for you. 

All told, the Hammerli 850 AirMagnum has just about everything if you have ever hoped for in a CO2 repeater!

(For more on 5 types of air rifles you need to know before buying, see this post)

Cocking Effort And Trigger

You should think seriously and consciously about the trigger performance or the cocking ability

You don’t want something that fires off course too easily. 

Luckily, the trigger performance of the Hammerli 850 AirMagnum air rifle is just unbeatable.

The HAM team has taken the test to check the ability of the trigger, and the results are amazing.

The Hammerli 850 has a cock-on-opening bolt-action,

And for sure, it is actually very easy to manage.

This means that the Hammerli 850 is suitable for both young shooters or less physically strong adults. 

The rifle does not discharge accidentally even with the lower pull weight of just 1 lb.

Therefore, the Hammerli 850 AirMagnum air rifle is safe to use in any way.

Moreover, the trigger pull is very smooth and consistent.

But I would make it clear here that if one snatches the rifle during shooting, it will miss the second target.

You would be amazed to learn that the Hammerli 850 has a bolt action that works like a firearm

This is the big attraction for you towards the rifle.

If you have a military background or interest in real firearms, you would love to have Hammerli 850 in your collection.

Note that the bolt is a little bit rough and bulky as you close the stroke.

But, maybe with time as you use the rifle, it’ll become smoother.

There is nothing wrong with having an action like this — it’s just something you’ll get used to.

Stock 

The Hammerli 850 AirMagnum wood stock is synthetic.

Umarex has made the gun to be used anytime, in any weather, and it’s beautiful in black – reminiscent of the military. 

(For more on the in-depth comparison between synthetic and wood stock, see this post.)

The Hammerli 850 has that renowned German quality as it is made of durable polymer.

With a raised cheek-piece on both sides of the Monte Carlo Stock, it is ambidextrous.

The rifle has an air-source cartridge of 88gms.

It is quite useful because it allows you to have up to 200 or 250 continuous shots before you change the cartridge.

Scope And Sight

The Hammerli 850 AirMagnum comes with fiber optic sights, which are very popular in airguns nowadays. 

These sights allow you to adjust between to a bright red, hooded foresight which is nicely designed along with an adjustable rear sight.

You can also add green fiber optics on a sliding ramp — all you need is a screwdriver to make the change.

(For more on how many types of air gun sights are out there and which one is suitable for you, see this post.)

Accuracy And Speed

Your concern regarding the accuracy has been very much considered by the Umarex Hammerli AirMagnum 850.

The speed of a CO2 air rifle can never be compared with a real gun because it cannot fulfill the requirement of a minimum number of shots per fill.

You can consider the multi-shot capability and lack of recoil at a reasonable price with a simple appearance and features.

The HAM team has tested the Umarex Hammerli AirMagnum 850 at a temperature of 65 degrees Fahrenheit. Below are the results:

PelletMuzzle Velocity-AverageMuzzle Energy-AverageAccuracy
Gamo Raptor Platinum 9.7 Grain674 fps9.8 ft/lbsGOOD
H & N field target trophy green 14.66 grain668 fps9.9 ft/lbsGOOD 
RWS hobby 11.9 grain640 fps10.8 ft/lbsEXCELLENT
Crosman premier HP 14.3 grain606 fps11.7 ft/lbsEXCELLENT
JSB Jumbo exact 14.35 grain610 fps11.9 ft/lbsBEST TESTED
H&N field target trophy 14.66 grain609 fps12.1 ft/lbsEXCELLENT
H&N Barracuda match 21.14 grain519 fps12.6 ft/lbsGOOD ONE FLYER

The muzzle velocity is quite a complicated topic when it comes to CO2-powered air guns since CO2 is performance is so dependent on temperature.

As the temperature rises, so too does the pressure of the CO2.

As the CO2 increases, the muzzle velocity increases as well since the temperature increases by 2 degrees Fahrenheit.

PelletMuzzle Velocity calculated at 67F-AverageMuzzle Velocity calculated at 75 F-AverageMuzzle Velocity calculated at 90F- Average
Gamo Raptor Platinum 9.7 Grain674 fps690 fps720 fps
H & N field target trophy green 14.66 grain668 fps684 fps714 fps
RWS hobby 11.9 grain640 fps656 fps686 fps
Crosman premier HP 14.3 grain606 fps622 fps652 fps
JSB Jumbo exact 14.35 grain610 fps626 fps656 fps
H&N field target trophy 14.66 grain609 fps625 fps655 fps
H&N barracuda match 21.14 grain519 fps535 fps565 fps

The table, as mentioned earlier, clearly shows the result of the increased muzzle velocity with an increase in temperature.

But the growth is limited; it cannot be said that it would grow at infinity.

At around 95 degrees Fahrenheit, there is increased pressure in the “valve lock”, and the muzzle velocity begins to fall very quickly.

Therefore, it is accurate to say that around 90 degrees Fahrenheit is the maximum shooting temperature for CO2-powered air rifles.

Manufacturers recommend that if you do this and your valve lock gets heated, then allow it to cool down.

This will bring the pressure down and allow you to shoot again. 

JSB Jumbo Exact Pellets achieved the best accuracy with the Hammerli 850.

However, this air rifle is not picky about pellets and shows good accuracy with a whole range. 

(For more on everything you need to know about air rifle accuracy, see this post)

Watch how this German-made tack driver puts .22 caliber pellets through the same hole at 35 yards:

click for the lowest price

Consistency

The Umarex Hammerli 850 AirMagnum demonstrates good consistency all around.

The standard deviation dropped to a lower extent of 4.2 FPS with JSB jumbo pellets. 

With GAMO platinum PBA pellets, the standard deviation recorded by the Hammerli 850 AirMagnum air rifle was just 8.7 FPS.

This was its best performance. 

The weight of the trigger pull was rock-steady, with no such variations when tested by HAM. This is outstanding and quite rare!

Loudness 

The Hammerli 850 AirMagnum air rifle is a high-powered CO2 air rifle with no silencer.

However, this is not the disappointment it might seem as many shooters like the noise!

It’s worth noting that the HAM team expected the sound to be much louder because it is high power CO2,

So the noise still doesn’t meet the norm for this type of gun.

You cannot compare the Hammerli 850 AirMagnum air rifle with .22 LR firearms in terms of the noise of course – it’s much quieter, even in .177 caliber.

Nevertheless, shooters looking for a quiet air rifle best avoid this air rifle. 

Shooting Ability

Amazing results here for Hammerli 850 AirMagnum air rifle!

The Hammerli 850 AirMagnum air rifle is so perfect.

It is easy to shoot as there is not such heavy cocking and no recoil.

It doesn’t take at all long to master. 

The rate-a-gun score is 4.1, which is outstanding.

The Hammerli 850 AirMagnum air rifle is very easy to handle and quick on the target.

The 16 joules valve is best for shooting with accuracy.

You can load the clip of the Hammerli 850 XT very smoothly, but it is suggested for you to take some time to push every pellet right down to the hole

So that the compressed pellet is seated correctly by the O ring that runs around the clip.

The HAM team experienced no misleads during the examination of the Hammerli 850 AirMagnum air rifle.

Appearance

The attractive color and design of the Hammerli 850 AirMagnum air rifle would urge you to get one for any shooting activity, be it backyard shooting, hunting, or sports competition. 

The Hammerli 850 AirMagnum combo comes within the forearm, which is removable, the CO2 cylinder is well concealed inside.

The finish of the Hammerli 850 AirMagnum air rifle is very impressive, featuring:

  • A well-finished metal part
  • And a well-molded black ambidextrous synthetic stock.

Note here that the Hammerli 850 AirMagnum wood stock version is available in the US.

It might be available in Europe but we’re not sure about the price.

The price for a Umarex Hammerli AirMagnum 850 can be high outside the US.

Outstanding Grip

With the stock of black synthetic material, the Hammerli 850 AirMagnum wood stock has a slim pistol grip.

It has raised dots, which will increase the grip.

It has a thick rubber butt-pad, and the cheek-piece makes it suitable for shooting from both sides.

Pros

  • Adjustable rear fiber optic sight 
  • The air rifle has a rifled steel barrel with all-weather synthetic stock and both are durable and eye-catching just as you see the Umarex Hammerli 850 air magnum
  • Hooded front fiber optic sight
  • As you buy, you would 3-9 * 40 mm of AO optic from the center point.
  • It has hardwood stock, and it has sling mount
  • The speed can be shooting up to a velocity of 1100 fps.
  • It is ideal for the small hunting game
  • It has higher efficiency rate when you read the instructions
  • Outstanding accuracy
  • Over-length is 41 inches, therefore; easy on shoulders
  • Light in weight as it is synthetic
  • Great trigger
  • Easy to shoot
  • Accurate with all tested pellets
  • Best to experience firearm
  • Great CO2 bolt-action
  • Safe while using with family due to safety mode
  • It does not emit CO2 even at the lowest muzzle velocity, therefore; safe to use with the 

Cons

  • High-cost CO2
  • Poor open sight
  • Balky bolt action
  • Harder trigger but adjustable

Price

The Hammerli 850 AirMagnum costs between $250 and $280.

Being a CO2 air-rifle, this is a viable alternative for the shooters or hunters who are looking for a PCP rifle with minimal recoil and don’t want to buy a refill tank. 

If you compare the accuracy and reliability, and indeed the real firearm feel, none can beat the Hammerli 850 AirMagnum at such a low price.

HAM Rating

Economical70%
Accuracy70%
Trigger and cocking effort90%
Consistency 90%
Loudness50%
Sight 20%
Shooting ability90%
Appearance 90%

The conclusions for the hard air magazine test are satisfactory.

The HAM team loves the Hammerli 850 AirMagnum.

It’s accurate and has an eight pellet clip and bolt action.

You can handle it very easily, and it doesn’t need tuning. It’s also very durable. 

Specifications

  • The manufacturer is Umarex USA (old name Hammerli)
  • .22 caliber in Hammerli 850 AirMagnum xt kit
  • The Umarex Hammerli AirMagnum 850 xt has the 650 fps velocity
  • Ammo type is pellets
  • The Hammerli 850 co2 is Bolt-action
  • Barrel style is rifled
  • Firing mode is a repeater
  • Weight of rifle is 5.65 lbs.
  • Noise is 3-medium
  • CO2 mechanism
  • Automatic safety
  • Fiber option rear sight
  • Trigger pull is 3 in Hammerli 850 AirMagnum accessories
  • Target shooting/ Small game hunting/ backyard shooting/ plinking
  • 1-year warranty
  • Testers were Doug wall
  • Model number 2251001
  • Serial number G038251
  • Price $250 – 280
  • 200 – 250 shots per cartridge
  • Quick firing 8-shot rotary magazine 
  • Monte Carlo stock
  • 2 stages adjustable trigger in Hammerli 850 hPa in Hammerli 850 accessories
  • Product dimensions 12 * 45.1 * 4.2 inches

Customer Reviews

The reviews of the customers are very much in favor of the Umarex Hammerli 850 air magnum,

As people appreciate the rifle’s accuracy and the price, as well as the easy loading and changing of the magazine. 

Moreover, the smooth trigger pull is widely appreciated.

Even the retired servicemen and engineers who have bought the rifle left positive reviews. 

Even the reviews reveal that people who bought some other rifle or gun previously were disappointed with their decision

And are encouraging other people to go for the Umarex Hammerli 850 AirMagnum as it is the best choice for hunters. 

Not only hunters will reap the benefits, however.

If you’re looking to have a good backyard shooting session, or even looking to teach someone how to handle a firearm, this is a great starting point. 

Moreover, one of the users of the rifle commented that bottle O ring blew just after the 5th CO2 bottle.

This suggests that the rifle should have some quality standard.

Additionally, since the Umarex Hammerli 850 AirMagnum is synthetic, it’s praised for being to light.

It’s easy on the shoulders so you can carry and fire it all day. 

Generally, there are no recurring complaints made about the Umarex Hammerli 850 AirMagnum

So it’s safe to assume that it has no chronic problems. 

In the same way, safety is also being considered because the Umarex Hammerli 850 AirMagnum comes with accuracy and safety.

The rifle is safe to use without much stress.

It does not leak CO2 even at lower temperatures or pressure.

Conclusion

Hammerli 850 is an excellent CO2 air rifle for the money.

The Hammerli 850 AirMagnum fulfills every primary requirement of the shooters.

If you are looking for a magazine-fed bolt action rifle, with accuracy and ease of use, Hammerli 850 AirMagnum suits you down to the ground.

Mature Buck Travel Patterns: Summer Vs. Fall Data

0

Despite the hot, muggy, “dog days” of summer, July and August are special months for the avid whitetail hunter. Bucks are formed in bachelor groups and are highly visible as they frequent agricultural fields and other high-quality food sources. This provides opportunities to assess the number, age, and antler quality of bucks in your area. This becomes even more exciting when several quality bucks are sighted on your hunting property. However, this excitement often turns to disappointment and frustration as these bucks magically disappear once the hunting season begins. Did they leave, become nocturnal, or go “underground” as many hunters believe? Thankfully, advancements in technology have enabled wildlife researchers to gain a better understanding of buck movements.

Maryland Study Is Revealing

Equipped with radio-collars that monitor hourly GPS locations, researchers in Maryland recently discovered many new aspects of buck home range and movements. The study took place at Chesapeake Farms, a 3,300-acre wildlife and agricultural research site on the eastern shore of Maryland owned by DuPont Corporation. The research effort was led by James Tomberlin, graduate student from North Carolina State University; Dr. Mark Conner, manager of Chesapeake Farms; and Dr. Richard Lancia, Wildlife and Fisheries Program Coordinator with North Carolina State University.

Chesapeake Farms has been managed under Quality Deer Management (QDM) guidelines since 1994 and boasts a fairly balanced adult sex ratio of 1.5 does per buck, and an older buck age structure with more than half of all bucks harvested being 3 1/2 years of age or older. Approximately 50% of the property is forested, 33% is cropland and the remainder is ponds, marshes, hedgerows, and other areas managed for wildlife and hunting.

From 2003 to 2005, researchers darted 18 bucks that were 2 1/2 years old or older and equipped them with GPS radio collars, which recorded their location and movements 24 hours a day, seven days a week. This information was used to determine buck home range size, core area use and excursions, and unusual movements outside of their home range.

Buck Home Range & Core Area Use

Previous studies have revealed significant variation in buck home range size according to age, habitat type, deer density, buck age structure, and more. Therefore, the following results should be viewed with caution, especially if the habitat or composition of your deer herd is significantly different than those on Chesapeake Farms.

In this study, the average home range size of mature bucks was approximately 700 acres. However, taken alone, this information can be misleading. First, there was considerable variation in home range size among individual bucks. This echoes previous studies that suggest some bucks are “homebodies” while others are “travelers.”

Second, there was considerable seasonable variation, with home range size being largest during the rut and smallest during summer. This is not surprising given a buck’s drive to breed as many does as possible during the rut, and the lack of need to move during the summer, except between bedding and feeding areas. Many bucks also exhibited significant shifts within their home ranges between seasons.

For example, many bucks that spent nearly every moment on or adjacent to an agricultural field during the summer shifted their home ranges a mile or more away during the breeding season. Researchers believed that changes in forage availability was likely responsible for the shift, as agricultural crops at Chesapeake Farms were harvested during early fall and mast crops in nearby hardwood forest areas became available. This could explain why many hunters in agricultural areas don’t see the bucks they watched all summer during the hunting season.

How to Hunt Your Neighbors’ Deer

Finally, and perhaps most important to hunters, the average size of a buck’s core area, or where he spent at least 50% of his time, was only around 100 acres. Like home range size, core area size also varied seasonally and was largest during the rut and smallest during summer. Surprisingly, during the rut, bucks spent 50% or more time in only 16% of their home ranges! Given that their study also confirmed that buck activity was lowest during daylight hours, it is not surprising why many mature bucks seem to disappear during the hunting season.

These findings also stress the need for hunters to identify a buck’s core area—or areas—during the hunting season. This is best accomplished through hunter observations and the use of game cameras. However, just because you took dozens of photos of a particular buck in August doesn’t mean that’s where he will be during November. Remember, within their home ranges, bucks often shift core areas seasonally. Therefore, to harvest a particular buck, you likely will need to shift your hunting areas as well. Bottom line, while the locations of those August photos might be the best place to harvest that buck during early archery season, they may be among the least-likely spots to take him later in the season.

When Bucks Go Wandering

During summer, daily buck movements tended to be short trips from bedding to feeding areas, but this changed dramatically during the breeding season. Beginning during the pre-rut, several bucks covered large portions of their home ranges and then returned to their core areas within eight to 30 hours.

Additionally, 58% of bucks also made excursions outside of their home ranges during the rut, often staying in the new locations six to 24 hours before returning to their home ranges. While unsure, researchers speculated that these bucks likely were in pursuit of an estrous doe. These seemingly random excursions outside of a buck’s normal home range could explain how some bucks that have never been seen or photographed previously, seem to magically appear and either get harvested or vanish—never to be seen again on the property.

Another interesting finding was the change in time of day the excursions occurred. During both the pre-rut and post-rut periods approximately 70% of excursions occurred during nighttime hours; whereas during the peak rut, 70% occurred during daylight hours. This certainly helps explain the increased visibility of bucks by hunters during the rut.

Scouting and Installing Water Sources for Deer

Buck Travel Patterns 6

How Will You Change Your Hunting Approach?

So, where do all the big bucks go? From this study, it’s clear there are numerous reasons why a hunter doesn’t cross paths with a particular buck during the hunting season. For example, where a buck spends his summer or early fall may be drastically different from where he will be during the rut. Also, a buck’s core area is smaller than previously believed. If you are not hunting within or very near this core area, you risk hunting locations that are never (or rarely) used by a given buck. Furthermore, except during the rut, a mature buck moves little during daylight hours except for brief periods during early morning and late evening.

To make matters worse, researchers at Chesapeake Farms also confirmed that at least some bucks can pattern hunters. They compared GPS locations of buck movements to those of their permanent hunting stands where all hunting occurred. For example, not once during daylight hours did one 3.5-year-old buck pass within shootable distance of any of these stands during the hunting season. However, at night he used them like mile markers on a highway, and was frequently recorded in their immediate vicinity. Unless this buck made a mistake, he had become essentially “unkillable” —at least by hunters on Chesapeake Farms.

Collectively, the findings of this study confirm what ardent whitetail hunters already knew—harvesting mature whitetails is among the most difficult of hunting challenges. However, armed with this new whitetail science, hopefully you can stack the odds a bit more in your favor this hunting season.

Planning Deer Hunting Vacations: Are Opening or Closing Days Better?

How to tell the difference between ramps and lily-of-the-valley

0

ramplily

New foragers sometimes worry about telling the difference between highly sought-after ramps (wild leeks) and their poisonous look-alikes, Lily-of-the-valley. It’s always wise to be leery when you’re new to foraging, but once you know what to look for you don’t need to worry. There are quite a few ways to accurately tell the difference between the two plants.

Ramps (ramsons in the UK) are alliums, members of the onion family. Their leaves taste like a milder mixture of garlic and onion, and once cooked they have the texture of spinach. They have a short season and are difficult to cultivate, which means that they fetch top dollar at farmers’ markets — up to $20 a pound.

In contrast, Lily-of-the-valley is an imported flower that has invasive habits and contains cardiac glycosides that affect the body in a similar manner to foxglove (digitalis). Symptoms of ingesting it include flushed skin, nausea, dizziness, headache, weakness, hallucinations and changes in heart rate. In extreme cases, it can lead to death. Most cases of poisoning by Lily-of-the-valley result from children eating the berries that occur later in the season, but occasionally there are cases of poisoning where people mistakenly cook with them, thinking they are ramps.

The two plants look similar, but there are good ways to tell them apart. You can see some differences right away and there are even more ways to be sure you’re picking ramps and not lily-of-the-valley.

Appearance:

  • Look at the roots. Ramps emerge from a bulb and have rootlets at the very end of it. Lily-of-the-valley do not have bulbs but have longer roots with rootlets along the length.
  • Look at the leaves. Ramps have one or two leaves that emerge separately from the ground, each on its own stem. Lily-of-the-valley has a stem that appears and multiple leaves that are whorled around the center.
  • Look at the flowers. Ramps do not have a flower stem until later in the season. The lily-of-the-valley flower stem appears almost as soon as the leaves unfold. Once the flowers emerge (generally after the season for harvesting ramps), the flowers look very different. Ramp flowers are small daisy-like clusters with green centers at the end of a stalk, while Lily-of-the-valley have many small bell-shaped flowers that hang down from the length of the stalk.

Location:

  • Look at the site. Ramps grow on the floor of moist, open woodlands. Lily-of-the-valley is a domestic plant which likes the same soil, but is usually found on old farm sites and around homes.

Season:

  • Pay attention to the time of year. Ramps emerge earlier in the year. They typically come up when Lily-of-the-valley are just breaking the ground in very early spring.

Scent:

  • Smell it. Smell is the easiest identifier by far. Tear the leaf — ramps smell very strongly of onion and garlic. Lily-of-the-valley has no smell when the leaves are torn.

It’s a good idea to locate and dig up a lily-of-the-valley so you can see and smell the differences for yourself. The best way is to forage with someone who has experience with ramps your first time out. That said, if you use these identifiers it is easy to tell the difference. Be sure to never eat anything that you are not sure about, however.

Ramps are extremely slow to reproduce, which means it’s important to forage for them responsibly. In some parts of the country they are over-harvested and it is illegal to harvest them in parts of Canada. Be sure to only harvest the leaves and not the bulbs, so the plants survive. Even then, harvest only a small percent of the leaves you find. This can help ensure that the stand can continue on for many years.

Once you have your ramps, here are wonderful ways to cook with them.

Ammo and Law: Navigating the Complex Legal Framework

0

If you have decided that shooting sports are now your thing or just want to purchase a handgun for self-defense, you must have already googled something like gun store near me or where to buy ammunition. Well, the whole topic of firearms possession is complex. But while ammo is not as regulated as firearms, you still must know federal and local ammo-related laws to avoid legal consequences. That is why you should read on, as this article provides an in-depth examination of the several legal issues surrounding ammunition. But before we begin, a little disclaimer – we are not lawyers, and the information given here is only for reference. Always check current gun and ammo legislation and consult professionals.

Federal Ammunition Laws

Ammo regulation is a topic that has gained significant attention in recent years, particularly due to the increasing frequency of mass shootings in the United States. While guns are subject to federal restrictions, ammunition sales are generally less regulated. This disparity in oversight has led to concerns about how easy it is for individuals to stockpile large amounts of ammunition without raising any red flags.

Many laws apply only to guns and not to ammunition. For instance, firearms sellers must generally be licensed as dealers and retain records of gun sales, providing a paper trail that can be used by law enforcement to trace firearms involved in criminal activity. There are no such requirements for businesses selling ammo.

Another example is the requirement for people to show ID and pass a background check, intended to prevent those with criminal records or other disqualifying factors from obtaining firearms. However, typically, no such checks are required for ammunition purchases.

Furthermore, there is a law saying that handgun sales across state lines must be processed by a local seller, which helps maintain some level of control over the distribution of firearms. In contrast, ammunition can often be purchased online or across state lines with relative ease.

Lastly, high-volume handgun sales are regulated to prevent individuals from buying multiple guns at once. Ammunition, however, is not subject to the same restrictions, allowing people to amass significant stockpiles without any legal barriers.

As of 2024, federal ammo regulations mainly focus on banning sales to specific individuals and forbidding the production, import, and sale of armor-piercing rounds. Although federal law stops certain buyer categories from acquiring ammunition, it doesn’t mandate sellers to perform background checks, leaving room for prohibited purchasers to slip through.

By the way, there is a common misconception regarding green-tip 5.56 NATO ammunition closely related to .223 ammo. It has often been mistakenly labeled as armor-piercing due to its steel penetrator tip. However, it does not meet the legal definition of armor-piercing ammunition. Back in time, the purpose of the green tip was to signify a steel penetrator within the bullet (instead of a plain lead core), intended to enhance its performance against hard targets.

California & Other State Ammunition Laws

State laws regulating ammunition sales vary across the US, with some states implementing stricter regulations than others. For instance, six states – New York, California, Connecticut, Illinois, Massachusetts, and New Jersey – have enacted laws regulating ammo sales and requiring background checks. Other states impose ammunition access restrictions through age limits or by banning specific categories of potentially dangerous individuals.

Let us consider the laws of these six states. New York and California mandate point-of-sale background checks for ammunition purchases, ensuring that only eligible individuals can buy ammo. In Connecticut, state agencies issue ammunition certificates, which must be renewed every five years. Illinois takes a slightly different approach by requiring residents to obtain a Firearm Owners Identification (FOID) card to legally purchase or possess firearms and ammunition. Massachusetts necessitates residents to obtain a firearm permit or license to purchase ammunition. Lastly, New Jersey enforces strict regulations on handgun ammunition purchases. Residents are typically prohibited from acquiring any handgun ammo unless they present a valid firearm purchaser identification card or a permit to purchase a handgun.

Ammunition Serialization

For several years now, gun reform advocates have been discussing the implementation of ammunition serialization technology as a potential solution to improve firearm regulations. Ammunition serialization is a process that involves assigning unique identification numbers to individual cartridges, providing a traceable link between the ammunition and its point of sale. This system can help law enforcement track the origin of bullets used in criminal activities, potentially leading to the identification of firearms and their owners. By marking each round with a serial number, either on the casing or the bullet itself, investigators can more efficiently connect recovered ammunition to specific purchases, sellers, and buyers. While ammunition serialization has the potential to significantly improve the crime-solving process, it also raises concerns about logistical challenges, increased manufacturing costs, and potential privacy issues for lawful gun owners. Despite these concerns, the concept of ammunition serialization continues to be explored.

Forgot your password?

0

We caught up with Jay Scott of Colburn and Scott Outfitters and learned about his well-earned success on the trickiest turkeys out there. He’s the host of the Jay Scott Outdoors Western Hunting & Fishing Podcast, but he is also a passionate hunter, angler, and big game guide.

Read on to learn about his relentless turkey hunting process and what it takes to get birds on the ground with his top spring turkey hunting tips and tricks.

Table of Contents:

Introduction 1. Better to Be Early Than Late 2. Carry More Calls Than You Need 3. Locator Calls Don’t Have to Be Perfect 4. Don’t Blow a Coyote Howler at Roosted Birds 5. Pinpoint Where They Roost 6. Tactics Once They’re on the Ground 7. Play Hard to Get! 8. Be Patient 9. Go for Round Two 10. Use the Roads to Your Advantage 11. Get As Close As You Can 12. Calling Cadence Outweighs Tone and Sound 13. Decoy Positioning SHOP THE FULL GEAR LIST

SPRING TURKEY HUNTING IS ONE OF MY FAVORITE SEASONS OF THE YEAR.

For many years as a beginner turkey hunter, I really struggled with calling birds into archery or shotgun range. I’ve been schooled by so many birds that it would seem silly for me to even write an article on bowhunting or shotgun hunting turkeys.

But like lots of other things in life, it seems that persistence usually pays off. I’ve been taught many things by veteran turkey hunters whom I have constantly bombarded with questions on the “Do’s and Don’ts” and “Tips & Tricks” of turkey hunting.

I’ve also learned a lot from trial and error with the turkeys themselves. I’m constantly learning something new about spring turkey hunting every day that I pursue them. One thing I’ve learned is that no two wild turkeys act the same but there are some turkey hunting tactics that can be repeated which will increase your odds of harvesting this magnificent animal.

I’ve attempted to outline some things to remember when chasing these weary longbeards. I hope that one of these turkey tactics will be something you can latch on to and incorporate into your turkey hunting routine.

1. BETTER TO BE EARLY THAN LATE

I always try to set my alarm 30 minutes earlier than my calculated time to get to the roost tree. Usually my alarm goes off around 3:00 AM during turkey season.

I like to be sitting in the dark waiting for the grey in the eastern sky and set up in my position at least 30 minutes before the first call of the hens or first gobble. It gives the woods some time to settle down after I just walked into the roosting area.

It also gives you time to go to plan B if something goes wrong prior to your setup. Another advantage to being early is usually that puts me ahead of other hunters. Being early will never work against you.

2. CARRY MORE CALLS THAN YOU NEED

It is good to have several diaphragms, slates, and box calls. Sometimes the birds will especially like one call or another. The worst feeling in the world is not having the right call.

Don’t be afraid to take a gobble call either (be very careful using the gobbler call on public land).

3. LOCATOR CALLS DON’T HAVE TO BE PERFECT

Locator calls such as coyote howler, owl hooter or peacock don’t have to sound exactly like the natural thing to be effective in getting birds to gobble in the roost.

Quite the contrary, I’ve found that my external reed coyote howler by Primos which does not sound near as natural or authentic as my diaphragm coyote yelp, seems to get more of a response by roosted gobblers.

Remember, you are looking for a shocking response so sometimes the worst shrieking noise you can make will be the best for getting a gobbler to answer.

4. DON’T BLOW A COYOTE HOWLER AT ROOSTED BIRDS

In the morning when you’re too close, the roosted male turkey might answer but they will be very leery to come into your hen yelps because they think a coyote is close and they don’t want to get eaten.

An owl hooter is a much better choice when you are close to the roosted bird. When I say close, I mean within 200 yards of a rooster gobbler.

5. PINPOINT WHERE THEY ROOST

When roosting a gobbler in the evening, make sure you try to pinpoint the exact tree that the gobbler is roosted in. Often, I will get them to shock gobble and then I will sneak in as close as possible.

I then plan my setup for the morning. Things to be looking for while pinpointing the exact tree are:

• easiest way into the setup since it will be pitch dark.• exactly which tree you want to be leaning against and set up under.• which way the bird will fly down.• which way the bird won’t go, etc.

I like to mark the spot where I will setup on my GPS and allow the breadcrumb feature to bring me right into the setup spot the following morning. Be careful not to let the roosted gobbler see your light on the GPS.

6. TACTICS ONCE THEY’RE ON THE GROUND

In the morning or afternoon, when the birds are already on the ground, and you are just prospecting for gobblers by walking ridges, if you get a gobbler to respond move as close to his position without being detected as you can.

Once in close to the gobbler (within 100 yards) set up and try to call again. This works way better than calling from the original position. Now, if you are moving towards his direction and he gobbles loudly and in your direction like he is coming immediately get setup.

7. PLAY HARD TO GET!

Make the gobbler want to come to you. If you get a bird gobbling sometimes just shutting up is the deadliest tactic. I like to fire them up and then shut up.

I usually let them gobble twice before I call again. Usually, they will come hard if you use this tactic. You may risk a bird walking off because you shut up but if they are halfway interested, they will be headed your way. This may be the single best bit of information I have learned over the years.

8. BE PATIENT

In the evenings be in the roost area and be patient. I like to get in areas that I know birds like to roost. I sit and call about every fifteen minutes. The last 30 minutes before fly-up is primetime. Let’s say it is 30 minutes before fly-up and you make a series of yelps and a gobbler answers off in the distance.

I might hit him right back with a series of excited cuts and then just shut up. More than likely he will come to inspect. If they come in but not in shooting range just sit still and watch they fly up into their roost trees. Then you can attack in the morning.

One thing to keep in mind while hunting Merriam’s turkeys is that they typically like to roost on a ridgeline or at least where there is a contour break. The birds like to walk uphill from their roost tree and then coast horizontally into the branch.

This tactic helps them conserve energy by less flying. Sometimes you can roost turkeys without hearing them gobble by just listening for the ruckus of their wings flapping when they fly up.

9. GO FOR ROUND TWO

When the evening hunt does not produce a roosted gobbler for the next morning. There are several options for the following early morning hunt.

Go into an area where you have heard gobblers before and sit tight. Listen at prime time for gobblers in the area. If you can move while it is still dark, then pursue them. If not, wait until they hit the ground and sneak in close to them.

10. USE THE ROADS TO YOUR ADVANTAGE

Another option is to cover as much country as possible in hopes of hearing a roosted bird. This can be done either on foot or in a vehicle.

Wake up extra early and drive to an area where you have seen or heard turkeys. Stop every half a mile and blow your peacock or coyote howler.

11. GET AS CLOSE AS YOU CAN

Always try and get as close to a gobbler before calling to him. If you spot a gobbler with your binoculars try and move in very close to him without being detected.

I will try to get within at least 100 yards or closer if the terrain and vegetation will allow prior to making my first call. Your success goes up tenfold if you practice this method.

12. CALLING CADENCE OUTWEIGHS TONE AND SOUND

The cadence of your calling is more important than the tone and sound of your call. This opinion is debatable but I noticed a big difference in my success when a friend of mine showed me the correct cadence to my hen yelps.

He told me I sounded decent, but my rhythm was off. As soon as I changed my rhythm and cadence it was like a light switched on and the gobblers became way more consistently responsive to my calling. The key is to listen to the hens and focus on the cadence or timing/rhythm of their call.

13. DECOY POSITIONING

Position your turkey decoys at a 45-degree angle from the hunter on the opposite side of where you think the gobbler will come in from. Decoys can be a huge asset if you use them correctly.

On the flip side, they can hurt you if they are positioned on the wrong side of where you want the birds to end up. An example of the correct way to set them up would be: If the gobbler answers your calls to your left it would be best to set the decoys out to your right about 25 yards.

In this case, the bird will come to your call but when he gets close, he will see the decoys and walk right by you (or the hunter) on the way to the decoys to your right.

Remember when the gobbler gets close to remain silent and very still because he will be really looking for the turkey he heard. He should then spot the decoys. You will then be able to have a clear shot as they focus on the decoys.

WRITTEN BY JAY SCOTT
  • Host of Jay Scott Outdoors Hunting and Fishing Podcast with over 34.5 million downloads.
  • Professional hunting guide for 24 years in Arizona and Old Mexico.
  • Has harvested many trophies around the west, which include several animals that make the Pope and Young and Boone and Crockett record books.
  • Learn more about what KUIU gear Jay Scott thinks is best for hunting turkeys in his turkey gear list.
  • Visit Jay Scott’s Youtube to see him in action.
  • Read more about the Gould’s Turkey, the least known subspecies of wild turkey.
  • Shop KUIU’s top turkey hunting gear list for the spring and fall turkey seasons.
  • Learn about turkey hunting camo and gear with more top turkey hunting picks for the active turkey hunter.

SIG Sauer P210: Most Accurate 9mm Pistol Ever? A Range Report

0

What Expert Had to Say: Back when I wrote my slightly controversial and proverbial pot-stirring article rating the Top 5 9mm Pistols, I gave Honorable Mention to three particular pistols, among them the legendary SIG Sauer P210. Although many consider the SIG Sauer 210 the most accurate 9mm pistol ever, I rationalized my mere Honorable Mention ranking because I hadn’t yet been able to fire and adequately evaluate the 210. For a long time, it was so goshdarn expensive that none of the gun ranges I frequented throughout the US of A over the past three decades made one available for rental. The pistol took on an aura of Unobtainium, and the Holy Grail all rolled into one.

A Brief History of the SIG Sauer P210

The SIG Sauer P210 has been likened to a Swiss watch of handguns, and that’s not just because Switzerland is the country of origin, though that certainly helps.

As noted by Sean Murphy of Outdoor Life, “While the Swiss aren’t known for a large military force, their arms are known to be high-quality for soldiers that know how to use them. Originally adopted in 1949, the SIG P49 (later renamed P210), featured a steel frame and slide that have full length contact, with a high-quality barrel and superb trigger. With match-grade ammunition, the specification for the original SIG P210 was a five-shot group measuring two-inches or less at 50 meters. Most pistols would struggle to offer this level of precision at half the distance.” (emphasis added)

Eventually, the SIG Sauer P220 replaced the P210 as the Swiss Army pistol. Remarkably, the pistol remains standard issue for Danish Defence (the unified armed forces for the Kingdom of Denmark), despite the overwhelming prevalence of higher-capacity double-action and striker-fired 9mm auto pistols; the P210 is a single-action autoloader with a modest 8-round magazine and an old-school European-style butt-heel magazine release that has long since fallen out of favor for the far faster push-button mag releases located behind the trigger guard.

The standard P210 weighs 970 g (34 oz), has an overall length of 215 mm (8.5 in), and a barrel length of 120 mm (4.7 in).

SIG Sauer P210: My Personal Shooting Impressions at the Range

So, as luck would have it, as I was taking some hard-earned Labor Day weekend vacay in my old childhood hometown of Los Angeles, I decided to visit one of my favorite old SoCal haunts, the good ol’ Los Angeles Gun Club in Downtown L.A…and I discovered to my delightful surprise that the LAGC folks actually had a SIG P210 available for rental! It would be a major understatement to say this was way too good and rare an opportunity to pass up!

After 33 years of aura of mystery surrounding this previously unobtainable pistol, the act of dispelling that aura was…good but not spectacular. (“And the crowd goes…mild.”) Definitely not a bad experience, but not one that blew me away either (bad pun intended).

Slide manipulation was delightfully smooth, probably at least partially because the slide rides inside the frame rails rather than atop them the way most semiautomatic pistol slides do, which also at least theoretically contributes to the gun’s intrinsic accuracy; relatively few other auto pistols emulate this feature, the CZ-75 being amongst those few.

The trigger was also remarkably smooth and worthy of the “Swiss watch” label. The frame-mounted safety flicked downward from the “Safe” to “Fire” position slickly and smartly…but going the opposite direction – such as for cocked-and-locked carry mode – was rough and gritty.

And then there was the aforementioned butt-heel magazine release. On this particular P210 (not sure if it’s a universal design flaw or just unique to this individual specimen), it was extremely stiff and awkward. My shooting buddy and I both struggled with it, and mind you, we both weigh over 200 pounds and work out regularly. Definitely not a desirable feature in a real-world gunfight or even a high-stakes competitive match wherein speed reloads AKA emergency reloads are called for.

(As a sidebar note, SIG did recently release their so-called P210 Carry version, which has the more desirable push-button mag release.)

As to accuracy, the basis of the SIG Sauer P210’s legend, I have to throw out a couple of caveats here. First of all, LAGC is only a 50-foot range, so in fairness, that limited my ability to do a true hard-core test of the gun’s long-distance dialing (so to speak) ability. Second of all, this was a range rental gun, so it’s got some wear & tear on it. That said…at 21 feet, all 25 rounds fired struck the ICE-QT target in the head, but the rounds strayed considerably to the right, clustering around the left eye of the target as opposed to the bridge of the nose that was my aim point. At the 50-foot mark, all 25 rounds were in the 5-zone of the torso, but only 8 rounds landed in the tiebreaking 5x zone, with the rounds once again straying noticeably to the right. The groups were pleasantly tight but nowhere near as tight as the kind I routinely score with my beloved Beretta 92FS/M9, Glock 17, Glock 21SF, Glock 26, or my WWI-vintage Colt M1911 that I fired at this very same range session.

The ammo used was the Remington Range 115-grain full metal jacket (FMJ).

SIG Sauer P210: Bottom Line

So then, I’m not planning to save up money to buy a SIG P210, as many other firearms remain higher-ranked on my Wish List. That said, it is still definitely a high-quality firearm and one of these days, I’d relish the chance to test the gun’s capabilities at 25 and 50 yards (as opposed to 21 and 50 feet). And the good news is, though the pistol is pricey, the price tag actually appears to have gone down compared to the $2,500.00 – $3,000.00 USD that was the norm back in the 1990s.

If you have the desire to own one of these legendary pistols, I definitely recommend it.

Bonus: Sig Sauer Photo Essay

Christian D. Orr has 33 years of shooting experience, starting at the tender age of 14. His marksmanship accomplishments include: the Air Force Small Arms Ribbon w/one device (for M16A2 rifle and M9 pistol); Pistol Expert Ratings from U.S. Customs & Border Protection (CBP), Immigration & Customs Enforcement (ICE), and the Federal Law Enforcement Training Center (FLETC) Criminal Investigator Training Program (CITP); multiple medals and trophies via the Glock Sport Shooting Foundation (GSSF) and the Nevada Police & Fires Games (NPAF). Chris has been an NRA Certified Basic Pistol Instructor since 2011. In his spare time, he enjoys (besides shooting, obviously) dining out, cigars, Irish and British pubs, travel, USC Trojans college football, and Washington DC professional sports.

ATV Won’t Start: Fixing the Most Common Problems

0

When your ATV doesn’t start, it can be frustrating, inconvenient, worrying, and confusing. There are so many things that cause an ATV to not respond to your will, so it’s good to know the most common reasons for an ATV to not start and the symptoms that will clue you in on the real reason behind your quad’s stubborn refusal to get going.

Why isn’t my ATV starting?

atv inspection

To start, an ATV needs enough fuel, air, spark, and power in the battery. When any of these things are lacking, your ATV won’t start up.

If these things have been taken care of, there could be a problem with the electrics, such as the kill switch. To work out which of these issues is the most likely, first consider whether the engine is starting at all.

My ATV engine isn’t turning over at all

engine stop button atv

Is the ATV in gear?

Many ATVs won’t start up if they’re in gear as a safety precaution. Double-check that your ride is in park.

Is the kill switch engaged?

OK, though this is the simplest possible answer to your problem, it’s also the most common reason an engine won’t crank up at all. The kill switch, also known as the run switch, should be in the “RUN” or “ON” position. Some ATVs have a kill switch with a tether pull cord, so make sure this is connected correctly before you start taking apart your machine in frustration.

Is the ATV battery dead?

atv battery

Your ATV won’t start if the battery doesn’t have enough charge. Check the battery using a voltmeter or multimeter. If you’ve somehow completely discharged the battery, you can use a smart battery charger designed for ATVs to bring it back to life. Sometimes, you’ll simply have to replace the battery if it’s past its prime.

Is the ATV solenoid getting power?

When you turn the key or hit the start button, you should hear a clicking sound. This clicking sound is the solenoid, which is a switch used to send current to your starter. If it’s not getting power from the battery, your ATV won’t start.

You’ll find the solenoid near the starter. Connecting a multimeter (red to red, black to ground) to the solenoid will show you whether the solenoid is getting power. If not, and your battery is charged, there’s a problem with the wiring or connections between the battery and the solenoid.

My ATV engine turns over but doesn’t start

atv spark plug

If everything above has been taken care of, your ATV engine should turn over. If it turns over but doesn’t start, we should now consider a potential problem with the fuel, spark, or air systems.

Before you leave for a ride, make sure you keep all basic tools and essential spare parts on board. Discover a range of storage options.

banner

Is the ATV engine getting fuel?

Let’s assume your ATV has adequate fuel and the fuel shut-off valve has not been closed off. Find your spark plug, which is usually behind some protective casing. On a carbureted ATV, remove the spark-plug wire, while on a fuel-injected ATV, remove the ignition coil. To take out the spark plug, use a spark-plug removal tool.

Check to see if the spark plug is dry. If so, the fuel isn’t getting to your cylinder. There is a problem either with the fuel pump or the lines between the gas tank and the carb. This will require finding the location of the problem through a process of elimination and then cleaning.

If the problem lies in the fuel intake system, there are different repair steps for carbureted ATVs and electronic fuel injection ATVs. It will be required to consult your manufacturer’s user guide for details on how to repair the fuel filter, fuel pump, or fuel injector.

Is the ATV engine getting enough spark?

If the spark plug is wet, it may still not be getting enough spark. The easiest way to diagnose this is to use an inline spark tester that fits between the spark plug and the coil/wire. Pressing the starter button should cause the test tool to light up, allowing you to eliminate this as the source of the problem.

If the tool shows there’s a problem with the spark, try testing the kill switch with a multimeter, checking for damaged wires, replacing the spark plug. If none of these relatively simple fixes restores the spark, you may have to replace the ignition coil.

Is the ATV getting enough air?

Your gas tank or gas cap will have a small vent for air to enter and escape. As fuel is pumped out of the gas tank, air is pulled in to replace it. If your gas vent is clogged, the fuel pump won’t be able to draw gas from the gas tank.

These are the main reasons an ATV won’t start and how to troubleshoot the issue. Check them all in turn, and you’ll quickly find the root of your problem and have your ATV back on the road in no time.

Best Air Rifle Deals

Popular Posts

Air gun 101: Everything you need to know about air rifle accuracy

0
Wyatt Earp has said: Fast is fine, but accuracy is everything And I just thought how many airgunners are obsessed with muzzle velocity and muzzle energy,...

Guide to find Best Scope for Break Barrel Air Rifles

0
"Unlock the Perfect Shot: Discover the Best Scope for Break Barrel Air Rifles. Enhance your shooting experience with precision and accuracy, as we delve...

Best Air Rifle Brands – Who Makes the Best Pellet Gun?

0
In Jeff Bezos’ own words: "A brand for a company is like a reputation for a person. You earn reputation by trying to do hard...