Whether you are looking to practice target shooting or you want to get into airsoft games, learning more about airsoft guns is an absolute necessity. This guide is here to help you learn more about what airsoft guns are, how they work and what type of model might be right for your needs and preferences.
What is an Airsoft Gun?
Airsoft guns do not shoot traditional bullets; instead, they shoot 6-millimeter pellets, otherwise known simply as “BBs”. Not only do airsoft guns not shoot traditional bullets, but the pellets leave the chamber at a much slower speed than bullets from a standard gun. This means that when airsoft guns are used safely and correctly, getting hit by an airsoft gun pellet should not cause much pain or result in any heavy-bleeding injuries. However, that being said, an airsoft gun is also not a toy. When operating an airsoft gun, you will still need to be mindful of your environment and take the recommended safety precautions. It is also recommended when playing games with airsoft guns that everyone wears the standard protective gear.
What are Airsoft Guns Used For?
Some airsoft guns have been designed to be almost exact replicas of real guns, whereas some operate more like paintball guns. In the same way as the designs of an airsoft gun can differ, so can the intended uses. Some of the most common uses of airsoft guns include:
Airsoft gun games this is seen as an alternative to paintball and is played throughout the US, Europe, and Asia.
Some police forces, like the UK police, also use airsoft guns, especially when dealing with large crowds.
Some people choose to use airsoft guns to deter smaller animals.
Airsoft guns are also popular with people who are looking for a safe way to practice target shooting.
The Different Types of Airsoft Guns
Some of the most common types of airsoft guns include:
Spring-Powered
Spring-powered is not the strongest form of airsoft gun, but they do provide a superior level of shooter control and accuracy. This type of airsoft gun is viewed as ideal for beginners, there are many affordable options, and they come in a number of different sizes.
Electric Guns
Airsoft electric guns, otherwise known simply as AEGs, are battery-powered; the pellet from these guns is propelled using an electric motor and a gearbox. This type of airsoft gun is extremely modifiable and is one of the most popular forms of airsoft gun, alongside the rifle.
Sniper Rifle
The sniper rifle is the perfect choice of airsoft gun for anyone who is looking to shoot at a long distance. The majority of airsoft sniper rifles work with a spring-power mechanism which allows you to use a significant amount of power in one shot. While the majority of sniper rifles are spring-powered, it is possible to purchase an electric or gas-powered sniper, depending upon your specific needs and preferences.
Shotgun
If you are looking for force rather than distance, then the shotgun might be the perfect choice of airsoft gun for your needs. Many airsoft shotguns have a very similar feel to their more serious counterparts and offer a great spray fire experience. However, they do require close proximity and can be difficult for younger users to pump.
The year 1965 holds a special place in my heart. If you were keen during history lessons, you know that’s the year that Dr. Martin Luther King Jr. led 3,200 people on the third and most successful civil rights march from Selma to Montgomery, Alabama.
“What does that have to do with Jim?” You ask!
My mom was a die-hard fan of Dr. King for the mere fact that he endlessly fought for civil rights. Of all the accomplishments of Dr. King, my mom’s most favorite was the ‘I have a dream’ speech. Quite a lot of things are mentioned in this world-renown speech. But the most important lesson she got was the need to dream positive for a better future.
So I was born a few months after the famous Selma-Montgomery marches. Scientifically, the experiences of a mother while pregnant may have a significant bearing on the child’s life. So, what do you expect of Jim Taylor whose mother was an avid ‘dreamer’ when carrying him in the womb? A miniature dreamer indeed!
That’s what I’ve been all my life.
I was born in the county of Jackson towards the south of the US state of Michigan. From an early age, I began getting sensitized on the injustices that common people were unleashing on the environment.
If you didn’t know, Michigan has about 65,000 inland lakes and ponds. The king of all these is the Great Lakes, which comprises Lakes Superior, Michigan, Huron, Erie, and Ontario. Pollution wasn’t rife then as it grew to be at the turn of the 21st Century. But the little pollution I witnessed made me weep for mother nature, as Dr. King weeped for the African-Americans. Talk of passion!
I had a dream! That one day, I would be in a position to actively protect my beautiful motherland’s environment and its ecosystems.
My subconscious work towards the dream officially kicked off in the year 1970 when I was enrolled in Kindergarten at Bennett School. I admit that the first 8 grades didn’t particularly expose me to environmental conservation.
When I began my secondary education at Grass Lake High School, I knew I had to make it count or my dreams would soon be null and void. I immediately joined the geography club, which was the most viable avenue for environmental conservation activities.
I was right! We would conduct regular studies on the cleanliness status of the surrounding lakes, namely Grass Lake, Tims Lake, Welch Lake, Goose Lake, Brill Lake, Gilletts Lake, Center Lake, and Wolf Lake. We would also join community clean-up programs time after time .
Towards the end of my 2nd year, I was elected the chairman of the Geography club. I managed to organize a total of 6 clean-up exercises during my 2-year reign. That was one of the greatest achievements in my teenage life.
To add on that, the Sharon State Wildlife Management Area is only 30 minutes away from Grass Lake High School. Due to my position as the chair of the Geography club, I got to interact a lot with relevant outsiders.
Perhaps the most important was the chief warden at Sharon State. He invited us for a tour of the 600 acre restricted access hunting area. And guess what! It was rabbit season. Scores of hunters were already on the ground with their camouflage hunting gear and air rifles. You can imagine how this captivated my young soul.
From that trip, my second passion was defined. And that was to hunt responsibly all the days of my life.
Work
Choosing a college and a course wasn’t any difficulty for me. I was sure of what I wanted to do the rest of my life. After successfully completing my high school studies, I enrolled in Grand Valley State University for Environmental and Sustainability studies. The years flew by swiftly through the power of loving what I was doing.
And 8 months after graduation, I got employed by the United States Marine Corps as a conservation law enforcement specialist. I honestly felt like a master of the universe with everything seemingly coming my way so effortlessly.
The job placement gave me first hand experience on real-world conservation. Among other things, my duties included:
Patrolling army bases to ensure all cultural and environmental resources are adequately protected
Patrolling all roadways and areas downrange to ensure there is no violation of laws and breach of security
Citing any offenders into magistrate courts
Ensuring that ongoing military training does not interfere with recreational activities downrange and vice versa
Monitoring and surveying the state of neighbouring archaeological sites and reporting any disturbances
Conducting compliance inspection of hunters to ensure their activities are authorized and that they stick to the required season dates and bag limits
Assisting in search and rescue efforts for unaccounted for recreationists
What an experience. It’s now 26 years and counting. Maybe I should herein mention that I also work with the US Coast Guard.
I like the fact that my conservation and hunting dreams were realized in one job. Talk of killing two birds with one stone!
Family
I’m happily married to Sue Johnson, with whom we have two kids, James, and Liam. Family is everything to me. They daily give me a reason to wake up strong and face the world as a man. They are the ones I turn to in both my high and low moments. I cherish them to the moon and back.
Aside from work and and my nuclear family, I actively participate in the following conservation groups:
West Michigan Land Conservancy
Michigan United Conservation Clubs
Michigan Conservative Coalition
The Nature Conservancy
Saul Lake Bog Nature Preserve
These form my extended family. It never feels like a burden to me. I love my work.
I also make sure to spare some good time for hunting whenever the season comes. I mostly stick around Michigan. I’m shy of making long trips to other states as I never want to stay too far from my family. For some natural reasons, my wife is not a hunter.
Perhaps that’s a true illustration of unlike poles attracting. She’s content with her financial management career as I am with mine.
I’m however glad that one of my sons is walking in my footsteps. Liam is an up-and-coming youth hunter. I’m sure he’s ready to pick up the mantle when old age catches up with me.
Why I hunt with air guns (not crossbow, real rifle)?
I would run out of space listing the areas in Michigan where hunting with firearms is prohibited. I used to feel so limited with my Remington Model 700 rifle. But over the years, Michigan laws have significantly changed in favor of hunting with airguns. The same is also true with several other US states. And that’s why I chose air rifles as my best hunting weapon .
Additionally, it came to a point that hunting with firearms felt so easy for me. I could take out deer at fairly long ranges. I felt my hunting skills had plateaued. For more adventure, I saw airguns as the best hunting weapon to use.
For crossbows, I realized how expensive it is to get a good quality one that could meet my hunting needs. Air rifles are relatively cheaper than crossbows.
So far, here’s my collection of airguns:
PCP air rifles
AimSport Gen 2 DAR .22
Benjamin Cayden .22
Benjamin Marauder .22
Benjamin Marauder, Semi-Auto .22
FX Crown Continuum .22/.25
FX Dreamline Classic .25/.22
FX Dream-Tac Compact .177/.22
FX Royale 400 .22
Huben K1 .22
PCP pistols
Ataman AP16 .22
Benjamin Marauder Pistol .22
Hatsan AT-P1 .177
You know me in great depth. Don’t hesitate to get in touch whenever you feel like. Even a simple ‘hi’ will do!
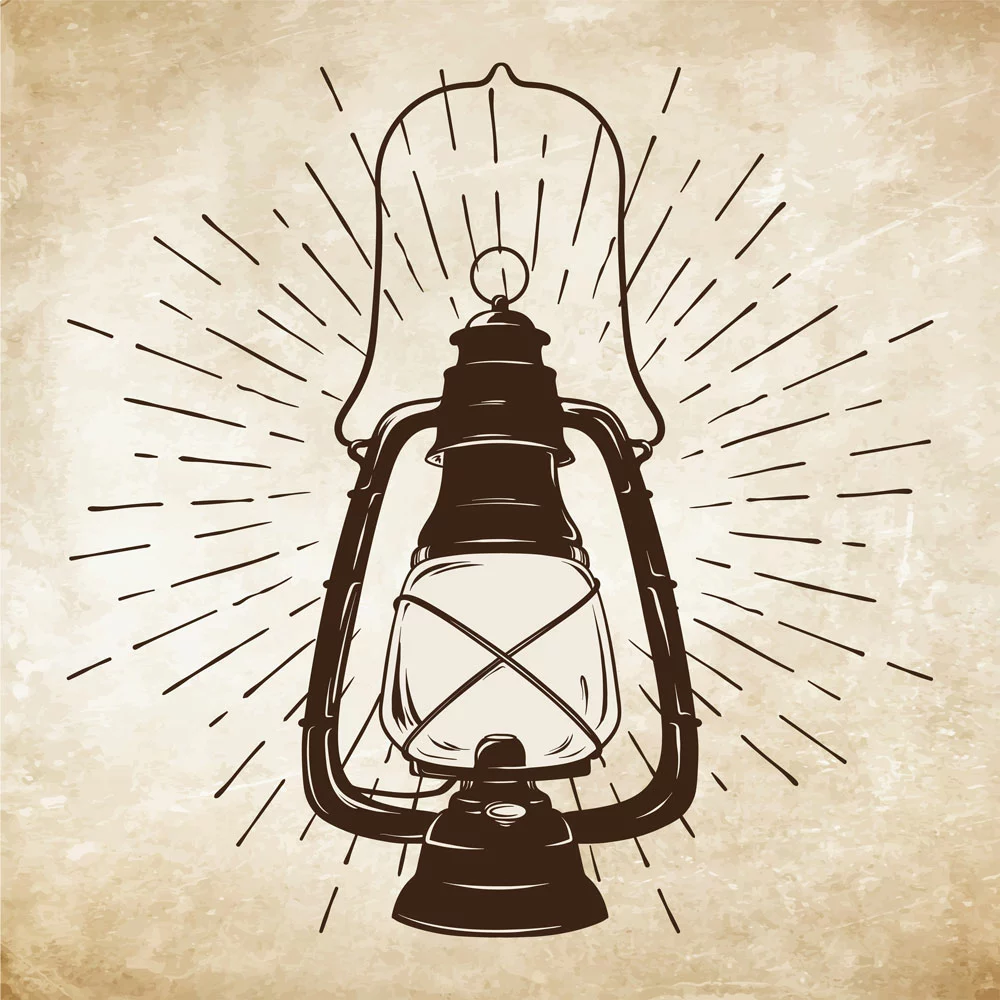
Oil lamps have become popular for their romantic ambiance and relaxing glow. But not all fuel sources are equal! There are two main types of fuel used for oil lamps: lamp oil vs. kerosene lamp oil. So, which one should you choose? Well, there are a few important factors to consider.
This guide we’lli explore the differences between lamp oil and kerosene lamps. Also, how to use each fuel type and any safety considerations to keep in mind.
Kerosene is a low-viscosity liquid that comes from petroleum. It contains hydrocarbons and has a clear to pale yellow flame color.
People use it as fuel for aviation, home heating, and cooking. Besides, kerosene is often used as a starting fluid for jet engines.
Also, Kerosene is one paraffin oil, and we use Paraffin oil in many industries. For example, the pharmaceutical, food processing, and cosmetics industries.
Further, we can use it as a lubricant and a cleaning agent. Despite their many uses, kerosene lanterns can be flammable, and you should handle them carefully.
Kerosene Candle Flame
Red Kerosene
Red kerosene is an industrial lubricant. We use it to power machines like engines and generators. Since it’s tax-free, you can’t use red kerosene for road vehicles like trucks. The dye in red kerosene helps identify trucking companies trying to avoid taxes using this type of kerosene.
K-1-rated kerosenes, such as red kerosene, can power lamps. But, the foul smell from burning dye in red kerosene will damage or clog your lamp’s wick.
We could not find any scientific evidence to corroborate the claim. But, some say red-dyed kerosene is dangerous when burned in lamps. To err on caution, we tell you against using it.
K-1 Kerosene
K-1 kerosene is the most available grade. You can find it in most major retail stores or filling stations. Also, you can use this type of kerosene in space heaters and lamps.
An upside to K-1 kerosene is that it’s very cheap. Besides, you can use it outdoors (e.g., with a portable stove). The scent of sulfur and other impurities from burning K-1 kerosene is less noticeable.
A kerosene lamp
What Is Lamp Oil?
Lamp oil is a type of fuel that comes from crude oil. It contains a mixture of hydrocarbons, molecules containing hydrogen and carbon atoms.
Unlike kerosene, lamp oil is odorless and has a clear appearance. Also, it is less refined than kerosene, so it contains higher levels of impurities, such as sulfur.
Additionally, it burns cleaner than kerosene, producing less soot and smoke. Finally, lamp oil leaks kerosene’s unpleasant smell, making it more pleasant to use indoors.
Alternative Types of Lamp Oil
Of course, you want to decrease the amount of sulfur and other impurities in the air. There are alternative types of lamp oil available on the market. These include:
Canola Oil
If you’re looking for a lamp oil substitute, look no further than rapeseed oil or canola oil. This semi-viscous liquid comes from the seeds of the rapeseed plant. Also, it burns much cleaner than kerosene.
In fact, it’s so clean-burning that it’s often used as a base oil for biodiesel production. It’s not quite as cheap as kerosene. But, it’s still a viable option to avoid using petroleum products in the home.
Canola oil
Castor Oil
Castor oil is a vegetable oil. People extract it from the seed of the castor plant (Ricinus communis). People have used the oil for centuries as a lubricant, fuel, and lighting oil.
Also, it contains triglycerides, which are molecules made up of three fatty acids. The unique structure gives castor oil its distinctive properties. For example, it is more viscous (thicker) than other oils and biodegrades more.
Castor oil produces a bright white light when burned in a lamp, making it an ideal choice for oil lamps.
Olive Oil
Olive oil comes from the fruit of the olive tree. It is renewable, odorless, non-toxic, and smokeless, making it a healthier option for indoor use. Also, it is much less likely to cause fires, making it a safer choice for home use, so people have used it for centuries as cooking oil, lamp oil, and medicine.
Olive oil
Fish Oil
Before people found out about kerosene and paraffin oils, they used whale oil for lamp fuels. Yet, whales are now endangered, so whale oil is scarce and not used.
Even though fish oil has some disadvantages, it is still a good option for lamp oil in some cases. The main advantages are that it is like whale oil and is still available in many places.
Also, it doesn’t burn as other oils do, making it difficult to see in low-light conditions. Additionally, fish oil can leave an unpleasant smell if used for too long. Also, it creates smoke if burned for extended periods.
Lamp Oil vs. Kerosene: What Sets Kerosene and Paraffin Oil Apart?
Odor
The smell is the first thing you should consider when picking a lamp’s fuel. If it gives off a rank byproduct, it’s not meant to be used inside.
While kerosene fumes can be dangerous and harmful, paraffin is better for indoor use. It doesn’t come with odor-inducing chemicals.
Burn Time/Length
Generally, paraffin will burn longer than kerosene because of its viscosity and purity.
Brightness
One of the main benefits kerosene has over lamp oil is that it burns much brighter. Although lamp oil may last longer, kerosene provides more light. Therefore, kerosene lamps are often used outdoors.
You can see them from further away and provide more light. Additionally, since they’re used outside, any fumes emitted aren’t as big of an issue.
Kerosene lamp with rays of light
Uses
Kerosene can power many types of industrial equipment. For example, you can use them for home generators, space heaters, and lamps. It’s popular because it works for so many purposes and is inexpensive. In contrast, paraffin lamp oil is only suitable for lamps.
Refining and distillation
Paraffin oils go through a more extensive distillation process. But kerosene goes through a less rigorous one.
Chemical differences
Paraffin is an alkane hydrocarbon with the formula CnH2n+2. But, Kerosene comes from petroleum oil, so it is a flammable hydrocarbon.
Lamp Oil vs. Kerosene: How Can I Maintain and Utilize My Oil Lamps?
Here are some tips on how to fill and use your lamps:
Unscrew the wick and collar from your lamp.
Fill your lamp with oil, making sure to follow all safety precautions.
Put the wick lamp back in and set it so that it’s above the wick holder—but not too much.
Light the flat wicks
Handmade Oil Lamps
Lamp Oil vs. Kerosene: How to Safely Fuel My Oil Lamp?
Always be sure to use the proper fuel for your oil lamp. Also, never use dangerous materials like mineral oil, rubbing alcohol, or pure gasoline. If these substances burn, they release harmful vapors and aromatics, which can cause serious respiratory illnesses.
Also, improper use of fuel can lead to fire or explosion. You should never fill your oil reservoir with ignitable substances, such as acetone, propane, turpentine, or household cleaners.
Lamp Oil vs. Kerosene: How to Dispose of Lamp Oil?
Now the last thing to consider is how to dispose of the fuel. Here are some tips to keep in mind:
Giving it to a Local Hazardous Waste Collection Site
For safe disposal, you can take your lamp oil to a local hazardous waste collection site. This way, they will recycle it instead of adding it to the landfill.
Also, some cities offer oil exchange programs. You can bring your used lamp oil and swap it for a new container.
Give It to Your Local Fire or Gas Station
You can check with your local fire or gas station to see if they accept used lamp oil. Most often, they are willing to take it and burn it off. Sometimes, you can even get a few cents back in exchange.
Donate It to a Recycling Company
You can search online for a local recycling company and drop off your used lamp oil. They will take it, filter it to remove any impurities, and re-use it in their products or machinery. Not only will you be helping the environment, but you can also get a tax incentive for donating it.
A Recycling Company
Donate It to Your Local Charity or Community Center
Sometimes you don’t have a recycling company nearby. So you can contact your local charity or community center to see if they will accept used lamp oil. Many of these organizations are always looking for donations, so it’s a great way to help and make an impact.
Give It to a Friend or Loved One
If you know someone who still uses oil lamps, consider giving them your used fuel. They appreciate the gesture. Also, a great way to reduce waste and keep resources out of landfills.
Use Your Leftover Lamp Oil Again
Finally, you can always use your leftover lamp oil again. Make sure to filter it first and follow all necessary safety precautions.
Burning kerosene lamp
FAQs
Can oil lamps be bad for my health?
Oil lamps are bad for your health if you don’t use the proper fuel. Always be sure to follow safety precautions. Also, never use flammable or hazardous materials for fuel.
For an oil lamp, what is the best type of oil I can use?
Olive oil is the best for an oil lamp. It has a high flash point and is non-toxic, making it a safe choice for indoor use.
Is it safe to use oil lamps inside my home?
They can be safely indoors if you use the right fuel and follow all safety precautions.
Heating oil vs. kerosene: which one is best for your furnace?
Heating oil is best for your furnace. It has a higher flash point than kerosene, which makes it safer and more efficient. Also, heating oil burns cleaner than kerosene and produces fewer byproducts.
Summary
Phew! You’ve mastered the ins and outs of oil lamps. Now you know how to fuel and dispose of your lamp. Always stay safe by following safety guidelines and using the proper fuel for your lamp.
We hope this article has been helpful, and you can now use your oil lamp with ease and enjoy the warmth and light it provides.
The straight answer to this question is yes, you can fire common 7.62X51 military ammo in any currently produced rifle chambered for .308 Winchester. However, there is more than one reason for this evaluation.
The 7.62×51 NATO cartridge is specific and it is built for military specifications. The reason is to make the round able to operate both belt-fed machine guns and semi-automatic rifles. The current specification for 7.62×51 is a pressure limit of 50,000 psi. And it is best for operating the M14, machine guns, and other semi-auto gas guns that the military uses.
As for the .308 Winchester ammunition, the pressure limit is SAAMI standardized at 62.000 psi. It makes a slight difference in cartridge specs between the military round and the .308 Winchester as currently produced. Therefore, the basic understanding is that the military cartridge will fit and fire in currently produced .308 rifles.
Normally, in a typical gun saloon bar discussion, the most heated debate is asking a bunch of people about the differences between .308 Winchester and 7.62x51mm NATO. There is a variety of responses that often include
They are not different
There is a difference
They might be different
Weirdly all those statements are all quite true. As it may be confusing to grasp, this article will try to explain it in a way that you will not bash your brains out. I will try to be void of making you read all the nuances of things like piezo transducers.
There are only limited categories of comparison and this will pretty much mess things up.
Understanding the Difference Between 7.62×51 and 308 Winchester
Before we delve much further, I must address this often-posed question “Are the 7.62×51 NATO and .308 Winchester the same?”
Again, the answer is NO. It is because of the differences in maximum pressures and the chamber specs. Nobody makes a 7.62mm (NATO) ammo that is not fitting to the .308 ‘headspace’ dimension spec. As a rule, this makes the 7.62mm ammo fit into .308 chambers.
But if you go the other way, you can encounter problems. A commercial .308 Winchester round exceeds the maximum rated pressure for the 7.62×51 ammo. If this is the case, avoid putting full-power .308 Win rounds into military rifles designed for a maximum pressure of 50,000 psi.
7.62 vs .308 – Pressure
The pressure is where most people get confused when analyzing the two ammo. The maximum pressure numbers for the two calibers are 50,000 psi for 7.62 and 62,000 psi for .308. At a glance, it appears to be a big difference and a reason to consider it unsafe to fire. The logic is, do not fire a higher pressure commercial .308 cartridge in a rifle built for 7.62x51mm NATO.
While it is true that a .308 ammo has a slightly higher pressure than 7.62x51mm NATO, the reality is that the brass and chambers are the issues to understand.
Here you must concentrate on the details. I put it that the 50,000 number is an accurate representation of copper units of pressure or CUP. It is a less precise way to measure pressure, as the method relies on looking at how much little copper disks compress when you fire the gun.
As things are, there is no consistent mathematical formula that equates CUP to pounds per square inch (PSI). The difference, therefore, in this specific case lies somewhere around 8,000. What this implies is that the maximum pressure for 7.62x51mm NATO is about 58,000 psi and not so far from 62,000 figures for the .308 Winchester.
If both loads are routinely proof tested at far higher levels, the 4,000 difference will not alter the trajectory.
7.62 NATO vs .308 Winchester – Case thickness
Measuring the thickness of the cartridge is quite challenging. I have developed a simpler way of doing it and it helps explain the difference. The process involves the representation of all sets of ammo. From my big bucket selection, I took both the .308 Winchester and 7.62x51mm NATO brass and weighed them. I further picked several of each from different brands and averaged the weights. I could not measure the cases because I had not fired them yet. And also because it will not tell me much other than the general size of the chamber from which they were fired.
The Winchester .308 weighs 163.3 grains while the Lake City 7.62x51mm NATO weighs 183.5 grains. As you can see this is a significant difference. When the thicker walls combine with similar exterior dimensions this means less powder capacity and the result is a lower- top end. All else the same, the result is a lower velocity and pressure.
The thicker brass of 7.62 cases is a significant factor and you will understand it better in what we discuss next.
7.62 NATO vs .308 Winchester – Headspace
The headspace is where we will get to the real difference. Military rifles for 7.62x51mm NATO usually do have longer chambers. There is a need for reliable feeding and there can be slack if you consider firing a machine gun powered with ammo made from all over the world. The operation needs to be smooth considering all the force used between the feeding and ejection process.
The solution is making the chamber headspace a bit longer. The headspace is the distance from the bolt face to the point in the chamber that stops the forward motion of the cartridge case. Therefore if headspace is too small, the bolt will not close properly or will require excess force to close. And if the chamber headspace is too long for a cartridge, it will float back and forth in the chamber.
The .308 Winchester chamber headspace is between 1.630 and 1.6340 inches. While that for 7.62x51mm NATO is between 1.6355 and 1.6405 inches. The slight difference in size might not seem like a big deal until you fire a thinner brass in a long-chambered rifle. The disaster is that the brass will stretch, perhaps enough to lead to a dangerous case rupture.
However, if you try the same with a thicker military brass, it is no big deal because of the way the system is designed. Using a thicker brass makes it handle the extra stretching into a longer chamber throat. The solution to the title question is to know your rifle and what its headspace is. Once you know this info you will determine if it is safe to shoot a .308 Winchester ammo in a 7.62 chamber.
How Can I Know if My Headspace is Safe?
To know if your headspace is safe is not a challenging task. You can use the set of .308 Winchester Go / No-Go headspace gauges. Use the gauges to check the chamber size. The bolt should close easily on a Go gauge and not close on a No-Go gauge. Also, the field gauge checks the maximum published chamber size. With some 7.62 rifles, you might find that the bolt still closes on the No-Go gauge. As long as the bolt closes, you are still within maximum published limits.
The Technicalities
In terms of specifications, there are differences, more so in the chambers of rifles designed to fire each cartridge. For the 7.62 brass is a bit thicker, and with the .308 is sometimes loaded to be slightly higher pressure. Other than that, the cartridges are pretty much the same.
One way to be entirely safe is to remain conservative and only fire 7.62x51m NATO in 7.62 chambered rifles and .308 Winchester in .308 rifles.
A final risk spectrum is just a scenario. In the case of using 7.62x51mm NATO ammo in a .308 chamber. In theory, you might run across particularly long ammo. Such ammo might not chamber or might require undue pressure to the chamber. The result could be dangerously high pressure. While such a scenario is highly unlikely as the 7.62 ammo to be significantly longer, is a pretty rare thing. It is why not most people will consider it a big deal to use 7.62 ammo in a .308 chambered rifle.
The Reverse Is Not True
However, you need to be careful while using .308 Winchester commercial ammo in a 7.62x51mm NATO chambered rifle. Even though the most modern 7.62 chambers tend to be cut almost closer to match the .308 dimensions, it is always safe to know exactly what you have in terms of headspace. If your rifle has a long headspace, stick to 7.62 NATO ammo. Do not use the .308 Winchester.
Great gear to bring along when visiting the range!
Conclusion
If you put everything else into consideration then the actual pressure differences between the .308 Win. and 7.62 NATO is not that large. However, it is a point of concern. Nonetheless, a tight chamber or an overly dirty chamber could pose a pressure issue. You don’t want to risk damaging a firearm and certainly never wish to see anyone hurt from negligence. It is why it is important to keep the golden rule in mind. A .308 Winchester chamber rifle can handle both .308 Win. and 7.62 NATO ammo safely, but a 7.62 rifle is only safe for a 7.62 NATO ammo.
Hunting slingshots fit a unique niche among hunters. They are primarily used by hunters who want an easy-to-use and easy-to-pack tool. Many slingshots can be folded and placed in a hunting backpack or a carrying case. There is usually room for ammunition too. Hunting slingshots are quiet and ideal for hunting small game like rabbits, small birds, squirrels and turkeys.
Many of today’s hunting slingshots feature metal frames and extra-strong rubber bands. When using one for hunting, it is recommended that the hunter have some experience with basic target practice with a slingshot to improve their accuracy. The top recommended hunting slingshot is the Ucho Professional Slingshot.
What to know before you buy a hunting slingshot
Start simple if you are a beginner
There are many designs of hunting slingshots, and some boast a laser sight and lights. While these extra features may be helpful down the road, they can make learning how to use a slingshot more difficult. If you are new to slingshots, start with a straightforward design and learn the basics of using a slingshot first.
Slingshots should be easy to repair
Over time and with extended use, the rubber bands on hunting slingshots can wear down or even break. Replacing the rubber bands should be an easy process. Review how rubber bands are exchanged on the model of interest to you. Look for products that include an extra set of rubber bands.
The slingshot handle should feel good in your hand
Slingshot handles can be made from wood, metal or plastic. Many are ergonomically designed to fit comfortably in your hand. Make sure that you have a sense of power and balance when holding the slingshot.
What to look for in a quality hunting slingshot
Arm support
Many hunting slingshots feature a fold-out arm brace that provides extra support when aiming and firing. Make sure the brace fits snugly against your forearm so there is no give.
Ammunition pouch
Usually made from leather, ammunition pouches hold the rubber or metal balls and are located at the holding point, so the pouch can be held in place when shooting.
Flat or tubular bands
Most hunting slingshots feature tubular rubber bands that are very durable but still stretch enough to generate the power needed for hunting small game. There are some models that use flat elastic bands. These can generate more power, but they also need to be replaced more often.
Sights
Typically located at the bottom of the grip, some models of hunting slingshots have a laser or fiber optic sight to help with accuracy.
How much you can expect to spend on a hunting slingshot
The lowest-priced hunting slingshots run between $10-$15 with lower-quality elastic bands, while for $15-$25, you will find hunting slingshots with greater durability and more accessories. Hunting slingshots made from stainless steel and offering the highest-quality materials are priced between $25-$50.
Hunting slingshot FAQ
How do I know if my accuracy is ready for hunting?
A. When hunting small game, accuracy is important. Typically, you are looking for a headshot. To test your accuracy, try hitting a ping pong ball from the typical distance you would be shooting from in the field. Once you are able to consistently hit the ping pong ball, you should be ready for hunting.
What is the best size of ammunition to use?
A. Slingshot ammunition typically runs between 5/16th of an inch to as large as a half-inch. However, the recommended size to use for hunting small game is 7/16th of an inch. This size shot allows you to maintain high accuracy but also enough power to take down your target from pigeons, squirrels and rabbits to even turkeys.
Do I need to wear safety glasses when using a hunting slingshot?
A. Yes, protective eyewear is a must when using a slingshot. Many safety glasses for hunting are anti-glare and anti-fog to keep your line of sight clear while keeping you safe from ricochets, broken bands or debris.
What’s the best hunting slingshot to buy?
Top hunting slingshot
Ucho Professional Slingshot
What you need to know: This versatile slingshot is easy to shoot and can be used by adults and children under supervision.
What you’ll love: Triple-strength rubber bands and a wide-bow design provide extra power and comfort. The magnetic leather pouch keeps ammo refill close by. The slingshot folds up easily and also comes with a laser flashlight holder for nighttime hunting.
What you should consider: The rubber bands wear down and lose their color over time.
Where to buy: Sold by Amazon
Top hunting slingshot for the money
Nobondo Strong Folding Slingshot
What you need to know: An affordable slingshot that offers precision shooting with high-velocity power.
What you’ll love: This slingshot is made from metal with durable rubber bands. It comes with a wrist brace and ergonomic adjustable handgrip that gives your hand extra power and comfort. The slingshot is packaged with 100 ammo balls.
What you should consider: The wrist brace doesn’t lay evenly on the forearm and can lead to inaccurate shots.
Where to buy: Sold by Amazon
Worth checking out
Wisdoman Outdoor Professional Slingshot
What you need to know: This slingshot is high quality and combines power and accuracy with multiple accessories.
What you’ll love: Made from anti-rust stainless steel and with high-tension rubber bands, this slingshot offers a unique professional design. It includes a leather wrapper, 50 steel balls and a small flashlight combination.
What you should consider: There were some reports of the rubber bands breaking. It has a shorter range than other similar slingshots.
Where to buy: Sold by Amazon
Sign up here to receive the BestReviews weekly newsletter for useful advice on new products and noteworthy deals.
Steve Gangerwrites for BestReviews. BestReviews has helped millions of consumers simplify their purchasing decisions, saving them time and money.
There is a manual for the shooter to take guidance to find out how to recoil the cocking and firing for the initial time.
The gun fires frequently as you draw the trigger, and this flexibility makes it trouble-free to use.
Impressive Consistency
HAM has tested the consistency of the Winchester model m14 air rifle, and the results are satisfactory.
Moreover, the accuracy is not affected by the bullet used in it.
Noted that the rifle was not for bird hunting, just for plinking.
In the case, you wish to have shooting fun on the weekend with your partner or family in the backyard.
The Winchester M14 CO2 air rifle would be the best option for you.
The HAM Test also shows that the rifle is a great gun for sport shooting.
The muzzle velocity was steady during shooting.
Winchester M14 – Accuracy And Reliability
Any shooter who wishes to use a rifle for hunting must be concerned with accuracy and reliability,
But since the Winchester M14 CO2 air rifle is not a hunting gun, perhaps that’s not so important here.
Note that the gun was tested by HAM at 61 degrees Fahrenheit on an indoor range.
Like all other CO2 air guns, it is sensitive to temperature and shoots more slowly in the cold.
However, you must have an idea, or you have to consider windage weather while shooting.
Let me be clear that you cannot go shooting on a cold winter’s day.
Compared with other CO2 rifles, the Winchester M14 Pellet BB Gun has a muzzle velocity which increases by around 2FPS per degree Fahrenheit and then can go beyond the temperature of 95 degrees.
Therefore, it can be said that as the temperature increases, the muzzle velocity of the air rifle also increases. Winchester M14 CO2 is one of the best 5 CO2 air rifles on the market.
Due to the reason that CO2 is a refrigerator gas, if you tend to shoot fast, it will cause it to shoot slower than usual.
During the HAM test, the time gap between the two shoots was 5 seconds.
You can have a clear view of the explanation mentioned above through the Table given below.
Rifle Pallet
Average Muzzle Velocity
Average Muzzle Energy
Result/Accuracy
Gamo Raptor Platinum 4.7 Grain
549.8 fps
3.13 ft/lbs
POOR
H & N Field Target Trophy Green 5.56 grain
510.5 fps
3.22 ft/lbs
POOR
RWS Hobby 7 grains
447.7 fps
3.12 ft/lbs
POOR
Crosman Premier HP 7.90 Grain
439.1 fps
3.38 ft/lbs
POOR
JSB Exact Diabolo 8.44 Grain
417.4 fps
3.27 ft/lbs
POOR.BEST TESTED
H & N Field Target trophy 8.64 grain
396.2 fps
3.01ft/lbs
POOR
H & N barracuda match 10.65 grain
354.8 fps
2.98ft/lbs
POOR
In the above table, you can see that the maximum muzzle velocity has been achieved with Gamo Raptor Target Trophy green 5.56 grain which is 549.8FPS.
This velocity is achieved at 61 Fahrenheit.
This means that muzzle velocity with the maximum figure can be found at 95 Fahrenheit in the region of 620 FPS.
After the HAM test, I can say that the accuracy is not that impressive. It was just accurate up to 10 yards.
The world of air pistols is as diverse as any other precision sport out there. And there are many factors that need to be considered when selecting your first air pistol. Rather than simply picking out any old air pistol or the most expensive one on the market.
In this article, you will learn all about the best air pistols, Co2 pistols, and other pellet pistols that are currently on the market. Not only that, but you’ll learn about the differences between them. So you can find exactly what you are looking for when entering the world of air pistols.
The following reviews will cover the best air pistols that are currently available. With an easy-to-read format and a breakdown of pros and cons. With this knowledge, you’ll be well on your way to choosing the perfect air pistol for your needs.
So, let’s get going with a quick comparison table of the models covered in this review.
Founded in 1924, Crosman Corporation manufactures and supplies all types of shooting products for sports such as archery, as well as, CO2 guns, airsoft guns, and pellet guns.
Product Description
The Crosman Benjamin Marauder is a pre-charged air pistol that shoots.22 caliber pellets. At full charge, the pellets reach speeds up to 700 fps (feet per second). It is made from synthetic plastic, keeping it light. The barrel is rifled and is made from steel with a matte coating to keep it from scratching.
The magazine holds up to 8 pellets and sits in a rotary-style magazine on top of the pistol. To reload, you use the bolt action on the back (like that of a sniper rifle), and it will reload a new pellet into the barrel.
Safety first…
For safety, the Crosman Benjamin Marauder has cross-bolt safety, which is very important for all shooting sports.
There are no iron sights included with the product, but there are rails on the top of the pistols for you attach any preferred optic, whether it be a red dot or a scope. However, you would have to use air pistol mounts to attach a scope as they are smaller than standard Picatinny rails.
Product Specification
For its size, it looks like it would be quite heavy, but in fact, it is surprisingly light weighing only 2.70 pounds unloaded. The weight reduction is mostly due to the synthetic material used, which allows the air pistol to be both lightweight and also durable.
For some, trigger pull can a big issue, so you’ll be pleased to know that the trigger on the Crosman Benjamin Marauder is very light at only 1.7 pounds.
Pros
Cons
Lightweight
Carbine option.
Pre-charged.
Rotary Magazine.
Light trigger.
Only eight rounds
Air pistol top rail, not a standard Picatinny.
No iron-sights.
2.Daisy Powerline 415 Pistol Air Gun Kit
Next up, we have a CO2 (Carbon dioxide) powered air pistol. This operates by compression, which comes from a cylinder that is inserted at the bottom of the grip and screwed in place.
Product Description
The Powerline 415 has a familiar-looking shape and build. The grip is comfortable, and firing accurately will take little practice, as will getting used to the functions of the pistol.
To insert the CO2 capsule, you remove the lower half of the pistol grip. Inserting the capsule is very easy, and screwing it in doesn’t take much effort either. The pressure from the Co2 is capable of firing the BBs at 500 fps and claims to reach a max distance of 240 yards.
An unusual design…
However, the magazine isn’t where you normally find it in the pistol grip but is on the top slide of the pistol. Reloading is, therefore, a little slow as you can only insert a single bullet at a time. The slide holds 21 round bullets.
There are iron sights that are built into the slide. These are plain black, so they might be hard to see if you are shooting in low-light situations.
As in the name, this is a kit, so you will get more than just a pistol. You will also get some .177 caliber or 4.5mm BBs, a pair of eye protection glasses, three Co2 capsules, and some oil to keep the O-rings from drying out.
Product Specification
Built mostly from polymer, the pistol is light and durable enough to handle the pressure of the CO2. However, using the pistol in rough situations will probably reduce its longevity. The only metal on the pistol is the trigger and the magazine spring.
The barrel measures around 8 inches and is a smoothbore, which means there is no rifling and no hop-up to create backspin on the BBs. Backspin is important for range and accuracy, but it seems to be lacking on the Powerline 415.
Measuring 8.6 inches, the pistol fits comfortably in your palm, and it feels like you’re firing a regular pistol. However, the biggest difference is in weight. The Powerline is made mostly out of plastic, so weighs only 0.98 pounds, which is very light.
Pros
Cons
Lightweight
21-round magazine
No recoil.
Attachment rail under the slide.
Co2 will have FPS drop.
Blacked-out iron sights.
No backspin on the BBs.
3.Beeman P3 Air Pistol
The Beeman P3 is a pump-action air pistol. This means that you have to pump the air into the compression tube before you can fire a shot. It does not have a reservoir like others that use a tank or a capsule to propel the pellet.
Product Description
As mentioned, the P3 needs to be pre-charged before firing. To pump the air, you will have to unlatch the “hammer” on the rear of the slide. In this case, the slide is not functional and is used as a lever instead. Once unlatched, the top half of the slide will open up, revealing the piston and the air tube. By lifting the lever forward and pushing it back into place, you pump the air into the compression tank.
The P3 doesn’t use a magazine to hold the pellets, so every time you pump the pistol, you have to insert the pellet into the barrel before snapping it shut.
Great for low light conditions…
Not only does the slide act as the air pump, but it also supports the iron sights. On the P3, you have the luxury of bright hi-vis fiber optic iron sights. The front sight is a single red dot, whereas the back is two yellow dots. High visibility iron-rights are good for shooting in low-light or dark backgrounds. They also aid in lining up the pistol to a target as your eye catches the sight a lot faster.
One thing worth mentioning is that the P3 has an automatic safety feature. This safety will lock the trigger as soon as you pump the pistol, which should avoid any injuries.
The barrel on the P3 is rifled, so you should get accurate shots. Other than that, the pistol is pretty simple. The grip allows you to comfortably hold the pistol, and the trigger is light and easy to pull. If you wish, you could also adjust the trigger pull, but the factory settings are already very good.
Product Specification
Made mostly from plastic, the P3 is very lightweight and easy to hold for long periods. However, all the moving parts, i.e., the piston, compression tube, trigger, and hammer latch, are made of metal to ensure longevity.
With a single pump, the pistol will fire a 0.177 caliber pellet at a max speed of 410 Fps. As there is no blowback from the slide, the shots are nearly silent when the trigger is pulled.
The P3 uses a charging system, so most of the effort goes into pushing the lever back into the locked position. It takes around 22 pounds of force to push the lever back so you will tire after shooting multiple shots.
Pros
Cons
Pre-charged.
Automatic safety.
High-visibility fiber adjustable optic iron sights.
Near silent when shooting.
Adjustable trigger.
Interchangeable rifled barrel.
The moving parts are metal.
No magazine.
Slow reloading.
4.Umarex TDP 45
Umarex is a popular German outdoor brand that supplies air pistols and recreation shooting products.
Product Description
The TDP 45 is a C02-powered semi-automatic air pistol. Like most C02-powered air pistols, the capsule is inserted in the pistol grip. For the TDP 45, there is a flip-up lever on the backstrap of the grip. Once opened, the Co2 can be placed in the slot and screwed in place.
The magazine holds 19 steel 0.177 or 4.5mm BBs and is shaped more like a stick mag than the regular full mags. To release the magazine, there is a magazine release located on the right thumb rest. Underneath the slide, there is also some rail space for accessories like red dot sight mounts or flashlights and lasers.
Dead on target…
The CO2-powered air pistol has no blowback and no functioning slide, but that is to be expected. On top of the slide, there are reflective iron sights. The white dots on both the front and rear sights aid in acquiring the sights and lining them up with the target.
Other than that, the trigger is standard and has a smooth and light pull. The safety is not located on the left side as standard pistols, so you’ll have to use your right index finger to access it rather than your thumb.
Product Specification
The TDP 45 is made mostly of a polymer. Not only does this reduce the cost but also keeps the pistol light, weighing only 0.80 pounds. All the moving parts of the TDP 45 are made of metal, such as the trigger, barrel, CO2 screw, nozzle, and magazine.
The barrel on the TDP 45 is a smoothbore allowing it to guide the BBs with as much accuracy as possible. However, most BB guns have a hop-up for backspin, but there is none on the TDP 45.
The C02 capsules that come with the pistol are 12 grams, and it is not recommended to use higher power capsules as they may damage the pistol. The 12-gram capsules propel the BBs at a maximum velocity of 410 fps measured with 4.5mm bbs.
Pros
Cons
16-round magazine.
Clear sights.
Smooth trigger-pull.
No blowback.
Accessory rail.
Polymer pistol.
Not a replica and lacks realism.
Fixed sights.
Screw-in capsules.
5.Gamo 611138054 P-25 Blowback CO2
Gamo is a Spanish brand that manufactures in Japan and is well-known for its quality products. With over 60 years of experience in manufacturing, they provide excellence in their bullets, rifles, and BB guns. Over the years, they have had significant growth and now supply and distribute in more than 90 countries.
Product Description
The Gamo P-25 is a C02-powered air pistol with a blowback feature as well as a single and double action trigger. By cocking the slide, you set the hammer into position, but the pellet isn’t loaded into the barrel. This happens when you pull the trigger, about halfway, and then the pellet is loaded into the rifled barrel.
With the final stroke, you release the gas and send the pellet to its target. The slide will then cock the hammer again and can keep firing.
Easy capsule install…
The P-25 has its CO2 capsule hidden in the pistol grip. To load the capsule, you’ll have to pull half of the grip off. This is a well-designed pistol and separates so cleanly that it is hard to tell where the two pieces meet. Once removed, you can insert the capsule into the slot. Before putting the pistol grip together, you screw the CO2 capsule in from the bottom and then put the grip back together.
The magazine is a double-sided, rotary magazine that holds eight pellets per side. Once one side is empty, you hit the magazine release and flip the magazine around, and the other eight pellets are ready to go. The magazine is well constructed and is made from alloy material and will stand the pressure of the CO2.
The safety can be found on the right side of the frame and is easy enough to access single-handedly but isn’t so easy that you can accidentally flip the safety into firing mode. On the top, you have reflective fixed iron sights that are easy to use to acquire targets.
Product Specification
The P-25 has a working slide made of metal, which gives it a very realistic feeling. The frame is made of plastic but also has metal moving parts. It weighs around 2 pounds.
The P-25 is said to be able to shoot 0.177 pellets as well as 4.5 BBs, but with the rifling, it is better to use pellets instead of round BBs. As usual, the CO2 is 12 grams and will propel the ammunition of choice at max speeds of 410 fps in warmer climates.
For one CO2 capsule, you will get around three full magazines used before having to change it. It is possible to get four magazines to use, but you will have to wait for the CO2 capsule to warm up a bit before shooting.
Pros
Cons
Blowback pistol.
16-round magazine.
Reflective sights.
Working hammer.
Metal slide.
Manual safety.
Rifled barrel.
Not CO2 efficient.
Not a replica.
No bolt catch or slide release.
No accessory rail.
6.Umarex Legends M712 Blowback Automatic
Umarex Legends line features some of the finest craftsmanship of any replica. The Umarex Legends M712 is a replica of the C96 Mouser and looks and feels exactly like the ones used and made popular during WW1.
Product Description
The M712 is a blowback semi and automatic C02 air pistol that stores its CO2 capsule in the magazine along with 18 single-stacked BBs. To insert the capsule, you first press the magazine release that is on the right side of the frame. Once the magazine is removed, you unscrew the lid. Once open, you just pop the CO2 capsule in and screw the lid back on to puncture the CO2.
Most of the controls are on the left side, such as the safety and the selector switch. The selector switch is the lever on the left side, which you access with your right thumb. There are two modes; single fire and rapid fire. To switch modes, you’ll have to press the button and then slide it up or down to select your firing option.
The safety is on the back next to the hammer and is pulled in the same way as the hammer to lock the trigger.
Take aim…
The trigger is smooth and doesn’t have a long trigger pull. On the top, there is no slide but, instead, a working bolt. This is where you’ll find the aiming post, which looks like that of an AK rifle, and a reflective dot on the front iron sight. The rear sight can be adjusted for elevation and range but not for windage. This isn’t a big deal, though, as it is a pistol, so most shots will be fired at close range.
The grip is one of the most iconic features of the pistol and is easily recognizable. The broomstick pistol grip swells out like a light bulb and fits comfortably in the hand. This, however, puts most of the weight on top of the hand, and compared to modern-day pistols, this is considered as a bad design. However, in its time, it was a masterpiece.
Product Specification
The pistol is a replica, so it is almost identical to its real firearm counterpart. The M712 is made entirely out of metal, and the only plastic part is the imitation wood on the pistol grip. This does make it fairly heavy, but that’s understandable, as its goal is to be as close to the real C96 as possible.
The barrel is a 6-inch smoothbore barrel and will fire all 4.5-gram bbs. The maximum fps with the 12-gram CO2 capsule is around 390 to 410 fps depending on temperature and BB weight. This pistol will, however, consume a lot of CO2 as the blowback needs to be powerful enough to cock the hammer back.
Pros
Cons
C96 replica.
Blowback.
Full metal construction.
Semi and automatic fire.
Heavy.
Uses quite a lot of CO2.
7.Crosman Vigilante CO2 Caliber .177 Pellet & BB Revolver
Next up, we have another great Crosman product, the Vigilante. This air pistol is very versatile and can be used with both pellets and BBs. You might notice that it looks fairly similar to the Colt Python 357, that’s because the Vigilante is a replica of that exact model.
Product Description
The Crosman Vigilante is a CO2-powered 10-round/pellet single and double-action revolver. Starting with the magazine, the rotary magazine fits ten rounds or pellets, but it does not pop out.
To load the magazine, there is a pressure point on the top that you push down to unlock the barrel assembly. Once that is unlocked, the barrel will flip down, revealing the circular magazine. From there, you simply take it out and load it then reverse the steps.
The CO2 capsule is placed inside the pistol grip and is fairly simple to install. All you have to do is remove the plastic caps that make up the pistol grip, and you’ll find the metal housing for the CO2. A simple install and screw twist will puncture the capsule, and you’ll be ready to go.
Never forget about safety…
The safety on the Vigilante is a cross-bolt style safety. This means it is a simple bar that crosses the bolt preventing the hammer from contacting the gas valve. On the top, you have blacked-out fixed iron sights, but they perform well under daylight firing. There is also a rail space for all duck tail attachments like red dots or optics.
The 6-inch inner barrel is metal and rifled for improved accuracy, but it does protrude the outer barrel. This is good for both accuracy and max fps, but many shooters will not like the look.
Product Specification
The Vigilante is part metal and part plastic and has a fair bit of weight to it. The pistol weighs around 1.70 pounds (without pellets). The metal parts are where they matter most like the frame, trigger, CO2 screw, barrel lock, safety, and hammer. The plastic parts are the outer barrel, the magazine, and the pistol grip.
For the best performance, Crosman recommends using 0.177 lead pellets or 4.5mm BBs. The CO2 capsule is 12 grams and will result in 435 maximum fps. There is no blowback on this pistol, so it will lack realism, but it will save on CO2 consumption as well as improve on accuracy.
Pros
Cons
Colt Python 357 replica.
10-round BBs/pellet magazine.
Rifled 6-inch barrel.
Metal frame.
CO2 efficient.
Blacked-out iron sights.
The magazine doesn’t pop out.
Plastic outer barrel.
The grip could have been rubberized.
8.Colt Defender
The Colt Defender is another Umarex product. However, this model is unlike any other in this top air pistol review.
Product Description
The Colt Defender is a replica of the actual Colt Defender 45 auto and is a single-piece pistol. This means that there are no removable parts, and everything is built into the pistol. It is a Co2 powered, and it is installed in the pistol grip. To install the CO2, you push the button where the magazine release would be. Instead, it opens the pistol grip caps and exposes the Co2 slot, where there is a screw at the bottom to puncture the capsule.
On the opposite side of the CO2 capsule, is the BB slot. To load the built-in magazine, you simply slide the spring down and feed the BBs into the slot. The magazine fits 18 rounds and shoots in single fire or semi-auto.
Lots of realistic details…
There are nice markings on the slide and some authentic warnings and serial numbers. On the top, you have fixed iron sights with a white reflective dot on the front sight and blacked-out iron sights on the rear. However, the slide will not move as the Colt Defender is non-blowback.
Underneath the barrel, there is a handy rail for your accessories. The pistol looks identical to the Colt Defender 45 auto, but there are no actual moving parts. The hammer, thumb safety, and slide catch are all part of the frame and don’t actually move.
There is working safety on the right side of the frame, and it is easy to operate single-handedly. To put the pistol into firing mode, you simply press the button and slide it back to the fire and push again and slide forward to put it in safe mode.
Product Specification
Made in Taiwan, the Colt Defender is made mostly of metal, apart from the plastic pistol grip. There is a 4-inch barrel installed and a double-action-only trigger. The pistol weighs around 1.70 pounds and shoots 4.5mm BBs and max speeds of 440 fps with 12-gram CO2 capsules.
Pros
Cons
Colt Defender 45 auto replica.
Full metal.
No removable parts.
CO2 efficient.
Rear iron sight is blacked out.
Ejection port is a sticker.
Molded hammer, slide safety, and bolt catch.
Long trigger-pull.
Lacks realism in terms of function.
9. Crosman American Classic Pump Pellet Pistol
And now, it’s time for yet another Crosman product. Most of the best air pistols in this review have been pre-charged or CO2, but this pistol uses a pumping action to compress the air.
Product Description
The Crosman American Classic is a single-shot, bolt action pistol with a pneumatic pump. This means that there is no magazine or compartment for you to store air. Much like the Beeman P3, it is slow to reload but has good fps.
The pistol can be pumped up to 10 times to get maximum fps and has enough power for close-range, small-game hunting. On the top, you have an adjustable rear sight for windage and elevation, and on the front, you have a fixed post. Both sights, however, are blacked out but still do a decent job.
The Crosman American Classic features a cross-bolt safety that will unlock the trigger whenever you wish to fire. The trigger has a fairly short and light trigger pull, but that is due to the high fps.
Product Specification
Made in the USA, the pistol is made of metal with only the pistol grip and handguard being made of plastic. However, if you get the buttstock accessory, that will also be made of plastic. You can pump the pistol up to ten times to get a maximum fps of 460 with .22 caliber pellets.
The inner barrel is also made of metal and measures around 8-inches with rifling making it fairly decent for accuracy and range. The pumping action is quite heavy and uses around 22 pounds of force to get the maximum fps, but you can pump the pistol as little as three times for target shooting and backyard plinking.
Pros
Cons
Full metal build.
Accurate.
Adjustable power.
Rifled barrel.
Adjustable rear sight.
Fairly light trigger.
Many modifications available.
Blacked-out sights.
Tough pumping action.
Plastic grip and handguard.
Best Air Pistols Buyers Guide
There are a few important considerations when it comes to choosing an air pistol. In this buyer’s guide, you will learn about them and why they are important.
First is the propellant, there are three popular types used in most of the best air pistols currently available. CO2 is one of the most popular because it is simple to install, and CO2 capsules are relatively cheap.
Next is the pre-charged air type. This type of propellant requires an external tank filled will compressed air. This can be pricy, but the temperature doesn’t affect the PCA types as much as it does the CO2-powered pistols.
The final less popular option are the pump-action pistols. These don’t require any external propellant, and you get higher fps. However, you will only get to shoot one shot at a time, and it takes longer to prepare for the next round.
The second factor to be considered is the type of ammunition. First, we have pellets, which are good for hunting and have higher accuracy as they benefit from a rifled barrel. The second are BBs, which are good for plinking and target practice as you get more realism.
Best Air Pistols Accessory Guide
Most pistols that come out of the box are fairly decent, but there are still a few things that you can add to your pistol to improve your shooting experience.
The first option is an optic or a scope, depending on your configuration. This will help you improve your accuracy. Secondly, you’ll want to modify your trigger to get a smooth and light trigger pull. This also improves accuracy. Thirdly, you might want to get some illumination, maybe a flashlight or a laser, to help you shoot in different situations.
Another great accessory would be a holster for your pistol or a strap if you have a buttstock configured on to your pistol. This helps in carrying the pistol around more comfortably.
If possible, try to buy some extra magazines so you can shoot without having to stop and reload. More magazines mean more fun!
So, What Are The Best Air Pistols?
There are many reasons to buy an air pistol, perhaps you enjoy small game hunting or have a pest problem. Or maybe you are someone that enjoys realism and likes to practice drills. Or maybe you just like to enjoy the afternoon shooting at cans and bottles. Whatever the reason, there is an air pistol that is excellent for each purpose.
The first up is for the hunting category. For this, the obvious winner is the…
Crosman Benjamin Marauder
This air pistol has the power and accuracy to take down small games. And it can be easily modified for stability and to add a scope. It is true that the Crosman American classic can indeed do the same, but it doesn’t have the magazine capacity and follow up shot speed that the Marauder has.
Next up is for how accurate the air pistol is in terms of realism and replication. This one is pretty tough, as many of the pistols that are replicas are pretty accurate. However the Umarex Legend M712 wins in this category. The realism is unmistakable, and the controls and pistol manipulation are mirrored to that of the C96 Mouser.
You should now know more than enough to make a great decision about which is the perfect air pistol for your needs. So stay safe and happy shooting with whichever one you choose!
Introducing the Ultimate Stealth Shooter: The 50 Cal Air Rifle Suppressed. Experience unmatched power and precision in this compact and silenced air rifle. Perfect for sharpshooters seeking a whisper-quiet weapon with unrivaled accuracy. Prepare to dominate the field with this game-changing innovation in air rifle technology.
50 cal air rifle suppressed
The 50 cal air rifle, when equipped with a suppressor, offers a unique combination of power and stealth. With its large caliber ammunition and advanced technology, this air rifle provides an effective means for hunting or target shooting without the loud noise associated with traditional firearms. The suppression system reduces the sound signature significantly, making it ideal for situations where noise reduction is desired such as backyard shooting or pest control.
One of the main advantages of using a 50 cal air rifle with a suppressor is the reduced recoil. The suppressor not only dampens the sound but also helps to mitigate recoil by redirecting gases and reducing muzzle rise. This allows for more accurate follow-up shots and better overall control of the firearm. Additionally, the use of compressed air as propellant eliminates the need for gunpowder, resulting in cleaner shooting experience without any harmful emissions or residue.
In conclusion, the introduction of suppressed <50 cal air rifles offers a game-changing solution for shooting enthusiasts. These rifles provide a quieter and more accurate shooting experience without compromising power or performance. With their reduced noise levels and advanced technology, these air rifles are ideal for hunting, target practice, and pest control. Whether you are a seasoned shooter or a beginner, the <50 cal air rifle with suppression is an innovative tool that enhances your shooting experience while respecting noise regulations and minimizing disturbance to others.
There are two locations where a reticle can be installed within a rifle scope: the first focal plane (FFP) or the second focal plane (SFP).
With a first focal plane scope, the reticle is physically placed on the “front” of the erector tube assembly and magnification lenses. The first focal plane is furthest from your eye when looking down the sight.
How does that make a difference?
With a First Focal Plane scope, the size of the reticle will appear to grow or shrink as the scope’s magnification is increased or decreased, respectively.
Now that you’ve got the basics, let’s talk about the pros and cons…
First Focal Plane: Pros and Cons
With the first focal plane optics, the reticle size is going to scale up or down with your magnification adjustments.
This means your trajectory markings, or holdover values, are going to remain accurate regardless of what magnification setting you’re on. This is great news if you hate doing math!
But, it comes at a cost…Literally.
The price is often higher by virtue of its more complicated construction. A first focal plane reticle is also typically associated with higher-end scopes.
With first focal plane scopes, the reticle will look small and thin with less power while the reticle will be thicker at higher power.
It can be easy to lose those thin reticle lines, especially against dark backgrounds. Although, some of the best Leupold riflescopes have illuminated reticles for better visibility.
Also, the reticle can cover too much target at the highest setting. If this is a dealbreaker to you, that’s where Second Focal Plane comes into play…
What is the Second Focal Plane?
The most common design is SFP, or a Second Focal Plane scope. It’s also referred to as Rear Focal Plane.
With a second focal plane scope, the reticle is placed behind the magnification lenses on the erector tube assembly.
The second focal plane scope is closer to your eye. Therefore, the reticle stays the same size at any magnification range.
Now, let’s talk about the pros and cons of this…
Second Focal Plane: Pros and Cons
Its lightweight, great resolution, and durability against heavy cartridges make it a popular choice among hunters and law enforcement.
With the second focal plane, your units of measure per each hash mark (MOA or MRAD) represent the same value regardless of your magnification setting.
However, the spacing for holdover in the reticle is only correct at the highest magnification setting. So, it’s not always reliable for variable long-range shooting.
For example:
Let’s look at the Viper HST 4-16×44. This is a second focal plane scope with a magnification range of 4-16x. The Viper HST has hash marks representing 1 MOA but this is only true at its full magnification: 16x.
Of course, you can always do the math in between. But it becomes complicated and confusing and we all know that’s no bueno.
Second focal plane scopes are more commonly seen in the average riflescope and they’re easier to manufacture. That’s why they’re typically less expensive.
First Focal Plane vs. Second Focal Plane for close-range shooting
A second focal plane scope is more suited for close-range hunting and defensive shooting.
Why?
Because you have a strong and easy-to-see reticle even at the lowest magnification. With low-powered optics, like 1-4X optics, this is a highly undervalued feature.
When it comes to a First Focal Plane scope, you can easily lose sight of your marks at low power. This can be a hassle when you need to make adjustments for the wind or distance— especially for older eyes.
Since you’d have to zoom out to get the rest of the marks in the scope’s view, your target shrinks relative to your view. If you’re hunting small game, this can be an inconvenience.
First Focal Plane vs. Second Focal Plane for long-range shooting
First focal plane scopes are best for competitive and long-range precision shooting.
The hash marks represent the same value across all magnification levels. It allows you to use and trust those holdovers at any given point in your magnification.
This is an advantage for spotting impacts and misses for corrections. It’s also very helpful if you need rapid and precise follow-up shots.
Hitting something at longer ranges means getting as much precision as possible. With a second focal plane scope, making those fractional MOA adjustments becomes far more difficult.
Conclusion
The truth is— it’s a matter of preference and intended use. There is no “better” between the two focal planes.
Higher magnification ranges are better in a first focal plane scope. Lower magnification is fine for second focal plane scopes.
If you’re into precision shooting, especially in matches, and you don’t mind the cost: a first focal plane riflescope is great to have.
If you won’t be taking many shots where you need to “hold” for windage or elevation, a second focal plane scope is more than enough. Plus, it won’t necessarily break the bank.
There are other things you need to consider before buying an optic— like choosing the best quick detach scope mounts. At least when it comes to a SFP scope vs a FFP scope, you won’t be scratching your head anymore.
Since we’re on the topic of upgrades, my AR-15 A2 front sight removal guide is up. Go check it out!
Unveiling the truth behind dry firing a Gamo air rifle, this intriguing headline delves into the possibility of safely practicing without ammunition. Join us...
")
")
")
")
")