Home Blog Page 139

Ark Gigantopithecus (How to Tame, Drops, Food, Location…)

0

Ark Gigantopithecus

The Gigantopithecus Fibrartor is a territorial herbivore that appeared in the Pleistocene epoch.

It can be mistaken as another human due to it walking upright, it is usually seen roaming about foraging for berries to eat.

Territorial in nature, this beast will aggressively attack humans that invade its personal space.

It can give an advantage to its rider by crossing obstacles or by throwing them across and even up cliffs or walls.

Dossier

Dossier Summary

The Gigantopithecus while being observed is docile and just forages berries all day, but when approached, it is extremely territorial and will attack relentlessly those who invade its space.

While Gigantopithecus are adept at picking berries, they can also be taught by their masters to harvest fibers from bushes as it enjoys picking from plants and bushes over most activities.

One of the advantages of having a Gigantopithecus is its ability to toss survivors which can be used strategically to get to hard to reach places.

Check Out Our Other Creature Guides

  • Shinehorn
  • Yutyrannus
  • Megatherium
  • Mesopithecus

Abilities

Throw Rider

The Gigantopithecus can throw its rider or small dinos great distances or heights.

Throw Rider Default Controls:

  • RMB (for PC)
  • LT (for Xbox)
  • L2 (for PS4)

Throw Carried Dinos Default Controls:

  • Press Hold C (for PC)
  • Right Stick (for Xbox)
  • Right Stick (for PS4)

Uses

Resource Harvesting

Being adept at harvesting from bushes and plants, the Gigantopithecus can gather a good amount of berries and even fiber.

Defender

Being able to wear helmets, these creatures have a good amount of defense and their base damage is good enough to damage attacker as well as the knockback from their attacks can push away threats.

Damage Dealer

The Gigantopithecus can deal a lot of damage to enemies due to their fast attacks as well as their ability to catch up to enemies.

Transportation

As a multipurpose mount, the Gigantopithecus can carry a rider and act like an extension of the rider, to assist in swimming, running and even fending off even the largest dino’s.

How to Tame Gigantopithecus?

Gigantopithecus are passively tamed which means you need to carry a food item that it eats in your last inventory slot..

Approaching behind the Gigantopithecus is the best route to feed it because If sensed, the Gigantopithecus may attack and it will prolong the taming process or even end up with you getting killed.

Wearing the Ghillie Armor to mask your presence will give the opportunity to feed the Gigantopithecus safely which you need to repeat until the taming bar is filled.

Food

Kibble

  • Regular Kibble

Other Food

  • Vegetables
  • Mejo berries
  • Other Berries

Saddle

The Gigantopithecus does not need a saddle to be ridden and there are none to be crafted for it but it is possible for it to wear a helmet.

Breeding

Baby

After mating the female Gigantopithecus will gestate and birth a baby Gigantopithecus.

Drops

Resources Harvested From Gigantopithecus Body

  • Raw Meat
  • Hide

Variants

Aberrant Gigantopithecus

Aberrant Gigantopithecus can be found in the Aberration map.

Location

Gigantopithecus is usually found in the redwood forests in secluded areas where it can forage in peace.

Maps where there are Gigantopithecus:

  • The Island
  • The Center
  • Ragnarok
  • Valguero

Gigantopithecus Spawn Location:

The following are spawn maps where the Gigantopithecus can be found

The Island: https://ark.gamepedia.com/Spawn_Map_(The_Island)

The Center: https://ark.gamepedia.com/Spawn_Map_(The_Center)

Ragnarok: https://ark.gamepedia.com/Spawn_Map_(Ragnarok)

Aberrant Gigantopithecus Spawn Location: The Aberrant Gigantopithecus only spawns in the Aberration map.

Aberration: https://ark.gamepedia.com/Spawn_Map_(Aberration)

Overview

The Gigantopithecus is a peculiar mount capable of carrying a shoulder mount, a rider and the rider’s shoulder mount, it can chuck the rider and its shoulder mount high walls, assisting in infiltrating bases.

Giving the feeling of wearing a monkey suit when mounted on the Gigantopithecus, owners feel like they are a powerful creature, capable of pushing even larger creatures around.

You can also use the Gigantopithecus in a rousing game of pass the dodo with your tribe or allies to pass the time.

Can You Eat Walleye?

0

Hey there my fellow fishing enthusiasts and welcome to my post discussing an important question when it comes to fishing… can you eat Walleye? Now, the short answer is absolutely, if fact, it is one of the most popular and sought after fresh water species to consume…

So let’s check out the ins and outs of eating Walleye below…

So, before we start, let’s just quickly recap what we are talking about here. Walleye are a freshwater gamefish native to the United States and Canada. Also known as also called the yellow pike or yellow pickerel, they live predominately at the bottom of lakes and rivers and are known as one of the most prized freshwater table fish you can catch.

Walleye have a long, thin body that is primarily gold and olive in color with a white belly. They posses two dorsal fins on the top of their bodies with a large mouth and sharp teeth. Their name comes from their eyes which are cloudy-looking which is caused by a reflective layer of pigment.

They generally live for around 15 – 20 years depending on their habitat and can reach sizes of up to 80 cm (31 in) in length.

Note: Due to their popularity as a sport fish and for consumption, many States and jurisdictions have seasonal restrictions or slot limits in place. To avoid fines, always check local regulations before hitting the water.

In short, absolutely they are. In fact they are one of the most popular and sought after freshwater table fish in the U.S. Their flesh is clean, sweet and extremely versatile. However, as with most freshwater species (such as Largemouth Bass etc.), the following should be considered:

  • They will take on the flavour of their surroundings – so avoid eating if they are caught in murky, stagnant or dirty water.
  • The older varieties tend to taste a lot stronger or ‘fishier’ so if you are planning to keep one for dinner, it doesn’t necessarily have to be the biggest one you catch.
  • Larger varieties are also more susceptible to worms, parasites and increased absorbsion of waterway contaminants.

In most cases, as long as the water is clean and you are within your slot limit, then you are generally good to go.

As with most white meated fish, Walleye do not need to be bled upon capture however if you plan to consume it, then it is always a good idea to place them on ice as soon as possible after it is landed. Many use an ice slurry in a cooler which is generally a ratio of 2 parts ice to 1 part water for this purpose.

Due to their eating habits, freshwater fish must be thoroughly cleaned and rinsed prior to consumption. From here, preparation will be determined by how you plan to eat it. If they are to be eaten whole then you will need to clean and scale them beforehand. If you plan to pan fry, then you can either scale and fillet or fillet and skin. Keep the meat refrigerated or on ice at all times before and after preparation.

Can you freeze uncooked fillets?

Yes – Raw Walleye fillets can be frozen for 6 – 12 months. It must at the very least be gutted and cleaned and placed in an airtight bag (ziplock bags are good here – try to remove as much air as possible) prior to being placed in the freezer. They will last longer (up to the full 12 months) if vacuum sealed instead.

Can they be eaten raw?

Technically yes, if it is caught in clean water and prepared with the utmost care until eaten then it can be ok – although the taste does not match that of saltwater species such as Tuna, Salmon and Kingfish. The issue here however is that freshwater fish tends to contain more bacteria and parasites which are killed off by cooking.

To be honest, if sashimi is your meal of choice then I would look for a species such as Striped Bass or those listed above and leave the freshwater catches for the frypan.

At the end of the day, due to its white flesh and versatility, Walleye can be prepared in the same manner as most other fresh or saltwater species in that they can be:

Grilled

Walleye fillets can be cooked over charcoal or gas grills with any and all spices and seasonings as you see fit. Below is a common recipe:

  1. Heat a grill hot but not smoking.
  2. Pat fillets dry then spread butter or oil over the non-skinned side (or both if fillet is skinned) along with salt and pepper.
  3. Grill fillets until just cooked (fillets start to flake) – Do not overcook as the meat will go dry.
  4. Consume with salad or grilled vegetables.

You can of course use any other herbs or spices on the flesh to taste.

Pan Fried

As above, but in a pan – I like to add garlic to the butter when I pan fry white fish fillets with the salt and pepper as well. I have seen many Walleye recipes with Asian spices or Italian herbs used too so that is also worth a try. Of course, they can also be crumbed as well which entails:

  1. Gather three bowls and in the first, place some flour, eggs (beaten) in the second and breadcrumbs in the third.
  2. Pat dry each fillet (skin on or off to preference) and then cover in flour.
  3. Sink the flour covered fillets into the egg mixture and then cover in breadcrumbs
  4. Shallow fry in the oil of your choice in a pan large enough to hold the full size of the fillet.
  5. Spritz with lemon juice and consume with fries (chips), salad or whatever else takes your fancy.

Note: For extra flavour, add salt and pepper to the flour or even some grated Parmesan cheese to the breadcrumbs. I have even seen some good recipes using BBQ rubs on the fillets as well.

Baked

For this last option, the fish is cooked whole in the oven. A cooking example is as below:

  1. Make sure the fish is cleaned and scaled.
  2. Score the skin with a sharp knife (This will stop it shrinking too much from the heat).
  3. Cover the outside with a lubricant such as butter or oil.
  4. Fill the cavity with whatever takes your fancy (common options are garlic, herbs, spices, lemon, tomatoes or mustard).
  5. Bake in the oven until just cooked – again, it will dry out if left too long.

Note: Based on my research over a number of recipes, a 1.5lb Walleye will take around 15 – 30 minutes in a 375F oven.

And there you go – my response to the question of whether you can eat Walleye. I hope it has been helpful and as usual, please let me know of your experiences – or recipes – would love to see your recipes below too.

Also, please do not hesitate to comment below if you have any questions, concerns, corrections, or would like me to check anything else out for you.

Until next time

Have fun

Paul

100 Phenomenal Hunting Captions for Instagram (With Puns!)

0

If you’re an avid hunter, capturing intense moments and sharing them on Instagram is a point of pride. That’s why we’ve made a comprehensive list of 100 hunting captions for Instagram.

Whether you enjoy the thrill of the hunt or the peacefulness of being in nature, these hunting quotes for Instagram will perfectly capture your experiences. For those who love to sprinkle a dash of humor in their posts, don’t miss our compilation of hunting puns for Instagram at the end of the list.

So gear up and prepare to give your posts that extra edge!

Hunting Captions for Instagram

  • Hunting is the real adventure sport.
  • Buck wild!
  • Embracing the wild, one hunt at a time.
  • This is the dawn of the deer. Let the chase begin.
  • This deer stand is my quiet place.
  • Does this camo make my hunting look good?
  • Hunting isn’t a hobby. It’s a way of life.
  • Hunt with pride, conserve with love.
  • Aim for success in every shot.
  • A hunter’s heart knows no bounds.

You Might Also Like: Nature Captions for Instagram

  • I’d rather be hunting.
  • Catch me living my best life in the wild.
  • Silent in pursuit, loud in victory.
  • There’s a part of the hunted in every hunter.
  • Deer season is here, and I’m fawning over it.
  • Embracing the wild silence.
  • A moment of patience can result in a great trophy.
  • The joy of hunting is in the chase, not the kill.
  • Do I love hunting? You bet your buck!
  • The hunt is a true test of patience.

Next: Beautiful Scenery Captions for Instagram

  • Born to hunt, forced to work.
  • The thrill of the chase, the victory of the capture. That’s hunting.
  • The beauty of nature, the excitement of the hunt.
  • Silent woods, loud heartbeat – it’s hunting season.
  • Hearing the call of the wild.
  • Nature’s finest moments are found in the hunt.
  • Live wild, hunt free.
  • The trophy pride is the result of patience and precision.
  • The legacy continues, one hunt at a time.
  • I love the camaraderie in the wild.

You Might Also Like: Travel Captions for Instagram

  • I find peace in the wilderness.
  • Hunting buddies for life!
  • In the quiet whispers of nature, we hunt.
  • Animal tracks lead to life’s greatest adventures.
  • Conservation, not destruction. That’s ethical hunting.
  • Staying where the Wi-Fi is weak but the hunt is strong.
  • Hunting tales told by campfires and starlight.
  • The call of the wild is impossible to resist.
  • Proudly carrying on the hunting legacy.
  • Nature’s secrets, a hunter’s gain.

Next: Dirt Bike Captions for Instagram

  • Rifles, racks, and deer tracks.
  • Embarking on a journey into the heart of nature is what makes hunting a thrilling experience.
  • Hunting is a passion that never fades.
  • We hunt responsibly and honor the land.
  • Hunting is a love story between a man and the wild.
  • Feel the thrill and embrace the chill, time to hunt.
  • Hunting is the pursuit of life, not the pursuit of death.
  • Moms make every shot.
  • Never underestimate a hunter’s determination.
  • Today’s office is the hunting blind.

You Might Also Like: ATV Riding Captions for Instagram

  • As the sun rises, so does the hunter.
  • A successful hunting trip is measured by the memories made, not the trophies taken.
  • True hunters are not defined by their kills but by their respect for nature.
  • The wilderness is my happy place, and hunting is my therapy.
  • Every hunting trip is an opportunity to learn something new.
  • Hunting is in my blood.
  • Hunting connects us to the land and the animals.
  • Life is a hunting ground, and I’m the hunter.
  • I came, I saw, I conquered the hunt.
  • Nature doesn’t discriminate, and neither do I.
  • Nature’s mysteries unfold with every hunt.
  • A bad day in the woods beats a good day anywhere else.
  • Bringing home the (deer) bacon, one hunt at a time.
  • Chasing adventure in the great outdoors.
  • True hunters never quit.
  • The great outdoors, where the only limit is my own ambition.
  • Hunting is my therapy, and nature is my refuge.
  • Stealth, strategy, and success: the hunter’s trinity.
  • The pursuit of greatness begins in the wilderness.
  • In the heart of the wilderness, hunters find solace.

Hunting Quotes for Instagram

  • “If we act like prey, they’ll act like predators” – Alyxandra Harvey
  • Problem-solving is hunting. It is a savage pleasure and we are born to it.- Thomas Harris
  • You know, if you need 100 rounds to kill a deer, maybe hunting isn’t your sport.- Elayne Boosler
  • I’m an outdoors girl – I like to go fishing, riding four-wheelers, and hunting.- Miranda Lambert
  • You must not only aim right but draw the bow with all your might.” – Henry David Thoreau
  • “A hunt based only on trophies taken falls far short of what the ultimate goal should be.” – Fred Bear
  • “If you are not working to protect hunting, then you are working to destroy it.” – Fred Bear
  • “You can see the true heart of a man when you’re out in the woods with a weapon.” – Jase Robertson
  • “Don’t get much better than fall. Bring on the camo, ammo, ducks, and bucks.” – Earl Dibbles, Jr.
  • “Look deep into nature, and then you will understand everything better.” – Albert Einstein
  • “To track prey, you must first know it as you would a brother.” – Michelle Paver
  • “A duck call in the hands of the unskilled is one of conservation’s greatest assets.” – Nash Buckingham
  • “The No. 1 rule of duck hunting is to go where the ducks are.” – Jose Robertson
  • “Wildlife and its habitat cannot speak, so we must and we will.” – Theodore Roosevelt
  • I have always tempered my killing with respect for the game pursued. I see the animal not only as a target, but as a living creature with more freedom than I will ever have. – Fred Bear
  • Hunting is the perfect blend of adrenaline and tranquility.
  • Hunting season: a time to reconnect with nature.
  • Nature comes alive through the lens of a hunter.
  • Hunting: where you hide yourself to find yourself.
  • In the pursuit of the wild, we find ourselves.

Hunting Puns for Instagram

  • Time to hunt. No ‘bucking’ around.
  • The silent steps of a hunter reveal the true heartbeat of the wilderness.
  • There’s a primal joy in tracking the elusive and conquering the untamed.
  • In the woods, time slows down, and the hunter becomes attuned to the rhythms of nature.
  • In the wild, I feel alive, connected, and truly free.
  • The thrill of the chase is only rivaled by the beauty of the wild.
  • Into the wild, we go.
  • Hunting: a primal instinct unleashed.
  • Tree stand naps are the best part of hunting.
  • Some girls play house, but real girls go hunting.

6.5 Grendel vs. 6.5 Creedmoor: Which is Right For You?

0

When we talk about ammunition for the AR-15, the most likely mentions include .223 Remington, 5.56×45 NATO, and .300 Blackout. Why? Because they are the most popular and readily available rounds available for sporting rifles today. But they are not the only rounds available.

Have you heard of the debate between 6.5 Grendel vs. 6.5 Creedmoor? Firearms enthusiasts everywhere can argue for hours about the two rounds and their ideal uses, kinetic energy ratings, and price per round comparisons.

Did you know that in Europe, the 6.5 caliber is immensely popular? Both hunters and target shooters adopted the round over a century ago. Here in North America, we stuck to what we know. That is changing, though. Both of the 6.5 caliber rounds we discuss here are making waves.

The History Behind 6.5 Grendel Vs. 6.5 Creedmoor

6.5 Grendel (Left) 5.56 NATO (Right) 6.5 Grendel next to a standard 5.56mm round

Both the 6.5 Grendel and 6.5 Creedmoor were designed with unique goals in mind. Like most other AR-15 ammunition, though, 6.5 Grendel stems from a desire to replace the iconic .223 Remington, while 6.5 Creedmoor hails from the .308 Winchester round.

6.5 Grendel History

During the Vietnam War, the M-16 and 5.56x45mm NATO cartridge saw extensive military use. That use left a lot to be desired, though. Soldiers in the field reported inaccurate ammunition and regular weapon jams. A better platform and caliber were necessary. Enter the 6.5mm caliber.

Many companies sought to improve upon the .223 Remington and 5.56x45mm rounds. Thus Bill Alexander, the creator of the .50 Beowulf, set out to develop the 6.5 Grendel by modifying a 6.5mm PPC case and succeeded. The 6.5 Grendel is significantly more potent than the original .223 Remington while still running in an AR-15.

The 6.5mm Grendel was first publicly announced in 2003 at a Blackwater Training Facility in North Carolina where it displayed its ability to pack a bigger punch than the 5.56 NATO round – one could consider it as the round that basically became the US version of the 7.62×39.

6.5 Creedmoor History

6.5 Creedmoor (Top) .308 Winchester (Bottom)

On the other hand, 6.5 Creedmoor was developed largely because of the competitive shooting scene. Dave Emary and Dennis DeMille, of Hornady Manufacturing, worked on the cartridge in the early 2000s. Their goal was simple: create a round for high-power rifle competition shooting, specifically with a high ballistic coefficient, that was more shootable than a .308.

The initial design drew inspirations from the .260 Remington, a wildcat cartridge. Again, they saw success. The 6.5 Creedmoor was as accurate as the .308 Winchester but delivered less recoil, had less wind drift and a relatively flat trajectory. In fact, most people in the precision community now consider .308 to be a completely dead round for the sport, with no reason to choose it over the 6.5 Creedmoor.In terms of precision shooting rounds, the 6.5 Creedmoor became one of the most hotly discussed cartridges of the 21st century. Originally introduced in 2007, today, almost every barrel manufacturer in the U.S. has tooled up to accommodate for the hotly demanded barrel chambered in 6.5 CM.

6.5 Grendel vs. 6.5 Creedmoor: Cartridge Sizes

As 6.5 Creedmoor was based on the .308 cartridge, it’s naturally a larger round. The 6.5 Grendel features a rim diameter of .441”, while the 6.5 Creedmoor is .473”. The larger size means the Creedmoor round achieves a higher maximum average pressure, because it has a larger case capacity for more powder.

6.5 Grendel Specs

  • Bullet Diameter: .264”
  • Case Length: 1.52”
  • Maximum Overall Length: 2.26”
  • Rim Diameter: .441”
  • Case Capacity: 35gr H2O
  • Max Pressure: 52,0000 psi

6.5 Creedmoor Specs

  • Bullet Diameter: .264”
  • Case Length: 1.92”
  • Maximum Overall Length: 2.825”
  • Rim Diameter: .473”
  • Case Capacity: 52.5gr H2O
  • Max Pressure: 62,000 psi

6.5 Creedmoor vs 6.5 Grendel Ballistics

6.5 Grendel vs. 6.5 Creedmoor: Which is Right For You?

The sheer size difference between the two rounds means a significant gap in ballistics. That being said, both rounds were built with unique purposes in mind. One was meant to replace .223 Remington, while the other was meant to improve upon .308 Winchester—two distinct rounds with massive differences of their own.

6.5 Grendel Ballistics

  • Muzzle Velocity: 2,580 fps, 1,818 ft-lb.
  • Trajectory – 100 Yards: +2.2”, 1,581 ft-lb.
  • Trajectory – 200 Yards: 0”, 1,376 ft-lb.
  • Trajectory – 300 Yards: -9.2”, 1,189 ft-lb.
  • Trajectory – 400 Yards: -26.4”, 1,023 ft-lb.
  • Trajectory – 500 Yards: -52.8”, 876 ft-lb.

6.5 Creedmoor Ballistics

  • Muzzle Velocity: 2,925 fps, 2,280 ft-lb.
  • Trajectory – 100 Yards: +1.6”, 1,968 ft-lb.
  • Trajectory – 200 Yards: 0”, 1,693 ft-lb.
  • Trajectory – 300 Yards: -7.1”, 1,448 ft-lb.
  • Trajectory – 400 Yards: -20.6”, 1,232 ft-lb.
  • Trajectory – 500 Yards: -41.6”, 1,024 ft-lb.

6.5 Grendel vs 6.5 Creedmoor Applications

As you can see 6.5 Grendel and 6.5 Creedmoor are fantastic rounds that successfully improve upon their respective parent rounds. But like all other rounds, each one has its own optimal application.

Why Choose 6.5 Grendel

In terms of intended applications, the 6.5 Grendel is best if you only expect to be using it in a rifle meant for home defense or any kind of target shooting on a range. It is also a very viable caliber for hunting white tail deer and varmints. If you’re looking for a caliber that’s somewhere in between the 5.56mm NATO and 7.62mm NATO rounds, this is it.

Why Choose 6.5 Creedmoor

To be clear, both calibers are excellent for hunting small game such as feral hogs, whitetail deer, and fallow deer at short- to medium-range distances. However, if you wish to hunt larger game, bigger than a deer, then 6.5 Creedmoor is the better choice. In Europe, hunters will take down moose with 6.5 Swede, which is fairly close to the 6.5CM round. Even in competitive shooting, 6.5 Creedmoor is the clear winner when compared against the 6.5 Grendel for its superior bullet velocity and (less bullet drop) flatter flight path.

How to Read a Fish Finder (The Right Way)

0

Fish finders are the single greatest advantage you can use on the water. Understand how to use them to find bass activity and patterns and you’ll be catching more fish in no time.

How to Read a Fish Finder (The Right Way)

Sidescanning sonar has grown tremendously over the past few years, leading to a nearly endless supply of choices of fish finders.

With brands like Garmin, Lowrance, and Humminbird flush with money, the technology also continues to grow with the competition.

With that, confusion also comes along. When you are trying to figure out what the fish are doing while managing everything else on the boat, the last thing you want is a confusing fish finder.

That’s why understanding a fish finder is a game changer. If done correctly, it will lead to serious results. You will find yourself catching more, and the fish that you do catch will be much bigger.

No serious bass fisherman can expect to compete without one.

Further, they will help you grow as a fisherman since they will teach you about the lakes you are fishing. When you combine sonar with GPS, you can virtually map the bottom topography of any body of water. Developing that understanding will prove to be more valuable than anything else when it comes to catching fish.

Ready to learn more? Let’s dive in! 👇

Properly Reading and Understanding a Fish Finder ✅

You need to understand that your fish finder displays actual fish. Many people doubt their equipment, but fish finders don’t lie. Not only do fish finders display actual fish, but they display them so accurately that researchers are harnessing them to conduct research on bodies of water.

The challenge becomes telling things apart. More advanced fish finders will attempt to do this for you, but with the complexity of variables below the boat and lack of a powerful enough artificial intelligence in fish finders, this is usually inaccurate at best. Therefore, you need to develop your own eye for what fish look like on your fish finder.

If your fish finder displays arches, you know you at least have fish under your boat. Fish taper in mass from one end to another. As the boat passes over them, they return signals that begin weak and then grow strong before weakening again. This results in an arch on the screen. When you are scouting new areas to fish for largemouth bass, this can be a very good sign.

Understanding the size of the arch is essential to determining what the arch actually represents. Looking at the length and thickness of the arch will help you figure out what sort of fish you are looking at, or even if it is a fish at all.

The arch length and color are two crucial features that are instantly recognizable as some sort of fish in the water. From there, you will have to leverage your knowledge as a fisherman to discern what type of fish it is.

Color is also a factor if you have one of the more advanced fish finders. The darker the color, the more dense the thing returning the signal is. This will help you gauge the density of the fish arches. It will also help you determine if the arch is just a big wad of grass that is floating along or if it is an actual fish.

However, just finding arches is only a part of the equation. Having the requisite knowledge to pick out bass from other types of fish is critical. Bass, walleye, catfish, and shad all behave differently and pursue prey in wildly different manners. This results in different patterns being displayed on your fish finder.

For instance, when bass sits on the bottom of the lake, they tend to want their space. This results in dots that are typically congregated near a structure of some sort. However, catfish, carp, and other bottom feeders typically look for depressions. The reason is both are pursuing food in their way. Depressions gather trash, and the structure brings in baitfish.

A note on baitfish, you will often see baitfish in open water as a large cluster of little dots. These large bait balls are easy to identify, and if you see larger, darker arches next to them, you can bet that there are fish feeding on them. However, this does not mean that it is the only place to find baitfish. Often when viewing underwater structures, you will see tons of little dots all around it. This is more often bait fish that feed on the aquatic life growing on the structure.

This is why FISH-ID is viewed as less than accurate. If a fish is swimming along, far away from any sort of cover, then you will likely have a positive identification of a fish from FISH-ID. However, the slightest bit of debris can cause it to misidentify or simply not recognize the fish at all. This is where the operator’s interpretation of the data becomes critical.

Reading Depth and Temperature 💡

There are two primary factors you need to understand with any fish finder. These fundamental factors are depth and water temperature. A mobile vessel such as a high-performance fishing kayak will allow you to reach new fishing areas; seeing what’s under the water is crucial.

While there are a variety of different ways they’re shown, here’s everything you need to know.

Colors 🌈

What do colors mean on a fish finder? We have already touched on how color denotes density on a fish finder. Generally speaking, the denser something is, the brighter the color is. Understanding density will help you discern hardened structures that can be targeted with soft plastics from other, often muddier, elements that hold little to no fish.

Yet, many fish finders offer different color palettes to choose from. Since there is so much information being transmitted on a fish finder screen, you need to make sure that everything is optimized for efficient, fast reading. Choosing a color palette that will allow you to read it no matter if your sunglasses are on or off, the sun is out, or its not, or if you are sensitive to certain colors over others are all factors that should be considered when selecting a color palette.

You should also not be loyal to any one color palette. Many times, conditions will cause you to have to change your color palette. Exceptionally muddy water or soft bottom lakes will often demand you dial up the sensitivity to pick out the hardened structure from the debris. Certain color palettes will make this much easier to read.

Fish Size 📏

Everyone wants to use their fish finder for spotting trophy bass. Though it may seem impossible to the new user, many people know that sonar has been used by researchers for years to find fish and determine their size. This comes down to paying attention to detail and knowing the fish you are pursuing.

That being said, a fish finder is just that, a fish finder. It is a useful tool, but it can only tell you that there is something below the boat returning sonar waves at a rate that is consistent with a fish. It is up to you to make sense of those returns and take action.

Arches will show the size of the return on the screen. If your fish finder is equipped with FISH-ID, it will likely identify a very strong return with a fish icon. However, it will never tell you what type of fish it is simply because it is nearly impossible to know from an algorithmic standpoint. This is where knowing your target fish and their habits come into play.

Trophy bass don’t typically school or move around in open water. This is because it is mostly inefficient to support their mass. Those fish will want to stay close to a structure that is conducive to catching frequent, easy meals. Finding quality structure is key to finding trophy bass.

Another detail that you should always pay attention to is temperature. There is likely not a fish finder on the market that won’t tell you how hot or cold the water is. It is typically displayed proudly on the screen, no matter what setting you have it on. Water temperature is one of the most important numbers to fish as they set their feeding, spawning, and movement plans based solely on water temperature.

If you see a fish that is outside of a depth, water temperature, and away from the structure that would be common to largemouth bass, it probably isn’t one. Many other fish that get quite large behave totally differently from the ambush-loving largemouth. Always keep this in mind when you are trying to decide what kind of fish are showing up on your fish finder.

Bottom Structure 👇

Knowing how to determine bottom structure is one of the key things you should learn early on when getting used to using a fish finder. Knowing what type of structure you are likely to encounter is one of the many things that will suggest the exact variety of fishing line you will need to use, be that monofilament, braided, or fluorocarbon.

Vegetation and mud are the most confusing things to discern on a fish finder screen. This is because they lack density and clearly defined edges that are able to be seen in detail. However, sunken tree tops, logs, stumps, and rocks will have clear edges that are hard to return a bright color. Telling these from other structures is fairly straightforward.

The key thing to know is that you need to match your boat’s speed with the speed and angle the fish finder is set at. Going too fast with a high-frequency, narrow beam will likely produce a lot of noise and less detail than is usable. However, going slow with the fish finder set to a wide, low-frequency rate will make for clear images, but you will be missing out on the detail that the fish finder is capable of producing.

Reading Different Types of Underwater Structure 🎯

Fish finder technology is continually evolving. The military has a unique interest in developing sonar technology as it helps detect an enemy’s presence in the water. However, as DARPA and the Department of the Navy develop technology that supersedes something it already has, it will sometimes allow for older tech to be released to the public.

One such development was the release of CHIRP sonar in July of 1960. When the Navy allowed the civilian sector to see what CHIRP was capable of, a series of papers were published exploring how it could be used and improved.

Today, CHIRP sonar has changed the way marine biologists identify marine sediment. Biologists, geologists, and other interested parties regularly used high-end CHIRP sonars to explore waters that would otherwise be completely inaccessible. However, it wasn’t long before the word was out, and the recreational fish finder market began to explode.

For years, the common man’s fish finder could tell that there was something on the bottom, but it was very difficult to tell what it was. Modern fish finders have changed this dynamic drastically. Today we can tell what vegetation, muddy bottoms, depressions, points, and underwater structures with relative ease.

Vegetation 🌿

Vegetation is one the most confusing things to read on a fish finder, but one of the most important. This is especially true if you are fishing with bass jigs and need to be precise about where your lure is placed.

Baitfish and vegetation often look very similar since they are assembled similarly and have comparable densities. Therefore, their color and distribution can often result in confusion between the two.

Vegetation is most easily identified by where it is relative to the bottom. Typically, vegetation will always be attached to the bottom. Therefore, when you see a large distribution of dots that seems to ascend from the bottom of the lake, you can guess it is likely some sort of vegetation.

Muddy Bottoms 🐾

Muddy bottoms are also a crucial part of bottom terrain that is advantageous to identify when fishing. One of the most crucial things in any sort of fishing is to figure out what the fish are feeding on. Once you understand the common diet of largemouth bass, then you will know that a muddy bottom is not something you want to pursue.

Muddy bottoms are identified by the color the fish finder returns. Depending on your individual color palette, they could look slightly different from unit to unit. However, the main thing you need to pay attention to is the density of the bottom.

If your unit returns a color that indicates a dense bottom, you can bet there is gravel or rock down there. However, if weaker colors are returned, you know the bottom is muddy.

Depressions 🗺

Another key terrain feature you will want to look for is depression. Depressions are simply low points on the bottom of the lake that gather trash that the current pushes along. This can become a major point of interest for fish, depending on the type. Downed tree tops that collect in depressions will bring in the bass, but bottom feeders also will find them since that is where most of the biomass ends up.

Depressions are easy to locate on a fish finder. As you troll along, pay attention to the depth that the boat is at. When you see a sudden drop in depth, zoom out to get a bigger picture.

This will allow you to chart the size of the depression and make sure it is not a drop-off. As the depth comes back up, mark it and turn the boat around. Then go back over the depression and mark the other side.

Points 💡

Every bass fisherman knows and loves points. Points provide fish with multiple escape routes if danger comes, are often choke points for bait fish that can be food, and provide quick and easy access to all depths of water. If you aren’t fishing over underwater points, you are likely missing the fish of a lifetime every time you motor on by.

Yet how do you find a point on a fish finder? Luckily, it is incredibly easy. A point is a terrain feature that jets out into the water, making an arrowhead shape. The point can either be above or below water. Finding points of terrain features below water is where your fish finder really pays for itself.

Look for areas that have rapid changes in depth. There will be a generally shallower area that gives way to the depths. Somewhere in that shallower area, there is likely to be an arrowhead-shaped structure that sticks out.

Run your boat over it, bisecting the long axis of the point. If using a lighter boat such as a kayak, use a trolling motor optimized for kayaks to quietly navigate over the area, ensuring you’re not spooking any fish. Each time you notice a depth drop-off, mark it. After a few passes, you will have a good understanding of where the point is and how best to leverage the tools in your tackle box to fish it.

Hidden Fish and Beam Width

It is easy to find fish when they are just sitting on the bottom, in a depression, or swimming in open water. However, largemouth bass live in structures that really come in all shapes and sizes. This puts the fisherman in a conundrum. You want to fish that structure, but you also don’t want to waste a lot of time on a structure that hasn’t attracted any fish.

The answer to this is beam width. While fish will hide in stumps, trees, and other structures that can be detected by a wide beam angle, they can’t be picked out. You will need a higher frequency, more narrow beam to be able to detect the fish that are held up in the cover.

Think about the beams like a flashlight. You will use a flood light if you want to see a lot. It doesn’t show the detail of anything, but it will let you see enough to know where everything is. However, in trying to find hidden fish, you will need a high-intensity spotlight to see the differences between the structure and the fish.

You should troll, cruise, and scout using a low-frequency, wide-beam setting on your fish finder. Once you have located some structure, mark it and then turn around with a high frequency, narrow beam setting enabled. Go slower on the second pass, and you will be able to pick apart the fish from the structure with relative ease.

Reading Chirp Sonar

One thing to note about CHIRP sonar is that it is incredibly powerful. CHIRP is powerful enough to even read the grain size of sediment on the bottom of the ocean. This is very helpful in finding transition zones in the bottom sentiment. These transition zones often bring in a variety of different types of fish, including bass.

While CHIRP is nothing more than an enhanced way to read sonar returns, this means that there is nothing different that you have to learn or do, just that your fish finder will provide you with a more powerful readout than a non-CHIRP fish finder. However, always defer to the CHIRP-enabled fish finder since it will give you a clear picture of the bottom, which is helpful when a rainy day completely disrupts your surface presentations.

Conclusion

There is no magic bullet when fishing. Even if you get a top-of-the-line fish finder, you still have to know how to fish. In a two-day study of crappie fishermen, researchers found that using a state-of-the-art fish finder had no real impact on the angler’s ability to catch fish. This means that if you control the environment, a good fisherman catches more fish with a fish finder, but a bad fisherman still catches no fish.

The lesson to take away is that a fish finder is just a tool that helps you be more efficient and effective when fishing. It will not be the answer to all your fishing challenges, but if you know how to properly employ it, it can be a great asset.

Understanding a Fish Finder: FAQs

What do bass look like on side imaging?

Bass generally appear as a dot on side imaging. Due to their behavior and preferences for being somewhat distant from other fish, it is often easy to find them sitting on the bottom or around cover. This method of identifying fish can be very effective. Side scan imaging is used widely to determine fish species on artificial reefs.

What’s the best frequency for a fish finder?

The best frequency for a fish finder is around 125 kHz. Fish finders generally range from 50 to 200 kHz. The lower end of the spectrum is better for wide-angle searches, but the higher end is good for high-fidelity imaging of certain areas or targets. Using a fish finder that straddles those two extremes gives you the most versatile tool available on the market today.

Can you see a lure on side imaging?

You can most definitely see a lure when you are using live sonar, but side imaging does not have the high level of fidelity required to give that level of detail fast enough to show your lure. While they are much more expensive, live sonar can be a highly beneficial upgrade to catch fish when they would otherwise be inaccessible.

How do you spot fish on sonar?

You spot fish on sonar by looking for arches or lines on the screen that are above the bottom of the lake. Depending on your setting, speed, and location of your transducer, fish detection can look much different from setup to setup. However, generally, a moving boat will show fish as arches, and a boat that is still will show them as lines.

Do you have to be moving for a fish finder to work?

You do not have to be moving for a fish finder to work. However, it is vital that you have your fish finder settings adjusted to properly compensate for the movement of your boat. If you anticipate moving at a fairly brisk pace, you want to set your fish finder up so that it also scans more frequently. However, if you have your transducer mounted to a trolling motor and don’t anticipate moving very quickly, then you will want to slow the scroll rate down to match the speed of your boat.

What do fish look like on a fish finder?

Fish look like arches on fish finders, generally speaking. However, depending on the setup and speed of the boat, fish can have a slight variance in how they look. As the boat moves over the fish, the fish is hit multiple times by sonar waves. Since they generally taper in size since the tips of tails and noses don’t have as much mass as the middle of a fish’s body, the first returns show a smaller creature. The returns increase the size of the creature it is encountering as it works its way to the middle point of the fish. After this, the returns show the fish decreasing in size. The graphic result of this is an arch.

European foxes

0

Standard Operating Procedure – FOX006

DOWNLOAD AS PRINTABLE PDF

Background

The introduced European red fox (Vulpes vulpes) has a significant impact on native fauna and agricultural production. Fox control methods include lethal baiting, trapping, shooting, den fumigation, den destruction and exclusion fencing.

Trapping may be useful for the control of nuisance animals but is not effective as a general fox control method.

Cage traps are used to capture problem foxes in urban/residential areas and other areas where it is unacceptable or undesirable to use 1080 or leg-hold traps. Animals trapped in a cage can be transported away from the area for euthanasia. Padded-jaw, leg-hold traps can only be used at sites where the animal can be killed by shooting while still held in the trap. (Refer to Trapping of foxes using padded-jaw traps.)

From an animal welfare perspective, cage traps are preferred over leg-hold traps as fewer injuries are sustained and non-target animals can be released unharmed.

This standard operating procedure (SOP) is a guide only; it does not replace or override the legislation that applies in the relevant state or territory jurisdiction. The SOP should only be used subject to the applicable legal requirements (including OH&S) operating in the relevant jurisdiction.

Application

  • Trapping is time-consuming and labour intensive and is therefore an inefficient method for large-scale fox control in Australia.
  • Cage traps are generally not effective in rural environments where foxes are more suspicious of man-made structures.
  • Traps have the potential to cause significant suffering and distress so should only be used when there is no suitable alternative.
  • Humane and successful trapping requires extensive training and experience.
  • Selection of appropriate traps and trap sites will maximise chance of capture and minimise the distress caused to target and non-target animals.
  • Every effort must be made to avoid target and non-target deaths from factors such as exposure, shock, capture myopathy and predation.
  • Once trapped, foxes are either euthanased by shooting at the site of capture or taken to an appropriate site away from residential areas to be shot whilst still in the cage or after transfer to a bag.
  • Traps must be used in accordance with relevant state and territory legislation (see Appendix 1). In some states for example, Western Australia, a permit may be required to trap within certain municipalities.
  • Shooting of foxes should only be performed by skilled operators who have the necessary experience with firearms and who hold the appropriate licences and accreditation. Storage and transportation of firearms and ammunition must comply with relevant legislation requirements.

Animal welfare considerations

Impact on target animals

  • Foxes are likely to suffer distress from being confined in a cage trap and they can sometimes be injured while trying to escape, although the potential for injury is less than that for leg-hold traps.
  • Cage traps can cause extensive injuries to the teeth and mouth of trapped foxes; this is minimised by using a small mesh size (50 mm is recommended).
  • Traps must be inspected daily to prevent suffering and possible death from exposure, thirst, starvation and/or shock.
  • It is preferable to set up traps at sites where vegetation can provide shade and shelter.
  • Shade cloth or hessian can be for used for protection during extremes of weather. In hot weather, water should be provided and in cold weather bedding should be available inside the cage. Where possible, trapping should be avoided when adverse weather conditions threaten the welfare of trapped animals.
  • Captured animals must be approached carefully and quietly to reduce panic, further stress and risk of injury.
  • Trapped foxes must be euthanased as quickly and humanely as possible.
  • If transporting a trapped fox away from the capture site to be euthanased, the cage should be covered with hessian or a blanket to provide shelter from direct sunlight, wind and rain and to minimise stress from visual threats.
  • To minimise the animal welfare implications of orphaning dependant cubs, it is preferable not to undertake trapping when vixens are lactating (i.e. August/September).
  • If lactating vixens are shot, reasonable efforts should be made to find dependent cubs and kill them quickly and humanely by either shooting (with a single shot to the brain) or by fumigation of the den with carbon monoxide (refer to Fumigation of fox dens with carbon monoxide).

Impact on non-target animals

  • Traps must not be set near areas that are regularly frequented by non-target species.
  • Traps are not target specific; therefore other species such as birds and reptiles may be caught.
  • Non-target animals caught in traps must be examined for injuries and signs of illness or distress and dealt with as follows: – Animals which are unharmed or have only received minimal injuries such as minor cuts or abrasions should be immediately released at the site of capture. – Animals which have more severe injuries or which are suffering from thermal stress should receive appropriate attention. An animal suffering from thermal stress can initially be placed in a suitable quiet holding area which provides warmth or shade to allow recovery before release. Animals with treatable injuries that cannot be immediately released or those failing to recover from thermal stress should be presented to a veterinarian or a registered wildlife carer for treatment. – Animals that have injuries which are untreatable or which would compromise their survival in the wild should be euthanased using a technique that is suitable for the species. For more information on euthanasia techniques (refer to GEN001 Methods of Euthanasia).
  • If a dog or a cat is caught in the trap, it should be taken to the nearest council pound for assessment. In some states this is a legal requirement. Traps placed in urban/residential areas have a reasonable likelihood of catching owned dogs or cats.

Health and safety considerations

  • Trapped foxes are dangerous to handle and can inflict serious bites. If these foxes are killed while still in the cage, there should be no need to handle them directly. However, if handling is necessary, leather gloves and a catching pole should be used. Operators must be protected by tetanus immunisation in case of bite infection.
  • Firearms are hazardous. All people should stand well behind the shooter when a fox is being shot. The line of fire must be chosen to prevent accidents or injury from stray bullets or ricochets.
  • Care must be taken when handling fox carcasses as they may carry diseases such as hydatidosis and sarcoptic mange that can affect humans and other animals. A fox with obvious mange should only be handled while wearing gloves. Routinely wash hands after handling all fox carcasses.

Equipment required

Traps

  • Wire mesh cage traps are used. These can be obtained from commercial suppliers and are available in a variety of sizes (eg a fox size cage is 90 cm x 45 cm x 45 cm, and made of 2.5 mm welded wire with a mesh size of 50 mm). The traps have a spring door that is activated either by a treadle plate or a hook mechanism.

Lures

  • Olfactory stimuli such as fox faeces or urine (or a mixture of both) or a commercially prepared lure (e.g. synthetic fermented egg) may be used to lure foxes into the trap.
  • The attractiveness of lures will vary with season and location.

Meat baits

  • A handful of meat bait is placed inside the cage trap. Rabbit, lamb, chicken, and kangaroo have all been used as bait.
  • Attractiveness and palatability of the bait will vary with season and location.

Firearms and ammunition

  • Firearms no smaller than a .17 calibre rimfire with hollow/soft point ammunition are recommended for euthanasia.
  • The accuracy and precision of firearms should be tested against inanimate targets prior to the commencement of any shooting operation.

Procedures

Selection of trap sites

  • Traps should be set along fences, tracks and trails or areas frequented by foxes for example, scent pads, scratch points, holes in fences, around carcases.
  • The location of all trap sites must be accurately recorded. This information should be readily available to others in case the trapper is unable to return to check traps.
  • Do not place in areas where the traps may be interfered with/damaged by large stock or humans.

Placing and setting the trap

  • It is preferable to set traps at the end of each day and check early each morning. If traps are left set during the day, they should be checked again in late afternoon.
  • Before setting each trap ensure that it is functioning properly.
  • Where possible place the traps parallel to objects such as fences, logs or sheds with the rear of the cage against an obstruction to prevent foxes taking the main bait without going into the trap.
  • Cage traps should be set squarely on the ground and the doors of the trap bent upward to increase the openness of the trap space.
  • Place the meat bait at the rear of the trap, attached to the hook mechanism if present. A second piece of meat is placed at the mouth of the trap.
  • Cover the floor of the trap with 3-5cm of soil.
  • If using lures place them in suitable positions inside and outside the trap.
  • The trap should be pegged to the ground to prevent the animal from tipping it over and injuring itself and/or releasing the trap door.

Shooting of foxes

  • Trapped live foxes should be destroyed by shooting whilst still inside the cage trap.
  • Unnecessary people should keep away from the area to allow the fox to become less agitated. The shooter should approach the animal in a calm and quiet manner.
  • To maximise the impact of the shot and to minimise the risk of misdirection the range should be as short as possible, that is, 3-5 cm from the head.
  • Never fire when the fox is moving its head, be patient and wait until the fox is motionless before shooting. Accuracy is important to achieve a humane death. One shot to the head should ensure instantaneous loss of consciousness and rapid death without resumption of consciousness.
  • Shots must be aimed to destroy the major centres at the back of the brain near the spinal cord. This can be achieved by one of the following methods (see Diagram 1):

Frontal position (front view)

The firearm is aimed at a point midway between the level of the eyes and the base of the ears, but slightly off to one side so as to miss the bony ridge that runs down the middle of the skull. The aim should be slightly across the centreline of the skull and towards the spine.

Temporal position (side view)

The firearm is aimed horizontally at the side of the head at a point midway between the eye and the base of the ear.

  • Death of shot animals should always be confirmed by observing the following: – absence of rhythmic, respiratory movements – absence of eye protection reflex (corneal reflex) or ‘blink’ – a fixed, glazed expression in the eyes – loss of colour in mucous membranes (become mottled and pale without refill after pressure is applied). If death cannot be verified, a second shot to the head should be taken immediately.

References

  • Baker PJ, Harris S, Robertson CPJ, Saunders G and White PCL (2001). Differences in the capture rate of cage-trapped red foxes Vulpes vulpes and an evaluation of rabies control measures in Britain. Journal of Applied Ecology 38:823-835.
  • Canadian Council on Animal Care (2003). Guidelines on the care and use of wildlife. CCAC, Ottawa, Canada. Kay B, Gifford E, Perry P and van de Ven R (2000). Trapping efficiency for foxes (Vulpes vulpes) in central New South Wales: age and sex biases and the effects of reduced fox abundance. Wildlife Research 27:547-552.
  • Longair JA, Finley GG, Laniel MA, MacKay C, Mould K, Olfert ED, Roswell H and Preston A (1991). Guidelines for euthanasia of domestic animals by firearms. Canadian Veterinary Journal 32:724-726.
  • Saunders G, Coman B, Kinnear J and Braysher M (1995). Managing vertebrate pests: foxes. Australian Government Publishing Service, Canberra.
  • UFAW (1988). Humane killing of animals (4th Ed). Universities Federation for Animal Welfare, Potters Bar, England.

The Centre for Invasive Species Solutions manages these documents on behalf of the Environment and Invasives Committee (EIC). The authors of these documents have taken care to validate the accuracy of the information at the time of writing. This information has been prepared with care but it is provided “as is”, without warranty of any kind, to the extent permitted by law.

How to Hunt Rabbits Without Dogs

0

Some years back, I was invited to hunt rabbits with a group of dedicated houndsmen who loved to run (and shoot) rabbits with their beagles. The day had been a relative success with our group scoring on about 18 rabbits for the day. For my personal efforts, I had managed to pull the trigger on a small number of the critters, missing a couple and accounting for a few in the final bag. The hunt had reminded me how enjoyable a small-game hunt can be—no stressed strategizing to score on the biggest racked trophy around or overly tactical effort like calling a longbeard to the gun—just trying to nab game as it appeared for the sake of shooting and adding to the bag limit. The whole experience left me wanting more.

The problem was, I didn’t have a pack of beagles. But I knew some places where I had frequently seen rabbits, both on my farm and my brother’s, so I decided to set off for some brush with a shotgun stoked with No. 6s draped across the crook of my arm. The results were surprising. While I didn’t bag as many rabbits on that first solo effort due to some tricky shooting, I scared up a lot more than I had expected. The effort opened up a new world of hunting to me. With rabbit season where I live running well into February, long after most other seasons have closed, it’s a great opportunity to grab another day or two of time outdoors and, with a little effort, enjoy a bit of exercise that typically results in more meat for stews or to accompany a side dish of risotto.

Whether you’re hunting solo or with a buddy or two, hunting rabbits without hounds is a relatively simple affair with good odds for success. Rabbits are abundant anywhere wild cover is available, meaning you are almost certain to find game. Here’s how to score on your own rabbit adventures.

Find ‘Em FirstRabbits don’t travel far between cover and food so one of the best places to find them is in thick, brushy areas right next to where they like to eat—open grassy areas with clovers and broadleaf weeds, or crop fields that have been planted in soybeans, peanuts, wheat, alfalfa and the like. Brushy patches of blackberries, honeysuckle, blueberry and other viney, tangled brush provide great cover for animals where they can feed without fear of being nabbed by avian predators. Brushy ditches and fencerows through fields, as well as brush piles and windrows, also provide excellent havens.

In the deep winter chill, brushy areas on south-facing slopes (or in flat-land the side of cover facing the sun) can be more productive, as rabbits will slip to the edge of their hideout and sun themselves for warmth.

In many areas where deer hunters have worked to establish lush, green plots to attract whitetails, you’ll find the overgrown edges bordering these deer magnets will also harbor a nice population of bunnies. The brushier the borders around these open areas, the better. Rabbits will also grow thick in overgrown clearcuts that have repopulated with small saplings that provide abundant twigs and bark for rabbits to chew on.

Gearing UpIt doesn’t take much to pull off a rabbit hunt, but a few key items will certainly make it more successful and comfortable for you. Some guys are content to sit at field edges at dawn or dusk, looking to snipe a few targets as they appear to feed, and for that, a precision-scoped .22 is ideal. This is a fine way to hunt them that will definitely produce, but after a season of sitting in a stand for whitetails, I personally don’t want to sit and wait for rabbits. I want to go after them and kick them up, which means using the scattergun. A 12-gauge remains the most versatile game gun for any sportsman, and without a doubt, serves the rabbit hunter ably, but I prefer a lighter, more compact 20-gauge for tromping brush and swinging in cover. The smaller, well-pointed charge, loaded with No. 6 shot is more than ample for rabbits.

Because you will likely be traipsing through thick, briar-laced cover to kick these creatures into the open, your legs will take some abuse. For this, a good pair of vinyl-faced brush pants or heavy chaps are a must, along with light, but durable boots with leather or Cordura uppers for walking. I like an old-style canvas upland game jacket too, with a lined nylon game pouch built into the rear for toting a brace as you collect the small treasures. A small backpack can also do the trick for keeping your hands free for more shooting.

When hunting with others, safety orange vests and/or hats are a really good idea, too, since hunters are generally obscured by the thick cover in which rabbits are found, yet are in close proximity to each other while hunting them.

Walk ‘Em UpMy favorite and most productive hunts are in spots where the brush is no more than waist-high and surrounded by relatively open ground that a bolting rabbit has to cross for an exposed shot. With your shotgun at the ready, simply plunge in and slowly walk a zigzag pattern—keeping your eyes alert for flashes of brown—and listen for scurrying ahead of you. Pause frequently, creating an almost herky-jerky approach that will leave rabbits guessing which way you are about to go and making them nervous. A nervous rabbit is one ready to move. I like to walk slowly for about 10 to 15 paces and then pause 20 to 30 seconds before moving on. This seems to work well. When working overgrown cutovers, look for areas that are no more than two to three years old. More than that, and they will be so grown up that while they’ll harbor plenty of rabbits, seeing and shooting them may be next to impossible.

A hunter can walk plenty of rabbit-rich brush, but if it is so thick he can’t see more than a few feet in front of him, then it will be a lot of wasted effort. Like the smaller patches of brush and tangles of honeysuckle and briars I prefer to hit, other good spots that offer the perfect blend between hideout and visibility include fencerows and ditches in fields as well as brush piles pushed up at the edge of open woods. Whether hunting rabbits or other species, I try to note these high-production spots throughout the season and return to them time and again when hunting for rabbits.

If hunting with partners, take turns with one guy working brush in this manner, while the others post slightly ahead, repositioning quietly and frequently as you progress. When hunting in pairs, hunters can also flank each other, standing 15 to 20 yards apart depending on the amount of brush they’re working, and alternate walking ahead of each other and pausing.

Hunting rabbits is really no more difficult than that—its simplicity in approach and execution, a big part of what makes it so much fun.

Wall Tent Shop Wilderness Tent Review

0

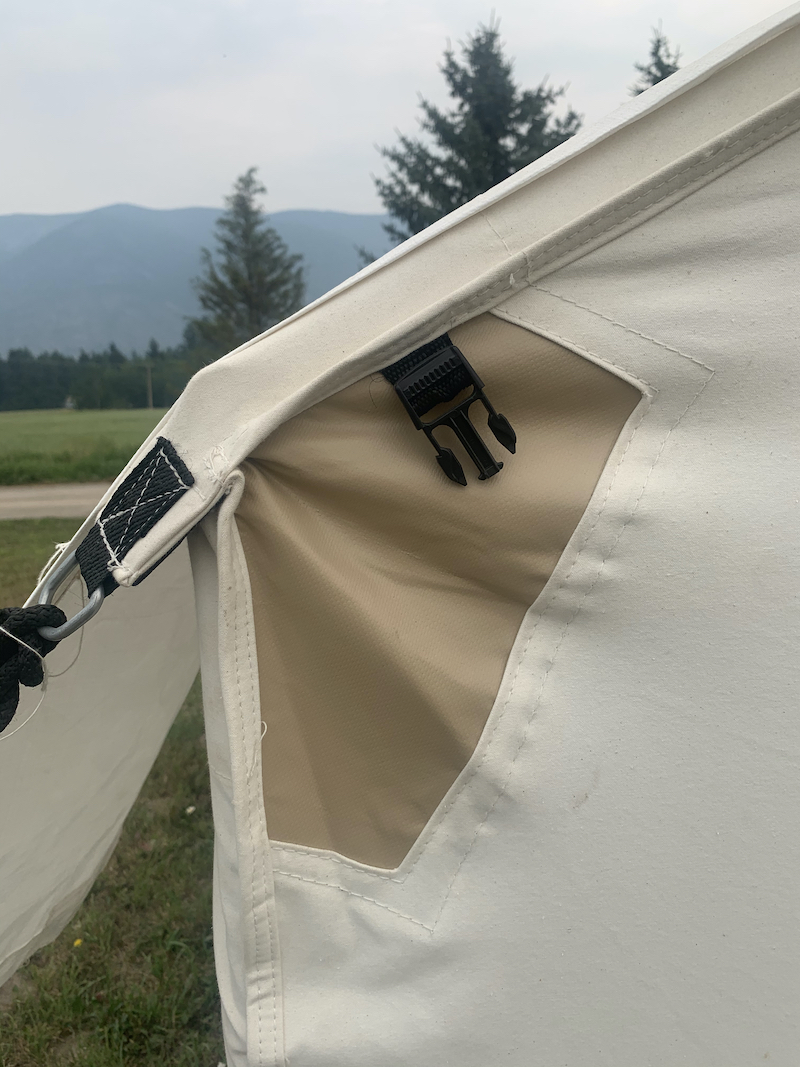
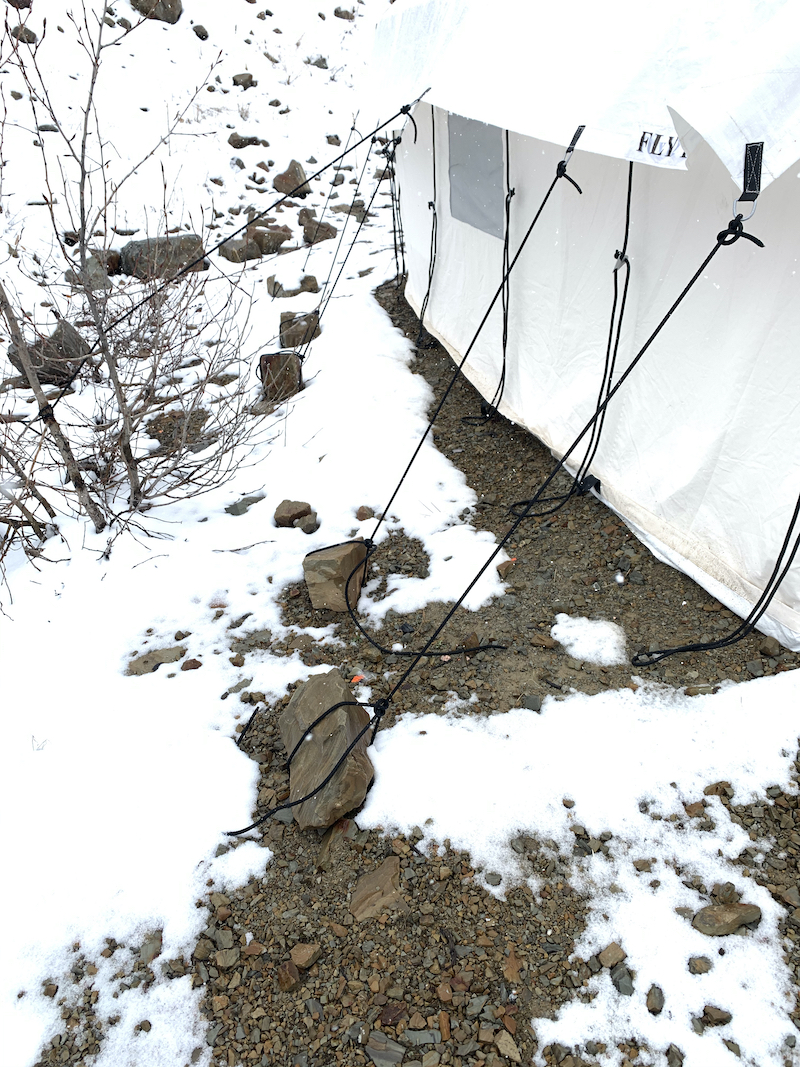
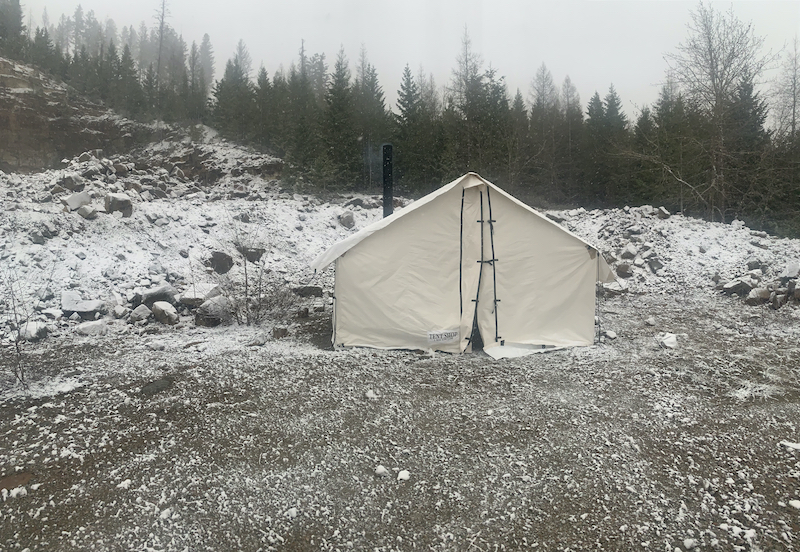
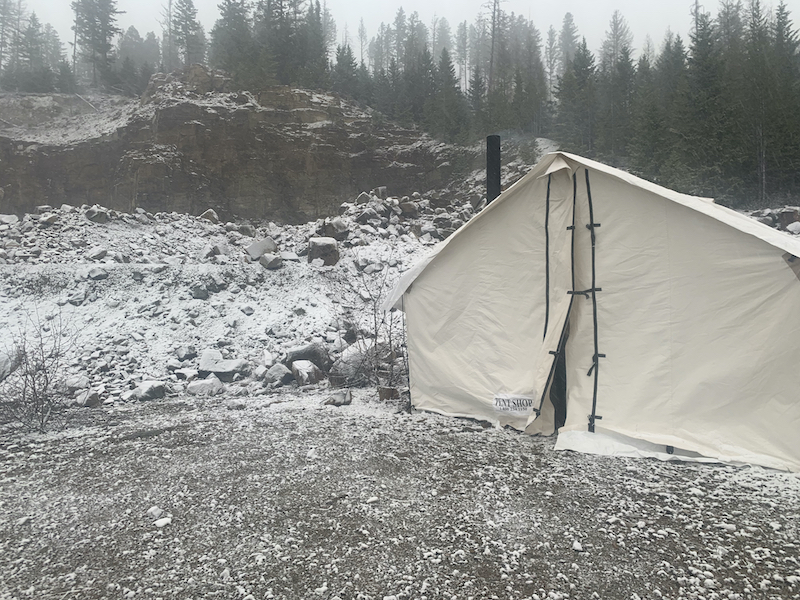
This past spring, we used the Wall Tent Shop’s 12’x14’ Wilderness Tent on a turkey hunt. When I hear the word “tent”, my mind naturally thinks lightweight, small dwelling that provides the minimum shelter essential for survival. A wall tent is a completely different story. It is literally a portable cabin. My family, friends, and I were impressed with how easy it was to set up and the ridiculous amount of room for living, sleeping, and storage. It was easily heated with a simple propane burner.

We also set it up for a spring bear hunt. We got smashed by unforeseen snow and spent an entire day riding out the storm. It was fantastic. We had no cell service. No internet. No agenda. I stoked the fire, slept, and stared at the stove for hours. We were warm and dry and comfortable. It was amazing how great it felt to unplug and disengage for the day.

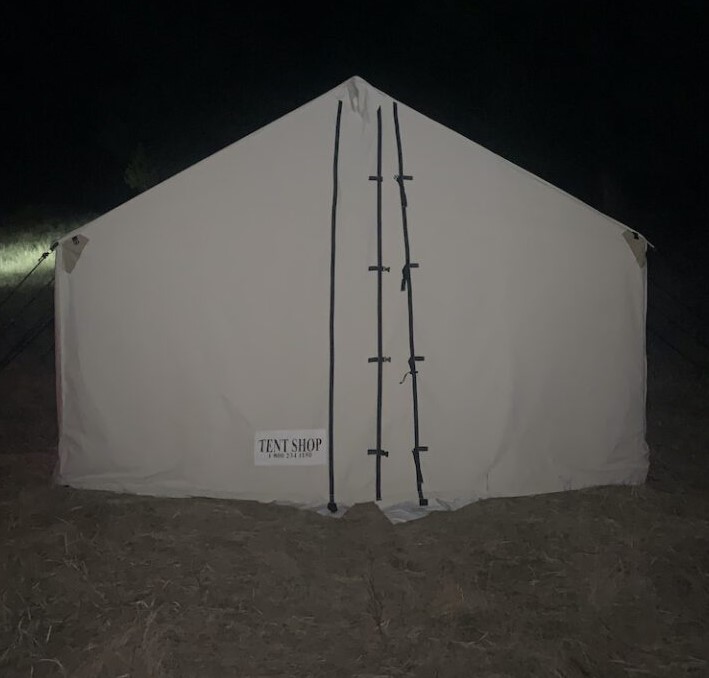
The tent is currently set up in the backyard as a semi-permanent “yard cabin” where my boys can hang out and sleep out whenever they want. It also comes in handy when they have friends come over and want to add a little adventure into the mix.

This fall, we’ll be taking it to elk camp. I have an elk spot that I can barely drive to. Getting a camper back there is impossible. This year, instead of getting up extra early and riding the ruts to the trailhead, we’ll take The Wilderness Wall Tent. That means less wear and tear on the Silverado and easier access to the comforts of camp.

First Impressions

You can’t help but notice the Wall Tent Shop’s emphasis on quality and durability. They have extensively thought through their product. Every option is built for a specific reason. All their wall tents are built with “Army Duck-Double Fill Canvas”. I’m a simple man. All I really care about is strength, durability, and high-quality performance. But if you want the canvas details, here’s a link.

The upper corners of the walls and the roof ridge line (high-wear areas) are reinforced with an extra layer of canvas. This increases the overall life of the tent and protects the ridge from holes and tears especially when using a lodgepole frame.

Some wall tents use grommets for tying guy wires, but a grommet cuts the canvas fibers creating potential weak points. Instead, the Wall Tent Shop sews webbing into the canvas with an attached D-ring as shown below.

Wall Tent Stoves

We’ve used propane burners in the past and they worked great. I have a double burner ready for this fall but for extended camp trips and colder weather, I want a wood stove. The Wall Tent Shop sells a variety of wood stoves available here. Their flat cooking tops would be a game changer. I’m a little jealous. Since my daughter can weld and my dad had a 35 gallon barrel, we decided to build our own. It was cheap and easy to build and it works. If you’re handy or on a budget, give it a try. I found the kit and all the necessary materials at our local hardware store.

Included Features

In addition to what has already been mentioned, each Wilderness Tent has a storm flap on the front and back of the main entrance protecting the YKK zippers from snow, ice, sand, etc. The flap has YKK buckles on both sides which gives you the ability to securely close the front door if the zipper were to become damaged or frozen.

A vinyl sod cloth is attached to the bottom of the walls. The sod cloth tucks inside the tent and creates both an air seal and a moisture barrier. This discourages the canvas walls from wicking ground moisture, and greatly increases the heating efficiency of a stove. You’ll burn less wood.

The stove jack comes standard. A canvas flap covers the chimney hole and can be held shut with Velcro or tied open. The stove jack includes a cut pattern to accommodate larger stove pipe sizes.

Wilderness Tents also come with the option of either a back window or a back door.

Additional Features (Take a Deep breath)

The extras are overwhelming and seemingly limitless. I get lost in the options. You can add doors and windows. You can have a kitchen cupboard, bow rack, gun rack, coat rack, fire mat, aluminum shelves, and a floor. Even add a porch for extra storage or outdoor cooking. They sell “T-angles” for adding a middle leg to the center of the tent if you’re expecting heavy snow loads … and the endless list goes on and on.

Each user will need to think through what options fit his individual needs. There are, however, two options that are essential in my opinion.

You Must Have A Rain Fly

Canvas tents are heavy. Once rain-soaked, they’re nearly impossible to load by yourself. Sewing the extra canvas to reinforce the ridges results in tiny pinholes that could leak. The tarp also helps keep the tent clean from pitch/sap, bird crap, pollen, and whatever else might fall from the sky. Thinking about the sticky-resin-buds that fall from cottonwood trees gives me nightmares. A spark hole in your tarp can easily be taped but a burn hole in the canvas would have to be sewn. In the long run, the UV light from the sun is your worst enemy. Just buy the rain fly!

The benefits of purchasing the Rain Fly far outweigh the costs
Screens

If you think that you might use your wall tent in the summer or early fall, then you’ll need airflow and bug protection. My tent has screen windows on three sides. The windows are 30” x 30” with zippers on the sides and Velcro along the top. The screen door is full-sized. D-rings in the corners secure the screen door out of the way when not in use. Airflow without mosquitos is a big deal.

Final Thoughts

There is a nostalgia that comes from hunting out of a wall tent and I like that feeling. It reminds me of my childhood. It reminds me of my roots and I remember where I came from. Those memories help me focus on the things that matter the most. Unfortunatley, memories don’t punch tags and fill freezers. The Wall Tent Shop reminded me that I can bring camper-level-comfort into the back country. The ability to get warm, dry off and rest in comfort makes the hunting trips last longer and sometimes a few more days is all it takes. If that peaks your interest, then I’d encourage you to look into a wall tent.

There are a lot of tips and tricks that come from experience. Too many to include in a review. Join me and others on the Rokslide forum and let’s discuss what we’ve learned. I’ll share more photos after the elk season. Hopefully, we’ll have an elk head leaning against the wall!

Comment on this review or ask Howard questions here.

Also check out Jared’s review.

This High-Fence Bull Elk Could Break an SCI World Record. It Scores More Than 648 Inches

0

A freakishly huge bull elk that was killed on a high-fence ranch in southeastern Idaho could potentially set a new world record in Safari Club International’s Record Book. Brian Dhooghe harvested the bull from Broadmouth Canyon Ranch, and he brought the meat from the animal into Bay City Sausage in Aberdeen, Washington, to be processed last week.

The local game processor shared photos of the massive bull’s rack on Facebook, where they’ve generated upwards of a thousand comments. The majority of those comments are negative, as many took the opportunity to criticize the idea of shooting elk on a game preserve.

Outdoor Life, the Boone & Crockett Club, Pope & Young Club, National Deer Association, and other hunting organizations do not believe that taking animals behind a high fence qualifies as traditional fair chase. But still, high-fence hunts are a multi-million dollar business in the U.S., and simply turning a blind eye, or leaving negative comments on a Facebook post, won’t change that. So, it’s worth taking a closer look at these types of hunts—or shoots—and some of the animals they produce.

Some commenters on the Facebook post questioned if the animal was even real, and a few claimed the pictures were Photoshopped. But according to Kyle Strode, who works at Bay City Sausage and saw the rack in person, it’s real, alright.

“Yeah, it was pretty wild. I took a picture of the rack,” Strode tells Outdoor Life, adding that he knew Dhooghe from processing some of his other animals over the years. “Brian has been bringing stuff in forever. So, yeah. It’s a legit animal.”

Outdoor Life was also able to catch up with Dhooghe, who shared the story behind the giant bull.

“What the hell is that thing?”

Brian Dhooghe never claimed his bull was wild or that he killed it “way out in the boon-toolies.” He says he didn’t travel to Idaho just to shoot a record-sized bull that he could brag about. His trip to Broadmouth Canyon Ranch was a 50th birthday present from his wife. The trip was initially booked in 2020, and after a two-year pandemic delay, Dhooghe went out to the ranch last Monday.

He says he had originally paid to shoot a 500-inch bull (for context, the Boone & Crockett Club world-record nontypical elk, known as the famous Spider Bull, scored 478 5/8 inches), but then the head guide made him a deal he couldn’t pass up. The guide mentioned a record-class bull they had walking around the 10,000-acre ranch. He told Dhooghe if they could find it, he could shoot that elk in addition to a mid-500’s bull, and he threw out a price that Dhooghe was willing to pay.

In most high-fence operations, the client chooses which species and size of animal they would like to shoot and then is charged accordingly. For example, Bull Basin, a high-fence operation in Colorado charges $15,900 for a 381- to 399-class bull. Most of these operations guarantee success.

“They had told us this potential record was walking around, but I wanted a nice, big, sexy-looking bull to mount on the wall. And this thing is definitely not that,” Dhooghe says. “He’s ugly. I mean he’s awesome, but kind of freaky lookin’. It looks like something prehistoric, like, what the hell is that thing?”

dhooghe bull 2
Brian Dhooghe’s bull was given a green score of 648 and 4/8. Brian Dhooghe

Dhooghe shot his first bull (which scored 571 inches) during one of his first mornings on the ranch. The next day, he joined a group of four other folks for an afternoon elk drive, where the shooters lined up at the end of a patch of timber and the guides walked through the trees pushing the animals out. The others were looking for 300- to 400-class bulls, so when they saw the record-sized bull step out, there was no question as to who would take the shot.

“We’re all sitting there when up comes this thing,” Dhooghe says. “We saw him close to 400 yards, so I put him in my scope and the damn thing didn’t even fit in there!”

Dhooghe shouldered his .300 Weatherby and waited for the bull to reach 150 yards. With the bull quartering to him, he aimed in front of its shoulder and fired. The hand-loaded, 180-grain Nolser Accubond bullet took out the bull’s heart, and after trotting about 15 feet, the massive animal cartwheeled over and died.

A High-Fence World Record?

Two of the guides at Broadmouth Canyon Ranch are certified as scorers by SCI. Dhooghe says that when they put a tape to the bull’s rack, they conservatively scored it at 648 and 4/8 inches.

Unlike Boone and Crockett and the Pope and Young Club, which don’t allow animals harvested on high-fence ranches into their record books, SCI recognizes these trophies as potential records. The organization simply categorizes them as “estate animals.”

Read Next: The Biggest Nontypical Whitetails of All Time

Dhooghe still has to wait until the mandatory 60-day drying period is up. At that point, he plans to bring the rack to an SCI-certifed master scorer in Washington State. If the master scorer concurs with the original green score, the rack will then be judged by a panel of five or six master scorers, who would make the ultimate call as to whether Dhooghe’s bull replaces SCI’s current world record for the biggest bull ever killed with a rifle.

To clarify, bigger bulls have been killed at Broadmouth Canyon Ranch. This September, a hunter named Brian Bailey shot an elk there with a pistol that scored 689 and 6/8 inches, according to the ranch’s Facebook page.

Outdoor Life reached out to SCI, but their Record Book Committee was unwilling to comment on Dhooghe’s bull until they see it officially. SCI’s Online Record Book has two separate books for non-typical Rocky Mountain Elk—one for elk harvested on high-fence ranches and the other for free-range animals. Looking at the high-fence record book, the biggest bull killed with a rifle was harvested from Bull Basin Ranch in Gunnison, Colorado, in 2020. It scored 648 and 2/8. The high-fence record book also includes two larger bulls: a 649-and-2/8-inch bull taken with a crossbow from a ranch in Utah, and a 671-inch bull killed with a muzzleloader from an undisclosed location in Saskatchewan.

High-Fence Controversy and Ethics

The overwhelming number of negative reactions to Bay City’s original Facebook post are proof that a lot of people (hunters included) have strong opinions about high-fence hunting. Many hunters bristle at the notion of killing an animal inside a fenced enclosure—no matter how large the enclosure may be. They make a distinction between “hunting” and “shooting”, saying that high-fence operations violate the most basic fair chase principles and create unnaturally large specimens that are more akin to livestock than wild animals. To many hunters, these outsized antlers and breeding programs designed to grow the largest racks possible degrade the importance of truly wild animals which earn every inch they grow and season they survive.

Plus, high-fence whitetail operations are under extra scrutiny these days as they’ve been connected to the spread of Chronic Wasting Disease.

dhooghe bull 3
The fact that the bull was killed on a high-fence ranch has led to criticism from a number of hunters. Brian Dhooghe

“Bought bull, high fence pet,” one commenter wrote. “Basically an animal raised like a beef cow that rich dudes pay to shoot. Would be no different or challenging than running down to your local dairy and shooting a Holstein cow with its head in a feed trough.”

It’s important to note that Dhooghe never violated any laws and never did anything to bring this heat upon himself. He didn’t brag about the elk or lie about where it was shot (the way some high-fence hunters have with trophy animals). In fact, Dhooghe isn’t even on social media. If it wasn’t for Bay City’s post, hardly anyone would know about the bull he harvested in Idaho.

“I don’t have Facebook, but my wife does,” he says. “I was looking at some of those comments and I had to quit looking because all it did was piss me off. All these people on there…can’t you just be happy for a guy to kill an animal like that?”

Dhooghe admits that he understands all the controversy around what SCI calls “estate animals.” At the same time, though, he says that regardless of what most people think, not all high-fence operations are created equal.

Read Next: Our Favorite Cartridges and Rifles for Hunting Elk

“I think there are places out there that give this kind of hunt a bad name. Where they keep them in a pen and you basically go out and pick one, so they can kick it across the field and you shoot it,” he says. “This place isn’t like that at all. They bring these elk in and then they turn them loose on 10,000 acres. My bull had been on that ranch for four years. He’s not a tame elk like everyone wants to think he is.”

No matter how much the hunting community decries high-fence hunting, there are clients willing to fork over tens of thousands of dollars in return for a guaranteed opportunity at trophy-class animals that they won’t get otherwise. And, there are plenty who say these hunting estates have their place. The North American Elk Breeders Association lists several reasons for why game preserves exist, including the opportunities they provide for physically challenged hunters, and the incentive they give landowners to turn a profit while maintaining large, undeveloped open spaces as wildlife habitat.

“I just can’t let it bother me, and it really doesn’t,” Dhooghe says about the vitriol over his giant bull. “I think I was 12 years old when I started hunting, and I never dreamed I would shoot an animal like that, or even have the opportunity to. I’m ecstatic about it.”

Where to Find Pheasants

0
Where to Find Pheasants
Pheasants flushed from cover outside corn can often be taken by hunters standing just inside the edge of the cornfield.

If a rooster pheasant were one of Batman’s archenemies, he’d be the Joker. The common denominator of both bird and Bad Guy? Neither of them plays fair, especially Mister Ringneck.

So how do you pin down such a slippery character? Well, for starters, you find out where he lives. Where he spends his time. And why he’s there. Next, you research his weaknesses — those habits than make him less than perfectly elusive. And finally, you develop tactics to exploit those weaknesses, using his shortcomings to your advantage.

Pheasants flushed from cover outside corn can often be taken by hunters standing just inside the edge of the cornfield.

It’s October, so let’s look closely at two of the ringneck’s preferred early season haunts — corn and cattails — and how best to attack this pair of perennial favorites.

CORN

In many areas where corn is planted as a large-scale crop, 95 percent or more of it will still be standing come the first week of October. And standing corn offers, at best, terrible hunting conditions.

Why? First, modern agricultural practices ensure little to no row-to-row cover in today’s 21st Century cornfields. No foxtail. No goldenrod. No reed canary grass. Just dirt sidewalks devoid of any weeds. Yields are maximized, but that doesn’t do much for pheasants and pheasant hunters.

Roosters do love standing corn, mainly for the overhead protection it provides; but again, overhead protection does little for the human predator. Second, standing corn is almost impossible for one or two hunters to work effectively. It’s noisy, and because it’s “clean” of weedy plants it allows pheasants to see us long before we see them.

Meanwhile, it can be difficult for hunting dogs and hunters to keep track of each other in standing corn. And finally, and with little exception, few farmers are going to grant permission to six guys asking to bulldoze through his corn. It’s simple economics there.

That’s the bad news about pheasants, October, and standing corn. The good news is corn is still an asset to the pheasant hunter; however, his approach to the crop needs to focus not on the crop itself, but whatever might be around it — that is, the more “huntable” cover immediately adjacent to it.

Even the largest cornfield has an edge, and as simple as it sounds, that’s where you want to focus your efforts. This will be a bit more challenging than merely walking through knee-high brome grass with standing corn off your left shoulder, and tagging a three-bird limit of roosters. Successfully hunting the edges along standing corn requires some strategy. And that means both tactics designed for you and, if you have one, your bird dog.

Gunning roosters along standing corn involves first understanding two variables — where, and when. Typically, pheasants won’t roost or spend the night in modern cornfields for the simple fact there’s no cover there. They will roost in adjoining cover, and will typically, as morning progresses, migrate toward the edge between corn and cover. Here, they have everything they need — the corn’s nearby overhead cover, bare dirt with grit, the ability to see predators, access to seeds and insects, and some 360-degree protection in the adjacent heavy grass.

What this means to the pheasant hunter is a return to the concept of strategy. If you hunt with a dog — ours were Labrador retrievers, both pointing and non-pointers — absolute control and obedience is paramount now. Pheasants are notoriously skittish; a dog that doesn’t stay extremely close, one that doesn’t obey non-verbal direction (i.e., low-volume whistle commands), won’t necessarily flush birds wild, but will send birds scurrying into the protection of the standing corn, where they will be almost impossible to roust.

The key here is to let the dogs hunt — let them to do their job — but keep them close and always under control.

Second, be quiet. Stealth certainly does play a role in successfully hunting standing corn. Quiet means no shouted commands to the dog. No yelling “Over here! Over here! Seeing anything!!??” back and forth to your hunting partner or partners.

No slamming car doors, shotgun actions, or thinking you can silently slip down to the end of the field between cornrows three and four. Pheasants, like the majority of wild game birds, can hear extremely well. And once they hear you, it’s off to the races — and they run faster than you can.

Finally, keep your numbers small and have a plan. Unless you’re in a group of 15 guns or more — which, granted, can at times be effective, albeit quite the logistical undertaking — a pair of hunters is plenty to work corn edges.

As for a plan, we’ll assume two guns here. Typically, rousted roosters will try to fly toward cover that is heavier than where they were originally flushed. Knowing this, one gun walks quietly at the edge of the standing corn; the second, and the one with the well-mannered and close-working dog, exacts a slow zigzag pattern parallel to and perhaps 30 to 50 yards off the shoulder of the first.

Ideally, birds that don’t go straight away from the man/dog team will make a beeline for the standing corn, and that’s where the silent solo gun waits. One-man pushes can also be tried. Ideally, the man/dog duo works into the wind toward a corner of the standing corn where an earlier quietly positioned hunter stands.

Pheasant Hunting Spoils

One last trick to try while hunting standing corn. Everywhere Daylight Savings Time takes effect in late October, dusk comes earlier in the day. And approaching dark means time for birds to come out of the corn where they’ve spent the day and head for overnight cover.

As close to the end of legal shooting time as possible watch for cockbirds that fly out of the corn, and mark their landing accurately. A quick but quiet approach just might put you into position for a flush and shot.

CATTAILS

Cattails are another phenomenal pheasant cover; however, like standing corn, they’re not without their challenges. One of the most significant is the water commonly associated with cattails. Pheasants don’t like to be wet. And second, cattails are tough enough to hunt when dry; add the water element, and cattails become almost impossible to work efficiently.

That said, pheasants love cattails for the protection they provide, so to ignore the cover is to ignore a good number of birds.

But how to hunt this impenetrable mass of vegetation? You could wait until the water freezes. This makes the cover much more accessible to both hunter and hunted; however, this is in many places a late-season tactic.

In the early season cattails still present a couple of different strategic options. Hunting the edges, as one does with standing corn, is one; the other is to search out those sections of marsh that are still dry following summer’s heat. As mentioned, pheasants dearly love these thick hideouts, and will pull out all the stops when it comes to self-preservation — running and burrowing into the mats, either before or after taking flight.

Cattails lend themselves perfectly to big, strong dogs. Our Labs liked nothing more than rooting roosters out of right-of-way stands of cattails. Still, such dogs need to be controlled and close-working — qualities which are often not a problem, thanks to the twisted web of broad-leafed marsh vegetation.

October, November, or January. Standing corn or cattail marsh. The calendar or the cover mean little to ringneck pheasants, who practice the art of evasion 365 days each year, and who will use either type of cover to full advantage. A quiet, stealthy, and well-thought plan of attack, however, can swing the odds a bit more in the hunter’s favor once opening day rolls ’round.

Best Air Rifle Deals

Popular Posts

Can you dry fire a gamo air rifle?

0
Unveiling the truth behind dry firing a Gamo air rifle, this intriguing headline delves into the possibility of safely practicing without ammunition. Join us...

PCP vs Spring Piston: Which one is better?

0
When reading about guns in the search for the first one that would be perfect for you, an age-old debate comes into question. Should...

Can a Felon Legally Possess an Air Rifle in Tennessee?

0
"Understanding the Legalities: Felon Ownership of Air Rifles in Tennessee" can a felon own an air rifle in tennessee? In the state of Tennessee, the ownership...

Air Rifle vs BB Gun: Understanding the Key Differences and Choosing the Best Option

0
"Air Rifle vs BB Gun: Unveiling the Key Differences and Choosing the Perfect Weapon for Your Shooting Needs. Delve into this comprehensive guide to...

How to choose the right Air Gun Caliber for your game?

0
A story is told of three Native American hunters. Two are smart, the other somewhat ignorant. On the first day of the hunting season, one of...