Home Blog Page 114

700 Captivating Rifle Names for Every Gun Lover

0

Welcome to our blog article on the intriguing topic of “700 rifle Names”! If you’re looking for some creative and captivating names for rifles, you’ve come to the right place. As firearm enthusiasts ourselves, we understand the importance of finding the perfect name that reflects the character and spirit of your weapon. As the renowned novelist Stephen King once said, “Fiction is the truth inside the lie.” In this case, these rifle names serve as an extension of the story you want to tell with your firearm.

As a Naming Specialist with three years of experience, I have delved into the fascinating world of naming various entities, including fantasy characters. The process of naming is an art that requires careful consideration of the qualities and characteristics you want to convey. It involves exploring the depths of imagination, drawing inspiration from various sources, and ultimately creating a name that resonates with its intended audience. With my expertise in this field, I am thrilled to share my knowledge and offer you a plethora of rifle names that will surely ignite your imagination.

In this article, you can expect to find a wide array of rifle names that are both distinctive and captivating. Whether you’re searching for a name that exudes strength and power, evokes a sense of history and tradition, or embodies a futuristic and technological vibe, we’ve got you covered. Our curated collection of 700 rifle names is designed to provide you with ample options, ensuring that you find a name that truly stands out from the crowd. Get ready to embark on an exciting journey of exploration and discovery as we unveil an assortment of unique names that will give your rifle the character it deserves.

Rifle Names

Rifle Names

  • Crimson Fury
  • Vanguard
  • Dominator
  • Stormbringer
  • Eclipse
  • Venomstrike
  • Thunderstorm
  • Havoc’s End
  • Silent Reaper
  • Ironsight
  • Valkyrie’s Grace
  • Phoenix Rising
  • Nightfall
  • Shadowhunter
  • Thunderclap
  • Serpent’s Bite
  • Death’s Whisper
  • Annihilator
  • Ghostwalker
  • Warbringer
  • Cyclone
  • Sentinel
  • Wrathbringer
  • Midnight Reaper
  • Seraph’s Wings
  • Thunderbolt
  • Steelstorm
  • Maelstrom
  • Hellfire
  • Frostbite
  • Viper’s Kiss
  • Celestial Guardian
  • Stormchaser
  • Harbinger
  • Ironsoul
  • Wraithwalker
  • Thunderstrike
  • Phantom’s Veil
  • Grim Reaper
  • Eclipse
  • Shadowstrike
  • Venomous Vengeance
  • Searing Sunfire
  • Nightshade
  • Frostfang
  • Obsidian Sentinel
  • Thunderous Roar
  • Reaper’s Embrace
  • Ashen Fury
  • Stormrider
  • Ironheart
  • Silent Stalker
  • Serpent’s Wrath
  • Oblivion’s Call
  • Cyclone Fury
  • Twilight’s Shadow
  • Ghostwalker
  • Vortex
  • Thunderclash
  • Whispering Death
  • Ravager
  • Phoenix’s Flight
  • Abyssal Abyss
  • Lunar Eclipse
  • Venomous Fury
  • Silverstrike
  • Voidwalker
  • Frostfire
  • Nightstalker
  • Seraph’s Salvation
  • Thunderous Echo
  • Ironclad
  • Shadow’s Embrace
  • Venomfang
  • Inferno
  • Frostwind
  • Midnight Howl
  • Serpent’s Scales
  • Annihilation
  • Stormbringer

20 Rifle Names With Meanings

Rifle Names

  1. Shadowsteel – Forged in darkness, strikes unseen.
  2. Valkyrie’s Resolve – Empowers warriors with determination.
  3. Thunderclash – Unleashes a deafening storm of power.
  4. Seraph’s Salvation – Protects and delivers divine justice.
  5. Nightshade – Conceals the user in shadows, deadly.
  6. Phoenix’s Retribution – Rises from ashes, avenges with fire.
  7. Ironsight Guardian – Ensures unwavering accuracy and protection.
  8. Glacier’s Embrace – Freezes enemies with icy precision.
  9. Cyclone Fury – Sweeps through foes with unstoppable rage.
  10. Abyssal Devastator – Plunges enemies into eternal darkness.
  11. Razorwind – Cuts through opposition with razor-sharp precision.
  12. Elysian Vanguard – Radiates heavenly strength and unwavering defense.
  13. Eclipse Requiem – Darkens the world, sings the dirge.
  14. Midnight Serenade – Engages enemies with haunting elegance.
  15. Astral Valkyrie – Soars above, guiding warriors to victory.
  16. Thunderstrike Dominator – Overwhelms foes with thunderous might.
  17. Wraith’s Whisper – Echoes through the void, bringing silent death.
  18. Enigma’s Enforcer – Unravels mysteries, enforces unyielding justice.
  19. Bloodmoon Avenger – Embodies the fury of the crimson moon.
  20. Twilight’s Salvation – Shields allies with the gentle embrace of dusk.

Old Rifle Names

Rifle Names

  • Thunderstrike – Impressive and formidable weapon.
  • Ironsoul – A rifle with enduring strength.
  • Whisperwind – Silent but deadly.
  • Shadowbane – Strikes fear into enemies’ hearts.
  • Thunderclap – Packs a powerful punch.
  • Vortexfire – Unleashes a whirlwind of destruction.
  • Grimshot – Brings doom to its targets.
  • Stormbringer – Controls the battlefield with its might.
  • Ghostfire – Hauntingly accurate and deadly.
  • Warhammer – A weapon of war’s fury.
  • Valkyrie’s Breath – Sends foes to the afterlife.
  • Grimjaw – Devours enemies without mercy.
  • Silverstrike – Shines brightly in battle.
  • Nightfall – Darkness falls upon the enemy.
  • Thunderbolt – Strikes with lightning speed.
  • Hellfire – Engulfs enemies in flames.
  • Dragon’s Roar – A rifle of mythical power.
  • Blackthorn – Pierces through armor effortlessly.
  • Hailstorm – Unleashes a torrent of bullets.
  • Wraithblade – Cuts through defenses like a ghost.
  • Bonecrusher – Crushes all opposition.
  • Grimshot – Sends foes to their graves.
  • Widowmaker – Leaves no survivors.
  • Crimson Fury – Bathes in the blood of foes.
  • Deathwhisper – Brings doom from the shadows.
  • Thunderstrike – Strikes fear into hearts.
  • Ironsoul – Unyielding and unstoppable.
  • Shadowbane – Cuts through darkness and enemies.
  • Stormbringer – Controls the winds of battle.
  • Vortexfire – Creates a whirlwind of destruction.

Sniper Rifle Names

Sniper Rifle Names

  • Serpent’s Gaze – Lethal precision from afar.
  • Widow’s Kiss – Strikes with deadly accuracy.
  • Silent Stalker – Virtually undetectable, a hunter’s delight.
  • Moonshadow – Strikes under cover of darkness.
  • Eagle Eye – Sees what others can’t.
  • Whisperwind – A silent breeze that brings death.
  • Frostbite – Freezes enemies in its sights.
  • Phantom’s Embrace – Envelops targets in a deadly grip.
  • Spectre’s Touch – Leaves no trace, only destruction.
  • Aurora Borealis – A dazzling display of lethal skill.
  • Obsidian Shard – Pierces the heart of the enemy.
  • Nightstrike – Strikes fear into the night.
  • Viper’s Fang – Deadly venom from a distance.
  • Silent Thunder – Kills without a sound.
  • Shadowshot – Destroys hope in a single shot.
  • Storm’s Eye – Sees through the chaos.
  • Vanquisher – Overcomes any obstacle with precision.
  • Frostfire – Freezes the soul before the body.
  • Valkyrie’s Whisper – Guides warriors to their fate.
  • Death’s Gaze – Foretells the end of life.
  • Silent Reaper – Claims lives without warning.
  • Celestial Archer – A divine force of destruction.
  • Ashen Wind – Burns everything in its path.
  • Maelstrom’s Fury – Unleashes chaos upon the target.
  • Lightning Strike – Strikes with unmatched speed.
  • Stargazer – Maps the path of destruction.
  • Stormcaller – Summons the wrath of nature.
  • Dreadshot – Inspires fear with each shot.
  • Mirage – Creates illusions of safety before the kill.
  • Glacier’s Breath – Freezes time in its tracks.

Cool Sniper Rifle Names

  • Enigma – Mysterious and deadly.
  • Shadowstrike – Strikes from the shadows.
  • Phantom’s Touch – Leaves no trace behind.
  • Frostbite – Freezes enemies with fear.
  • Eclipse – Darkens the enemy’s future.
  • Spectral Fury – Haunts the battlefield.
  • Nova – Explodes with unstoppable force.
  • Thunderbolt – Strikes fear with lightning precision.
  • Cyclone – Whirls through enemies with grace.
  • Vortex – Devours all in its path.
  • Venomous Serpent – Injects death from afar.
  • Obsidian Reaper – Harvests souls from a distance.
  • Arctic Gale – Blows away all resistance.
  • Ragnarok – Brings about the end of worlds.
  • Zenith – Reaches the pinnacle of lethality.
  • Phoenix’s Wing – Rises from the ashes of battle.
  • Voidwalker – Steps between dimensions to deliver death.
  • Solstice – Brings light to the darkest of shadows.
  • Thunderstrike – Shakes the earth with its power.
  • Enigma – Unravels the enemy’s defenses.
  • Shadowstrike – Lurks in the darkness, ready to strike.
  • Phantom’s Touch – Ghostly accuracy from a distance.
  • Frostbite – Freezes enemies to the bone.
  • Eclipse – Engulfs the target in darkness.
  • Spectral Fury – Unleashes a ghostly storm.
  • Nova – Explodes with devastating force.
  • Thunderbolt – Strikes with lightning speed.
  • Cyclone – Whirls through enemies with ease.
  • Vortex – Swallows enemies without mercy.
  • Venomous Serpent – Injects lethal venom.

Assault Rifle Names

  • Annihilator – Obliterates all opposition.
  • Inferno – Burns enemies to ashes.
  • Thunderclap – Unleashes a deafening roar.
  • Havoc – Wreaks havoc on the battlefield.
  • Viper’s Bite – Strikes with deadly precision.
  • Warbringer – Brings destruction to the enemy.
  • Stormbreaker – Shatters defenses like a storm.
  • Ironsight – Locks onto targets with deadly accuracy.
  • Grim Reaper – Claims souls without remorse.
  • Omega – The ultimate weapon of war.
  • Rapture – Sends enemies into a trance of destruction.
  • Titanfall – Crushes all opposition under its might.
  • Venomstrike – Injects lethal venom into foes.
  • Obliterator – Erases enemies from existence.
  • Blackout – Plunges enemies into darkness.
  • Ravager – Leaves a trail of destruction.
  • Firestorm – Engulfs the battlefield in flames.
  • Sentinel – Guards the frontlines with unwavering resolve.
  • Ironsoul – Indomitable spirit in the face of danger.
  • Punisher – Dispenses justice with each bullet.
  • Annihilator – Eradicates all traces of resistance.
  • Inferno – Burns away enemies’ hopes.
  • Thunderclap – Unleashes thunderous destruction.
  • Havoc – Creates chaos in its wake.
  • Viper’s Bite – Delivers a venomous strike.
  • Warbringer – Brings war to the enemy’s doorstep.
  • Stormbreaker – Breaks through defenses like a storm.
  • Ironsight – Locks onto targets with precision.
  • Grim Reaper – Claims lives without mercy.
  • Omega – The end of all resistance.

Gun Rifle Names

Thunderstrike – Strikes with earth-shattering force.

Executioner – Dispenses swift and final justice.

Shadowfire – Burns enemies to cinders.

Warhawk – Dominates the battlefield with unwavering ferocity.

Nightbringer – Casts darkness upon its victims.

Tempest – Unleashes a storm of destruction.

Ironclad – A fortress of unstoppable firepower.

Venomfang – Inflicts deadly poison on its targets.

Hellstorm – Rains down chaos and devastation.

Grimshot – Strikes fear into the hearts of foes.

Thunderstrike – Unleashes a thunderous assault.

Executioner – Ends lives with ruthless efficiency.

Shadowfire – Consumes enemies in its flames.

Warhawk – Reigns supreme in the chaos of war.

Nightbringer – Shrouds the battlefield in darkness.

Tempest – Whirls through enemies with unstoppable force.

Ironclad – Invulnerable to opposition’s feeble attempts.

Venomfang – Inflicts lethal venom on its victims.

Hellstorm – Engulfs enemies in a fiery inferno.

Grimshot – Sends foes to their graves.

Thunderstrike – Shakes the very foundation of battle.

Executioner – Renders justice swiftly and mercilessly.

Shadowfire – Engulfs enemies in shadows.

Warhawk – Dominates the skies of war.

Nightbringer – Brings eternal darkness to the battlefield.

Tempest – Unleashes a relentless storm.

Ironclad – Invincible against all opposition.

Venomfang – Injects lethal poison into its targets.

Hellstorm – Unleashes a torrent of fiery destruction.

Grimshot – Strikes fear into the hearts of all.

Rifle Bullet Names

Thunderbolt – Strikes with electrifying speed.

Ironpiercer – Pierces through armor effortlessly.

Soulshatter – Shatters souls with each impact.

Annihilation Round – Erases enemies from existence.

Venomstrike – Delivers lethal poison on impact.

Shadowwhisper – Silent but deadly.

Reaper’s Kiss – Claims lives without mercy.

Maelstrom Round – Unleashes chaos upon the target.

Inferno Bullet – Engulfs enemies in flames.

Cyclone Round – Creates a whirlwind of destruction.

Thunderbolt – Strikes with lightning precision.

Ironpiercer – Pierces through defenses with ease.

Soulshatter – Destroys souls with each hit.

Annihilation Round – Obliterates all in its path.

Venomstrike – Injects deadly venom on impact.

Shadowwhisper – Silent but lethal.

Reaper’s Kiss – Seals the fate of its targets.

Maelstrom Round – Unleashes a storm of devastation.

Inferno Bullet – Sets enemies ablaze.

Cyclone Round – Sweeps away opposition effortlessly.

Thunderbolt – Strikes with electrifying accuracy.

Ironpiercer – Penetrates armor with ease.

Soulshatter – Crushes souls upon impact.

Annihilation Round – Eradicates all in its wake.

Venomstrike – Spreads lethal poison with each hit.

Shadowwhisper – Silently eliminates targets.

Reaper’s Kiss – Claims lives swiftly and mercilessly.

Maelstrom Round – Unleashes a whirlwind of destruction.

Inferno Bullet – Engulfs enemies in a raging fire.

Cyclone Round – Creates chaos in its path.

Rifle Scope Names

Hawkeye – Provides unparalleled vision and accuracy.

Thunderstorm – Enhances precision in the storm.

Shadowstrike – Brings enemies into focus from darkness.

Spectral Sight – Sees through obstacles and illusions.

Nightfall – Embraces the darkness to expose the enemy.

Valkyrie’s Gaze – Guides warriors to victory.

Guardian’s Eye – Watches over allies with unwavering vigilance.

Ghostwalker – Allows stealthy observation without detection.

Eclipse – Darkens the target, highlighting vulnerabilities.

Silent Serpent – Camouflages the user’s presence for a lethal strike.

Hawkeye – Unmatched vision and accuracy.

Thunderstorm – Sees through the chaos of battle.

Shadowstrike – Illuminates targets in darkness.

Spectral Sight – Peers into the ethereal realm.

Nightfall – Sees through the shroud of night.

Valkyrie’s Gaze – Guides warriors to their fate.

Guardian’s Eye – Keeps watch over allies.

Ghostwalker – Moves undetected through the shadows.

Eclipse – Darkens the enemy’s future.

Silent Serpent – Strikes without warning.

Hawkeye – Targets with unparalleled precision.

Thunderstorm – Cuts through the storm with clarity.

Shadowstrike – Strikes from the shadows with accuracy.

Spectral Sight – Sees what others cannot.

Nightfall – Reveals the enemy in the darkest hour.

Valkyrie’s Gaze – Leads warriors to glory.

Guardian’s Eye – Protects allies with unwavering vision.

Ghostwalker – Steps silently through the realm of shadows.

Eclipse – Veils the enemy’s path.

Silent Serpent – Strikes with deadly silence.

Famous Rifle Names

Winchester – A legend of the Wild West.

Mauser – Synonymous with precision and reliability.

Mosin-Nagant – A symbol of Russian firepower.

M1 Garand – Iconic American rifle of World War II.

AK-47 – The most widely recognized assault rifle.

Lee-Enfield – British marksmanship at its finest.

Remington 700 – Renowned for its accuracy.

Springfield 1903 –S. military staple of the early 20th century.

Barrett M82 – The mighty .50 caliber sniper rifle.

Henry Repeating Rifle – Revolutionary lever-action design.

Winchester – The Wild West’s most trusted companion.

Mauser – A testament to precision and reliability.

Mosin-Nagant – The pride of Russian firepower.

M1 Garand – America’s rifle of choice in WWII.

AK-47 – The iconic symbol of warfare.

Lee-Enfield – British marksmanship at its peak.

Remington 700 – Synonymous with accuracy.

Springfield 1903 – A staple of the U.S. military.

Barrett M82 – The king of .50 caliber sniping.

Henry Repeating Rifle – Revolutionized lever-action technology.

Winchester – A legend that defined the West.

Mauser – Precision engineering at its best.

Mosin-Nagant – The rifle that changed history.

M1 Garand – The rifle that won the war.

AK-47 – The rifle that conquered the world.

Lee-Enfield – A testament to British marksmanship.

Remington 700 – The embodiment of precision.

Springfield 1903 – A classic rifle of the early 20th century.

Barrett M82 – The epitome of long-range power.

Henry Repeating Rifle – An icon of innovation.

Cool Rifle Names

Havoc’s Wrath – Unleashes chaos on foes.

Serpent’s Fang – Strikes with lethal precision.

Stormbringer – Commands the power of nature.

Vengeance – Retribution with deadly force.

Eclipse – Engulfs enemies in darkness.

Thunderstrike – Electrifies the battlefield with power.

Phantom’s Whisper – Silently eliminates targets.

Ragnarok – Brings about the end of battles.

Venomstrike – Delivers deadly poison to foes.

Havoc’s Wrath – Unleashes unrelenting chaos.

Serpent’s Fang – Delivers a lethal strike.

Stormbringer – Controls the power of storms.

Vengeance – Strikes with unforgiving force.

Eclipse – Shrouds enemies in darkness.

Thunderstrike – Electrifies the battlefield with fury.

Phantom’s Whisper – Eliminates targets without a sound.

Ragnarok – Signals the end of conflicts.

Venomstrike – Inflicts lethal poison on foes.

Havoc’s Wrath – Unleashes devastation without mercy.

Serpent’s Fang – Pierces through defenses with precision.

Stormbringer – Commands the tempest of war.

Vengeance – Delivers retribution with deadly accuracy.

Eclipse – Casts a shadow over enemies’ hopes.

Thunderstrike – Sends shockwaves through the battlefield.

Phantom’s Whisper – Eliminates targets unnoticed.

Ragnarok – Brings about the apocalypse of battle.

Venomstrike – Injects lethal venom into its victims.

Havoc’s Wrath – Unleashes chaos with devastating force.

Serpent’s Fang – Strikes with deadly accuracy.

Stormbringer – Wields the power of nature’s fury.

Rifle Names

How To Choose A Good Rifle Name

When it comes to firearms, choosing the right name for your rifle can be a deeply personal and meaningful process. A good rifle name goes beyond mere identification; it becomes an integral part of the rifle’s identity. As enthusiasts, we understand the significance of finding a name that reflects the essence and character of your firearm, creating a connection that goes beyond the physical. In this article, we will explore the art of choosing a good rifle name and provide you with insights and guidelines to assist you in this creative endeavor.

Understanding the Purpose

Before diving into the world of rifle names, it is essential to understand the purpose behind your firearm. Is it a hunting rifle, a target shooting rifle, or a self-defense firearm? Recognizing the role of your rifle will help you determine the direction for naming. Each purpose carries distinct connotations and emotions, which can be effectively conveyed through the right name. Take a moment to reflect on the intended use and the feelings you want your rifle to evoke.

Reflecting the Rifle’s Characteristics

Every rifle possesses its own unique set of characteristics, which can range from power and precision to elegance and craftsmanship. By analyzing these attributes, you can narrow down the qualities you wish to highlight in the name. For example, if your rifle is known for its exceptional accuracy, a name that signifies precision and focus would be fitting. Consider the materials, design, and performance of your firearm, and let these elements guide you in choosing a name that accurately reflects its essence.

Drawing Inspiration

Inspiration for rifle names can be found in a multitude of sources. History offers a treasure trove of ideas, with significant events, legendary figures, and iconic battles providing a rich tapestry of possibilities. Literature and mythology are also excellent sources, offering names that carry deep symbolism and cultural significance. Delve into these realms, exploring stories, legends, and epics to discover names that resonate with your rifle’s identity. By drawing inspiration from the past, you can infuse your firearm with a sense of heritage and significance.

Considering Personal Preference

Ultimately, the decision of a rifle name rests with you as the owner. Consider your personal preferences and style when choosing a name. Does a classic and timeless name appeal to you, or are you drawn to more modern and innovative choices? Your rifle’s name should reflect your taste and resonate with your own identity. After all, it is a reflection of your connection to the firearm and the story you want to tell.

Engaging Creativity

Naming a rifle is an opportunity to let your creativity soar. Brainstorm a list of potential names, allowing yourself to explore various themes, languages, and concepts. Experiment with wordplay, alliteration, or even combining different words to create a unique and memorable name. Push the boundaries of your imagination and challenge conventional naming conventions. This is your chance to give your rifle a name that stands out from the crowd.

Seeking Feedback

Sometimes, an outside perspective can provide valuable insights and suggestions. Share your list of potential names with fellow firearm enthusiasts or experts, seeking their opinions and feedback. They may offer fresh perspectives or point out nuances that you may have overlooked. Engaging in conversations and discussions can enhance your understanding of how others perceive the names and help you make an informed decision.

Testing the Name

Once you have selected a name that resonates with you, visualize your rifle with its chosen name. Imagine how it will look engraved or inscribed on the firearm. Consider how well the name aligns with the rifle’s overall identity and the emotions you intend to evoke. Testing the name in this manner allows you to evaluate its compatibility and determine whether it truly captures the essence of your firearm.

Conclusion

In conclusion, we hope this article has served as a valuable resource for those in search of the perfect name for their rifles. With our collection of 700 rifle names, we aimed to provide a diverse range of options to suit different preferences and styles. Remember, the name you choose for your firearm is not merely a label, but an opportunity to infuse it with personality and meaning.

Naming a rifle is a personal and creative endeavor, and we encourage you to explore your imagination and draw inspiration from various sources. Consider the purpose, history, and unique features of your rifle as you make your selection. Whether you prefer a name that reflects its power, pays homage to historical figures or events, or simply resonates with your own personal taste, there is a name waiting to be discovered within our extensive list.

We hope that the names we’ve shared in this article have sparked your creativity and provided you with a starting point in your quest for the perfect rifle name. Remember, the name you choose should make you feel a sense of pride and connection to your firearm. So go ahead, select a name that resonates with you, and let it become an integral part of your rifle’s story.

Related:

Army Names

5 Tips For Hunting Teal More Successfully

0

Shane Smith

Anyone who has pursued early-season teal has certainly had their share of misses at a flock of fast-flying aerial acrobatic teal. You fire off three rounds and can’t believe you missed all three times! You start taking inventory of the boxes of shells you brought, hoping you have brought enough. I would like to lay out five helpful yet disciplined tips to put into use to consistently kill more teal per box of shells.

green-winged teal

Teal Hunting Is Fast and Furious

In the world of waterfowl hunting, blue-winged teal are one of the most acrobatic of all waterfowl. As the season goes on, their acrobatics only seems to improve. Even seasoned duck hunters are left in awe at the aerial display. There are ways to improve your odds this duck season. This brings us to our first tip to put more teal on the table.

1. Smooth is fast. This is a saying we use all the time in tactical applications and is very true for wing shooting as well. Make a smooth and deliberate mount of your shotgun and move your barrel smoothly through the bird to its head and pull the trigger. Try not to play catch-up with the bird and stay behind with the hopes of snatching rapidly ahead and making a miracle shot. Keep it smooth and follow through and you will be shocked at how many more teal you will kill.

It’s opening day, your decoys are set and everything seems perfect. Experienced teal hunters know that even with everything just right, timing is everything. From Texas to Missouri and from Louisiana to Mississippi, all duck hunters know that a little teamwork goes a long way. Timing and teamwork bring us to point number two. 2. Stand ’um up. On many, many occasions, people let teal get waaay too close before they shoot. I like to try and shoot my first shot at 20-30 yards or so and teal will usually stand straight up like a skyscraper and present you much easier shots. If you wait to shoot when they are 10 yards or so, your pattern is very tight and not very forgiving. Have someone shoot first and stand up the flock and then start picking them off one at a time.

You can improve the odds of taking blue-winged teal, green-winged teal and cinnamon teal before duck season begins. Improve your odds by knowing your shotgun and how it patterns. Knowing your shotgun, its pattern at different ranges and its performance with different ammo simply cannot be taken for granted. This brings us to tip number three.

3. Change your choke/load combination. Blue/Green wing teal are the smallest dabbling ducks in the country and require much less terminal velocity to bring them down than a mallard. This is a good time for 4s, 5s or 6s to reign supreme. If you shoot an aftermarket choke tube like a Patternmaster or JEBs, take out your full or modified and opt for a “decoy” or short-range tube. Most of your shots will be less than 35 yards, and you will have a dense and gap-free pattern with a good wad stripping choke rather than a constriction-style choke.

All duck hunters have been there — it’s opening day and you sit freezing in a duck blind before the sun comes up. You’re shooting the breeze with the other hunters in the blind and sipping coffee. All at once, the sun is up and suddenly you have more blue-winged teal than you ever dreamed of bearing down on you. What do you do next? That brings us to tip number four.

4. Keep your head down and focus. It is very easy to want to look at the whole show when 50 bluewings are twisting and dive-bombing the dekes at daylight. However, this will usually lead to three spent hulls and your retriever looking at you with disgust. Pick a single bird and kill him FIRST. Don’t worry about the others that are zig-zagging like they are possessed by a devil. When your cheek meets your stock, keep it there and maintain that focus and I guarantee you will kill more birds.

If teamwork is a key factor to bagging more teal, then you don’t want to be the weak link in the duck blind. Being organized from opening day, knowing your gear, where your gear is in the blind and how to get to it quickly is key. It is common for young duck hunters to have teal buzz through and only manage one shot. That brings us to tip number five.

5. Keep other shells handy. Teal are notorious for flying the first 30-45 minutes of legal shooting time and then almost disappearing. As soon as you are done shooting, IMMEDIATELY reload. I have certainly been guilty of looking and seeing more birds approaching and raising up only to hear a “click” and realize I never reloaded my gun. Try and keep the shells in a wader pouch, bench or somewhere that is very easy and convenient to reach. I will often attempt to put shells in a loaded gun to make sure I am ready for the next bunch that falls into the blocks. Just as fast as the action can start, it can certainly end, so be sitting on go with a reloaded weapon.

This Teal Season Can Be Different

No one wants to be a weak link. The duck hunter who can only manage a few shots despite the fact that the teal were plentiful and conditions perfect. Thinking back to the last teal season, you vowed to shoot more teal. That’s why you took the time to read these tips. Try and apply these tips this year when teal season rolls around and you don’t have to be a weak link. I know some of this may seem like common sense and other parts may be new to you, but give them a shot and see if they don’t help you this teal season. Maybe this year, you can be the hunter who tagged out.

The Best Archery Targets & Practice Strategy for Bowhunters

0
The Best Archery Targets & Practice Strategy for Bowhunters

A good friend of mine will occasionally give me updates on how many arrows he has shot throughout the year. He keeps track, and is the kind of guy who simply loves the process of shooting. He’ll shoot 10,000 arrows in a year, which is a lot.

I’m jealous of him, because while I also love to shoot, I get bored easily. Standing at a set distance and shooting groups at bull’s-eyes is not my thing. I do it every year, especially at the beginning of the summer when I’m trying hard to get into the daily groove, but it doesn’t take long for my mind to start wandering and my desire to toe the line with a full hip quiver wanes.

It’s at that point in the summer when I know I need a change of pace. This used to involve a lot more trips to a nearby target range, where I could get my change-of-scenery fix by shooting the walk-through courses there. I still love them, but these days I have less free time to devote to a range trip.

Where I live in the suburbs, I’m lucky in that I can stagger several targets out to a distance of 50 yards beside my house. I also can stand on a sidehill for angled shots, and I can mess around with plenty of different shot angles.

Those quartering or obstructed shooting sessions tend to increase my confidence for real-world shots when critters are in play. That’s also why my favorite target right now is the 1⁄3 Scale Woodland Elk ($220) from Rinehart. This dwarf bull stands 38″ tall, looks just like the real thing, and is a great way to tighten up your groups if you have an elk hunt planned for the fall. Rinehart targets aren’t the cheapest option out there, but they last so long they’re worth the investment.

If you’ve got an elk target, you better pick up a deer target like the Big Shooter Buck ($100) from Shooter 3D Archery Targets. This 48″-tall target will stop all fieldpoints and broadheads, and is lightweight enough that you can move it around to work on different angles and varying distances. It’s also designed with a replaceable insert.

Shooter 3D Archery Targets Big Shooter Buck

While it’s easy to love 3-D targets, you should probably also own something with a few bull’s-eyes on it, like the High Roller ($120) from Morrell Targets. When it comes to this style of target, it’s hard to beat the High Roller, and for some reason my little girls love shooting it as well. Maybe it’s the very visible bull’s-eyes, or simply the nontraditional color scheme? Either way, this six-sided, 100-percent weatherproof target is a great backyard option — especially when you consider it’s designed to handle both fieldpoints and broadheads.

Morrell High Roller

Of course, you can’t get into this target category without mentioning an offering from BLOCK. Their 6X6 is one of the best deals going, considering you can own it for a cool $100. This target is designed to handle fieldpoints and broadheads as well, offers up easy arrow removal, and with its six-sided shooting allows you to fling away for years without worrying about blowing it out.

Block 6x6 target

Power-Stop Archery Targets also has a $100 arrow-stopper that’s perfect for a quick evening session in the backyard. Their Range 16 can be used with broadheads or fieldtips, is made right here in the USA, and in addition to offering up traditional bull’s-eyes, it also has a Battleship face. This is a great target for competing with your buddies, or simply honing your skills with tiny aiming points.

Power-Stop Range 16

By far one of the best deals going this year in new targets is from Delta McKenzie. Their Wedgie ($55) is half the price of most targets, weighs 36 lbs., and is printed on both sides with multiple aiming points. It draws its name from its wedge shape, which allows it to stand up easily and stay standing during every shot, unlike most bag targets that will tip over not only when you shoot them but when a slight wisp of a breeze blows in their direction.

Delta McKenzie Wedgie

A target company you may not be familiar with but that is producing some killer products is Walk-On Archery. Their MarXMan 6 Sided Field Point Target with Broadhead Windows ($90) allows you to shoot six sides with fieldpoints, and two sides with broadheads. It weighs only 28 lbs., is covered in a durable, weather-resistant polypropylene cover, and is built with a bonded, high-density foam core to withstand the abuse of thousands of shots.

Walk-On MarXMan 6 Sided Field Point Target with Broadhead Windows

Cabela’s churns out a lot of products, and they’ve got a few in the target market. Their Barricade Archery Target ($45) is a good choice for anyone looking for a cheap, highly portable target. It weighs only 7 lbs. but it’s built to withstand both fieldpoints and broadheads. Several different aiming options on the four shootable sides allow you to go precise if you wish, or give yourself a bigger bull’s-eye for dropping long-range bombs.

Cabela

How to Train a German Shorthaired Pointer to Hunt

0

Training a German Shorthaired Pointer to hunt can be a rewarding experience for both the dog and the owner. These dogs are natural hunters and have been bred for generations to excel in the field. However, proper training is essential to ensure the dog is safe, obedient, and effective in the hunt.

One of the first steps in training a German Shorthaired Pointer to hunt is establishing a solid foundation of obedience. This includes basic commands such as sit, stay, come, and heel. The dog should also be trained to respond to hand signals and whistle commands, which will be important in the field. Establishing a hierarchy with the dog is essential, making it clear that the owner is the pack leader.

Once a strong foundation of obedience has been established, the dog can begin training in specific hunting skills. This includes teaching the dog to track and locate the game, to point and flush birds, and to retrieve the downed game. Consistency, patience, and positive reinforcement are essential to successful training. A German Shorthaired Pointer can become a skilled and reliable hunting companion with proper training.

Understanding German Shorthaired Pointers

History of German Shorthaired Pointers

German Shorthaired Pointers (GSP) is a versatile breed first developed in Germany in the late 19th century. According to the American Kennel Club (AKC), the breed was created by crossing various breeds, including the Spanish Pointer, Foxhound, and English Pointers. The goal was to create a dog that could do it all – hunt, retrieve, and track – and the GSP was the result.

Characteristics of German Shorthaired Pointers

GSPs are medium to large dogs with a distinctive liver and white or black and white coat pattern. They are known for their athleticism, intelligence, and loyalty. These dogs are highly trainable but have a lot of energy and require regular exercise and mental stimulation. GSPs are excellent hunting dogs and have a strong prey drive. They are versatile and can hunt various games, including birds, rabbits, and deer. They are also excellent retrievers and can retrieve both on land and in water. In addition to their hunting abilities, GSPs are also great family dogs. They are affectionate and love to be around people. They are good with children and other pets but have a strong prey drive, so caution should be taken when introducing them to smaller animals. Overall, GSPs are a breed that requires an experienced owner who can provide them with the exercise, training, and mental stimulation they need to thrive. With the proper care and attention, they make excellent hunting companions and loyal family pets.

Preparing for Training

Before beginning training, it is essential to prepare both the dog and the trainer. This section will cover the physical and mental preparation needed for successful training and the required equipment.

Physical Preparation

Training a German Shorthaired Pointer to hunt requires a certain level of physical fitness. The dog and the trainer should be in good health and able to withstand long periods of activity. It is recommended to start with short training sessions and gradually increase the duration as the dog and trainer build endurance.

Additionally, it is essential to ensure the dog is up to date on all necessary vaccinations and has received a clean bill of health from a veterinarian. This will help prevent any potential health issues from interfering with training.

Mental Preparation

Training a German Shorthaired Pointer to hunt also requires mental preparation. The dog should have a strong foundation in basic obedience commands, such as sit, stay, come, and heel. It is recommended to work on these commands before beginning hunting training.

The trainer should also clearly understand the training process and be patient and consistent in their approach. It is essential to remain calm and avoid becoming frustrated or angry with the dog during training sessions.

Equipment Needed

Several pieces of equipment are needed for training a German Shorthaired Pointer to hunt. The following is a list of some of the essential items:

  • Hunting vest
  • Training collar
  • Leash
  • Whistle
  • Bird launcher
  • Birds for training

The hunting vest should have pockets for storing training equipment and birds. The training collar should be fitted appropriately and used with positive reinforcement techniques. The leash should be sturdy and long enough to allow the dog to move freely while maintaining control.

The whistle is used for recall training and should be consistently used during training sessions. The bird launcher is used to simulate the experience of a bird taking flight and should be used in conjunction with live birds for training purposes.

Basic Training

Before a German Shorthaired Pointer can become an effective hunting dog, it must undergo basic training. This training is essential to develop the dog’s obedience, socialization, and hunting skills. Basic training is divided into three sub-sections: obedience training, socialization training, and introduction to hunting.

Obedience Training

Obedience training is the foundation of all dog training. It teaches the dog to follow commands and behave appropriately in different situations. The training should start as early as possible, preferably when the dog is a puppy. The dog should be taught basic commands such as sit, stay, come, and heel. These commands are essential for controlling the dog during a hunt.

The training should be positive and reward-based. The dog should be praised and rewarded for following commands. Punishment should be avoided as it can lead to fear and aggression. The training should be consistent, and the dog should be trained in different environments to ensure it can follow commands.

Socialization Training

Socialization training ensures the dog is comfortable around people and other animals. The training should start as early as possible, preferably when the dog is a puppy. To ensure comfort, the dog should be exposed to different people, animals, and environments.

The training should be positive and reward-based. The dog should be praised and rewarded for good behavior. The training should be consistent, and the dog should be exposed to different situations to ensure comfort.

Introduction to Hunting

The introduction to hunting should start after the dog has undergone obedience and socialization training. The training should begin with basic exercises such as retrieving and pointing. The dog should be taught to retrieve objects such as balls and dummies.

The dog should also be taught to point at birds and other games. The training should be positive and reward-based. The dog should be praised and rewarded for good behavior. The training should be consistent, and the dog should be exposed to different hunting situations to ensure it can perform in any hunting situation.

Basic training is essential to develop a German Shorthaired Pointer’s obedience, socialization, and hunting skills. The training should be positive and reward-based, and the dog should be exposed to different situations to ensure it can perform.

Advanced Training

After your German Shorthaired Pointer has mastered the basics of obedience and hunting, it’s time to move on to more advanced training. This will help your dog become a more skilled and versatile hunting partner.

Hunting Techniques

Advanced hunting techniques involve teaching your dog to work with you to locate and flush out the game. This can include preparing your dog to follow hand signals or whistle commands to stay within range and perform a specific area. It can also involve teaching your dog to work with other dogs to cover a larger size and flush out more games.

Another important skill to teach your dog is how to track wounded games. This involves teaching your dog to follow a blood trail and locate the animal. This can be a challenging skill to teach, but it can make a big difference in your success as a hunter.

Retrieving Training

In addition to flushing out the game, your German Shorthaired Pointer should also be skilled in a retrieving match that has been shot. This involves teaching your dog to retrieve birds, other small game, and larger animals like deer.

Retrieving training should start with simple exercises, such as retrieving a dummy or toy. Gradually increase the difficulty by adding distractions, such as other dogs or people. It’s important to teach your dog to retrieve gently, not damage the game, and to release the game on command.

Water Training

Many hunting situations involve water, so teaching your German Shorthaired Pointer to be comfortable and skilled in the water is essential. This can include teaching your dog to swim, retrieve game from water, and work in marshy or swampy areas.

Water training should start with simple exercises in shallow water and gradually progress to deeper water and more challenging conditions. Using positive reinforcement and making the training fun for your dog is essential.

Maintaining Your German Shorthaired Pointer’s Skills

After training your German Shorthaired Pointer to hunt, it is essential to maintain their skills. Consistency in training, regular exercise, and proper nutrition are critical factors in keeping your GSP in top hunting condition.

Consistency in Training

Consistency is crucial in maintaining your GSP’s hunting skills. Training your dog at least once weekly is recommended to keep their skills sharp. Using the same commands and techniques during initial training is essential to avoid confusion. Consistency in training will help your GSP maintain their hunting abilities and improve their overall performance in the field.

Regular Exercise

Regular exercise is vital for keeping your GSP in top physical condition. Hunting requires a lot of energy, so providing your dog with enough exercise is essential to maintain its stamina. Daily walks or runs, swimming, and playing fetch are great ways to keep your GSP active and healthy. A well-exercised dog is likelier to perform better in the field and have a more enjoyable hunting experience.

Proper Nutrition

Proper nutrition is essential for maintaining your GSP’s hunting skills. A well-balanced diet that includes protein, carbohydrates, and healthy fats will give your dog the energy they need to perform at its best. It is recommended to feed your GSP high-quality dog food that is specifically formulated for active dogs. Additionally, providing your dog with fresh water at all times is crucial to its overall health and performance.

Maintaining your German Shorthaired Pointer’s hunting skills requires Consistency in training, regular exercise, and proper nutrition. Following these guidelines ensures your GSP is in top physical and mental condition for their next hunting trip.

Conclusion

Training a German Shorthaired Pointer to hunt can be a fun and rewarding experience for both the dog and the owner. It requires patience, Consistency, and dedication. The key is training the dog at a young age and maintaining a consistent training schedule.

It is important to remember that every dog is different and may require different training methods. Owners should be willing to adapt and modify their training techniques to suit their dog’s individual needs.

Some essential tips to keep in mind when training a German Shorthaired Pointer to hunt include:

  • Starting training at a young age
  • Using positive reinforcement techniques
  • Maintaining a consistent training schedule
  • Gradually increasing the difficulty of training exercises
  • Providing plenty of exercise and mental stimulation outside of training sessions

Owners should also be aware of the potential risks and dangers associated with hunting, such as exposure to wildlife, harsh weather conditions, and possible injury. It is important to take necessary precautions to ensure the safety of both the dog and the owner.

Overall, training a German Shorthaired Pointer to hunt can be a challenging but rewarding experience. With patience, dedication, and a willingness to adapt, owners can help their dogs reach their full potential as skilled and reliable hunting companions.

7 Largest Catfish Ever Caught

0

Overall, catfish are some of the most abundant species of fish in the world. According to Practical Fishkeeping, there are now over 3,000 species of catfish around the world. Depending on the species, catfish can range in size from 1.5 to 2 inches (4 to 5 cm) to hundreds of pounds, like the behemoths on this list. All of the catfish on this list are over 100 pounds (45.36 kilograms). Nearly all of these catfish are listed as the world record for their species in the International Game Fish Association’s (IGFA) World Records Database. As of the time of this writing the records are accurate.

  1. Record Flathead Catfish

Record Flathead Catfish Source: IGFA World Records Database

The record for the largest flathead catfish belongs to Ken Paulie, who landed his big flathead over 20 years ago. Paulie’s flathead catfish weighed 123 pounds (55.79 kilograms) and was over 5 feet (1.55 meters) in length.

While Paulie’s record was verified by the the Kansas Department of Wildlife and Parks and has been standing for over 20 years, many people have questioned the legitimacy of Paulie’s catch. Paulie was using a light tackle while he was crappie fishing and the flathead was a lucky catch.

Did You Know?

Paulie’s flathead catfish was frozen for many years before it was presented to the Kansas Department of Wildlife, Parks, and Tourism in 2016 for further examination. Researchers determined that the record flathead catfish was at least 22 years old, grew very rapidly, and was most likely a male.

  1. Record Redtail Catfish (Pirarara)

Record Redtail Catfish (Pirarara) Source: IGFA World Records Database

The world’s largest redtail catfish was captured in 2010 by Gilberto Fernandes in Brazil’s Amazon River. Fernandes’ redtail catfish was 123 pounds 7 ounces (56 kilograms) and 4.62 feet (1.408 meters) long. There really isn’t any more details about Fernandes’ catch, but he did use a fiberglass Sportex rod to land the redtail catfish.

According to a news report, Fernandes has over 100 IGFA world fishing records. Just a month before he made his record redtail catfish catch, Fernandes caught another redtail that was 113 pounds 8 ounces (51.5 kilograms).

Did You Know?

Redtail catfish are not picky eaters and in the wild tend to eat fish and crustaceans. In captivity, redtail catfish eat assorted worms, frozen foods, sinking catfish pellets, and dry foods.

  1. Record Blue Catfish

Record Blue Catfish Source: The Roanoake Times

The record blue catfish was caught in 2011 in Kerr Lake, Virginia by a man named Richard Nicholas Anderson. This large blue catfish weighed in at 143 pounds (64.86 kilograms) and was 4.75 feet (1.45 meters) long. It took Anderson about 45 minutes to land the giant blue catfish, whose size surprised Virginia Department of Game and Inland Fisheries chief Gary Martel.

Anderson wanted to keep his blue catfish alive so that it could be put in a tank at a local Bass Pro Shops retail store. However, despite his best efforts, his record blue catfish died.

Did You Know?

Blue catfish were intentionally introduced into rivers in Virginia in the 1970s, but have now become an invasive species that grows and breeds rapidly.

  1. Record Goonch

Record Goonch Source: fiskefuralle.se

The record for the largest Goonch ever caught belongs to Jakub Vágner, the host of National Geographic’s “Fish Warrior.” Vágner’s Goonch was 165 pounds 5 ounces (75 kilograms) and over 5 feet (1.57 meters) long. The Goonch was caught in the River Ramganga in India.

In addition to the large Goonch, Vágner has caught several other large freshwater fish, including and 286.6 pound (130 kilogram) Arapaima and an 242.5 pound (110 kilogram) Wels catfish. In an interview, Vágner said that he is sill after the world record Goliath Tiger Fish of the Kongo river.

Did You Know?

Goonch catfish have reportedly been known to eat corpses from funeral pyres on the Kali River, which runs between Nepal and India. It is speculated that this has allowed the Goonch to grow so large and develop a taste for human flesh.

  1. Dino Ferrari’s Wels Catfish

Dino Ferrari Source: Adventure Sports Network

In 2015, an Italian fisherman named Dino Ferrari was featured in international news for capturing a monster Wels catfish in the Po Delta. Ferrari’s Wels catfish weighed 280 pounds (127 kilograms) and was 8.75 feet (2.67 meters) long. Although Ferrari’s catch is impressive, unfortunately he was just shy of the world record for a Wels catfish catch, which weighed 297 pounds 9 ounces (134.97 kilograms).

However, other than the official record listing on the International Game Fish Association’s website, there wasn’t enough information to feature the story of the record Wels catfish. Ferrari’s sponsor did say that his catch may hold the world record for a fish caught with a Torpedo spinning rod made by an Italian manufacturer.

Did You Know?

It took Ferrari 40 minutes to catch the Wels catfish and he decided to release the fish back into the water so he could be caught again in the future.

  1. Record Lau-Lau (Piraiba)

Record Lau-Lau (Piraiba) Source: bigfishesoftheworld.blogspot.com

Jorge Masullo de Aguiar currently holds the world record for the largest Lau-Lau (Piraiba), which is a species of catfish that is native to South America. Masullo de Aguiar’s Piraiba was caught in 2009 and weighed 341 pounds 11 ounces (155 kilograms). This giant South American catfish was also over 6.5 feet (2 meters) long.

While Masullo de Aguiar’s Piraiba is the largest officially on record, in general, Piraiba can weigh over 450 pounds (204 kilograms). In fact, the Piraiba is the largest of the catfish species found in the Amazon.

Did You Know?

Piraiba are so large that monkeys, cats, dogs, birds, and other catfish have been found in their stomachs.

  1. Mekong Giant Catfish

Mekong Giant Catfish Source: NBC News

In 2005, a behemoth Mekong giant catfish, weighing in at a scale-tipping 646 pounds (293 kilograms) was caught in a remote village in Thailand near the Mekong River. Experts believe that this monster Mekong giant catfish is not only the largest catfish ever caught in the world, but the largest freshwater fish ever recorded.

In addition to weighing nearly 650 pounds, this Mekong giant catfish was 9 feet (2.7 meters) long. It took over an hour for the Thai fishermen to reel in the heavy catfish. Officials from Thailand’s Inland Fishery Department wanted to use the female Mekong giant catfish for a breeding program, but she ended up dying. The people from the nearby villagers didn’t let the fish go to waste and ended up eating it.

Did You Know?

The Mekong giant catfish is rare and endangered and the one caught in 2005 was the largest ever caught since Thailand began keeping records in 1981.

The Diamond Edge SB1 vs the Infinite Edge Pro: Which is Right for You in 2024?

0

Diamond Archery has some really popular bows in their line-up, and the two that are most often compared are probably the Diamond Infinite Edge (their most popular model), and the Diamond Edge SB-1 (the model that came right after it).

No products found.

VS

In this post, we’ll take a close look at these two bows, how they compare, and which might be the right option for you.

Let’s Compare the Stats…

This is a good place to start. Both bows are made for recreational shooting and bowhunting, but there are plenty of differences to look at. We’ll ping-pong back and forth between bows, and we’ll start off looking at the…

Draw Length:

Infinite Edge: 13 to 31 Inches. The Infinite Edge is Diamond’s go-to “mass market” bow, and when they designed it, they wanted it to be usable by as many people as possible. That range in draw length is good for everyone to very young archers, all the way up to very tall archers (the draw length of 31 inches can fit someone who’s up to about 6-and-a-half feet tall).

SB-1: 15 to 30 inches. The SB-1 has a shorter draw length range (but still pretty large, in the grand scheme of things). That draw length of 30 inches is suitable for folks up to 6-foot-3-inches tall, and if you’re taller than that, the Infinite Edge comes out on top.

Verdict: For most people, this would be a tie. The Infinite Edge is probably a better pick for very young archers, and for folks taller than 6-foot-3-inches.

Draw Weight:

Infinite Edge: 5 to 70 Pounds. This is, at present, the largest draw weight range on a Diamond bow. 5 to 70 pounds should be suitable for just about anyone, but keep in mind that…

SB-1: 7 to 70 Pounds. This ain’t so bad either. Even very small kids should be able to pull 7 pounds (and that’s before we consider the let-off, which we’ll discuss in a second). 70 pounds is pretty high—you can find higher, but that’s up there—and it’s powerful enough to hunt just about all North American large game.

Verdict: A tie, really, but the Infinite Edge has a lower bottom measurement.

Mass Weight:

Infinite Edge: 3.2 Pounds. For a bow in this range, 3.2 pounds is pretty decent, and it’s better than…

SB-1: 3.6 Pounds. This isn’t terrible, but it’s definitely heavier.

Verdict: Infinite Edge gets the prize. That lower mass weight isn’t a big deal if you shoot here and there, but if you engage in hours-long practice sessions, or if you’re a dedicated bowhunter and need to aim for minutes at a time, that lower weight can be important.

Brace Height:

Infinite Edge: 7 Inches. This is a pretty common brace height, and good for hunting bows, because it provides both arrow speed and a liiiiittle forgiveness in your shot. It’s the same as the…

SB-1: 7 Inches. This is one of those measurements that ultimately becomes a matter of preference. 7 inches is reasonable, though, for sure.

Verdict: Tie.

Axle-to-Axle:

Infinite Edge: 31 Inches. Same as the…

SB-1: 31 Inches. What’s fascinating is that these two measurements—the brace height and the axle-to-axle length—make this a very similar bow. And we’ll talk more about that below.

Verdict: Tie.

IBO Speed:

Infinite Edge: 310 FPS. For a mid-range bow like the Infinite Edge, 310 feet-per-second is pretty good, and that’s why we’ve recommended it to new bowhunters. There are bows that will proper arrow with greater speed, but they tend to high-end bows (or crossbows!). 310 FPS is very good. But, obviously, not as good as…

SB-1: 318 FPS. Diamond upped their game with the 318 FPS, and while those 8 feet may not sound like much, the faster you get, the harder it is to increase that measurement. 318 is excellent for a mid-range bow.

Verdict: The SB-1 takes this one, and if you’re bowhunting, those 8 feet per second can make a big difference—game is quick!

Next up in our Diamond Edge SB1 vs the Infinite Edge Pro face-off…

Let-Off:

Infinite Edge: 80%. This is above-average for a bow in this range, and very good for mass-market bow. And that’s why it’s a little surprising that the let-off on the SB-1 is…

SB-1: 80%. We were a little surprised when we found that the SB-1 has a let-off 80%. We thought, because the SB-1 is technically a more advanced bow, the let-off would be greater, but… no.

Verdict: Tie. Don’t get us wrong—80% is still very good, and if you’re going to jack up your draw weight to 50 / 60 / 70 pounds, 80% can provide you with a lot of comfort and ease to aim. But it is surprising that both of these bows have the same let-off.

So it would seem that these two bows are almost identical, right? The specs all seem the same. They even look very similar:

No products found.

They’re not the same, though—there are actually some important differences between the two, so now…

Let’s Compare the “Hidden” Features

It really does seem like these two bows have a whole lot in common. Even the features that are different aren’t really *that* much different. So what gives?

We’ve written… goodness gracious, at this point we’ve written hundreds of bow reviews, and we’ve found the following: 1) people get really obsessed with feet-per-second and let-off and other numbers-based details, but they…

2) frequently overlook the “non-spec” aspects of a bow—and that’s a shame, because those “non-spec” aspects of a bow are often the most important things to look at. And that’s the case here.

There are two main differences between these two bows that won’t show up in a spec list. They are:

The Ease of Adjustability

The Diamond Infinite Edge was a great success for Diamond, and because of its incredible adjustability, it was a great option for both beginners and intermediates. You can make the draw weight light, and then increase it as you gain strength, and you could even buy the bow as a younger person and use it as you got older by extending the draw length. The only problem was…

It wasn’t *really* that easy to adjust. It wasn’t! In many cases, people had to bring it to the pro shop to get it adjusted (and we advised many people to do so).

And that’s one of the real advantages of the SB-1: it’s easier to adjust—and designed to be easier to adjust. Diamond made a lot of effort to make adjustability easier, and they even put videos on YouTube to show people how to do it:

So that’s Big Difference #1, and it’s a big one—especially if you’re new to archery, or getting the bow for a younger person.

The second big difference is…

The Cam System

These two bows have very different cam sets, and if you take a close look, you can see the difference: the cams on the SB-1 are more aggressive and ovoid, whereas the cams on the Infinite Edge are a little rounded. Not only does that aggressive shape of the cams on the SB-1 contribute to the higher FPS measurement, but it also makes for a smoother draw cycle.

Cams are designed to do a lot of things—pulling on the bow string to propel the arrow forward being the main one—but they need to reliable, and the Bowtech Synchronized Binary Cam system—which is on the SB-1 but not on the Infinite Edge—is designed for reliability. It’s manufactured to keep the cams moving as mirror images to each other, so that the nock—the part of the bow string that holds your arrow in place—travels forward in as flat a flat trajectory as possible.

So that’s Big Difference #2: the cam system. Another big difference.

The Diamond Edge SB1 vs the Infinite Edge Pro: Our Verdict

Of these two bows, the SB-1 comes out on top—and that’s by design: it’s *supposed* to be the better bow—but honestly, there’s more in common here than not. Here’s how we’d express it:

> Both are great bows, and both are good for recreational shooting and bowhunting by people of all ages. From a performance angle, they’re very similar, and we’ve been pleased with both—but at the end of the day, the draw cycle is a little smoother on the SB-1 because of the Bowtech Synchronized Binary Cam system.

> If you want a bow that you, yourself, can adjust so that it meets your draw weight and draw length specifications, the SB-1 is probably the better bet. It’s easier to tune for beginners, and there are some really helpful guides on YouTube put up by Diamond.

> If you don’t want to fiddle with the bow, and are fine taking it to a pro shop for tuning, the Diamond Infinite Edge will do you just fine. Have the pro shop rep adjust it to your specifications, and go from there. It’s a solid bow, and we’ve used our model for years.

There you have it!

No products found.

Good luck, have fun, and happy shooting!

How to Train Your Dog to Find Antler Sheds

0

Dogs are considered man’s best friend for a number of reasons; they are loyal, loving, affectionate, and they can be trained to do amazing things. Police departments and law officials use them to locate narcotics, firearms, and explosives with their keen sense of smell. But did you know that dogs can help you find antler sheds as well? If you’re interested in training your dog to find antlers, continue reading and I’ll tell you how you can train them to become your new favorite shed hunting buddy.

Shed Caribou Antlers

Benefits of Using a Dog To Find Antlers

  • A dog’s sense of smell is far superior to that of a human’s. Using their nose, they can sniff out and locate shed antlers that people like you and me wouldn’t be able to find.
  • Dogs are able to get into thick, dense brush to retrieve antlers.
  • It’s a heck of a lot more fun taking a dog with you to hunt for sheds than doing it alone!

My Antler-Hunting Dog

Let me first start off by saying that I’m not a professional dog trainer, and when I got my Golden Labrador Retriever, Jesse, I had no intention of training her to become a shed-hunting dog. In fact, I originally wasn’t even aware people trained dogs to find antlers. Not long after getting her, though, one of my hunting buddies saw my dog and was telling me about how he had seen someone train their Lab to sniff out sheds in the woods. With this knowledge at hand, I thought I might as well try and train Jesse. After all, the only thing I had to lose was time, and I enjoyed spending time with Jesse.

After talking with some people who trained their dogs to find antlers, and scouring the internet for advice on training Labradors, I had a good idea of how to train her. What I didn’t know, though, was just how quickly she would catch on. Jesse now goes on every antler hunt I go on and is almost certain to find more sheds than I do. Anytime I bring along buddies or guests on shed-hunting trips, they are always amazed at her uncanny ability to find sheds.

Jesse Playing In Water

Which Breeds Are The Best Shed Hunters?

I’ve only trained my Lab, Jesse, to find sheds, so I really can’t say what the best shed-hunting breed is. I do know Labrador Retrievers are one of the most popular breeds for this because of their intelligence, sense of smell and ability to obey commands. I’ve also heard that Dachshunds can be trained to be effective shed hunters.

The most important thing, though, is making sure your dog will obey and follow your commands in the woods. Dogs that run off at the sight of a squirrel or any other animal create a dangerous situation.

The Basics of Training

Before you start, you’re going to need lots of treats (milk biscuits work well) and lots of antlers. You can either go out and try to find some sheds in the woods, or you can buy them online. Remember, only authentic antlers work, as fake ones don’t carry the same scent and feel. Try to get ones that are fresh and not completely sun bleached or dried out. Old antlers are likely to have lost a significant portion of their scent, making it difficult for your dog to locate them by smell.

Step #1 – Introducing Deer Antlers

Labrador Retrievers Make Wonderful Shed Hunters

You’ll want to give deer antlers to your dog as early as possible to get them used to the look, feel, and scent that they give off. This is one of the keys to successfully training your dog to find sheds in the wild. Try tossing some deer antler sheds out in the yard and say a command, such as “go get it” or “get the antlers.” If your dog obeys your command and successfully retrieves the antlers, give them a treat followed by lots of petting and praise. Positive reinforcement goes a long way when it comes to any form of dog training and/or obedience.

Don’t worry if your dog won’t immediately go after the antler. You may need to get them used to playing with it by putting it under their nose and almost teasing them with it. This shouldn’t be difficult, as most dogs will grow fond of playing antlers pretty quickly. Dogs instinctively love to fetch items thrown by their owners, so toss them out in the yard and let them chase them. Once they bring it back, give them a treat.

Step #2 – Hide-And-Seek

Once your dog is accustomed to the scent of deer antlers, it’s time to step up its training to the next level. Assuming you have access to some woods or a forest, hide a couple of them in moderately difficult areas. Place them underneath some leaves about 30 to 40 yards apart and give your dog the fetch command that you’ve previously trained them with.

If they don’t immediately go after the antlers, which they probably won’t on their first try, just walk over to the areas with the antlers and see if your dog can sense it. When they’ve found it, them a treat and lots of praise. Keep doing this once a day and you should see start to see improvements in how fast your dog is able to uncover the antlers.

Step #3 – The “Real” Thing

Once your dog has some training under their belt, it’s time to take them out on a real antler hunt with you. Just go about your search as you normally would, walking down trails and scanning your surroundings. Hopefully, your dog will pick up on the scent of a nearby shed and follow it. Keep your dog in sight and call them back if they try to run off without you. Once they find an antler, continue with the reward and praise. Alternatively, if you see an antler that your dog doesn’t, say the fetch command and let them uncover it.

That’s really all there is to training your dog to find antlers. Just keep taking your dog out there on your hunts and give them the opportunity to find the sheds. Keep rewarding your dog when they make a find and before you know it, your dog will be uncovering sheds left and right.

Tips For Training Your Dog To Find Antlers

  • Always be positive and reward your dog with a treat and praise when they find an antler. If they don’t find anything, don’t punish or scold them.
  • Keep your training sessions short. Typically, a single 20-to-30-minute session per day is more than enough needed to train.
  • Let your dog play with antlers and use them as chew toys. Not only will this allow them to get used to the antlers, but antlers contain beneficial nutrients like calcium.
  • Always keep your dog in sight, and if they run too far away, call them back. It’s dangerous for dogs to chase after animals in the woods.
  • If you haven’t done so already, you’ll want to train your dog basic commands, such as sit, stay and come. This will help make sure your dog is obedient and will obey your commands when you’re out in the woods.

Video of Zeke Learning How To Find Antler Sheds

The Day the Duck Hunters Died

0

It is easy to forget the days like the one the duck hunters died. It is easy to forget that there was a time—not so very long ago, really—when there was no Gore-Tex, no Thinsulate, no neoprene and no polypropylene for duck hunters. There was a time when outboard motors, far from the sleek and powerful marvels of today, were crude, cumbersome beasts, unreliable under the best circumstances and all but useless under the worst. There was a time when there were no cell phones, no emergency beacons, no Flight for Life helicopters.

There was a time, too, when there were no weather satellites, no telemetry to provide data that could be plugged into sophisticated formulas and fed into supercomputers for timely forecasts. Indeed, that the weather could be predicted with any degree of accuracy then—November 1940, to be precise—seems almost miraculous, meteorology in those days being one part science and two parts the divination of omens, signs and portents. Nothing brings this into starker relief than the fact that, a little more than a year later, what appeared on radar to be a swarm of aircraft approaching the Hawaiian Islands was dismissed as some sort of malfunction by military officers who refused to trust this newfangled and unproven technology.flying mallard duck

Of course, some things do not change with the passage of time, and one of those constants is the love of duck hunters for the kind of wet, raw, blustery, thoroughly miserable days that keep normal people indoors with the fireplace crackling and the teakettle whistling on the stove. And just as absence makes the heart grow fonder, the longer the duck hunter is made to wait for such a day, the hotter burns his pent-up desire to escape the sloughs and bays and marshes, and there—decoys artfully set, blind brushed and grassed, dog expectant and quivering, call poised to be pressed to lips—scan the lowering skies for birds that ride the wind.

The fall of 1940 had been a mild one in the Upper Midwest, an extended Indian summer of warm temperatures and little rainfall. In other words, the duck hunting had been disappointing. Oh, there had been the usual “local” birds in the early season—teal, wigeon, shoveler, the odd mallard—but without any heavy weather to set the migration in motion, the great flocks of northern ducks were still in the prairie provinces of Canada, fattening up for the long flight south. Hunters throughout the region, from the Dakotas across to Wisconsin, from Minnesota down to southern Illinois, were on pins and needles, knowing that the change in weather they so dearly wanted was overdue, that it could happen any day.

Finally, on Sunday, November 10, came a forecast that held promise. The outlook was for clouds, snow flurries, and colder temperatures. Wildfowlers were ecstatic, and what made this good news even better was that Monday, November 11, was Armistice Day—the predecessor to Veterans Day, and, for many people, a holiday. Although as holidays go it was a fairly somber one. The grinding effect of the Great Depression still lingered in the U.S., and in Europe. There, where just 22 years earlier the eponymous armistice had been signed, war raged once again.

flying gadwall duck
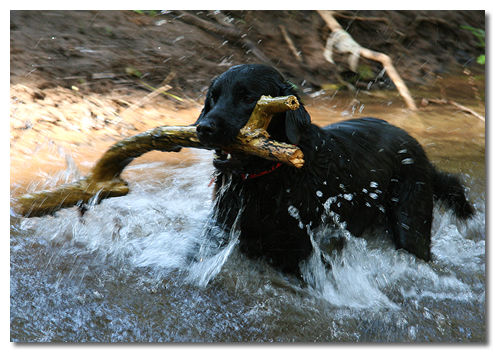
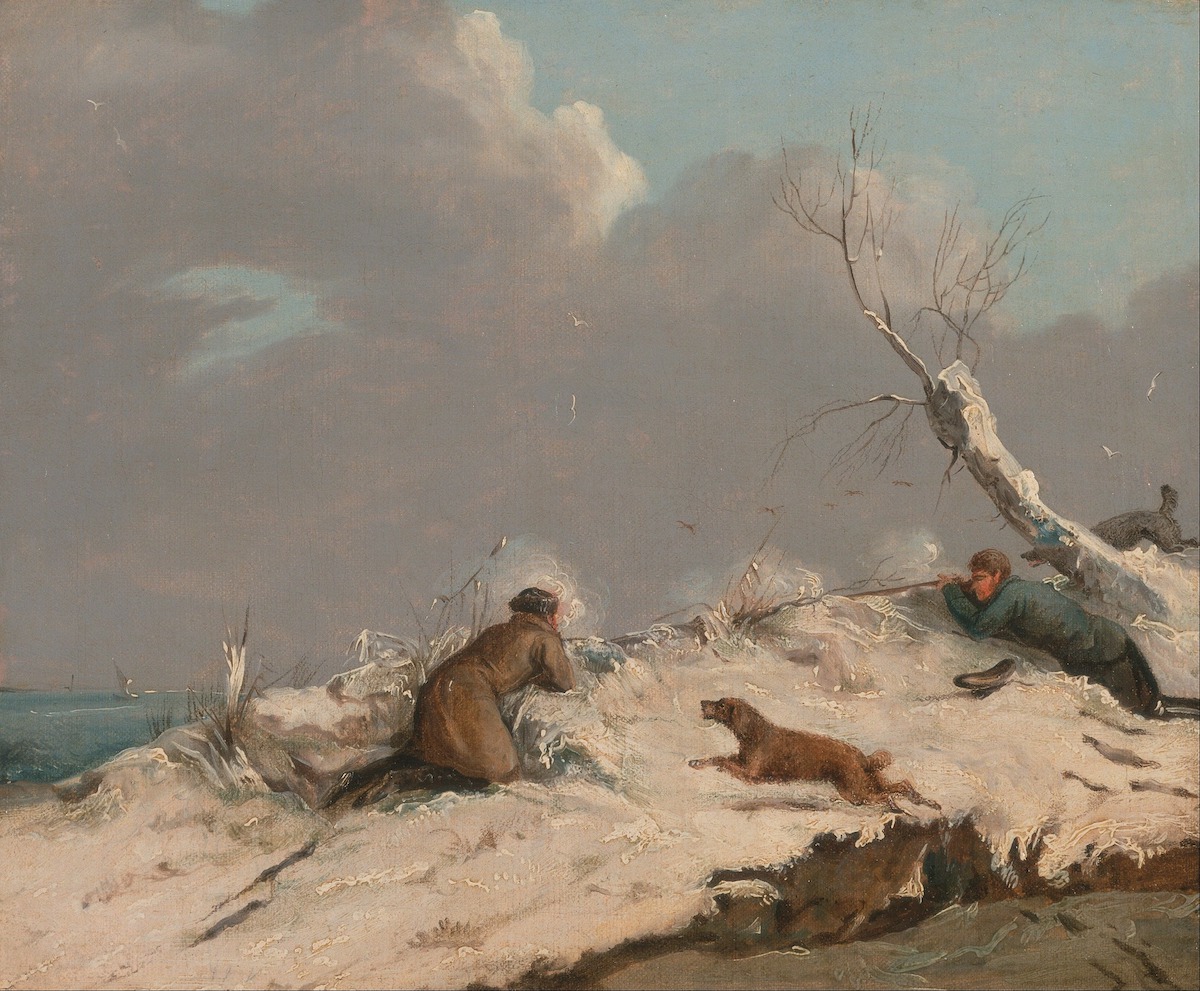
Still, it’s not much of a leap to suppose that the typical waterfowler of the Upper Midwest, upon hearing the forecast on the radio or reading it in the local newspaper, felt blessed—even jubilant. Other concerns were pushed aside; nothing mattered now but getting ready for tomorrow’s hunt. Decoys, shell boxes, shotguns, and calls were checked and rechecked. Ditto for boats, motors, gas tanks, and oars. Clothes were carefully laid out; sandwiches were made, wrapped in wax paper and refrigerated; thermos bottles were placed next to coffee percolators. The dog was given an extra bit of food, because in a few hours he was going to be one busy retriever and would need all the energy and stamina he could muster.

The phone lines hummed as hunting partner called hunting partner, their voices crackling with excitement. They knew, with as much certainty as they knew anything, the ducks would be flying, and they aimed to be smack dab in the middle of them.

They got more than they bargained for.

In his magisterial Where The Sky Began: Land of the Tallgrass Prairie, John Madson describes the genesis of a Midwestern blizzard as a “temperature marriage” of cold, dry polar air sweeping down from Canada and warm, moist subtropical air welling up from the Gulf of Mexico.

“Since its primary component is wind,” Madson wrote, “the classic blizzard is essentially a phenomenon of the open lands—particularly the plains and prairies, where the topography offers little resistance to moving air and the great storms can run almost impeded. There may be more snow in northern and eastern forest regions, and certainly much cold. The difference between winter storms there and the classic prairie blizzard lies in the intensity of unbridled wind that plunges the chill factor to deadly lows, drives a blinding smother of snow during the actual storm, and continues as ground blizzards and white-outs long after snow has stopped falling. Depending on snowfall and wind, the storm may leave drifts three times as tall as a man and is usually followed by calm, silver-blue days of burning cold.”

That, in a nutshell, describes the blizzard that screamed across the Upper Midwest on Monday, November 11, 1940, devastating everything it touched along the way. The winds blasted at a constant 40-50 mph with gusts in excess of 80. More than 16 inches of snow fell in the Twin Cities, while more than 26 inches were recorded a few miles up the Mississippi River near St. Cloud. In LaCrosse, downstream on the Wisconsin side of the Mississippi, the barometric pressure sank to an all-time low. The temperature dropped 30 degrees—from above freezing to single digits—in two hours and continued to plummet from there. Windchills were virtually off the charts.

Wind-blown snow and trees

Nothing escaped the storm’s furious, relentless, indiscriminate wrath. Livestock perished by the hundreds of thousands. So many turkeys died in parts of Minnesota and Iowa that after the storm farmers were selling whole “fresh frozen” birds for 25 cents apiece. The losses to wildlife, especially pheasants, were spectacular. Communications and power were disrupted across thousands of square miles, and transportation was brought to an absolute standstill. Every town and village close to a main road became a refuge as stranded travelers sought shelter from the storm. Countless people opened their homes to complete strangers, providing whatever they could offer in the way of board and room.

But for some there was no shelter, no refuge. Motorists stuck in snowdrifts on remote stretches of road were buried alive in their cars, their frozen bodies not exhumed for days. On Lake Michigan, the freighter William B. Davock was sheared in two by monstrous waves.

The ferocity of the storm was almost beyond human reckoning. There are accounts of farmers who, after checking their livestock, could not find their way from the barn to the farmhouse. Disoriented, pummeled by the wind, with no visible landmarks to guide them, and no sense of east, west, north, or south, they wandered blindly through a roaring white hell. The lucky ones bumped into something recognizable and groped their way to safety. The unlucky ones didn’t.old boat in water

Nearly everyone who survived the storm remarked on how incredibly difficult it was just to breathe. The air was so laden with moisture that it seemed as thick as syrup. And even when you were able to draw a deep breath, the cold seared your lungs like a red-hot blade.

This is what thousands of duck hunters, with their wooden skiffs and their cranky outboards and their canvas caps, found themselves caught in. Most of the world knows the Midwestern blizzard of November 11, 1940, as the Armistice Day Storm. To sportsmen, it’s simply the day the duck hunters died.

No one really knows how many people lost their lives as a direct result of the Armistice Day Storm. Although Time put the death toll at 159, the actual figure was probably closer to 200—and about half of them were duck hunters. According to John Madson, 85 duck hunters perished in Minnesota, Wisconsin, and Illinois alone. As he wrote in Where The Sky Began, “Caught by the storm with little warning, they drowned as they tried to reach land, or stayed in their duck blinds as waves tore them apart, or simply died of exposure that night on the river islands out of reach of help . . .”

If a storm causing as much destruction and loss of life occurred today, someone like Sebastian Junger or Jon Krakauer would write a best-selling book about it. But while it certainly made headlines—a spread in Life was entitled “Midwest Tempest Strews Death By Land and Lake”—America was preoccupied with other matters. After the dead were buried, the damage was cleared, and the bereaved had ceased to mourn, life resumed more-or-less as usual. And the weather for the remainder of the winter of 1940-’41 was largely unremarkable.

But no one who was there would ever forget it. Nor did their memories, like photos left too long in a show window, pale with the passage of time. It was the persistence of these memories that, 45 years after the event, prompted a Minnesota man named William Hull to track down and interview more than 500 people who’d lived through the Armistice Day Storm. He then selected 167 of these accounts and assembled them into a book called, fittingly, All Hell Broke Loose.

Now in its 18th printing, it’s replete with tales not only of close calls and narrow escapes, but of countless acts of charity, generosity, selflessness, and heroism. (There are a number of humorous, Keillor-esque tales as well, such as the one entitled “Three Hours Digging Path to Outhouse.”) Not a few of these stories were told by duck hunters. While the specifics may differ slightly—some recalled seemingly endless flocks of divers like redheads, bluebills, and canvasbacks, while others remember wave upon wave of mallards—they all agree that they had never seen the sky so full of ducks. They agree, too, that there was nothing in the weather that morning to presage what was coming, that the storm was upon them almost before they knew what was happening, and that it was only by the grace of God that they survived when so many others did not.

Every sportsman who was there has his own wrinkle to add to the story. Cyril Looker of Fremont, Wisconsin,—in the heart of the wildlife-rich Wolf River bottoms—recalls standing on the shore near a power line cut and burning up two boxes of shells as the ducks poured into Partridge Lake. The kicker, notes the 83-year-old Looker, is that the birds—mallards and divers both—were flying beneath the wires.

painting of hunters and dog in snow

The account that eclipses all the rest, though—and has made the Armistice Day Storm vividly and chillingly real for generations of sportsmen ever since—is the one written by the great Gordon MacQuarrie. Indeed, it’s entirely likely that if MacQuarrie, then the outdoors editor for the Milwaukee Journal, hadn’t been on the scene, the event would be little more than a footnote in duck hunting history. While a lesser writer might have filed a competent and informative report, MacQuarrie penned a masterpiece.

His story, under the headline “Icy Death Rides Gale on Duck Hunt Trail,” appeared on the front page of the Journal on Wednesday, November 13. It was filed from Winona, Minnesota, a Mississippi River town about 90 miles downstream from the Twin Cities. The river there is a sprawling, two-mile-wide wilderness of islands, oxbows, and backwater sloughs, and Winona was the epicenter of the disaster: At least 20 duck hunters died within 50 miles of the city.

“The winds of hell were loose on the Mississippi Armistice day and night,” wrote MacQuarrie. “They came across the prairie, from the south and west, a mighty freezing force. They charged down from the high river bluffs to the placid stream below and reached with deathly fingers for the life that beat beneath the canvas jackets of hundreds of duck hunters . . .

“The wind did it, the furious wind that pierced any clothing, that locked outboard engines in sheaths of ice, that froze on faces and hands and clothing, so that survivors crackled when they got to safety and said their prayers.

“Mother Nature caught hundreds of duck hunters on the Armistice holiday. She lured them out to the marshes with fine, whooping wind, and when she got them there she froze them like muskrats in traps. She promised ducks in the wind. They came all right, but by that time the duck hunters were playing a bigger game with the wind, and their lives were the stake.

fallen trees, snow and ice

“By that time men along the Mississippi were drowning and freezing. The ducks came and men died. They died underneath upturned skiffs as the blast sought them out on boggy, unprotected islands; they died trying to light fires and jumping and sparring trying to keep warm; they died sitting in skiffs. They died standing in river water to their hips, awaiting help; they died trying to help each other. A hundred tales of heroism will be told, long after the funerals are over.”

MacQuarrie told of Gerald Tarras, a strapping 17-year-old who’d gone hunting in the Mississippi bottoms that fateful day with his father, brother, a family friend, and their black Lab. They set up mid-morning in a drizzling rain; by noon they were trapped by six-foot waves, waves that pounded like huge iron fists and hurled freezing spray that turned instantly to boilerplate ice. The men beat on one another to try to keep warm, but it was a losing battle. At about 2 a.m. the friend uttered one last moan and died in Gerald’s arms. Gerald’s brother held out until 11 in the morning, but after 23 hours of exposure, he, too, succumbed.

Then, shortly after noon, a small plane flew over. Gerald waved, and the pilot signaled that help was on the way. Rescuers in the government tugboat Throckmorton arrived at 2:30—half an hour too late to save Gerald’s father. They found the boy crouched against a stump, holding his dog for warmth, fighting to remain conscious.

frozen pond, lake

Max Conrad, the pilot who led rescuers to Gerald Tarras, was one of the true heroes of the Armistice Day Storm. Dozens of hunters would later acknowledge that they owed their lives to him. On Tuesday the 12th, with the wind still howling but the skies clear, he took off from his hangar in Winona to help find the hunters who hadn’t come home. Flying a redoubtable Piper Cub—and fighting to make even 20 or 30 knots of airspeed against the brutal headwinds—he scanned the frozen margins of the Mississippi for the living, but often as not discovered the dead.

When he located survivors—they were frequently huddled in the lee of a skiff they’d propped up as a windbreak—Conrad would circle low, cut the engine for a moment, and holler “Hang on! Help is coming!” A few minutes later, he’d return and, like manna sent down from heaven, drop a canister filled with sandwiches, whiskey, dry matches, and cigarettes. Conrad would then circle until the Throckmorton or one of the many rescue boats that had deployed in search of survivors could get a fix on the spot. He kept flying until 10 p.m. that night, and he was out again at dawn the following day.

There is no telling how many hunters died for the simple want of dry matches. But even that was no guarantee, as there was still the problem of finding dry fuel to burn. Many a prized Mason decoy went up in flames, and a group of 17 hunters stranded on the same island took turns shooting down limbs for firewood until their ammunition ran out.

The Mississippi River was not the only place where duckboats became sepulchres, of course. Two hunters died on Wisconsin’s Big Muskego Lake, barely 20 miles from downtown Milwaukee. One of these men was alone in his skiff, trapped by waves and ice. Toward the end, another party of hunters glimpsed him standing in his boat with his head tilted back, his arms stretched outwards, and his palms turned up. It was as if he was imploring God—or perhaps commending his soul to Him. While the other hunters, who themselves were fighting to survive, watched helplessly, the man slumped back into his skiff, leaned heavily against the gunwale, and went motionless.

His spirit, like the ducks that drew him out on that terrible day, had flown.

The author wishes to thank Howard Mead of Madison, Wisconsin, for his assistance in providing background research.

How to Make a Deadfall Trap (With 3 Tutorials)

0

Need to catch dinner in the wilderness? Go set a deadfall trap.

Trapping is one of the oldest ways to get food in the wild. People have been using traps to catch small to medium-sized game in between major hunts. Learning how to set a few good traps in ideal locations can cut your chances of starving significantly.

Primitive traps like the deadfall are especially popular among survivalists and bushcraft enthusiasts because they’re straightforward and relatively easy to construct. They also come in different variations that can fit your individual situation and skill level.

Need to brush up on your primitive trapping skills? Read on for easy-to-follow tutorials and tips:

Primitive Trapping Basics

Any prepper or bushcrafter worth his salt should know how to trap animals for food, fur, and other purposes. Actively hunting for game is always best for fresh meat, but trapping can save you a lot of time and energy, especially if you find yourself in a survival situation with little to no modern tools.

Before we look into the ins and outs of making deadfall trap configurations, here’s a quick refresher on the basics of trapping:

What are you trapping?

Your trap depends on the size and species of animal. As a trapper, you have to know what type of animals frequent the area. Watch out for tracks and pawprints, disturbed vegetation, and droppings to identify the critters.

Deadfall traps, in particular, are great for catching small to medium animals like rodents, squirrels, and prairie dogs.

Finding the perfect location to set your trap

Location is crucial when setting traps. Once you’ve identified the kind of animal you want to capture, you can now zero in on where to put your trap. Construct it near the animal’s habitat (outside its burrow or hiding place), or in places where it usually gets food and water.

Set the trap to make it look as natural as possible by covering it with soil or leaves. Unlike humans, animals have a very keen sense of smell, so remove or mask any human trace by wearing gloves and handling the trap as little as possible.

Skills needed in trapping

As mentioned earlier, you have to know what type of animals live in the area, so a sharp set of tracking skills will come in handy when making traps. Trapping requires other bushcraft basics like whittling, making cordage, and tying effective knots, as in the case of most deadfall traps. And, of course, field dressing and bushcraft cooking skills will ultimately come in handy when it’s time to eat.

What’s the best type of bait to use in trapping?

Not all baits are created equal. Use one that will attract your target animal. Most small mammals like rats and squirrels love to munch on nuts, seeds, and fruit, so use those when baiting your deadfall trap.

Safety precautions to follow

Constructing deadfall traps can seriously hurt you if you’re not careful. When setting one up, put a temporary support rock to hold up the deadfall weight. This way, you don’t accidentally activate the trap and crush your fingers.

Local trapping regulations

Some areas regulate or prohibit trapping animals for food or other purposes, so check local regulations before setting out traps.

A Closer Look at the Deadfall Trap

People have been using the deadfall trap since the dawn of civilization to catch a meal—and it remains one of the best primitive traps to this day.

The reason?

Deadfall traps simply work.

This primitive trapping mechanism uses a heavy rock or logs propped up by sticks to capture prey. Once the animal takes the bait, the sticks collapse, and the animal gets instantly crushed beneath the weight. It’s an effective and straightforward way to catch a meal, especially if you don’t have modern supplies at your disposal.

Types of Deadfall Traps

There are three main types of deadfall traps, namely the Paiute, Figure 4, and Split Stick. You’ll find detailed tutorials of these variations below:

Paiute Deadfall Trap

The Paiute deadfall trap is believed to have been invented by the Native American tribe of the same name. It’s also arguably the most popular among the deadfall trap varieties since it’s easy to set up and has a very sensitive trigger that allows you to catch prey in a snap.

The Paiute deadfall trap uses a total of 4 wood components:

  • One long diagonal stick to support the deadfall weight
  • One shorter vertical stick that holds up the diagonal portion
  • One small twig that serves as a trigger stick
  • A small piece of wood that will act as a toggle

What sets it apart from other configurations is that it uses cordage to hold these components together. You can use any available cordage, including dry fibers from plants like milkweed or stinging nettle.

In the video above, you’ll see a detailed tutorial on how to build an effective Paiute deadfall trap using primitive materials and methods.

Traps like these usually take a bit of trial and error before you get it right. Consider vital factors like the angle of the rock, the height of the trap, or the placement of the bait. Adjusting any of these can significantly improve your chances of catching the target animal.

Figure 4 Deadfall Trap

It’s pretty safe to say that the Figure 4 deadfall trap is the Paiute’s less trigger-sensitive cousin. Many find the Figure 4 quite challenging since it needs a sharp set of carving and whittling skills. It also needs some time to master and doesn’t deploy as quickly as the Paiute.

Still, when made correctly, it does a decent enough job, so knowing how to make an effective Figure 4 should still be part of your skills arsenal.

To construct a Figure 4 deadfall trap, you need three sticks:

  • 1 long diagonal stick that holds up the deadfall weight
  • 1 horizontal stick that goes near the base
  • 1 shorter vertical stick that holds everything together and acts as the trigger

All three sticks should be straight and of roughly the same diameter.

Notice that instead of cordage, the Figure 4 deadfall trap uses notches carved into the sticks to hold the entire structure together.

This is the tricky part: each notch should be carved just right and must fit well with each other to support the trap. It’s like making your own puzzle pieces. Carving notches takes considerable skill, so if it’s your first time making this trap, be patient.

The Figure also needs a balance between strength and sensitivity. The trigger, located at the base of the trap, should be strong enough to support the trap’s weight but sensitive enough to deploy quickly.

Because the Figure 4 deadfall trap doesn’t deploy as easily as the Paiute, it’s important to create as many traps as possible to increase your chances of catching food.

Split Stick Deadfall Trap

The split-stick deadfall trap is basically a cross between the Paiute and the Figure 4. It’s got a very sensitive trigger like the Paiute but, similar to the Figure 4, it doesn’t use any cordage.

The principle behind this trap is quite simple.

Take a long stick and cut it roughly in half. Next, carve notches on their meeting points so they loosely fit together. Make a larger notch in one of the sticks to make the trap more sensitive. Then put a small, thin stick in between these two components. This will serve as your trigger mechanism. Once the target animal takes the bait, the entire structure collapses, and the animal gets crushed beneath the deadfall weight.

It’s as easy as that.

Perhaps the only disadvantage to the split stick deadfall trap is that it could easily collapse due to other factors, like the wind. Nonetheless, it’s a good way to practice your bushcraft trapping skills and also catch an animal in the process.

Quick Facts About Deadfall Traps

To sum things up, here are the things you should know about deadfall traps:

  • Deadfall traps are ideal for small- to medium-sized animals such as rabbits and squirrels.
  • The three main types of deadfall traps are the Paiute, Figure 4, and Split Stick traps.
  • Depending on where you live, rigging up a deadfall trap may be illegal, so check local regulations first.
  • Be careful when you’re setting up a deadfall trap. It can seriously harm your hands if you accidentally trigger it.

Final Thoughts

People have been trapping since the beginning of civilization. Although most modern traps are now manufactured, nothing beats knowing how to make primitive traps for prepping and survival.

These traps will be indispensable when you find yourself in a survival situation with little to no modern tools at your disposal.

Deadfall traps require no more than some sticks and a flat slab of rock to make. The Paiute, Figure 4, and Bait Stick deadfall traps are relatively easy to construct and are effective in catching small to medium-sized animals. They’re a good fail-safe in case you can’t catch a meal when hunting or fishing.

Continue practicing your deadfall trap-making skills and you’ll be able to catch small game for dinner in no time.

Outdoors International Podcast: Coyote Hunting Basics with Clay Owens

0

Clay has been a Top Ten finisher in the WORLD CHAMPIONSHIP COYOTE CALLING CONTEST® (WCCCC) the last two years running. He has hunted coyotes all over the US. In this podcast, Clay talks in detail about coyote calling techniques in different areas of the US, how to call them, how to set up, and the advantages of using FoxPro electronic calls vs. mouth calls.

Coyote Hunting Basics by Clay Owens

  • This how to call coyotes video by Clay Owens will give you the basics and have you well on your way to successfully hunting coyotes. Clay Owens is coyote calling Champion and FoxPro field staffer.
  • Learn how you can go on a predator hunt with Clay for some one-on-one hunting experience. (coming soon)

Why do we hunt predators?

  • To control their numbers to protect livestock and game.
  • For their fur.
  • Because it is fun.

Stand Strategies:

  • Hunt where the coyotes are. Scout just as you would for deer hunting. Landowners are usually willing to help. Your success will decrease drastically if you are just doing cold sets.
  • It is very important to have a good vantage point where you can see 360 degrees if possible.
  • Set up with the wind in your face, or at the very least a crosswind. Make sure you can see downwind however. Coyotes have exceptional senses. They have great eyesight and hearing, but their nose is something you’re never going to beat. 90% of coyotes will try to work the wind and get in behind you.
  • In some cases, calling with a buddy is critical.

Three things drive coyotes to come in to a call:

  1. Food: Rabbit distress, fawn distress and mouse squeaks are the go-to calls you need in your arsenal. Hear Clay demonstrate in the video.
  2. Fighting: Howling is more difficult. If you’re a rookie, Clay suggests you get yourself an electronic call. Listen to Clay do a location howl on the video. Clay also demonstrates the Female Challenge Howl and a pup distress call with a diaphragm call. Clay also shows us how to use the CS24 FoxPro Electronic call.
  3. Sex

How to call coyotes depending on the season:

  • Fall: In the fall, pups are receptive to distress calls. The pups are still young, undispersed and hungry.
  • Winter: In the winter, Clay still starts with distress sounds.
  • Spring: Spring is when coyotes start to pair up for breeding season. This is when howling becomes more critical. You are appealing to a single male looking for some love, or trying to pick a fight. Sometimes Clay also uses a Pair Howl. Distress calls still work well in the Spring as well.
  • Clay leaves the coyotes alone in the summer to raise their pups.

Other coyote hunting tips:

  • Start your calling sequence softly, stepping up the volume gradually.
  • If you call a coyote to within 100 yards, SHOOT!
  • Often, they come as a pair or even a pack. After the shot, be quick to get on the pup in distress call to get them to stop.
  • Clay thinks that there is a big difference in hunting mountain coyotes and plains coyotes. Mountain coyotes are more difficult, in his opinion. He thinks it’s because mountain coyotes have more predators such as mountain lions, wolves, and even golden eagles to contend with, so they are more cautious.
  • Western vs. Eastern coyotes. Eastern coyotes are a bit bigger, because they have more food available, but Clay doesn’t think that there is much difference in hunting them.
  • Coyotes come to fight, breed or find food. Learn how to appeal to those needs, and you’ll a successful predator hunter.
  • Three things you need to master in order to be a successful predator hunter:
    • 1) Good woodsmanship;
    • 2) Learn the behaviour of coyotes and how to handle them as they’re approaching;
    • 3) Practice your shooting.
  • Clay scouts 75% of the time, and only spends 25% of his time actually hunting. Scouting is super important, as it doesn’t do any good to hunt where there aren’t any dogs. While he is scouting, Clay is in “stealth mode”, and usually in the dark. He likes to run up and down backroads looking for tracks and scat piles. He also likes to stop every once in awhile and howl, patterning an area where they live, and also learning the pack dynamics i.e., is there a dominant male in the area, or a bunch of pups in a big group?…hunting each will be different. While he’s scouting, he is quiet, and tries not to be seen or winded as you looks for sign and vantage points that will make good calling setups. He also takes notes of what direction the wind needs to be blowing from in order to hunt that setup and waits until the conditions are right before hunting it.
  • If you find a dead cow, or a road kill deer, you know they won’t be more than a mile away from that free meal, so that’s a bonus. When he finds that situation, he calls there “pretty soon”. Coyotes will travel a long way to feed on a dead cow, so take advantage of the opportunity. You may get the chance to hunt coyotes that don’t even live in the area while they’re getting a free meal.
  • Clay almost exclusively uses FoxPro electronic predator calls. With their calls, you can replicate almost any type of call you need to.
  • Pack dynamics will dictate your hunting strategy.
    • If you’re dealing with a family group, he uses more vocalizations as opposed to distress sounds (excluding pup distress). Males will circle to get the wind, and females will charge right in.
    • Breeding season is late winter, through early spring (January, through early March). They will start pairing up in January, so you’ll start using more vocalizations. Family howling sequences; female single howls; male challenge howls; and female challenge howls. He will often just howl one single time, and then wait ten minutes for them to come.
    • Calling to an entire pack can sometimes be pretty easy, when you hear them howling. Clay will often just make a “desperate” distress sound for about five seconds, and then wait. If they’re within a few hundred yards, they could be in range in under a minute. If they don’t come, you might try it a few more times.
  • Clay’s go-to sounds are howling (all variations); rabbit distress; deer fawn distress; any kind of bird distress sound; rodent distress; and one of his favorites is an antelope fawn distress sound.
    • Don’t start out too loudly. Start with a 30 to 60 second sequence of a super low rabbit or rodent distress calls. Then wait two minutes before starting the next sequence.
    • Then he will go into two, one minute sequences of mid-volume rabbit distress a minute each, with a two minute break between each sequence.
    • If nothing has shown up, he might throw in some howling.
    • The entire setup will last 15 to 25 minutes. Mountain coyotes however, are more cautious, and sometimes take 30 to 40 minutes to come in.

Discover why thousands of people have trusted us with their adventures.

Request Pricing Or More Info Talk To a Consultant

Best Air Rifle Deals

Popular Posts

Air Rifle Scope vs. Rifle Scope – Which One Fits Your Shooting Needs?

0
"Air Rifle Scope vs Rifle Scope: Unveiling the Ultimate Precision Optics. Discover the essential differences and benefits of these two optical devices, empowering shooters...

How Does an Air Rifle Work?

0
Discover the inner workings of an air rifle with our comprehensive guide! From the mechanics behind its powerful shots to the intricate process of...

Air Gun 101: What You Should Know about Air Rifle Barrels Before Buying

0
Have you ever heard the phrase: “Imitation is the sincerest form of flattery”? The Chinese must have been very sincere in emulating this proverb. I...

Guide to find Best Scope for Break Barrel Air Rifles

0
"Unlock the Perfect Shot: Discover the Best Scope for Break Barrel Air Rifles. Enhance your shooting experience with precision and accuracy, as we delve...

What Is a Break Barrel Air Rifle?

0
A break barrel air rifle is a type of air rifle that uses a break action to load and unload pellets. It is one...