Home Blog Page 76

PVC vs. Rubber Air Hose: What’s the Difference?

0

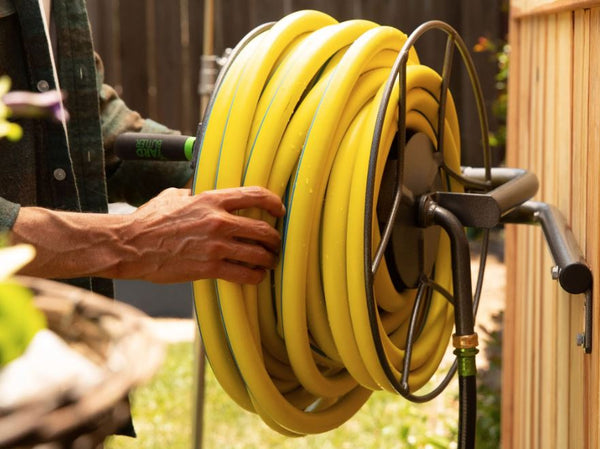
Finding the right air hose for your air compressor or other air tool can be challenging. Because there are so many choices on the market today, it can be difficult to know which ones are best for you and your needs. In order to narrow things down, we have prepared a handy guide to two of the most common and highly recommended air hose materials: PVC and Rubber.

Below, we delve into the advantages and disadvantages each type brings to the table, what you should be looking for in an air hose, and hopefully you can end this article with a much clearer perspective as to which one you want to invest in.

What Is The Best Air Hose For Me?

Since an air hose can be used for multiple types of tools and tasks, you want to choose one that is versatile, durable, and made to last so that you can make the most out of your purchase. In relation to that, these 5 factors are what you should consider when looking for an air hose that is perfect for your personal needs and activities.

Length Of Hose

Standard sized air hoses are usually offered at 25 feet, 50 feet, and 100 feet. Air hoses that come in longer lengths result in lesser control but not enough to deem it ineffective. The length of the hose matters since this can affect how you can utilize it. For instance, if you will need the hose while moving from station to station, you may require one of longer length to allow greater mobility.

However, if you will just be working in one area, keeping a short hose may be easier in terms of moving around and also in terms of storage.

Diameter Of Hose

Most air hoses come in either one of two diameters, namely ¼” (6.33 mm) and 3/8” (9.5mm). The wider the diameter, the more compressed air it can hold, which allows for more strength. However, in order to maximize it, you will need to have a sizable compressor.

The narrow diameter is better for tasks that do not need as much fuel, such as when you are pumping a tire, air bed, or inflatable pool.

Weight Of Hose

To determine if you need a lighter or a heavier hose, you will first need to establish your main purpose for purchasing one. If your activities revolve around operating in one place, then heavier hoses can be more beneficial since they are less likely to kink. However, if you will need to move around often, a lighter hose may be better suited. Just keep in mind that these are more susceptible to kinking, so you will need to take more precaution when storing them after every use.

Who Manufactured The Hose

An air hose is not necessarily a household tool that you want to repurchase every now and then. To guarantee a longer lifespan, we highly suggest purchasing only from trusted companies with great warranties and even better customer support. Some of the best air hose manufacturers today are:

  • FlexZilla
  • Amflo
  • Hitachi
  • TekTon
  • Goodyear

Material Of Hose

Air hoses also come in a variety of materials, with the two most common ones being PVC and rubber. To better understand which one of the leading materials is best for you, we put a detailed list of their benefits and disadvantages up against one another in the section below.

What is the better air hose: rubber or PVC

Below we discuss what exactly makes up each material and where do they function best?

PVC Air Hose

PVC stands for PolyVinyl Chloride, and is the 3rd most widely used plastic rubber across the globe. It can be used in a variety of materials – from tubing, wires, signs, flooring, and yes, hoses!

Apart from its versatility, another reason that PVC is so common is because of its affordability. It is also very lightweight, portable, and easy to handle. However, we do not suggest using the in colder climates or the winter season because they are prone to freezing up. Aside from that, another disadvantage is that they are susceptible to kinking quickly.

Rubber Air Hose

Rubber is made of natural material as it is extracted from the rubber plant. It starts off as a white, dense, and somewhat gooey liquid, which is then taken to manufacturers and turned into the many rubberized products you see today.

Just like PVC, rubber can also be used in a wide range of things, such as tires of vehicles, tubes, household items, and much more. Rubber is incredibly durable and can last a long time, but it does not come cheap.

Rubber air hoses are quite heavy, but they are very resilient, sturdy, and well worth the investment due to its long lifespan. Because of how much they weigh, they are best used for static workstations such as in a garage or at a workshop. They are also fairly simple to coil up and store away, with little to no risk of kink.

What are other air hose materials to consider?

While rubber and PVC hoses are the most common and widely available air hoses today, they are not the only ones on the market. You may also opt to purchase a Polyurethane Air Hose or a Hybrid Air Hose instead.

Polyurethane Air Hose

Air hoses made of polyurethane are very lightweight and do very well in extreme temperatures. They are also highly resistant to abrasive wear, tearing, or puncturing. Moreover air hoses made of polyurethane are highly flexible and smooth, which allows them to easily glide across varying surfaces. One flaw it may have is that it is more susceptible to kinking when compared to the more robust rubber air hose.

Hybrid Air Hose

As its name suggests, hybrid air hoses are made from a mix of material, namely PVC, polyurethane, and rubber. It was specifically designed to give you the best of all the materials by merging their positive features such as its resiliency against kinking. However, it does lack quite a bit in durability when compared to the pure rubber hoses, and are more likely to kink in the long run.

What Factors Should I Look For in An Air Hose?

The length, diameter, manufacturer, material, and weight of the hose are important when determining which hose is best for your specific activities and needs. However, the 5 additional factors below should also be weighed in as it can affect the overall quality of the hose you choose.

Coiling Capabilities

Air hoses usually either coil in a standard method or in a recoil method. With standard, the hose would lie flat without any bends, which makes them a breeze to unroll. Recoils, however, have small twists within the structure to make them recoil backwards once you let go.

Connections

It is important to consider the right sized connector that is also a quick release for your own set of tools. We recommend getting brass connectors as these are much more resistant compared to aluminum and are also resistant to corroding.

Kink Resistance

Similar to how you would weigh out garden hoses, consider the kink resistance of your air hoses as well. Investing in material that is less likely to kink can go a long way and prevent any disruption in your work.

Pressure Rating

All air hoses have their own maximum pressure rating, which is indicated by PSI (pounds per square inch). You must first determine how much pressure you would need for your tasks and then find a hose that is capable of handling it. Hoses with higher pressure ratings are usually only needed in much tougher jobs such as inflating truck tires.

Temperature Compatibility

It is important to find a hose that would not deteriorate or lessen in efficiency when the temperature shifts. PVC air hoses have a harder time in cold temperatures because it reduces their flexibility. A rubber hose keeps a stable flexibility level even in freezing temperatures, so does polyurethane air hoses and hybrid variants.

You’re All Set!

Knowing what to look for in an air hose can help you in making a more informed decision, and take home a hose you can use for many years to come.

If you are looking for other gardening equipment, check our best selling collections below:

Yard Butler Hose Reels

Yard Butler Hose Reel Carts

Yard Butler Hose Hangers

Yard Butler Irrigation Tools

The Perfect Arrow-Broadhead-Vane Build For Turkeys — Plus A Little More

0

Bowhunting longbeards with a bow and arrow is challenging enough; make it easier by choosing the right arrow, broadhead, and vane combo.

by Jace Bauserman

Wild turkeys may be tailored to be shot in the dome with a load of #5s, but they are fun to chase with archery tackle. Not to mention, in many states, stick-and-string toters get the first crack at these springtime butterballs. Tags, even for non-residents, are affordable, and generally, there are no preference or bonus points needed to hunt turkeys.

The main reason I love chasing these birds with a bow is the challenge. Calling a wild turkey into bow range is no easy job, and once that bird reads the script and falls for the blind-and-decoy, bow-mounted decoy, or outside-the-blind ambush, your accuracy has to be exceptional.

I don’t have the data, but I’d argue that bowhunters lose more turkeys each spring than most all other game animals combined.

Why?

The margin of error is minimal, and bowhunters take too long shots on a tiny target with hard-to-decipher vitals. Precision is paramount when hunting wild turkeys, and you want an uber-accurate arrow with some weight to it tipped with a large, expandable broadhead.

For the past several years, my go-to for archery turkey hunting has been Easton’s 4mm Full Metal Jacket, AAE Hybrid 23 vanes, and SEVR’s Titanium 2.0 broadheads.

Let’s discuss my arrow choice first. No, you don’t need a micro-diameter arrow to bowhunt turkeys with; I filled my quiver with Easton’s 5MM FMJs for years. However, I like the 4MM for big game, and I don’t believe there is a more accurate arrow on the planet. The 4MM cuts the wind like butter and tracks seamlessly behind a large-cut expandable, reducing friction as it passes through the target. Weighing 482-grains, my Hoyt VTM 31, set at a draw length of 29 inches and a draw weight of 65 pounds (for turkeys), pushes these arrows at 274 fps. When you crunch the numbers, that’s 80.34 foot-pounds of kinetic energy, which is enough to blow through a moose, let alone a turkey. Plus, when you shoot a heavy, micro-diameter arrow, you get exceptional accuracy, penetration, and tranquil arrow flight.

Now for my broadhead, SEVR’s Titanium 2.0. Make no mistake; there are some great broadheads on the market, and if you don’t run a SEVR, OK, please just don’t thread a fixed blade into your arrow’s insert when turkeys are on the menu. Turkeys are thin-skinned and have hollow bones, and with a kill zone that’s a little smaller than the size of a softball, a large-cutting expandable can clean up an errant shot. You want your broadhead to cause as much damage as possible.

Yes, those dense dark feathers can clog up a broadhead and seem like armor, but remember, you don’t need a ton of penetration to kill a turkey. I often prefer it if I don’t get a complete pass-through so the broadhead can stay in the bird and cause increased trauma. You want to cut a large hole, and because SEVR blades pivot as they pass through the animal, it’s more difficult for all those feathers to gum up on the blades. With vented fixed-blade broadheads, you’ll get loads of feathers pulled into the vents halting penetration, and you don’t get a large wound channel. If my life depended on killing a turkey with a bow and arrow and having that turkey expire within seconds, I’m shooting an Easton FMJ 4MM or 5MM tipped with a two-inch cut SEVR.

I geek out about making my arrows. There’s a sense of satisfaction that comes from it, and it gives one the knowledge they are making the most accurate arrow for their set-up. Shooting expandable broadheads, we don’t need to go down the straight, offset, or helical fletch rabbit hole. Bowhunting turkeys should be a close-range game, reducing the importance of the fletch number or orientation. What matters, though, is the fletching style. I want a low-profile fletch to steer my arrows with excellence and not grab a pile of feathers should the arrow pass through the bird. Tall vanes that are super stiff tend to collect massive globs of blood-soaked arrows. I also want a fletch system that welds the fletch to the arrow-like cement. If the fletch-to-arrow bond is weak, the nose of the fletch will lift, and gobs of feathers will slip in under it.

My fletch go-to, not only for turkeys but for all animals I bowhunt, is AAE’s Hybrid 23 vanes. Each vane measures 2.30 inches in length, has a height of .38 inches and weighs 5.7 grains. AAE’s Plastifletch “Lick & Stick” material with a factory-applied activator ensures great bonding when used in concert with AAE’s Maxweld Primer Pen and Max Bond Arrow Glue. The vane’s base is well-built, and I love the stabilization ridges that run horizontally along the vane. These ridges increase ease of fletch, boost durability, and aid in accuracy.

I’m always on the fence when it comes to lighted nocks. There are some good ones on the market and some poor makes. When shooting 4MM arrows, I usually avoid them as the ones I’ve shot snap easily where the nock and arrow meet. The X-size nock from Nocturnal, which would fit an Easton 5MM arrow, does work well, and I like how well the lighted nock shows up against a bird’s dark feathers. I’m more confident of my arrow’s impact when shooting a lighted nock.

Now for a little bonus section. One of the questions I get most is: “Where do I shoot a turkey with an arrow?” Great question. However, it depends on the bird’s position. Here’s my where-to-shoot a springtime noisemaker guide:

  • Broadside – Whether the bird is in strut or not, divide his body into thirds. You want to be in the middle third and, if anything, toward the top of that third. Hit a tom low, and you’ll watch him go. My broadside aiming point is about two inches back from where the wing butt disappears into the body. Hit the bird here, and you get all the goodies.
  • Quartering Toward – A quartering-toward shot is complex, and I typically wait for a full-frontal. However, if this is your shot, I try to put my arrow into the wing butt or slightly in front of it, about two inches to the quartering side of the bird’s beard. This will break the wing at the joint and give your arrow a good angle to catch other vital organs. Again, stay in the top third.
  • Quartering Away – As with big-game animals, this shot is money. Remember to stay in the middle third, come up the back leg, and let your pin find the distinct line behind the wing and below the tail fan. This happens when the bird is in strut. Slide your arrow in this spot, and it’s game over.
  • Full Frontal – This is my favorite shot on a turkey. Yes, it’s more marginal, but I know that if I do my job and execute it, it’s 100 percent lethal. Let your pin settle above the bird’s beard and start pushing and pulling.
  • Facing Away – Take the Texas heart shot. You want to put your arrow right at the base of the fan feathers. If the bird isn’t in strut, hit him right in the middle of the back, halfway up the body.

TIP: One of the best tips I can give to solve the “where” to shoot a turkey with an arrow conundrum is to get a 3-D target like Delta McKenzie’s Strutter Turkey. The target is inexpensive, and you can turn the full strut tom to any angle to improve your practice sessions.

Bowhunting turkeys is super enjoyable and highly addictive. Heed the advice in this article, and you’ll bag more birds with archery gear this spring.

Moose Size Comparison: How big are they?

0

Indeed, wildlife in Alaska is larger and more plentiful. But the size of the Moose is out of this world.

Actually, It’s a medieval creature. Most people on earth are unfamiliar with Moose, yet they are an everyday occurrence for some.

More than 500 traffic accidents involving Moose occur annually in northern New England.

The physical damages endured by car passengers are significantly more catastrophic and likely to end in fatalities due to the animal’s height and weight.

When a car slams into a moose, the animal’s long legs are crushed, causing the animal’s body to smash against the windshield and roof.

This significant problem has been noted in Canada and Scandinavia, affecting humans and animals.

You may wonder how high and huge an average moose is, which makes it so deadly in traffic accidents.

But if you are mindful of its height and bulk, you will almost certainly avoid a face-to-face encounter when driving north or camping in the woods.

These wild animals evolve and develop throughout their lives. The body mass does not accumulate until males are nine years old and females are four years old.

Let us read along and dive straight into the moose size comparison!

Introducing Moose and its subspecies

The term moose is prevalent in North America and was inspired by the Algonquian word “moosh,” which means “stripper and eater of bark” in the Innu language of Quebec, Canada.

These species of deer are the largest among deer species. There are 8 subspecies of moose, with Alces alces gigas, American moose being the biggest.

The classification includes European moose and Siberian, East Siberian, and West Siberian moose. Other species of these wild animals are often classified as North American or Canadian moose.

The male and female moose are referred to as bull and cow moose, respectively. The moose cows are comparatively smaller than bulls.

The moose prefer aquatic vegetation and wetlands for their food source and dwelling.

These excellent swimmers were almost extinct in Sweden back in the 19th century. But after expanding throughout Europe, North America, and Canada in the 20th century, they restored their population.

Size And Appearance of Moose

As per the Alaska Department of Fish and Game, Moose is the largest representative of the deer family. They are also North America’s tallest mammals.

Their height varies from 5 to 6.5 feet from hoof to shoulder. Males measure 794 to 1,323 pounds, while females weigh 595 to 882 pounds.

However, there is more divergence in the spectra than these binary numbers; a healthy Moose may range from 300 pounds to 1800 pounds!

Moose have tiny tails, a hump on their shoulders, and huge ears that can twist, allowing them to hear in stereophonic mode.

Their hair is typically dark or black, offering valuable insulation against the cold. Male Moose, known as bulls, have enormous antlers.

These can reach a width of 6 feet (1.8 m) from tip to tip. Antlers are solely used to fight for a mate and are shed each winter following the mating season.

Moose Size Comparison

Although all Moose are huge, there are geographical variances in size. Varying species sizes are determined by their habitat and genetic compositions.

Moose is, believe it or not, a pretty enormous deer, and North America has four species of these giants.

Moose species size comparison

The moose species can have variable size differences based on their genetic structure interline.

1. Alaskan Moose

This giant Moose is the biggest of the four moose subspecies and inhabit Alaska. Male Alaskan Moose may grow 6 feet 9 inches tall at the shoulder.

To put that in context, most NBA basketball players could effortlessly glide beneath a standing moose.

Alaska-Yukon Moose may weigh up to 1400 pounds. Their antlers are also a little under 6 feet wide.

2. Northwestern Moose

These moose are spotted around the North of the United States, such as North Dakota and central Canada. They reach a height of 6 feet 4 inches and weigh up to 1590 pounds.

3. Shiras Moose

The residential moose of the United States from Utah to Idaho can also be spotted in British Columbia. They are the tiniest moose subspecies.

Shiras stand 36-55 inches tall from hoof to shoulder. They may also weigh up to 1200 lbs.

4. Eastern Moose

Eastern Canada and the northeastern United States are home to Maine’s own Eastern Moose.

It is the third most populous moose subspecies, after Alaskan and Western Moose. These moose can be spotted in Seney National Wildlife Park and Tahquamenon Falls State park in the upper peninsula region.

They may reach a height of 6 feet 6 inches at the shoulder. Their weight may exceed 1400 lbs.

Moose Size Comparison to a Human

Adult bulls are substantially taller than even the world’s tallest humans!

A moose may stand up to 6.5 feet tall at the shoulder, while an adult male human stands at 5 foot 7.5 inches on average.

At the shoulder, the Alaskan Moose stands more than 7 feet higher. When the head and antlers are added, the overall height exceeds 10 feet. Even the tallest person cannot face a Moose with their head lifted.

Moose Size Comparison to a Horse

Let us contrast a Moose with a horse!

A Moose’s typical shoulder height ranges from 5 to 6.5 feet, while a horse’s average shoulder height is from 2.5 to 5.8 feet.

A full-grown Moose may weigh up to 1,800 pounds, whereas a horse can weigh between 120 and 2,200 pounds.

A Moose is thus larger than a horse in terms of size. In terms of mass, a horse is heavier than a moose.

Moose Size Comparison to a Truck

When matched to a Nissan Titan, the Moose’s and vehicle’s heights are now roughly equal.

Because most Titans are roughly 6.5 feet tall, the top of the truck would likely be slightly higher than the Moose’s shoulders.

If the Moose is huge, it should be taller than a truck!

Moose vs. Elk: Confusion solved!

The most classic mistake shooters make in Colorado is mixing Moose with elk. Moose have a lot darker fur than elk and lack the lighter abdomen of elk.

A moose’s snout is also considerably bigger and more spherical or round than an elk’s sharp nose.

The antlers of Moose and elk develop in quite distinct ways. A moose’s antlers expand to the side of its head, but an elk’s antlers grow rearward over its body.

Elk antlers have a primary shaft with long points sprouting off it, but moose antlers develop in a shovel-like form with many spikes sprouting off the thick, shovel-shaped part.

Finally, moose develop a fluttering strip of skin beneath their necks known as a dewlap or bell. This characteristic is specific to Moose and not found in elk.

Fun Facts about Moose

  • Moose can move each ear and eye independently.
  • During the rut, bull moose emits various noises, including a loud bellow, croaks, and barking when collecting their young female moose utter protracted quavering groans that conclude in cough-like moo and a grunt.
  • Moose stomachs can hold up to 100 pounds of food.
  • Every wintertime, moose lose their paddles and develop new ones the following spring. Antler development is determined by testosterone levels and the duration of the day. Antlers can also be used to determine age.
  • “Harem herd” is the term given for a herd of female moose chosen by dominant male moose during mating season in Alaska. The remaining males will compete with the herd’s alpha for the privilege of mating with the females.
  • The hollow structure of moose hair aids in protecting the animal from the cold.
  • The front legs of a moose are longer than the rear legs. This makes it easier for the Moose to jump over obstacles along its route.
  • The famous Canadian city Moose Jaw is often believed to be named after moose, but that is not the case. The city is named after the Cree language, which means A warm place by the river.

Frequently Asked Questions

Yes, Moose are gigantic, and yes, they do kill humans on occasion. Overall, moose are enigmatic animals that balance and beautify the world’s ecology.

So do you want to go to the Northern part of the world to witness this marvelous creation?

If you want to know about animals’ expertise in standing sleep or the giant Chordata that can sore in the sky, go through the respective hyperlink.

(Last Updated on August 28, 2022 by Sadrish Dabadi)

How to choose the right air source for your PCP rifle?

0

Choosing the right air source for your PCP gun can be tricky.

There are several ways to fill your PCP gun and each will have its advantages and disadvantages.

It’s best to take a step back to consider your options so that you end up with the best method for you.

In order to help you navigate this, we will take a look at the three most popular ways to fill your gun:

  • The hand pump
  • Scuba tank
  • And carbon fiber tank. 

Hand pump

A hand pump is generally the same as a bicycle pump.

Instead of pumping bike tires, a hand pump will connect to the air reservoir of a PCP gun.

A modern hand pump can get to 3,000 psi (pounds per square inch).

When you start to pump, the beginning is easy and you can even pump with one hand to get to 1,000 psi.

However, you’ll most likely encounter more resistance once you hit 2,500 psi.

At this point, it’s best to leverage your body weight to pump the remainder.

It’s recommended that you do not pump for more than five minutes

And to let the pump cool down 15 minutes between pumping sessions to prevent overheating.

ProsCons
  • Small and easy to store
  • Doesn’t need any technical testing
  • Cheaper price compared to carbon fiber tanks
  • No need to refill so it doesn’t cost any money on the refilling process like air tank
  • Does not break easily, hand pump is generally durable and can last for years
  • Never run out of air power
  • Can be repaired and serviced easily
  • Hand pump is highly cost effective. You buy it once and there is little money to spend for its maintenance
  • Gives you ultimate control over the pressure level. You can pump the gun and stop at any pressure point that you want. This characteristic alone makes some air gun experts prefer a hand pump over air tanks for their PCP rifles
  • Takes some physical strength and effort to use the pump though it could be your work out for that day
  • Not fast in term of filling speed
  • Requires understanding of a hand pump to operate it successfully
  • Some pumps don’t have the moisture filter so they might put water into the gun and cause damage in the long run. This issue can be handled by using the pump in a climate controlled environment where the moisture level is low

Scuba tank

Scuba tanks are also called diving cylinders.

They are usually made of steel or aluminum and often have a pressure of 3,000 psi.

It’s required to perform hydrostatic testing on scuba tanks every five years.

ProsCons
  • Take very little effort to use
  • Fast filling speed: scuba tank will fill your PCP gun in seconds
  • Filled with filtered and dried air. Therefore, it won’t put any moisture into your gun and doesn’t cause any rusting problem.
  • Needs to be tested every 5 years
  • Costs money to refill
  • Takes significant space to store
  • Hard to stop exactly where you want because the pressure rises so fast.
  • Finding a place to refill a scuba tank could be a problem
  • Hard to fill completely to over 3000 psi PCP gun

Carbon fiber tank

A carbon fiber tank has the same look as a scuba tank but it is much smaller.

It uses carbon fiber so the tank material is much lighter than a scuba tank.

A carbon fiber tank can get up to a pressure of 4,500 psi and gets more fills than both a hand pump and scuba tank.

ProsCons
  • Fills the gun in seconds
  • Available in different sizes
  • Compact and smaller than a diving cylinder
  • High pressure level, up to 4500 psi
  • Compact ,smaller and lighter than a scuba tank
  • Convenient to carry along to travel or to the shooting range
  • More expensive than a scuba tank or hand pump
  • Finding a place to refill the tank could be a problem
  • Costs money to refill the tank when it drops out in pressure

Air gun compressor

The final method is with a specialized 3,000+PSI compressor.

Disadvantages – they can be loud and expensive, although prices have come down a bit in the last couple of years.

Tyler, a Pyramyd Air expert, shows us how to fill your PCP airgun using the most popular methods here:

Conclusion

Of the four air sources reviewed here, it’s easy to see how one air source may be more convenient than another.

So far, we have seen that a hand pump, scuba tank and carbon fiber tank each have their merits. 

If you want a more effective method of filling your rifle, then you might want to consider a scuba tank or a carbon fiber tank.

Depending on the level of preparation you are able to provide, like if you are able to go into a store to fill your scuba or carbon fiber tank, then you might have to choose an option that is simpler.

If you’re willing to spend more money to save time on the fill-up, then choosing a scuba tank or carbon fiber tank will be best. 

Make sure to research if there are scuba tank or carbon fiber tank refill locations in your area before purchasing either of these items.

If there aren’t, this may limit when you would be able to refill your tanks. 

If you’d rather your air source be filled automatically or without manual effort, then a scuba tank or carbon fiber tank is a great way to go.

If you are a regular member of a local shooting range, a carbon fiber tank could be your best friend because of its lightweight and portability . 

Therefore, you should think about your specific situation before making a buying decision.

If you are an occasional shooter and you don’t mind some extra work, then a hand pump will give you total control over the power of your PCP gun.

=> For more on the best PCP air rifles on the market, see this post

Since hand pumps are affordable, you could always purchase one as a backup in case you cannot get it filled at a local station. 

With each of these options, you cannot go wrong!

Can a .22 Air Rifle Effectively Take Down a Coyote?

0

“Unveiling the truth: Can a .22 air rifle take down a coyote? Delve into the efficacy and limitations of this weapon as we explore its potential to neutralize one of nature’s wiliest predators. Discover the factors at play and gain insights into the practicality and ethical considerations surrounding this contentious matter.”

can a.22 air rifle kill a coyote

can a.22 air rifle kill a coyote

When it comes to hunting coyotes, many hunters wonder if a.22 air rifle can effectively take down these elusive creatures. The answer to this question is not straightforward and depends on several factors. Firstly, it is important to note that coyotes are resilient animals with thick fur and tough hides, making them more resistant to smaller caliber ammunition. While a.22 air rifle may be able to inflict injury, it may not deliver a lethal shot unless placed precisely.

Additionally, the power and accuracy of the specific.22 air rifle being used play a crucial role. Some high-powered models with velocities exceeding 1000 feet per second (fps) can produce enough force to kill a coyote if the shot placement is ideal. However, most standard.22 air rifles have lower velocities and may lack the stopping power required for an ethical and humane kill on such large game. Therefore, using a.22 air rifle for coyote hunting should be approached with caution and requires careful consideration of equipment capabilities and shot placement.

In conclusion, while a.22 air rifle may be capable of injuring or even killing a coyote under certain circumstances, it is not considered an optimal choice for humane and effective coyote control. It is recommended to consult local authorities and use legally approved methods for dealing with coyote-related issues to ensure both safety and ethical treatment of wildlife.

Test: CZ Tactical Sports 2 – The new generation of the classic IPSC pistol from Ceská Zbrojovka

0

CZ has hit the big time in the IPSC Production and Production Optics divisions: the Shadow 2/Shadow 2 OR models clearly dominate these two divisions of dynamic pistol shooting. This is not surprising, since successful ergonomics and high reliability coupled with an unbeatable price-performance ratio are compelling arguments.

In addition, there are the countless successes that have been achieved with the Czech all-steel pistol in recent years. The Czech manufacturer has long been committed to the dynamic IPSC discipline, as Tactical Sports has been part of the product range since 1996. So it looks as if CZ is once again on the attack with the brand-new single-action all-steel TS 2 pistol that should stand up for itself against the 2011 models that have dominated the standard class to date.

Czech triumvirate: CZ Tactical Sports 2 in three versions

Three different models were presented for the future at the online press conference, which also featured CZ team shooter and multiple world champion Eric Grauffel. In addition to the entry-level model for €1750, which was introduced and tested here for the first time, there will also be the TS 2 Racing Green for €2049, which is better equipped in detail, and the top model TS 2 Deep Bronze for €2649 (see also our original news article).Whether the new TS 2 models, like the Shadow 2, will be available in the young CZ online configurator, so that they can be customized according to individual wishes, is unfortunately not exactly known at the moment. The trio is of course not only available in 9mm Luger, but also in the “IPSC Major Power Factor” .40 S&W caliber.

You can discover the CZ configurator here.Time will tell if the previous flagship in the form of the TS Orange will continue to be available for around 2400 euros. At the very least, the first generation Shadow will continue to be in the lineup.

Features of the CZ Tactical Sports 2 pistol in detail

A typical feature is the muzzle-length dust cover, which is now angular in profile compared to its TS predecessor. The undercut at the transition area between the front strap and the trigger guard, as well as under the beavertail, are now a bit more pronounced to allow the gun to sink even deeper into the hand for maximum control when firing.Also new are the recesses on both sides above the trigger, which give the elongated trigger finger better access to the trigger blade. Unfortunately, the trigger blade is made of cheap and elastic plastic, which also applies to the magazine floors. Trigger pull is a low 730 grams with minimal creep before break, but this should go unnoticed, especially in dynamic disciplines. Of course, the trigger is equipped with an adjustable trigger stop. The reset travel of around 1.7 millimeters is short and easily manageable.

As with the Shadow 2, the slide contour of the CZ TS 2 tapers upward, which incidentally means 14 grams less mass to move when firing. The total weight is 48.67 oz/1380 grams, a good 1.05 oz/30 grams more than the TS Orange. The moving mass has thus been further reduced, but the overall weight has increased somewhat, which again contributes to a better shooting feel.To change the point of impact laterally, the rear sight can only be drifted and then fixed with two Torx screws. A point of impact shift in elevation can only be achieved by replacing the fiber optic front sight. In our opinion, this is a bit of a shame, as the less expensive Shadow 2 at least has a height-adjustable rear sight. However, the “Racing Green” and “Deep Bronze” models seem to have a height-adjustable version. Likewise, a left hand thumb rest will be available here, with which many a shooter will achieve greater gun control.

The safety on the entry-level model has a large thumb lever on the left side only. However, an enlarged safety lever for the right side is also available in the CZ accessories store. In our experience, however, this is not absolutely necessary, since the CZ Tactical Sports 2 can be operated perfectly well even in the standard configuration.

The magazine button sticks out far, so that it already pressed a bit into the author’s support hand. Nevertheless, at no time was the magazine accidentally released, although the release resistance was not very high. However, this is also very dependent on the shooter’s grip technique and hand size, so other shooters will not even notice this possible, marginal ergonomics problem.

Even if some aesthetes and material lovers may turn up their noses at the rational production of the frame and slide by means of investment casting, it must be acknowledged without envy that CZ seems to have this process perfectly under control. For one looks in vain for obvious blowholes or exposed seams. The frame/slide tolerances were quite tight.

The 5.25″/131 mm long barrel is formed by rational swaging – better known as hammering – and has the typical European twist of 1-10″/1-250 mm. The barrel is guided at the front by a pressed-in bushing. Under the barrel sits the one-piece spring guide rod with plastic buffer. A 13-lb spring has also been fitted here, which represents a good compromise in terms of reliability and good shooting behavior.If you want, you can also get springs with a lower power in the aftermarket, which promise an even more pleasant shooting behavior. However, based on practical experience, Eric Grauffel recommends not going below 10 lb, otherwise the gun could be too heavily stressed. At least two spare magazines can be found in the hard case.

Make your own pellets for air rifle

0

“Unlocking Precision and Economy: Effortlessly Craft Your Own Air Rifle Pellets with Ease! Discover the ultimate solution to optimize your shooting experience by producing custom-made pellets for your air rifle. Save on costs and tailor your ammunition to achieve unparalleled accuracy and precision. Embrace the art of pellet-making today!”

make your own pellets for air rifle

make your own pellets for air rifle

If you are an avid air rifle shooter, you may have considered making your own pellets instead of relying on store-bought options. Making your own pellets can offer several advantages, such as cost savings and the ability to customize the shape and weight of the pellet. However, it is important to approach this process with caution and ensure that you have the necessary knowledge and equipment to do so safely.

One option for making your own pellets is to invest in a pellet-making kit. These kits typically include a mold, which allows you to create pellets of various shapes and sizes. Additionally, they often come with lead wire or alloy that can be melted down and poured into the mold. This method requires careful attention to detail, as temperature control is crucial for achieving consistent results. It is also important to note that working with lead or other melting materials can be hazardous if proper safety precautions are not taken.

Another approach for making your own pellets is to use a pellet swaging tool. This tool essentially compresses soft lead into a pellet shape by applying high pressure. The advantage of this method is that it eliminates the need for melting materials, making it safer and easier to use. However, it may require more effort and time compared to using a mold and pouring molten material.

In conclusion, making your own pellets for air rifles can be a cost-effective and efficient alternative to purchasing them. With the right equipment and materials, you can create customized pellets that suit your shooting needs. This process allows for greater control over pellet quality, weight, and design, ultimately enhancing your shooting experience. So why not explore the possibilities and start producing your own pellets today?

How To Grip Compound Bow (Pro-staff tips)

0

Gripping a compound bow is probably one of those things you don’t worry about or notice until it becomes an issue. I’ve had my fair share of grip issues and sometimes still tweak it slightly.

There are three stages you’ll need to go through to fix your grip:

  • Good and bad grip
  • Proper bow hand grip
  • Making your grip you’re own

In this post, I will take you through what a good and lousy grip placement looks like, how to improve it if you’ve got a wrong placement, and finally, how to make your grip comfy. We’ll cover Good and bad grip placement; How to grip the bow properly, Making your grip your own.

Good And Bad Grip

So to understand what makes a bad grip ‘bad’ and a good grip ‘good,’ I’m going to talk about both so that you might be able to recognize if these are some of the things you do or don’t do. I believe it’ll be easier if I talk about the lousy grip first.

Bad Grip Placement

Bad compound bow grip
Incorrect bow grip

You’ll know a lousy grip placement when you see a guy holding onto his bow tight. The best comparison I can make to a wrong grip placement is gripping your bow as if you were gripping a baseball bat, knuckles out, fingers wrapped around, lots of tension in your hand. (pic number 1)

On paper, it sounds like it should work, right? Well, this couldn’t be further from the truth. The reason some guys do this is simply an anticipation of the shot. When their trigger goes off, they want to grab the bow subconsciously. What it’ll do is create torq in your shot. From the moment the trigger goes, your brain tells you to grip the bow.

This happens in split seconds. So the arrow is still in the bow. Your bow hand is the last thing to touch the arrow before it leaves the bow. So if you go from not gripping the bow at all to gripping it really tight, it’s going to torq the bow and change the flight of the arrow.

Good Hand Placement

Correct compound bow grip
Correct bow grip

So the opposite, good grip placement can be done in a multitude of ways, but the one common denominator is that the bow isn’t being gripped super tight. The bow is being held by the thumb and fingers pressing on either side of the bow.

What this does is it doesn’t create any form of tension in hand, and you are keeping the bow steady with the thumb and fingers (picture 2). Now, you can position your fingers in a load of different ways, but we will get into that later in the article.

Proper Bow Hand Grip

So here I’m going to walk you through how to get a good consistent handgrip placement. I’ll be explaining as if you are a right-handed archer (swap hands for left-handed archers). With your left hand, make an L shape with your fingers and thumb 90 degrees, then turn your hand about 30 degrees to the left.

Get your bow and slot your hand in (picture 3). Try to get some contact with the palm of your hand with your bow grip. Then what your going to do is your going to curl in all your fingers and run them at a 45 degree down from the shelf of your riser, then push your thumb along the inside of your riser.

You will achieve the best handgrip when you try to squeeze your thumb and fingers together without them actually touching. This will put pressure on both sides of the bow, putting a little torque in the bow.

Let’s say that previously you were gripping your bow last second in anticipation. You can follow the steps above to try and get used to the new idea. You can place your fingers straight out instead of curled. However, ultimately you want to be able to have your fingers curled for a better and more consistent pressure in hand.

Making Your Grip Your Own

Once you’ve gone and practiced the steps in my last heading, I almost guarantee you you’ll have said something along the lines of ‘I wonder could I move my…’, and the answer will usually be yes! A person’s grip is as individual as their thumbprint. You can move the angle of your hand down or out, move your first finger and your second finger around the front of the bow.

Like I said before, there is a multitude of things you can do. Once you’re keeping that squeeze instead of gripping, you can play around with it. All I’ll say is once you find something that you find a comfortable stick with it.

There’s no point in changing the way you hold your bow 24/7. At first, it might feel like a conscious effort to get your hand in the same spot. Over time, practice will make it subconscious action.

To give you an example of a grip, I’ll explain mine. Place the first two fingers around the front of the bow and the last two pushed up against the edge of the grip, thumb pushing onto the grip on the other side. I also use some sticky grip tape which I highly recommend.

Related Questions

Are shot trainers good? Shot trainers are suitable for practicing the execution of your shot, but sometimes, since it’s not the same pressure as a bow, the timing of your shot can be different.

You may find the following posts useful:

Should you wrap your bow grip?

Field archery shooting tips

How to hold bow arm steady?

How to use back tension with a trigger release?

What aperture for my peep?

Archery sight marks

South Dakota Pheasant Hunting

0

Never been to South Dakota pheasant hunting? You might not know what you are missing.

That was the case with me. Having hunted only in Minnesota and Iowa from 1979-1999 I enjoyed the pheasant hunting that the land afforded me and my hunting partners for years.

Being passionate about habitat and wanting to really affect my hunting outcomes and experiences I began looking for pheasant hunting land to purchase, develop and enjoy. I started in Iowa and through several contacts came across a realtor in Iowa who had some land for sale in Iowa but also South Dakota. I had never hunted pheasants in South Dakota but always assumed it was about as good as Iowa (which was way better than Minnesota at the time). After some discussion and persuasion by the realtor I figured I’d have to be stupid not to go out and at least look at the property.

Just driving out there, which was in the springtime, I could tell by how many birds were hanging around the roads that the bird numbers were good. Long story short is I ended up buying the acreage there and hunting/developing the property for pheasants, deer and turkey since 1999. Every opening weekend we harvest between 30-60 birds per day. I also heard stories around the state of parties of 20 hunters getting their 60 bird limit in as little as ½ hour. That’s more chaos than hunting I would venture but just the same – that’s what South Dakota wild pheasant hunting is capable of producing.

Pheasant Capital of the World? I think most hunters would agree. If you read most pheasant hunting outlooks and forecasts, such as Pheasants Forever or Outdoor News, you’ll find that the statistics again and again point to the South Dakota bird and harvest numbers as the reigning leader.

As recently as 2005, the pheasant population approached 10 million birds (1 40-year record). Number of birds harvested that year was nearly 2 million roosters (11.2 birds per hunter. 2 birds per person per day).

This quote from the Pheasants Forever website on the 2005 season sums it up:

“Overview: The 2005 pheasant hunting season was a year to remember across the upper Midwest. South Dakota maintained its hold as the “Pheasant Capital” with an estimated harvest of over 1.9 million roosters, a 40-year high. Iowa, North Dakota and Kansas all checked in with big 800,000 bird totals.”

South Dakota boasted a rooster harvest over twice as large as the next nearest competitors.

In addition to the native resource, South Dakota also reigns champ in the offerings of public hunting, free walk-in access to private land and a host of commercial fee hunting opportunities. In fact, it could possibly be that since South Dakota’s commercial pheasant hunting is so strong and established that Cabela’s in Mitchell can attract hunters from all 50 states in the union on South Dakota’s annual opening pheasant weekend.

Today the passionate upland bird hunter, thanks to the internet, has excellent access to whatever quality pheasant hunting package they desire. If it’s a pheasant hunting trip of a lifetime you desire, look no further than South Dakota. Whether you’re a budget minded do-it-yourselfer looking for the best public land hunt or Bo Jackson looking for that $5000/day experience you can find it. You’ll have to do a little research. But it’s time well spent.

What ever you do, get to South Dakota soon and experience “The State of Pheasant Hunting”.

Check Availability of UGUIDE South Dakota Pheasant Hunting Camps Here

Run Cost Scenarios of your groups pheasant hunting package here with our Trip Cost Calculator

Largemouth Bass

0

Micropterus salmoides

by Wayne Jones Updated by Kevin Dockendorf, Fisheries Biologist, 2009.N.C. Wildlife Resources Commission.

Classification

Class: Osteichthyes (bony fishes) Order: Centrarchidae (sunfish)

Average Size

2 to 3 lbs.; the world record largemouth bass weighed 22 lbs, 4 oz. The North Carolina record is 15 lbs, 14 oz.

Food

Worms, salamanders, frogs, crayfish, snakes, ducklings, insects and fish.

Breeding

Spawning season occurs in spring when water temperatures reach 63 degrees. Female deposits eggs in nest guarded by male bass. From 2,000 to 12,000 fry hatch. Only 5 to 10 will reach 10 in.

Young

When hatched, largemouth bass are known as fry. Fry are less than 1 inch long and eat zooplankton. As they grow from 1 to 3 inches, largemouth bass are known as fingerlings and eat aquatic insects and small fish.

Life Expectancy

Females live longer than males. In North Carolina, 10 years is long-lived. Most survive only 3 to 4 years.

Range and Distribution

In North Carolina, the largemouth bass is found in ponds, reservoirs, streams and rivers throughout the state, as well as in brackish coastal waters alongside saltwater species. Populations are considered good in every area of North Carolina, with the best populations occurring in the Piedmont and Coastal Plain. Bass tend to grow faster and larger in reservoirs, although large fish are also common in many farm ponds and in some coastal rivers.

General Information

Largemouth bass are the most sought-after freshwater gamefish in the United States. There are several reasons for the popularity of this fish. Anglers can usually find waters that contain largemouth bass within a short distance from their homes; they can catch bass that regularly reach trophy size (7 to 15 lbs.); and these fish are exciting to catch, with a battle characterized by head shaking and explosive leaps from the water.

Description

Largemouth bass belong to a group of fish collectively called black bass. Other black bass found in North Carolina include the smallmouth and spotted bass. All black bass belong to the sunfish family, but are distinguished from other sun fish by their elongated bodies. Largemouth bass are distinguished from other black bass by means of the lower jaw, which is longer than those of other bass. The largemouth bass is also a bigger species than the smallmouth or spotted bass. There are two subspecies of largemouth bass: the Florida largemouth bass and the northern largemouth bass.

History and Status

The largemouth bass is a native species of North Carolina. In North America it was originally found from southeastern Canada through the Great Lakes; south down the Mississippi Valley to Mexico and Florida; and up the Atlantic coast as far north as Maryland. As the fish grew in popularity with anglers, it was stocked in other areas and today is found throughout the continental United States and Hawaii, and southeastern Canada. It has also been stocked in Europe, Asia, Africa and South America.

Habitat and Habits

The largemouth bass prefers habitat with lots of structure. This structure may be in the form of weed beds, sunken logs, rocks, brush and standing timber. It uses structure as cover for ambush sites and to hide from larger predators.

Largemouth bass prefer temperatures between 77 and 86 degrees. Bass seldom feed at temperatures below 50 degrees and cannot survive for long at temperatures above 98 degrees.

When water temperatures approach 60 degrees in the spring, male bass swim to the spawning grounds. Male bass spend several days selecting their nest sites. The beds are usually in 1 to 4 ft. of water, but they may be deeper in clear water.

Spawning begins when the water reaches 63 to 68 degrees and remains in this temperature range for several days. A female largemouth bass lays between 2,000 and 7,000 eggs per pound of body weight.

The male guards the nest, fanning the eggs with his tail to keep off silt and debris. He will attack anything that swims near the nest. Despite the male’s vigilance, many eggs are eaten by other fish species. Hatching time for bass eggs depends on water temperatures. If the water is 72 degrees, eggs will hatch in only 2 days, but they take 5 days to hatch in water around 67 degrees. Approximately 2,000 to 12,000 fry hatch from each nest. Of these, however, only 5 to 10 are likely to survive to reach a size of 10 in. Newly hatched largemouth bass feed on tiny crustaceans and other zooplankton until they reach 2 in. in length. Young largemouth bass eat insects and small fish, including smaller bass. The adult largemouth bass will eat almost anything alive that will fit in their mouths. Fish, worms, frogs, insect larvae, crayfish, salamanders, snakes, small mammals, birds and ducklings are also eaten. Anglers use a variety of natural baits and artificial lures to catch largemouth bass.

Springtime movements center around spawning when bass move from deep to shallow water. During the summer months, bass are active in shallow waters during the morning and afternoons, but may move to deeper water at midday, when the water temperature increases in the shallows. When the water starts to cool in the fall, bass return to the shallows to look for food. As the water temperatures decrease during the winter months, bass become more sluggish, their metabolism slows down, and they require less food. They may become active during winter months if several days of warm weather heat the water temperatures above 50 degrees.

People Interactions

Largemouth bass have had a tremendous influence on many people. Tackle manufacturers, boat dealers and bait shops all provide specialized gear for largemouth bass fishing, especially for an increasing number of anglers involved in largemouth bass tournaments. Largemouth bass fishing is big business; many people make their livelihood from this popular sport. Although water pollution is a real threat to largemouth bass and other fish populations in some waters, the largemouth bass is an adaptable species and, overall, its future looks bright.

NCWRC Interaction

After fish kills associated with Hurricane Isabel occurred in northeast North Carolina in 2003, fisheries biologists began an intensive largemouth bass stocking project to evaluate stocking strategies that may be used after future hurricane-induced fish kills. In 2004, largemouth bass of different sizes (8, 2 and 5 inches, respectively) were cheek-tagged with a minute magnetic tag and stocked in the Roanoke and Chowan Rivers; stocking size was related to the time of year that certain sizes of largemouth bass may normally occur. Stockings were evaluated through an intensive electrofishing recapture period; the recapture period was completed in spring 2007. Although an initial boost of tagged individuals was observed in the population, the number of tagged largemouth bass contributing to the population over time dwindled to a mere fraction of the naturally produced largemouth bass. In this case, natural recruitment was likely a product of a few fish that must have survived to reproduce and repopulate a devastated fish community. Still, this study provided valuable insight on a management strategy to monitor largemouth bass recovery. Plans include implementing a sub-adult stocking strategy, when minimal to no natural recruitment occurs after hurricane-induced fish kills.

Best Air Rifle Deals

Popular Posts

How Do Break Barrel Air Rifles Work?

0
A break barrel air rifle is a type of airgun where the barrel breaks open at a hinge point just above the breech. This...

Synthetic vs Wood Stock: The Final Showdown Between Brunette And Blonde

0
I understand that you’re here to get some quick facts on synthetic vs wood stocks Probably to guide your purchase.  Quick alert - the debate...

Dry Firing Air Rifles: What You Need to Know

0
"Master the art of precision shooting with dry firing air rifles. Enhance your aiming skills, trigger control, and muscle memory without using ammunition. Discover...

What Is An Air Rifle?

0
If you have stumbled upon this article, chances are that you probably have a pest problem at your house. This is a very common...

Best Distance for Sighting In an Air Rifle

0
Shooting with an air rifle always seems like a thrilling experience, but if you are a newbie then you have lots to learn. One...