SALT LAKE CITY, Utah (ABC4) – The Utah Division of Wildlife Resources (DWR) has announced a statewide emergency closure to “shed hunting” in an effort to help wintering big game, particularly deer populations. The last time shed hunting was prohibited in Utah was 2017.
The antler gathering restrictions are effective Feb. 7 through April 30 across Utah, on both private and public lands, according to a press release.
DWR biologists have reportedly been monitoring the condition of the deer, as well as snow depths and winter temperatures, throughout Utah since early Dec.
These monitoring efforts include “body condition and health assessments,” conducted during the big game captures that take place each Dec. Biologists measure and record “overall deer condition, body fat levels and fawn weights” of the animals going into winter, the release states.
Biologists also place GPS collars on deer to monitor animal migrations and survival.
Data from these monitoring efforts and GPS tracking reportedly show that the extreme cold and increased snowpack across the state are starting to impact mule deer fawn survival rates, and may negatively impact the ability of the adult deer to survive the winter.
In these types of conditions, big game animals are weakened and highly vulnerable to repeated human-caused disturbances. The unnecessary expenditure of energy and stress associated with disturbance — like being repeatedly followed by someone gathering shed antlers — may significantly decrease the survival rates of big game animals, particularly deer, this winter. Closing the shed antler and horn gathering season will minimize a major source of disturbance in the areas and during the time periods when big game animals are the most exposed and vulnerable. Shed antler gathering is not the only winter activity with the potential to disturb wintering wildlife. We encourage everyone to be aware of wildlife during this vulnerable period and do their best to not disturb them.
Utah Division of Wildlife Resources Director J. Shirley
The release states these temporary restrictions also apply to looking for horns and antlers still attached to the skull plate of a deceased animal, in addition to naturally shed antlers.
DWR conservation officers will reportedly be conducting additional patrols this winter to enforce the restrictions and ensure that people aren’t disturbing wintering wildlife. “Violators may be cited,” according to the DWR.
The DWR has also implemented “emergency deer feeding” in parts of Rich, Summit and Cache counties. Biologists may also feed deer in additional locations, if emergency feeding criteria are met. However, deer feeding will reportedly not happen in areas where chronic wasting disease, a fatal, neurological illness among deer, elk, moose, etc., has been found.
Except for other emergency changes made since Jan 1, 2024, all other rules established in the 2024 Big Game Application Guidebook remain in effect.
“We know shed hunting is a popular pastime for many families in Utah, and we appreciate everyone’s understanding and cooperation in waiting to go gather antlers until after April 30,” DWR Big Game Coordinator Dax Mangus said. “These efforts will help reduce stress on Utah’s big game animals and increase their chances of surviving the winter.”
The DWR states they will continue to monitor the condition of deer and the winter conditions across the state and may lift the closures earlier than April 30, if conditions allow.
As I said, I have recently been experimenting with different broadhead options and while I did my testing at a maximum range of 30 yards, it wasn’t until I stretched the distance that the weakness in my system began to show its face. And, despite the fact that the average treestand bow-shot happens between 15-20 yards, I like to push the limits of my equipment and increase my maximum, effective killing range (MEKR) whenever possible.
Walk back tuning of your bow can dramatically improve accuracy of your arrows
My broadhead, which seemed to fly so precisely at 30 yards (matching my field points) suddenly began to develop a mind of its own when I hit 40 paces. However, instead of looking at the head in question with a skeptical eye, I knew exactly where the problem lies. It could be found in my arrow rest. The only way to fix the problem was to Walk Back Tune it.
How Do You Walk Back Tune Your Rest?
While the term might sound complicated the procedure is rather simple to perform. But, before we discuss the “how” let’s cover the necessary items you will need.
Large Target: Try to find the biggest one possible.
Duct Tape or Blue Painters Tape
Shooting distance of at least 40 yards
Allen Wrenches
Range Finder
Calm or No Wind.
Start by using the tape to make a T on your target face starting at about 6 inches below the top of the target. Depending on the speed of your bow, the vertical portion of the T might need to be longer or shorter.
Once you have made the T on the target face it is then time to shoot your first arrow. Starting at 10 or 20 yards, aim exactly where the horizontal and vertical portions of the T connect. If your arrows don’t hit the mark then adjust your sight only. Keep adjusting your sight until your arrow impacts the intersecting lines. Once that happens it is time to move further away from the target.
Using the same pin you used for the first arrow (20 yards) walk back to 30 yards and launch an arrow at the same intersecting point on the T. Then, walk back to 40 yards and, using the same 20-yard pin to aim with, shoot an arrow at the intersecting lines on the T. Repeat this process for 50 and 60 yards if possible. Again, all shots are taken while aiming at the same intersecting line of the T using only your 20-yard pin.
View of the T, starting six inches above the target
Once completed, you will find that of course, your arrows will fall from the top to the bottom. However, the critical detail will be which side of the tape they landed on; either right or left of the centerline on the T. You will notice that the further the distance of the shot, the further away from the centerline your arrows will be. This is normal as the greater the distance the greater the influence on arrow impact.
Adjusting Your Arrow Rest
Unlike sighting in your bow (when you chase the arrow with your sight’s pin), walk back tuning requires that your arrow rest be moved in the direction you want the arrow to go. For example, if your arrows are falling to the left of the centerline on the T then you will want to move your arrow rest to the right. Conversely, if your arrows are falling to the right of the centerline on the T then you will want to move your arrow rest to the left.
If an arrow is to the left of the blue T line, adjust your rest to the right.
Believe me when I tell you it only takes a minute amount of movement in order to drastically change your arrow’s point of impact. More than once I have overcompensated and pushed my arrow beyond the desired impact point.
So, after making a small adjustment to your rest repeat the process to determine if more movement is necessary and in what direction. Pretty soon all of your arrows should impact the vertical line on the T from top to bottom. Remember, use only your top pin for all shots.
The Basics of 2nd and 3rd Axis Adjustments
I once thought that the 2nd and 3rd axis adjustments on my bow sight were more suited for the western big-game bowhunter. However, while prepping for a western hunt I realized the importance of setting these adjustments not only for elk in September but also for my favorite whitetail stand in November. As it turns out, the 2nd and 3rd axis adjustments are both critical for dead-on accuracy; especially in hill country or when shooting uphill, downhill, and even side-hill.
The 2nd Axis adjustment (which can be done with your bow leveled and resting) is probably the easiest to understand as it runs through the shooter’s line of sight and is adjusted by rotating the sight housing like the hands on a clock (clockwise or counterclockwise). Up close you might not recognize any effects if things are out of whack. However, at longer distances, your accuracy will suffer.
The 3rd Axis adjustment (which should be done while you are at full draw) influences the rotational axis that your sight level moves on. In other words, it is like a door swinging open either toward the shooter or away. Both of which you do not want.
Instead, when you reach full draw, your bow’s bubble level should be exactly perpendicular to your line of sight. You don’t want the level to angle (or hinge) toward you or away from you. If it does, even if slightly, the difference in angle will be enough to ruin your uphill and downhill shots. This typically results in left and right misses.
Second and Third Axis adjustments are made differently depending on what type of sight you are using and the manufacturer. Therefore, it is best to refer to your owner’s manual when attempting to adjust them. My intent with this article isn’t to show you how to do it but the importance of doing it.
However, one universal tool that will be needed is a level that attaches to your bow. You can either purchase one or you can build your own. I built my own and spent the money I saved on something else hunting-related.
Conclusion
While you might be knee-deep in hanging tree stands and organizing trail camera images, don’t neglect the most important variable in your whitetail efforts-your bow. After all, nothing else matters if it isn’t tuned to its maximum potential. With Walk Back Tuning and 2nd and 3rd Axis adjustments, you can rest assured that it will be.
“Unleash your shooting potential with the ultimate high-performance air rifle! Discover the highest FPS air rifle on the market that requires no license. Experience unrivaled power and precision in a compact package, perfect for both beginners and seasoned shooters. Elevate your shooting experience without any legal hassles – get ready to dominate the target range like never before!”
highest fps air rifle without a license
When it comes to air rifles, enthusiasts are always on the lookout for the highest FPS (feet per second) models that do not require a license. These powerful air rifles offer an exceptional shooting experience without the need for any additional paperwork or permits. Whether you are a seasoned shooter or a beginner looking to explore the world of air rifle shooting, finding the highest FPS air rifle without a license can provide you with an exhilarating and satisfying shooting experience.
One of the top contenders in this category is the Benjamin Bulldog.357. With its impressive 800 FPS muzzle velocity, this air rifle delivers unparalleled power and accuracy. It is capable of taking down small game with ease and has become a favorite among hunters and target shooters alike. Another noteworthy option is the Gamo Swarm Magnum, which boasts an impressive velocity of up to 1650 FPS. This break barrel air rifle offers incredible precision and speed, making it suitable for both hunting and competitive shooting.
It’s important to note that regulations regarding air rifles vary from country to country, so it is crucial to familiarize yourself with local laws before purchasing or using any high-powered air rifle. While these models may not require a license in certain regions, it is always best to ensure compliance with legal requirements. By selecting the highest FPS air rifle without a license that aligns with your needs and adheres to local regulations, you can enjoy the thrill of shooting while staying within legal boundaries.
In conclusion, owning the highest FPS air rifle without a license comes with its pros and cons. While it offers power and accuracy for recreational purposes, it also raises concerns over safety and legal implications. It is crucial for individuals to adhere to local laws, regulations, and safety precautions when considering such firearms.
In this Leupold VX 3 HD review, we are going to dive into the details of this 4.5-14×40 Leupold VX 3 HD rifle scope. Leupold’s new scope that is just a step below their extremely popular VX 5 HD, is a bit more affordable, but still big on performance. Featuring Leupold’s HD glass and a wide range of magnification offerings, the Leupold VX 3 HD rifle scope is the perfect scope for the hunter who doesn’t need ultra long range capabilities, but wants a scope that will perform well on a hunt.
Love optics? We certainly do here at Backwoods Pursuit, so make sure to check out our other optics reviews, as well as our massive 19 Spotting Scope Review where we lined up 19 of the best spotting scopes on the market and tested them side by side!
Looking for a binoculars? Check out ourMASSIVE 26 BINOCULAR REVIEW where we put 26 of the best binoculars side by side!
In this Leupold VX 3 HD review we are going to look at how this rifle scope stacks up as a hunting scope. It’s not a long range optic, so if that is what you are looking for, there are better options. However, if you are looking for a great rifle scope that has the ability to take longer shots, the 14x magnification with the CDS-ZL locking turret can reach out there as far as most of us are comfortable shooting at game. The CDS stands for “Custom Dial System” and the ZL means “Zero Lock”, which we’ll go over below.
The Testing: Leupold VX 3 HD Review
In preparation for the hunting season, many trips to the range were made to get this scope dialed in and to practice plenty to make sure both it, and myself were ready when the time came to make the shot.
What’s In the Box: Leupold VX 3 HD Review
The Leupold VX 3 HD rifle scope comes with all the tools needed to set your zero stop. You also get an integrated throw lever that is very user friendly and not overly large or bulky like some. Unfortunately, it doesn’t come with a Leupold Sun Shade, the Leupold Flip Back Lens Cover Kit, or the handy Leupold Neoprene Scope Cover.
All of the Leupold accessories are top notch and extremely well-built. They are, however, on the expensive side and if you pick them all up, it adds up quick. This is was bit of a disappointment as the only accessory that comes with the scope is the rubber lens cover, but if you like having a sun shade, flip up caps, or neoprene cover, you’ll have to drop an additional few hundred bucks to get the whole setup.
Leupold VX 3 HD Specs
The Leupold VX 3HD rifle scope is a fantastic rifle scope that’s purposefully built for the hunter who needs a solid, super lightweight scope that also gives you enough magnification to reach out a little ways if needed. It features some pretty impressive specs:
WordPress Tables Plugin
Eye Relief: Leupold VX 3 HD Review
The Leupold VX 3 HD 4.5-14×40 gives you a nice 3.6-4.4 inches of eye relief, keeping your face plenty far away from the scope to avoid getting a nice half moon decoration on the top of your nose/eye. I found that, consistent with the specs, you do lose a little eye relief moving to the top end of the zoom range, but the 3.6 inches of eye relief when at 14x is more than enough.
I tested the Leupold VX 3 HD along side others like the Bushnell Forge 4.5-27×50 as well as the Athlon Cronus 4.5-29×50, the Tract Toric UHD 4-20×50, the Sig Tango4 6-24×50 and the Zeiss Conquest V4 6-24×50 rifle scopes, and the Leupold VX 3 HD hung in there, even among some of those more expensive ones. Now obviously this VX 3 HD is a very different scope than most of the ones just mentioned given its design, size and purpose, but it still impressed when compared to the others.
Turrets & Side Focus: Leupold VX 3 HD Review
Between field testing and range time testing for this Leupold VX 3 HD review, I found the turrets to be perfect for the hunter who wants to keep things simple, but also wants to be able to dial in for the occasional longer range shot when needed and have the ability to set the side parallax with the side focus knob. The elevation turret locks nicely in place and only moves using a spring loaded push button when it’s time to dial it in. The side focus knob works very well and is nice and smooth without too much resistance, however, I do wish it had some yardage reference points.
The turrets are crisp and give you nice audible clicks so there’s no mistaking how many MOAs you have moved it. You get only one rotation out of the dial, but that gives you 15 MOAs, and for most of us, that’s more than enough. 15 MOAs still gets you a long ways out there with most modern hunting rifles.
The windage turret on the Leupold VX 3 HD is capped, but if you remove the cap, you have a nice, easily adjustable knob in the event you want to calibrate for wind. Of course, if you remove the cap and make your adjustment manually you’d need a few extra seconds for that. If you select the Windplex reticle like we tested here, you can make your windage adjustments using the reticle if needed.
The Leupold VX 3 HD gives you an easy to read side parallax adjustment that moves freely enough to not be overly difficult to adjust, but not too freely to accidentally move on you. Side parallax is usually a feature reserved for your long range scopes, but it’s great that Leupuold made this VX 3 HD model with it, given that you have up to 15 MOAs of adjustment with the CDS-ZL dial when you want to make a longer shot. Having that side parallax adjustment makes a big difference once you start stretching the range out.
The Leupold VX 3 HD gives you an amazing 75 minutes of windage and 75 minutes of elevation adjustment. Impressive that you get that much adjustment in this scope!
Zero Lock & CDS-ZL Dial: Leupold VX 3 HD Review
The Leupold VX 3 HD rifle scope gives you a unique Zero Stop feature that locks into place with a spring loaded button. To move the turret from “zero,” you simply push the button and dial to whatever MOA you need. To bring it back to zero, turn the knob and the button will pop back into its locking position when you reach zero. Pretty slick setup that is pretty fool proof and easy to use. While it’s possible to accidentally push the button and move the turret from zero, it’s very unlikely. Make sure to double check your zero before your shot, though, as that’s always a good idea.
To set your zero on the Leupold VX 3 HD, you’ll need to remove the cap via the small allen screws. Once the cap is removed, you have access to zero your rifle at whatever distance you like, then reinstall the cap and you are set. Make sure to bring the tool to pull the turret cap off with you to the range when zeroing your rifle or you may not be able to make the needed adjustment.
Image quality: Leupold VX 3 HD Review
A good Leupold VX 3 HD review wouldn’t be complete without testing the optical performance throughout the zoom range of the scope. While testing, I found that the Leupold VX 3 HD provides outstanding optical performance, particularly for a rifle scope in its price range. One of the things that really stood out is the impressive field of view and substantial eye relief you get. There is almost no “dreaded donut,” or black ring around the image like so many scopes have. With the Leupold VX 3 HD, you don’t feel like you are looking through a tunnel at all, which is a welcomed feature for such a small and lightweight scope.
Optically, you get a brilliant image that will not disappoint. It’s not quite as top notch as the VX5 HD or VX6 HD as you would expect, but still extremely good. As with most scopes, you do lose a little image clarity at the top end of the zoom range, but not much. The image you get at 14x is still sharp and clear, particularly if you take the time to use the side focus/parallax adjustment and make sure your eyepiece is focused properly.
4.5-14x40mm Magnification & Functionality
With the Leupold VX 3 HD rifle scope you get a perfect zoom range of 4.5x up to 14x, which is really all that’s neccesary for most practical hunting situations. Again, if you are into long range shooting, there are better scopes out there than the VX3 HD to fit that need, but for a hunting scope, this thing is ideal.
The zoom mechanism is super smooth and you get a throw lever included which is really convenient. The throw lever is nice and compact as well, unlike most other throw levers on the market that are much more bulky. The amount of resistance on the zoom mechanism is just about perfect for a hunting scope, but I did find that I preferred leaving the throw lever on there rather than removing it.
The loss in eye relief is noticeable as you move to the 14x magnification and requires you to “suck in” to the scope a bit, but you still have plenty of eye relief when at max zoom.
2nd Focal Plane & Subtensions
The Leupold VX 3 HD is a second focal plane scope. Now, backing up a bit, a second focal plane scope is one where the reticle size remains the same throughout the zoom range (unlike a first focal plane scope which gets larger as you zoom the scope in). The challenge with a second focal plane scope like the Leupold VX3 HD can be that your subtensions change depending on the magnification you are using. As with most scopes, the hash marks noted above are set for when you are at max zoom -14x in this case. This design makes sense in that, if you are holding for wind, you are likely to be at max zoom anyway.
As you can see above, the subtensions are nicely set with windage hash marks to help you hold for wind if you choose to do so. Even the width of the reticle can be used as a reference point, which can be very useful if you don’t have time to dial in the distance. There are no elevation subtensions, however, so you’ll want to utilize the CDS-ZL dial for elevation adjustments if you are wanting to stretch out the distance.
How The Leupold VX3 HD Ranked
Leupold VX 3 HD Review: Conclusion
After taking the Leupold VX 3 HD rifle scope through the paces, I came away really liking this rifle scope. It’s an ideal setup for a hunting scope, particularly if you are someone who likes to play a little bit at longer ranges, and/or at least want the ability to do so and dial in your reticle for those longer shots.
The WindPlex reticle is very functional, but it’s certainly not for everyone either. Some will love it and others might prefer a standard duplex. Personally, I didn’t find the WindPlex reticle too busy or distracting at all. Some of your long range scope reticles can get very busy, and it can simply be too much for a hunting scope. You get a TON of bang for your buck with this scope in image quality, build quality, fantastic zero stop, and great eye relief.
One downside, as mentioned above, is how expensive the accessories are for this scope and that most of the time, you have to buy them separately which is a bummer. If you are someone who likes to have a sun shade, caps and/or a neoprene cover, you’ll have to drop some additional cash to add those pieces to your scope.
At the end of the day, though, you’d be hard pressed to find a better rifle scope around the $750 price point than the Leupold VX 3 HD. It gives you fantastic optical performance with everything you need as a hunter and nothing that you don’t. This lightweight rifle scope features a solid locking zero stop design, non-bulky turrets, a CDS-ZL elevation turret that is compatible with a customizable turret from Leupold, and even a side focus knob. It hits all the marks for a great hunting scope!
Subscribe to Backwoods Pursuit to get Your FREE Backcountry Gear Worksheet!!!
Dial in your gear list, calculate your pack weight, and lighten up your pack with this handy tool!
If you are looking for a new or pre-owned bass boat, you’ll find no shortage of popular bass boat brands available. These brands specialize in creating boats designed and equipped for bass fishing primarily in freshwater, but some are ready for the rigors of saltwater as well. Bass boats typically have a powerful outboard motor for fast access to where the fish are and a stealthy electric trolling motor to avoid spooking them once you arrive. The boats also include specialized fishing features like livewells, fish-finders, open decks for casting, and storage spaces for rods and tackle.
With the wide array of brands on the market, working out which type of bass boat may be best for you will take some study. This guide should give you a good start towards understanding the advantages of different types of bass boats and learning about the best bass boat brands on the market today.
Different Types of Bass Boats
Before we begin exploring the different brands, let’s talk about the big differentiator among bass boats, the construction material. Bass boats are usually made out of either fiberglass or aluminum, with some bass boat brands focusing on one or the other, and others utilizing both materials. Here are the advantages of each type.
Advantages of aluminum
Aluminum hulls are lighter, making them easier to tow and launch, reducing draft, giving them a higher power-to-weight ratio, and making them some of the most fuel-efficient boats on the water.
Aluminum construction is usually less expensive when it comes to small -boat models, including bass boats (which generally top out at around 22 feet), creating boats that are more affordable.
Aluminum boats require minimal maintenance.
Impact damage is usually easier to repair with aluminum, since it tends to dent instead of shattering or cracking.
More information: The Best Aluminum Bass Boats on the Market Today
Alumacraft Classic 165 Sport aluminium bass boat. Photo credit: Alumacraft
Advantages of fiberglass
Fiberglass construction allows for more complex shapes in the hull and topsides, and more molded-in integrated features and components.
The strength, weight, and seaworthiness of many fiberglass boats allow them to be used more comfortably in heavier seas and at faster speeds than than many aluminum boats.
With more weight and a bit more draft, fiberglass boats tend to drift slower in a breeze and don’t get buffeted around as much at the dock or boat ramp.
Fiberglass boats can be made in nearly any color desired, and most people feel they have more visual appeal.
We’ve chosen 10 top brands based on performance, reputation, and value. However, there are many other factors that might make a brand the top brand for you. The companies below offer a wide array of models, from boats that are affordable to top performers.
Bass Cat
Founded in 1971, Bass Cat is a small-volume builder of top-tier competition-level bass boats. All their models are available with a lifetime, transferable structural warranty.
Bass Cat offers six models of bass boats in their Premium range, two models in their Advantage range, and two in their Vision range. Their models have long lists of standard features that go well beyond the norm and include items like dip -net scabbards, digital switch panels, jack plates, and custom welded and fitted trailers.
Bass Cat bass boats for sale
Crestliner
Crestliner has won CSI (Customer Satisfaction Index) awards for 15 consecutive years for its boats, and the company’s aluminum bass boats are considered some of the best in the industry. Crestliner bass boats have all-welded aluminum hulls for strength and durability and back up their boats with a limited lifetime warranty on all main seam welds and a three-year bow-to-stern warranty.
Crestliner offers a wide variety of bass boat options for anglers, ranging from 16 feet to 21 feet, inches in length. Power options range from 20 horsepower to 250 horsepower. Their high-end offerings are tournament-ready and are built with 0.125” gauge aluminum, as opposed to the more common 0.10” gauge.
Crestliner bass boats for sale
Crestliner XF 189. Photo credit: Crestliner
Lowe
Lowe builds aluminum boats only and has a reputation for making highly versatile bass boats with multiple power and interior options. Customization options include a multitude of innovative fishing features and style choices such as different electric trolling motors, fishfinders, and jack plates.
Lowe currently offers two series of boat models for bass fishing. The economical Skorpion line has three models available from 16 to 17 feet. The Stinger line includes four models dedicated to bass alone, plus two multispecies models, and ranges from 17 feet, 7 inches, to 19 feet, 10 inches. All feature angling accouterments like lockable rod storage, livewells, fish-finders, and tournament-style seating.
Lowe bass boats for sale
Lowe WV1260. Photo credi: Lowe Boats
Lund
In business since 1948, the Lund brand is extremely popular with people who know a lot about boats. This boatbuilder uses innovative layouts to create bass boats that use space efficiently without sacrificing comfort.
Lund’s aluminum boat line includes two bass boat styles between 17 feet, 9 inches and 20 feet, 10 inches long. One, the Pro-V Bass XS, is a premium-priced boat designed for tournament fishing that has all the features an angler could want, including a four-seat layout with hydraulic steering, lighted instrumentation, and a custom fiberglass console and dash. The more affordable Renegade line includes smaller, simpler models intended for crossover fishing for multiple species.
Lund bass boats for sale
Lund 1875 Pro V Bass XS. Photo credit: Lund Boats
Nitro
Nitro is a top brand among fiberglass bass boats and its Z series has nine different models from 17 feet, 4 inches to 21 feet, 2 inches, widely ranging in both price and performance. All are sold as fully equipped boat-motor-trailer packages, and the vast majority of the options Nitro offers are upgrades to existing stock equipment.
Many of their models include high-tech electronics with features like side-scanning not just at the helm, but also on the bow. And these are often networked via NMEA2000, so units like the fishfinders and the trolling motors can work in sync.
Nitro bass boats for sale
Nitro Z18. Photo credit: Nitro
Ranger
Founded in 1968, the Ranger brand is a household name in the world of bass boats and has a reputation or creating boats that are built to last. The company makes a wide range of bass boats, both fiberglass and aluminum, to appeal to various types of anglers.
Ranger’s aluminum bass boat line has six models. Each one offers foam-filled hulls, all-welded construction, and numerous fishing features. Their fiberglass lineup has 11 models from 18 feet, 8 inches to 21 feet, 9 inches.
Ranger bass boats for sale
Ranger Z519. Photo credit: Ranger Boats
Skeeter
Skeeter is a bass fishing -boat brand that has been in business for 75 years. The company designs tournament-worthy, high-end bass boats from 18 feet, 6 inches, to 21 feet, 4 inches. They come with an eye-opening lifetime limited structural warranty, a 10-year transferable warranty, and a three -year component warranty.
These are not inexpensive boats, and even in stock form are outfitted with powerful outboards, advanced electronics, jack plates, and potent electric trolling motors. You’ll have a difficult time finding any bass fishing features you can dream of that doesn’t appear on their list
Skeeter bass boats for sale
Skeeter FXR20 Apex. Photo credit: Skeeter Boats
Tracker
Tracker has taken the top spot as America’s No. 1 seller of aluminum fishing boats by offering a wide selection of affordable boat models through the popular Bass Pro Shops and Cabela’s Boating Centers, as well as additional area dealers. Made with all-welded aluminum hulls, Tracker boats come packed with fishing features like a Lowrance color fish-finder, pedestal seating at the bow and stern, and Minn Kota trolling motors.
Tracker offers a lineup of six modified-V bass boats ranging from 16 feet, 8 inches to 18 feet, 7 inches. Tracker models come with generally modest price tags and most don’t offer tournament-level performance, but they are packed with standard features and offer a tremendous bang for the buck.
Triton builds a wide range of fiberglass bass boats from 18 feet, six6 inches to 21 feet in length. These are tournament-level boats and the newest, the 2024 20XP Patriot, boasts speeds of over 70 mph. Triton utilizes a double-brace, seven -cross-member stringer system to reduce hull and deck twisting and attain top-level performance.
Along with the top-tier performance, Triton brings a visual flair to the table. Their boats are available in 14 different color packages which are coordinated with the trailer. They also feature high-end accessories, like Centric II mesh pedestal seats, ResQ retractable reboarding ladders, and Vault trailer hubs.
Triton bass boats for sale
Triton 21XRT. Photo credit: Triton Boats
Xpress
Xpress boats build a line of eight aluminum bass boats from 17 to 21 feet, ranging from tournament-level to beginner boats. While they come fairly well equipped, a huge list of optional items allows for a lot of customization ranging from blinker-style trim control to premium sound systems with RGB lighting.
One unusual component of the Xpress bass boat offerings is the Xplorer lineup, which is designed to serve as a bass fishing machine during the summer and a waterfowl hunting boat in the winter. It has a basic bass boat design but a smaller foredeck coupled with an enlarged cockpit, and is finished completely in camo.
Xpress bass boats for sale
Xpress X21Pro. Photo credit: Xpress boats
If you love bass fishing, there’s no doubt that sooner or later there will be a bass boat in your future. Just which one you choose will be a tough call. Maybe it will be one of the top 10 brands we’ve called out here, and maybe a smaller builder or a custom make that strikes your fancy. Either way, it’s a sure thing that once you make your choice your bass fishing will get a whole lot better.
Some of the links below are affiliate links, meaning, at no additional cost to you, we will earn a commission if you click through and make a purchase.
The Hatsan 95 air rifle has been at the top of my review list for quite some time now. I’ve heard great things about it, and until I tried it for myself, I assumed that most people were exaggerating. To say I was blown away, is an understatement.
Technical Specs
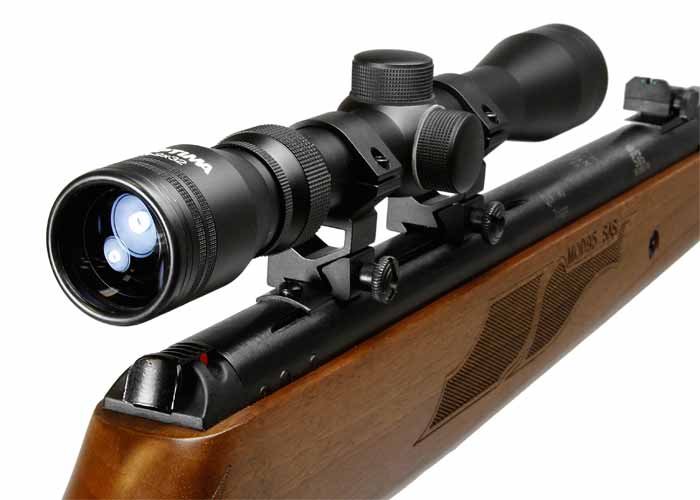
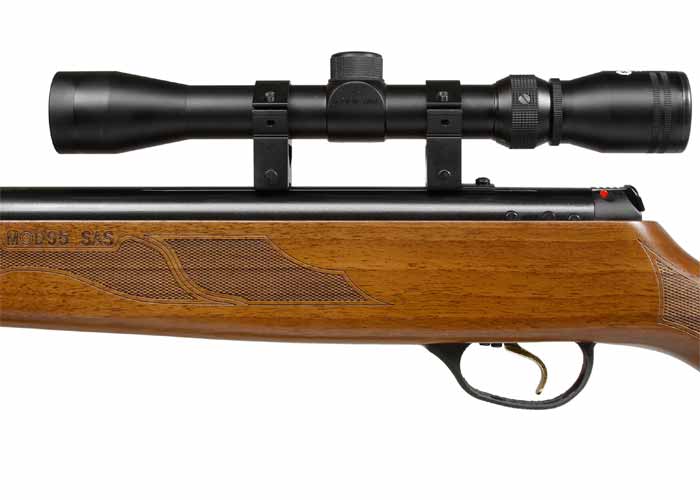
Let’s start by talking about the technical stuff first. This gun comes in three calibers: .177, .22 and .25. It’s a spring-piston break barrel single-shot air rifle with adjustable rear sight and a 3-9×32 scope. With a Turkish walnut stock and gold plated trigger, this is a beautiful air rifle.
Click here to buy now and get discounted price on the Hatsan 95 .177, .22 and .25 Caliber Air Rifle. Plus, get FREE shipping too!
Powerful Shot
Because we have three calibers with the Hatsan 95, power will depend on which rifle you choose.
The .177 has a velocity of 1,000fps
The .22 has a velocity of 800fps
The .25 has a velocity of 650fps
The .177 shoots faster than the other two calibers, but the .22 and the .25 will have a greater impact.
With that much power, this is a rifle that can easily be used for hunting or just plain fun plinking. At 50 yards, I had no problem taking out a squirrel with the .22. I’m still amazed by how powerful and accurate this rifle is.
Accurate and Durable
Even without the scope, this rifle is consistently accurate. At 40 yards, I was shooting with dime size accuracy.
Once the scope is sighted in, the accuracy gets even better. Fixed TruGlo fiber optics in the front and adjustable TruGlo rear sight help to further improve your accuracy.
I like the two-stage trigger on this rifle. It allows for pull weight, length of travel, first stage and second stage adjustments. The stock is ambidextrous, so any shooter can use this gun comfortably. The grip is checkered, so it won’t slip. The rubber pad on the forearm absorbs shock and reduces recoil. Just about every aspect of this gun is designed to improve accuracy.
But what about the quality of the build? A rifle can be deadly accurate, but it’s not worth buying if it only lasts a few months. The Hatsan 95 is a rifle you’ll have around for quite some time. The stock is made of Turkish walnut, the trigger is gold plated, and the barrel is made from German steel. It’s a bit on the heavy side at 7.8lbs (without the scope), but I’ve shot heavier air rifles.
Check out the beautiful detail in the walnut stock and also the trigger! (Click to enlarge pictures below)
Pros
The Hatsan 95 really surprised me. It’s an underrated gun that’s powerful, accurate and well-made. You have three calibers to choose from and it comes with a decent 3-9×32 scope and mount. It’s hard to find an air rifle that’s as well built and powerful as the 95 in the under $200 price range.
Cons
Like other air rifles, this one is loud. It’s a little heavy even without the scope at 7.8lbs. And it also takes quite a bit of force to cock it. Hatsan puts the cocking force at 35-40lbs.
I’m not really sure I would consider these cons, but they’re things you should be aware of. Most air rifles are about the same weight (or heavier even) and just as loud. Sure, it takes some force to cock this rifle, but it’s not something a typical adult couldn’t handle. And you probably don’t want kids shooting this gun anyway.
The Final Verdict
The Hatsan 95 is an accurate, powerful and well-built air rifle that looks just as good as it shoots. For under $200, this is one of my best air rifle and is easily worth double its price and is right on par with the big name rifles on the market today. I’ve had people unfamiliar with the brand think the rifle was worth well north of $400!
Click here to buy now and get discounted price on the Hatsan 95 .177, .22 and .25 Caliber Air Rifle. Plus, get FREE shipping too!
Crabbing is a great way to spend time on the water, and trot-lining is a very effective and fairly easy way to fill the bushel basket. Crabbing in my family started when I was very young, when I would go out with my dad and have a fun morning—and then an even better afternoon as we got to feast on the succulent crustaceans. Then I started my own business crabbing commercially for the past two summers. Here are 10 things I learned while trot-lining on the bay.
You want to catch a bushel of prime jimmies? Trot lining is the way to make it happen.
1. Don’t be afraid to pick up and move your line. Crabs are very depth- and bottom-oriented. If you’re not in the right area, you simply won’t catch crabs. Although moving the line may seem like a waste of time when you’re out on the water, if you’re only catching a crab or two that are keepers every run, it’s worth it to try a different depth. The type of bottom you’re over also plays a big role. If you notice that your trot line is flinging mud off your baits and you’re not catching crabs, go try a spot where you know there’s a shell bottom.
2. Use a heavy enough anchor. I highly recommend using mushroom anchors. Mushrooms are very easy to handle, can be dragged if necessary, and work on all bottoms. When buying your mushroom anchor, it’s crucial to choose an anchor heavy enough to stick on the bottom when you pick up the line to start running it. If your anchor is too light, you’ll drag it as the boat moves forward. This process will create lots of slack in your line, and will ruin that run—while also creating a problem (all that slack) that you need to fix. An anchor anywhere from seven to 10 pounds should do the trick. Although heavier anchors are harder to move around the boat, it is more important that you can run your trotline effectively.
3. Tighten or tie baits as tightly as possible to your line and snoods. Crabs are very tricky carnivorous devils. Whatever bait you are using, you should tie or tighten your snood as tightly as possible. On a good day of crabbing, especially if you are using chicken necks, after a couple of hours your baits will start to go missing. If you don’t tighten down the baits to your line to the full potential, even more will be missing. Crabs are able to dislodge baits from the line and they will scuttle away with it whenever possible, freeloaders taking that bait you paid for and painstakingly put on the line.
4. Use clips or carabineers at the ends of your main line. It’s great to use metal clips or carabineers for attachment points. They allow you to connect your anchor and float lines to your main line in a timely fashion. This will make setting out your line much easier, because all you must do is put a loop (at the end of your main line) in the clip and then you can keep feeding your line overboard. Also, this allows for easy storage of your anchors and floats because when pulling in the line you can simply unclip it and leave the rest of the rig on the boat until next time. When using a 1200 foot line it can be advantageous to have clips in the middle of your line, too. If you’re uncertain where crabs are going to be, you can split your trot line into two half-lines and lay them in different areas, to test where the crabs are.
5. At each end of mainline, use a short length of galvanized chain. This will ensure that the line is resting on the bottom, so crabs are able to locate the baits and hang on until the scooper is ready to attack. When using a long trot line, some people like to add another short length of chain in the middle.
This is the kind of bushel basket we like to see – one full of blue crabs!!
6. Keep enough slack in the line. Although too much slack can ruin your run and impede on the operations, it’s crucial to make sure that your line is not too tight, either. In most cases it’s obvious when your line is too tight; it will be stretched out so you see baits a mile away, and in turn, you will watch as crabs drop the baits because they see what’s headed for them. If this is happening to you, it’s actually very easy to fix. Go to the end and grab the anchor line, pull it until you feel the anchor lift off the bottom, and then simply drop it back down. This will add a bit of slack into your line and after you run it a few times, the line should level out and run more effectively.
7. Work with the tide and wind, not against it. When it is a bit choppy or windy it can be very hard to crab. Try your best to set the line in a calmer area that’s sheltered from the wind. If you know where the crabs are but your spot is troubled by wind, it is crucial that you run your line with the wind at your back. By doing this you will avoid many troubles; going too slow while the wind pushes against your bow, not being able to control where your boat is going, and your bow crashing against the waves and scaring off crabs. Don’t worry too much about how this affects your speed, because as long as you remain at idle it’s rare to go fast enough to cause crabs to drop off, even with a strong wind at your back.
8. Judge soak-time by trot line length. How long you wait before you begin scooping crabs again, after finishing a run, depends on how long your line is. When using a 600 foot trot line, it’s important to let your baits sit for 10 minutes (give or take) before running it again. This is because with a shorter line you will run it faster, and there will be less time for the baits to rest on the bottom. If you’re using a 1200 foot trotline, however, by the time you finish your run the first baits you scooped on have already been resting on the bottom for a while so you can go back to the start and run it right away. If crabbing is really hot, even with a shorter line you should start a new run quickly—in some cases the crabs will just eat off your baits, if you give them any extra time.
9. Use a wire-mesh net. Using a nylon or cotton mesh net is a very common mistake for beginner crabbers. Making an investment into a nice wire-mesh net is very important and will lead to a lot less frustration down the road. When using a nylon or cotton net, the crabs will get stuck in the mesh much easier or the mesh will tangle in the line. You have a lot less control with the mesh, and in turn will miss more crabs.
10. Try your best not to cast a shadow over your trot line. When running the line on a bright day, it’s important that you run the trot line in a direction so that your shadow doesn’t cast over top your line. If the sun is to your back and a shadow appears over your line, the crabs will see it and let go of the baits before you have time to scoop them. It may mean changing the direction you run the line in or even how you have your trot line laid out, but either way, eliminating that shadow will mean catching more crabs.
The more you go and do it, the more crabs you will catch. Every boat and every trot line is a little bit different, and it may take a season or two to get the trot-lining process down with confidence. But scooping crabs as you watch the sunrise is very relaxing—and eating crabs as you watch the sunset may even be better.
– by Max Rudow
Want to learn how to go trot lining from a kayak? Check out this video:
Spring is my second favorite season. The winter weather is finally loosening its grip. The rivers are breaking up, the grass is starting to poke through the snow patches on south-facing slopes, and bears are crawling out of their dens. Yet my favorite part of spring is shed antler hunting.
Deer, elk, and moose go through the annual ritual of losing last year’s antlers in late winter and begin to grow new bone through spring and summer. This cycle starts after the breeding period when the bucks and bulls drop testosterone, signaling the beginning of the shedding of their antlers. The pedicel, or point where the antler meets the skull, degrades and eventually the antler drops off, usually one at a time.
Shed hunting or antler hunting or horn hunting (even though antlers aren’t horns) is the spring search for these castoffs after the snowmelt. Shed hunting has boomed in popularity in recent years as more people have realized the benefit of outdoor spring exercise — and the thrill of finding a castoff antler. Here are some tips for getting started.
A whitetail shed that’s been lying on a sun-soaked ridge for a year or more. Photo by Jordan Voigt for Free Range American.
Know the Range
Deer and elk have historic areas they use for different aspects of their life: breeding grounds, summer feed, winter feed, etc. Paying attention to where you see the male animals in winter will give insight into where to start your search in spring. It’s important to note that animals are stressed during the winter more than at any other time of year. They’re weakened from the long, cold several months of just trying to get by in many areas. For this reason, several states have made it illegal to go into winter ranges before a certain date. Check state law before you make off for the mountains.
Find the Feed
If you’ve done your homework and seen some deer or elk wintering, that’s a great place to start looking. Animals try to winter where getting to feed is easiest for them, and they need to spend more time searching for food due to the stressors of winter. By becoming familiar with an animal’s food sources and at what time of year they’re using each source, a person can find spots to look for dropped antlers based on what’s on the menu.
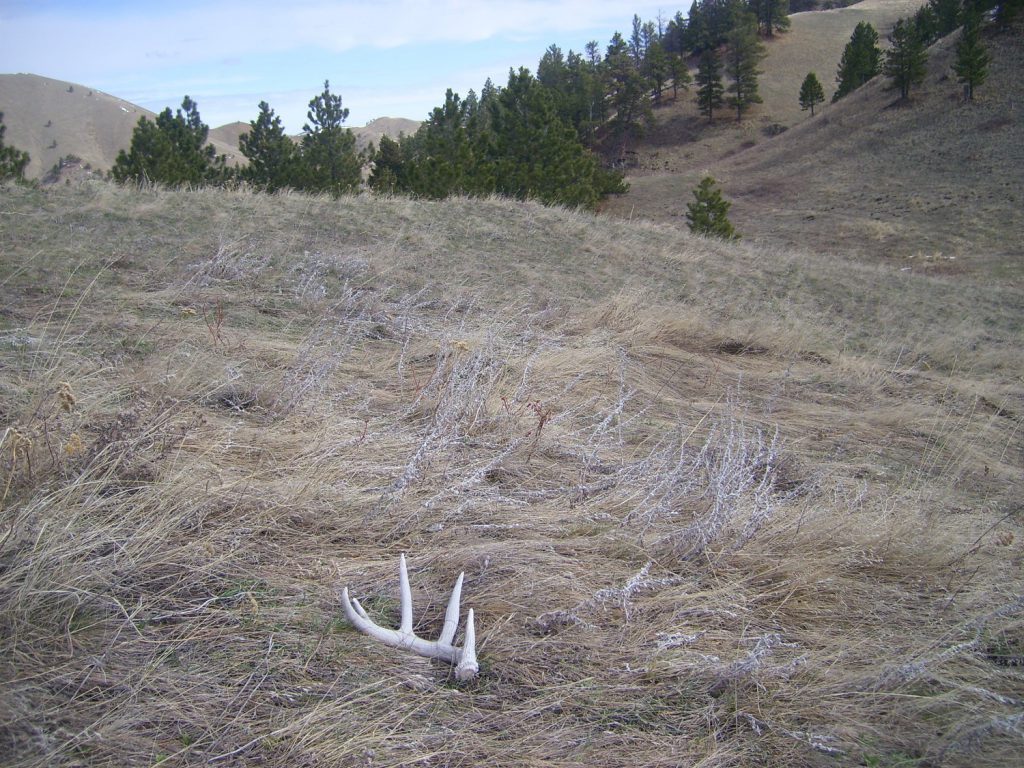
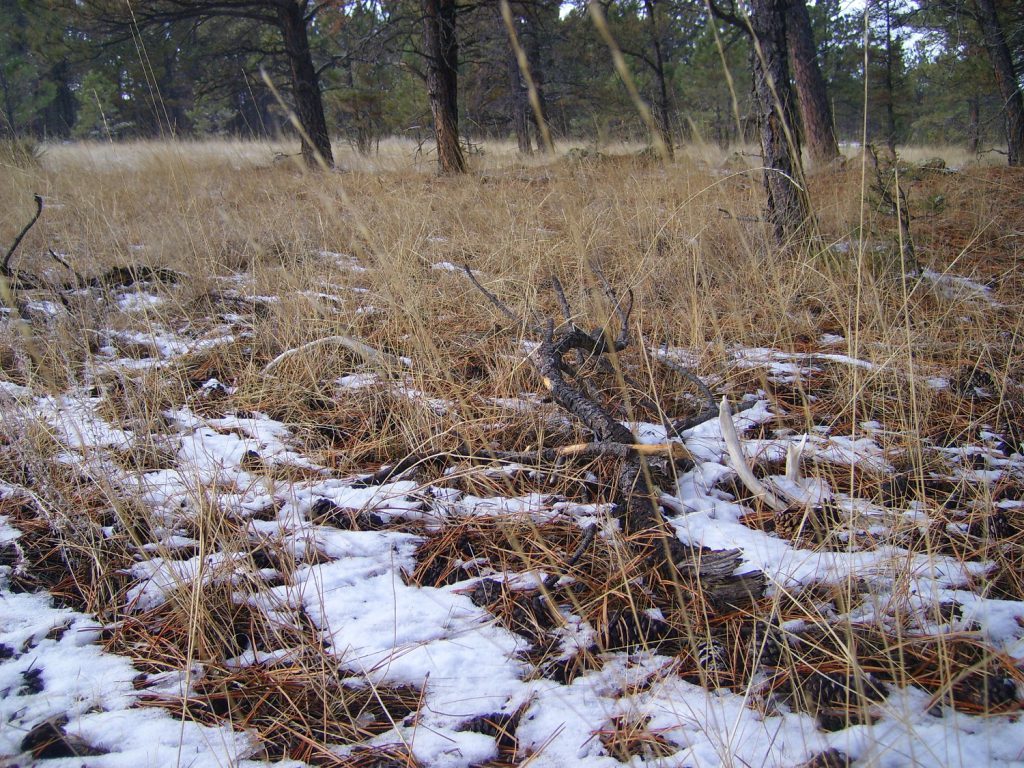
Can you see them? Two antlers on a winter feeding bench. Photo by Jordan Voigt for Free Range American.
Break Into the Bedroom
After feeding, animals spend the most significant portion of their day in their beds, resting and digesting their food. Looking for bedding areas that are close to feeding spots will pay off for the patient antler hunter. Most animals bed in fairly thick cover, so bedding areas can require more patience to work through but provide just as much opportunity at an antler as a food source.
Run Fences
Another place to check frequently are fence lines. As antlers loosen on the skull, a sudden jolt, such as jumping a fence, can jar them from their owner, leaving the patient and observant walker a chance at finding them. My son found his first matched set of deer antlers this way. After picking one up in a field, he started to walk the adjacent fence lines until he found the first antler’s mate tucked in the grass by a barbed wire fence.
Bring the Binos
Investment in a good pair of binoculars can pay dividends as well, depending on the country a shed antler hunter frequents. Instead of walking all over that big field or mountainside, get above or across from it and use your glass to pick it apart. In the early to mid-spring, the new grass hasn’t grown up enough to obscure most freshly shed antlers, allowing a detail-conscious person to find them from afar.
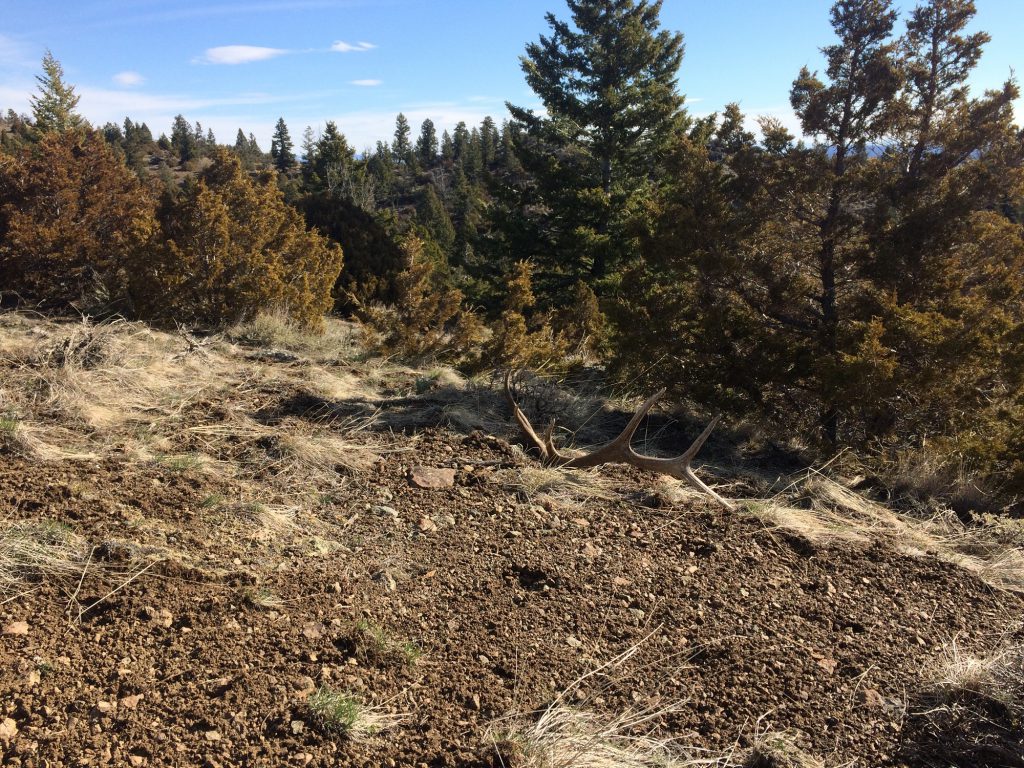
A fresh elk shed on the edge of a winter feeding area. Photo by Jordan Voigt for Free Range American.
Know Your Colors
It’s important to note that the length of time the antler has been lying on the ground and its location can determine the color. An antler shed on a south-facing slope, exposed to the sun, will turn white within a year, making it easier to see — whereas one lying in the shade on a north-facing slope with limited sun may stay mostly brown up to a year or more. This can be a clue to determine how long ago an antler was shed.
Freshly dropped antlers have pink or bloody pedicels, due to the recent separation, and can carry a unique aroma of the vegetation the deer or elk was rubbing on before they shed. Year-old antlers have begun to turn or are totally white due to sun bleaching but are smooth and haven’t begun to develop exterior faults. After more than a year in the sun, antlers naturally begin to break down, soften, and crack. Once they get to this stage, they’re sometimes referred to as “chalk” due to their propensity to leave white pieces in one’s hand after handling.
Antlers are all unique in their own way, like the many reasons people have for picking them up. Some like the exercise, some the challenge of finding bigger ones than last year, while others may depend on the collection and selling of antlers as part of their yearly income. Whatever your reason, get out and incorporate some of these tips with your own ideas and enjoy searching for some brown gold.
Read Next: Off the Couch and Into Life: Get Children Excited About the Outdoors
Lighter Score Weight When Filled Fuel Pre-filled? Top Pick: BIC Mini Lighter 0.39 oz Butane Yes Runner-Up: Clipper Mini Lighter 0.39 oz Butane Yes Best for Adverse Weather: UCO Stormproof Torch 3.21 oz Butane No UST Wayfinder Lighter 1.27 oz Butane No Zippo Matte Lighter 2.15 oz Zippo Lighter Fluid No
We bought 5 of the best backpacking lighters available and set about testing their water-resistance by soaking them in water, their wind-resistance by trying to blow them out, and their reliability by striking them until we got blisters. Our tests confirmed what backpackers have long known: the BIC Mini Lighter (commonly called the “Mini BIC”) is the best lighter for backpacking.
It is ultralight, reliable, decently water-resistant, and a great bang for your buck.
The Mini BIC’s only downside is it’s not wind-resistant. A simple windscreen can usually solve this problem though.
If you need a lighter for backpacking in extremely wet or windy conditions, we recommend the UCO Stormproof Torch. It was the most wind- and water-resistant lighter we tested.
Also, it’s important to point out the Mini BIC earned the top score in our tests by the slimmest of margins. The Clipper Mini Lighter is an excellent alternative. It isn’t as easy to find in the US, however — you’ll likely have to pick one up online or at a head shop.
Read on for our full reviews.
The 5 lighters we tested
Top Pick: BIC Mini Lighter
Supremely affordable and available everywhere, the Mini BIC earned our Top Pick award because of its reliability, value, and ultralight weight.
When I struck the BIC 200 times, it lit a perfect 200. BIC has perfected lighting consistency.
The Mini BIC is also decently water-resistant. After performing 3 “Soak Tests” with it — submerging the lighter in water, shaking it out, and then trying to light it in 1-minute intervals — it took an average of 2 minutes before it started lighting again consistently.
(To dry it out quicker you can also run it up and down a piece of wood or your pants leg for 30 seconds.)
The BIC’s main drawback is how poorly it holds up in windy conditions. The flame is difficult to light in even a slight breeze.
Without some sort of windscreen, a BIC is hard to light in even a slight breeze. The wind was blowing a few miles per hour at the time of this photo.
It’s an easy problem to overcome though — I usually have luck with using my hand or windscreen to block the wind long enough to light my backpacking stove.
If you’re worried that you need something beefier to take into the backcountry, don’t be.
BIC lighters have been put through the ringer countless times by backpackers of all varieties. Every year plenty of AT and PCT thru-hikers complete their hikes having used only Mini BICs. And adventurer Andrew Skurka uses a BIC in his Cadillac Stove System.
Runner-Up: Clipper Mini Lighter
The Mini Clipper is another excellent backpacking lighter.
While not nearly as ubiquitous as the Mini BIC, it performed actually better in our tests.
For starters, like the Mini BIC it lit a perfect 200/200 times.
It is also slightly more wind- and water-resistant than the Mini BIC.
Where it took the BIC 2 minutes on average to start lighting consistently after having been submerged in water, it took the Clipper 1 minute. I was also able to light the Clipper more easily in a slight breeze.
You might be wondering at this point…
“If it performed better in your tests, why didn’t it get a higher score?”
Based on reports I read of backpackers who had used a Clipper for a long time, the general consensus was that a Clipper’s flint wore out quicker than a BIC’s. As such I docked it some points for being less reliable over the long-term.
In my view you still can’t go wrong if you take a Clipper on your next backpacking trip. Let price and availability be your guides if you’re undecided between the two.
Mini Clippers ship pre-filled but unlike BIC lighters they are refillable with butane. You can also purchase replacement flints and replace a used-up one yourself.
Best for Adverse Weather: UCO Stormproof Torch
Most backpackers — whether you’re a beginner or seasoned thru-hiker — don’t need this lighter.
It’s heavy, bulky, and costly relative to BICs and Clippers.
Its flame is impressive but unnecessary for all but the most adverse weather conditions.
But should you truly need a weather-resistant lighter, the UCO Stormproof Torch is your best option.
While neither truly windproof nor waterproof like UCO’s incredible stormproof matches, this lighter was the most wind- and water-resistant that we tested.
When submerged with the cap on, the inside of the lighter remained completely dry and lit immediately after shaking off the excess water. As marketed, the case is waterproof.
When submerged without the cap, it took just one minute of drying in my pants pocket before the lighter started lighting again consistently.
Its wind-resistance isn’t anything to write home about — it was pretty easy to blow out — but it was the best lighter we tested in this regard, just edging out the competition.
I do have some long-term reliability concerns with this lighter however. The more I struck it the more the flame started to sputter. If you do go with the Torch, take a back-up ignition source with you just in case.
There are two versions of this lighter: one comes with a bottle opener, the other with duct tape. I tested the duct tape version.
UST Wayfinder Lighter
The Wayfinder Lighter from UST, like the UCO Torch, is a butane lighter with piezo-electric ignition.
UST says it “performs without fail in the most adverse conditions.”
I found it to be reliably unreliable.
When I struck it 200 times, it lit just 87, the least of any lighter by far. It is marketed as “windproof” and is apparently able to withstand winds of up to 80 mph. I didn’t test it in those conditions, but I was able to blow it out by blowing air at a moderate rate.
The Wayfinder’s performance was heavily affected by being submerged in water. The inside of the lighter got wet even when the cap was on. Also, air bubbles came out of the fuel refill port, which made me wonder if water was entering the fuel chamber.
It took an average of 9 minutes of drying the lighter in my pants pocket before it lit again, and over 20 minutes before it started lighting consistently.
One of my main gripes with the Wayfinder is that there’s no way to know how much fuel is left. On backpacking trips, especially long ones, this in an important thing to know.
Overall I wasn’t impressed. The unreliability and high price point make this lighter a less than ideal choice for your next backpacking trip.
Zippo Matte Lighter
The Zippo is a classic, but it makes for a bad backpacking lighter.
The biggest drawback of this lighter is its unreliability.
Now, I don’t mean this lighter doesn’t light consistently. It does. The Zippo was the third most reliable lighter in that regard, lighting 175 out of 200 times.
In this case, I mean it’s unreliable because of the issues that stem from its fuel.
First, I had an issue with the fuel leaking. After soaking the lighter in water to test its water-resistance, the fuel started leaking on my hands, in my pants pocket, and on the outside of the lighter.
This poses two threats when out in the backcountry:
It increases your chances of running out of fuel
It poses a fire hazard should you light the lighter without realizing it’s been leaking
What’s more, the fuel evaporates slowly out of the lighter. There are numerous accounts online of people complaining about this and trying to come up with their own fixes to the problem.
This even happened to me when I took these lighters with me on an overnight backpacking trip. The Zippo had fuel in it when I left. When I returned just a day later, despite lighting it only a handful of times, it was empty.
The last thing you want on a backpacking trip is for the fuel in your lighter to leak or evaporate. As such, we don’t recommend the Zippo.
And that’s good news actually — the Zippo has the highest retail price of any of the lighters we tested, you need to buy fuel for it and refill it yourself, and it’s heavier than a backpacking lighter needs to be.
Save yourself a couple ounces and a handful of dollars: pick up a Mini BIC or Mini Clipper and be done with it.
Summary
Here are the best backpacking lighters:
BIC Mini Lighter
Clipper Mini Lighter
UCO Stormproof Torch
UST Wayfinder Lighter
Zippo Matte Lighter
Alternative Ways to Light Your Backpacking Stove or Start a Campfire
In my experience, lighters are the most popular way backpackers light stoves and start campfires.
There are other ways, though, which we’ve also written about. Consider these other products if you’d like an alternative to lighters (click on the link to see our reviews of the top options):
Fire starters
Stormproof matches
Waterproof matches
Even if you do go with a lighter, you might want to take a back-up ignition source just in case. Most backpackers I know who do this will carry one in the form of a ferro rod, magnesium fire starter, or pack of waterproof or stormproof matches.
How to Choose the Right Backpacking Lighter for Your Needs
Weight
When it comes to backpacking gear, lighter is always preferable.
The lighters we tested ranged from 0.39-3.21 oz. That isn’t terribly heavy in the grand scheme of things, but relatively speaking the heaviest lighter weighs over 8 times as much as the lightest.
Unless you want to go with our top option for adverse weather, the UCO Stormproof Torch, a lighter shouldn’t cost you more than an ounce in pack weight.
If you’ll be backpacking for an extended amount of time you might want to consider bringing a back-up lighter or, if your lighter is refillable, extra fuel.
Flint vs. Piezo-Electric Ignition
Flint lighters — like the BIC, Clipper, and Zippo — use a flint to generate sparks.
Piezo-electric lighters — like the UCO and UST — use a spring-loaded hammer to hit a piezo-electric crystal and create an electrical charge.
I found the flint lighters to be much more reliable over the long-term than the piezo-electric lighters.
Unless you need a highly weather-resistant lighter such as the UCO Stormproof Torch, I’d recommend you go with a flint lighter.
There are also battery-powered electric lighters (aka plasma lighters). These are not water-resistant and thus are less than ideal for taking into the backcountry.
Weather-Resistance
There is no perfectly windproof or waterproof backpacking lighter. However, all the lighters we tested sported some degree of weather-resistance.
Although, just because you expect to encounter adverse weather on your trip doesn’t mean that you need to bring along a highly weather-resistant lighter.
While I would generally recommend you go with a Mini BIC or Mini Clipper for the weight and cost savings, there are some situations where a highly weather-resistant lighter might be preferable — such as emergency or survival scenarios. Also, if you aren’t concerned with the extra weight and bulk it’s hard to put a price on peace of mind.
Pre-Filled vs. Empty
BICs and Clippers come pre-filled. The other three lighters we tested come empty and you must fill them with the appropriate fuel, which you also must buy.
Pre-filled lighters are less hassle and cheaper upfront. You don’t have to buy fuel or fill the lighter yourself.
Empty lighters you must buy fuel for and fill yourself. They are refillable and thus may work out to be cheaper in the long-run. The two types of fuel we used were butane for the UCO Stormproof Torch and UST Wayfinder Lighter and Zippo lighter fluid for the Zippo Matte Lighter. (The Mini Clipper can also be refilled with butane.)
Type of Fuel: Butane vs. Lighter Fluid
Backpacking lighters are generally butane lighters. The fuel they use is premium butane.
We also tested the Zippo Matte Lighter which uses Zippo Lighter Fluid.
The two types of fuel used by the lighters we tested
After testing these lighters side-by-side, I personally would never take anything other than a butane lighter on the trail.
The reason?
The Zippo started leaking fuel after being submerged in water. The fuel got on my hands, on the outside of the lighter, and on my pants pocket where I had placed the lighter to dry.
How We Tested
Soak Test
For each lighter I did the following 3 times and averaged the results:
Submerged it in water for 5 seconds
Shook off excess water for 10 seconds
Tried to light it
If it didn’t light, I stuck it in my pants pocket to dry and took it out and tried to light it in 1-minute intervals, recording how long it took before each lighter started lighting consistently again
Submerging a lighter in water for the Soak Test
Results:
Mini BIC: 2 minutes
Mini Clipper: 1 minute
UCO Stormproof Torch: immediately when submerged with cap on; 1 minute when submerged with cap off
UST Wayfinder Lighter: 9 minutes when submerged with cap on; didn’t bother testing with cap off
Zippo Matte Lighter: 20+ minutes when submerged with lid closed; didn’t bother testing with lid open
(H/T to this reddit thread for giving me the idea for this test, as well as the idea to test a Clipper lighter in the first place.)
Reliability Test
This was a straightforward test: I struck each lighter 200 times and recorded how many times each one lit.
Results:
Mini BIC: 200/200
Mini Clipper: 200/200
UCO Stormproof Torch: 200/200
UST Wayfinder Lighter: 87/200
Zippo Matte Lighter: 175/200
Lesson learned — strike a flint lighter enough times and you’ll get blisters!
Since I didn’t have time to test long-term durability, I then read reports of backpackers who had used these lighters for extended periods of time. If other hikers consistently reported that a lighter was unreliable over the long-term, I incorporated that into my final reliability rating.
Note: I removed the metal safety band from my Mini BIC prior to testing.
“Wind” Test
I don’t have a fan or leaf blower, but I do have lungs.
I lit each lighter and then tried to blow it out, starting by blowing lightly and getting progressively more forceful. It was an admittedly crude test.
Overall, I was disappointed in the wind-resistance of these lighters. If you’d like something that is truly windproof (and waterproof), read our reviews of the best stormproof matches. Otherwise, just be sure to bring along a windscreen to block the breeze.
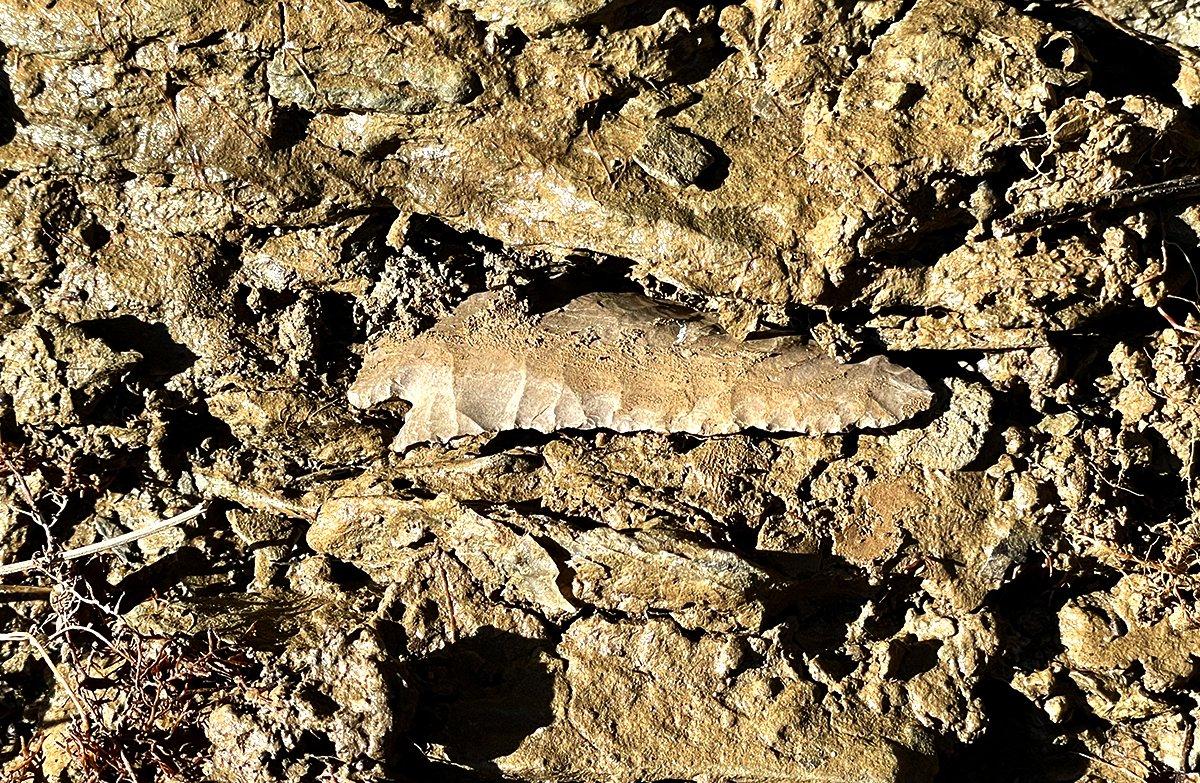
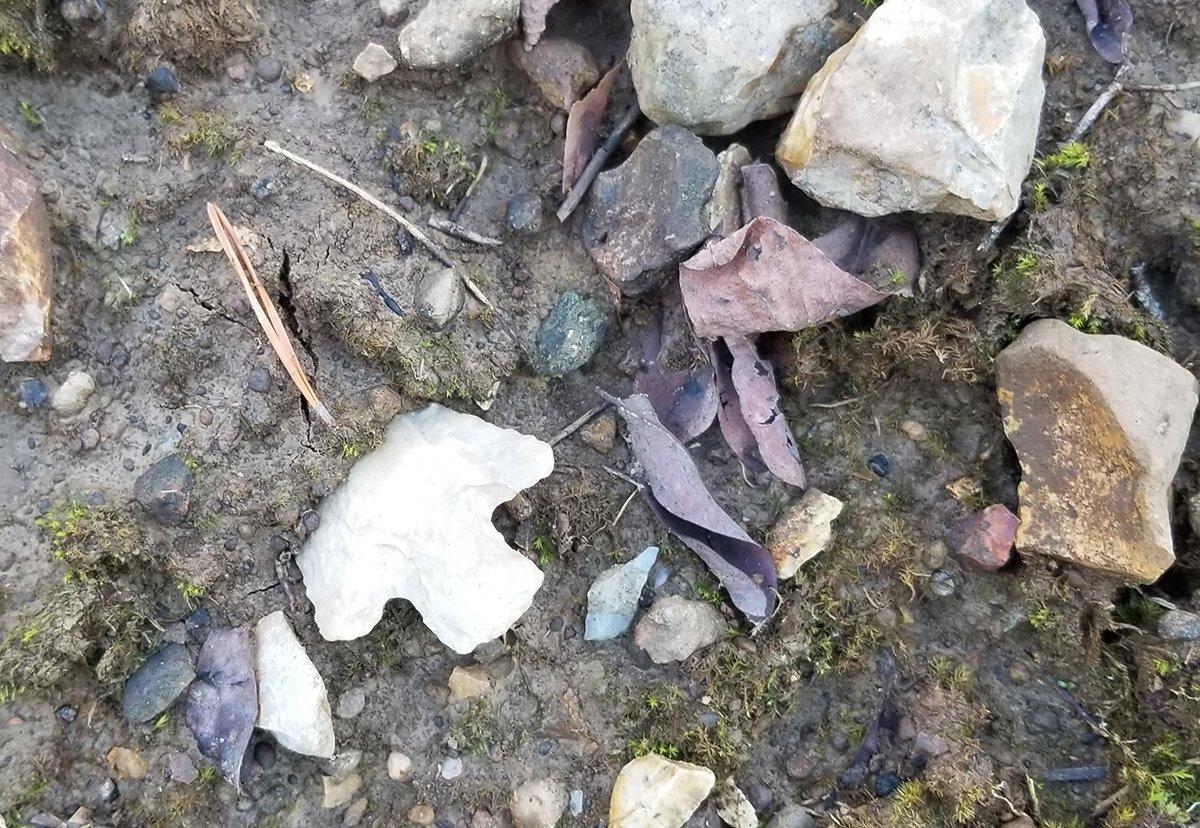
I wasn’t the first hunter who had been there. Even though I was miles from the nearest road, the glint of gray rock shining on the muddy creek bank told me at least one other hunter had walked this valley in the past 13,000 years. It was a stone point, carefully knapped to a razor’s edge when hunting gear meant the difference between life and death.
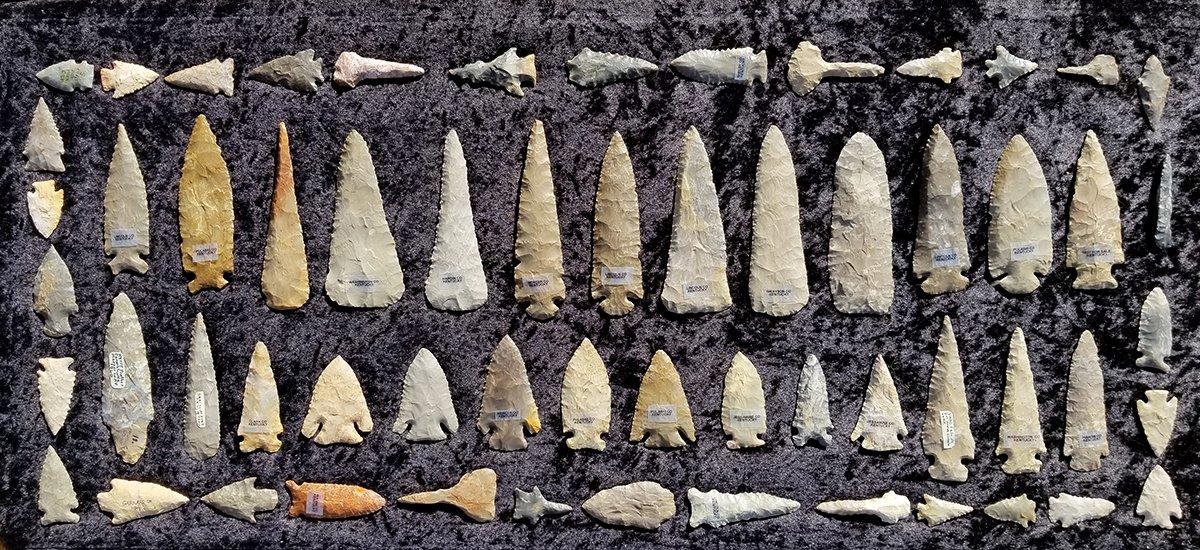
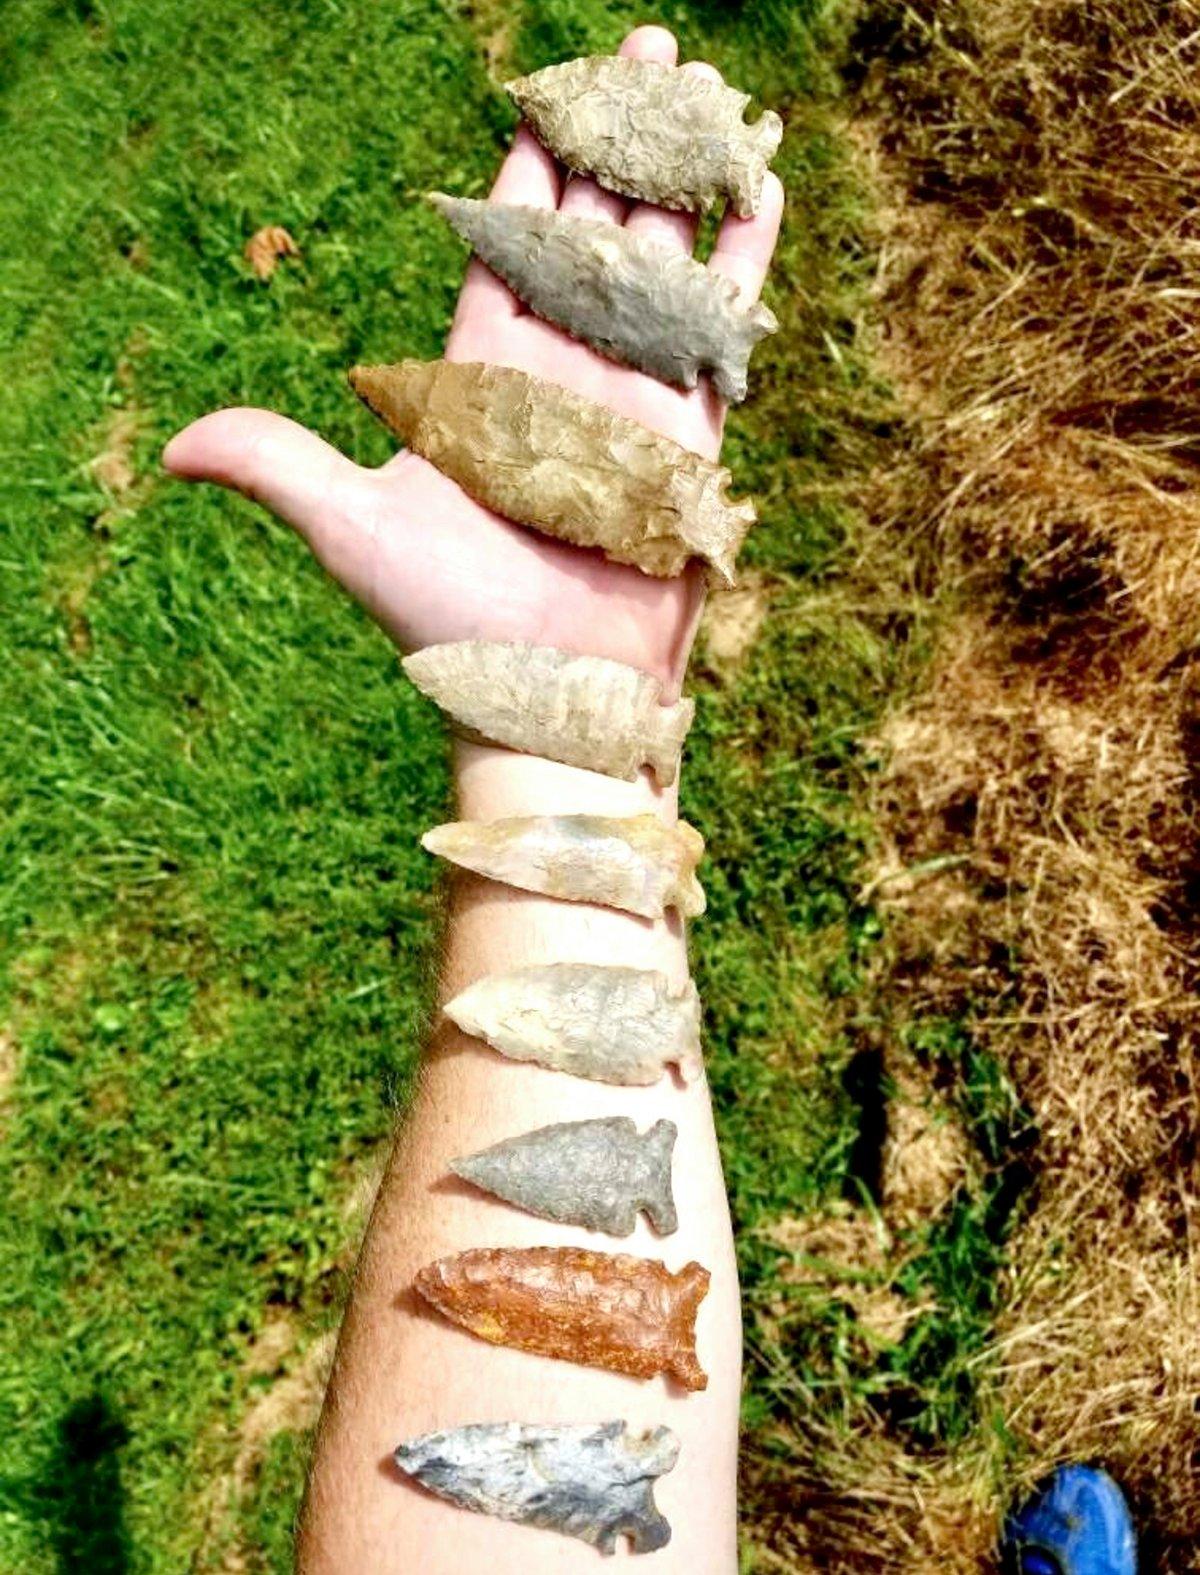
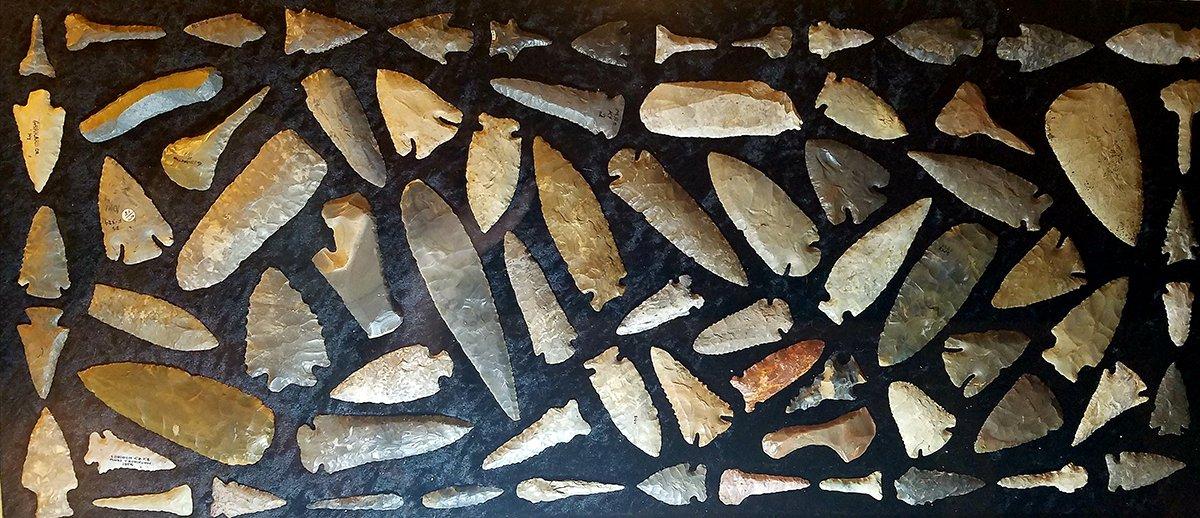
Searching for and collecting Native American artifacts is a popular hobby among folks who love the outdoors. It’s a great way to spend the off-season and will help to keep you in shape. Keeping your eyes on the ground while you’re hunting will often turn up evidence of past civilizations and people who lived and hunted the same ground thousands of years ago.
Getting Started
If searching for artifacts sounds interesting, artifact collector Les Hatton of Kentucky said some reading will help you become a better collector.
I always tell people to read through a good reference book or two to familiarize themselves with the types of artifacts that might be in their area — who made them and how old they may be,” he said. “One of the best out there is The Official Overstreet Indian Arrowheads Identification and Price Guide.”
Now on its 15th edition, the Overstreet guide is a hands-on reference to arrowhead types, manufacturing, grading, materials and values. The current edition contains 12,000 actual-size photographs covering hundreds of point types, and has information on how to grade, identify and catalog points. The guide covers points found throughout the United States, including Alaska.
(Don’t Miss: 15 Ways to Bag More Late Season Small Game)
Where to Look
Travis Hood is on a constant search for artifacts around his Indiana home.
My favorite places to look are plowed fields, high ground around 200 yards from the outer bends of waterways, and along creeks and streams — both on the bottom and on the shore, especially if there are washed-out steep creek banks, he said. I’ve even had good luck artifact hunting in areas where pigs are pastured because their constant rooting often turns up points.
If I am in a new area, my rule of thumb is to look around and ask myself, ‘Where would I live if I were here thousands of years ago?’ I’d want nearby access to fresh water, but be high enough and far enough away that my camp wouldn’t wash away in a flood or have constant standing water on the ground. The neat part about finding a good spot where a village once stood is that you might find artifacts from a civilization as current as a thousand years ago and some from as old as 10,000 years ago just feet from each other. Man’s basic needs didn’t change that much over 15,000 years, and a good spot to live is a good spot to live.
Hood and Hatton said old fire pits, often still visible as dark rings of charcoal and carbon in otherwise light-colored soil, are excellent places to find points and other artifacts.
The campfire is where they spent their time and where they did most of their point knapping, Hood said.
What to Look For
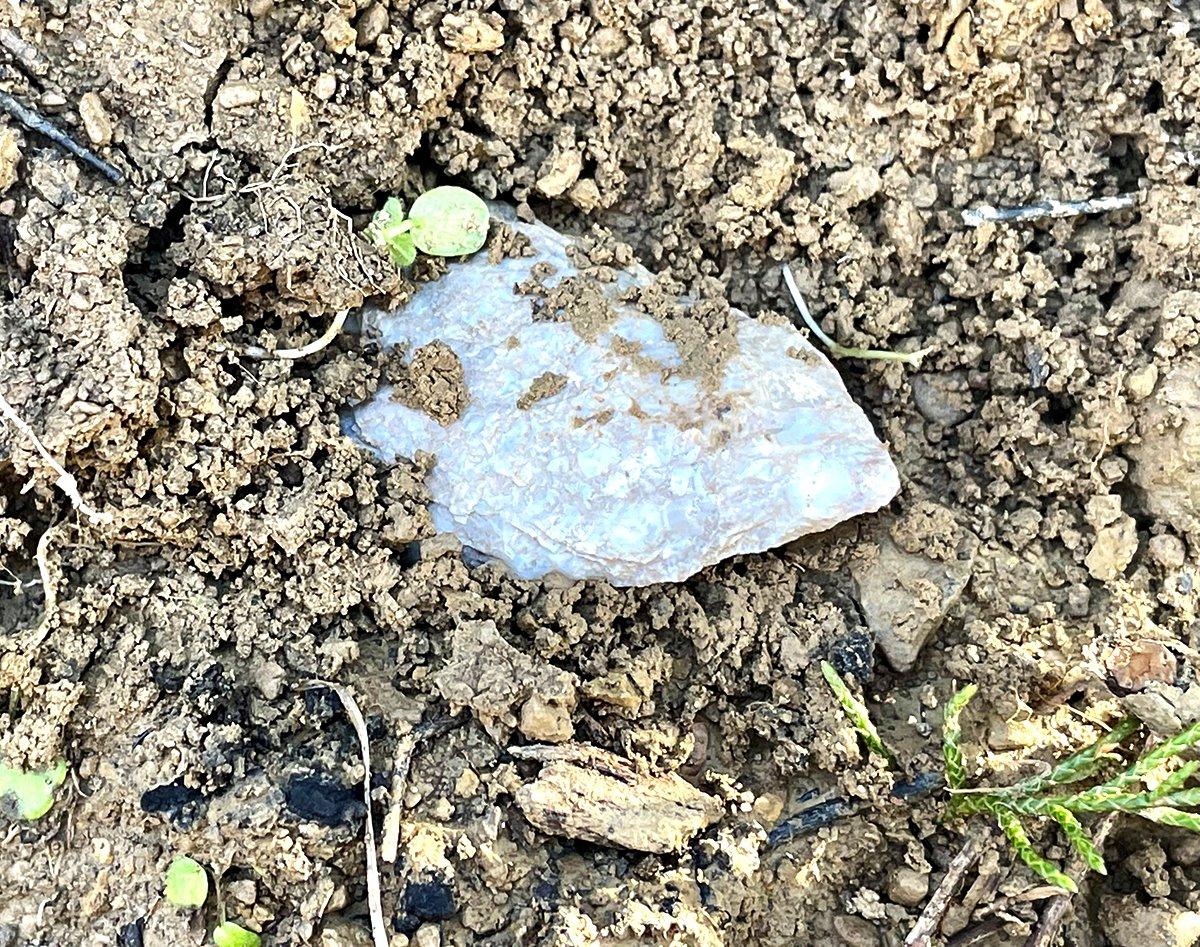
You know you’re in a good spot if you start finding small flakes of flint scattered around, especially if flint isn’t common in the area.
Once I start noticing flint flakes, called debitage, I start looking for whole or partial points,” Hood said. “While nearly everyone generally calls any knapped projectile an ‘arrowhead,’ most of the stuff you find was probably something else. It could be an ax or celt, a digging hoe, a blade, scraping tool or even a drill. Sure, they made arrowheads, but before bows were commonly used, they made atlatl points and lots of other tools. Some of the earliest stone tools were crude stone blades from the Clovis culture — made by people that lived in the desert Southwest between 11,000 and 13,000 years ago.”
Hatton said aging points gets easier with experience, but referencing guide books will help you figure out who made it and when. You might think the more intricate and detailed the point, the more modern it is, but that isn’t always the case.
It’s interesting, Hood said. Points and tools like those from the Clovis period started out crude and on the large side. Over time, new techniques and experience allowed the tool makers to turn out finer and more intricate points. What’s fascinating to me is that the finest points come from the middle period of stone tool making. Up until around 8,000 to 10,000 years ago, points were crude. Then, from 8,000 up to about 2,000 years ago, they got increasingly finer and more advanced. Then, starting a couple of thousand years ago, they regressed into cruder, less finished points. Maybe they were mass producing these points by then and needed to turn out a more disposable, quickly made point or something.
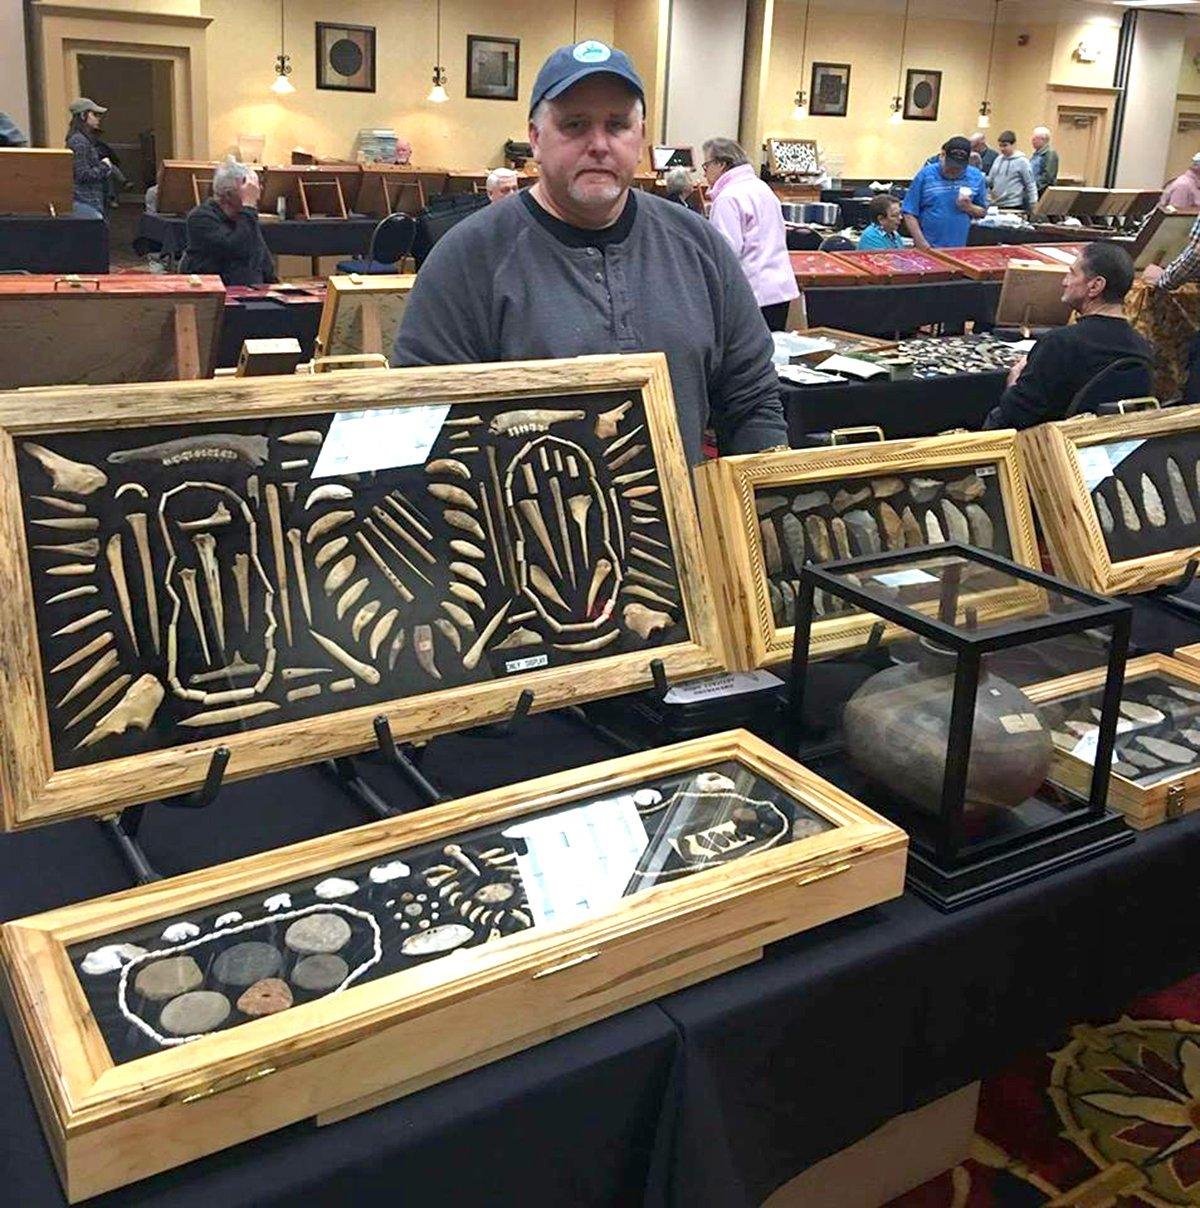
Besides stone tools and points, you might also find whole or pieces of stone pottery or beads, as well as bone tools, jewelry, clay pipes and other remnants of everyday life. If you are lucky enough to find something like that, keep looking. You are probably near a village or long-term camping spot, and there will likely be more artifacts in the area.
You Found Something, Now What?
So you went out looking and found a point. Now what? Hatton recommended taking a bit of time to record some details, especially if it’s a whole tool or point, or possibly a really valuable artifact.
Snap a quick photo of the artifact on the ground before you pick it up,” he said. “Note where the artifact was found, how deep in the soil and the coordinates or at least a nearby street address. All of this information will be helpful for you to figure out when and by whom the artifact was made, and having as much historical information, known as provenance, with your find as possible might make it more valuable as a collectable.”
Plus, keeping information on find locations will act as a guide for future searches.
Cleaning and Storage
When you locate a point or other artifact, what do you do with it?
The first thing to do is leave it alone, Hatton said. You can use a soft brush or toothbrush to remove loose soil from the point, but don’t get too rough with it, and don’t scrub it clean with soap and water or any other solvents. When experts look at a point under a magnifying glass or microscope, they are looking for certain mineral or soil deposits that help to verify the age. If those deposits are gone, it gets a lot harder to certify that a point is the real thing.
Although avid collectors might have buckets full of partial, unfinished or broken points, Hatton said whole points or anything else that might be valuable need to be stored carefully.
When you toss a stone point into a bucket with other points, they beat against one another to the point that they can chip or break, destroying their value,” he said. “The best way to store them is in a flat display case that you can set on a shelf or hang on a wall, or in flat boxes with layers of paper or cloth between the points to prevent them from touching one another.
Some of these points can be extremely valuable. I’ve personally witnessed one sell for $45,000, and I know of another rare Clovis point right now that is valued at over $100,000. You might find something that is worth a lot of money to the right collector, so treat them gently until you can have them looked at by an expert if you think you have something that might be valuable. That’s another area where the reference books come in handy. By comparing size, shape, flaking style, material and notch methods from your point to the reference books, you can get a pretty good idea how much a point is worth and whether or not you should get it appraised.
Keep it Legal
Before you head out to find your own artifacts, Hood and Hatton recommend familiarizing yourself with state and federal laws that apply to artifact hunting. As a rule, private lands require only the permission of the landowner to collect artifacts. But depending on the state, there might be exceptions, such as burial sites, caves and even certain deep stone overhangs that might have been used as religious sites.
When it comes to federally owned lands, removal of artifacts is generally not allowed. The Archeological Resources Protection Act of 1979, which protects any item of archeological interest that is more than 100 years old, and Title 36 of the U.S. Code of Federal Regulations, which deals with theft or destruction of public property, state that anyone found digging or removing artifacts from publicly owned lands can face fines, jail time or both.
On your next hunt, glance down at the ground from time to time. Chances are good that the same wildlife trail you’re watching has been used for thousands of years. Perhaps another hunter sat in a nearby location, doing the same thing. Maybe he or she left behind a sign that they were there.








 Supremely affordable and available everywhere, the Mini BIC earned our Top Pick award because of its reliability, value, and ultralight weight.
 The Mini Clipper is another excellent backpacking lighter.
 Most backpackers — whether you’re a beginner or seasoned thru-hiker — don’t need this lighter.
 The Wayfinder Lighter from UST, like the UCO Torch, is a butane lighter with piezo-electric ignition.
 The Zippo is a classic, but it makes for a bad backpacking lighter.