Mule deer and elk are two large deer species in North America. They may look similar at first glance since they both have antlers that are shed once a year, and both are popular for sport hunting. Even though they’re both deer, there are some key differences between the two species. This article will compare the mule deer vs. elk so that you will be able to recognize their differences and even identify them.
Enjoy!
Mule Deer vs. Elk – 8 Key Differences
These two deer species are similar in many ways, but they also have many characteristics that set them apart. Continue reading to learn more about mule deer vs. elk.
1. Differences In Size
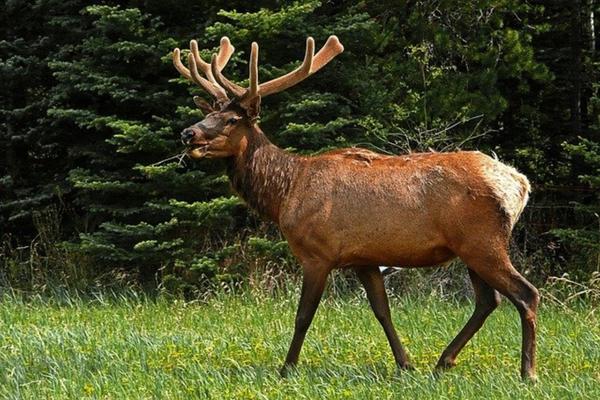
Elk in the grass | Image by Brigitte Werner from Pixabay
The main difference you will notice between elk and mule deer is their size. Elk are some of the largest deer in North America, coming in second to moose. Mule deer are much smaller in size and stature.
Adult bull elk stand around 5 feet tall at the shoulders. They can weigh 700 to over 1,000 pounds.
Female elk are called cows. They weigh anywhere from 500 to 600 pounds and stand over 4 feet tall at the shoulders.
Mule deer stands about 3.5 feet at the shoulders, with does being slightly shorter than bucks. A buck can weigh over 300 pounds and does typically weigh up to 200 pounds. Needless to say, mule deer weigh a few hundred pounds less than elk.
The overall appearance of an elk also differs greatly from a mule deer. Mule deer look like other deer typical of North America, like the whitetail deer. In comparison, elk look more like big reindeer or are similar to caribou.
Elk, in appearance, is a bigger animal with a broader body, wider stance, and bigger features all over, like a bigger nose and hooves. Mule deer, while also large, look thinner compared to elk and have smaller bone structures and stances.
2. Color Differences
Pair of mule deer at rocky mountain arsenal
Mule deer and elk differ greatly in their colors. Mule deer are reddish brown or dark grayish brown in the summer and then fade to gray in the winter.
Elk, on the other hand, have more red in their color. In the summer, they’re darker reddish brown and then turn lighter tan in the wintertime.
Elk also don’t have any of the white on their backside and underbelly like mule deer. Elk are darker brown on their neck to their face, almost appearing to have a mane. Their belly and legs are also darker browns in color.
3. Bucks And Does vs. Bulls And Cows
Male Mule Deer at the National Bison Range, Montana | image by Astrophoto Andy via Flickr
Male mule deer are called bucks and females are called does. This is pretty typical of most deer. Male elk, on the other hand, are called bulls, and females are called cows.
This comes down to the etymology or origins of the names of the animals. Bucks in deer comes from a relation to male goats and the bleating sound made. Bull in elk comes from their bugling sound that compares to a bovine.
4. Diet
Both elk and mule deer are ruminants which means they eat plants and vegetation and then regurgitate it to chew the cud as a stage in their digestion. However, they have different feeding habits.
Mule deer tend to be browsers and foragers. They pick and eat as they move. They have a varied diet depending on their habitat but mostly feed on shrubs, grasses, and weeds that grow in desert areas and higher elevations.
Elk are mostly grazers but also forage occasionally. They primarily feed on grasses and will sometimes eat bark or other low-hanging vegetation from trees.
Elk prefer grasslands that produce lots of native grasses for their grazing. Many migrate to the same areas to feed during different times of the year.
5. Antlers
image: Pixabay.com | male and female elk
Elk and mule deer antlers are significantly different. In both species, only the males grow antlers and shed them every year.
Elk antlers are tall and dark-colored. The tines grow from one large main beam that is much wider at the base than mule deer. One adult elk antler can weigh over 10 pounds and measure over 4 feet tall.
Mule deer antlers are not nearly as elongated as the elk’s and are much shorter. They also spread out more, with more tines forking off of one another for more points. Mule deer antlers are lighter gray in color.
6. Herding Behavior
Behaviorally, there are some key differences as well. Elk are known for their herding behavior. They will often form large herds of up to 100 animals.
Some elk herds have reached upwards of 500 members. Interestingly, elk will separate by gender in their herds, with males in one area and females in another while grazing together.
Mule deer, on the other hand, tend to be more solitary creatures. While they are social animals, they rarely remain in large herds year around. They will usually only travel in small groups of 4 to 7 animals.
Mule deer may gather in group feeding areas during certain times of year and mating season but move in and out of larger family groups. Young bucks leave the group once reaching sexual maturity.
7. Sounds and Calls
Elk and mule deer make entirely different sounds and calls, especially when it’s time to find a mate. Generally, you’ll only hear males calling for females.
Elk are generally much louder than mule deer, and their calls can carry for miles. Mule deer calls are usually softer and shorter-range.
Mule deer grunt, snort, and bleat out sound, especially during the rut. The rattling of antlers is a good way for hunters to attract mule deer since that’s another common sound for bucks to make.
Elk make a signature bugling sound in addition to grunts and barks. Bull elk bugle to show dominance and attract cows for mating. It’s a loud, hollow, multi-tone call.
8. Habitat
Mule Deer at the Malheur National Wildlife Refuge in Oregon | image by USFWS via Flickr | CC BY 2.0
Mule deer and elk have overlapping habitats, but their preferences vary greatly. Mule deer ranges are much broader than those of elk.
Elk primarily remain in the Rocky Mountains further north than the mule deer range. Mule deer live in the western part of the continent ranging from Canada to Mexico.
Mule deer like dry areas with shrubs to forage. They are well-adapted to living in arid conditions and can be found in desert scrublands, sagebrush steppes, and rocky mountain slopes.
Elk prefer meadows and open ranges in mountainous regions with thick grasses. They’re less likely to be seen in dry arid deserts where mule deer are found.
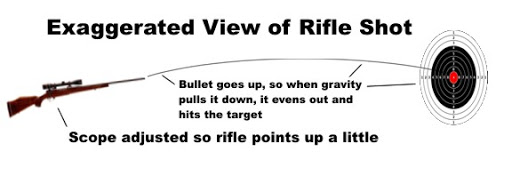
This has the advantage of yielding a perfectly straight trajectory from the airgun to the target.
At least it saves you the burden of figuring out how much under or over you should aim the airgun so as to take care of the curved trajectory.
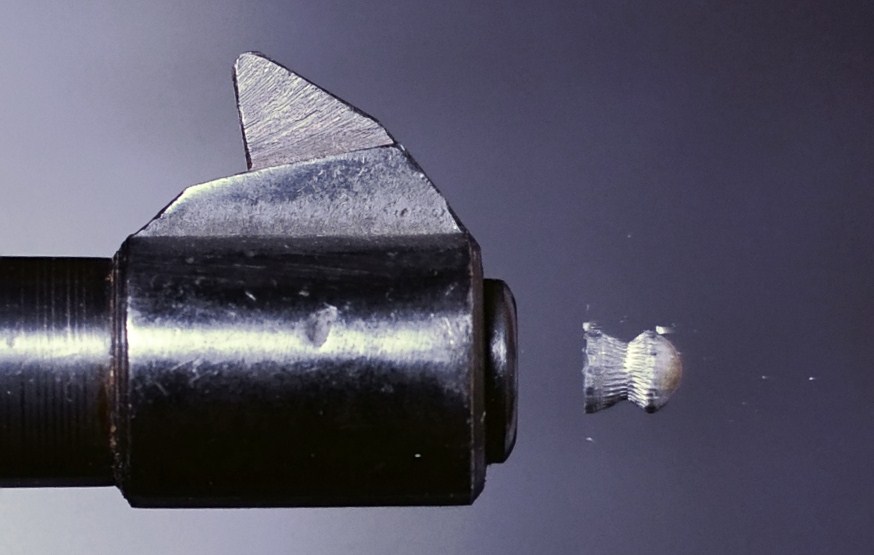
One downside you may experience with the .177 ammo is air resistance.
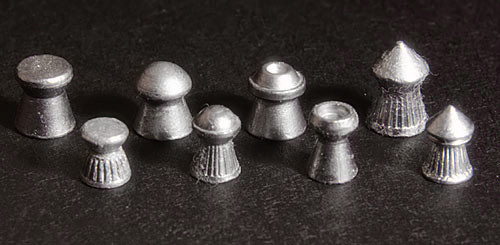
You see, most .177 ammo weighs between 7.0 and 20.0 grains.
If it is windy at the time you are shooting, there is a high likelihood that the pellets will be swayed by the wind, which leads to you missing the target.
When it comes to shooting, the .177 caliber should purely be reserved for small games like rats, rabbits, squirrels, geese, quails, cranes, swans, etc.
The reason for this is the relatively low punching power, or rather muzzle energy, associated with the .177 ammo.
Recall this formula:
Muzzle Energy in FPE = [(Velocity in fps)2 X Pellet Weight] / 450,240
From the above, it follows that the heavier the pellet, the greater the muzzle energy, which is in essence the killing power.
And as previously stated, .177 pellets only go to a maximum of 20 grains.
More so, .177 pellets have the tendency of penetrating the flesh of the prey from one end to the other without necessarily killing it .
That brings us to our next caliber, the .20.
.20 Caliber
Not so popular! Perhaps you don’t even know it exists.
And that’s it – it simply didn’t gain ground in many parts of the world.
As such, you have a limited number of air rifles made in this caliber.
Likewise, the choice of .20 pellets is somewhat limited.
Nevertheless, if you land your hands on one, you have all the reasons to boast.
You have something more powerful than the .177 but cheaper than the .22 and .25.
You can also expect the accuracy and range to be better than that of the .25 air rifles.
Most .25 air rifles use either PCP, Spring, Nitro Piston, or Gas Piston firing mechanisms.
Additionally, .25 air rifles use up quite an amount of air to fire a single shot.
Take the example of the Air Arms S510 XS Xtra FAC Regulated air rifle.
The .177 model yields 60 shots per fill while the .25 model offers only 35 shots per fill.
So if you have the .25 for your hunting session, consider investing in the less tiresome scuba tank for refilling the air cylinders rather than a hand pump.
The .25 is your go-to air rifle if you are after medium-sized games such as deers, foxes, bobcats, coyotes, and pronghorns.
Below are the calibers associated with these air rifles:
.257
.30
.357
.45
.50
As airguns increased in popularity, manufacturers saw the need to produce air rifles that would humanely kill animals such as bison, buffalo, grizzly bear, polar bear, elk, moose, muskox, and cougar.
With the big bores, you expect unmatched punching power.
For instance, the Seneca Dragon Claw of .50 caliber yields 230 FPE.
Deadly indeed. The .357 model of the Airforce Texan Big Bore air rifle yields 300 ft/lbs
While the .50 model of the same air rifle yields 700 ft/lbs.
Heavy traffic, window air conditioner, noisy restaurant, power lawnmower
80-89
Subway, shouted conversation
90-95
Boom box, ATV, motorcycle
96-100
School dance
101-105
Chainsaw, leaf blower, snowmobile
106-115
Night club with a band playing
110
Sports crowd, rock concert, loud symphony
120-129
Stock car races
130
Siren at 100 feet
140
We can now place the average loudness of air rifles next to that of shouted conversation.
To put it better, all the above air rifles tested can be classified as medium-quiet airguns.
Any airgun producing more than 100 dB is considered loud.
But still, the 100 dB produced by air rifles is not as loud compared to that from other sources given that it is not sustained over some period of time.
It is always instantaneous, lasting just a couple of seconds.
16. What caliber air gun should I use for a survival weapon?
I have personally not fallen into serious survival situations.
Perhaps a word from an expert in the same will do us good.
Creek of Willow Haven Outdoor upholds the .22 caliber air rifle as an excellent inclusion in his survival kit.
And the reasons are as follows:
.22 air rifles are excellent for small game hunting, which is very necessary for eliminating hunger during such situations
.22 ammo is very cheap. You can purchase a tin of 500 pellets for less than 40 bucks.
That can last you months if you’re economical with your ammo.
.22 air rifles are effectively silent to allow you to hunt for survival without drawing uncalled-for attention.
.22 air rifles are available in the multi-pump and break-barrel models, which need air for operation, and the air is always there, free for all.
19. What is the most powerful air gun caliber?
The most lethal of all is the .50 caliber.
Remember the 700 FPE attained with the .50 Airforce Texan Big Bore?
20. How lethal is a .22 caliber air gun?
Very lethal! Always remember: guns are not toys.
Always treat air rifles as lethal weapons and engage all the safety precautions required in handling them.
For small critters within your yard, a .177 will equally do you good.
For small-game hunting, advance to the .22, which assures you of a clean kill.
For raccoon-sized prey and above, go for the .25 caliber air rifles.
The big-bore air rifles may be quite powerful for most of your hunting needs unless your purpose is hunting big games like buffaloes, bears, and the like.
Even so, the caliber should not be considered in isolation.
Doing that would be like looking at the waist only when choosing a dress.
Who does that? There are a lot of other considerations to make like the color of the dress, material, style, quality of the dye, sleeve length, height above or below the knees, etc.
Likewise, for air rifles, consider aspects such as loudness, barrel length, weight, stock type, powering mechanism, shots per fill, included accessories, and the brand.
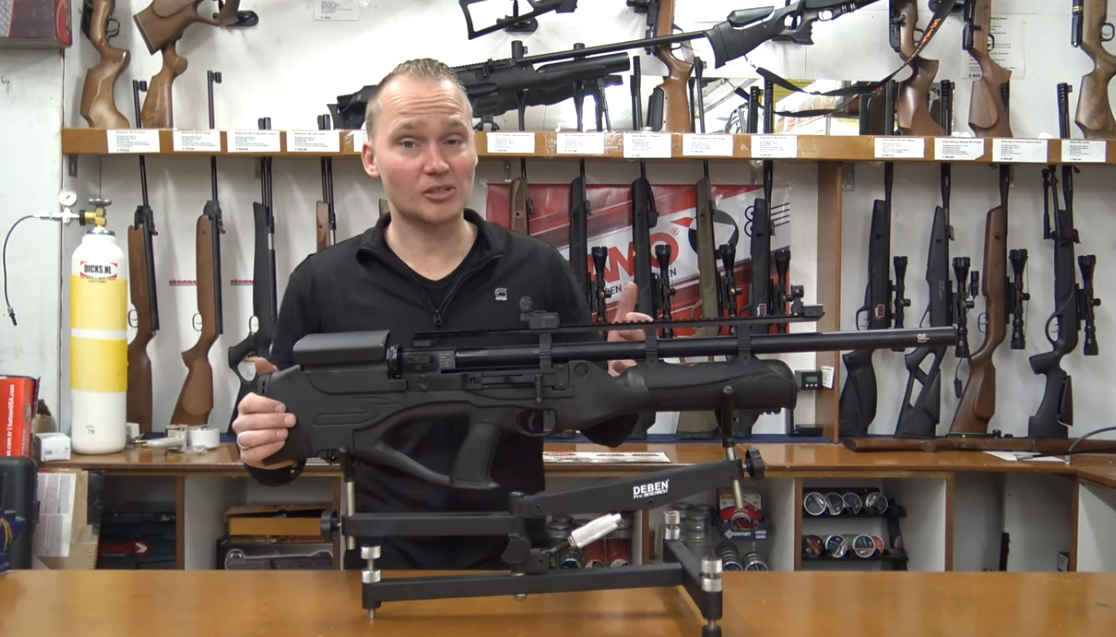
Ruger Yukon is a break barrel gun which means that you have to cock it each time you want to shoot.
Break barrel gun is the easiest of all air guns to load because the breech is exposed when they break open.
Besides, it gives you unlimited shooting capacity and is easy to repair because it is a simple mechanism.
And finally, a break barrel gun is easy to clean since you have direct access to the barrel.
This rifle is a single-shot gun so it gives you control over the ammunition you’re shooting.
You will find out what pellets work best for your gun in the shortest amount of time.
In addition, single-shot rifles hone your marksmanship skills: you have to aim and shoot carefully because you have only one chance to hit the target before reloading.
The barrel is rifled with helical grooves inside the bore to make the bullet spin, which stabilizes pellets, enhances shooting range, and improves accuracy.
The stock is ambidextrous: it gives the same shooting experience for both left-handed and right-handed shooters.
Moreover, it has nice checkering in the grip and forearm to prevent slippage from shooters’ sweat, enhance stability when aiming and increase accuracy.
Furthermore, the stock has a sculpted rubber recoil pad.
Even the ReAxis gas piston produces much less recoil than a traditional spring-piston gun,
Having a recoil buttplate is truly a plus point since it helps you absorb recoil and prevents your shoulder from fatiguing after long hours of shooting.
And you can see clearly that the prominent, eye-catching Ruger emblem is attached to the buttplate to add to the aesthetic side of this gun. Cool, huh?
Ammo
The Ruger Yukon uses .177 and .22 pellets corresponding to its 2 types of caliber.
.177 pellets are popular, easy to find, and cost half the price compared to .22 pellets for the same amount
So it’s your best choice for endless fun hours of target shooting and plinking.
On the other hand, .22 pellet is heavier than.177 so it’s more stable in the way it travels towards the target and isn’t affected much by outside conditions like wind.
Moreover, .22 pellets have more knockdown power and retain more kinetic energy after they hit the target
So it is a great choice for hunters and pest eliminators who want to get the job done in one clean shot.
As if the fiber optics sight is not enough, Umarex has also installed a 3-9 x32 scope with a duplex reticle and 35 yards parallax setting.
32 is the diameter of the front lens of the scope. 3-9 is the magnification power of the scope:
It means that it magnifies the picture 3 to 9 times bigger than the image you see without it.
Moreover, this variable-zoom scope has a duplex reticle consisting of four thick posts that go almost toward the center of the reticle and then turn into standard crosshairs in the center.
The idea behind a duplex reticle is to lead the eye to the center (the main point of the reticle).
A duplex reticle is great in low light and gives you the ability to accurately extend your range.
Having this handy scope gives you a small group in target shooting and boosts the accuracy of your gun to the roof.
This accessory is manufactured in the Picatinny style.
A Picatinny rail is almost identical to the weaver rail, except it has a series of ridges located at precise intervals along the rail.
The Picatinny rail gives you lots of benefits.
First, you have more mounting options.
Second, you can swap scopes from one gun to another and use different scopes in one air gun as well.
Finally, there’s no more worrying about tube length, eye relief, etc since you can place scope rings at any place you want.
In summary, the Picatinny rail is undoubtedly the most accomplished and flexible of all optic rails.
Velocity, Accuracy and Power
If you are expecting a supersonic velocity, then you are not going to be disappointed with this rifle.
In .177 caliber, Ruger Yukon delivers up to 1250 FPS with alloy pellets and up to 1050 FPS with lead pellets.
In .22, it generates 1050 FPS with alloy and 850 FPS with lead.
This is a high-end velocity compared with other air guns on the market so you can use it for both short and long-range shooting.
Now those are the numbers on the paper, but how about the actual velocities that this gun performs under Chrony tests?
Pellets (.22)
FPS
FPE
Baracuda green pellet 12.35 gr
790
17.12
RWS Hobby 11.9 gr
750
14.87
RWS Superdome 14.5 gr
693
15.47
RWS Hobby 11.9 gr
746
14.71
RWS H-point 14.2 gr
773
18.85
JSB Exact 16.2 gr
619
13.79
Gamo Hunter 15.3 gr
690
16.18
Crosman Premiere 14.3 gr
740
17.39
As you can see, the real velocity is pretty close to the advertised numbers, and the more important thing is:
It has more than enough knockdown power to deal with vermin like squirrels, skunks, roosters, crows, etc.
Those velocity numbers are great, but how about accuracy?
Let’s see, the common shooting groups are:
0.734” at 20 yards with RWS Superdome,
1/2″ at 20 yards with JSB,
0.25” at 25 yards with 21gr pellet,
1 1/2” at 30 yards with Discovery 14 gr.
Dime size group at 25 yards using RWS Superdome.
2” at 50 yards with 8.4 RWs Superdome,
nickel size at 60 yards with RWS ,
0.35” at 20 yards,
1” at 15 yards with RWs Superdome 8.3 gr,
dime size at 30 yards with Crosman Premiere Hollow point.
Moreover, it can:
Nail a rat or hammer a feral rooster at night,
put a real good dent in a 50 gallon barrel,
go through 1/2″ plywood at 20 yards,
penetrate 1 1/2″ through a hard bound encyclopedia,
penetrate 1” into 2 layers of 3/4″ birch plywood,
and shoot through an armadillo shell.
In summary, the Ruger Yukon is not only an accurate rifle but also packs a heavy punch to deal with pesky pests like raccoons, possums, and squirrels, etc.
This gun is very quiet with a noise test result of only 80.3 DB which is much less than other break barrel rifles, which often have over 100 DB.
Many customer reviews confirm this.
One shooter remarked that he shot this gun in his backyard with the neighbors surrounding, but no one noticed the noise.
Another buyer affirms to have killed raccoons in the rafters of his barn at 45 feet without waking up the horse at 2 am!
At any rate, thanks to the silencer, you can plink away without letting the whole world know and take revenge for your decimated garden in a stealthy way.
Specifications
Caliber: .177/.22
Powerplant: ReAxis gas piston
Velocity: 1250 FPS with .177/1050 FPS with .22
Loudness: 3- Medium
Barrel Length: 18.7”
Overall Length: 44.8”
Shot Capacity:1
Cocking Effort: 30 lbs
Barrel : rifled
Silencer: SilencAir integral
Front Sight: Fiber Optic
Rear Sight: Fiber Optic, adjustable for windage and elevation
Scopeable: Weaver/ Picatinny
Trigger: Two-stage adjustable
Safety: Automatic
Length of pull: 14”
Buttplate: Rubber
Suggested for:Small game hunting/ plinking
Trigger pull: 3.3 lbs
Action: Break barrel
Safety: Automatic
Function: Single-shot
Body Type: Rifle
Weight: 9.0 lbs
Customer Reviews
Buyers rave about this gun: they love its accuracy, power, and quietness.
It’s very hard to find a negative review of all online Ruger Yukon reviews about this gun.
Nothing stands out as a serious issue, there are a few complaints here and there about how the scope does not meet their expectations,
But you can upgrade it easily down the road.
Price
The price for Ruger Yukon is only about 200 dollars.
You cannot find many guns in this price range that have the same quality as this gun.
Pros
Stunning ReAxis technology
Proven SilencAir noise dampener
Eye-catching stock
Wonderful fiber optic sight
Impressive scope
High-end velocity
Low noise level
Mind-blowing power
Great accuracy
Cons
The scope could be better but you upgrade it later.
Ramps, also known as wild garlic or wild leeks, (Allium triccocum, and Allium burdickii) where I live, are a delicious wild vegetable and one of Nature’s greatest gifts to foragers. Read on and I’ll break down everything you need to know about them.
The two I harvest are just a few of the many different types of wild alliums you could find though, and their cousins like Allium triquetrum (3-cornered leek) and Allium ursinum (bear garlic) and Allium victorialis (the victory onion) are enjoyed around the world.
Anyway you cut it, ramps and feral onions are one of your best friends in the kitchen, and people have been harvesting and enjoying these wild vegetables for millennia.
Harvesting
Ramps are ephemerals, meaning that they come up early in the spring, with their leaves maturing before the trees form their leaves, which will eventually shade them out restricting their sunlight and their means of harnessing energy.
After the tree leaves fill out, around late May where I live, the ramp leaves will wilt and fall back, and it will appear that they’re completely gone, but they’re not. In mid summer, ramps shoot up their flower stalks, which will give scapes, eventually ramp flowers, and finally, seeds.
Ramp Sustainability
If you dig up a wild ramp, you kill the plant, and it takes 6 to 7 years for ramps to grow and mature. In patches on private land, it isn’t really a big deal to dig a few ramp bulbs here and there, but in a place like public land, where it’s illegal to dig wild plants, they can easily be over-harvested since multiple people will be hitting the same patch.
“If you harvest only ramp leaves, there’s no digging, no hours of cleaning and trimming, and, you can feel good knowing that your patch will be there the next year, and years to come, so that you can share your delicious onions with your friends and family.”
Wild alliums have been harvested for a thousands of years, but most of the people doing that had a much deeper relationship with nature than we do today, and a much more comprehensive knowledge and understanding of how to encourage their wild onion patches to grow and flourish despite harvesting bulbs.
How much harvesting is sustainable?
I see a lot of speculation on this. Some people say one leaf per colony. Some say remove one plant, bulb and all from every three colonies, or some other random, arbitrary number they’ve come up with.
Don’t get me wrong, I’m a conservationist, but the fact is people are going to harvest ramps, bulbs and all from public and private land whether we like it or not, and no one is going to walk around taking a single leaf here and there when they’re in a field of wild leeks as far as the eyes can see, and more importantly, when no one else is watching.
These plants can, and will take some harvesting of their bulbs. Some people, like my friend Sam Thayer are doing studies to figure out what the long-term impacts of harvesting are, exactly how many ramps a certain patch of land can sustainably produce, and what the proper way to go about doing it is from a scientific point of view is.
Until those studies are published though, here’s some sustainable harvesting tips:
Harvesting tips
Know your local laws. Digging ramp bulbs on public land in the United States is Illegal in most places.
Harvest from large stands where the plants seem to go on forever. Seeing a couple colonies here and there doesn’t mean it’s a “patch”.
Leave whole colonies of ramps in tact as much as possible-consider taking 20% or less from each colony you disturb.
Don’t concentrated your harvest in one area, spread out and give the plants some room to breathe, this will allow the ramps to spread and fill back in the spots naturally.
If you find yourself in a public area where others have been harvesting, move to another untouched spot.
If you harvest bulbs, come back during the late summer to gather seeds to spread in the patch. Help the plants that give you food.
Plant ramps in your yard or garden to grow your own patch.
Ramp Leaves: The Most Sustainable Harvest
When I’m going out to pick ramps, most of the time I’m not bringing a shovel, I’m bringing a scissors. Why? Ramp colonies with their leaves cut will often still make flower stalks that make seeds and reproduce, those that get dug up, won’t. Secondly, it’s just easier. These plants don’t want to come out of the ground and digging them is hard work.
If you harvest only leaves, there’s no digging, no hours of cleaning and trimming, and, you can feel good knowing that your patch will be there the next year, and years to come, so that you can share your delicious onions with your friends and family.
That being said, I do harvest ramp bulbs when I please, but I’m harvesting them from private land, where I have permission. It is totally fine to dig ramp bulbs to your hearts content on your own property, or property where you have permission to dig.
How to Plant Ramps
As a perennial onion, Ramps can be planted into a shady area, and will come up year after year for you. They’re a wonderful addition to a native-lawn/food forest.
The only catch is that it takes time, a long time. Growing and tending your own patch will definitely give you an appreciation for how long it takes them to grow.
As a bonus, if you have a place to go and harvest them, the small baby leeks in your yard will be a good indicator for when you should go out and pick.
As far as how to plant your own patch you have a couple options. Here’s a quick breakdown.
Planting Ramp Seeds
Seeds will take the longest, but they’re also relatively easy to find, and plant.
Go to your patch in the late summer, after the flowers have formed, and find the seed heads.
Shake the little black seeds into a container, and bring them with you to plant the next year.
Make sure to toss some seeds around while you’re harvesting in the patch to thank the ramps, too.
Dry the seeds in a dehydrator on the lowest heat, or in front of a fan, and store in a cool-dry place until they’re ready to plant the next spring.
You can also smush seeds into the ground in the late summer or fall when they would fall naturally.
Transplanting ramps
The easiest method. Go to a coop, farmers market, or your favorite ramp patch, dig some up, leaving as many of the roots attached as possible, and plant them in a shady spot in your yard. That’s it.
Plant more than you think you will want, since you’re trying to establish a large colony if you want to harvest anything other than leaves.
Planting cut ramp roots
The rumors are true. With plants you dig or buy, you can take the cut roots and plant them directly in a shady spot and they can grow.
The operative word in this experiment though, is “can”. Ramps can grow from cut roots, but it doesn’t mean that you’ll have a great success rate. Used in combination with seeds and transplants though, you’ll have your own patch in no time.
Other Ramp Edible Parts: Seeds, Flowers, and Scapes
These incredible alliums have more than just bulbs and leaves. These additional parts are not mentioned by many other authors, and are sustainable things to harvest. They’re a good reason to check on your ramp patch for other things later in the season like the hen of the woods or maitake mushroom.
Scapes
Scapes will begin to come up after the leaves have died back, a good way to know when to look for them is when other alliums in your area like garlic have started to form their scapes. In Minnesota and Wisconsin where I live and hunt, this is in mid June.
Unripe Green Ramp Seeds
Unripe green seeds are something not a lot of people talk about, but they can be gathered easily without a shovel, and have the same strong rampy flavor you know and love.
Ramp Flowers
The flowers make a delicious addition to just about anything, and will keep in the fridge for a week or more. keep in mind if you remove the flowers that they won’t get pollinated, and from there, will not make seeds.
Cooking
Wild leeks are incredibly versatile in the kitchen and can be used to make everything from hot sauces, to pestos, and butters. I even use them to make vegan fish sauce.
How to Clean Ramps
First, fill a large sink with cold water-better yet, a bucket outside, since dirt can and will clog your sink.
Take your ramps and set them out on towels or something to cool, as they have probably been in your car in bags or something and might be a bit warm if you have just picked them from the wild. Using a paring knife, cut off just the root end of each ramp, leaving as much of the oniony bulb on them as possible.
Also inspect each of the leaves to make sure there are no yellowed or slimy parts, you want to trim those off. Now wash the ramps thoroughly in the cold water, then dry.
Next, trim the leaves off of each ramp where the green stem turns into oniony bulb and put the leaves into a paper bag or other container with a small moist towel or paper towel (this will keep them fresh) and store them in your fridge. Save the little bulbs for eating fresh, cooking, pickling, etc.
How to Preserve Ramps
If you have a lot of wild leeks, you need to know some ways to process, store, and preserve them. Drying and dehydrating is a good way to store the leaves, and pickling is probably my favorite way to store the bulbs.
There’s also different recipes like fermenting and shelf-stable sauces like my famous ramp leaf fermented sriracha . There’s a whole world of oniony goodness to explore.
How to Freeze Ramps
Ramps can be blanched in boiling salted water until wilted (60 seconds) drained, but not squeezed, and placed into a vacuum bag or zip loc and frozen. Keeping some of the juice in the greens helps prevent freezer burn, salt extends the shelf life and makes them taste good. They’re good added to soup or pureed.
If freezing in a vacuum bag, I like to place the bags in the freezer vertically, unsealed. When the nettles and their juice are frozen solid, I vacuum seal the bag. Preserving them in their own juice helps prevent freezer burn and extends the shelf life. You can also freeze them pecked into a deli container still wet with their juice, like a block of ice.
Wild Leek and Ramp Recipes
Here’s a selection of popular recipes. There’s many more in the archive.
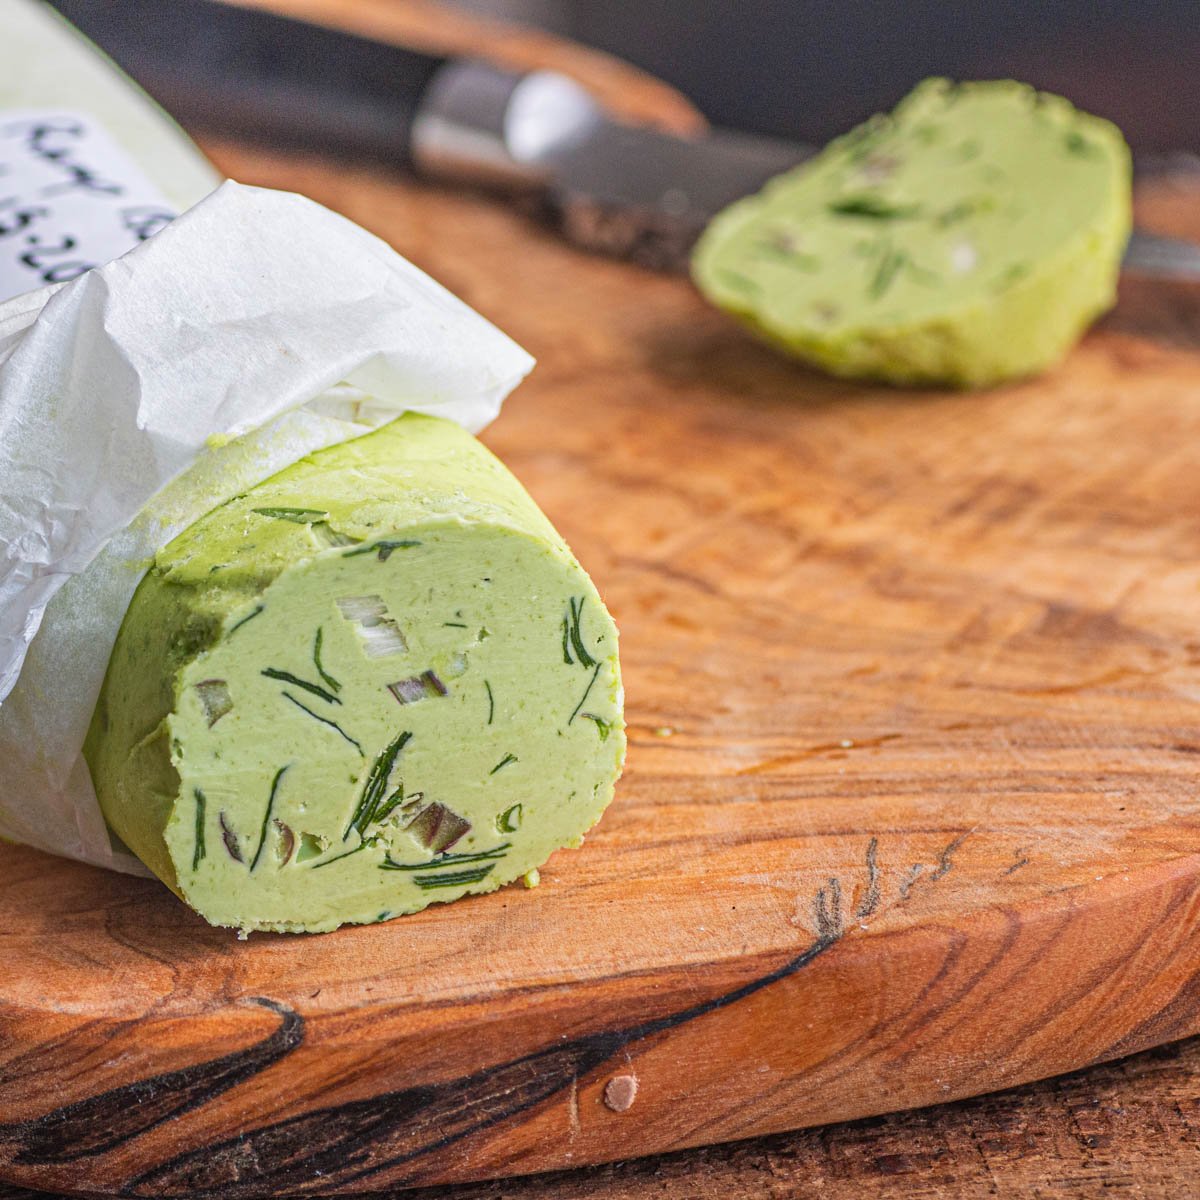
Ramp Butter
A rich compound butter made from wild leek leaves is a forager’s favorite.
Ramp Leaf Pesto
Another classic way to preserve wild leeks leaves is pesto. It also freezes well. Mine uses sunflower seeds instead of pine nuts and you can be more generous with it than with regular pesto.
Basic Pickled Ramps
One of the most popular ways to preserve the bulbs. My recipe is guaranteed to keep their color and not turn blue. Use them to make my pickled wild leek aioli or tartar sauce.
Ramp and Morel Spaghetti
My old Chef’s recipe for two of the best wild spring ingredients is something you’ll want to make every year. It’s a simple morel pasta with wild leeks in a light wine sauce, with plenty of parmesan.
Grilled Ramps with Chokecherry Sauce
Nothing says spring like whole wild leeks on the grill. I serve them with a sweet and sour sauce you can make from different juicy berries and fruits.
Coyotes are often known to be the smaller cousins of gray wolves, and the foxes of the coyotes. You can clearly see the similarities in their appearances. However, there are many points of comparison between the three animals. This AnimalSake article does an analysis to put an end to the age-old debate of coyote vs. wolf vs. fox.
Wolves, coyotes, and foxes have roamed the earth alongside man for millennia. And yet they still manage to be an integral part of our ecosystem. But truly what is the difference between these three wonderful creatures besides their appearance?
Apart from looking quite similar to each other, they fall under the dog family ofCanidae. The Canidae family is divided into two main categories, the Canini, which consists of dogs, jackals, and wolves, and then there is the Vulpini family, which largely consists of foxes.
However, a few questions have haunted many for a very long time―are coyotes and wolves in the same family, how are coyotes and wolves alike, and how are coyotes and wolves different from each other? This article elaborates on size, diet, appearance, etc., about these beautiful Canidae for your understanding.
Coyote Vs. Wolf Vs. Fox
Following are some points of similarities and differences between the fox, coyote, and the wolf, which will help you see the variations in the same family.
Scientific Classification
Note: The following table includes the scientific classification for red foxes and gray wolves.
Appearance
Foxes are the smallest of the three weighing around 6 to 24 lb. They stand tall at around 15 – 20 inches and 15 – 30 inches long. They have a flattened skull, upright ears, slanted eyes, slightly upward-turned snout, elongated body with short limbs, and a long bushy tail.
Coyotes are smaller than the wolf and larger than the fox. They weigh around 24 – 46 lb. and are around 4 – 5 feet long and 50 – 66 cm tall. They have a long and slender snout with triangular ears and a long bushy tail. They have a bluish-black scent gland located at the upper side of the base of their tail.
Wolves have a heavier and larger body structure in comparison to the fox and coyote. They also have a wider and rounded snout. Wolves have shorter ears and a torso with a sloping back. They also have long but less bushier tails, which they carry high while running. They also have a black gland spot on the upper side of the base of their tail.
Coat
Foxes have been known to shed their dense winter coat around April. Different subspecies of foxes come in a variety of coats of fur color, length, and density. They range from white, black freckled with white, gray underside, auburn pelt, etc.
Coyotes have light gray, red, black and white-colored fur on their body. The colors and shades vary as per their geographical location. For example, those living on high elevations have black and gray fur as compared to desert dwellers, who are more whitish-gray. The coyote’s fur consists of short, soft underfur and long, coarse guard hair.
Wolves have a dense and coarse guard fur, along with a long and fluffy regular coat. Most of the unwanted fur is shed out on the offset of spring and grows back around fall. You can often find them in a combination of grays, blacks, and whites.
Behavior
Foxes are omnivorous scavengers, who tread out in search of food in the form of small prey only at the night. Unlike other canids, foxes do not live in packs. On the contrary, some like the Arctic foxes live solitary lives.
Coyotes are strictly monogamous and the pack is centered around the nuclear family, mostly around the reproductive female. However, it has been found that other non-family members join the pack temporarily.
Wolves are often found hunting in packs of around 7 – 8 wolves. This often includes the alpha male and female, older offspring, and pups.
Vocalization
A fox’s vocal repertoire is vast depending on what it wants to convey. It whines, yelps, lets out explosive calls, combat calls, growls, barks, and produces shrill screams.
Coyotes are often heard yipping and at times giving out short barking howls.
Wolves, as you are aware, are known for their howls. They also bark and whine to communicate.
Diet
A fox’s diet mainly consists of smaller mammals, rabbits, birds, insects, reptiles, crabs, eggs, and plants.
Coyotes hunt for rodents, reptiles, amphibians, fish, birds, pigs, sheep, goats, deer, hare, rabbits, and insects.
A fox’s natural enemies mainly consist of the coyote and wolf and other predators, viz., bears, humans, eagles, and other larger carnivores.
Coyotes fall prey to mountain lions, tigers, bears, humans, and wolves.
A wolf’s life is often endangered by predators, viz., tigers, humans, and other wolves.
Reproduction
Foxes mate around December to February, with a 52-day gestation period. The litter can consist of around 4 – 5 cubs. In the initial 2 – 3 weeks of a cub’s life, they are kept within their den receiving the heat and nutrition from the vixen. Around 4 weeks into this world, they begin to slowly emerge out of their underground homes. The cubs are weaned when they are around 6 weeks of age. At around 6 months of age, they step into young adulthood.
Coyotes mate around mid-January to early February and have a gestation period of 60 – 66 days. The litter consists of around 2 – 10 pups. The pups survive away their mother at around 7 weeks and begin to eat solids after 3 weeks. Around October to November, when the pups are 7 – 8 months old, they begin to accompany their parents on hunts. On reaching adulthood, pups split from their parents and find their own mates.
Wolves breed around January to March with a gestation period of around 63 days. The litter often consists of around 4 – 7 pups. The entire pack pitches in to care for the pups till they have reached maturity, which is around their 10 months of age. Around this time, they are able to hunt on their own and become a contributing member of the pack. At times, some young wolves disperse into the wild.
Though these beautiful creatures are found wandering in the wild, they are in constant threat due to deforestation, unlawful human encroachment, and killing. Conversational camps and programs have been enforced to reduce the depletion of their fast-depleting population. Furthermore, cross mating with our faithful companions (dogs), and crossbreeding between coyotes and wolves have brought in new species.
So you are interested in getting into archery and more specifically crossbow archery but you aren’t sure where to start…we have all been there and are happy to put together this guide for getting in to this exciting and fun sport. As this guide is geared toward beginners, we will discuss everything from selecting the right crossbow for you all the way to how to shoot it and even how to sight in the scope. Please read on and enjoy!
Selecting the right crossbow
There are literally hundreds of crossbows out there to choose from, so how do you know which is the best one for you? When you are looking at a crossbow, it is important to first ask yourself what you intend to do with it. Are you looking for something purely for target shooting? Are you looking for something to hunt with? If so, what size animals will you be looking to take and at what realistic ranges? Many modern crossbows are capable of taking down a deer out to ranges in excess of 60 yards, but that is also going to require a lot of time and effort on your part to become proficient enough with your crossbow to make shots at that range. More realistic ranges are typically going to be 30 to 40 yards, so keep that in mind when looking at your hunting opportunities. So what are the biggest factors you should look for in a crossbow and how will they affect your shooting?
What is better, a recurve or compound crossbow?
A lot of people wonder about the difference between a recurve crossbow and a compound crossbow and what the advantage and/or disadvantage of each is. Both have a place in the target as well as the hunting world and both have a dedicated cadre of shooters. Here is a breakdown of the pros and cons of each type.
Recurve Crossbows
The recurve crossbow is the most purist of the crossbows and is the type of crossbow that has been around for hundreds of years. It is often selected by archers for its simplicity and reliability. The recurve crossbow essentially has a simple bow and string with no cables or pulleys to adjust or to worry about failing at a critical moment. The trade off for this simplicity is that a recurve crossbow is typically going to be quite a bit wider from axle to axle (ATA), which is the measurement across the widest part of the bow section. The recurve will typically also have a higher draw weight with less overall speed than its compound counterpart.
Compound Crossbows
Compound crossbows are the most popular crossbow type largely due to their lower draw weights with higher arrow speeds. The addition of the cables and pulleys means that a compound crossbow can enjoy a narrower ATA, which makes it more portable and easier to shoot from a confined area such a deer blind. Those cables and pulleys also translate to additional moving parts, and as such, additional potential points of failure. This isn’t to say that modern compound crossbows are overly prone to such failures, merely that the possibility exists, and likely won’t happen at the most opportune moment!
Speed
We are constantly asked about the speed of a crossbow and usually are asked, “What is the fastest crossbow?” There are some truly fast crossbows out there with speed capabilities well in excess of 400 fps. The most important question to ask yourself is why do you need that much speed? If you plan to go hunt a T-Rex in Jurassic Park, we might understand that, but for simple target shooting or for most deer hunting, nothing near that is necessary.
A fact not understood by a lot of shooters is that too much speed can actually be detrimental to your shooting. A fast arrow is great in terms of hitting harder and shooting flatter (a flatter shooting projectile means there is less drop of the projectile over distance so knowing the exact range is not as critical as with a slower projectile). The drawback is that as you increase speed, you decrease the crossbow’s tolerance for any little mistake. A fast arrow is going to react more to a less than perfect draw as well as being less forgiving for any imperfections in the arrow or vanes.
It is also important to know what weight arrows are recommended and what weight total projectile (arrows and points) were used to calculate the claimed speed of a crossbow. Often times, a heavier arrow will slow your speed, but will actually carry more force to the target, especially at longer ranges. Just remember, that you want an arrow that is fast enough to get the job done, but not so fast that the overkill makes your shots more difficult.
Safety
A beginner archer should really be concerned about the safety aspects of a crossbow as there are a lot of things to learn, so integrated safety devices will help keep you from injuring yourself or damaging your new crossbow. The most important safety features are discussed below.
Anti Dry Fire
A “dry fire” for a crossbow is when the crossbow is fired without an arrow in place. This is one of the single worst things you can do to a crossbow as it puts enormous stress of the limbs of the crossbow. The arrow provides resistance to the limbs when fired to allow them to release their energy in a controlled fashion, so firing without an arrow allows for a lot of energy to be released more rapidly than the limbs were designed for. Many modern crossbows feature a mechanism that will not allow the string to be released unless an arrow in place. This is called a “dry fire inhibitor”, or an “anti dry fire” device and is something you should definitely look for when selecting your crossbow.
Auto-Engaging Safety
Just about all crossbows on the market today will feature a mechanical safety that keeps the trigger from releasing the string when set. This functions much like the safety on a rifle and can be of many different designs. An auto-engaging safety is one that is automatically set during the action of drawing the bow string. This is a great feature for the beginner shooter as it is something you will not have to remember to set yourself and will keep the crossbow safe until you are ready to intentionally pull the trigger.
Forward Grip Design
The forward grip is the part of the crossbow located under the rail where your stabilizing hand is going to go. In a typical rifle design, this grip is simply a piece of wood or plastic where you can hold the rifle when shooting, without much concern for the safety of that hand as the bullet is contained inside the barrel. On a crossbow, while the arrow is contained somewhat within the rail, the bow string is not and slides rapidly down the rail when the crossbow is fired. If a finger or thumb from the forward shooting hand is up a bit too high and gets in the way of that string, at best the shot is going to be ruined, but most likely there is also going to be a significant injury to that hand.
To minimize this possibility, you should look for a crossbow that has a forward grip design with ‘wings’ that stick out to the side and run the length of the grip. These wings will help keep your fingers well below the string path and make for one less thing you need to focus on when learning to shoot.
Once your crossbow arrives
Typically, beginner crossbows will come as a combo, often with included arrows and other accessories. Keep in mind that just about every crossbow you order is going to require some level of assembly.
Assembly
Knowing that your crossbow is going to arrive in a big box, but is still going to need to be assembled is an important thing to understand. Don’t worry, assembly isn’t really a big deal at all. Typically, the bow section is going to come fully assembled, and in the case of a compound bow is going to be fully strung as well. The assembly will usually consist of mating the bow section to the barrel/stock assembly, mounting the scope and possibly adding a few accessories, such as a grip or quiver mount. The required tools are usually included and the instructions aren’t hard to follow.
Be sure when mounting your scope that you place it in the proper orientation. First look through it so you know the back and the front to ensure you don’t put it on backwards. Also, as you mount the scope, if it is an illuminated scope, there will be three round dials (one for the illumination settings) and/or round covers (two for the windage and elevation scope adjustments) at the midpoint of the scope. Simply place the middle cap in the up position and mount the scope. If the scope is not illuminated, there will only be two round caps for windage and elevation adjustments. One will be pointed straight up and the other straight to the right side of the crossbow. It is important to ensure your scope is mounted straight up and down and with the adjustments in the proper position or you will not be able to sight in your scope properly.
Arrow selection
If your crossbow didn’t come with arrows, you will need to select a good set of arrows to go with it. Most shooters use aluminum or carbon arrows but the carbon are the most popular. Be sure when selecting your arrows that you know what the recommended shaft length is for your crossbow as getting one that is too short can present a danger for shooting and might not weigh enough for your crossbow to shoot without the risk of dry fire.
Target selection
A crossbow is a much more powerful archery tool than a traditional vertical bow. The arrows are fired at much faster speeds and can often penetrate a standard archery target. Even with a good crossbow target, the arrows can often bury themselves so deeply that an arrow pulling tool might be required to remove them.
We have tested several different targets in our target selection guide to offer you some convenient recommendations: Best Crossbow Targets
Shooting your crossbow
So now you have everything assembled and the proper equipment ready to go so it is finally time to shoot your new crossbow. Before you shoot the crossbow, it is very important that you understand a few of the most important aspects of safely shooting.
For starters, never cock your crossbow until you are ready to shoot and most definitely never load it until it is time to fire. Keep in mind that once you are more experienced, this will not apply to hunting situations where you will want the crossbow cocked and loaded once you are safely situated in your hunting location. Be sure you never point your crossbow at something that you don’t intend to shoot and never EVER touch the trigger until you are lined up with your target and ready to fire. Lastly, always be completely sure of what you are shooting at and also know what is BEYOND your target. A crossbow arrow carries a lot of energy and can easily pass through an animal or you might miss the target…either way, be sure you know what is beyond your target and that conditions are safe to shoot.
How to aim
Just about all modern crossbows come with some sort of scope, or are set up with a rail to mount one. When you look through the scope you will either see a vertical line intersecting a horizontal line in the center of the scope. This is called the crosshairs. In the most simplistic version of shooting, you place the crosshairs where you intend the arrow to hit and squeeze the trigger. This will work assuming the scope is sighted in and the distance for the sighting in is the distance you are shooting (more on that below). There might also be a dot in the center of the scope which will be used in the same way.
Many scopes also have additional horizontal lines below the main crosshairs. These are used to shoot at targets further away, with each horizontal line creating a new crosshair where it intersects the vertical line. The lower the crosshair in the scope, the further away the target it is meant for. You will typically need to sight in the scope at say 30 yards, and then see how far away your specific crossbow/arrow/scope combination impacts at each crosshair to know the yardage it should be used for.
How to draw
Drawing a crossbow requires quite a bit more force than drawing a standard vertical bow. Most crossbows have draw weights in the range of 150 to 180 pounds with some having draw weights in excess of 200 pounds. It is critical that you draw the bow string in a uniform fashion every time such that your shots will be reproducible. The easiest way to accomplish this is through the use of a rope cocking aid. This is a device that is designed to hook to the bow string on either side of the rail and loops across the back of the crossbow.
First, place the crossbow pointed down at the ground and place your foot in the foot stirrup (the piece that sticks out from the end of the crossbow to place your foot in when pointed down). Hook the hooks on the rope cocker on each side of the rail and grab the handles on the end of each side of the rope cocker in the respective hand on that side. Then you simply pull straight up on the handles evenly with both hands until you feel the string engage in the firing mechanism. A swift solid pull straight up along the rail will make for the easiest cocking. Then ensure the safety is on and remove the rope cocker.
How to fire
Once the crossbow is cocked, you will need to place an arrow on the rail. You do so by grasping the arrow near the point (about four inches back from the tip) and slide it down into place on the rail and all the way back until it makes contact with the bow string. It is important when you do this to make sure the one of the vanes (usually the one that is the odd color relative to the other two vanes) is pointed straight down in the slot of the rail such that the arrow rests on the rail and not the vanes. It is also important to ensure that the groove in the nock of the arrow is horizontal such that the bow string seats into the groove (keep in mind that if your arrows that come with the crossbow have flat nocks, there will be no groove in the nock). It is very important that the arrow is loaded with the odd color vane straight down and that the arrow is fully seated back against the string. Once the arrow is in place, you simply aim at your target, click the safety to the “off” position and squeeze the trigger. There will usually be a bit of a slap sound from the string when you fire but very little recoil will be felt.
How to sight in
Once you are comfortable with how to look through your scope and understand how everything works you will want to sight in your crossbow. To do so, you will need to unscrew the caps on the top and right side of the scope. Removing these caps will expose the dials to allow you to adjust your scope to zero it in. You should first fire your crossbow into a target about 20 yards away to ensure your scope is close enough that you will be able to hit your target at 30 yards. If it is way off, simply use the dials to adjust where the aim point is. As you look at the dial on the right side, it will typically have a letter “L” and an arrow. That means if you click the dial in that direction, you will be moving your aim point to the left, and if you go the opposite direction of the arrow, you will be moving your aim point to the right. So if your arrow is several inches to the right of the bullseye, you will want to move the dial in the direction of the arrow to adjust your aim point to the left. The same method is applied with the top dial except it will usually have an “UP” and an arrow which means if you move the dial in the direction of the arrow, you will bring your aim point up and vice versa. Once you get familiar with how the dials move the aim point of the scope, you will be able to zero your scope in with ease.
Below are some of the most frequently asked questions we receive from new shooters:
Are there right and left handed crossbows? No. Crossbows do not eject any type of spent casing like a rifle does so you can shoot it either way. You might have to move mountings for a quiver if it attaches along the side of the crossbow, but other than that there is no right or left.
Can I change the string on my crossbow? Yes, but you will need to have the proper tools. It is easiest to accomplish changing a string with a bow press which essentially allows you to remove any tension from the limbs for easy changing of the string. Quite often this will require an archery pro shop, although we have used a portable bow press that worked quite well.
Here is a link to that review for more information: Night Hawk Bow Press
What is the absolute furthest I can hunt with my crossbow? Modern crossbows are capable of launching an arrow literally hundreds of yards, although without much accuracy. A very accomplished shooter might be able to hunt at ranges out to 80 yards, but that is a VERY accomplished shooter. Most beginner shooters should keep within 30 to 40 yards until they have enough range time to ensure accuracy at greater distances.
Are crossbows legal to hunt with everywhere? More and more states are adopting laws allowing the use of crossbows for hunting during archery season by all hunters, regardless of whether they have a disability. We would recommend you check with your local and state regulations to know the laws pertaining to crossbows in your area.
What’s the difference in a crossbow arrow and a crossbow bolt? You may see quite often the use of the terms crossbow “arrow” and “bolt” used interchangeably. This is actually incorrect. The true crossbow bolt which was used for so many hundreds of years is a front heavy projectile with no stabilizing fins or vanes. The modern projectiles used with crossbows that have vanes or fletching are crossbow arrows, just like a regular arrow only a bit shorter to fit the crossbow requirements.
What kind of hunting points should I use? You can use any type of broadhead that is legal in your area, but most crossbow shooters prefer mechanical broadheads over fixed broadheads. This is primarily due to the extreme speeds of crossbow arrows. Having the fixed broadhead can affect your accuracy while a mechanical broadhead will fly more like a field point.
Can I cock it by hand? The short answer is “yes” if you have the strength to pull it back. Cocking by hand is not recommended, however as the string may not seat perfectly leading to variability in shot placement. A rope cocking aid is always recommended as it makes it easier to cock by reducing the felt draw weight by around 50%, and it also allows you to ensure the string is centered for each shot.
While hunters and marksmanship enthusiasts are more familiar with how grain affects shooting performance, the average American gun owner does not understand the importance of making this part of their criteria when purchasing rounds. The team at The Range 702 explains why you should pay attention to grain weight and its effect on recoil, trajectory, and impact, as well as practical applications.
Common Misconception About Grain Weight
Before we get into what grain weight is, let’s first talk about what grain weight is not. Don’t fall into the trap of thinking that the grain weight listed on a box of ammunition represents powder weight or the overall power of the cartridge.
Some people connect the reference of grain weight as being a measurement of the “grains” of gunpowder in the ammo. However, it has nothing to do with that. Grain weight refers to the overall weight of the entire round that is projected from the gun. In fact, different gun powder formulas can have varying weights but still deliver comparable performance levels.
What Is Grain Weight?
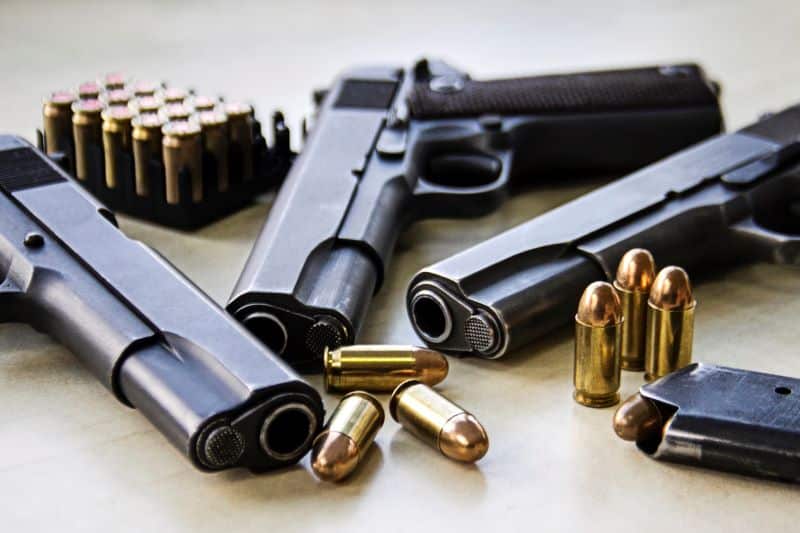
The grain weight system is used to measure the mass of a piece of ammunition. Measuring in grain (gr) is a measuring system to describe the mass of the cartridge projectile (the part that is propelled forward from the firearm). These measurements of mass help determine the correct size of ammo to use for specific shooting purposes.
Ready to improve your shooting? Book a training class with our skilled instructors at The Range 702 in Las Vegas!
Understanding Grain Weight and Firearms
Rounds of ammunition for handguns and rifles come in cartridges made up of the following parts:
Primer
Propellant
Casing
Projectile
Shotgun shells are structurally different and require one more part known as a wad.
The weight of the projectile is measured in grains using the grain symbol gr. When converted using the metric system, there is approximately 7,000 grain in one pound. The weight of a paper clip is about 16 grain.
The mass of the 5.56 NATO rounds1 for the M4 carbines is 62 grain, which equals around four paperclips. However, there are other versions of this ammunition for AR-15 rifles with 55 grain for a lighter projectile.
Selecting the Right Grain Weight for Your Shooting Purposes
There are some things to consider when choosing the right grain to help with your shooting performance, including:
Caliber – Caliber is the internal diameter of the barrel and is the first factor to consider when selecting ammunition. The rounds must fit the magazine, chamber, and barrel, which requires a specific shell size. Cartridges come in a range of calibers and grain. Heavier grain results in a larger projectile, but the difference is not always noticeable.
Ballistics – The grain weight of ammunition will affect ballistics (velocity, energy, and overall shot performance). Ballistics considers the mechanics of how a shot behaves and is an important factor in choosing cartridge weight to match its purpose.
Joules – Grain affects recoil energy (pushback the shooter feels from the gun once discharged) and the energy put downrange. This energy is expressed in a unit of measurement called joules. When you feel the recoil of standard grain, think about the following: heavier grain weight will have greater recoil force while lighter grain will have less. Likewise, grain weight affects the energy felt by the target.
Learn more shooting tips from the experienced instructors at The Range 702. Contact us to book a lane today!
Which Grain Weight Is Best for Shooting?
The answer to which grain weight is best depends on the type of shooting and which firearm you’re using. Here are some various applications and their recommended grain weight:
1. Routine Range Shooting
Understanding grain weight isn’t as important when first becoming familiar with various firearms. For beginners, there is a standard size and grain weight for all ammunition types and brands. For the range, the 55 grain for AR-15 and other 5.56/.223 rifles are adequate because you will aim at targets positioned in short to medium distances.
2. Hunting
You generally want heavier grain weight to deliver more energy into the game, but this may also depend on animal species. Hunters who do not want to leave blood trails, meaning they prefer a more humane shot that drops the game on the spot, will go for heavier grain. A heavier grain also means that they may have to do more stalking to get closer because heavier cartridges travel slower.
3. Self-Defense
Self-defense situations typically occur at close ranges of at least 21 feet from the threat2. Should you need to engage a threat, you want the stopping power that heavier rounds provide. While considering round weight and energy, you should choose rounds that are less likely to pass through a target, which means lost energy and additional hazards. Even though self-defense rounds are commonly more expensive, you should practice shooting these at a range to ensure they feed and fire without malfunction in your firearm, and to familiarize yourself with how they shoot.
4. Marksmanship
Sport shooting of rifles at longer distances may require lighter grain ammunition. Other factors, such as wind conditions and the type of rifle, should also be considered.
In conclusion, choosing adequate grain weight is essential to your real-life shooting experiences. Getting used to various ammunition weights will also help you improve the handling of your firearm.
Visit The Range 702 in Las Vegas
If you’re interested in getting a personal feel of what these various ammunitions feel like, check out our shooting experiences and gun vault! Get expert advice from our instructors and sign up for one of our many classes that will help you learn how to handle your gun better.
Sources:
1Wikipedia. 5.56×45mm NATO. Retrieved on 20 December 2021.
2Findley, Ben. (8 April 2015). What is Your Safe Distance to Engage the Threat: The 21-Foot Rule. USA Carry. Retrieved 20 December 2021.
As a busy archery instructor with dozens of students, I’m always on the lookout for the best crossbow targets.
Over the years, I’ve bought dozens of targets and seen exactly how they perform on the range and in the field.
After testing everything from cheap targets that get chewed up after a few hundred bolts to premium targets that can withstand thousands of impacts, I know which targets are worth the money and which are best avoided.
To share everything I’ve learned, I decided to put together this list of what I think are the five best crossbow targets you can buy right now:
Morrell Double Duty 450 FPS Target – Best overall ($83.99)
Rinehart 18-1 Broadhead Target – Best for broadheads ($171.85)
Morrell Yellow Jacket Field Point Target – Best portable ($71.99)
Delta McKenzie Speedbag 20” Target – Best value ($44.97)
GlenDel Buck 3D Archery Target – Best 3D target for hunters. ($175.99)
In first place is the Morrell Double Duty 450 FPS Target.
The Double Duty is my go-to target whenever I’m coaching students or practicing my hunting skills and, in my opinion, is the overall best crossbow target on the market today.
Here’s a quick look at some of the key features that make the Double Duty my No 1 pick.
Extreme durability
According to Morrell, the Double Duty’s ‘floating center’, which is filled with burlap and stuffing, can withstand bolts traveling at up to 450 fps (feet per second) and is durable enough to withstand thousands of bolts.
For peace of mind, the Double Duty comes with a replacement cover, increasing its lifespan even longer.
Two-finger bolt removal
Morrell is famous for claiming that bolts shot into its targets can be removed with just two fingers. Even though the Double Duty is rated for the fastest bolts, it is claimed to offer the same two-finger bolt removal as other Morrell targets.
Multi-use cube design
The Double Duty is a free-standing cube that can be flipped onto different sides depending on whether you want to practice shooting traditional bullseyes, a dartboard, the billiards game nine-ball, or even deer vitals to brush up on your hunting skills.
Based on what I’ve read online, crossbow enthusiasts seem to absolutely love the Double Duty.
It is currently rated 4.7 out of 5 stars on Amazon based on 2,687 global ratings.
Take Choche, for instance, who says the Double Duty offers easy bolt removal and can withstand thousands of bolt impacts without any issues.
My Experience With The Double Duty
I’ve owned a Double Duty for a couple of years now, and it’s by far my favorite crossbow target and is a great addition to any of the crossbows on this list of the best crossbows.
The Double Duty is incredibly tough and would definitely be my top recommendation for anyone with a super fast crossbow. One of my buddies shot my Double Duty with his TenPoint Nitro 505 Xero Crossbow, and it had no problem stopping the 505 fps bolt before the vanes.
True to Morrell’s claims, you really can remove bolts from the Double Duty with just two fingers. In fact, this target has the easiest bolt removal of any crossbow target I’ve ever tested or owned.
Having multiple sides to shoot at is a real plus, as I can go from shooting at traditional bullseyes to shooting at deer vitals simply by flipping the target. While shooting at the deer vitals side isn’t as immersive as shooting at a real 3D archery target, the Double Duty is far more durable and much better value.
My only complaint is that while the exterior is waterproof, the sun can fade the material, so it can’t really be left outside all the time. Luckily it has sturdy carrying handles and stowing it away isn’t too much of a hassle.
Priced at just $84.99 on Amazon, the Double Duty is my pick for the best overall crossbow target and is a must-have if you plan on shooting high-speed crossbows.
Click here to read more about the Morrell Double Duty 450 FPS Target and get the best price on Amazon.
2: Rinehart 18-1 Broadhead Target (Best For Broadheads)
In second place on my list of the best crossbow targets is the Rinehart 18-1 Broadhead Target.
The 18-1 is an extremely tough and durable target designed to withstand broadheads. With a 12-month warranty, it’s my pick for the best crossbow target for broadheads.
Key features
Extreme durability: According to Rinehart, the 18-1 is made from self-healing foam that can handle bolts traveling at more than 500 fps.
Lightweight and portable: With an easy-carry handle, the Rinehart is designed with portability in mind and can easily be transported between the club, the woods, or even your backyard.
High visibility: The 18-1’s target zones are highly visible, making shot identification very easy, even in low-light conditions.
There aren’t many broadhead-compatible crossbow targets to choose from, and the 18-1 seems extremely popular with customers.
Currently rated 4.6 out of 5 stars on Amazon based on 645 reviews, 80% of customers who purchased the 18-1 have rated it 5 stars.
Take Ben W, for instance, who claims to have shot over 3,000 bolts into his 18-1, making it the longest-lasting target he’s ever owned.
After putting in a warranty claim, he was really impressed that Rinehart sent him a replacement target.
My Experience With The 18-1
As an avid hunter, the 18-1 is my favorite target for testing new broadheads and getting my crossbow zeroed in before heading into the woods.
Here’s my honest review of how my 18-1 has performed:
The 18-1 is extremely durable and has excellent self-healing, especially with mechanical broadheads. Twin-blade mechanicals cause the least damage, while fixed broadheads can tear the target up more.
The target markings are highly visible at all times of the day. This makes it far quicker and easier to zero a crossbow, which comes in handy whenever I’m testing new broadheads.
Although the 18-1 has a high price tag, Rinehart does honor the 12-month warranty and will send a replacement if the target lasts less than a year.
Priced at $129.99 on Amazon, the Rinehart is my pick for the best crossbow target for broadheads.
Click here to read more about the Rinehart 18-1 Broadhead Target and get the best price on Amazon.
3: Morrell Yellow Jacket Field Point Target (Best Portable)
In third place on my list of the best crossbow targets is the Morrell Yellow Jacket Field Point Target.
Yellow Jacket targets are almost as tough and durable as my first place pick, the Double Duty, but they are much more portable.
Here are some of the features that make these crossbow-approved bag targets some of the best crossbow targets you can buy right now.
Long lifecycle: According to Morrell, the double-sided Yellow Jacket targets are highly weather resistant and stand up well to the elements. The material inside doesn’t degrade, and the targets are claimed to have a very long lifecycle. They also come with a replacement cover to extend the lifespan of the target when the original cover becomes too damaged.
High durability: Capable of stopping bolts traveling at up to 425 fps, the Yellow Jacket is ideal for all but the most powerful crossbows and is extremely tough. Morrell claims that the Yellow Jacket can withstand thousands of bolt impacts without tearing up.
Ease of use: Weighing just 32 pounds, the Yellow Jacket is highly portable and has grommets so it can be hung from target stands or trees. Morrell says that bolts can be removed with just two fingers, giving it great ease of use.
I’ve been happily using Yellow Jacket crossbow targets for years, but I wanted to see what others were saying about them online.
With a current rating of 4.7 out of 5 stars on Amazon, it’s safe to say that most customers seem to love Yellow Jacket targets.
Take Joshua, for example, who says his Yellow Jacket stops 125 gr. field points dead in its tracks and is extremely happy with its performance.
My Experience With The Yellow Jacket
I’ve purchased six Yellow Jackets over the years, and here are my thoughts:
Yellow Jackets are one of the most weather-resistant target bags I’ve ever bought. My oldest target is more than five years old and still going strong. The replacement cover really helps get years of extra life from these targets.
One of the best things about Yellow Jackets is how portable they are. You can hang them up, stand them against a tree, or position them at just about any angle. If I’m coaching a student at their home, I’ll throw a couple of Yellow Jackets in my truck’s bed, and off I go.
The only downside about Yellow Jacket targets is that pulling bolts out can be a little tougher than other targets like the Double Duty.
Priced at just $78.75, Yellow Jacket field point targets are my top pick for the most portable crossbow targets. They are durable, easy to use, and give years of reliable use.
Click here to read more about the Morrell Yellow Jacket Field Point Target and get the best price on Amazon.
In fourth place on my list of the best crossbow targets is the Delta McKenzie Speedbag 20” Target.
While I’m a huge fan of Morrell’s products, I realize that not everyone wants to spend $80 on a crossbow target. That’s why the Speedbag 20 is my fourth-place pick.
In my opinion, the Speedbag 20 is a great budget-priced crossbow target that holds up well to thousands of bolt impacts.
Here are a few of its features that make it my No 4 pick for the best crossbow target.
Key features
Max FPS rated: Delta McKenzie says the Speedbag 20 is rated to handle the fastest-shooting crossbows.
Multiple targets: The dual-sided Speedbag 20 has multiple aiming points, making it suitable for novice and experienced shooters alike.
Weather resistant: The Speedbag 20 is highly weather resistant and offers great outdoor durability.
I own a couple of Speedbag 20s and know firsthand how great they are. From what I’ve read online, customers seem to love them too.
Currently rated 4.5 out of 5 stars on Amazon based on 34 global ratings, the Speedbag 20 seems to be extremely popular with other crossbow owners.
Bretty says the Speedbag 20 is a solid crossbow target that has stopped every bolt he’s tried. He recommends the target for anyone looking for a budget-friendly target with great stopping power.
My Experience with the Speedbag 20
After shooting thousands of bolts at my Speedbag 20s over the years, here’s my honest assessment of how they perform:
Delta McKenzie’s claim about the Speedbag 20s being ‘Max FPS’ rated is definitely justified. It has absolutely no trouble stopping 400+ fps bolts from any crossbow and comfortably stops 450 fps bolts from my Ravin R29X Predator.
I love how portable the Speedbag 20s are and often use them when I’m coaching a client at their home.
My only complaint about the Speedbags is they aren’t as weather resistant as the Yellow Jackets, so I don’t recommend leaving them outside.
Overall, the Speedbag 20 is an excellent budget-priced crossbow target that holds up well and should provide years of happy use.
Click here to learn more about the Delta McKenzie Speedbag 20” Target and get the best price on Amazon.
5: GlenDel Buck 3D Archery Target (Best 3D Target For Hunters)
In fifth place on my list of the best crossbow targets is the GlenDel Buck 3D Archery Target with Replaceable Insert Core.
I love 3D archery and have tested a number of 3D targets over the years. In my opinion, GlenDel makes the best one, and it’s my top pick for the best 3D archery target for crossbow hunters.
Here’s why I rate the GlenDel so highly.
Key Features
Realistic hunting practice:GlenDel’s 3D deer target is approximately the same size as a 200lb buck, making it extremely realistic for target practice. Standing 34” at shoulder height, it’s great for honing your skills as you prepare to drop a monster buck.
Long target life: Made in the U.S.A. using PolyFusion Technology, GlenDel claims that its target can withstand thousands of bolt impacts. The replaceable four-sided insert core can easily be replaced when they reach the end of its lifespan.
High maneuverability: The head and antlers are fully removable, making the target much easier to transport and position in the field.
I’ve had a GlenDel 3D deer target as part of my range for more than two years and am extremely happy. Looking online, it seems most other owners are similarly impressed.
The target is rated 4.4 out of 5 on Amazon based on 1,609 global ratings, and 71% of reviewers gave it the top score.
Marcus says his 3D target is impressively sturdy and has held up well after 100 arrows. He says the arrows are easy to pull out and recommends this target to anyone looking for a realistic hunting target.
Patience and persistence can lead to great rewards.
Keep these 10 pheasant hunting tips in mind to get more pheasants in your sights.
From hot, dry weather early in the season to crowded conditions at state wildlife areas where birds are released, pheasant hunting can be a challenge. Yet veteran hunters have learned to use weather, heavy hunting pressure and wary birds to their advantage and shoot bag limits of roosters each fall.
Here are 10 tips from some of the best pheasant hunters around -hunting guides, state wildlife area managers and hunting club owners -on how to find more birds on public and private lands through the West.
1. USE A GOOD BIRD DOG
Each fall, many hunters are successful by walking through cover and flushing birds without a dog. But the most successful hunters are those with a good bird dog, be it a Lab or a pointer. Not only will a dog help you find more pheasants and other upland birds, but can also track down pheasants after they are shot.
“I’ve noticed that really good bird dogs are a huge advantage,” says Vince Oredson, a state wildlife area manager in Oregon. “I’ve seen fields get hunted over and over throughout the day. And then someone with a dog with a good nose will go in and find birds right away.”
Some hunters prefer Labs, which are excellent at flushing pheasants from heavy cover and also unmatched when it comes to tracking down birds after they are shot.
Others like a pointer, which will locate pheasants hiding in grass and brush and let their owner know exactly where they are.
“A flushing dog that can get into the heavy cattails and other cover can be an advantage in the middle of the day,” Oredson says.
“The pointer dogs work better in the shorter grass where the birds will be early in the morning.”
Burt Holzhauser owns the Rising Sun Hunting Preserve in California, one of the West’s best private-land pheasant hunting areas. He utilizes both Labs and English setters at his ranch.
“You have to have a dog,” Holzhauser says. “You lose too many birds because you knock them down and won’t be able to find them without a dog.”
Some private hunting clubs provide dogs and handlers for an additional charge.
2. LEARN TO DRIVE BIRDS
Jeremy Eubank is a very successful hunting and fishing guide from eastern Washington. He likes to drive pheasants early in the season when hot, dry weather limits success for many hunters.
Eubank’s technique works with or without dogs, although his Lab helps him bag even more birds. He will have one or more hunters take position at the top of a hill or ridge and wait. Then he pushes the birds to them by walking a slow zigzag pattern through brush and other cover.
Pheasants will often retreat uphill, running through the cover and then fly once the cover ends. That’s where the other hunter should be stationed.
Eubank cautions hunters to avoid pushing pheasants downhill. They will often take off flying before they near the hunters waiting to ambush them.
3. HUNT NEAR WATER
Oredson, the manager of Denman Wildlife Area in southern Oregon, and Holzhauser – whose Siskiyou County, Calif., ranch is rated as one of the best pheasant hunting destinations anywhere – get chances to see pheasants under all types of weather conditions. Early in the season and during dry weather patterns, pheasants will often hang out in areas with lots of water.
“They are going to be closer to the water holes,” Holzhauser says of birds in dry weather. “They are going to be in the good cover.”
Oredson agrees: “The birds will gravitate to streams and water holes during hot weather.”
Also look for birds near other water sources, aside from with streams and ponds – such as faucets, irrigation canals, livestock watering containers, pump houses and irrigation equipment.
4. PRACTICE MAKES PERFECT
Private hunting clubs are gaining popularity with hunters as places to train their dogs before hunting pheasants on public-land areas. Hunting clubs and preserves often open before the general pheasant season and are great places to give bird dogs exposure to pheasant hunting.
Break out your rain gear and waterproof boots after the first big storm of fall for some of the best opportunities of bagging a pheasant.
“I have quite a few people who start young dogs here,” Holzhauser says. “I can flag the birds or tell the hunter exactly where they are. You know your dog is on a bird and not a rabbit or something else.”
Hunting clubs also often have a variety of types of cover to expose flushing and pointing dogs to differing terrains, vegetation types and hunting situations.
“I like to mix it up,” Holzhauser says of training new dogs. “I put them through everything from grain fields to tall wheat grass to sagebrush.”
It’s also a good idea to get reacquainted with your shotgun before the season starts – instead of when your dog points to or flushes the first rooster of the season.
“Practice shooting some clay pigeons before the season,” Oredson suggests. “Go out to the gun range and make sure your gun is functioning right. Pattern your shotgun. Make sure you are shooting a good pattern.”
Just as deer hunters scout before rifle season opens, good pheasant hunters will make a trip to their favorite hunting area before upland bird season begin. Watching where the birds are without hunters around will reveal locations to keep an eye on early in the mornings and late in the afternoons. Scouting for pheasants will also reveal cover types to be aware of once hunting opens.
5. SELECT THE RIGHT SHOT
While many hunters prefer 20-gauge shotguns for pheasant hunting, some like a 16-gauge. And the ever-popular 12-gauge, also used for duck and goose hunting, will suffice.
At Holzhauser’s ranch, lead shot is allowed. “I like No. 5 lead shot,” Holzhauser says.
“Something comparable to 4 and 6s. A heavy load, because the birds are tough enough that 7 1/2 isn’t going to knock them down.”
Holzhauser has seen hunters shoot birds with 7 1/2 shot. Despite being hit, the birds will often survive the blast and live.
If using steel shot, go with a bigger size than if you were using lead. On public lands, lead shot often cannot be used. Instead, size-4 steel shot is a good choice.
“Four seems to be the most popular size shot,” Oredson says. “You have a little less range with steel. If you keep them under 50 yards, you should do fine,” he says of shot range.
6. TIME YOUR HUNTS
Just like most hunting and fishing, pheasant hunting tends to be at its best early in the morning and again in the evening.
Mornings are best because the birds are often found in grasses or other light cover, searching for food. Once hunters and dogs arrive, the birds will retreat to heavier cover until pressure eases. They will then begin searching for food again.
At private hunting clubs, however, hunting is good throughout the day, as birds are often released several minutes to a few hours before hunters begin their hunt. Hunters can tell hunting club managers what type of hunt they want, from beginner to more challenging and if they want the birds disoriented or not.
On public grounds later in the day, the birds will come out again when hunting pressure drops off.
7. FIND PHEASANT SIGNS
When hunting new areas, Holzhauser says there are several giveaways – including tracks and crowing – to indicate if there are birds in the area.
“You will see them crossing the road,” said Holzhauser. “You’ll hear the roosters crowing.”
Late in the evening, pheasants will come out and feed before bedding down. You can often see them at dusk, which is a good time to scout for pheasants.
When scouting a new pheasant hunting area, Oredson suggests you look for birds where corn is growing.
“Corn seems to be a magnet for pheasants,” Oredson says. “They like the shade, they like the green cover and they like the corn itself. Pheasants also like thick cattails. Marshy areas hold a lot of birds, but they are a little harder to hunt.”
8. BE PATIENT
Many hunters become frustrated when they don’t bag a rooster within the first half hour of hunting.
Be patient, says Oredson. “If things aren’t working, take a break, sit down, eat a sandwich.” he says.
“Things change all the time. Another hunter can push birds into our area. Don’t get too frustrated. Sometimes you have to let the birds come to you.”
If you know birds are in an area but have hunkered down, slowly work the area with your dog. Break down the entire area and methodically going through all the cover with your dog.
9. HUNT THE COLD
The first really cold spell of the year can produce some of the best pheasant hunting of the season.
“The advantage of cold, wet weather is it’s easier on the dogs, and it makes the scenting conditions better for the dogs,” Oredson says.
Break out your rain gear and waterproof boots after the first big storm of fall for some of the best opportunities of bagging a pheasant.
Pheasants can also be easy to track on muddy or snow-covered ground.
10. KNOW THE REGS
Study the hunting regulations in your state before hunting. Regulation books will often include public-land release sites for pheasants.
Some Western states hold paid pheasant hunts, where hunters can harvest roosters on public land for a fee of about $10 a bird. There also are junior or youth pheasant hunts in many states.
California, Oregon and Washington all have information about the youth and adult state wildlife area pheasant hunts on their Web sites and in their regulation books.
Hunters must also be aware of tag and recording requirements. In Oregon, for example, you can be fined for bagging a pheasant and not recording it on your tag, just like keeping a salmon without recording it on your fishing license.
Also be aware of any hunter orange requirements, load or firearm restrictions or hunter education requirements for your state.
IT ALL STARTED HERE
Although the Plains States have a reputation for top-quality pheasant hunting, pheasants were first introduced to the U.S. in the Pacific Northwest.
After ring-necked pheasants were brought in from China in 1882, Oregon’s Willamette Valley was the first place in the U.S. to sustain wild populations of the birds.
Pheasants were also introduced to the Longview, Wash., area at the same time. The newly introduced birds thrived, and their populations quickly grew into the tens of thousands.
Eastern Oregon, eastern Washington and northeastern California still have good numbers of wild pheasants, although the birds are not as plentiful as they once were because of changes in the agricultural industries.
Pheasants thrive in farming areas of each state, but also are found in state wildlife areas where they are raised and released for hunters.
There also are private hunting clubs in each state where hunters can pay for each bird they want released.
There’s no doubt about Gaston Glock’s pistol, it’s a good gun.
But can it be better?
Absolutely.
One of the most obvious improvements would be an upgraded trigger system. There are roughly a million different upgrades for the trigger out there…so how do you choose?
That’s where we come in…we’ve bought, used, and tested the most popular triggers over thousands of rounds.
Obligatory disclaimer that you should have a qualified gunsmith install and test all this stuff.
Many will say to get a better Glock trigger, you just have to shoot it. And they are right.
Thousands and thousands of rounds (or dry-fire) will polish up the internals and make the trigger much better. Not custom 1911 level…but better than when you bought it.
We cover how to do the infamous Glock 25 Cent Trigger Job with some polishing compound and Dremel.
Another affordable upgrade I do is upgrading the stock 5 lb connector with a Lone Wolf or Ghost 3.5 lb connector. If you built a Polymer80 Glock with a Lone Wolf frame kit…you already have the 3.5 lb connector.
Doing both in my G19 brings the trigger pull down from around 6 lb 6 oz to 5 lb 4 oz and makes it much crisper and with a smoother reset. Perfect for general purpose and maintaining the stock safeties.
Here’s a quick video on the first pull and reset so we have a baseline for the others.
Perfectly manageable, but still room for improvement!
Best Glock Triggers
1. Apex Tactical Glock Enhancement Trigger
Apex is well known for improving the turd of a trigger that comes on Smith and Wesson M&Ps, especially the first models that hit the streets. Obviously, they’ve expanded, or they wouldn’t be on this list.
Apex’s Glock Enhancement Trigger came out a few years ago and is one of the most affordable drop-in trigger systems.
When I say drop-in trigger…I mean it.
It’s a self-contained system with a trigger, trigger bar, and disconnector all built together. You remove your standard Glock guts and fill in the blank. It’s a very simple installation process and very convenient.
The Apex trigger gives you a quick stop initially, so you know when to ease and squeeze the trigger. There’s some minor pull before a clean break.
Also, a much shorter reset that’s followed by a similar pull and clean break again.
Red not doing it for you…they have purple and black too.
One big difference is the flat-faced trigger that still maintains the safety features of the standard Glock. I definitely like flat-faced triggers after using the Apex a bunch. It’s also a little meatier than the other triggers, which I like.
You can combine upgrades with the Zev Competition Spring kit, which I heavily recommend. With it and a polish job…my trigger pull is 5 lb 7 oz and much smoother.
However, I found with mine that I got light primer strikes with the use of the reduced weight striker spring. So be sure to test.
If that happens to you…you might need the Zev Skeletonized Striker ($79) to take full advantage of the springs.
The Apex Glock trigger is my pick for best bang-for-the-buck since it looks cool, is reliable, improves upon the stock trigger, and is priced right.
What’s your take on the Apex trigger? Rate it below.
2. Velocity Trigger
This Velocity Trigger I got sent for testing, and I put it in a new Polymer 80 build with a SeeAll Sight and matching gold Faxon Barrel.
It’s much thinner than the Apex or stock Glock trigger. The flat-faced trigger is also ridged for your finger’s pleasure with a lower-activating safety.
With stock springs and only a 3.5 connector, I was getting 4 lb 12 oz. With the competition spring kit…it should go down some more.
However…one big thing I didn’t like was that in my P80 build and my style of pressing the trigger (pretty high up with thin fingers)…many times, the “safe-action” trigger wouldn’t engage. And I’d be left with no PEW.
Whatever at the range…annoying at a competition…but potentially deadly in a real-life encounter. Not that I would recommend having anything modified on your gun for self-defense.
Otherwise, the trigger was great…longer pull after the initial stop and a nice click.
I would recommend for competition/range if you’re finger placement is usually on the lower half of the trigger or if you have thicker fingers than I do.
3. Overwatch Precision Trigger
The Overwatch Precision is from another P80 build. It also has the competition spring kit.
With everything…I get a super soft 2 lb 12 oz trigger pull. However…it’s pretty spongy when compared to the other triggers. Nice reset, though.
But…runs into the same safety reset problem as with the Velocity (so make sure you press lower or have thicker fingers).
My pick if you really want a light trigger pull throughout. I personally prefer less spongy (even at the expense of pull-weight), so this is my least favorite trigger out of all the series.
4. Zev Fulcrum Ultimate Trigger
My favorite trigger that lives in my G34 for competition shooting. What I’ve shot the most besides stock Glock triggers.
It breaks the cleanest without a lot of pre-travel and no mushiness. Combined with a little 25-cent trigger job polishing and the lightest springs…it comes in at under 3 lb 10 oz.
It’s not much to look at when installed…but the kit comes with an entirely new trigger assembly, lightened springs, and lightened striker (or else sometimes, when you only change springs, you get light primer strikes).
Plus…adjustable pre-travel and over-travel to get YOUR perfect trigger pull. This all comes at a price, though!
5. Tyrant CNC ITTS Trigger
Want a nicer-looking trigger but don’t want to change your trigger pull?
You can check out the Tyrant CNC ITTS Trigger, which replaces the trigger shoe with something purrty.
Fully Modded P80 PF9SS (Glock 43)
Easy enough to install with instructions right here.
It keeps your original trigger pull for safety reasons but makes your Glock look a whole lot better!
Tyrant CNC Glock
And while it doesn’t change the performance of the pull, that machined aluminum sure does feel nice. They come in different color combinations too!
6. Timney Alpha Glock 5
First off, I like the Gen 5 Glock trigger and consider it to be a significant improvement over previous generations.
Pressing back on the trigger, it travels back a few millimeters with minor resistance before stopping at a pretty well-defined wall. Pushing beyond this, the trigger breaks crisply at an average of around 4 pounds on my Lyman Digital Gauge.
Timney Alpha Glock 5
Reset occurs after a slight release and is both audible and tactile. It’s a great trigger for a striker-fired gun, and I have definitely gotten used to it.
Given Timney’s overall reputation in triggers, I was excited to try the Alpha Glock 5. So I cracked open the package and started putting it in.
Hold your mouth jussssst right
Installation was a little challenging due to the small parts, but the instructions were detailed and included good photos. Then, the trigger return spring has to be compressed on the inside of the locking block while installing the locking block.
After installing, I noticed the surface of the all-aluminum trigger shoe was smoother, and the interface with the safety bar in the trigger was also smoother.
The pull weight felt lighter, and I confirmed this on the gauge at an average of 2.5 pounds.
Smooth and pretty
During press, the previously defined wall before break felt softer. And finally, trigger reset felt a bit longer to reach but was still audible and tactile.
Out at the range, the trigger truly shines with a performance you soon become accustomed to and can repeat easily. It’s a great upgrade for around $150.
Honorable Mentions
There are a lot of Glock triggers. Here are some honorable mentions:
Agency Arms ($160): Pretty good as well…but I’d still take the Apex with the spring kit. Personal preference, though…tons of people love it.
Lone Wolf Adjustable ($75): The P80 kit trigger is actually pretty good…and this adjustable upgrade is not too shabby either.
CMC Trigger ($170): Another popular one, but was meh to me when I tried it.
Final Thoughts
We can all agree that sometimes swapping out a Glock factory trigger for something a little nicer can make all the difference when it comes to shooting.
And hopefully, we’ve given you some options to kick your Glock up a notch.
How did we do…what other triggers did we miss that we can test for the next update? Let us know. For a perfect trigger tune-up, make sure to grab a trigger pull gauge. We have our recommendations here!
"Unleash the Power: Mastering Break Barrel Air Rifles for Maximum Performance. Discover expert tips and techniques to enhance the power and precision of your...