Home Blog Page 40

Benjamin Maximus Review

0

Built-in the United States, Benjamin Maximus is the most affordable, accurate, and powerful air rifle for the money.

Available in both .177 Caliber and .22 Caliber, the air rifle is a pre-charged pneumatic, single-shot bolt-action,

And features an all-weather stock available in black.

(For more on the differences between .177 & .22 and which jobs they do best, see this post.)

Additionally, the rifle delivers 30 shots per fill and is able to be quickly filled with a hand pump.

For those who are searching for an air rifle for small game hunting, target practice, and plinking,

The Benjamin Maximus air rifle is the most accurate and affordable option.

(For the best air rifles for hunting, see this post)

Likewise, if you’re after a good entry-level air rifle for target shooting, Benjamin Maximus .177 is a very reliable option.

In fact, it’s probably best known for being just that – a wonderful entry-level target air rifle.

Benjamin Maximus air rifle is pretty imposing in size as it was conceived to attract people

Who were on the fence about PCP air rifles and were unsure about the value for money, real-feel, and ease of use.

The manufacturers gave a lot of consideration to young shooters during the R&D phase,

Particularly those interested in sport shooting in the likes of the Olympics,

And would need high performance but not an overly complicated weapon.

If you are a beginner, you can save your time and effort with our list of top air rifles for under $100 for beginners.

Quickly filled with the hand pump or high-pressure tank, the Maximus can contain 2000 psi

And allows 30 shots per fill in .177 or 20 shots at .22 Caliber.

The rifle features an onboard 200-bar manometer to check pressure filling.

It’s charged for action by a two-piece 11mm optic mount and compatible accessories.

If you are thinking of starting target shooting practice in your backyard

And are trying to find the best reasonably priced air rifle, the Benjamin Maximus has to be in the mix given its $200 price tag.

Although the Benjamin Maximus air rifle weighs a bit more than average, the feel of the rifle is smooth and it is still lighter than it looks.

This is the reason that the air rifle is a good fit for people of all ages.

However, there is a warning from the manufacturing company to only use it if you are 18+.

Even if you are looking for an air rifle as a gift, Benjamin Maximus, with its tremendous out-of-the-box accuracy, would be the best option for you.

However, the Benjamin Maximus is a pretty loud rifle, with no silencer and no way to lower the volume.

If you’re looking for something for backyard use, you’d better hope to have pretty understanding neighbors!

In this review, we will be discussing the features of Benjamin Maximus and comparing its performance to Benjamin Discovery, so that you can decide which to add to your collection.

Benjamin Maximus Air Rifle Review

Trigger And Cocking Effort

Benjamin Maximus trigger mod comes with a synthetic trigger blade.

In this way, the standard trigger pull weight was too weighty at an average weight of 5 pounds, 13 ounces.

However, the single-stage trigger, though being heavy, did not appear to affect the accuracy of the rifle at all.

There is a manual safety catch for the trigger in its trigger guard,

And the non-automatic characteristics give full control of the air rifle to the shooter.

Talking about the cocking effort, it requires a firm pull back adjacent to the hammer spring to set the trigger sear.

However, the small-sized bolt handles help amplify the effort.

You do not have any aftermarket options for the Benjamin Maximus trigger, so it’s just a bit heavier full stop.

During the HAM test, it was surprising to note that the bolt handles of the Benjamin Maximus PCP were very tight.

Appearance

The Maximus air rifle has a synthetic stock and is quite long and thin.

Having said that, it’s still only 2 inches longer than the Discovery.

The black, synthetic stock is pleasing to the eye.

(For more on the in-depth comparison between synthetic and wood stock, see this post.)

There is a molded stippling to help with handgrip if the weather turns wet, making it pretty user-friendly.

The finish of the stock is outstanding, with minimal molding marks, and the added provision of a sling swivel stud is well finished.

The Benjamin Maximus valve is red, unlike the Discovery.

If you look at the cheek weld, the 3 – 9 X scope meets the shooter’s eye quite naturally.

The metal finish is pretty fetching too.

However, since the air rifle is nowhere close to the $1000 mark, it’s unrealistic to expect far too much here.

After the HAM test, it is evident that Benjamin Maximus does, unfortunately, have a poorly finished breech.

The surface of the Benjamin Maximus is a bit dull in its matt black style, however, this doesn’t cover the whole metal area.

In summary, the Benjamin Maximus air rifle is pretty good in terms of appearance, but it’s still far from amazing.

Shooting Ability

The Benjamin Maximus is long, light, and easy to handle.

It weighs only 6 pounds, 5 ounces, which is pretty light for an air rifle with this power.

The magazine has the most comfortable PCP, with 2000 PSI fill pressure which can be done easily with a hand pump.

Without any doubt, this would be the best option for shooters who struggle to make a more usual fill of 3000 PSI, which is required by most other PCP rifles.

Here is the good news for shooters who are in search of perfection and accuracy.

The HAM test revealed that the RATEAGUN score of just 4.5, confirmed the Benjamin Maximus air rifle is very easy to shoot accurately.

Minimal space is afforded when loading pellets into the breach due to its restrictive, compact design.

Therefore, reloading can be a little bit tricky.

Likewise, the small bolt handle also makes the air rifle cocking effort feel rather heavy.

Power, Accuracy And Velocity

The Benjamin Maximus air rifle can fire both .177 and .22 Caliber rounds.

The former is more suitable for target shooting, while the latter is best for small game hunting or pest control.

(For more on how to choose the right air gun caliber for your game, see this post.)

The Benjamin Maximus air rifle HAM test showed a maximum of 943.77 FPS muzzle velocity

While shooting alloy pellets like Gamo Raptor Platinum pellet.

Moreover, a higher muzzle velocity of 875.52 FPS can be reached with 11.9 Hobby pellets from Grain RWS.

Accuracy was excellent during the test, but the HAM test revealed that light pellets (under 14 grams) did not shoot well.

However, once you reach the pellet weight of 14.3 grains or above, you can get outstanding accuracy.

Nevertheless, the HAM test claimed after much study that the Benjamin Maximus air rifle has the best in accuracy for such a low cost.

Below is the table to show the muzzle velocity, muzzle energy for measurement of the best result for accuracy of Benjamin Maximus air rifle:

PelletMuzzle velocity-AverageMuzzle energy- AverageAccuracy
Gamo Raptor Platinum 9.7 Grain943.77 FPS19.19 Ft/Lbs.Fair
H&N Field target trophy grain 10.03934.90 FPS19.47 Ft/Lbs.Fair
RWS Hobby 11.9 grain875.52 FPS20.26 Ft/Lbs.Very Good
Crossman Premier HP 14.3 Grain827.77 FPS21.76 Ft/Lbs.Excellent
JSB Jumbo exact 14.35 grain832.38 FPS22.08Excellent
H&N Field target trophy 14.66 grain820.35 FPS21.91 Ft/Lbs.Excellent
H&N Baracuda match 21.14 grain705.83 FPS21.14 FPSExcellent (best tested)

For these results, the shooting took place from 50 yards with the Benjamin Maximus air rifle.

The H&N Baracuda match 21.14-gram pellet, which fired at 705.83 FPS, gave the best accuracy for the Benjamin Maximus air rifle.

Loudness

The Benjamin Maximus air rifle does not come with any kind of sound suppression system.

Furthermore, there are no aftermarket options, so you’ll just have to get used to the noise.

In all honesty, it makes a pretty thunderous bang for an air rifle!

As the model used for the HAM test was .22 Caliber, the muzzle velocity was approximately 1100 FPS, which at least doesn’t cross the sound barrier!

It should be noted that the .177 Caliber version possibly does not have the same result as lightweight alloy pellets.

Consistency

The Benjamin Maximus air rifle is not a synchronized PCP. Consequently, the muzzle velocity plunges as the gun fires.

Without any doubt, you would experience this drop quite often, but it is less rapid,

And as a result more controllable than that of Benjamin Discovery.

The trigger pull mass was a hefty standard of 5 Lb 13 Oz.

The accuracy was constant, as well — HAM tested 14.3 Grains pellets and higher shot with consistency and accuracy.

Sight And Scope

The most attractive air rifle, Benjamin Maximus, is fitted with iron sights.

The sights are modifiable and feature fiber-optic dots.

(For more on how many types of air gun sights are out there and which one is suitable for you, see this post.)

Benjamin Maximus VS Discovery

If you’re having a hard time choosing between the Maximus and the Discovery, please know that there are some important differences.

Physically, the Maximus valve is red, and the Discovery valve is silver.

The Discovery is made with wood stock. Internally, there is a difference in the diameter of the sleeves.

Crossman claims that the Benjamin Maximus has a maximum muzzle velocity with lead pellets of 85 FPS in .22 Calibers.

However, in the HAM test, it actually shot much faster with alloy pellets.

While testing, for every 30 shots taken with the Maximus, the muzzle velocity dropped by approximately 100FPS.

The test was taken with 14.35-grain JSB Exact Jumbo Express Diabolo pellets.

The muzzle velocity drop is not as radical as the Discovery, and it is more accurate.

So, can you say that Maximus gives up to 30 effective shots per fill?

The answer is yes, so long as you accept that a 100FPS drop from first to last shot is effective (That’s a 23% reduction).

Market Availability

The Benjamin Maximus air rifle is available online and is trouble-free to buy, while Crosman is aiming to bring it to most sport shooting stores.

The Benjamin Maximus offers a distinctive twelve-month warranty, as the manufacturer is well known for its customer care for having replacement parts available.

In case of any problems, their team is highly qualified and knowledgeable to support the customer with any query or confusion.

Most owners will be shooting their Maximus air rifle with hollow-point pellets from Crosman Premier,

Which are available everywhere, and give the best performance.

A trouble-free pump that loads to 2000 psi, the standard foster Q/D pack nozzle, and a great look,

It’s these characteristics that make the Maximus a top PCP air rifle.

(For more on the best PCP air rifles in 2021, see this post)

The HAM test found that the air pressure gauge was not situated in the pressure tube end, but rather it was inside the underside of the stock.

It is clear that while you are checking the pressure, it would not be necessary to look down the barrel.

This makes it perfect from a safety point of view.

This feature shows that Crosman does not compromise on safety to lower the cost for the air rifle.

However, the fiber optic sight could potentially harm the user as the open front is not protective.

The shooter can install the replacement, which is cheap and can easily be changed.

Anyhow, everyone who will be utilizing Benjamin Maximus will prefer to use the scope.

The Maximus has no de-gassing capability, so should you wish to eliminate air tube pressure

Then it is mandatory to remove the pressure by dry firing the gun.

As a whole, the Benjamin Maximus accessories are easily bought on the market.

Specifications

  • Manufacturer is Benjamin
  • Ammo type is pellets
  • 1-year warranty
  • .177 Calibers, .22 Calibers
  • Maximum velocity is 1000 fps
  • Muzzle velocity is 18ft/lbs.
  • 4-medium-high loudness
  • Barrel length is 26.25.”
  • Overall length 41.7.”
  • The shot capacity is 1
  • Barrel rifled
  • Front sight – fiber sight
  • Rear right – fiber optic
  • 11mm dovetail is scope
  • Single-stage trigger
  • Plastic butt plate
  • Suggested for small game hunting/plinking
  • Trigger pull is 3.75 lbs.
  • Bolt action
  • Manual safety
  • Pre-charged pneumatic
  • Single-shot function
  • Maximum shots per fill are 30
  • Body type is a rifle
  • Weight is 5 lbs.
  • The cylinder size is 135cc
  • Color is black
  • Ambi grip
  • Built-in pressure gauge
  • Metal breech
  • 2000 psi

Pros & Cons

ProsCons
  • Thumb-hole, all-weather synthetic stock
  • Gas piston-powered (second-generation design)
  • Decent velocity in both Calibers
  • Smooth cocking action
  • Picatinny rail optics mounting
  • Reasonable price
  • Great consistency
  • Great power and accuracy
  • 30 consistent shots per fill
  • A bit dull in appearance
  • High magnification power on a rifle with a range of 100 yards or less is not necessary
  • Stock is not that durable
  • The trigger is heavy to load
  • Loud in sound, therefore; noisy air rifle
  • Bolt action can be broken if not handled properly or loaded heavily again and again

Price

The Benjamin Maximus is considered so highly among customers for being so low in price.

The Maximus is the first PCP air rifle to break the sub $200 street price.

This feature alone makes it more valuable and outstanding.

The low price doesn’t always come with low quality.

The main issue here is that, like any of the PCP air rifles, it requires a consistent supply of high-pressure air.

The hand pump for the Benjamin air rifle is the lowest cost suitable pressure supply, and it costs around $180.

It is impressive to note that the price of the air rifle is close to the same as that of the pump!

You should note here that the price of air rifles is falling all the time, but the cost of the equipment to fill them is staying about the same.

Customer Reviews

The customer reviews for Benjamin Maximus are mostly favorable. 80% of customers are satisfied with the usability of the rifle.

Benjamin Maximus is famous for its reasonable price, of course.

However, the high accuracy of the air rifle is also deeply appreciated.

As the Benjamin Maximus kit comes with its pump, target, and a can of ammo, it has saved buyers a lot of money.

In the Benjamin Maximus air rifle review, shooters have found the air rifle to be lighter than they expected, so it is an appropriate choice for less physically strong shooters.

It does not feel that heavy on shoulders and allows you to have an excellent shooting experience without any significant barricade.

The stock of the air rifle feels natural and not too bulky.

Though the manufacturers allow warranty claims to be made in case of dropping, most customers haven’t needed it.

It shots H&N 10.65gr, pellets into a9/16’ group at a measure of 25 yards, and there is no complaint about the air leakage of the air rifle.

Reviewers have also lauded the power of the air rifle, which is way above expectations given the low price.

The appearance of the air rifle is also discussed and concurs that it has a lovely shape and color, but with time, the air rifle loses its attraction and becomes a bit faded in color.

For those who are in search of an attractive-looking air rifle that will keep its luster over time, perhaps a second thought is required.

Customers have even recommended many extras of the Benjamin Maximus air rifle;

First is the air pump that must not be disconnected without the drainage of the tank.

Secondly, the air must not stay in the air gun.

One customer complained in their review that the cocking mechanism broke off after only a few uses.

Though the air rifle is loud, there is no such complaint about the noise of Benjamin Maximus among the customer reviews.

Lastly, one widely made criticism of Benjamin Maximus is that the trigger is a bit heavy but still crisp and predictable.

Some customers regret that the air rifle is unavailable in .25 Caliber.

The design of the air rifle is a cause for consternation among customers, for the durability we mentioned above.

There have also been some claims that the bolt actions broke while loading, tying into the above point.

Conclusion

In summary, customers are mostly satisfied with the Benjamin Maximus for being so powerful at such a reasonable price. If you are comfortable with the noticable sound , then the Maximus is the best choice to have in your hands!
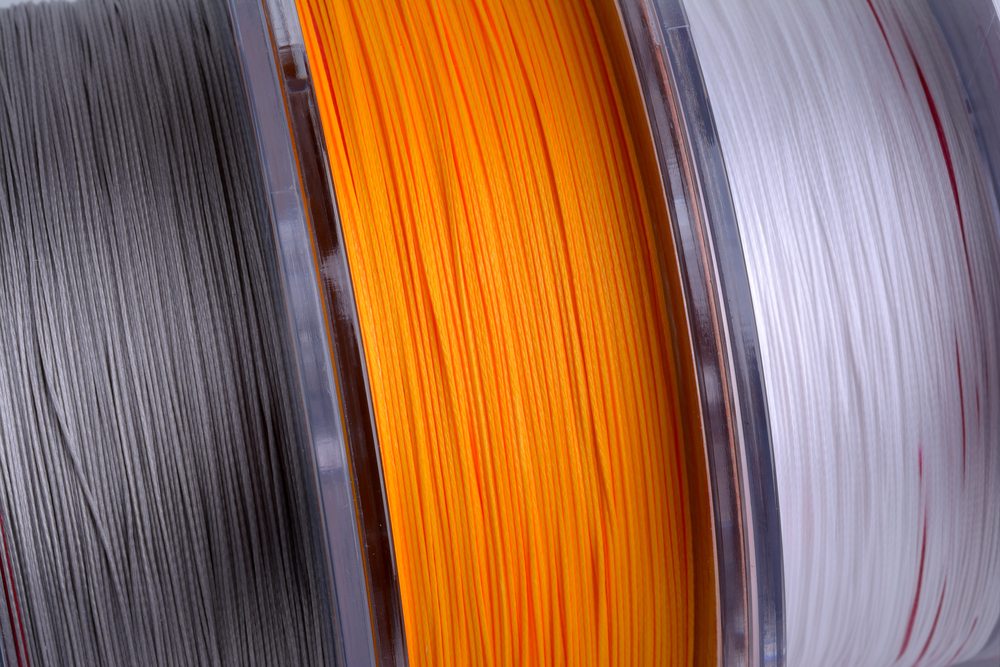
9mm Glock Models [Ultimate Guide]

0

For those of us who are into handguns and have not been living under a rock for the past 3 decades or so, the name Glock has come to be a household word in the shooting universe. People who may have never held a gun (let alone a Glock) recognize the name. It is estimated that 65% of U.S. police agencies use some form of Glock or another. It is time for us to take a deep dive into all you need to know about the Glock 9mm and the various models. We’ll look at:

The Glock story is quite remarkable considering that the man who designed the gun knew next to nothing about pistol design. Gaston Glock sold curtain rods and knives to the Austrian military, and was familiar with injection-molded parts. His team designed the Model 17 pistol to help the Austrian military who needed a new sidearm, and a firearms legend was born. An interesting tidbit is that the “17” represents the 17th patent issued to the Glock corporation, and this numbering sytems continues to this day.

Love ‘Em Or Hate ‘Em

Shooters tend to either be Glock fans or detractors – not much middle ground there. I am one of those rare birds who is in the middle with my opinion of Gaston’s wunderkind. I owned a Model 30 .45 ACP for a good while and had an aftermarket barrel for it so I could shoot my cast bullet handloads. It performed well without being overly showy. Gun eye candy it wasn’t. I called Glocks in another article I’d written the Chevy Impala of the pistol industry. The Impala is a good, mid-price car that is a popular choice among car buyers – reliable and well-designed without being overly showy.

The Glock, just like the Impala, gets the job done in a utilitarian manner. It gets the job done without costing an arm and a leg. And, they tend to be very reliable. All those police agencies buying into the Glock system is a pretty good testament to this.

Let’s Get Specific – the best sellers

Narrowing it down a bit, let’s look at Glock’s best sellers. In terms of caliber, the 9mm rules the roost for Glock. And, of over fifty pistol models Glock sells, their very-best-seller is the 9mm Model 19. This compact pistol packs 15+ 1 rounds in a smallish package. I know of many people who carry this model, as it seems to hit the optimal middle ground between concealable size and capacity. Now if that one isn’t for you you got another 19 main 9mm Glock models to chose from.

I put together a chart comparing specifications for the most popular models as well as an extended version comparing all twenty, for all you detail-oriented shooters. To be sure, some of these models are pretty scarce in gun shops as they tend to fulfill a very specific purpose (example: long-range competition, which the Model 34 excels at). So, before we crunch all the chart’s numbers, let’s look at the most popular Glock 9mms in some detail.

The Breakdown

In general, here is a quick, condensed listing of most of Glock’s models.

That’s the condensed list. Are you a numbers guy? Here is the extended version of all the 9mm Glocks available and you can click on the header to sort them (Table is best viewed on PC or Tablet):

Some Definitions, Please

Now, let’s look at the individual models, but before that, a little explanation is needed. If you glance at the table above, you will see “MOS” and “FS” listed after some models. MOS stands for Modular Optic System. Glock modified the frame on these guns by milling a slot in front of the rear sight to accept a red dot or other sight’s mounting plate. This is covered with a filler when not being used.

FS means the guns include Front (slide) Serrations. Those pistols marked FS have serrations on the front part of the slide to aid in manipulating the slide, in addition to the standard rear serrations. Many shooters asked Glock to include front serrations on all their newer guns. So far they only applied them to those guns that are marked FS.

Gen What? What’s The Difference?

An explanation of Glock’s generations is in order, if we are to keep this article as helpful as possible for those of you considering the purchase of a Glock. A “Generation” in Glock terminology equates to other companies coming out with “Mod 2”, “2.0”, etc. It basically designates a major overhaul of features on their guns. The feature changes (usually referred to as upgrades) could be several smaller ones, a few “big” important ones, or a combination of both in order to qualify to become the next generation. So, here we go, from the original Glock (now called Gen1) through the newest generation as of this writing, the Gen5.

Gen1 – Introduced in 1982

This is the original, bare-bones Glock Model 17. We can identify this gun by its relative lack of stippling or texturing on the frame and no finger grooves. This is the Glock that originally equipped the Austrian military when they placed an order for 25,000 pistols in 1983. Here’s an interesting note: In addition to the Model 17 pistols sold to the military were Model 18s – a Model 17 with selective-fire capability that fired between 1100-1300 RPM. Glock also offered a compensated version of this gun (Model 18C). This was technically a machine pistol and as such, was subject to the regulations and fees imposed on the ownership of machine guns as those individuals found out who attempted to buy one.

Gen2 – Introduced in 1988

Gen3 – Introduced in 1998

They gave the Model 22 RTF2 (.40 S&W) a rough, textured finish and fish-gill-shaped slide serrations and new checkering around the grip in 2009. Other models made available with the RTF2 treatment included the 31, 32, 23, 21, and 19, although not all had the fish-gill-shaped serrations.

Gen4 – Introduced at the SHOT Show, 2010

Gen5 – Introduced in August, 2017

OK…Got it? Now let’s look at some of the more common, readily-available models…

The 9mm Glock lineup

Glock 17

Starting with Model 17, we see a full-size frame and a longer barrel than the smaller models. This gun was the first Glock to go mainstream. This was mainly down to the adoption by the Austrian military and some police units starting in 1982. I remember when the gun came out – the first “plastic pistol” to go worldwide (the H&K VP70 technically was the first polymer pistol, introduced in 1970 for the German market).

The anti-gunners were all worked up that this “plastic gun” would be invisible to airport metal detectors, and some in the shooting community thought the gun would fail because of concerns they had as to the durability of the gun’s frame. Neither concern amounted to anything – they simply did not happen. Instead, the pistol’s reliability and innovative design endeared it to not only military and police units but to civilians as well. The gun has, on average, only 35 parts…talk about simplicity! My brother has a Gen 4 Model 17 that he really likes. I have shot it and was impressed. Due to its size, the 17 is not really made for concealed carry. It is more at home in a police officer’s Level 3 Retention holster, or in a tactical rig on the leg of a military SOE operative.

Variations

The Model 17 comes in Gen 3, 4 and 5 versions. Therefore, if you like finger grooves (or not), you are in luck – just buy the generation that has what you want. Need a competition gun? Pick up a Gen4 or Gen5 MOS and mount a red-dot sight on it. Want a plain-jane all-around shooter? Get a Gen3 and save some money (if you can still find one). The Model 17, as stated above, started it all.

Model 19

OK…now let’s look at a compact 9mm. Being the best-selling Glock make, the Model 19 has its share of enthusiastic users out there. Also, let’s not forget the after-market parts industry. The Model 19 probably has more third-party parts available than any other Glock. That said, the Model 19 is just about perfect for IWB- or OWB-concealed carry with its 4-inch barrel, slim inch-and-a-quarter width, and 15 rounds in the magazine. As I have written about before, this pistol is the benchmark other compact 9mms are judged against.

I know several people who carry a Model 19 and love it. It is no coincidence that Glock chose to release the Model 17 and the Model 19 first in their Gen5 configuration. The 17, with its law enforcement following, and the Model 19, being the best-selling Glock.

However…

The Gen5 Model 19 was generally well-received. The only complaint I’ve heard about the Gen5 Model 19 concerns the cutout at the front bottom of the frame. Some shooters say it hurts their hand, as it lies at the point where their hand’s heel and palm meet the frame. The sharp edge is the culprit, they say. This doesn’t seem to be an issue with the Model 17 due to its longer grip frame. Fortunately, they also addressed this issue in the new Model 45 (below).

Variations

Just as with the Model 17, there are several variations available for the Model 19. Depending upon your need, there is a configuration that should work for you. For competitors needing a red dot sight, the MOS models are indicated. You get the added benefit of forward slide serrations with those models, as well.

In addition to the availability of Gen3, 4, and 5 Model 19s, the fairly new 19X is now available as well. I think this one is worthy of a write-up here, and we’ll get to it next. You can also read my full Glock 19X review.

Glock 19X

To begin, it’s important to grasp what the Glock 19X is. It’s a G19 slide mounted on a G17 frame. Shorter barrels and longer frames are the current trends in weapons. That is precisely what the Glock 19x is all about. What’s the advantage of that? It provides a well-balanced and easy-to-control blasting experience. The redesigned Marksman barrel, paired with modifications to the handgun’s exterior frame, Glock claims, increases accuracy, longevity, efficiency, grip, and flexibility. Recoil management, on the other hand, was a piece of cake. Of course, there are still Glock haters and people who don’t like the adjustments. But for some shooters, as long as it is a ‘Glock’, it will be a fine gun.

What are the differences? With this version, you’ll get two reversed 19-round magazines and one 17-round magazine. The trigger pull is lighter than a standard 19. There’s also a lanyard loop and standard night sights. The most noticeable difference is the color, which is now coyote tan. The Glock 19x is bulky and difficult to conceal. Yet, the Glock 19x is still a competitive firearm and is useful for a variety of purposes.

When it comes to shooting, there are a few things to keep in mind. I fired a couple of different 9mm rounds through the 19X, and let me tell you, it’s a very accurate gun. The G19x could handle a wide range of bullet types, including hollow tips.

The snappy and smooth Gen 5 trigger is perhaps the G19X’s standout feature. The Gen 5 trigger incorporates a dual lock block pin assembly and a modified trigger bar. They altered the safety plunger on the Gen 5 to allow for a smoother trigger pull.

Glock 26

Here we have Glock’s double-stack subcompact 9mm. The Model 26 is a favorite backup gun among law enforcement officers and a prime candidate for purchase by civilian concealed carriers. At only a little over four inches high, this gun disappears in an IWB holster. When you carry a gun concealed, especially inside your waistband, the height of the gun is important.

The higher (or taller) the gun is, the harder it is to hide the grip frame as it tends to stick out and print under your garment. That’s why compact and subcompact guns usually come with a flush-fit magazine and sometimes an extended one as well. Most folks carry the flush-fit magazine in the gun with the longer one as a spare. The shorter the height of the gun, the easier it is to conceal, generally speaking. That’s why the Model 26 is so popular, being only a shade over four inches in height.

Glock still makes the 26 in Gen3, along with Gen4 and Gen5. This model is also able to use the greatest number of Glock 9mm magazines, eight. This gun’s standard capacity is ten rounds, but it can use all the Glock magazines up to thirty-three rounds. That’s versatility! Many people will buy a Model 26 in order to get the concealability it offers, and they also realize that they have the ability to use up to a thirty-three-round magazine. This is the best of both worlds for them.

Glock 34

The long-range specialist…the Model 34 was designed to be accurate “way out there.” It uses the longest barrel that Glock puts in a 9mm pistol, a 5.3-inch tube. This gun is a mainstay at competitions that require longer-range shooting. It is also a favorite of SWAT teams. What makes it so accurate? The longer barrel? The barrel length helps by ensuring that velocity is kept up. The main factor that aids accuracy is the approximate 7.5 inches between the front and rear sights. The further apart the sights are, the greater the chances of increased practical accuracy. Sights are about 5.3 inches apart on a Model 26 – that’s a pretty big difference.

The guns, obviously, serve two different purposes but I use the shorter-barreled gun as an example to point out just how long the barrel on the Model 34 is and how much different the sight radius is. Generalizations are difficult to make, but all else being equal, most shooters would be more accurate from 50-100 yards with the Model 34 than any shorter-barreled, shorter-sight-radius gun.

The fact that Glock sells a goodly amount of these pistols testifies to the fact that it works. Now…if we talk about intrinsic accuracy (the ability of the gun by itself to shoot accurately without human intervention), a lot of Glock 9mms would show they could be accurate at distance. Put a Model 19, say, in a Ransom Rest and see what it does at 50 yards. As for practical accuracy (a shooter holding the gun and shooting the best that he/she can), that’s where the longer sight radius comes in. Generally speaking, as stated above, the further apart the sights are, the better the gun’s practical accuracy.

The Model 34 is not made as a Gen3 gun, only a Gen4 and Gen5. With either of those, however, you can get the MOS version that really brings out the tack-driving accuracy these guns are capable of. Put a good optic on the gun and you’re good, as I said earlier, “way out there!” Such is the Model 34.

Glock 43

Now we come to the only single-stack 9mm that Glock makes. Here we have a gun that will just about fit in your pocket yet has the ability to put 6 + 1 rounds on a target very quickly and accurately. With a loaded magazine aboard, the gun only weighs about 21 ounces. This is a gun you can carry all day and forget that it’s there.

I have a friend on a local police force who traded a Beretta to acquire a Model 43. He told me he’s had a little trigger work done on the gun, but that’s the extent of his mods. He carries it daily. I’ve had the chance to shoot with him and his partner at my backyard range and well, let’s just say that I wouldn’t want to be on the other end of his Model 43’s muzzle. He is good with it, to put it mildly because he practices with it a lot.

If you are looking for either a primary concealed carry weapon or a backup, the Model 43 is a good choice. It only comes in one flavor right now – you can’t get a Gen5 version – but the one is good enough. A Model 43 and a couple of extra mags will make you good to go. I mentioned carrying this gun in your pocket. This is feasible, and a viable way to pack the 43. This is the only 9mm Glock that I know of that will fit in a pocket. The Model 42 .380 will ride in your pocket, but it’s not a 9mm.

My police officer friend Austin tells me he loves the little gun, as do many police officers who carry them in pockets, on their ankles, inside their waistbands, or anywhere else. It’s the de facto designated go-to

The Best Fishing Knots Of All Time [Ranked Strongest To Weakest]

0

It’s fishing knot time!

Do you want to know something that might shock you about fishing knots?

After testing hundreds of fishing knots over the past couple of years, I’ve learned one very important lesson…

The “100% fishing knot” is a myth.

Why?

Physics.

Yes, simple physics is the reason why. Pretty much all knots will create a weak point on the line given that it creates a point on the line where a max load is hitting it from more than just one direction.

And although there are some instances where the main line (or leader) will break before the knot fails, there is no single knot that can always do that with all types of lines.

So step #1 in using the strongest possible knots for your fishing needs is to understand that there is no such thing as a “100% knot”…

And if you hear someone say that their knot is 100% without any exclusions, then they likely have never tested it out in a controlled test with multiple lines, so I be wary of their recommendation.

Here’s the hard truth…

Your favorite fishing knot is weak, and so is mine…

This is simply due to the fact the contorting line and creating hard turns that get put under tension will always create a weak point in the line making it the weakest point in the system (assuming that the main line is not compromised).

Note: This weak point is almost always at the first hard turn in the top section of the knot coming from the main line, so it most often leaves a clean break which looks like the mainline simply snapped when an angler examines the line after a break-off.

Now that we’re past the first hurdle (acceptance), step #2 is to actually test our knots to make sure that you don’t lose the fish of a lifetime due using a knot that isn’t the absolute best for each connection in your line system.

To help save you time in testing knots, I’ll be displaying results from my continued testing on this page.

Best of all, the individual fishing knots will be ranked based on their strength & performance results for the following knot connection categories:

Knot Category Groupings

Feel free to use the links below to skip down to the knot connection that you’re most interested in. Otherwise, you can simply scroll down to see all of the knots.

  • Best Knots For Braid
    • Braid to Leader Knots
    • Loop Knots (Line Doubling Knots)
    • Doubled Line to Leader Knots
    • Braid to Swivel/Lure/Hook Knots
  • Best Knots for Monofilament & Fluorocarbon
    • Mono to Mono Knots
    • Mono to Hook (Overview)
      • Mono to Hook/Lure Knots (Loop)
      • Mono to Hook/Lure Knots (Snug)

And if you don’t see your favorite knot listed, just leave a comment on the bottom of this post (click here) and I’ll add it to my list of fishing knots to evaluate.

So let’s get started…

Definition of Bad, Good, & Great Fishing Knots

best fishing knots

Before going on the knot strength results, it is essential that we first all understand the different categories of knots in terms of their strength:

  • Bad Knot: unravels/slips when under heavy tension
  • Good Knot: does not unravel or slip (it breaks before unraveling)
  • Great Knot: does not unravel/slip and has a higher breaking point than “Good knots”

How To Determine A Bad Knot

A bad knot is very easy to see because it leaves behind the telltale sign of trouble… the curly tag end.

Yes, the curly tag end that you may have seen after a break-off means that the knot used was either a bad knot, or there was a poor job in tying a good/great knot.

So if you ever see the curly end after a break-off, do not tie the same knot the same way because it’ll likely happen again.

How To Determine A Good Knot vs. A Great Knot

The difference between a Good knot and a Great knot requires the act of intentionally breaking them under a controlled test to see how much tension they can hold before the break occurs.

This is the missing link that most anglers overlook because it requires time and effort.

I am the perfect example of this because I was even fishing tournaments with money and pride at stake and never even bothered to actually test my personal knots.

And when I finally did test my knots, I was shocked at the results… the very first test I did revealed that I was getting 30% less strength than I otherwise would have had I been simply using a different knot for my line to leader connection (replacing the Double-Uni knot with the FG knot… both shown below).

So I highly recommend testing out your knots. And if you’d like a shortcut, this page shows the results from my testing below to help guide you to the best knots from my many tests done so far.

And I’ll continually update this “best fishing knot” post as more and more knots are tested so that you can have the latest and greatest data.

So if you want to save time while maximizing your line strength, this post is for you.

What Are The Best Fishing Knots?

There are many different types of lines which in many cases have completely different textures, sizes, and friction coefficients.

So we’ll be evaluating knots based on the type of line used within these general line categories:

  • Braid
  • Monofilament/Fluorocarbon
  • Wire (Coming soon)
  • Flyline (Coming soon)

And to truly evaluate a fishing knot, it is essential to focus each test on a specific type of connection because a knot that is very good for line-to-line connections is often not good at all for line-to-lure connections (and visa-Aversa).

So we’ll break out the rankings shown below into the following connections types for each line category:

  • Line-to-Line Knots
  • Line-to-Hook/Lure Knots [Snug]
  • Line-to-Hook/Lure Knots [Loop]

Let’s get started!

Best Fishing Knots for Braided Line

braided fishing line

Braided line has quickly become an extremely popular choice for inshore anglers because it allows for longer casts and better feel of lures given that its strength to diameter ratio is so much higher than mono/fluoro lines.

Plus, it has very little stretch which enables the angler to feel even the lightest of taps on the other end of the line.

But braid requires much for friction within the knot compared to monofilament so it almost always requires a different knot than the traditional knots used on mono.

Best Braid to Leader Knots

To kick things off, we’ll start with the most important of all connections for most saltwater anglers who use a lighter main line to connect to a stronger leader.

This setup is becoming very common because it allows for the overall system to have optimal casting performance (due to the lighter line in the reel) while having a stronger leader line at the business end to hold up to the sharp teeth and/or rough mouths of the target species.

Fluorocarbon is the most commonly used monofilament leader these days since it’s known for being less visible in the water while also being more resistant to abrasions, so this analysis is focused on connecting a braided line to a fluorocarbon leader.

Here are the top 5 ranking knots based on the knot tests I’ve done so far:

  1. PR Bobbin Knot [requires tools]
    • Pro: This is an extremely strong knot when tied correctly
    • Con: Requires tools to tie and takes a long time (extremely tough to do while on the water)
  2. FG Knot*
    • Pro: Thinnest knot I’ve ever seen while also having the highest breaking strength.
    • Con: Requires a strong cinch before cutting the tags so that it fully locks into place.
      • Note: Only use this knot if tying a braided line to a stronger mono/fluoro leader.
  3. 6 Turn Surgeon’s Knot
    • Pro: Very quick to tie while having a shocking strong breaking point and can be tied using lines of any size
    • Con: Bulkier and slightly weaker than the FG knot
  4. Doubled-Over Double Uni Knot
    • Pro: Easy knot to tie and it can be used for all connections
    • Con: Up to 30% weaker than the FG knot in my tests
  5. Crazy Alberto Knot
    • Pro: Nice low profile knot with a strong breaking point
    • Con: Up to 30% weaker than the FG knot in my tests
  6. Improved Albright
    • Pro: Nice low profile knot with a strong breaking point
    • Con: Weaker than the FG knot and the Crazy Alberto
  7. GT Knot
    • Pro: The viral version is easy to tie
    • Con: This knot isn’t nearly as strong as it’s touted for lighter lines

Click here to see the first contest I hosted for this connection.

Note: If your favorite knot isn’t included, leave a comment below and I’ll test it out and add it to the list.

Best Doubled Braid-to-Leader Knots

Many anglers like to double the braid by forming a loop at the end of the braid and then tying a line-to-line knot to connect the doubled braid to the leader.

In many instances, this does increase the overall line strength for anglers who are using a lighter braid relative to the leader.

However, the FG knot tied on a single line has proven to outperform the doubled knot connections in most of my testing. The only combination that consistently beats the single line FG knot is the use of the FG knot to connect a doubled line formed by the Bimini Twist to the leader.

Line Doubling Knots [Braid]

  1. Bimini Twist
    • Pro: Extremely strong doubling knot
    • Con: It often requires more twists (30+) with braid so that it won’t slip
  2. Spider Hitch
    • Pro: Faster to tie than the Bimini Twist
    • Con: Not as strong as the Bimini Twist
  3. Surgeon Loop (6-turn)
    • Pro: Extremely fast to tie
    • Con: Not quite as strong as the Bimini Twist

Doubled Line To Leader Knots [Braid to Fluoro]

  1. FG Knot
    • Pro: Thinnest knot I’ve ever seen while also having the highest breaking strength.
    • Con: Requires a very strong cinch before cutting the tags so that it fully locks into place.
      • Note: Only use this knot if tying a braided line to a stronger mono/fluoro leader.
  2. No-Name Knot (aka- Bristol Knot)
    • Pro: Quick and easy knot to tie
    • Con: Not as strong as the FG knot
  3. Yucatan Knot
    • Pro: Quick and easy to tie (very similar to Bristol knot)
    • Con: Not as strong as the FG knot

Note: If your favorite knot isn’t included, leave a comment below and I’ll test it out and add it to the list.

Best Braid-to-Swivel/Lure/Hook Knots

This next category is focused for anglers who use braided line and like to use swivels.

But it could also be useful if you like to use connect your braided line directly to your terminal tackle (although I do not recommend tying directly to your lure or hook using braid because fish can see it so much better than mono/fluoro… instead, use a ~20 to 30 inch leader in between your braid and lure/hook).

  1. Braid Uni Knot
    • Pro: Great knot that is very strong and easy to tie
    • Con: Although an easy knot to tie, some are faster
  2. San Diego Jam Knot
    • Pro: Strong knot that is easy and quick to tie
    • Con: Not quite as strong as the Modified Uni Knot
  3. Palomar Knot
    • Pro: Very fast and easy to tie
    • Con: Not as strong with braid as it is with mono
  4. Orvis Knot
    • Pro: Quick and easy to tie
    • Con: Not as strong with braid as it is with mono
  5. Improved Cinch Knot
    • Pro: Quick and easy to tie
    • Con: This knot doesn’t perform well with braid (prone to slippage)
  6. Clinch Knot
    • Pro: Quick and easy to tie
    • Con: This knot doesn’t perform well with braid (prone to slippage)

Click here to see results from a contest I hosted for this connection.

Note: If your favorite knot isn’t included, leave a comment below and I’ll test it out and add it to the list.

Best Fishing Knots for Monofilament/Fluorocarbon Line

best fishing knots for mono line

Monofilament line is used by almost all anglers in some capacity, so I’ve done many tests with knots using mono line.

For tests that I’ve done for my personal use, I focused on Fluorocarbon line, which is a specific type of mono.

Many anglers use Fluorocarbon for their leader material since it’s known to be stronger the less visible than traditional monofilament line.

Here’s what I’ve tested so far:

Best Mono-to-Mono Knots

Here are the top mono-to-mono knots that I have tested:

  1. Blood Knot*
    • Pro: Easy to tie with lines of similar size
    • Con: Not as effective with lines of different diameters
  2. Double Uni Knot
    • Pro: Easy knot to tie and it can be used for all connections
    • Con: Not as fast or strong as the Surgeon’s knot
  3. 3 Turn Surgeon’s Knot
    • Pro: Extremely easy and fast knot to tie with very strong holding strength
    • Con: Need to tie this before tying on a lure or hook
  4. SS Knot
    • Pro: Versatile knot connection with an impressive breaking strength
    • Con: Not quite as fast or strong as the Surgeon’s knot
  5. Albright Special
    • Pro: Easy knot to tie that looks very nice once completed
    • Con: Not as fast or strong as the Surgeon’s knot

Click here to see results from a contest I hosted for this connection.

Note: If your favorite knot isn’t included, leave a comment below and I’ll test it out and add it to the list.

Best Line-to-Hook Knots [Mono/Fluoro]

Now that we covered the very important line-to-line connection, let’s dig in to the best fishing knots for connecting our hooks and lures to the end of the line.

For this category, we’ll split it up into two sections to cover the two core different types of connections:

  1. Loop Knot – Leaves a loop so that the lure/hook has more range of motion in the water (less strength compared to snug)
  2. Snug Knot – Line hugs around hook/lure eye forming a strong connection (less range of motion)

Note: I’ve specifically focused on fluorocarbon line since it’s the most popular for saltwater anglers… if you want me to test these with standard mono, just let me know and I’ll add it to this post.

Best Loop Knot to Lure/Hook

When fishing with artificial lures, using a loop knot is an advantage because it allows the lure to have more motion in the water which most often leads to more strikes.

But the downside is that loop knots are not as strong as snug knots, so that needs to be taken into account when selecting your leader line size and when setting drag.

Here are my favorites:

  1. Rapala Loop Knot
    • Pro: The strongest loop knot I’ve tested so far
    • Con: Takes a bit longer to tie than many others and leaves a tag end facing up which can snag weeds/debris
  2. Non-Slip Loop Knot (aka. Kreh Loop)*
    • Pro: Very quick and easy to tie and has a tag end that points down towards the lure (more weedless)
    • Con: Just a tad weaker than the Rapala knot
  3. Figure 8 Loop Knot
    • Pro: Tested to be very strong (very close to Rapala Loop Knot
    • Con: Takes longer to tie than the Non-Slip Loop knot and does not have a weedless tag end
  4. Perfection Loop Knot
    • Pro: Strong loop knot that is quick to tie
    • Con: Tougher to tie since this knot requires the hook/lure to pass through a loop
  5. Canoe Man Loop Knot
    • Pro: Extremely fast loop knot to tie
    • Con: Strength test was great with traditional mono, but it didn’t perform nearly as well with fluorocarbon

Click here to see the first contest I did with this important connection.

Note: If your favorite knot isn’t included, leave a comment below and I’ll test it out and add it to the list.

Best “Snug” Knot to Lure/Hook

When going for maximum strength when having action in the water is not as important, then the snug knot is the way to go because a good snug knot will be a significant amount stronger than a good loop knot.

Here’s my ranking of the Snug knots that I’ve tested so far:

  1. Palomar Knot
    • Pro: Very strong knot that is easy to tie when using bare hooks
    • Con: Can become cumbersome when using larger lures because it requires the lure pass through a loop
  2. Clinch Knot
    • Pro: Quick and easy knot to tie
    • Con: Not as fast and easy as the Orvis Knot nor as strong as the Palomar Knot
  3. Uni Knot
    • Pro: Good knot that is fairly quick to tie and can be used for almost any connection
    • Con: Not quite as strong as the Palomar knot nor the Clinch knot
  4. Orvis Knot*
    • Pro: Very quick and easy knot to tie that is very strong
    • Con: Not quite as strong as the knots listed above
  5. Double Davy Knot
    • Pro: Very quick and easy to tie (just 1 more twist vs. the Davie Knot)
    • Con: Not quite as strong as the Orvis knot which is just as easy to tie
  6. Davy Knot
    • Pro: Very quick and easy to tie
    • Con: Not quite as strong as the Orvis knot which is just as easy to tie

Click here to see the first contest I did with this important connection.

Note: If your favorite knot isn’t included, leave a comment below and I’ll test it out and add it to the list.

More test data getting added soon, so be sure to bookmark this page!

Conclusion

best fishing knots

Of the many factors that determine if you land the fish of a lifetime that you hook, the one that we have 100% control over is the quality of the knots that we use.

So it’s essential for us to select the absolute best fishing knot for each connection to get the most overall line strength.

You have certainly heard the saying, “A chain is only as strong as its weakest link…” Well, a rod, reel, and an angler are only as strong as the knot between them and the fish.

Make it count.

There isn’t (and never will be) one fishing knot that can do everything with all line types and connection needs, so make sure to be mindful of the knot options you have for each connection need you have.

This post will continually grow over time as knot suggestions come in, so leave a comment below letting us know of any other knots you’d like us to add to this analysis.

Note: The * symbols next to the knots listed above are the ones that I personally use for each of the respective connections.

The tests have been done using 10 to 20 lb PowerPro braid tied to 20 to 30 lb Ande monofilament and Seaguar fluorocarbon.

Related Posts:

1. How To Tie The Perfect Leader Assembly For Inshore Fishing

2. What Is The Proper Drag Tension To Use For A Fishing Reel?

3. How To Get A Hooked Fish Out Of Structure Without Breaking Off

4. The Best Online Fishing Club…

P.S. – If you think your angler friends or fishing networks would enjoy seeing this, please Tag them or Share this with them. You Rock! Pa-POW!

15 Tarp Shelter Designs For Simple Camping Comfort

0

15 Tarp Shelter Designs

Having in your survival bag a versatile item like a tarp will come in handy during an emergency situation. It will help you gather water, camouflage your supplies and it will provide a good shelter in case nothing else is available. Improvising a basic tarp shelter can keep your head dry, it will help you conserve heat and it provides a sense of comfort and safety.

A polyethylene tarp will go a long way and you should definitely get one for your bug out bag. It is lightweight, durable, draft-proof and waterproof. They come in a variety of sizes and color, and they won’t burn a hole in your wallet.

Making a tarp shelter is easy and there are dozens of different ways and patterns to construct a suitable shelter with only a single tarp.

Before you make your tarp shelter you must consider the following:

  • The location of your shelter is very important and you should stop and think about it before building your shelter.
  • The direction from which the wind is blowing should be taken into account or your shelter will sail away.
  • The ground should be comfortable enough if you plan to get some sleep. Pointy rocks will keep you awake.
  • The ground should slope slightly for the water to runoff.
  • If there is no slope, you will have to dig some trenches around your shelter to aid drainage.
  • Take into account the purpose of the shelter and make it as large as it needs to be.
  • Consider the weather and chose a model that is stable and won’t collapse if rain or snow are expected.

For all the shelter examples provided here, you can use a 10X10 foot tarp.

1. The A-frame tarp shelter

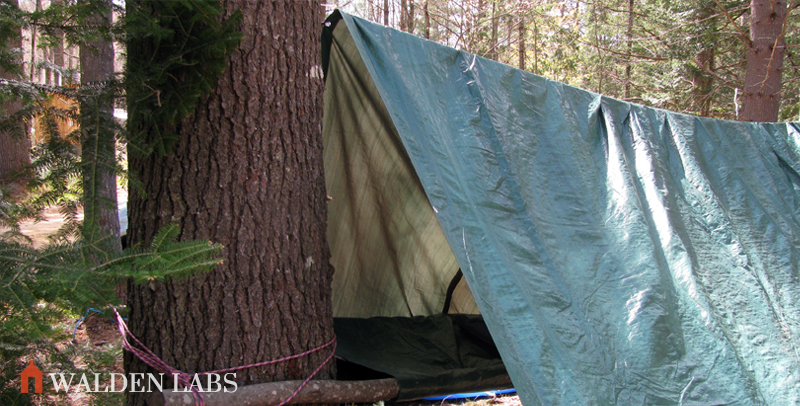
Basic-A-Frame-tarp-shelterThe A-Frame shelter is probably the most common shelter one can make. It can be made by stringing the paracord between two trees. Draping over the tarp and staking it down are the final steps required to make this common shelter. The 30-degree angle of the tarp’s roof will create a ten foot-long living area. The shelter will be 8.6 feet wide and 2.5 feet tall. This shelter provides a good rain and snow runoff and a good wind deflection. The downside of the A-frame shelter is that there is no floor and if you haven’t stretchered the paracord tight enough, there will be sagging in the middle.
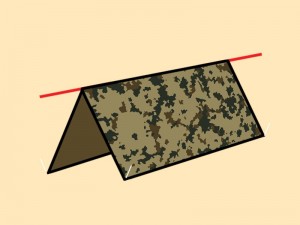
2. The Sunshade tarp shelter

Basic-Sunshade-tarp-shelterTo create this type of shelter you will need four anchoring points to which you will tie the paracord. This is a shelter parallel to the ground and it’s designed to provide 100 square feet of shade against the sun. some people use this type of shelter during the rain because the water will pool in the middle and it’s easier to collect it. To make it sturdier you can add support poles to the corners. This basic sunshade tarp shelter will provide maximum protection against the sun, but it’s not suitable for cold weather and it can’t support rain for long.
3. The Lean-To tarp shelter

Preppers-Will-Basic-Lean-To-tarp-shelterThis is another shelter that it’s simple to make and it’s great for deflecting wind or providing sunshade. To make this shelter you need to secure the tarp to the ground on the windward side and support it with the paracord between to anchor points. A 30 degree angle of the tarp will provide five feet of height and 8 feet of width under the shelter. This is an “on the go” shelter because it’s easy to erect and you can quickly take it down. It provides great wind deflection and it will keep you safe from rain or sun heat. The downside of this shelter is that there are not sides and no floor to offer protection against other elements.
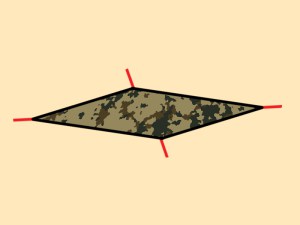
4. The tube tent tarp shelter

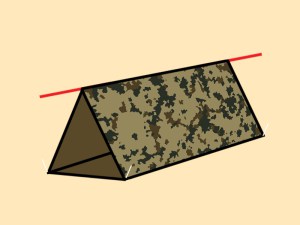
Preppers-Will-Tube-Tent-tarp-shelterThis is a sturdy shelter that provides a floor and, if properly secured to the ground, will prevent rain from seeping in. To make it, you will need to secure the paracord between to trees and drape over the tarp with the opposite ends secured together. The sixty degrees walls will provide 3 feet of width and almost 3 feet of headroom. This should be enough room for a single adult.
5. The mushroom fly tarp shelter

Preppers-Will-Mushroom-Fly-tarp-shelterThis type of shelter is very similar to the basic sunshade shelter but it adds a central support pole at the tarp’s midpoint. It is designed for rain or snow runoff and it’s pretty sturdy if you secure the four corners of the tarp well enough. You can make it as tall or as short as you need depending on the length of the pole. This shelter provides a great runoff for rain or snow, but it doesn’t have any sides to protect you from the wind or cold.
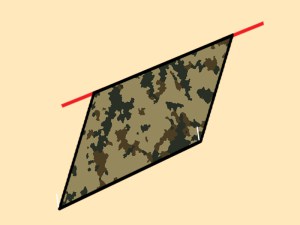
6. The cornet tarp shelter

Preppers-Will-The-Cornet-tarp-shelterThis shelter utilizes the entire length of the paracrod strung from a tree to the ground. The tarp is draped over the paracord diagonally, while the leading edges fold under to form the floor. The corner of the shelter must be faced towards the direction of the wind. You will also need to tie off some drip lines above the entrance of the shelter to prevent rain from running down the paracord and into the shelter. This is a good design for wind deflection and rain/debris shedding. The downside of this design is that it doesn’t offer too much head room and if you are a tall person, you might not have enough room for you and your gear.
7. The dining fly tarp shelter

Preppers-Will-Dining-Fly-tarp-shelterThis is the favorite design for many camper and it’s a simple open air cover. It provides a good sunshade and enough headroom without sacrificing too much space. It keeps away rain but it provides limited protection against the other elements due to its lack of sides. When properly tied down and staked, the dining fly becomes a sturdy shelter and the height of the support pole will dictate the amount of headroom. This is a good model for desert survival because it provides good ventilation and adequate coverage.
8. The wind shed tarp shelter

Preppers-Will-Wind-Shed-tarp-shelterThis type of shelter requires a little practice to get it done the right way. You will need to fold the tarp into thirds and make sure the leading edge of the roof hangs over the groundsheet for adequate rain runoff. The main ridgeline has to be secured with paracords while stretched between two trees. A length of paracord must be added to the bottom fold, where the back panel meets the groundsheet. It provides great wind deflection, but it requires a lot of secure points. The hanging roofline could also sag under rain loads and channel the water onto the groundsheet.
9. The Fold-Over Wind Shed tarp shelter

Preppers-Will-Fold-Over-Wind-Shed-tarp-shelterThis design is similar to the traditional wind shed, but it provides more coverage by sacrificing the groundsheet. The height of the paracord ridgeline determines the angle of the roof and the footprint of the shelter. It provides great wind deflection and rain runoff, but it doesn’t protect completely against the elements due to its lack of floor, flaps or sides.
10. The diamond fly tarp shelter

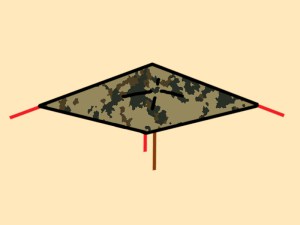
Preppers-Will-Diamond-Fly-tarp-shelterThis shelter is suitable for two persons and it’s easy to make. You will need to secure the paracord to a tree and the ground, and drape over the tarp at a diagonal. The length of the paracord and the angle with which it is tied to a tree will determine the overall headroom and width of the shelter. The steep walls will shed rain and will deflect wind if they are well staked. This model will require drip lines, just like the cornet shelter. Depending on the size of the tarp, this shelter can accommodate more than two persons or more equipment, but the lack of a floor and flaps won’t keep out the elements. If the wind changes direction frequently, the shelter can be compromised.
11. The arrowhead shelter

Preppers-Will-Arrowhead-tarp-shelterStart the construction of this shelter by supporting the center of two perpendicular edges with five foot long poles or by attaching those edges to trees using a paracord. You will need to stake to the ground the opposite corner so that it creates a series of four triangles. This design will provide 35 square feet of living space and five feet of headroom at the opening. The flap will hand down and make a partial closure. The poles need to be supported by paracord tie-downs. This shelter deflects wind with its low profile and it’s very roomy.
12. The half box tarp shelter

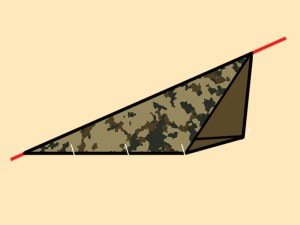
Preppers-Will-Half-Box-tarp-shelterThis shelter will require some time to be built and you need to use at least four support poles and as many or more tie downs to hold it all up. The footprint provided is 25 square feet and it has two sides of protection from the elements. If not supported in the middle or kept taut from the sides, it will sag under the weight of water or snow. A full one quarter of the tarp goes unused and folded up behind the rear corner. This type of tarp shelter provides good sunshade throughout the entire day if you position it properly.
13. The barn stall tarp shelter

Preppers-Will-Barn-Stall-tarp-shelterTo make this shelter you can either use four five foot poles for support or two poles and a paracrod attached to two anchor points. The front is supported by poles and the single 90 degree wall provides enough protection, although strong wind can damage the entire structure. This shelter produces a 50 square feet living area but it has no floor. It’s simple to build, but it doesn’t provide adequate protection from the weather.
14. The Square arch tarp shelter

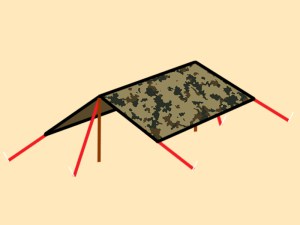
Preppers-Will-Square-Arch-tarp-shelterAs the name implies, this shelter is an arch with a square top. Starting with two parallel lengths of paracord attached to anchor points approximately 3 feet apart and 3 feet high, drape the ground cloth over the two lengths of paracord and secure the long ends of the tarp with stakes. This is a good shelter for narrow spaces, but the odds of finding four anchor points in the needed proximity is quite low. To allow rain to runoff, make sure you secure one paracord slightly higher than the other. This shelter is three feet wide, three feet wide and ten feet long.
15. The shade sail tarp shelter

Preppers-Will-Shade-Sail-tarp-shelterThis is an easy and quick to build shelter and it requires to diagonally drape the tarp over a length of paracord attached to two anchor points. The opposite corners of the tarp are staked to the ground. This is an open and airy shelter and the lower the angles of the sides are, the better it will deflect wind and the more shade will provide. It provides all day shade and it requires minimal stakes and set up, but it’s not weather resistant and it will not keep you dry.
What not to do when building a tarp shelter:

  • Don’t build your shelter over an ant nest or any type of burrows
  • Don’t set up your shelter beneath a dead tree or in the vicinity of one
  • Don’t attach tarp lines to a tree standing alone or to tall trees. Always go for the short tree in a group of taller trees.
  • Don’t set up your shelter below the high tide mark of a shoreline
  • Don’t set up your shelter on top of a hill or ridge.
  • Don’t set up your shelter on a river bank

Making a tarp shelter is not rocket science and with a little bit of practice anyone should be able to make one. Learning these tarp shelter patterns will come in handy during an emergency preparedness situation.

Stay safe and God Bless!

The UNBREAKABLE Fishing Knot – PR Bobbin Knot [Free PDF Guide]

0

PR Bobbin Knot

We couldn’t believe it when Captain Dylan Hubbard first told us that the PR Bobbin Knot has 100 percent knot strength… but so far it’s proven to be true.

The PR Bobbin Knot is the only fishing knot guaranteed to hold up 100 percent of the time (assuming you tie it correctly like Joe from Dogfish Tackle shows you below).

What does 100% knot strength mean?

It means that your fishing line — braid, fluorocarbon or monofilament — will break before the PR Bobbin Knot will (100% of the time).

Capt. Dylan says this is the ultimate knot for braid to leader connections and is unrivaled in its strength.

Its an offshore angler’s dream and will hold up against the biggest fish out there.

That being said, this is not the simplest knot to tie. It takes practice and a bobbin tool to properly tie it.

It’s also best to tie the PR Bobbin Knot the night before your fishing trip.

We created this article to be the ultimate tutorial for the PR Bobbin Knot.

To do this, we created a FREE PDF DOWNLOAD with the full guide on how to tie the PR Bobbin Knot.

We also teamed up with Capt. Dylan and Joe from Dogfish Tackle to create a video tutorial on exactly how to tie the PR Bobbin Knot.

What You’ll Need To Tie The PR Bobbin Knot

Bobbin for the PR Bobbin Knot

You need to make sure you have the following items to tie this knot.

What you’ll need:

  1. Bobbin – This is a small tool (pictured above) that loads the tag end of your mainline up onto the tool in order to make the wraps you need to tie the PR Bobbin Knot. The bobbin helps you keep line tension during the tying process.
  2. Mainline – You need a large amount of mainline tag end to spool onto your bobbin for the knot.
  3. Leader Line – You need a large spool of leader line to attach to the mainline for this knot.

The bobbin is necessary for this knot and can be found at most tackle shops – especially those that cater to offshore anglers.

Bobbin prices range from about $25-80.

Note: If you don’t like to use knots that require tools, then be sure to learn the FG knot if you want to maximize the strength of your braid to mono/fluoro connections.

How To Tie The PR Bobbin Knot [Video Tutorial]

In this video, Capt. Dylan and Joe from Dogfish Tackle show you how to tie the PR Bobbin Knot and what you’ll need to do it.

Just wait until you see how tight this knot gets!

CLICK HERE to see a great tutorial showing how to tie the FG knot that was referenced in the video as the strongest knot that can be tied while out on the water without any needed tools.

Conclusion

pr bobbin knot

If you’re looking for the absolute strongest line-to-line knot in the game, the PR Bobbin Knot is your best choice.

Although it is intricate and takes some practice to tie, it won’t let you down and will give you the best chance possible at landing a trophy fish of any size.

For the best results, tie this knot the night before your trip. This knot can be very difficult to tie once you’re on the boat, especially offshore while bartering with big swells.

If tied properly, this knot will not fail you.

If you’re looking for other fishing knots – such as the best terminal connection knots, loop knots and more – click here to see our fishing knots strength ranking page.

If you have any questions about the PR Bobbin Knot or how to tie it, let us know in the comments below… we’re here to help you!

Tight Lines!

Related Posts:

1. How To Tie The FG Knot [Picture & Video Tutorial]

2. How To Tie The San Diego Jam Knot [Video Tutorial And Step-By-Step Instructions]

3. How to Tie the Blood Knot [Video & Picture Tutorials]

P.S. – Be sure to share this post with any of your fishing friends and tell them that this knot is the strongest fishing knot there is!

Palomino Trout: What Are They and How to Catch Them

0

It’s not uncommon to find gold in the mountain streams and rivers of the Appalachian mountains, but many anglers venture into these hills in search of a different kind of gold.

The golden rainbow trout is one of the most unique fish in North America and has captured the attention of anglers for more than half a century.

These fish are also known as “bananas” or “lightning trout”, and they are known for their distinctive bright yellow coloration. This golden coloring comes from breeding a West Virginia rainbow trout with a classically colored rainbow trout to create this striking hybrid.

Palomino Trout or Golden Rainbow Trout

Their origins can be traced back to the Mountain State of West Virginia, and they are vastly different in appearance from any other fish you’ll find in the state. The emergence of the golden rainbow trout began in 1955 when workers at a fish hatchery noticed a unique fish that stood out from the rest.

The hatchery-raised rainbow trout, but this one bright fish appeared quite different. Instead of having the same pigmentation as a regular rainbow trout, the trout’s body color was bright yellow. This was due to an extremely rare genetic mutation that normally pigmented rainbow trout do not possess.

Palomino Trout vs Rainbow Trout

This one fish was taken and studied by scientists who worked to produce a new species of golden trout through selective breeding with typical rainbow trout. By selectively breeding this single rainbow trout, the golden rainbow trout originated and has since become one of the most sought-after trout species in fly fishing.

Through these cross breed species of such bright fish, biologists have gone on to produce vast numbers of self-sustaining populations in small creeks throughout North America. The golden rainbow trout or palomino trout has now become one of the most popular trophy fish in the country.

It’s one of the most famous trout species in sport fishing or fly fishing and is sought by nearly every avid angler with a fly rod. From one single fish in West Virginia, an entirely new cross breed has emerged and is bred and sold from fish hatcheries all throughout the United States.

The golden rainbow trout is a beautiful fish that’s known by a number of different names, such as the palomino trout, palomino rainbow trout, golden rainbow, banana trout, golden trout, golden rainbows, and lightning trout. They are also sometimes even called swimming bananas.

Palomino Trout Facts

This article covers all the facts and information you need when it comes to fishing for golden rainbow or palomino trout.

Where to Find Palomino Trout

Palomino trouts have been stocked from various fish hatcheries throughout West Virginia and other states in the eastern part of the country. They are now commonly found in West Virginia and have self-sustaining populations of palomino trout all throughout the Great Lakes region and even the Pacific Northwest.

Golden rainbow trout can usually be caught in most areas where you might expect to find other trout, especially brown trout, brook trout, lake trout, and even salmon species like cutthroat trout. Palomino trout are capable of living their entire life in the wild and can reproduce, unlike other hybrid species like tiger trout.

Palomino Trout Characteristics

Palomino trout (Oncorhynchus mykiss aguabonita) are very similar in their physical appearance to other trout species. Despite being such bright fish, their physical traits – skin color aside – look almost indistinguishable from that of brook trout and regular rainbow trout, as well as brown trout.

Golden rainbow trout, much like rainbow trout and brown trout, will develop a large hooked jaw as they mature. Like other trout, palomino trout have a similar adipose fin, which is found between the dorsal fin and the caudal fin, or tail.

Golden trout are known for having white-colored edges around their dorsal fin, lateral fin, and anal fins. Like rainbow trout, palomino trout also have dark green coloring along the top of their backs. Palomino trout are known to have intersecting horizontally-aligned ovals that are known as parr marks. These fish also sport dark spots along their backs and sides as well.

The palomino trout is known to have red horizontal marks along their lateral line, which is very similar to rainbow trout, which they are closely related to, and also have a purple or reddish lateral line. The belly of golden trout can be a pink or orange color, which becomes more vibrant in spawning males.

Palomino trout are known to grow much larger and faster than regular rainbow trout due to hybrid vigor, which is also known as heterosis. Hybrid vigor is an enhanced function of the palomino trouts’ biological systems as a result of hybrid breeding.

The world record palomino trout is a Pennsylvania fish that weighed 13 lbs, 8 ounces. The fish was caught in Mahoning Creek, Pennsylvania. The population of golden trout in Mahoning Creek is higher in concentration than in any other stream in the world.

How to Catch Palomino Trout

The best method of catching palomino trout is virtually the same techniques you might employ for targeting rainbow trout or brook trout, and even lake trout. They are known to feed voraciously on salmon eggs and, like other species of trout, will strike at many different types of flies and spinner lures.

Palomino trout are known to be much harder to catch than rainbow trout, brook trout or brown trout, but this is mainly thought to be due to the fact that they get more pressure. Like tiger trout, golden rainbow trout are easily spotted in any stream, which means anglers will be able to see them (particularly if using polarized fishing sunglasses) and cast to them effectively.

Catching Palomino Trout on the Fly

The techniques and presentations you might use to catch palomino trout are virtually the same as what you might use for rainbow trout or other species. Some anglers in states like West Virginia have learned that these fish are so highly targeted by other anglers that they have to resort to using flies or nymphs that are very different than what they might normally cast at native brook trout or rainbows.

You’ll want to use dry flies for palomino trout much like you would any other species. It’s also a good idea to fish with streamers that are different than what other anglers are throwing, as the palomino trout in any stream might take an interest in different colors that they are not so used to seeing.

This is a great strategy for states such as West Virginia, where palomino trout are very highly-pressured. The only way to guarantee that you’ll have a greater chance of catching palomino trout when fishing in a popular area is to get to the best locations as early as possible, right before the fish are stocked.

Catching Palomino Trout on Lure

Many anglers that fish for lake trout often use various lures to catch them. Although there are not any known palomino trout in the Great Lakes, you can catch them in some lakes throughout this area. It’s best to use lures like worms or insects to catch palomino trout in lakes as well as streams.

What Makes a Good Fish Fillet Knife?

0

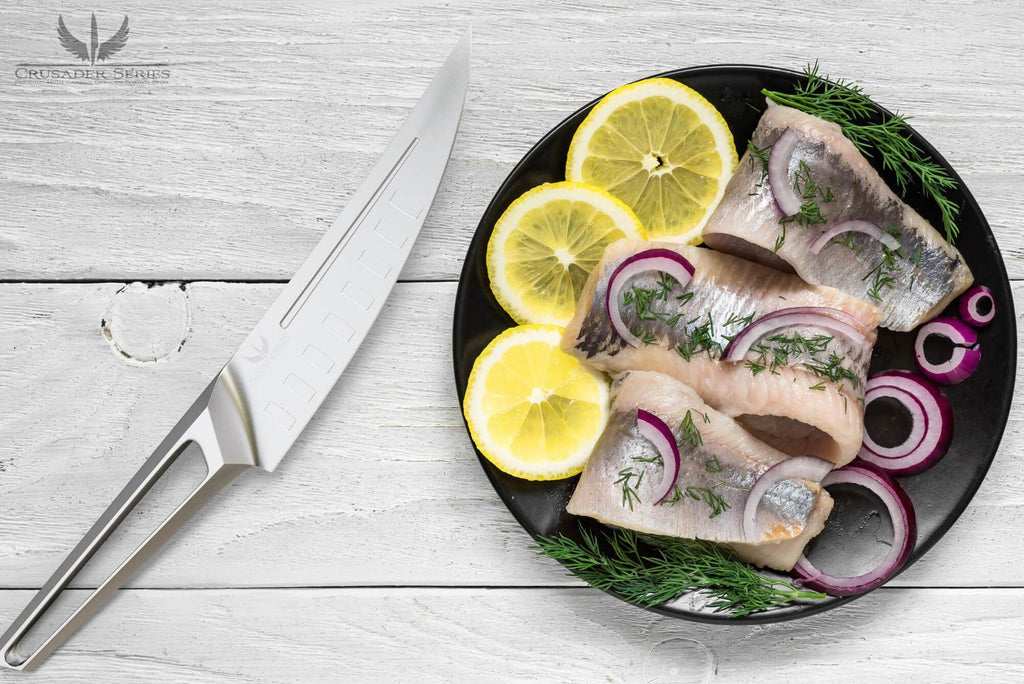
Stainless Steel fillet knife with hollow handle next to a plate of uncooked fish and sliced lemon

Crusader Series 6.5″ Fillet Knife – NSF Certified

  • Material — Pick a blade that won’t rust easily, and can last you forever.
  • Thin, Flexible Blades — Slice through the fillet with ease, and make precise cuts.
  • Sharp-Edged Blades — Pierce the fish and remove the fish bones intricately.
  • Blade Length — The optimal blade length for a fillet knife varies by fish. Check out the table below.
  • Handle Type—Choosing a handle that comfortably fits into your hand is essential. It allows for a firm grip.

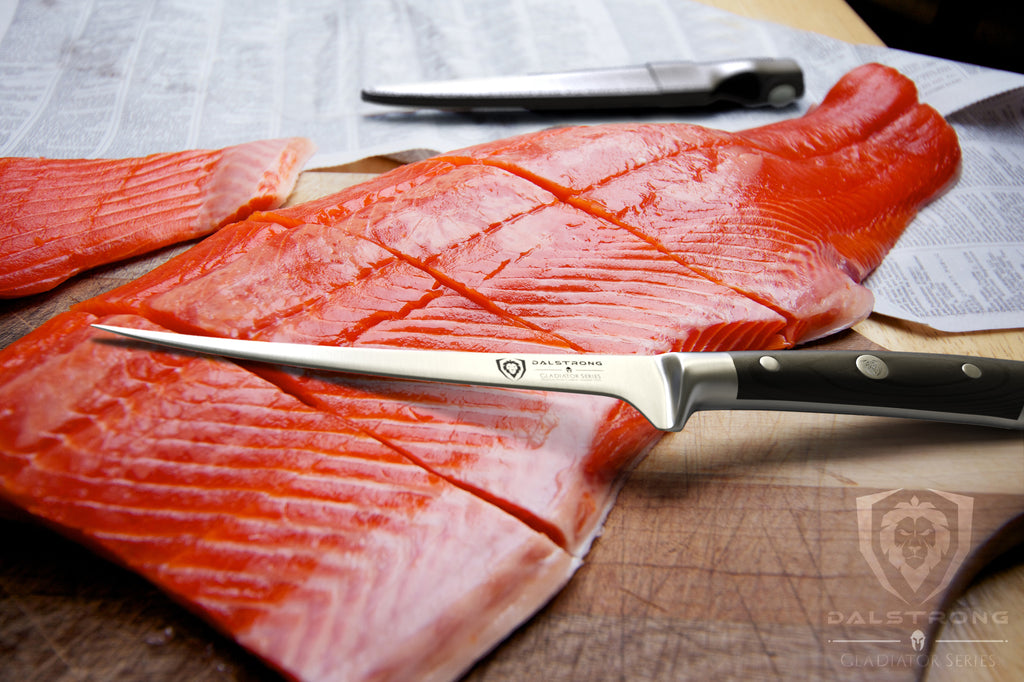
Skinny fillet knife with its blade resting on a large. uncooked red fish

Gladiator Series 7″ Flexible Fillet Knife

Let me preface this by saying I’ve only gotten into fish in the last 6 years or so (I’m 33 at the time of writing this). Now, before you rush to judgement, I remind you I live in a country that is globally known for its meat and people here will prefer beef over just about anything. Sad, right? But those are the facts.

That’s why, when I first attempted to cook my first fish at home, I was disappointed at the fact that I did not own the proper tools to process it. Longer story short, I ended up cooking the entire fish but it felt like cheating, in a way. I couldn’t help but feel that something was missing so, after a quick online research process, I went ahead and ordered myself a fillet knife.

Filleting, for those of you who don’t know, is basically separating the flesh of the fish from the bone. This is achieved by making smooth, precise cuts along the fish’s backbone, from the tail to the head. Initially, it might sound like a daunting task but a fillet knife can make the job way easier thanks to its flexible yet robust blade, giving you more control over the entire processing endeavor.

And while its raison d’etre might be filleting fish, the fillet knife should also be your go-to tool for the earlier stages of the fish preparation process, aka de-skinning and deboning. Other culinary tasks such as whipping up poultry fillets, producing ultra-thin slices of carpaccio meat, and even deveining shrimp are also among the things a filleting knife can excel at.

So, you see, when you invest in a quality fillet knife, you’re actually investing in a highly versatile tool that will greatly enhance your entire cooking process.

But enough of the chit-chat, let’s get down to business. Here’s everything you need to know about what makes a good fish fillet knife.

  1. What makes a good fish fillet knife?
  2. What is the best knife for filleting fish?
  3. What is a filleting knife used for?
  4. What is the difference between a fillet knife and a boning knife?
  5. What kind of knife do you use to cut fish?
  6. Dalstrong Film – The Fishmonger & The Sea

1. What makes a good fish fillet knife?

Small fillet knife resting on an uncooked fish that is laying on a small wooden cutting board

Shogun Series 6” Fillet Knife

There are several aspects that you want to look out for in a good fish fillet knife. These include:

  • Material — Pick a blade that won’t rust easily, and can last you forever.
  • Thin, Flexible Blades — Slice through the fillet with ease, and make precise cuts.
  • Sharp-Edged Blades — Pierce the fish and remove the fish bones intricately
  • Blade Length — A cheaper blade might be good for small-fry but you want something that can handle all manner of catches.
  • Handle Type—Choosing a handle that comfortably fits into your hand is essential. It allows for a firm grip.

Material

You may only be using your knife at home, but a key thing to remember is: fillet knives are also likely to be used on a fishing expedition. This means they’re going to be exposed to saltwater.

You might be wondering how that’s relevant?

All fillet knives should be corrosion-resistant because of this. A high-carbon stainless steel blade ensures that your knife remains in prime condition, even if it gets wet.

Cheaper knives do sell themselves as being made out of stainless steel, but you’ll find they’re less brittle and lacking the high-carbon the higher end knives offer. These will rust more quickly and lose their sharp-edge.

It’s one of the first aspects you should look for in picking a good knife.

Thin, Flexible Blades

The keyword here is control, and this is something often overlooked. Your knife needs to be thin and flexible, so you can make clean precision cuts.

Imagine trying to do that with a cheap and thick knife.

You’ll likely tear the flesh, and snap the fish’s bones as you make the cut — in turn, that makes it more liable those bones will get lost and end up on your plate!

Sharp-Edged Blades

You’ve found the perfect blade. It’s made of the highest carbon steel, it’s thinner than a piece of string, yet when you go to make your cut, it hardly leaves a mark on the fish!

That’s because you need a sharp-edged blade.

It says that an ideal fillet knife’s edge will have an angle of 12-17 degrees. It’s one of the finer bevels.

A fillet knife needs to be sharp so you can make a smooth cut, just like butter!

It also helps with the fish bones, too. If you spot an elusive bone inside your fish, you wouldn’t want to tear at it with a blunt blade. That could ruin the entire filleting process.

You want to get underneath the bone with a fine point and get it out with ease.

That’s why you need a sharp knife.

Blade Length

It’s easy to overlook the blade length.

You pick up a knife and assume it’s good for the job. 9 times out of 10, it probably is.

However, with a fillet knife, you may be making your life more difficult.

While smaller sized knives allow for more flexibility, when filleting large fish you need a longer blade.

We’ve made a handy guide to help you:

Knife Length Fish Type 4-6” inch blade. Perch Trout Walleye Pan Fish Mackerel 7-8” inch blade. Pink Salmon Salmon 8”-9.5” inch blade. Codfish Tuna Catfish Halibut

Having two or three blade sizes available is a brilliant idea, as you’ll always be prepared — no matter what type of fish you plan to cook!

Knife Handle

Similar to the length, another aspect often overlooked is the handle. Luckily, however, this one is a matter of preference!

Choosing a handle that comfortably fits into your hand is essential. It allows for a firm grip.

Remember: A firm grip means better control. Better control means a better cut.

These are the main three different types of handles available on the market:

  • Wood — Comfortable to hold and very sturdy. Slippery when wet.
  • Rubber — Better grip than wood, easier to clean. Not as sturdy as wood.
  • Plastic — Better grip than wood, easier to clean. Not as sturdy as wood.

2. What Is the Best Knife for Filleting Fish?

As you might’ve inferred from my lengthy preamble, the best knife for filleting fish is, wait for it, the fillet knife. Featuring a lightweight blade that gently curves from the handle to the tip, the fillet knife is the best suited knife to turn a whole fish into a series of longitudinal strips of flesh also known as, yes, you’ve guessed it, fillets.

With a blade length ranging from 6 to 11 inches, this member of the boning knife family is pretty much the only tool you’ll need to de-skin, debone, and filet your freshly caught fish like an actual pro.

In terms of variety, there are two main types of fillet knives out there that you can easily find on any online retailer:

  • Japanese-style fillet knives, usually called deba, which are less flexible but extremely sharp thanks to their single-beveled blade (it’s only sharpened on one side).
  • On the other hand, Scandinavian (also known as German) fillet knives are also popular, featuring a double-beveled blade with a heftier feel.

At the end of the day, there is no right or wrong when choosing between these two varieties. It all comes down to preference—Japanese fillet knives offer more precision at a granular level but Scandinavian fillet knives are sturdier and therefore better suited for outdoor activities.

If you’ve made it this far, we assume that you might’ve done some research on your end, trying to determine which fillet knife to finally purchase. You might’ve read about Bubba Blade or Rapala, known for their state-of-the-art folding fillet knives and fishing knives. And while we encourage you to follow your heart, we’re not here to tell you what you already know.

We take it for granted that you wouldn’t be reading this article if you weren’t looking for something different, something that could both spice up your kitchen and accompany you on all of your trips and excursions. A unique fillet knife that looks good and, most importantly, feels good.

For that reason, we handpicked a few items from Dalstrong’s wide assortment of fillet knives to offer you a couple of forward-thinking solutions to your current filleting dilemma.

Let’s get started!

1. Filet Knife 6″ | Shadow Black Series | | NSF Certified

Filet Knife 6

There’s no denying it, the Shadow Black Series 6” Filet Knife is one mean-looking knife. Its pitch-black titanium coating makes it look like something Batman would use on his fishing trips. Skin, bone, sinew—nothing stands a chance against its 7CR17MOV-X vacuum-treated steel blade, painstakingly hand sharpened to 16-18° per side for optimal performance.

Pros:

  • Peerless design.
  • Black, non-reflective titanium-nitride coating for corrosion-resistant, non-stick properties.
  • Features an ergonomic handle for maximum comfort.

Cons:

  • At 6”, it might not be the best option for working with larger fish.
  • Its unique looks might not be for everyone.

2. Curved Fillet Knife 6″ | Gladiator Series

Curved Fillet Knife 6

The Gladiator Series’ 6” Curved Fillet Knife is a true all-around performer. From filleting fish and poultry to finely mincing onions and shallots, the versatility of this excellent knife knows no boundaries. Forged from a single piece of high-carbon German ThyssenKrupp steel, its blade is designed for laser-sharp precision.

Pros:

  • Beautiful hand-polished finish.
  • Excellent edge retention.
  • Comes with a PerfectFit Dalstrong Sheath.

Cons:

  • Its design is a bit more conservative than other knives on this list.
  • Some cooks might prefer a thinner fillet knife blade.

3. Fillet Knife 6″ | Delta Wolf Series

Fillet Knife 6

Don’t be fooled by its size, the Delta Wolf Series 6” Fillet Knife is one ruthless performer. Inspired by the Special Operations Force of the same name, it features a high-carbon 9CR18MOV steel blade with a narrow tip that will allow you to filet, trim, de-bone, de-skin, and butterfly with minimal effort. Whether in your kitchen or in the great outdoors, this stunner of a knife is sure to turn heads wherever you go.

Pros:

  • Edge is painstakingly hand sharpened to 8-12° for optimal performance.
  • The triple-riveted G10 camo handle is designed to withstand the most extreme conditions.
  • Comes with a gorgeous PU Leather Sheath.

Cons:

  • Some outdoorsy cooks will prefer a slightly longer knife to work with large fish.
  • Its stealthy looks might not be everyone’s cup of tea.

4. Shogun Series 6″ Fillet Knife

Shogun Series 6

A part of Dalstrong’s very own Shogun Series, this 6” fillet knife marries centuries of Japanese knife making knowledge with modern technology to superb results. With a blend of Japanese high-carbon AUS-10V steel and 66-alternating layers of SUS410 damascus, its blade offers the perfect balance between maneuverability and strength.

Pros:

  • Stunning Tsunami Rose pattern on the blade.
  • Nitrogen cooled for enhanced harness, flexibility and corrosion resistance.
  • G-10 Garolite handle adorned with a classy copper mosaic pin.

Cons:

  • Its price point might be a little high for casual home cooks.
  • Believe it or not, more conservative chefs will prefer a clean stainless steel finish as opposed to the Damascus steel’s distinctive pattern.

5. Fillet Knife 6.5″ | Crusader Series | NSF Certified

Fillet Knife 6.5

Last but not least, we have the Crusader Series’ 6.5” Fillet Knife. Sporting a minimalist design inspired by medieval swords, this knife will become a trusted ally in your kitchen for all things filleting. Built from a single piece of German-made ThyssenKrupp stainless steel painstakingly sharpened at 16-18 degrees per side, the Crusader is one stellar piece of craftsmanship that will stand the test of time.

Pros:

  • Full tang blade for strength and robustness.
  • Its seamless transition from the blade to the handle makes it super hygienic and easy to clean.
  • Comes with a handcrafted Acacia wood magnetic sheath to keep your knife secured and in place.

Cons:

  • Some folks prefer the feel of a traditional wooden handle.
  • Its modern looks might be a turnoff for more conservative chefs.

3. What Is a Filleting Knife Used For?

Uncooked fish on a wooden cutting board beside a black fillet knife with a light blue surfaceFillet Knife 6″ | Shadow Black Series
Like we established before, a fillet knife’s main purpose is to produce thin strips of flesh from an entire fish known as fillets. Due to its flexible blade, the fillet knife can cut around the contour of the bones, joints, and skin, making sure nothing goes to waste.

But far from being a one-trick pony, the fillet knife has many aces up its sleeve. Some of the things you can also do with a filet knife include:

  • De-bone, filet, and remove the fat from a whole chicken.
  • If you don’t own a meat slicer, the fillet knife can act as a decent substitute to get ultra-thin slices of beef.
  • Since this type of knife is specially designed to work with fish, it can also come in handy when removing the scales and removing all of the internal organs. This process is also known as cleaning.
  • Cut, slice, and peel fruits and vegetables.
  • Create sophisticated garnishes for your salads and cocktails.

Pro tip: If you want to look cool while filleting fish for a fancy dinner at home, check out our collection of aprons.

4. What Is the Difference Between a Fillet Knife and a Boning Knife?

While there might be some overlap between these two, the truth is that they serve two entirely different purposes.

Let’s start with the specs:

Boning Knives

  • Designed to separate bones from meat and fish.
  • Average blade length: between 5 and 7 inches.
  • Type of blade: usually flat with a straight and slightly curved tip.
  • Removes meat from heavy bones or tiny bones from fish.
  • Slightly thicker than fillet knives.

Fillet Knives

  • Thinner and more flexible than most other knives.
  • Average blade length: between 6 and 11 inches
  • Type of blade: features a gentle upward curve that ends in a sharp curved tip.
  • Perfect for removing scales from a fish without damaging the meat.
  • Can’t handle excessive force like a chef’s knife—it’s mostly meant to perform delicate tasks.

To sum it up, fillet knives are a part of the boning knife family but are generally designed to work solely with fish. Their fillet blade is thinner and more flexible than most boning knives, allowing for a greater degree of control. Like we’ve mentioned before, a fillet knife can perform many other tasks but an irresponsible use can dramatically reduce its lifespan and damage the sharp blade.

Boning knives, on the other hand, are a bit sturdier and can easily process larger pieces of beef and game. While they’re considered more versatile than fillet knives, boning knives are not as flexible and will not perform as well with delicate meats such as fish. This requires a level of flexibility and finesse that only the fillet knife possesses.

Pro tip: What’s your sharpening go-to method? Whetstone? Sharpening steel? Regardless of your weapon of choice, this nifty sharpening tutorial covers pretty much all you need to know about keeping your knife blade’s sharp edge.

5. What Kind of Knife Do You Use to Cut Fish?

A black fillet knife next to a raw fish by water

6” Fillet Knife | Delta Wolf Series | Dalstrong ©

There’s just no way around it. Processing fish requires a high quality fillet knife. Your average kitchen knife or chef’s knife just won’t do.

If you want to step up your fish-processing game, you need a fillet knife with corrosion-resistant properties. This is a must, since prepping fish means you’ll be working mostly in wet environments. Most modern high-carbon stainless steel blades will do just fine.

Also, when working with fish, hardness is not so much of a concern. What you need is a thin and flexible blade that can breeze through the fish’s fragile bones and skin without leaving a full-on carnage on your cutting board. A good fillet knife can transform an entire fish into precisely cut fillets with surgical precision.

Note: There are also electric fillet knives that can work just as well as a fixed blade. That said, they’re generally larger, heavier, and more expensive. Now, that wouldn’t be a problem if you were only using it in your kitchen but think about your fishing trips: would you wanna carry around a power source wherever you go? We didn’t think so either.

Frequently Asked Questions

What is the best quality fillet knife?

The best quality fillet knife can vary depending on personal preferences and needs. Factors to consider include the knife’s blade material, sharpness, flexibility, and handle comfort. Brands like Wusthof, Victorinox, and Bubba offer reliable options. An electric fillet knife, like those from Rapala or American Angler, can also be a good choice for efficient filleting. A comfortable handle with a nonslip grip enhances safety and control.

6. Dalstrong Film – The Fishmonger & The Sea

SHOP FILLET KNIVES TODAY

You can also check in with our Expert Knife Finder Quiz and get specific recommendations based on your needs.

Dalstrong Expert Knife Finder

Written by Pablo Perez

When he’s not adding way too much butter to his recipes, Pablo likes to write about knives, music, food, cinema, and all of the other things that make life worth living.

Top 100 Duck Hunting Dog Names!

0

dog names for duck hunting

Duck hunting dogs, also called gun or bird dogs, are truly set apart from other dogs. Bred and raised specifically for duck hunting, these dogs have different personalities from other dogs-and fittingly, they should have different names from other dogs!

But the tricky question is: what should you name your duck hunting dog? In this article, we’ll break down 100 of the best dog hunting dog names for your hunting companion.

Check out these other articles: 10 Hunting Dogs That Don’t Shed and Strong Female Dog Names.

Boy Duck Hunting Dog Names

Boy Duck Hunting Dog Names

Whether you’re looking for pointer, golden retriever, or black lab duck hunting dog names, there are many available options for male duck hunting dogs. This list reflects the variety of names for boy duck hunting dogs, from the fierce to the friendly.

  1. Ace – First on our list of duck dog names, this is a great name for a dog who seems adept at just about everything.
  2. Captain – For a natural-born leader.
  3. Trooper – For a dog who can weather any storm.
  4. Dodger – Great for a dextrous and agile dog.
  5. Hunter – An on-the-nose name for an excellent duck dog.
  6. Killer – For a dog that seems extra eager about duck hunting.
  7. Trapper – For a clever and witty hunting dog.
  8. General – For an older dog who can lead a pack.
  9. Commander – For a dog with a naturally commanding presence.
  10. Marshall – Great when a dog exudes power and authority.
  11. Leader – Ideal if your dog is ready to take the helm on a hunting trip.
  12. Stalwart – For a dog that’s loyal to you to the end.
  13. Speed – One of many cool duck hunting dog names for agile dogs.
  14. Bourbon – Great if your favorite thing after a hunt is to kick back with your dog and a drink.
  15. Bud – For a true friend-or a dog who likes to drink Bud Light.
  16. Charger – For a dog who’s maybe a little more enthusiastic than intelligent.
  17. Coffee – A great name for a dog who’ll be with you at the crack of dawn.
  18. Bull – One of many great duck dog names for labs.
  19. Scout – For a hunting dog with stamina and agility.
  20. Sport – For a young, enthusiastic dog.
  21. Rogue – Best suited to a dog that follows its own rules.
  22. Ranger – Ideal for a dog that seems completely at home in the wilderness.
  23. Glory – If you think your dog is poised for success, this name could be a good luck charm.
  24. Bolt – For a dog that can speed off and bring back a duck in no time.
  25. Fighter – For a dog with spunk.

Girl Duck Hunting Dog Names

Girl Duck Hunting Dog Names

There’s an equally rich cache of cute hunting dog names for female duck hunting dogs.

  1. Dancer – Ideal for a graceful and agile dog.
  2. Fidelity – For a dog who will always stay by your side.
  3. Loyalty – Another name for a duck dog that is your ultimate partner.
  4. Faith – A name for a duck hunting dog that you can trust.
  5. Freedom – A dog that seems to belong in the wild deserves this name.
  6. Mistress – For a dog with an air of authority.
  7. Lady – For a dog that seems like she could be a royal.
  8. Huntress – For a dog that is perfectly suited to her job.
  9. Amazon – For a dog that’s commanding, authoritative, and a master hunter.
  10. Grace – For a dog that is poised and in control.
  11. Rose – A great name for a dog that’s beautiful as well as deadly.
  12. Liberty – A patriotic name for a hunting dog.
  13. Luster – For a dog with a shimmering coat.
  14. Vixen – For a dog well-suited to the wild.
  15. Willow – A name for a dog as sturdy as a tree.
  16. Goldenrod – For a dog whose fur is light and shiny.
  17. Hope – When all else seems lost, this dog will come through for you.
  18. Rebel – For a dog who you can’t get under control.
  19. Witch – For a dog who’s rambunctious-for ducks and you!
  20. Enchantress – For the dog who always attracts everyone’s attention.
  21. Bard – For a dog that’s extra vocal.
  22. Tulip – Great for a younger, more delicate hunting dog.
  23. Angel – For a dog that’s always on the ball-or an ironic name for a perpetual troublemaker.
  24. Kestrel – For a dog that’s a natural-born hunter.
  25. Glamor – A great name for a pooch with pride.

Hunting Dog Names Based on Nature

Hunting Dog Names Based on Nature

Do you want to give your duck hunting dog a name that draws on the rich symbolism of the natural world while still evoking their hunting vocation? Check out this list.

  1. Thunder – To reflect a booming presence.
  2. Lightning – If they can run this way and that in a flash.
  3. Peak – For a dog that’s the pinnacle of hunting.
  4. Cloud – For a light-colored or mysterious dog.
  5. River – If your dog moves fluidly like running water.
  6. Sunburst – For a bombastic and excitable dog.
  7. Bear – For a big, furry dog.
  8. Wolf – To remind you of their wild heritage.
  9. Birch – To reflect the stalwart integrity of the tree.
  10. Acorn – For a smaller dog you’re nourishing since birth.
  11. Basil – For a dog with a little spice.
  12. Tiger – A feline name that connotes wildness and ferocity.
  13. Falcon – Great for a fast, graceful dog.
  14. Thistle – Beautiful, but dangerous.
  15. Shark – For a dog that’s out for blood-duck blood.
  16. Hammerhead – For a dog that loves to hunt but maybe isn’t the smartest.
  17. Sawgrass – If you’re hunting in Florida, this botanical name is perfect.
  18. Oak – For a dog that’s big, dark, and sturdy.
  19. Rainbow – For a dog that seems to lighten up the place wherever they go.
  20. Typhoon – For a dog that’s an unstoppable force of nature.
  21. Bramblepelt – Good name for a dog that’s not afraid to get down and dirty.
  22. Briar – For a dog ready to dive into the depths to get its quarry.
  23. Snow – Great for a pale, mysterious hunter.
  24. Midnight – Ideal for a dog that moves in silence.
  25. Storm – The opposite: for a dog that loves to make noise.

Names for Hunting Dogs Based on History and Culture

Names for Hunting Dogs Based on History and Culture

One of the best ways to decide on a dog name is to draw from hunters (or the hunted) in history and culture). Check out some of these:

  1. Nimrod – Despite the connotation of stupidity, this is actually the name of a famed biblical hunter.
  2. Elmer – After dopey-but-eager hunter Elmer Fudd.
  3. Orion – After the constellation and the Greek mythological hunter on which it’s based.
  4. Rexxar – Perfect for fans of the Warcraft franchise.
  5. Daffy – An ironic name based on the Looney Tunes duck.
  6. Herne – A ghost hunter from English folklore.
  7. Geralt – The legendary monster hunter from the Witcher books, video games, and TV series.
  8. Artemis – After the Greek goddess of the hunt, who notably turned the hunter Actaeon into a stag and had her dogs hunt him.
  9. Diana – Named after the Roman counterpart to Artemis.
  10. Robin – After the bird and folkloric bowman Robin Hood, or the DC Comics superhero Robin.
  11. Pan – After the Greek god of wilderness and hunters.
  12. Hubertus – After the patron saint of hunters.
  13. Thor – After the superhero and Norse mythological powerhouse.
  14. Bloodsport – The gun-toting hero of The Suicide Squad.
  15. Daisy – Another ironic name: Daisy Duck.
  16. Donald – Based on Disney’s Donald Duck. Especially great if you aren’t a particular fan of Disney or have a sense of humor.
  17. Scrooge – Based on the character from Disney comics and DuckTales.
  18. Huey – The first of three brothers in DuckTales.
  19. Dewey – The blue-hat-wearing brother in DuckTales.
  20. Louie – The DuckTales brother who rocks a green outfit.
  21. Davy – Based on the folk hero and real-life man Davy Crocket.
  22. Teddy – Based on American president and naturalist Theodore Roosevelt.
  23. Mighty – After the film The Mighty Ducks and the corresponding hockey team.
  24. Wolverine – After Marvel Comics’ famous wildman superhero.
  25. Lon – Named after Lon Chaney, star of The Wolfman.

Conclusion for Duck Hunting Dog Names

If your dog is going to be a duck hunter, you’ll want to give them an appropriate name. Remember to keep their name short, easy to pronounce, and not similar to any of your family. We hope you enjoyed our list of the best duck hunting dog names and found something for your puppy!

Other articles you would like:

  • Are Goldendoodles Good Hunting Dogs?
  • Best Hypoallergenic Hunting Dogs
  • Best Shock Collar for Hunting Dogs

Judges strike down Tennessee law allowing warrantless searches by state wildlife officials

0

The longstanding practice of conducting warrantless searches on private property by officers with the Tennessee Wildlife Resources Agency is unconstitutional, a three judge panel hearing a case in Benton County Circuit Court ruled Tuesday.

The ruling invalidates Tennessee law that TWRA has relied on to conduct warrantless searches and surveillance on private land in order to fulfill its mission of enforcing the state’s hunting, fishing and wildlife laws.

It’s an authority that is not explicitly extended to any other state or local law enforcement. The law, the judges wrote, gives rise to an “intolerable risk of abusive searches” and violates the Tennessee Constitution’s property protections. It is “unconstitutional, unlawful and unenforceable,” their ruling said.

An attorney representing Hunter Hollingsworth and Terry Rainwaters, two Benton County men who filed suit against the TWRA over warrantless searches on their lands, called the ruling a “momentous thing.”

“This is a decision that’s going to have a really huge impact on private landowners in Tennessee,” said Joshua Windham, an attorney for the Institute for Justice, a libertarian leaning law firm.

Windham said the ruling may have implications beyond Tennessee. The Tennessee Constitution’s property protection language, cited by the judges, is echoed in the constitutions of 16 other states, potentially leading to legal challenges of similar wildlife agency enforcement practices elsewhere. TWRA’s practice of patrolling private property without an owner’s consent or a warrant is not uncommon.

A spokesperson for TWRA on Wednesday did not immediately respond to questions about the ruling, or whether state officials plan to appeal.

State wildlife officers patrol private lands across the state year-round without giving owners notice, obtaining consent or appearing before a judge to make a case for a warrant, court records said.

TWRA officers sometimes investigate turkey-, dove- and deer-hunting offenses by crouching in bushes and secretly taping hunters — hiding within the line of fire in some instances cited in the lawsuit. The agency keeps no records of when or how often officers enter private property. TWRA officers do not need a supervisors’ permission before entering private land. There are no agency rule limiting how long officers may spend searching private property.

TWRA attorneys have argued that state wildlife officers must have the flexibility to enter private lands to do their jobs. The agency’s mission is to protect wildlife and enforce hunting, fishing and boating laws. The vast majority of hunting in Tennessee takes place on private property and wildlife aren’t confined to public lands, they noted.

TWRA also cited a well-established U.S. Supreme Court precedent, known as the “open fields doctrine,” which says that property owners have no “reasonable expectation of privacy” on private property deemed to be an open field — property outside the immediate vicinity of an owner’s home or yard, such as a field of crops well beyond a farmer’s homestead.

But the three judge panel in Benton County concluded that the Tennessee Constitution gives property owners more protection. Article I, Section 7 of the Tennessee Constitution provides a “broader guarantee of security for an individual’s real property than its federal counterpart,” they wrote.

Tennessee’s Constitution protects all “property, real or person, actually possessed or occupied,” the court noted. Under Tennessee Supreme Court precedent, land possessed or occupied extends beyond a homestead. Only “wild or waste lands” that are not used, farmed, fenced or otherwise utilized are excluded from those protections, the state Supreme Court has found.

The judges also concluded that the statute giving TWRA the right to enter private land amounted to a “general warrant,” giving officials wide latitude to conduct searches. “General warrants are dangerous to liberty and ought not to be granted,” the court ruled.

Hollingsworth, a Benton County railroad worker, said Wednesday he felt vindicated after years of challenging multiple TWRA officers forays onto his property, where they secretly hid behind bushes to videotape Hollingsworth, his girlfriend and friends while they hunted and socialized. They patrolled his land and surveilled his movements.

Hunter Hollingsworth on his property in Benton County. Photo: John Partipilo.

“I think it’ll be a lot more relaxing to be on my property and you won’t have to be paranoid that they’re looking at you all the time,” Hollingsworth said. “I think it’s fantastic that other people will get to enjoy their property without worrying if they’re being watched.”

Rainwaters similarly expressed “great relief to have the court recognize that searching my property without permission and without a warrant was unconstitutional.”

“It’s even better to hear that the court doesn’t believe anyone else in Tennessee should have their rights violated in the same way,” he said. “I’m going to sleep a little better tonight knowing that state officials have to respect my property rights.”

The case was heard under a new state law requiring a panel of three judges, one from each division of the state, to hear challenges to state law. Judge Donald Parish, Chancellor Jerri Bryant and Judge Russel Parkes presided over the case.

Parish, who concurred with the majority of the decision, filed a dissenting opinion in which he argued the court should have gone further.

The Institute for Justice had requested an injunction barring TWRA from entering private property — which was rejected by the panel because they had already concluded Tennessee’s law was invalid.

But Parish noted that TWRA lawyers argued that their authority to conduct warrantless searches also rests in the Tennessee Constitution’s recognition of a personal right to hunt or fish, subject to reasonable regulation.

Parish also cited a TWRA officer’s conversation with Hollingsworth in the court’s record. Hollingsworth told an officer who showed up on his property that he wasn’t invited.

“When you bought your hunting license, you invited me,” the officer told Hollingsworth.

Absent an injunction, Parish wrote, “I believe an ‘intolerable risk’ of improper searches by the TWRA persists.”

The 3 Best Trout Fishing Rigs For Rivers And Streams (With Pictures)

0

UPDATED 03 NOVEMBER 2024

by Robert Ceran

Fishing for trout in streams and rivers is very different from trout fishing in lakes and ponds.

First of all, the trout don’t move around very much, so you need to keep moving yourself, and secondly, all of your fishing tactics need to be effective for fishing in water that’s constantly moving.

In order to catch trout successfully in rivers and streams, it’s important to use the right tactics to find trout positioned in feeding lanes close to the main current, and present your bait to them at exactly the right depth.

In this article we’ll discuss the top 3 trout rigs for rivers and streams, and will go over what each of them is best suited for.

How do you rig for trout in a stream or river?

The three most important trout rigs for fishing in rivers and streams are:

  • Fixed bobber rig
  • Drift rig for trout
  • Spinner rig

These three trout rigs cover the majority of all trout fishing applications in rivers and streams, and if you know how to use them effectively, you’ll catch a lot of fish.

That being said, each of them comes in several different shapes and sizes, so there is plenty of room to adapt them to your specific fishing conditions.

Both the fixed bobber rig and the drift rig are great tools for drifting a baited hook with the current, and are ideal for presenting it at the right depth for trout in feeding lanes of rivers and streams.

Each of them comes with its own strengths and weaknesses, and we’ll go into those in more detail below.

The spinner rig is a great option for fishing trout lures in any kind of moving water, from tiny streams to wide rivers, and can be adjusted for each of these scenarios.

Now let’s dive into the details, and discuss each of these rigs more fully.

Fixed bobber rig

Fixed bobber rig for trout

This is one of the simplest trout rigs, but works very well for streams and rivers, as it allows you to drift your bait with the current into the most promising spots where trout are likely to be positioned while they wait for the current to bring them food.

Since streams are rarely deeper than 6 or 7 feet, you can cover all depths with a fixed bobber rig, and don’t need to use a slip bobber.

One advantage of using a fixed bobber rig is that you can easily adjust the depth at which you’re fishing by sliding your bobber up or down, and thus fish a range of different depths in every spot, before moving on to the next.

Tying a fixed bobber rig is very easy. You start by threading your bobber onto the line, and then tying the line to swivel or snap swivel.

Next tie a 3 to 4 foot fluorocarbon leader to the swivel, and then tie a size 8 to 14 bait hook to the other end of the leader. And finally, add one or more split shots to the rig to weigh down your baited hook in the water.

The best baits to use with this rig are worms, salmon eggs, or plastic beads (which look like salmon eggs).

You can also use plastic worms, which come in a wide variety of colors. Powerbait doesn’t work as effectively for wild trout in streams as it does for stocked trout in lakes.

Drift rig for trout

Drift rig for trout

This is the most important rig for drift fishing for trout in strong currents, and in deep runs and holes.

The advantage of this bottom fishing rig is that it presents your bait close to the bottom, where trout are usually positioned while they wait for the current to carry food to them.

The great thing about the trout drift rig is that you can use a weaker dropper line to attach the split shot weights, and if the weights should get snagged on the bottom, you can break off the dropper line without losing the rest of your setup.

Another advantage is that you can easily adjust the amount of weight by adding or subtracting split shot weights, or switching out a pencil weight at the end of the dropper line.

This is very important, as you’re going to encounter currents of different strengths, and will need different amounts of weight to get your rig down to the bottom fast enough.

In order to tie the drift rig for trout, start by tying your main line to one eye of a three way swivel.

Next, tie a 3 to 4 foot long fluorocarbon leader to another eye of the swivel, and then tie your bait hook to the other end of that leader.

Finally, tie a 2 to 3 inch long dropper line to the third eye of the 3 way swivel, and either attach several split shot weights, or tie a pencil weight to the end of the dropper line.

The best baits to use for trout when drift fishing with this rig are worms and salmon eggs, or plastic beads or plastic worms of various shapes and color.

Incidentally, this setup also works very well for catching steelhead from the bank, and you may be able to target both species at the same time in some rivers.

Spinner rig

Spinner rig for trout

This is a classical trout fishing rig that works well in both running and still waters.

When using it in small streams, try to downsize your lures, since the average size of trout is likely to be smaller than in lakes and ponds.

If you’re fishing in bigger rivers, on the other hand, you can definitely upsize your lure size, and will likely be catching bigger fish as well.

While you can potentially tie your main line directly to your lure, it’s better not to do this.

For one thing, you should use a swivel to avoid the lure twisting up your main line, and secondly, if you’re using braided main line, using a fluorocarbon leader will help to avoid spooking fish.

The best way to tie a spinner rig is to start by tying your main line to a size 6 swivel, and then tying 2 to 3 foot of fluorocarbon leader to the other eye of the swivel.

Then tie a bait hook to the leader, and attach one or more split shot weights above the swivel.

The split shot weights are necessary if you’re spinner fishing for trout in a strong current, and need to get your trout spinner or lure down to the right depth as fast as possible.

What is the best rig for trout fishing in streams?

The best rig for trout fishing in streams is the fixed bobber rig. It’s the perfect setup for drifting a baited hook or soft plastic worm along trout feeding lanes in streams.

The correct way to fish a bobber rig is to lift your main line up above the water, which results in the whole setup floating down the stream at a natural speed with the current, and this is by far the best tactic to catch trout in streams.

That being said, you can definitely also use the other two rigs to your advantage when fishing in trout streams.

The drift rig is a great option if you’re fishing in strong currents, and the spinner rig is ideal if you want to cover a lot of water quickly.

What is the best rig for trout fishing in rivers?

The best rig for trout fishing in rivers is the drift rig, since it’s ideal for presenting your bait close to the bottom even in strong currents.

By adjusting the amount of weight on the rig you can easily switch from one strength of current to another.

And since this fishing rig is also great for catching steelhead in rivers, it’s definitely worth learning how to use it effectively.

Best rod and reel setup for trout fishing in streams and rivers

Now let’s talk about the best trout rod and reel setup to use when fishing with these rigs.

All three rigs are best fished with a 7 to 8 foot long light or ultralight spinning rod.

However, when fishing on small streams, you may want to choose a shorter rod around 6 foot long, since that’s easier to use under trees and bushes.

Also, if you’re fishing in big rivers where trout grow larger (or where you could hook into steelhead as well), you probably want to increase the strength of your rod to medium power.

The ideal reel to use with this setup is a 2000 to 3000 size spinning reel spooled with 10 to 20 lb test braided line.

Braid is the best choice of trout fishing line in rivers because it has almost no stretch, which allows you to feel trout bites with more sensitivity compared to mono or fluoro.

While braid is the best choice for your main line, the leader should definitely be fluorocarbon, since that has lower visibility underwater, and presents your bait with more stealth.

Best Air Rifle Deals

Popular Posts

How to make a break barrel air rifle more powerful

0
"Unleash the Power: Mastering Break Barrel Air Rifles for Maximum Performance. Discover expert tips and techniques to enhance the power and precision of your...

Best Air Rifle Brands – Who Makes The Best Pellet Gun?

0
In Jeff Bezos’ own words: "A brand for a company is like a reputation for a person. You earn reputation by trying to do hard...

What Is An Air Rifle?

0
If you have stumbled upon this article, chances are that you probably have a pest problem at your house. This is a very common...