Want to know the easiest way to catch a big freshwater fish? Put a worm on a hook, attach a few weights, and then bomb that sucker out into the fishiest looking spot you can find. Then, all you need to do is get comfortable and wait.
Fishing With Live Worms: High Passion, Low Production
In the video above, I take my cousin fishing, and go over 3 of the most straightforward ways you can fish a worm on the bottom. What this video lacks in production quality, it makes up for it with it’s honesty and entry level approach.
So, the next time you’re thinking about wacky rigging a Senko in that same old bass pond for the millionth time – instead, find a shady spot, grab a pack of worms, and do some bottom fishing!
Been In The Game For Years Making Worm Rigs
Since I was a kid, I’ve been fishing this way with my dad and brothers along the banks of rivers and ponds surrounding our house. Over the years, interests have changed, skills developed and now I spend more time flipping jigs, burning crankbaits, or looking for that surface strike from a hungry bass choking topwater frogs deep in the summer weeds.As much as I love all of those things, and boy, do I love them dearly, there is something that always draws me back to what I call ”bottom fishing with crawlers”
For me, this technique is not only nostalgic, it’s an easy way to relax on a lazy afternoon while proving to be an extremely effective way to catch big fish. This is especially true for new anglers or people in areas with a lack of species diversity, fishing opportunities, or places generally considered to be ”good fishing”.
Live Worm Fishing: Minimal Assembly Required
Worms, hooks, and weights. Together, they create the simplest rig in freshwater fishing.
Assuming you have a fishing rod and reel spooled up and ready to go (if not, click here), all you’ll need is hooks, weights, and worms to put together these three simple rigs that will catch you a boatload of fish.
Get a sturdy ”Y” shaped stick or a store-bought rod holder strong enough that it can be jammed in the ground and hold up your rod while you sit and wait for a bite.
Keeping the line between your rod and bait taught helps increase your ability to detect bites, and in return, catch more fish.
Live Worm Bottom Fishing Checklist:
Fishing Rod + Reel
Line
Weights
Hooks
Worms
Chair
Net
Shade
Patience!
Nightcrawler Fishing Pro Tips:
Ask for a paper bag when buying worms and keep them in the shade. A brown bag keeps your worms cool throughout the day and prevents them from drying out.
Add a clip-on fishing bell to the tip of your rod to help alert you of any bites when bottom fishing
Keep a taut line on your bottom rod. This will help you detect bites much easier
Loosen your drag or secure your rod safely when bottom fishing. This will help prevent your rod from getting pulled in the water by a big fish (it’s happened to me twice)
If you’re out on a hike, or just poking around the back 40, you’re likely to see mushrooms growing from trees in the woods. Some of them are edible, some aren’t. For the purposes here, I’ve gathered useful, common mushrooms you can eat, since that’s what I’m usually looking for.
It’s important to know that the title is a little misleading. While mushrooms may appear to grow on trees, what we see is only the fruiting body that will eventually make spores and attempt to reproduce. The mushroom life force, or mycelium, is inside of the tree, waiting for the right conditions (temperature, rain, and seasonality) to fruit.
Mushrooms That Grow on Living Trees
Most of the mushrooms I look for that grow on trees grow on living, or injured trees. As you’ll see, there is some overlap between the two. Here’s a few very common mushrooms you might see on your next hike.
Oyster Mushrooms (Pluerotus and others)
Oyster mushrooms (Pluerotus species and relatives) are some of the most common mushrooms found on trees. Most of these are easy to identify, and all are edible with no poisonous mushroom look alikes.
H. ulmarius. P. citrinopileatus. S. serotina. (photo credit Ariel Bonkoski)P. dryinus. P. populina.
Depending on where you are and what kind of trees are in your area, there can be a number of different species to look for. All oyster mushrooms have gills and white spore prints.
Elm oyster mushrooms (Hypsizygus ulmarius) grow on elm trees and box elder.
Aspen oyster mushroom (Pluerotus populina) grows on aspen.
Pluerotus dryinus is found late in the season growing on oak and beech.
Late Fall Oyster (Sarcomyxa serotina or Mukitake) is eaten in Japan. There’s been confusion over claims it contains carcinogens, but that information has been disproven and the mushroom is fine to eat. Reference.
Golden Oyster Mushrooms are a new, invasive species that grows on elms, cherry and other hardwoods.
Chicken of the Woods (Laetiporus)
Chicken of the woods are extremely common, edible, and found around the world. They grow from living and dead trees, stumps, and over roots. Depending on the species they can grow from coniferous or deciduous trees. There’s a number of species, and all of them are edible, with caution. Read more about them in my post Chicken of the Woods Mushrooms.
Hen of the Woods or Maitake Mushrooms (Grifola frondosa)
Similar to chicken of the woods, maitake are a parasite of trees, typically white and red oak, but occasionally on maple. They cause a butt rot in the host tree, and are common on stumps, downed trees, and living trees.
Long appreciated in Japan where they’re known as maitake (dancing mushroom) they’re edible, delicious, and widely appreciated by many foragers East of the Rocky Mountains. Read more about them in my post on Hen of the Woods.
Resinous Polypore (Ischnoderma resinosum)
This common parasite of hardwood trees appears in the summer and is common on oaks. It’s a good mushroom for foragers to know as it’s edible and underappreciated, meaning it tastes great, but not a lot of people harvest it.
Some people call it salisbury steak of the woods, or beef of the woods, and that’s a pretty good comparison. Read more about them in my post on Resinous Polypore/Ischnoderma resinosum.
Hericiums
The genus Hericium includes lions mane and its cousins is commonly found on dying oak trees. While the coral tooth fungus (Hericium coralloides) and bearded tooth mushroom (Hericium americanum) seem to prefer dying and fallen oak trees covered in moss, lions mane (Hericium erinaceous) also likes to grow on trees that are still standing. All Hericium are edible, and taste great. Read more about them in my post Lions Mane and Hericium Mushrooms.
Enokitake (Flammulina velutipes)
Enokitake, also known as enoki and the velvet shank mushroom, are parasitic, saprobic decomposers of wood, especially elms. These are the same species of edible mushroom found in stores, but have brown stems and a yellow to orangeish cap when exposed to sunlight.
They appear in the Spring and will continue to fruit throughout the year. Make sure to be able to identify Galerina marginata if you plant to eat them. Read more about them in my post on Enokitake or Velvet Shank Mushrooms.
Pheasant Back (Cerioporus squamosus)
Also known as the dryad saddle, the pheasant back is a parasite and decomposer of hardwood trees, especially box elder and elms. Named for it’s cap scales that resembles pheasant feathers, it’s a common Spring mushroom, but can be found throughout the year.
It’s edible, and tastes very good, but gets tough quickly as it grows so it must be sliced thinly. Read more about them in my post on Dryad Saddle or Pheasant Back Mushrooms.
Wood Ear (Auricularia judae)
Wood Ear Mushrooms, also known by the outdated name of “Jews Ear” are a common decomposer of hardwood trees, often seen growing on branches. Long enjoyed in Asian cuisine, they can be added to soups and broths, especially wood ear mushroom ramen.
Witches Butter (Tremella mesenterica)
Another common tree mushroom is witches butter. This is a commonly found yellow jelly fungus often seen on fallen branches. It has a lobed appearance, and is slimy or sticky when wet.
It’s an edible mushroom, and some foragers like to simmer it in sugar syrup to make mushroom jelly candies. If you want to try that, you can substitute them in my recipe for candied black trumpet mushrooms.
Mushrooms That Prefer Dead Trees
Some mushrooms prefer dead or rotting trees over living ones, although some species like Hericium enjoy feeding on both. Here’s two very common ones you might come across.
Turkey tail (Trametes versicolor)
One of the most common mushrooms on trees in North America, and a popular mushroom mostly known for its “medicinal” benefits. Turkey tails are a decomposer of logs and stumps of deciduous trees, and on the rare occasion, coniferous trees. They’re widely used as a medicinal in things like mushroom tinctures.
Crown coral (Artomyces pyxidatus)
The crown coral mushroom is very common where I live in Minnesota. These only grow from dead, fallen logs that are decaying, and will never grow from live wood. They’re commonly confused with species of coral mushroom or Ramaria, some of which are edible. The key to separating the two genera of fungi is that Ramaria will only grow from the ground, where crown corals only grow from dead and dying wood. Learn more about them in my post on Crown-Tipped Coral Mushrooms.
Tree Feeding Mushrooms and Other Fungi
Besides the mushrooms mentioned here, there’s also many other mushrooms that may grow on trees that you may not notice. One of the most common are crust fungus. There’s many different genera here, including Phlebia, Stereum, and Thelephora. They’re common wood-decomposing fungi.
Another example is cherry knot fungus (Apiosporina morbosa), also known as black knot. It appears as charcoal-like swelling black growths on branches of cherry trees that have been injured, as well as plum trees. Cherry knot fungus will inhibit fruiting, but can be kept in check by regular pruning or fungicides.
Chances are the title anecdote is engrained deep in your subconscious, whether you grew up fishing the Chesapeake Bay or simply visited a local tackle shop while passing through the watershed. For those of us that fall into the former category, we likely accepted this as truth largely by way of trust in our mentors, followed by empirical validation of our own. Walk down any aisle in a local tackle shop, however, and you’ll be presented with a wide spectrum of color choices, most if not all of which will catch fish under certain conditions. So, what is it about chartreuse that made this particular color so pervasive that it was immortalized by the late great Lefty Kreh? To be honest, I never truly asked myself this question until I began to look at the problem through the lens of optics. A quick Google search of “if it ain’t chartreuse it ain’t no use” will present similar takes by local experts, so I make no claim to be the first to broach the subject. That being said, let’s consider the results of a simple optical analysis of the subject.
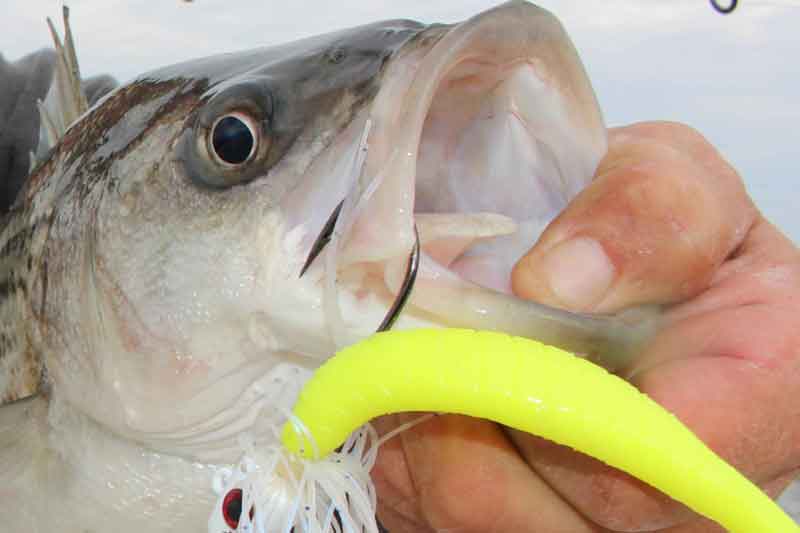
Unimpressed with the author’s surf caught dink, Beau Taylor Parr begins to ponder the validity of the title anecdote.
A wise man once taught me to seek simple models that develop physical intuition. Implicit in this statement is that these simple models must be constructed with physics that sufficiently describe the phenomenon which we seek to understand. In this light, let us reduce the complexity of the problem from which we derive such simple pleasure: to elicit a visual reaction strike in the daytime, light rays emanating from the sun must first travel through the vacuum of space for tens of millions of miles before reaching the edge of Earth’s atmosphere. At this interface, worldly optical phenomena begin. Some of these rays are reflected back into space in a mirror-like fashion, while the remainder pass through. Most of the time these rays are bent onto a new path when entering Earth’s atmosphere. For these rays to reach Earth’s surface, they must then travel along a path on which some rays are misdirected and/or plucked from thin air, by a variety of atmospheric constituents such as gaseous molecules and suspended particulate. Each ray of light represents a single color and the number of these rays that are misdirected and/or plucked from thin air depends on that color. As such, the color content at the edge of Earth’s atmosphere will differ from that on the Bay’s surface.
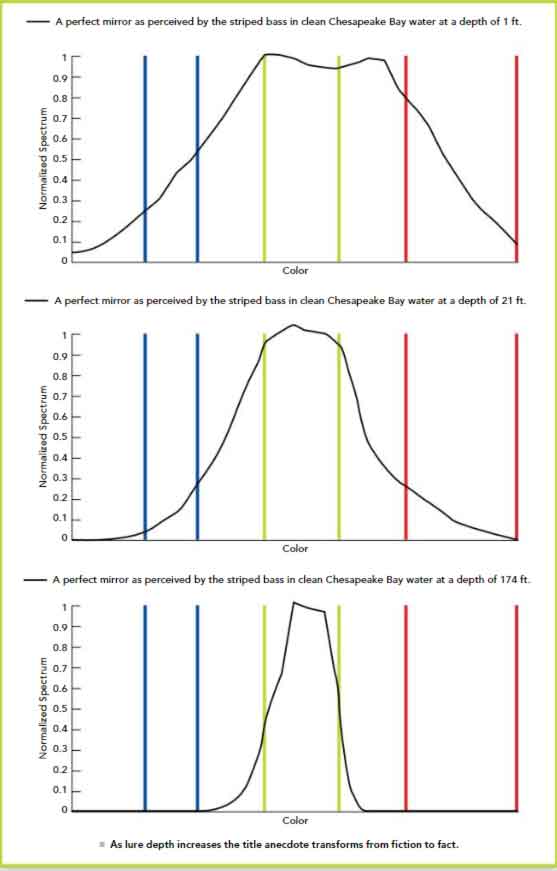
The process described above is again at play when a new interface (such as water) is introduced. The optical model described here therefore considers that rays reaching the Bay’s surface(1) are subject to being reflected, passed through, bent, misdirected(2) and/or plucked from the water column(2) all before being reflected by a lure. A perfect mirror for which all colors are completely reflected has been used instead of a lure of specific color (we’ll assess the effect of this lure choice soon enough). A detector with the daytime color response of the striped bass’ retina(3) has been situated immediately following the perfect mirror to complete the model. This color response is measured by electroretinography and accounts for the fact that not all colors are equal, as far as the striped bass’s retina is concerned. The results of this simple analysis are presented for clean Bay water at a depth of one foot, the average depth of the Bay (21 feet) and the deepest spot in the Bay (174 feet).
The deeper you go, the more chartreuse seems like a natural winner.
At a depth of one foot, most of the color content that was present on the Bay’s surface has persisted and the effect of the color response of the striped bass’ retina is prominent. You’ll notice that the color response of the striped bass’s retina tends to rank colors in the chartreuse band as being most significant, although at this shallow depth most colors are still at your disposal in terms of lure selection. In proceeding to 21 feet, a depth to which you’ve undoubtedly dropped a jig or two, the progressive action of the plankton-filled water column acts like a sponge for blue and red colors. As well, as the pickiness of the striped bass’ retinal color response has begun to turn our perfect mirror into a chartreuse mirror. At a depth of 174 feet, the kind of optical transformation that striped bass dream about has effectively completed.
Not a fan of even the simplest of models without empirical validation? Neither am I. You may take some comfort in that Navy divers at depth in the Long Island Sound most commonly reported white targets as green, white, and yellow(4) – in that order. Keep in mind that that chartreuse is also referred to as yellow-green. Still not convinced? Well I’ll need the help of our community to take this argument further. For the underwater photographers in the audience, I’d like to present an open challenge to get images of a chartreuse and white lure falling into the depths of the Bay, as viewed through a filter corresponding to the color response of the striped bass’s retina.
Surely, you have chartreuse in your tacklebox.
Let’s take a moment to reflect once more on the title anecdote. Regardless of whether or not striped bass can distinguish between individual colors or their brains simply rank colors differently, you’d best consider choosing a lure color that reflects or misdirects yellow-green, such as chartreuse, if you’re fishing at depth and want to elicit a visible reaction strike. As to the veracity of “if it ain’t chartreuse it ain’t no use,” you already knew that in reality it’s not absolute. To flip the script, you might consider choosing a lure color (such as black) that strongly plucks chartreuse from the available light for optical contrast to the yellow-green aquatic environment.
Don’t get out your pitchforks just yet—I’ll be danged if you see me throwing anything other than chartreuse on the first cast. That is unless we’re talking about fluorescence colors, which don’t play by the same rules…
-By Michael Brupbacher
1. U.S. Department of Energy (DOE)/NREL/ALLIANCE
2. E.O. Hulburt, Optics of distilled and natural water, Journal of The Optical Society of America, 35(11), 1945, 698-705.
3. A.Z. Horodysky, R.W. Brill, E.J. Warrant, J.A. Musick, R.J. Latour, Comparative visual function in four piscivorous fished inhabiting the Chesapeake Bay, The Journal of Experimental Biology, 213, 2010, 1751-1761.
4. J A S. Kinney, S.M. Luria, D.O. Weitzman, Visibility of colors underwater, Journal of the The Optical Society of America, 57(6), 1967, 802-809.
When it comes to AR-15 barrels…you may be noticing different rifle twists in their specs.
Does it really matter that much?
Will the wrong weight bullet for your twist rate make it fly off into the sunset?
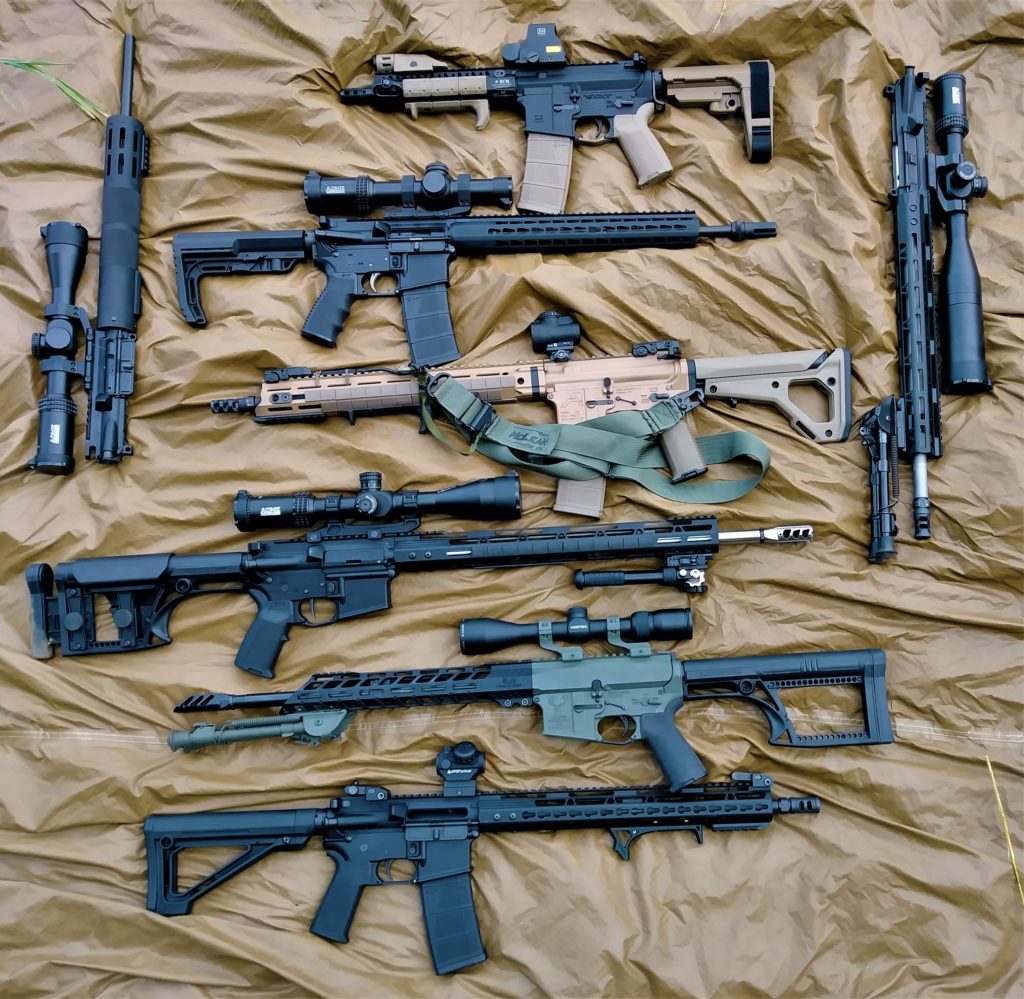
Author’s Collection of AR-15s
It does matter, but I’m here to make your decision easy and help you understand what it all means.
Bullet Weight Does Not Dictate Barrel Twist
The first thing that needs to be understood is that bullet weight does not directly have anything to do with what rifle twist you should be using in your AR15 barrel chambered in 5.56 NATO or .223 Wylde.
Now before some people start pounding their table, and grabbing pitchforks, let me explain.
Bullet length is what ultimately dictates your barrel rifling twist. If you do a quick google image search, you will find a few different charts or graphs that specifically show bullet weight and which rifle twist you “need”.
Ar-15 Rifling Twist Rate
While it is a general rule of thumb with weight, in reality, the longer a bullet is, the heavier it becomes.
With newer types of bullets on the market and lead-free designs, some bullets made of copper and zinc are very light but require extra length to achieve the same weight compared to a lead core projectile.
So, the longer the bullet you shoot, generally speaking, the faster the rifling twist needs to be to properly stabilize the bullet in flight. With great stability comes great accuracy. But what does the barrel twist mean?
A Cliff Notes History Lesson
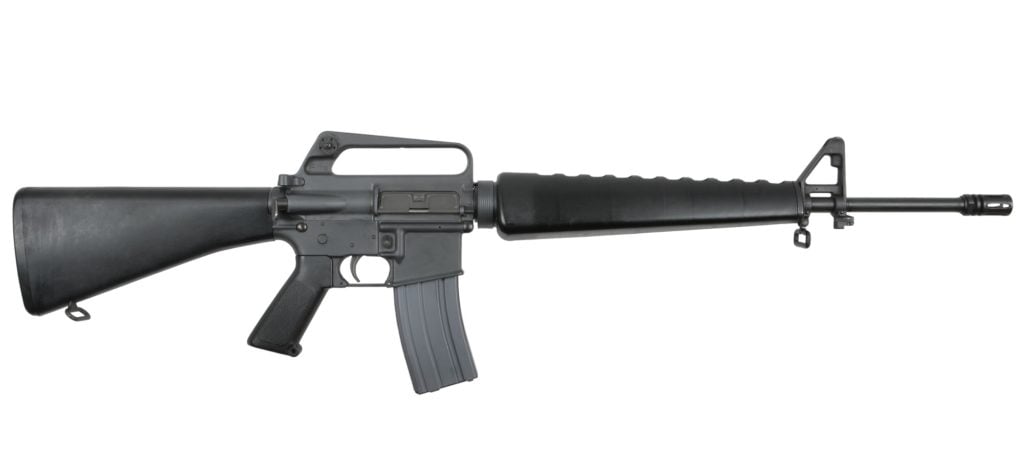
In the early years of the AR15’s development, the rifling twist that was adopted was a 1:14 rifle twist.
The easiest way to explain what that means is that the rifling makes a complete twist 1 time every 14″. Most loads shot through these barrels were a very short, lightweight bullet in the 40-55 grain category.
You can read a more complete history of the M16, but for now, let’s fast forward to the present.
The early M16A1 utilized a rifle twist rate of 1:12 to stabilize the 55 grain M193.
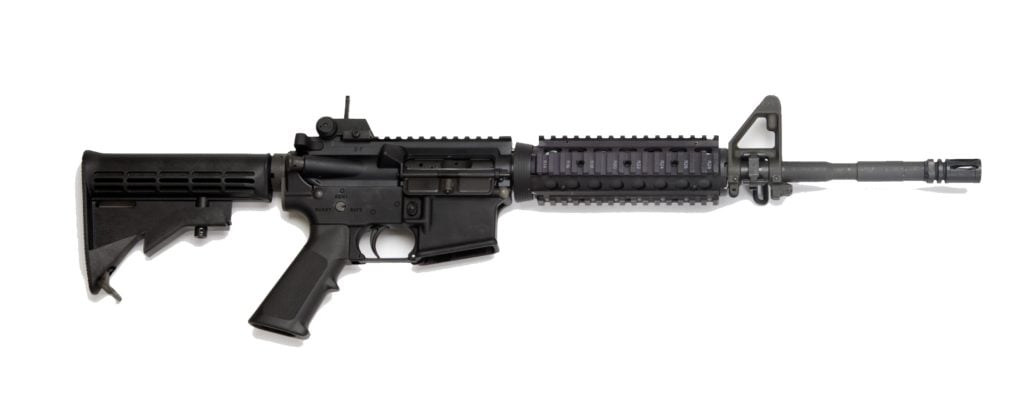
After the adoption of the M16A2, the military started using a 1:7 rifle twist, which was faster. The rifling made a complete revolution within 7″ now instead of 14.” We are talking twice as fast.
The military also adopted a longer, heavier projectile with the SS109 steel core projectiles loaded in the M855 cartridge.
The current example of an M4 carbine with a twist rate of 1:7 to stabilize the 62 grain M855.
Capitalism at Its Finest
So why are there multiple rifle twists on the civilian market with the 1:9, 1:8, and the 1:7 as stated before?
Short answer: Capitalism.
If you are a red-blooded American, you enjoy the perks of capitalism.
The one drawback of capitalism though is that the market breeds more choices and more decisions. A lot of barrel manufacturers sell all of the top three rifle twists in their barrels, and it can be a little daunting when you are trying to figure out which one to get.
We covered the fact that you need to properly stabilize a bullet, and we have covered a quick history of different rifle twists. Stick with me here, because I am going to make this a very easy decision for you.
A Lot of Bad Info
Out in the unnatural world of the interwebs, you can run into a lot of bad information regarding practically anything. Rifle twist and bullet choice are no different.
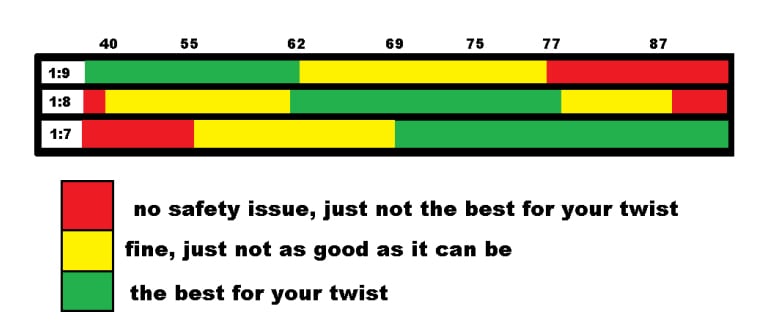
When it comes to slower rifle twist, i.e. 1:14, 1:12, 1:9, you really shouldn’t be shooting bullet weights over 65 grains or the equivalent length for a 65-grain bullet. It won’t damage your rifle, but you will have very poor accuracy.
Are bad twist rates why Stormtroopers can’t hit anything?
It is absolutely true that heavier, longer bullets in the 69-85 grain flavors like faster rifle twists of 1:8, or 1:7. When someone tells you, “if you want to shoot some operator level Mk262 77 grain OTM ammo, you need a 1:7 twist”, believe that they have your best interest at heart.
But what about an all-purpose twist you may ask?
Maybe you are just like me, and you want a barrel twist that can excel with the heavier 77 grain or 85-grain loads, BUT at the same time you want to get out and smoke some woodchucks or prairie dogs, and you would like a 40-grain bullet to shoot accurately?
Can you “over-stabilize” a lighter bullet with too fast of a rifling twist?
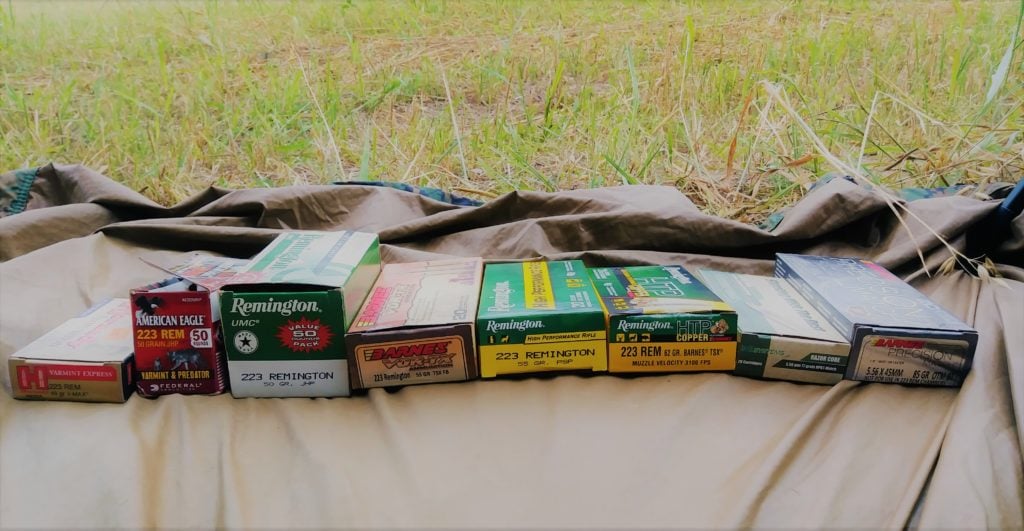
Ammo for days! A sampling of the different loads shot for the experiment
Shoot, Switch Ammo, Repeat
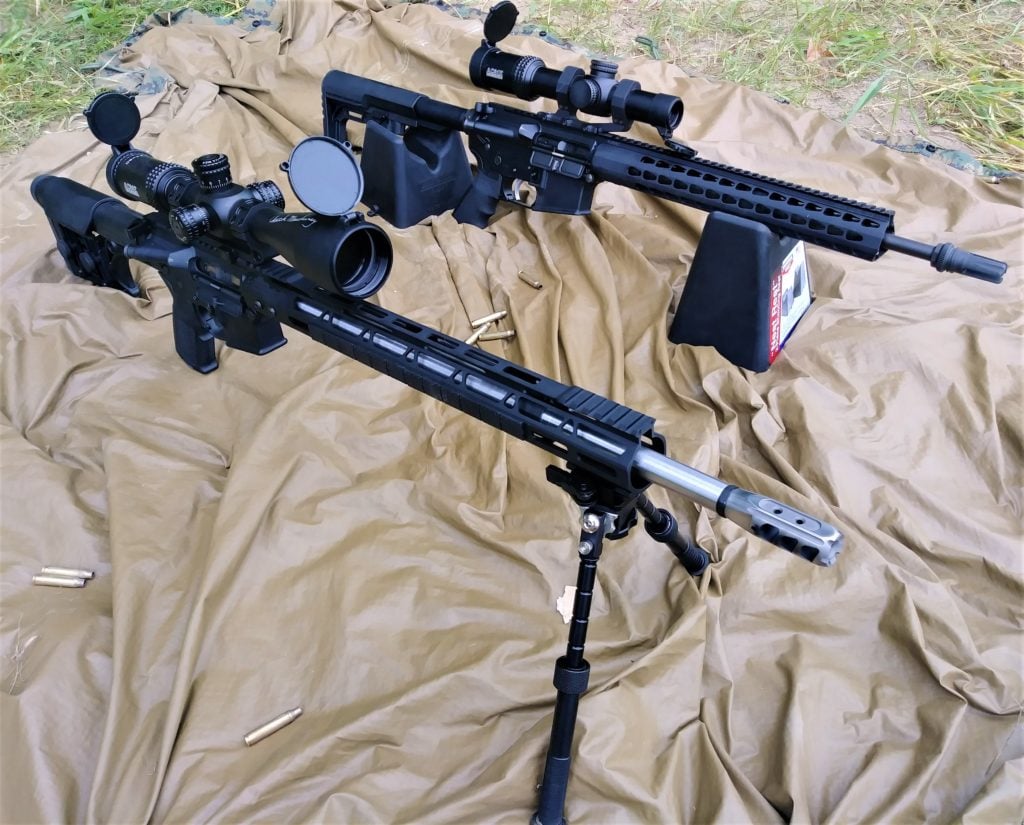
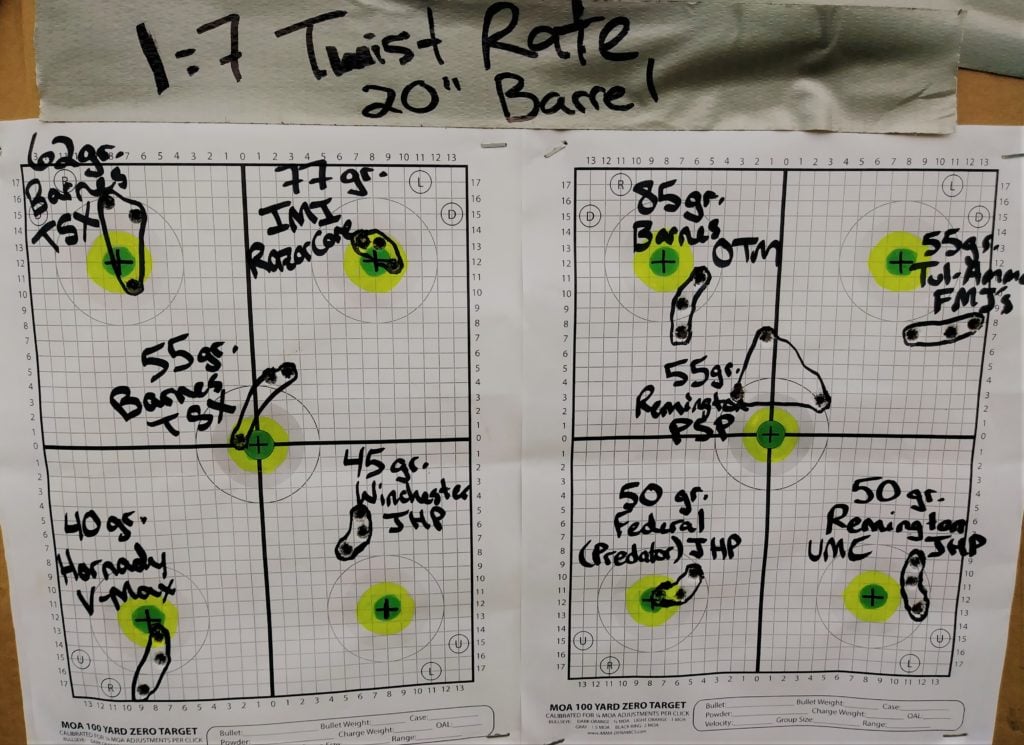
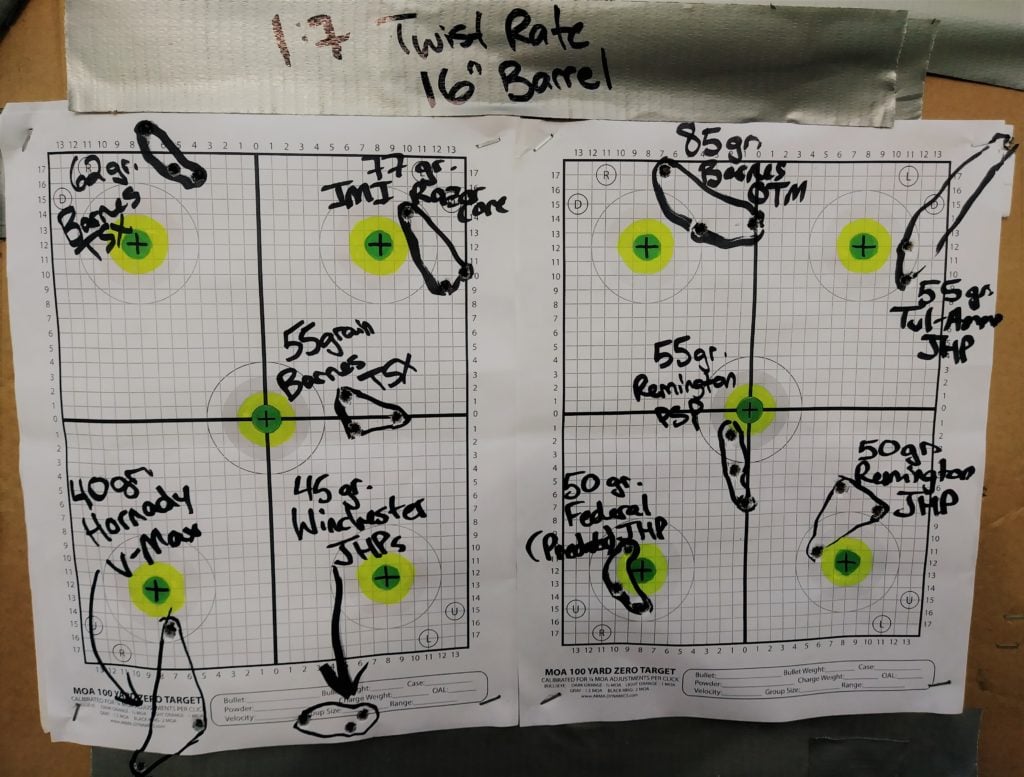
I decided to run through a little experiment with multiple loads of .223 Remington and 5.56 NATO. Ten different loads to be exact. And to make this even more scientific, I did it with two different rifles that both have a 1:7 rifle twist.
The first rifle that I tested is a home-rolled rifle that utilizes a Radical Barrels, LLC 20″ 416R stainless barrel. Rick Hoffmeyer of Radical Barrels, LLC made it for me, and it’s a fantastic barrel.
The optic on this rifle is an ACME Machine 6-24x50mm FFP TR-MOA. For the price, it is hard to beat for a first-focal-plane optic.
Author’s two rifles used for the accuracy test of a 1:7 rifle twist
The second rifle is a factory Bushmaster Minimalist that Remington had me use on a hog hunt down in Texas at the Spike Box Ranch. (If you ever get offered a chance to go there, don’t think about it. DO IT.) The only thing I added to this rifle was an ACME Machine 1-8x28mm FFP low-powered variable optic.
Glass clarity on this scope is impressive, to say the least. Both rifles used scope mounts from Green Blob Outdoors, and for the price, are exceptionally solid scope mounts that lock down tight.
From the lightest grain bullet to heaviest shot was:
Hornady 40 Grain V-Max
Winchester 45 Grain JHP
Federal 50 Grain JHP (Varming & Predator)
Remington UMC 50 Grain JHP
Tul-Ammo 55 grain FMJ (Just for the hell of it.)
Barnes 55 Grain TSX
Remington 55 Grain PSP
Barnes 62 Grain TSX
IMI 77 Grain OTM Razorcore
Barnes 85 Grain OTM
Moment of Truth
With ten different loads, all varying from the lightest/shortest to the heaviest/longest projectile that will fit inside the mag well of an AR15, I went about firing 3 round groups with each load at 100 yards to test how well each bullet would do.
I fully understand that some purists may be wringing their hands in the air because I did not do 5 shot groups. I get it. When I really test accuracy for a specific load, I fire 5-10 round groups to really see its potential.
The reality of the situation is that I have kids to feed, and a wife that will literally stab me to death in my sleep if I drain my bank account for ammo. She showed me the knife…
While this isn’t a comprehensive accuracy test for each load, this test shows a good representation of the accuracy potential for each load out of a 1:7 rifle twist barrel.
As you can see from the included photos, there was absolutely no loss of accuracy from an “over-stabilized” lighter/shorter bullet.
Both rifles tend to shoot roughly the same point of impact, varying across the whole spectrum of bullet lengths and weights at 100 yards.
Some conventional “wisdom” would dictate that my accuracy should have suffered greatly with the shorter/lighter bullets with a faster 1:7 rifle twist or worst case scenario tumble through the air and keyhole the target. This just isn’t the case.
Within the normal ranges that most shooters fire their rifles, bullet length and twist should not be a concern if you have a faster 1:7 rifle twist.
Targets for the 10 different loads tested out of a 20” Radical Barrel
What should be a concern though, is feeding your rifle quality ammunition, and making sure your barrel is of good quality if you are striving for accuracy. Ultimately, that is the deciding factor of accuracy when using a 1:7 rifle twist.
Targets for the 10 different loads tested out of a 16” Bushmaster barrel
Decisions, decisions…
So its time to pay the piper, and make a decision on the rifling twist that will best suit your needs as a shooter. My vote is a 1:7, hands down. With a 1:7 rifle twist, shooting quality ammo, you can go as light as you would like with commercially available ammunition.
A case could be made that “over-stabilization” can bring about issues at extended ranges, but why would you honestly shoot a 40-grain projectile past 300 yards? If you are actually trying for accuracy at extended ranges of 300-700 yards, a 69-85 grain bullet is much better suited for the task at hand.
For up-close shooting drills, or within 300 yards, bulk 55 grain M193 will do just fine as well out of a quality barrel when you are on a budget.
Obviously, your mileage may vary, but generally speaking, if a load shoots like a dumpster fire, more than likely, your barrel just doesn’t like that specific mixture of powder weight and bullet style.
In my opinion, it just makes sense to stick with a 1:7 rifle twist! And now that you know how twist rates affect you, you’ll want to know what the Best AR-15 Ammo: Home Defense & Range is for you and your rifle.
What twist rate is your barrel in? What is your favorite ammo? Let us know in the comments!
What’s the most diverse group of guns in use by the world’s military forces?
It’s not rifles, or machine guns, or submachine guns, or even shotguns. Most successful long-gun fall into just a few different designs.
When you see oddball service rifles, you often see them plagued by issues of all kinds I.E. the INSAS, the FAMAS, the SA-80, and even the G36 have all had their problems.
And yes, we know the M16 had issues also.
The most diverse group of military weapons are handguns, aka sidearms. Even within certain countries, pistols can be diversely issued depending on the unit and mission.
Sometimes pistols are such a second thought they are a mishmash of different guns.
For example, see Israel at the near end of this list. Another challenge is how countries outside of Western Europe equip their military forces. In the Western World, there is a big move towards standardization that’s not present with other countries.
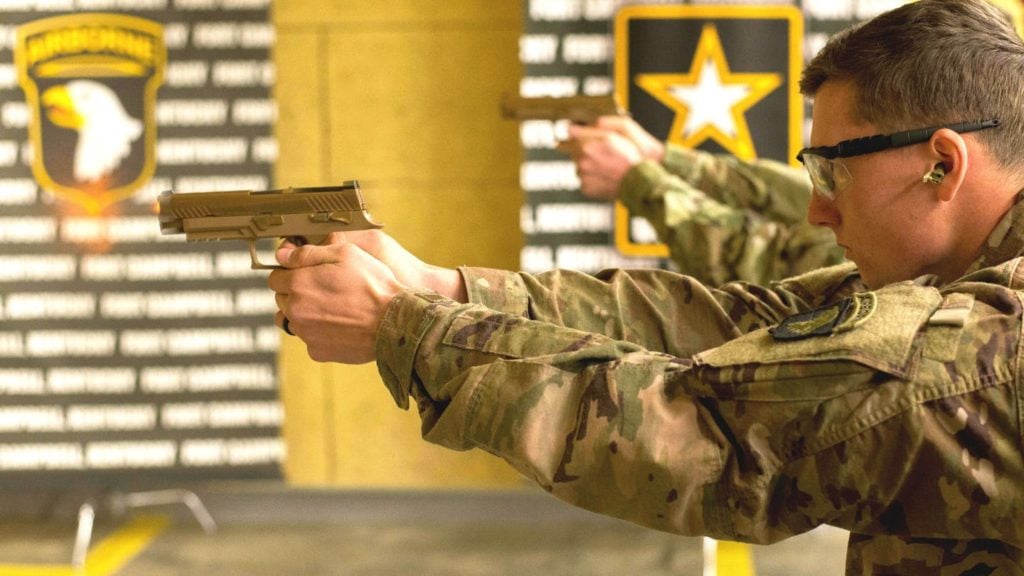
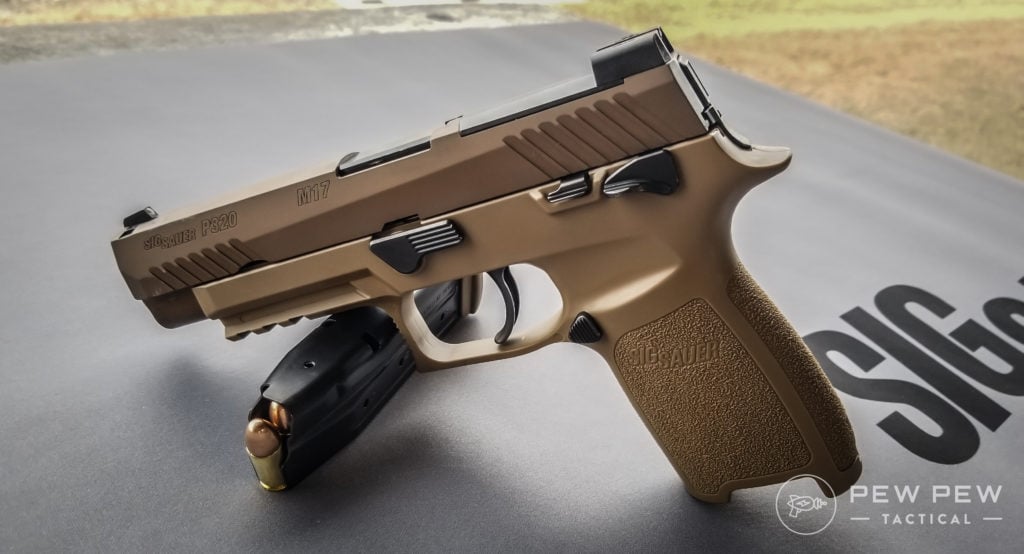
U.S. Army new M17
Several countries also don’t put out a press release when they purchase or adopt a new handgun, making it difficult to verify the information.
To be entirely fair, sidearms are just a step above bayonets on the necessity of military equipment priorities. Most countries issue them in small numbers to officers and specialists.
I put my best foot forward to come up with a comprehensive list of the sidearms from around the world. It was a little harder than I initially thought, but the research was still fascinating and fun.
With all this in mind, I’ve tried my hardest to verify the issuance of every firearm on this list. I set my parameters to general issue sidearms.
Some Special ops teams may use something different than the standard forces, and trying to catalog these weapons along with general sidearms would take several articles.
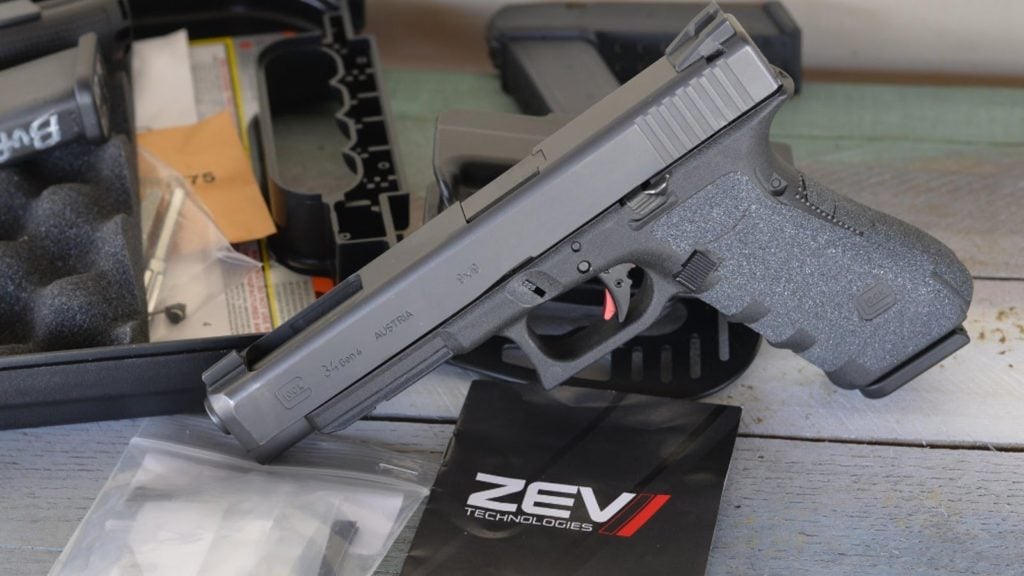
For example, the United States military alone issues the Beretta M9, the M17/18, the MEU/SOC 1911, the SIG P226, the M11A1, the P229R, the Glock 34, Glock 17, Glock 19, Glock 22, and many more we’ve likely never seen. It’s much more reasonable to focus on the general issue sidearms of these military forces.
Since several military forces have adopted the same gun, we’ll group those together to simplify things.
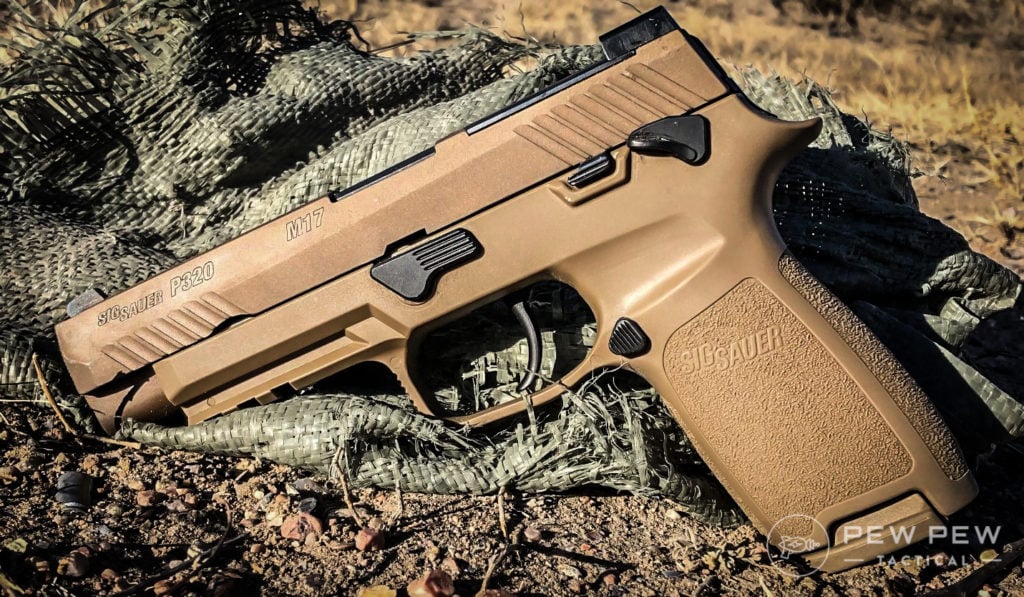
1. United States – SIG P320 Designated the M17/18
I was lucky enough to be at SHOT Show when it was announced that the SIG P320 would be adopted for military service with the U.S. Army. Needless to say, the folks at the SIG booth were quite excited.
Sig Sauer, SHOT 2018, colorized
The P320, designated the M17 and M18, was adopted in 9mm in full size (M17) and compact (M18) variants. The M17/18 series are quite advanced for military sidearms and feature red dot optics compatibility. Although red dots have not been issued as far as I know.
P320-M17
Like the P320 the ability exists to move the serialized fire control group to different grip modules. The military is quite strict with serial numbers and if the military allows the issued troop to choose a grip module they could get a gun that fits them. One size fits all is rarely a good idea.
Of course, the U.S. Military is nanny like and included a manual safety. In reality, more training would be more beneficial than a manual safety, but who am I to judge big army.
The M17 has since been adopted by the Air Force, the Navy, and the Marines. The M17 is currently being issued to combat arms units first in the U.S. Army. The Army plans to replace every M9 within ten years with an M17/18.
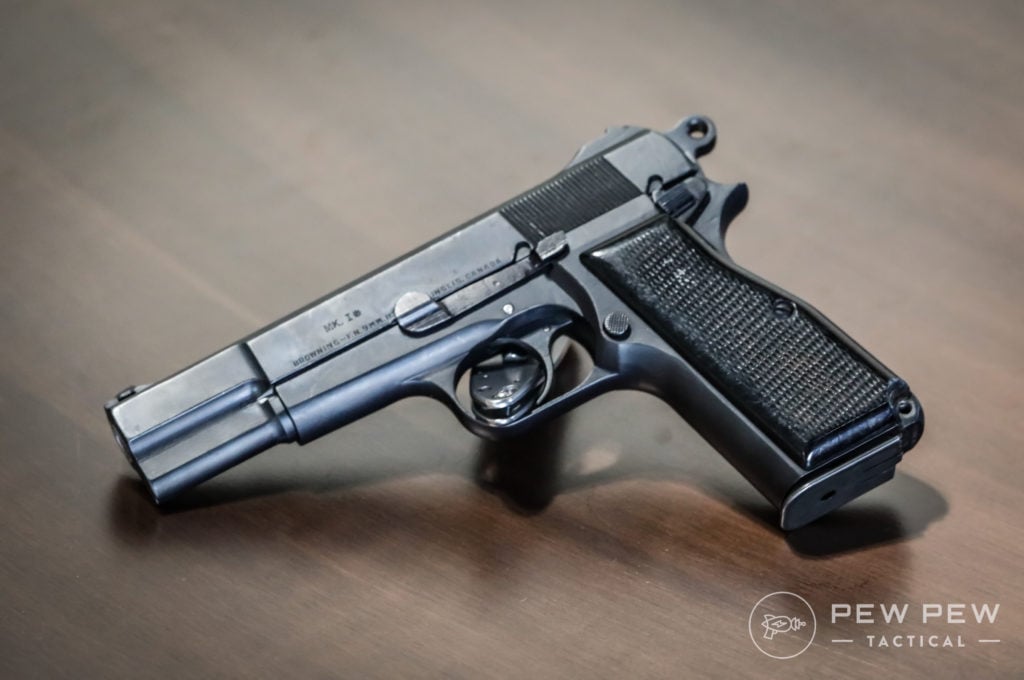
2. Commonwealth Club – The Browning Hi-Power
Canada, Australia, Bahrain, India, Thailand
The Browning Hi-Power is the European 1911.
FN Browning Hi-Power
What I mean by that is its popularity and longevity in military service. The Hi-Power has been used by just about everybody and in only the last few years have more modern designs replaced it.
Original World War II Era Browning Hi-Power
The Hi-Power was one of the first high capacity 9mms that entered regular service. It’s a single action only weapon with a manual safety and a 13 round magazine. The Hi-Power is a beautiful gun that is robust and reliable.
It’s close to 100 years old and is still seeing war.
It’s one of the few guns to see action on both sides of WW2 in service with numerous Allied Forces, including the British, and in the hands of Germans. The Hi-Power is an excellent firearm and was a final fitting design for John Browning.
Its legacy of service across the world is nearly unmatched. Much like the sun never sets on the British empire, the sun doesn’t set on the Hi-Power. While it’s been produced mostly in Europe, the gun is also widely built in South American factories as well.
Modern Browning Hi-Power Mark III with World War II Era Hi-Power
It’s been heavily used in Europe, the Middle East, Asia, and South America. From imported goods to domestic production copies, the Hi-Power is a legend in small arms design.
It’s currently the issued sidearm of Commonwealth countries like Canada and Australia, and as far out as India and Thailand.
Canadian Hi-Power
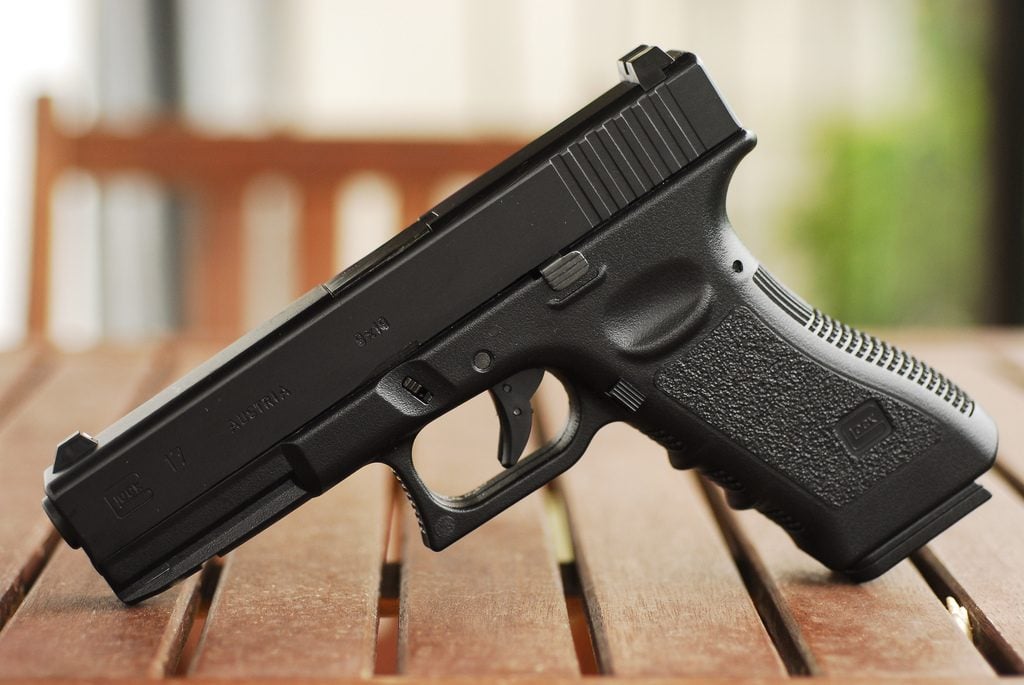
3. 20+ Nations – The Glock 17, 19, and 34.
The United Kingdom, Sweden, Austria, Finland, Malaysia, Mexico (Navy), Montenegro, The Netherlands, New Zealand, Norway, Poland, Portugal, Romania, Switzerland, Yemen, Venezuela, Uruguay, India, and many more.
It would seemingly be easier to make a list of countries the Glock 9mm series doesn’t serve in. The weapon seems to be everywhere in the world.
Glock 19
Why not? The 9mm Glocks are the flagship of their handguns, and the only difference between the 17, 19, and 34 is barrel and grip length.
Glock 9mm pistols are legendary for their rugged and reliable design. These superbly simple guns work, and keep working. On top of that, Glock has logistics nailed with supplies and spare parts out the yin yang.
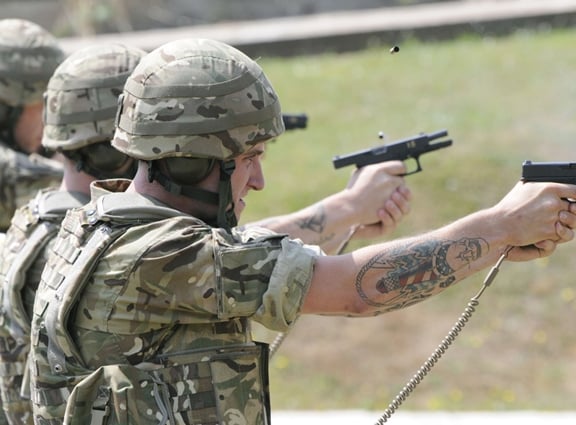
UK Glock 17
Generation wise it appears that Gen 3 and Gen 4 models are the most popular variants in the military market. The Glock series also seems to be the most popular choice in countries where Spec Ops have more leeway in choosing a handgun.
The Glock series of firearms are popular the world over for a good reason. They are accurate, easy to use, highly reliable, lightweight, and cheap. The price Glock sells their guns to Police Forces is criminally low, and I imagine the price for military forces is even smaller.
Penny pinchers often give a big say when it comes to new guns, and price always matters. Glock makes their weapons affordable while being high quality. As far as military sidearms go the Glock 17 will likely remain the most popular choice for some time to come.
If you want to get your own Glock, you should take a look at some of these articles:
Best Glock (All Sizes & Calibers)
Best 9mm Glock
Best Glock Upgrades
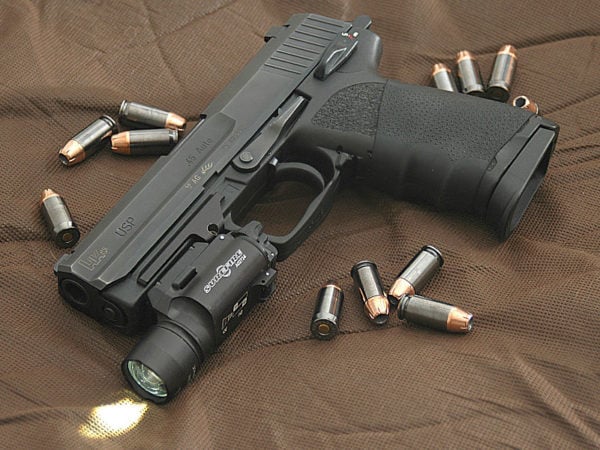
4. Germany, Ireland, Greece, and Spain – The HK U.S.P.
I love the HK U.S.P. It’s one of my favorite DA/SA guns, and that’s saying a lot. The U.S.P., or universal self-loading pistol, is Heckler and Koch’s premier handgun design.
Germans with their HK USP
It’s a fascinating gun and while 9mm is the chosen NATO cartridge the USP was one of the first guns built around the 40 S&W. The gun was also chambered in 357 SIG, and later 45 A.C.P.
HK45 USP with mounted light
The U.S.P. stood apart from other polymer-frame guns of the time due to its mechanical recoil reduction system. This system is implemented with a heavy captive coil spring around the guide rod that reduced the force of the slide slinging rearward.
This buffers recoil by up to 30% according to H.K. The U.S.P. came to be because of the Offensive Handgun Weapon System, where it was tested alongside prototypes of the Mk 23 Mod 0. From the very beginning the gun was always meant to be a service pistol.
As a service weapon, it has been adopted by at least four countries as the general issue sidearm. In several more countries, it serves as a pistol for Special Operations units. Plus the U.S.P. C. is Jack Bauer’s gun of choice.
5. The French – M.A.C. Mle 50 and PAMAS G1
I’m not picking on the French, but any look into their current small arms will find them lacking. Their military is often ignored and their weapons are often quite old. There are two current service pistols in use, and neither is a new design.
French army MAC50
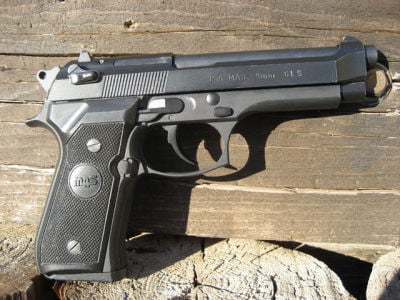
First we have the ancient, but domestically designed M.A.C. Mle 50 and then the PAMAS G1. The PAMAS G1 is a licensed clone of the Beretta 92F and is built in France.
The 30-year-old G1 was supposed to replace the MAC Mle 50, but it seems the process has been moving along very slowly. They are looking to now replace both pistols as of March 2019.
The M.A.C. Mle 50 is a product of its time, and as a gun designed in 1950, that means it’s a single stack 9mm with nine rounds and a single-action design. It uses the Browning system like a Hi-Power and has an integral barrel feed ramp.
The M.A.C. 50 is a stout little gun that’s known for its durability, clearly, since it’s been around for nearly 70 years now.
The PAMAS G1 is a clone of the Beretta 92F made in France. There are a few differences between the PAMAS G1 and Beretta 92F. The G1 has a decocking lever only, and apparently, the French steel is more brittle.
Since it’s a 92F, it lacks the enlarged hammer axis pin that prevents the slide from accidentally leaving the gun and hitting the operator in the face. However, there is some speculation this was initially caused by +P+ ammo.
PAMAS G1
The French will likely adopt a Glock pistol, but until then, the M.A.C. and PAMAS are chugging along. The PAMAS is certainly a step up from the MAC, but both are likely well past their service life.
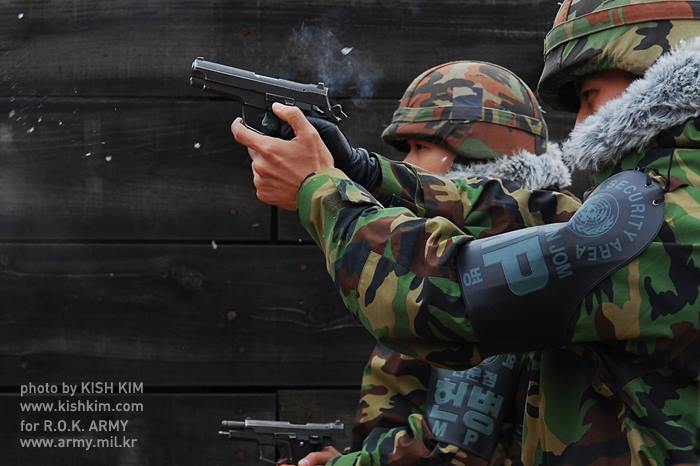
6. South Korea – The Daewoo K5
South Korea has a robust and well established domestic arms production history. Rather than just relying on the U.S., the Daewoo brand has produced most of South Korea’s military firearms.
The Daewoo K5 is an innovative and exciting firearm design that has served the Koreans since 1989.
Daewoo K5
The Daewoo K5 is a DA/SA pistol with a hammer, made on metal frame and is chambered in 9mm. The Daewoo K5 holds 15 rounds of 9mm, and in 1989 was quite high tech. It’s slightly dated now, but still an excellent combat pistol.
The K5 features an unusual trigger mechanism, sometimes called Triple action or Double action +. It’s quite similar to the P99, except with an actual hammer-fired handgun. The K5’s hammer can be decoked, while still maintaining mainspring compression.
The DP51 is the export version of the K5
The end result is a trigger pull with the length of a double-action trigger, but the weight of a single-action design. In the states, the Lionheart imported pistol had the same innovative feature. The K5 is a fascinating gun, and in 1989 showed a lot of innovative thought from Daewoo and South Korea.
Daewoo is an interesting company. They make everything from TVs to Cars, and handguns and assault rifles. If you need a slow, fuel-efficient car and a machine gun, call Daewoo.
7. China – Type 92
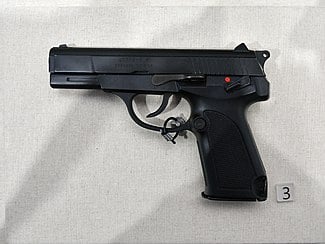
The Type 92, aka the QSZ-92, is China’s primary service sidearm. This recoil-operated, locked-breech pistol has a rotating barrel locking system like the Beretta PX4 series. This rotating barrel setup is supposed to improve reliability and decrease recoil.
Chinese Type 92
This is an interesting little gun, and it was ahead of its time.
The Type 92 was designed in 1994 and featured a detachable steel frame that holds the fire control group. This sits in the plastic grip and acts very much like a SIG P320’s FCU. The frame can be removed and moved into different sized frames and grip designs.
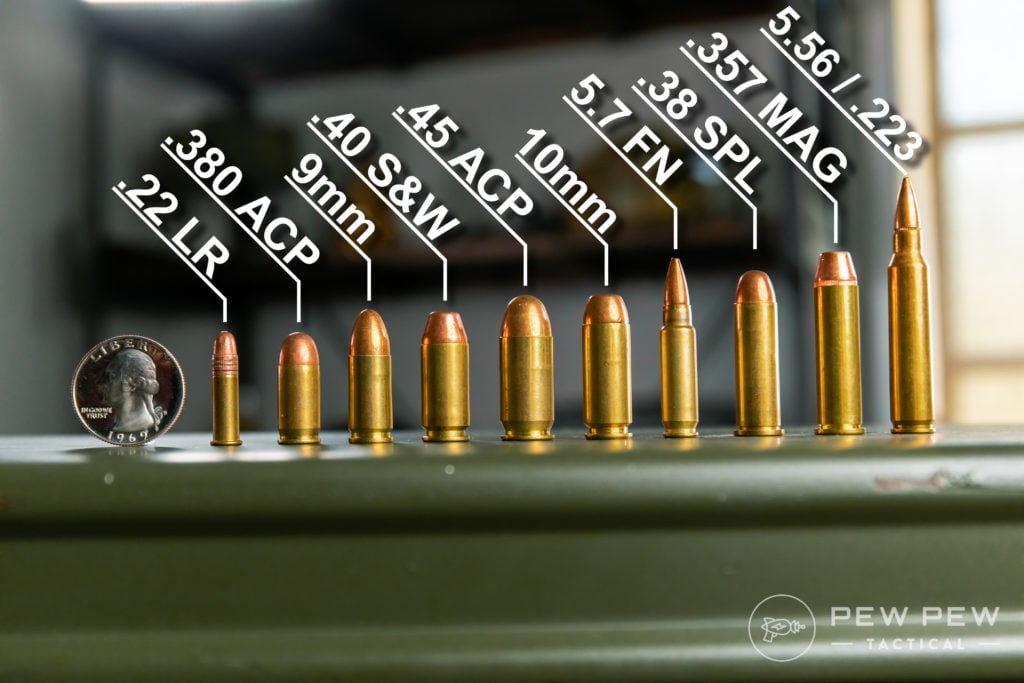
Whether or not this was ever done remains to be seen. The gun is also chambered in the very odd 5.8x21mm round. This was China’s variant of the 5.7 and was designed to defeat soft armor.
Popular Pistol Calibers
It holds 20 rounds of the 5.8×21 round in a double-stack magazine and has a combination safety/decocker. It’s a DA/SA design and is issued lightly among Chinese forces.
9mm variants also exist for export… for reasons.
I’m betting the 5.8 round handles a lot like the 5.7, and it’s a shame we can’t find out for ourselves.
8. Russia – Makarov, and MP-443
Russian is a weird country for small arms.
Admittedly they are much more focused on their rifles than their handguns. That’s why the Makarov pistol is still around and kicking in use by their military forces. This Great Value brand Walther PP has been serving since 1951.
Rusian Makarov RT
It’s a blowback-operated design that’s very compact for a service pistol. When your handgun is more or less used for executing traitors and subjugating people, I guess size doesn’t matter. The Makarov had a capacity of 8 rounds of what is essentially a +P .380 ACP round.
The most impressive thing about the Makarov is the fact it’s made of only 27 parts. This was perfect for the Soviet Union at the time. It is cheap and easy to produce, and had very few failure points.
The Makarov pistol has been around for so long because the former Soviet Union produced millions of them, and they are robust little pistols.
The MP 443 Grach, aka the PYa, is a more modern Russian service pistol that aims to replace the Makarov. The MP 443 is a modern 9mm Parabellum pistol with a 17 or 18 round magazine capacity. The MP 443 is slowly making its way into the hands of Russian forces, and the gun has been in mass production for eight years now.
Russian MP443
The MP 443 is pretty standard as far as pistols go. It’s a DA/SA design that does allow the user to swap the slide stop lever and manual safety to the right and left sides of the gun. The MP 443 uses a Colt-Browning design and doesn’t do anything revolutionary.
So it’s a lot unlike bored Russians in that sense.
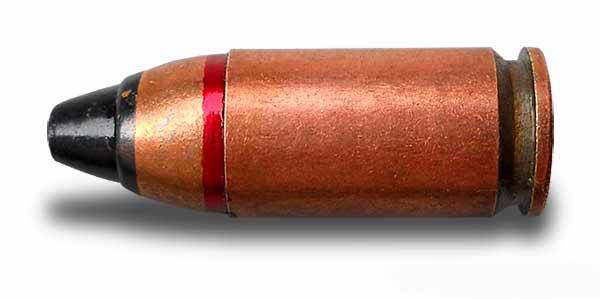
It is an all-steel gun, and while this adds to the gun’s weight, it is quite robust and durable. It needs to be to use the Russian armor piercing 9mm 7N21 armor-piercing round. This s a +P+ style round apparently and is a hard hitter
Russian 7N21 AP 9mm
The MP 443 is another gun we will likely never see, but I doubt it does anything an old SW 3rd gen doesn’t do.
9. Belgium – FN Five-Seven
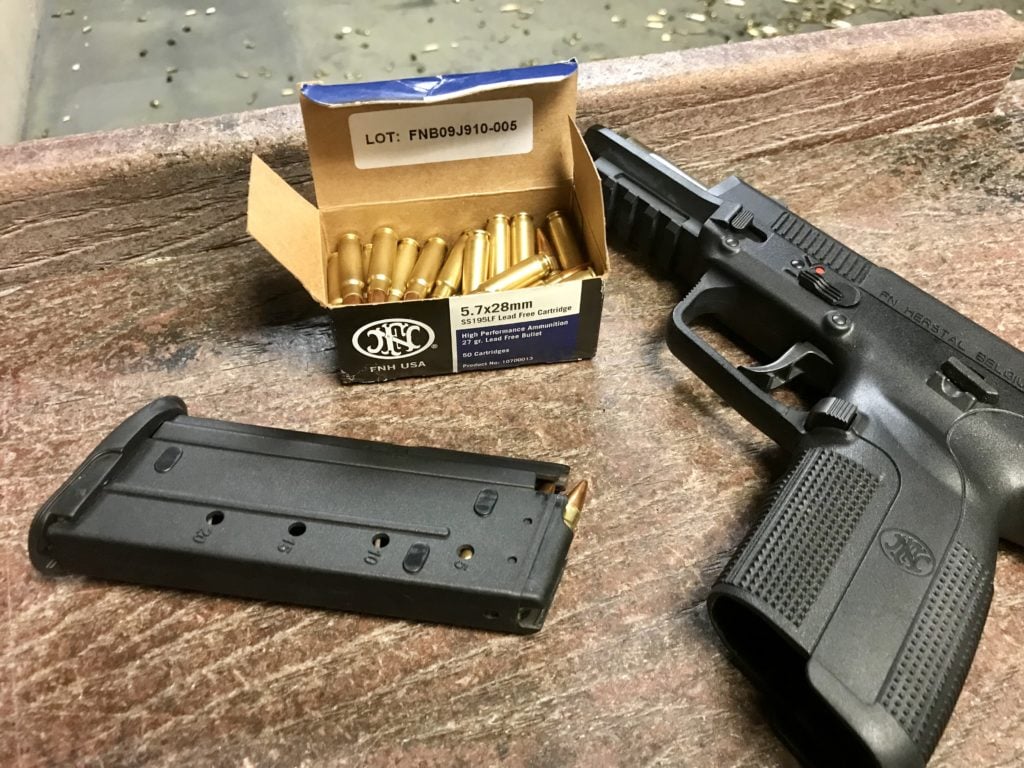
The Belgium FN Five-Seven pistol is an interesting firearm. It fires the 5.7x28mm round and was developed to share ammunition with the FN P90 PDW. The round it fires is similar to a rifle round in design and shape.
Five-SeveN with Ammo and Mag 2
While the ammunition is long, it’s thin, and this allows the Five-Seven to hold 20 rounds in a flush-fitting magazine. The Five-Seven offers soft armor penetration and very low recoil on top of a flat shooting cartridge that can reach out to 100 yards.
This is a very easy shooting gun, and I can see why a military would adopt it. Plus it’s lightweight, reliable, and is unlike most handguns when it comes to armor and barrier penetration. The gun and the ammo is quite pricey though.
The gun is Belgium designed and is currently replacing the Browning Hi-Power with the Belgium Army. The Five-Seven also serves the Air Force, Special Forces Group, and Federal Police forces. The Five-Seven is an unconventional choice but is an effective weapon.
And of course, it is the firearm of Ivan Chesnokov fame.
We literally cannot think about the FN Five-seveN without thinking of Ivan Chesnokov.
10. Czech Republic – C.Z. 75 Phantom
The Czech Republic has a long history of private firearms ownership and is one of the few European countries to have a strong firearm’s civil rights. C.Z. is also one of my favorite personal gun makers.
Czech soldier with CZ 75 Phantom
The C.Z. 75 has been used extensively by their military for quite some time, and still serves in reserve units.
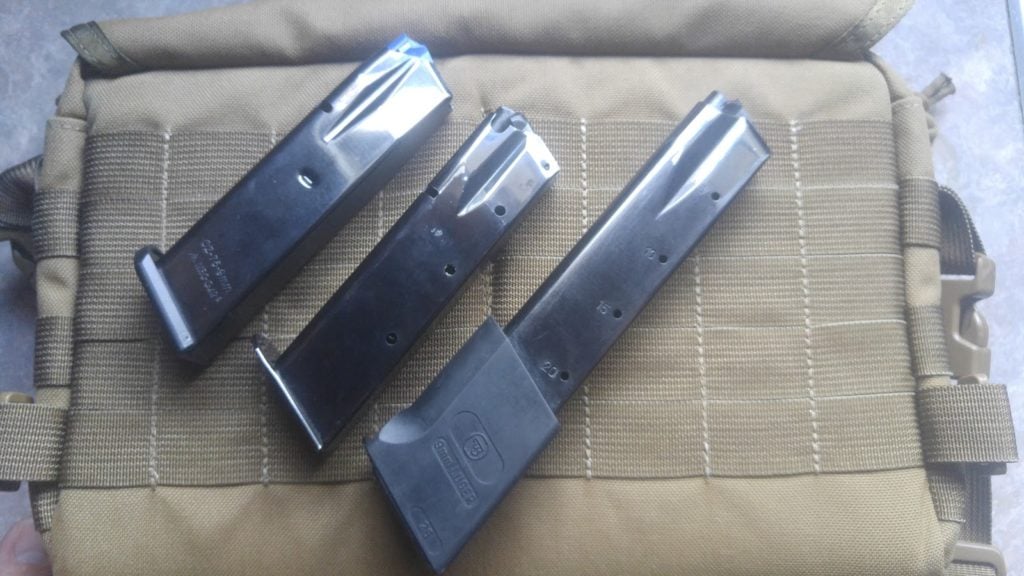
The C.Z. 75 Phantom is now the primary service pistol. This gun is similar in design to the classic C.Z. 75 but features a polymer frame, Picatinny rail, and a decocker only design. It also uses a larger 19 round magazine, but can also work with classic C.Z. 75 mags.
Lots of CZ 75 mags
The C.Z. 75 Phantom is a robust and accurate weapon. The ergonomics are simply incredible, and C.Z. isn’t afraid to sell the gun in the States, so yay for us. The Phantom is a service pistol with the handling of a competition gun.
It has an excellent trigger, a low bore axis, and is well proven. The Phantom is an excellent gun, and it was a great choice by the Army of the Czech Republic.
11. South Africa – Vektor Z88 and SP1
South Africa has an exciting history of arms design and has both cloned and created their weapons. Their service handguns are a mixture of both. The Z88 was a domestically produced clone of the Beretta 92.
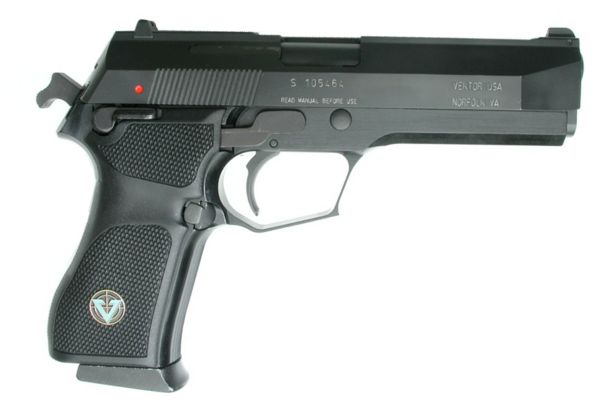
Vektor SP1
They couldn’t license it or receive handgun imports due to the arms embargo on South Africa at the time. Beretta also couldn’t sue because South African’s couldn’t come to court to defend themselves.
The Z88 was a direct clone of the Beretta 92 and, as such, is a DA/SA gun with a decoking safety and a 15 round magazine. The Z88 was a very well done clone and helped modernize the South African military. It still serves today in a limited role.
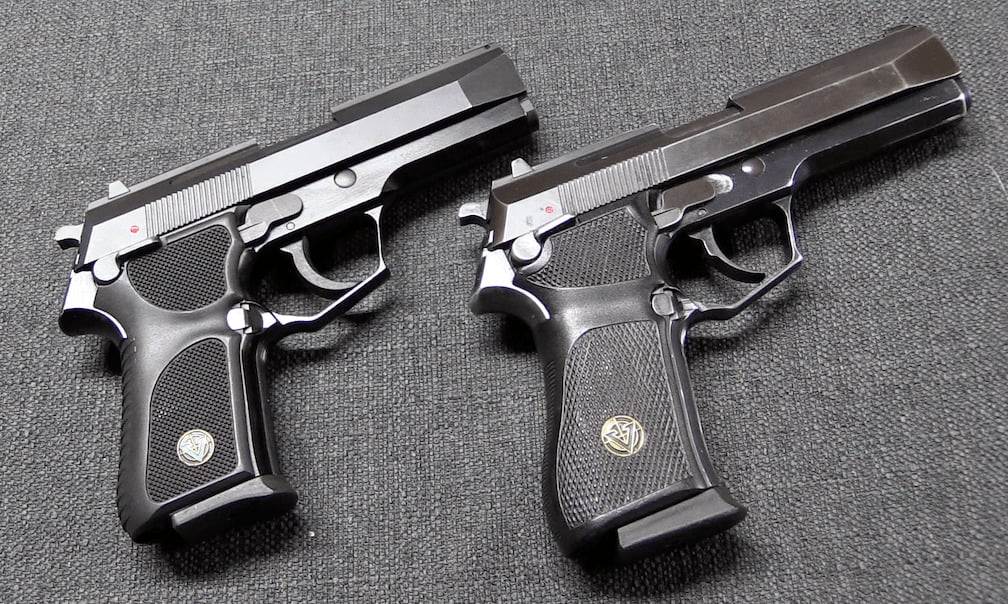
Z88 and SP1, Forgotten Weapons
After the sanctions were lifted, Beretta was in a place where they could file lawsuits, so South Africa wisely changed the design and came up with the Vektor SP1. This gun utilized the same basic Beretta design with some changes. The safety was moved to the frame, the barrel was no longer exposed, and a 40 S&W variant was created.
The SP1 is a metal frame pistol, and it still utilizes Beretta magazines. It currently serves the South African National Defence Force and the Police Service. It admittedly looks very cool and while limited numbers were imported to the States I’ve never seen one in person.
The SP1 is reportedly a well made combat handgun, and since the weapon is based on a Beretta 92 it’s got a solid platform to start on. South Africa apparently likes the weapon enough that they’ve yet to start shopping for a new sidearm, even without an arms embargo.
12. Italy – Beretta 92FS
Beretta, the world’s oldest still-operating arms company, is an Italian firm. Are we at all surprised that the Italians are using one of Beretta’s most legendary handguns?
The 92FS has served several countries as a military and police sidearm, including our own, for more than 30 years.
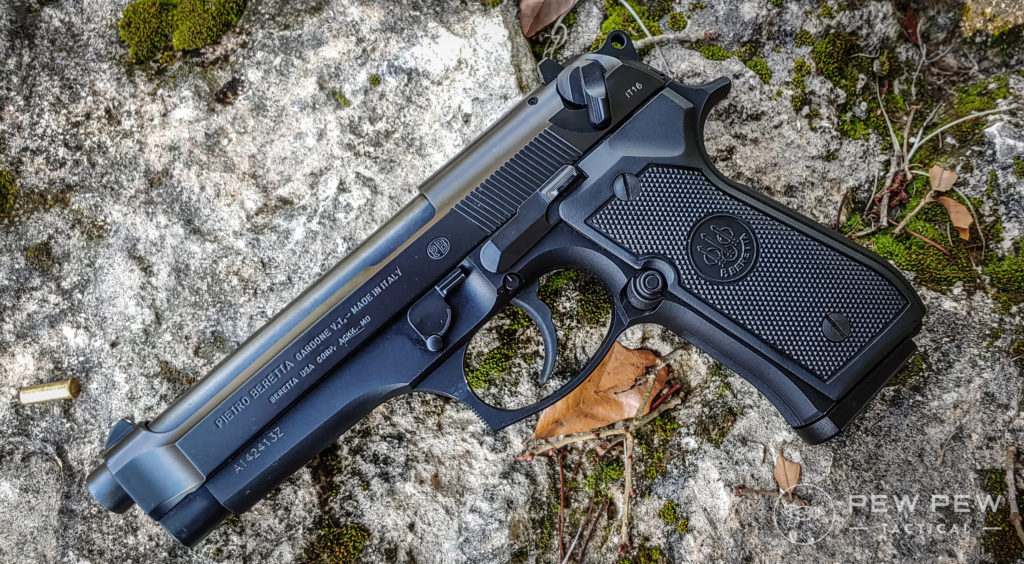
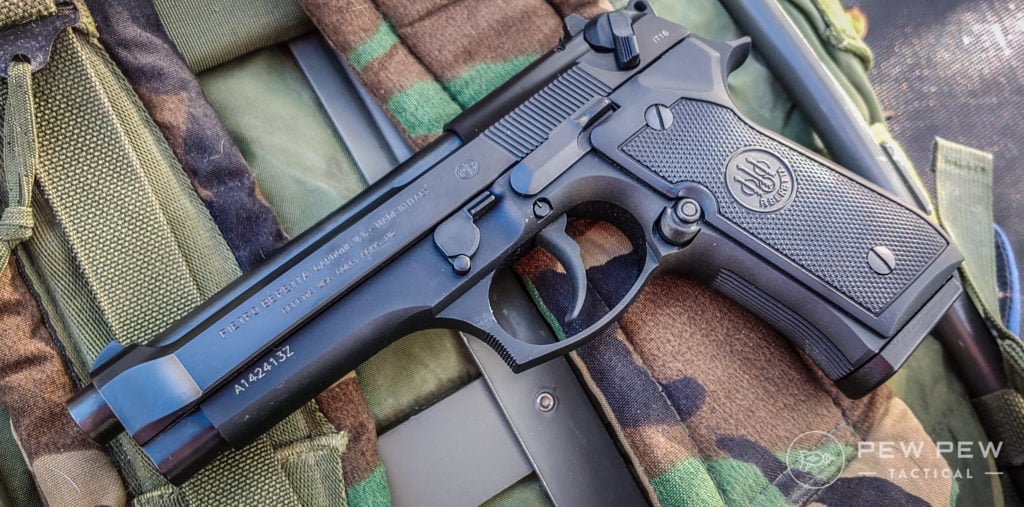
Beretta 92FS
The Italian military uses the Beretta 92FS. This DA/SA design features one of the best stock factory triggers on the market. The 92FS has a combination safety and decocker and excellent ergonomics outside of the safety.
The 92FS in it’s M9 form was the gun I used and it’s an excellent weapon. The 92FS is robust, reliable, and well-proven. The direct feed system and open slide design greatly increase the gun’s reliability.
Beretta’s and the U.S. Army’s numerous testing has shown that the weapon is extremely reliable and can take a ton of abuse before it cracks.
The all-metal frame pistol has very low recoil and handles like a dream. It’s perfect for both new recruits and expert shots. The 92FS is Italy’s standard service pistol, and there doesn’t seem to be a rush to swap it out.
13. Brazil – Taurus PT-92
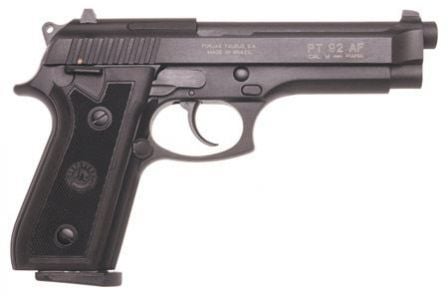
The PT-92 is the Brazillian copy of the Beretta 92, made by Brazillian firm Taurus. It’s not an identical copy of the Beretta. Taurus makes these guns on original Beretta machinery left behind after Beretta’s military contract expired in Brazil.
PT 92
The Taurus PT-92’s most significant and most noticeable change from the Italian Stallion was the use of a frame-mounted combination safety and decocker. Other than that, the PT-92 handles almost identically to the Beretta 92.
This includes the DA/A design, the direct feed design, and the double-stack magazine. The PT-92 has been serving the Brazillian military for decades now without much issue. The teething problems the Taurus guns sometimes have are seemingly not present in the P.T. 92’s design.
14. Israel… A Little Bit of Everything
Tracking down one service pistol for the Israeli army isn’t easy. It seems like they keep a bit of everything around.
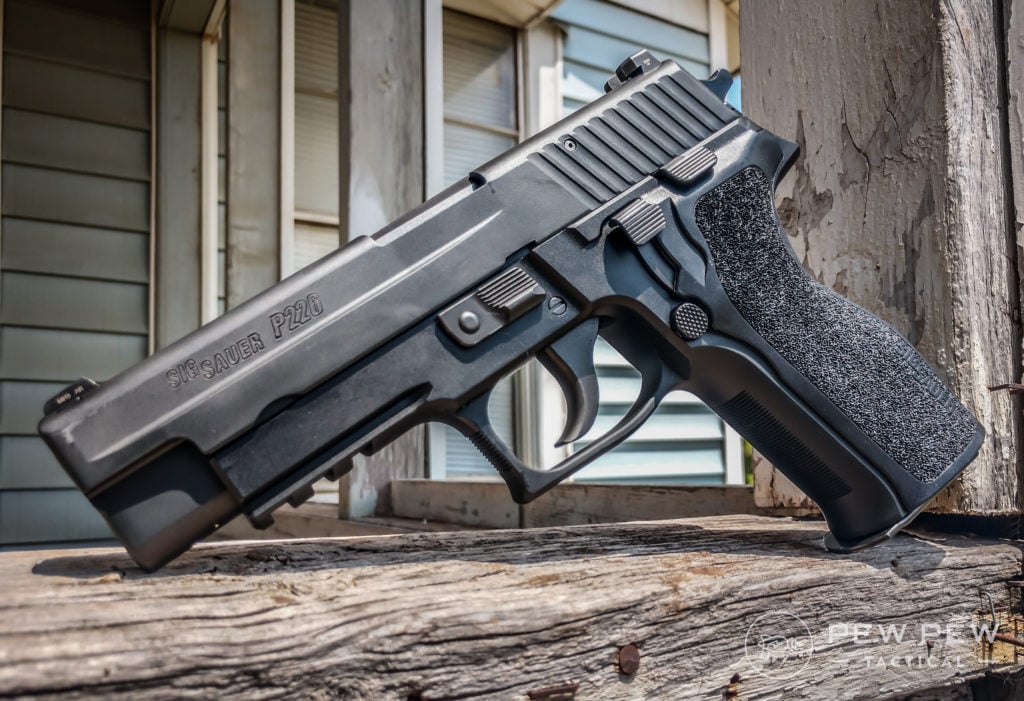
The domestically produced Jericho pistol is in the inventory, as well as the SIG P226 and 228, the Hi-Power, the Glock 17 and 19 models, and more.
Sig Sauer 226
Researching this article has shown me that service pistols in the Israeli Army are highly uncommon. The Special Forces and Intelligence agencies all seem to have their particular pistol.
I mean, does the Uzi pistol count as a pistol?
Sure, this was the full-sized Uzi. But it was still his CCW!
The one common thread between Israeli pistols is that they are all quality options. They are well made, proven guns with a long history of service and success.
Conclusion
Service pistols are such a diverse subject to cover, guns that include both past and present designs. The current field of Service pistols around the world is massive, and I was left exhausted after researching and writing this article.
Service pistols are a fascinating subject to research, and I’m surprised to see such exciting diversity. I can’t possibly have conquered them all, so I ask you fine folks in the comments, which ones have I missed? Want more…check out Police Sidearms: From Past to Present.
The Leupold VX-R packs some pretty impressive features into a relatively affordable package.
But what do those features mean for you? And is the Leupold VX-R worthy of a place atop your rifle?
In this Leupold VX-R review, I’ll answer that question and more.
Let’s get started!
Here’s My Leupold VX-R Review
The Leupold VX-R is a high-end scope with a mid-level price tag.
It’s durable, accurate, and lightweight. Plus, the Illuminated Ballistic Firedot reticle is excellent for rapid target acquisition.
In fact:
It’s one of my favorite hog gun scopes.
I expected quality from a Leupold scope, and I wasn’t disappointed. Here’s why…
Glass Clarity & Reticle
The glass is clear and produces a bright image.
The best part?
I can easily hunt in low light conditions (dawn or dusk). Here’s why:
Leupold applied their Index Matched Lens and Twilight Max management system. Combined, it allows for crazy bright views in dark conditions.
The VX-R uses one of my favorite red dot reticles:
The Ballistic Illuminated Firedot.
The dot is bright and draws the eye naturally to center without obscuring the target. This works especially well when I’m trying to take down running game.
The lines on the bottom post allow me to push my shots out beyond 200 yards and still maintain accuracy.
There are 8 brightness settings, and I was able to find the perfect settings for daylight and night shooting pretty quickly.
However, there was one thing I didn’t like about the VX-R:
The brightness button.
Instead of a dial, the VX-R uses a button to cycle between the light levels. And sometimes, it’ll get stuck. If this happens to you, simply unscrew the battery cap and put it back on, and the button should work fine again.
It’s not a deal-breaker, but I do wish they had a dial instead.
Speaking of dial, the VX-R uses a battery to power the illumination. It’s nice, crisp and equipped with an auto on/off feature.
This is literally a battery saver since I sometimes forget to turn off the illumination. Due to this, I didn’t need to change my battery for months now.
Eye Relief & Eye Box
The eye relief sits at a comfortable 3.7-4.2 inches.
I have mine right at 4 inches on my AR and it’s extremely easy and comfortable to line up with.
With that much eye relief, I could easily mount the VX-R on a higher recoiling rifle and not worry about scope bite.
Related: Best .300 Blackout Scopes and Optics
Eye box is generous and easy to settle into. I’ve found that it maintains field of view even when I zoom it all the way in.
Durability
The VX-R packs in all of the durability you’d expect from a Leupold scope.
The tube is machined from aircraft grade aluminum. This means that the tube is not only tough, but it’s also light, weighing in at 15.3 ounces.
The VX-R is waterproof up to a depth of thirty three feet. So if you accidentally drop your scope in water, it should still be fully functional.
It’s also fully fogproof and scratchproof – like the Leupold Rifleman 4-12×40 – so you can use it in all environments and conditions.
Elevation & Windage Knobs
The turrets are easy to use and turn with a solid, stiff click.
I was able to zero the scope to 200 yards very quickly and have had no issues with any drifting, even after months of shooting.
The turrets proved to be reliable.
Speaking of which, Leupold offers CDS (Custom Dial System) elevation turrets that you can order specific for your caliber and bullet load. I didn’t find this necessary, but it’s a great option to have.
The CDS is a custom elevation dial tuned to your exact load, velocity, and shooting conditions. This means all you have to do is range your target, set the dial, and fire away.
Parallax & Magnification
The VX-R gives you 3-9x variable magnification which is great for close to mid-range shooting.
The best part?
The reticle is set in the second focal plane. Which means, when magnification is changed, the reticle’s size remains the same.
I’ve had zero problems with the reticle obscuring the target, even when I dial the magnification all the way up.
In fact, the image remains clear, even at 9x. No fuzziness or distortion — just a crisp view.
In case you’re wondering about parallax, there is none…
Because the VX-R comes from the factory with parallax eliminated. So all you have to do is zero it in and go shoot.
Mounting & Rings
If you don’t have a mount, I recommend using the Mark AR 30mm mount. It fits like a glove and holds zero well.
Also, the VX-R ships with a scope cover to help keep your scope clean and protected when not in use.
However, I’d recommend some Butler Creek flip-up lens caps (size 02A)…
…and a 40mm Leupold Sunshade if you shoot in sunny conditions.
Is The Leupold VX-R For You?
Overall, the Leupold VX-R is a monster of a mid-range scope, especially when used with an AR or other tactical rifle, like the M1A.
Here’s why. It’s got:
Clear glass
3-9x magnification
Second focal plane
Auto-shutoff battery saver
Reliable, hand adjustable turrets
Ballistic Illuminated Firedot reticle
Extremely durable, waterproof, and fogproof
The VX-R brings all the quality and reliability that I would expect from a Leupold but at a reasonable price. If you want to start stepping up your glass game, then the Leupold VX-R is for you.
Plus, the Leupold Lifetime Warranty means that even if you somehow manage to damage the VX-R, you’re covered.
So if you’re ready to take the next step in quality riflescopes, give the Leupold VX-R a try.
I doubt you’ll regret it.
FAQ
If you own a VX-R riflescope or recently bought one, how do you like it so far? Let me know in the comments below. Also, I’ve written an in-depth guide on the best .22-250 scopes on the market.
The IGFA world record for crappie has stood since 2018 and is held by a Tennessee angler who caught the 5lb 5oz black crappie on a jig.
In this article, we provide full details of that record fish caught in Tennessee and a bunch of other notable crappie records, including the 50-year-old record for white crappie that has really stood the test of time.
Crappie, slabs, bricks, hogs, specks, white perch- no matter what you call them, nothing is quite as sweet as catching a huge crappie. Imagine your excitement at not only catching a beast but finding out it’s the new world record. Read on to find out more about crappie records and some hints on how to catch trophy crappie.
The Current IGFA World Record Black Crappie
Date: 2018
Location: Loudon County, Tennessee
Angler: Lionel “Jam” Ferguson
Weight: 5lbs 5oz
Length: 19.75″
On May 15, 2018, Lionel “Jam” Ferguson of Paint Rock, Tennessee, got off work and did a little fishing. It was warm and muggy, and he was having a slow day bass fishing, so he moved to another spot he knew in the Philadelphia area of Loudon County, Tennessee.
Richeison Pond, a privately owned farm pond, was just a short distance away, and he had caught a few bigger fish from the pond in the past. He began lazily casting and retrieving a Triple Threat John Deere colored grub on a ⅛ oz jig head. His slow retrieve worked. An enormous fish grabbed the bait and dove.
Jam and the fish battled until he got the fish into shallow water. At this point, Jam knew it was a big crappie and didn’t want to lose his fish, so he jumped in the water and pulled it out by hand. The black crappie weighed five pounds, five ounces, and was nineteen and three-quarters inches long.
At the urging of his buddy, Jam took it to a local grocery store and had it weighed on certified scales, then contacted the Tennessee Wildlife Resources Agency. Once the Tennessee wildlife officer certified the weight and length, Jam wrapped the fish in wet towels and froze it until he found out if it was a state record.
Ferguson’s catch was not only the new Tennessee state record; it was also the new black crappie world record. The fish has since been mounted and tagged.
World Record White Crappie
Date: 1957
Location: Yocona River, Mississippi
Angler: Fred Bright
Weight: 5lbs 3oz
Length: 21″
The white crappie world record has stood for over 50 years. The fish was caught near Enid Dam on the Yocona River in Yolabusha County, Mississippi, on July 31, 1957. Angler Fred Bright was fishing artificial bait on a fast action rod with a Denison Johnson reel when the five-pound, three-ounce fish grabbed the bait and ran. After capture, the fish’s weight and length were certified by an officer from the state of Mississippi, and DNA testing confirmed that the fish was a world record white crappie that weighed five pounds, three ounces, and measured twenty-one inches in length. See here for info on the differences between black crappie and white crappie.
Other Notable Crappie Captures
You remember Lionel Jam Ferguson, who caught the world record black crappie in that little farm pond. This one-acre private pond in Loudon County, Tennessee, might not have many fish in it, but it seems they are all about the same size. Just a few years before his world record, Jam caught a crappie weighing four pounds, four ounces from this same pond. Not realizing that it might be a record, Jam took the fish home and ate it.
Before Jam Ferguson caught his world record black crappie, John Horstman had the previous record. He landed a 5-pound, 19-inch black crappie back in 2006 while fishing in a private lake near his home in Callaway County, Missouri. After his catch was weighed and certified, Horstman donated it to Bass Pro Shops, where the fish lived in the aquarium at the company headquarters in Springfield, Missouri, until its death earlier this year.
Another massive crappie catch was that of Clear Lake Outdoors owner Dave Burruss of Lakeport, California. On February 17, 2021, while bass fishing, Burruss spotted three large fish on the screen of Garmin Livescope fish finder. He threw out a 4-inch Keitech Easy Shiner on twelve-pound test. He says it took 30 seconds to pull in the four-pound, five-ounce black crappie. The fish was larger than the previous state record, and after being weighed on a certified scale, it was officially named the new California state record.
Best Locations To Try For a New World Record
Crappie fishing has been associated with the southern United States for years, but more anglers are going after crappies in other states. Crappie fish actually live in forty-eight of the fifty states. The only places they are not naturally occurring are Alaska and Hawaii.
Crappie prefer to live in warmer water, which is why most of the world record fish seem to come from Alabama, Missouri, Tennessee, Mississippi, Arkansas, Louisiana, and Kentucky.
The best time of the year to fish for crappie is late spring. In the southern states, that usually means mid-April to early May, when the days are warming up but the nights are still cool. Crappie won’t begin their spring spawn until water temperature reaches 57 degrees. Even then, they prefer to spawn in slightly deeper water than other panfish. Start dropping your bait around weeds and brush piles in the three to four-foot deep range.
If you are searching for the perfect place to catch one of these monster fish, there are a few things to look for.
There is plenty of cover- weeds, tree tops, rocks, etc.
The water gets deeper in the middle (at least 8 feet or more).
There is algae, phytoplankton, and zooplankton in the water.
The water is brackish rather than crystal clear.
The bottom has more of a sandy than muddy texture.
If you must fish in clearer water, fish deep. In brackish water, they won’t be so deep unless it is very cold or very hot out. For those living on a lake or pond, here are some tips for attracting crappie to your dock.
See also:
Crappie Fishing Gear List
How to Catch Crappie: Some Killer Tips
Best Lures for Crappie Fishing
Best Baits and Lures for World Record Crappie
Crappie feed on living things, for the most part, and big crappie eat bigger things than smaller ones do. Don’t be afraid to pull your bass lures out of the tackle box and give them a try. Personally, I know at least one crappie was caught on a rubber frog in the weeds this summer.
Live minnows or small shiners suspended over brush piles, fallen logs, and recognizable spawning beds are always a hit.
Other common lures to try are:
Small, deep diving crank baits presented slowly in deep water
Silver spinners or spoons thrown across logs or at the edge of weed beds
Lightweight jig heads with colored grub or skirt bodies
An umbrella rig can also be effective for crappie
In dark or brackish water: white, chartreuse, pink and white, lime, red and white, gold
In clear water: white, chartreuse, black and white, dark blue, brown, motor oil color
For rods and reels for crappie, check out this article on choosing a good combo for crappie fishing.
How Records Are Measured and Verified
All fish state records and world records are maintained by the International Game Fish Association (IGFA) in a public database. Once a large fish is caught, local wildlife officers weigh it using a scale that has been calibrated and certified by a scientific lab. These types of scales can be found in grocers, packing houses, and other locations. State wildlife offices should also have a calibrated scale.
After verifying that the fish is larger than any previous records held in the state, by searching the IGFA database, an angler can fill out the application for examination, DNA testing, and measurement of the catch. If the IGFA determines the fish is a record, the angler will be credited, and the record will be uploaded into the database.
See also:
Fly Fishing For Crappie
The Best Ice Fishing Lures for Crappie Reviewed
Best times to Catch Crappie
Best Hook Sizes for Crappie Fishing
Final Thoughts on Record Crappie
Most anglers aren’t going to catch a crappie the size of Jam Ferguson’s catch. Huge crappies are not that plentiful, but fishing for crappie of any size is lots of fun. If you are lucky enough to catch a big slab that you think might be a record, immediately contact your local wildlife resources officer to begin the certification process. Your record catch may or may not be a new state record, but you won’t know unless you have it measured.
When it comes to hog hunting, one of the most effective tactics you can employ to bring the animals out in the open is by using hog bait. While hog bait can be bought straight off the shelf at your local outdoors store, at HOGMAN-OUTDOORS we’ve had great success in creating our own DIY hog hunting bait. Check out our tips for drawing out feral hogs below.
HOGS ARE ONMIVORESBecause hogs are omnivores, meaning they eat both plants and animals, a wide variety of baits can be used to successfully draw them in to the open. And hogs think with their stomach – the saying isn’t “eat like a pig” for nothing – meaning they’ll readily come out of cover when they smell food. That being said…
NOT ALL BAITS ARE CREATED EQUALAlthough hogs aren’t picky eaters, there are some smells and flavors that will draw their attention more readily than others.
Stick to Something FamiliarSweet corn is a staple in hog baits, because hogs can easily recognize the smell. Corn will “sour” once soaked for several days, creating a smell that will attract hogs but keep other animals, such as deer, away. Additionally, corn is a versatile bait that can be used in all kinds of different mixes (corn + Kool-Aid; corn + Jell-O; corn + beer). Hogs also have a liking to pecans and acorns, which can be used in your bait mix, or around the feeder area.
Play Up the Sweet StuffIt’s no secret that hogs have a sweet tooth, so play up the sweet stuff to really attract their attention. As mentioned above, corn can be mixed with low-budget drink powders, such as Kool-Aid, or with sweet gelatin-flavored packets. Effective hog bait can be created by mixing corn with sugar and several packets of Kool-Aid or Jell-O, and letting the mix soak together for a while. Here’s a great recipe from the Georgia Department of Natural Resources that does just that:
150 pounds of corn
8 pounds of sugar
1 packet of yeast
4 or 5 packets of grape, strawberry, or raspberry flavored gelatin or drink powder. Place the corn in a 40 gallon metal trash can and fill it with water to 3 to 4 inches above the corn. Mix in all the other ingredients. Place the trash can in the sun with the lid secured. Stir it with a shovel or paddle daily for 10 to 14 days.
KNOW THE LAWKnow what’s allowed before you make your hog bait. The use of toxicants and chemicals in the baiting of feral hogs is illegal in all 50 states; additionally, check your local hunting regulations to ensure that baiting is allowed on public lands.
PRE-BAITPre-baiting is a great way to condition hogs to associate your feeder area with a food source. This involves leaving your bait out in the open for several days (or using an automatic feeder with a timer). This will encourage hogs to lower their defenses and become accustomed to the area, making it easier for you to slide in and make the kill.
Get hunting!
ADVANTAGE: HUNTER
The HOGMAN-OUTDOORS Game Alert® Hog Hunting Light is the new generation in hog hunting technology. The low-intensity, motion-activated, red LED light is magnetically attached under a hog feeder, and provides momentary (10-second) illumination only when movement is detected within a 200-yard perimeter. The discreet light allows for hunters to remain virtually undetected by prey, keeping them hidden until the moment strikes.
Taking a world-record buck is hard under any circumstances. Doing so with a 45-pound recurve and wooden arrows is even more remarkable.
Such was the situation in 1962, when then-34-year-old Lloyd Goad shot his 14-pointer in southern Iowa. At the time, the deer was the top bow typical of the modern era, at 197 6/8 net Pope & Young points, and he’d wear the crown for three years.
Lloyd died on Dec. 20, 1993, and remarkably little has been written about his great whitetail. The following was taken from his handwritten account of the historic hunt.
“I started hunting squirrels with a neighbor when I was about 14 years old,” Lloyd wrote. “Kenny was several years older than me. All of his close hunting buddies had been called off to service during World War II, but he was unable to go because of a heart condition. He was one of the finest hunters I ever knew.”
After getting married, Lloyd found a new hunting partner in his wife’s brother, Donald. They enjoyed many trips to hunt small game near the Des Moines River, in an area that later became part of Red Rock Lake.
Around 1953, the Conservation Commission opened a special deer season with a limited number of permits for a two-day shotgun hunt. It was a new experience for both men.
“Gradually our enthusiasm for deer hunting in Iowa spread,” Lloyd wrote. “We didn’t fill our tags each year, but for about six or seven years we had some very rewarding hunts.
“During the late ’50s, more and more shotgun hunters began to invade our territory,” he noted. “About that time, several of the original bowhunters in our area brought in the biggest bucks I’d ever seen! I decided the challenge of bowhunting for deer was something I wanted to try.
“Midway through the 50-day 1961 bowhunting season, I purchased some hunting equipment from the closest archery dealer around, a man named Elwood Stafford, who lived in Albia, Iowa,” Lloyd noted. “I bought myself a 45-pound York Crescent recurve bow and some cedar shafts tipped with Hill’s Hornet broadheads.
“Being a veteran bowhunter himself, Elwood was very helpful in showing me some of the fundamentals of bowhunting,” Lloyd noted. “I knew I should do a lot of practicing, so I acquired several bales of straw from a farmer. I placed them against the lube room wall of the service station (which Lloyd ran), along with several layers of cardboard.
“The longest distance I could get from the target without running the risk of having someone walk in front of an arrow was about 40 feet. Studying this distance from a gun hunter’s perspective, I said to myself, ‘This’ll be a cinch!’ But the many scars on the cement block wall were grim reminders of the misses and broken arrows that resulted from my first few practice sessions. After several days, though, I began to get the feel of a decent release, and I started shooting some reasonable groupings.”
With less than two weeks left in the 1961 season, Lloyd headed for the Monroe County woods. Hunting on the ground, he got a shot at a button buck — but the arrow sailed about four inches over the deer’s shoulder. Days later, Lloyd missed a forkhorn walking broadside at about 20 yards. That arrow deflected off a tree limb.
Although disappointed, Lloyd was now hooked on bowhunting. “Those two misses gave me more of a thrill than practically all of my shotgun kills,” he wrote.
Lloyd then had two more misses during the early weeks of the 1962 season. Little could he know that his next shot — only his fifth at a wild deer — would bring down one of the greatest typicals of all time.
“When the last day of the ’62 archery season appeared on the calendar wall at the service station — Dec. 2, 1962 — I was still without a deer,” Lloyd wrote. “I resolved to take the entire day off and hunt all day long, if necessary.
“The day began pretty much like any other — up early, a good-luck wish from my wife, Loretta, and I started on the 18-mile ride to my stand with the windows and vents open on my pickup to help rid my clothes of all household odors. Before heading into the woods, I applied a liberal dose of buck lure on the sleeves and legs of my camouflage suit and a little extra on my cap for good measure.
“To a large degree, the good fortune I was about to experience was due largely to several outings I had shared with a good friend named Paul Pearson,” Lloyd wrote. “Paul had been one of the best wolf hunters in southern Iowa during his younger years, and he taught me a lot about reading the woods and looking for deer sign — especially about trails and crossings. Since most bowhunters hunted on the ground in those days, my preferred method was to set up near a major trail not far from a little-used road crossing. You could get there quickly and quietly without spreading a lot of scent in the woods, and I found that deer liked to use these trails.
“When I reached the area I intended to hunt, I met a hunting buddy, Bob DeMoss, who planned to do some squirrel hunting in the same general area. I also ran into two other bowhunters. One had shot a doe the evening before, and he was back to look for it. He planned to continue his search in an area just north of where I wanted to hunt. His friend said he would cover a trail to the west, in case something was chased out.
“Bob decided to hunt squirrels in the timber on some state forest land just south of me across a dirt road. So I decided to hunt a well-used trail not far from the road — pretty much in the middle of all this activity — in hopes that something might happen.”
Lloyd quietly slipped into a small, triangular patch of woods near the right-angle intersection of two dirt roads. He took a stand next to a large elm not far from a fencerow that ran from one road to the other.
Hunting conditions were perfect. The area was cloaked in a heavy mist, the kind big bucks love to sneak around in. Lloyd barely had time to pick his spot before he heard a noise coming from toward the road.
“I took a peak around the elm, and there he came — slipping through the wild plum sprouts and sumac bushes with his h
ead down. He had so many points on his head that I couldn’t distinguish his antlers from the limbs of the bushes. My heart started pounding so hard I thought he must be deaf not to hear it,” Lloyd recalled.
“He walked up to the fence and stopped behind some brush not 20 feet away. I was behind the tree, and he couldn’t see me trembling. I could have taken a shot through a small opening in the brush at that time, but the experience of four previous misses had taught me that it was simply too risky. I waited.
“He just sort of melted over the fence with no effort. My bow was already in position, and all I had to do was pull it back. When I did, he stopped and looked straight at me at a distance of 18 steps. He was already beginning to whirl around and go back into the brush as I released.”
Lloyd waited a half-hour and then eased back to the truck. He met Bob a few minutes later and showed him the buck’s enormous tracks in the road crossing. Lloyd returned four hours later with friends, and they soon found the buck. Hit in a leg artery, he’d gone less than 150 yards.
“He carried 14 points and weighed 224 pounds field dressed,” Lloyd beamed. “I couldn’t have planned a more perfect ending to any season!”
This trophy had an almost perfectly symmetrical 7×7 rack, and at 197 6/8 typical, he was an easy archery world record. His mark fell three years later, when Mel Johnson arrowed his 204 4/8-inch typical in Illinois. That buck remains No. 1 in P&Y.
In 1986, Curt Van Lith arrowed a huge 11-pointer in Minnesota, tying Lloyd’s buck for No. 2 in P&Y. Their deer still share that spot, though they figure to drop with confirmation of the 203 3/8-inch Hubert “Tiggy” Collins buck, taken in Saskatchewan last fall. (See the February and August issues.)
Lloyd kept bowhunting for many seasons after downing his Iowa record. He was often asked how it felt to have to settle for shooting bucks smaller than one he’d already taken.
“Every deer is a new experience,” Lloyd would reply. “And every shot is a challenge. Not every deer will make the top of the record book, but they all make my book — bowhunting pleasure!”
Once one of Larry Huffman’s Legendary Whitetails, this giant now is in the “King of Bucks” collection at the American National Fish & Wildlife Museum in Springfield, Missouri. For more on the Goad buck, visit legendarywhitetails.com.
Best Uses: Big Game Hunting, Varmint Hunting, Target Shooting
Update: Leupold has discontinued their VX-1 range of rifle scopes but have released the VX-Freedom line with the aim to provide affordable, US made optics to hunters and shooters. The VX-Freedom 3-9×40 is a great, affordable alternative to the discontinued VX-1 3-9×40. Check it out at Optics Planet and Amazon.
Leupold VX-1 Scope Review
The Leupold VX-1 3-9X40 rifle scope is the all-purpose big game hunting scope that’ll perform exceptionally well for a variety of hunters. It doesn’t matter that this scope is on the lower price end for Leupold, you’re getting excellent value for your buck. It is waterproof, fog-proof and recoil-proof and features Leupold’s Quantum Optical System. ‘What is that?’ I hear you ask, you will have to keep reading to get the answer.
Reviewers are chirping the same high praises I have for this scope, with a stunning rating from loads of feedback to date. In fact, many reviewers gave this VX-1 a perfect score. This scope is far from being a bottom-barrel scope considering it is one of Leupold’s most affordable optics.
Out of the four models in the VX-1 series, I had to go with the most versatile and practical 3-9X40 scope for this review. It’s no debate that these dimensions are the most commonly used among hunters, that and the fact that the price is well-suited for most hunters budgets, is what made this scope an obvious pick.
Although this Leupold is the first of the VX series and is at the bottom end for their line, it’s still better quality and a better buy than other brands high end scopes. Take a peek at the Q&A to get a full rundown of what this great value scope has to offer.
Pros:
Price
Aesthetic appeal
Eco-friendly glass
Excellent quality coatings
Made in USA
Cons:
No complex ballistic reticle
VX-1 3-9X40 Rifle Scope Q&A:
What is the Quantum Optical System on the VX-1 rifle scope?
This rifle scope, and all of the the VX (Variable Power) series scopes, have Leupold’s Quantum Optical System that combines sophisticated mechanisms, engineering and science expertise, and industry-leading optical designs to create a whole new experience with a variable power rifle scope.
They’re made with lead-free, environmentally-friendly glass compositions that’s undergone a thorough and scrutinous refining process to ensure the glass produces as much of a razor-sharp image quality as possible.
The short answer? It’s a souped-up and pimped-out system that gets you the best glass for the best image and best light transmission possible. You see better, you shoot better, you hunt better.
Is this a low budget rifle scope?
While the VX-1 has a low budget price, it’s actually a mid-range rifle scope that looks more like a premium one. I say low budget because you can get it for less than $200 when you buy online, in fact, we named it one of our top picks for a rifle scope under $200. Otherwise, you’re going to find it in the price range of anywhere between $200 to $450.
The sleek feature that also makes it look like a premium scope is the lack of slapping on intrusive brand labels and the like with contrasting white lettering. Leupold keeps it classy and simple with bare minimum gold accents on the black matte finish.
Where is the Leupold rifle scope made?
All of Leupold rifle scopes are designed, manufactured, assembled, and packaged in their factory in Oregon, USA. They haven’t been outsourced overseas to Japan, China, Germany, or the Philippines – not that outsourced rifle scopes aren’t good, but it’s satisfying to own American-made products that are unmatched.
What style reticles are available with the VX-1?
This Leupold VX-1 rifle scope has the popular, clean, and non-distracting reticle there is – the classic Duplex cross-hair.
The only other available reticle with this rifle scope is the LR Duplex that features two dots on the elevation cross hair below the center to serve as a basic bullet drop compensator.
Noteworthy Features:
Quantum Optical System for the most advanced variable power ranging scope
Leupold’s Multicoat 4 for 92% light transmission and pristine, crystal clear images
1/4 MOA clicks that are finger-adjustable for easy rotations
Fully waterproof, recoil-proof, and fog-proof
Available with the LR Duplex reticle for long distance shots
American classic style eyepiece with low profile lockable ring
Light-weight and compact for field hunting and scouting
Easy to mount, super fast and simple to sight in
Made in the USA
Our Verdict on the VX1 3-9X40
According to the bull’s-eye, the Leupold VX-1 3-9X40 rifle scope has more reach than you think – it’s all in the glass. The glass is world-class, the coatings are top-notch, and the quality is unbeatable. The only thing that it’s missing is a more advanced ballistic reticle option. It is available with a simple LR Duplex reticle, but it would be nice to see something that can match its quality and potential.
However, doubling your budget can land you the VX-3i 3.5-10X40 where you have the option of buying the Boone & Crockett reticle. Or, you could just sneak your way online into Leupold’s Custom Shop and upgrade your VX-1 with any of the 18 available reticles like the super-cool TMOA reticle. Ouch, we can already feel the penny pinching going on!
Moving on and staying on budget, the Redfield Revolution 3-9X40 scope would be the VX-1’s closest alternative. Maybe it has something to do with its relationship to Leupold? If you pay close attention to the full Revolution review, you’ll know exactly what we’re talking about!
The VX-1 has earned it’s place in the hunting world, and it’s on the Top 100 Best Seller’s List as a very popular and in-demand scope. To sum it up, we’ve already said it perfectly. With the VX-1, “You see better, you shoot better, you hunt better.” ‘Nuff said.
Update: Leupold has discontinued their VX-1 range of rifle scopes but have released the VX-Freedom line with the aim to provide affordable, US made optics to hunters and shooters. The VX-Freedom 3-9×40 is a great, affordable alternative to the discontinued VX-1 3-9×40. Check it out at Optics Planet and Amazon.
Further Reading
27 Tips to Help You Understand Rifle Scope Parallax Adjustments Today
Wyatt Earp has said:
Fast is fine, but accuracy is everything
And I just thought how many airgunners are obsessed with muzzle velocity and muzzle energy,...