The health benefits of fish are numerous, as fish are rich in healthy omega-3 fatty acids. But those looking for a luxurious fish dinner experience might want to skip the cod and canned tuna and opt for a high-quality, tasty fish.
The most expensive fish to eat is bluefin tuna, especially specimens caught off the coast of Japan. A single bluefin tuna can sell for more than $2 million! If you’re looking for a domestic fish to chow down on, you’ll want to choose an American glass eel, as these cost upwards of $2,000 per pound.
Let’s take a gander at the most expensive edible fish so that you can choose a luxury-quality filet for your next fish dinner.
A standard can of tuna often costs less than $2, but it’s bound to pale in comparison to the tastiest (and most expensive) fish in the world. So for the most refined palate-pleasing experience, you’ll need to pay far more.
Still, you might find yourself wondering, “What qualities make some tasty fish so expensive?” Typically, the three factors that contribute to a dinner-friendly fish’s cost include:
Rarity
High demand
Legal restrictions
Let’s take a quick moment to explore why these aspects influence cost.
Rarity
Rare fish are often the most expensive type of seafood, as diners are willing to pay a high price to enjoy something that few ever get to enjoy. But a rare and tasty fish is even costlier, as it tastes far better than the standard fish filet and is nearly impossible to obtain.
But scarcity alone doesn’t make an edible fish expensive. High demand is just as crucial to a fish’s price.
High Demand
What do the most expensive steak cuts and fish have in common? The tastier they are, the more people want to try a bite!
The most costly types of fish have unique flavors and melt-in-your-mouth textures that make them culinary delights. Unlike a fried cod filet, these tasty fish are often served lightly cooked or raw to ensure diners get an unspoiled experience.
Legal Restrictions
For better or worse, some of the world’s priciest fish are endangered or close to reaching endangerment. After all, the more scarce and delicious a fish is, the more demand there is!
Some regions have strict regulations about specific fish species, limiting the number of certain types of fish that anglers are allowed to catch each year. Unfortunately, these legal restrictions only make these delectable fish more valuable and desirable. An estimated 20% of wild-caught fish imported to the United States are illegal in some way.
Still, if you’re determined to try the priciest fish in the sea, be sure that you’re choosing specimens that are legally obtained. Otherwise, you could be looking at some hefty fines that outdo the initial cost of the fish.
Most Expensive Fish to Eat: Summary List
Bluefin Tuna
American Glass Eel
Pufferfish
Alaskan Wild King Salmon
Swordfish
Yellowfin Tuna
Chinook Salmon
Halibut
Dover Sole
Sockeye Salmon
10. Sockeye Salmon
Salmon is one of the priciest fish species in the world, though some types are more expensive than others. Sockeye salmon tends to fall on the lower spectrum in terms of price, though it’s one of the tastiest types of fish you can add to your shopping list.
Notably, this type of salmon is hard to forget, especially if ordered whole. It has bright red scales across most of its body but a distinctly green head. Overall, this fish is considered the most flavorful salmon, though it’s often smoked to accentuate its natural taste.
At $20 per pound, sockeye salmon isn’t the priciest type of salmon, but it will cost you more than cod, tilapia, or mackerel.
Why It’s Expensive
Wild-caught sockeye salmon tend to command the highest prices, as they’re often much larger than farm-bred fish. Larger fish means heftier portions, so heavier specimens always cost more than smaller ones. Still, high demand and transportation costs have helped make this fish comparatively expensive.
9. Dover Sole
The Dover sole might look like the most appetizing fish. It has a muddy brown body that’s far flatter than a fresh-caught, round-bellied tuna. But it has a uniquely sweet flavor that’s often compared to spiced chicken or beef.
This flavor profile is unusual, as the Dover sole are saltwater fish. Still, they’re the least “fishy” type of fish you can enjoy, making them an ideal choice for those that tend to avoid seafood.
And with a price tag of about $29 per pound, these flatfish are far costlier than other species of edible fish. Naturally, wild-caught specimens are more expensive than farmed options.
Why It’s Expensive
The primary reason Dover sole fish are expensive is that they’re so tasty. This species is also easy to prepare, with most professional chefs and at-home cooks baking them whole. Because they have a mild flavor profile, they’re a favorite among diners that enjoy the benefits of eating fish but don’t enjoy the taste of seafood.
8. Halibut
Halibut is also a type of flatfish, but they can grow to jaw-dropping sizes, making full-grown Dover sole fish look like babies. For example, Pacific halibut can weigh more than 400lbs, and their Atlantic cousins often weigh in at more than 300lbs.
This species is also notable for its low fat content and sweet taste. Many people compare the taste of halibut to tilapia, but milder and thicker. As a result, halibut filets are ideal for fish burgers or filling fish dinners.
However, wild-caught halibut isn’t as common as it once was, making it one of the pricier types of edible fish. Generally, you can expect to spend about $30 per pound to enjoy this saltwater fish.
Why It’s Expensive
Halibut is one of the tastiest and most filling types of fish, and as a result, it’s become one of the most popular types of fish around the world. However, this high demand has boosted the price of halibut filets and made wild specimens scarce. These factors make it pricier than similarly flavored species like tilapia.
7. Chinook Salmon
Unlike sockeye salmon, Chinook salmon tend to have greenish-white bodies with small brushstrokes of red along their abdomens. However, they can be almost as enormous as their bright ride relatives, making them easy to slice into hefty portions ideal for meals.
Native to the Pacific Ocean, these fish are prized for their savory, buttery flavor and soft texture. But this mouthwatering taste has also made Chinook salmon endangered in some areas and rare in others.
You’ll likely spend about $30 per pound on farmed Chinook salmon.
Why It’s Expensive
There are two reasons why Chinook salmon is one of the most expensive types of edible fish. Firstly, they’re well-known for being one of the most delicious types of salmon, with a rich flavor that’s rarely found in other species.
However, Chinook salmon are also threatened by overfishing, making them increasingly scarce. This rarity and superior flavor profile make it pricier than other anadromous (living in saltwater and freshwater environments) fish.
6. Yellowfin Tuna
Yellowfin tuna (ahi) are gorgeous edible fish with glittering silver bellies and colorful blue-green spines. Native to tropical waters, particularly those off the coastlines of Hawaii, these fish tend to grow into enormous creatures. It’s not uncommon to see anglers catching 300lb or 400lb yellowfin tuna.
Because these fish can grow to impressive sizes, they’re often used for a variety of meals, including sushi and fish patties. But their mild taste and significant portions also make them a popular choice. Ahi typically costs about $30 per pound, but prices may be higher for those living far from tropical regions or coastal areas.
Still, once you’ve tried yellowfin tuna for yourself, you might never be able to go back to albacore! Adding a small handful of some of the world’s most expensive mushrooms to your tuna dinner can make things even better.
Why It’s Expensive
Yellowfin tuna is pricier than other types of fish because it’s gigantic, tasty, and in high demand. Additionally, some diners may pay more for this fish due to high transport costs.
5. Swordfish
The swordfish gets its name from the long, blade-like protrusion sticking out from its head. It’s been a treasured catch among anglers for centuries, but it’s also prized for its meaty filets and mild flavor.
Like other costly fish from around the world, swordfish can grow to jaw-dropping sizes. While it might not be quite as hefty as some tuna or salmon, the average swordfish can weigh about 200lbs. Consequently, a single swordfish can feed quite a few people!
At about $60 per pound, this tasty fish is also one of the most expensive types of seafood.
Why It’s Expensive
It’s impossible to raise swordfish on standard fish farms, as these fish require plenty of space and saltwater to thrive. But marine fisheries are far more costly to maintain than terrestrial fish farms. Additionally, wild-caught swordfish are becoming a rare sight to the high demand for this delicately flavored fish.
4. Alaskan Wild King Salmon
Technically, Alaskan Wild King salmon and Chinook salmon are the same species. However, Chinook salmon is the more generic term and often refers to fish bred on fish farms or wild-caught throughout the continental United States.
On the other hand, Alaskan Wild King salmon is almost always a wild-caught Chinook originating from Alaska’s pristine rivers and coastlines. Because these fish have more unspoiled areas to explore and thrive in, they can grow larger than their continental cousins.
Diners may prefer Alaskan Wild King salmon over farm-bred Chinook due to the cleaner Alaskan environment. But the higher demand for Alaskan-caught Chinook salmon results in a noticeable price difference of over $30. For example, Alaskan Wild King salmon often costs $70 or more per pound.
Why It’s Expensive
A cleaner and more expansive environment can result in better-tasting and larger fish. Of course, the same is true of any other commonly eaten animal, including chickens and cows. So you can think of Alaskan Wild King salmon as free-range or grass-fed beef.
It’s higher quality than standard Chinook salmon, which means that folks are often willing to pay a higher price for it. And because it’s caught in Alaska (almost 3,000 miles away from the continental United States), transportation costs are high.
3. Pufferfish
The pufferfish (also called fugu) is one of the most expensive seafood items on the planet. Unfortunately, it also happens to be one of the most dangerous, as pufferfish contain a combination of potentially lethal toxins.
If prepared incorrectly, pufferfish toxin can kill you in just four hours! And while you might think that this dangerous quality makes pufferfish one of the least-desired fish in the world, it only increases demand.
The most skillful chefs in the world know how to prepare pufferfish in a way that makes it entirely safe to consume. As such, many daredevil diners are more than willing to give this fish a try.
Still, you’ll need to be willing to invest some money to give this fish a try. A single fugu sushi dish can cost $60, and this fish is known to cost $200 or more per pound.
Why It’s Expensive
Pufferfish has a taste that’s challenging to describe, with most diners describing it as absolutely unforgettable. But it can also prove deadly if poorly prepared.
This combination of unique flavor and high risk makes it fugu an attractive experience for many. Still, the primary reason it’s expensive is the skillful preparation needed to make it safe to eat.
2. American Glass Eel
The American glass eel (sometimes called the bay eel) is native to northeast coastlines in North America. However, it’s not nearly as common as it used to be. As a result, anglers in Maine can now charge outrageous prices for a single pound of fresh-caught eel.
In 2009, the per-pound price for Maine glass eels was about $100. But in 2019, that price tag stood at a hefty $3,000 per pound!
Still, eel typically isn’t the first dish people imagine an exquisite and expensive fish dinner. So, why is the price of American glass eels so high?
Why It’s Expensive
The glass eel is often compared to chicken and catfish in terms of taste, and it’s not beloved due to its flavor profile. That said, this slim snake-like fish is one of the most expensive because it’s become scarce.
Poaching and illegal catching are significant problems, leading to substantial catching restrictions that have inflated the price of these fish. The American glass eel can also grow to an astounding length, occasionally reaching up to six feet long.
This quality makes them ideal specimens for sushi, and the most expensive sushi platters often include at least one cut of glass eel.
1. Bluefin Tuna
Bluefin tuna is the most expensive edible fish on the planet. In 2019, a whopping 600-pound bluefin tuna sold for ¥333.6 million (that’s about $3 million). That’s nearly $5,000 per pound!
This type of tuna is native to the North Atlantic Ocean and the Meditteranean Sea. But the costliest specimens are often found in the Pacific Ocean, off the coast of Japan.
While many types of tuna fish grow to enormous sizes, bluefin tuna is one of the largest types of tasty fish. It’s also considered a delicacy due to its increasing rarity and distinct flavor. Still, these aren’t the only reasons bluefin tuna are so expensive.
Why It’s Expensive
Bluefin tuna is one of the most prized sushi ingredients. It’s also constantly in high demand due to its international reputation for being the best-tasting type of tuna.
But this massive and tasty fish isn’t plentiful, primarily due to overfishing and enormous demand. In addition, larger specimens have become increasingly rare over the last several decades, making the heaviest catches incredibly expensive.
Try These Tasty Fish
The most expensive fish to eat is Japanese bluefin tuna. That’s because these fish are massive, rare, and in high demand. That said, bluefin tuna isn’t the only tasty fish that costs a pretty penny.
If you’re feeling in the mood to treat yourself, be sure to consider any of the above options. Though your wallet might be lighter, your belly is bound to feel a little fuller!
Are you hungry for more of the world’s most expensive foods, experiences, and items? If so, be sure to check out our blog now!
If you’ve made the mistake of leaving your trail cameras hanging on the same tree from opening day until post-rut then it’s time to start looking at the calendar and designing a better trail camera strategy for different seasons.
Please note this trail camera placement strategy guide does not give exact dates due to our global customer base and that every region is a little different. Shoot, even Northern and Southern deer hunters in the States will have different time schedules when they move trail cams, but you get the point!
Even if you like to track spring gobblers during this time of year (and who doesn’t), you can still kick off your trail camera tour. The only thing needed is a little attractant to get the ball rolling. For the most part, this includes one ingredient – salt.
Not only are minerals a good attractant, but introducing an intruder into the area is a great way to arouse a buck’s interest. This can be accomplished with a licking branch and some natural, pre-orbital gland secretions.
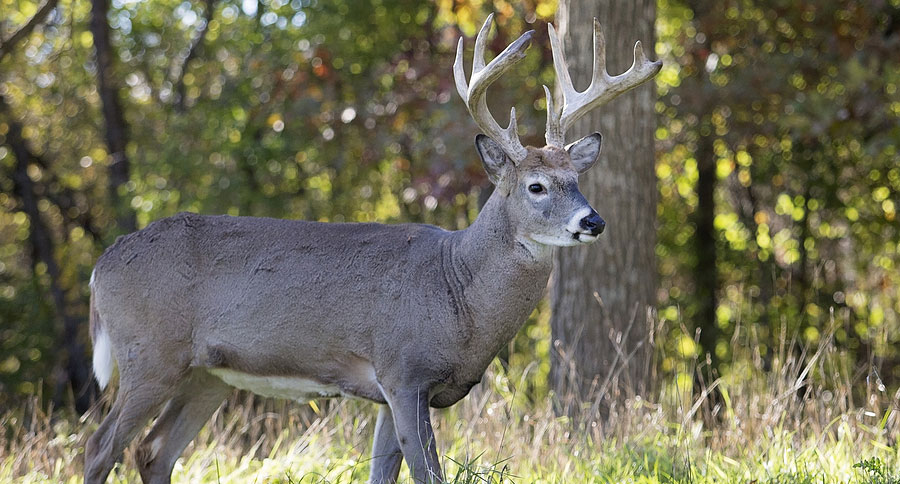
As soon as the leaves start to gobble up, the landscape buck antlers will start growing, and they will naturally seek out salt and other minerals. Whitetail does and fawns will also be attracted to these sites, and capturing them on camera is a great way to determine how many new deer have been added to the herd as well as how many does are in the area. This info will be precious in a few short months when the rut kicks in.
Doe bedding areas or suspected big buck hideouts are great locations to start mineral sites in early spring. Look for pinch points and funnels that will drive deer to your salt block and, ultimately, your trail camera. If you live in agricultural areas, then field edges are a great place to start. Once travel routes have been revealed, you can always choose to delve deeper into cover and start a new mineral site to get closer to bedding or staging areas.
Summer Trail Camera Strategies
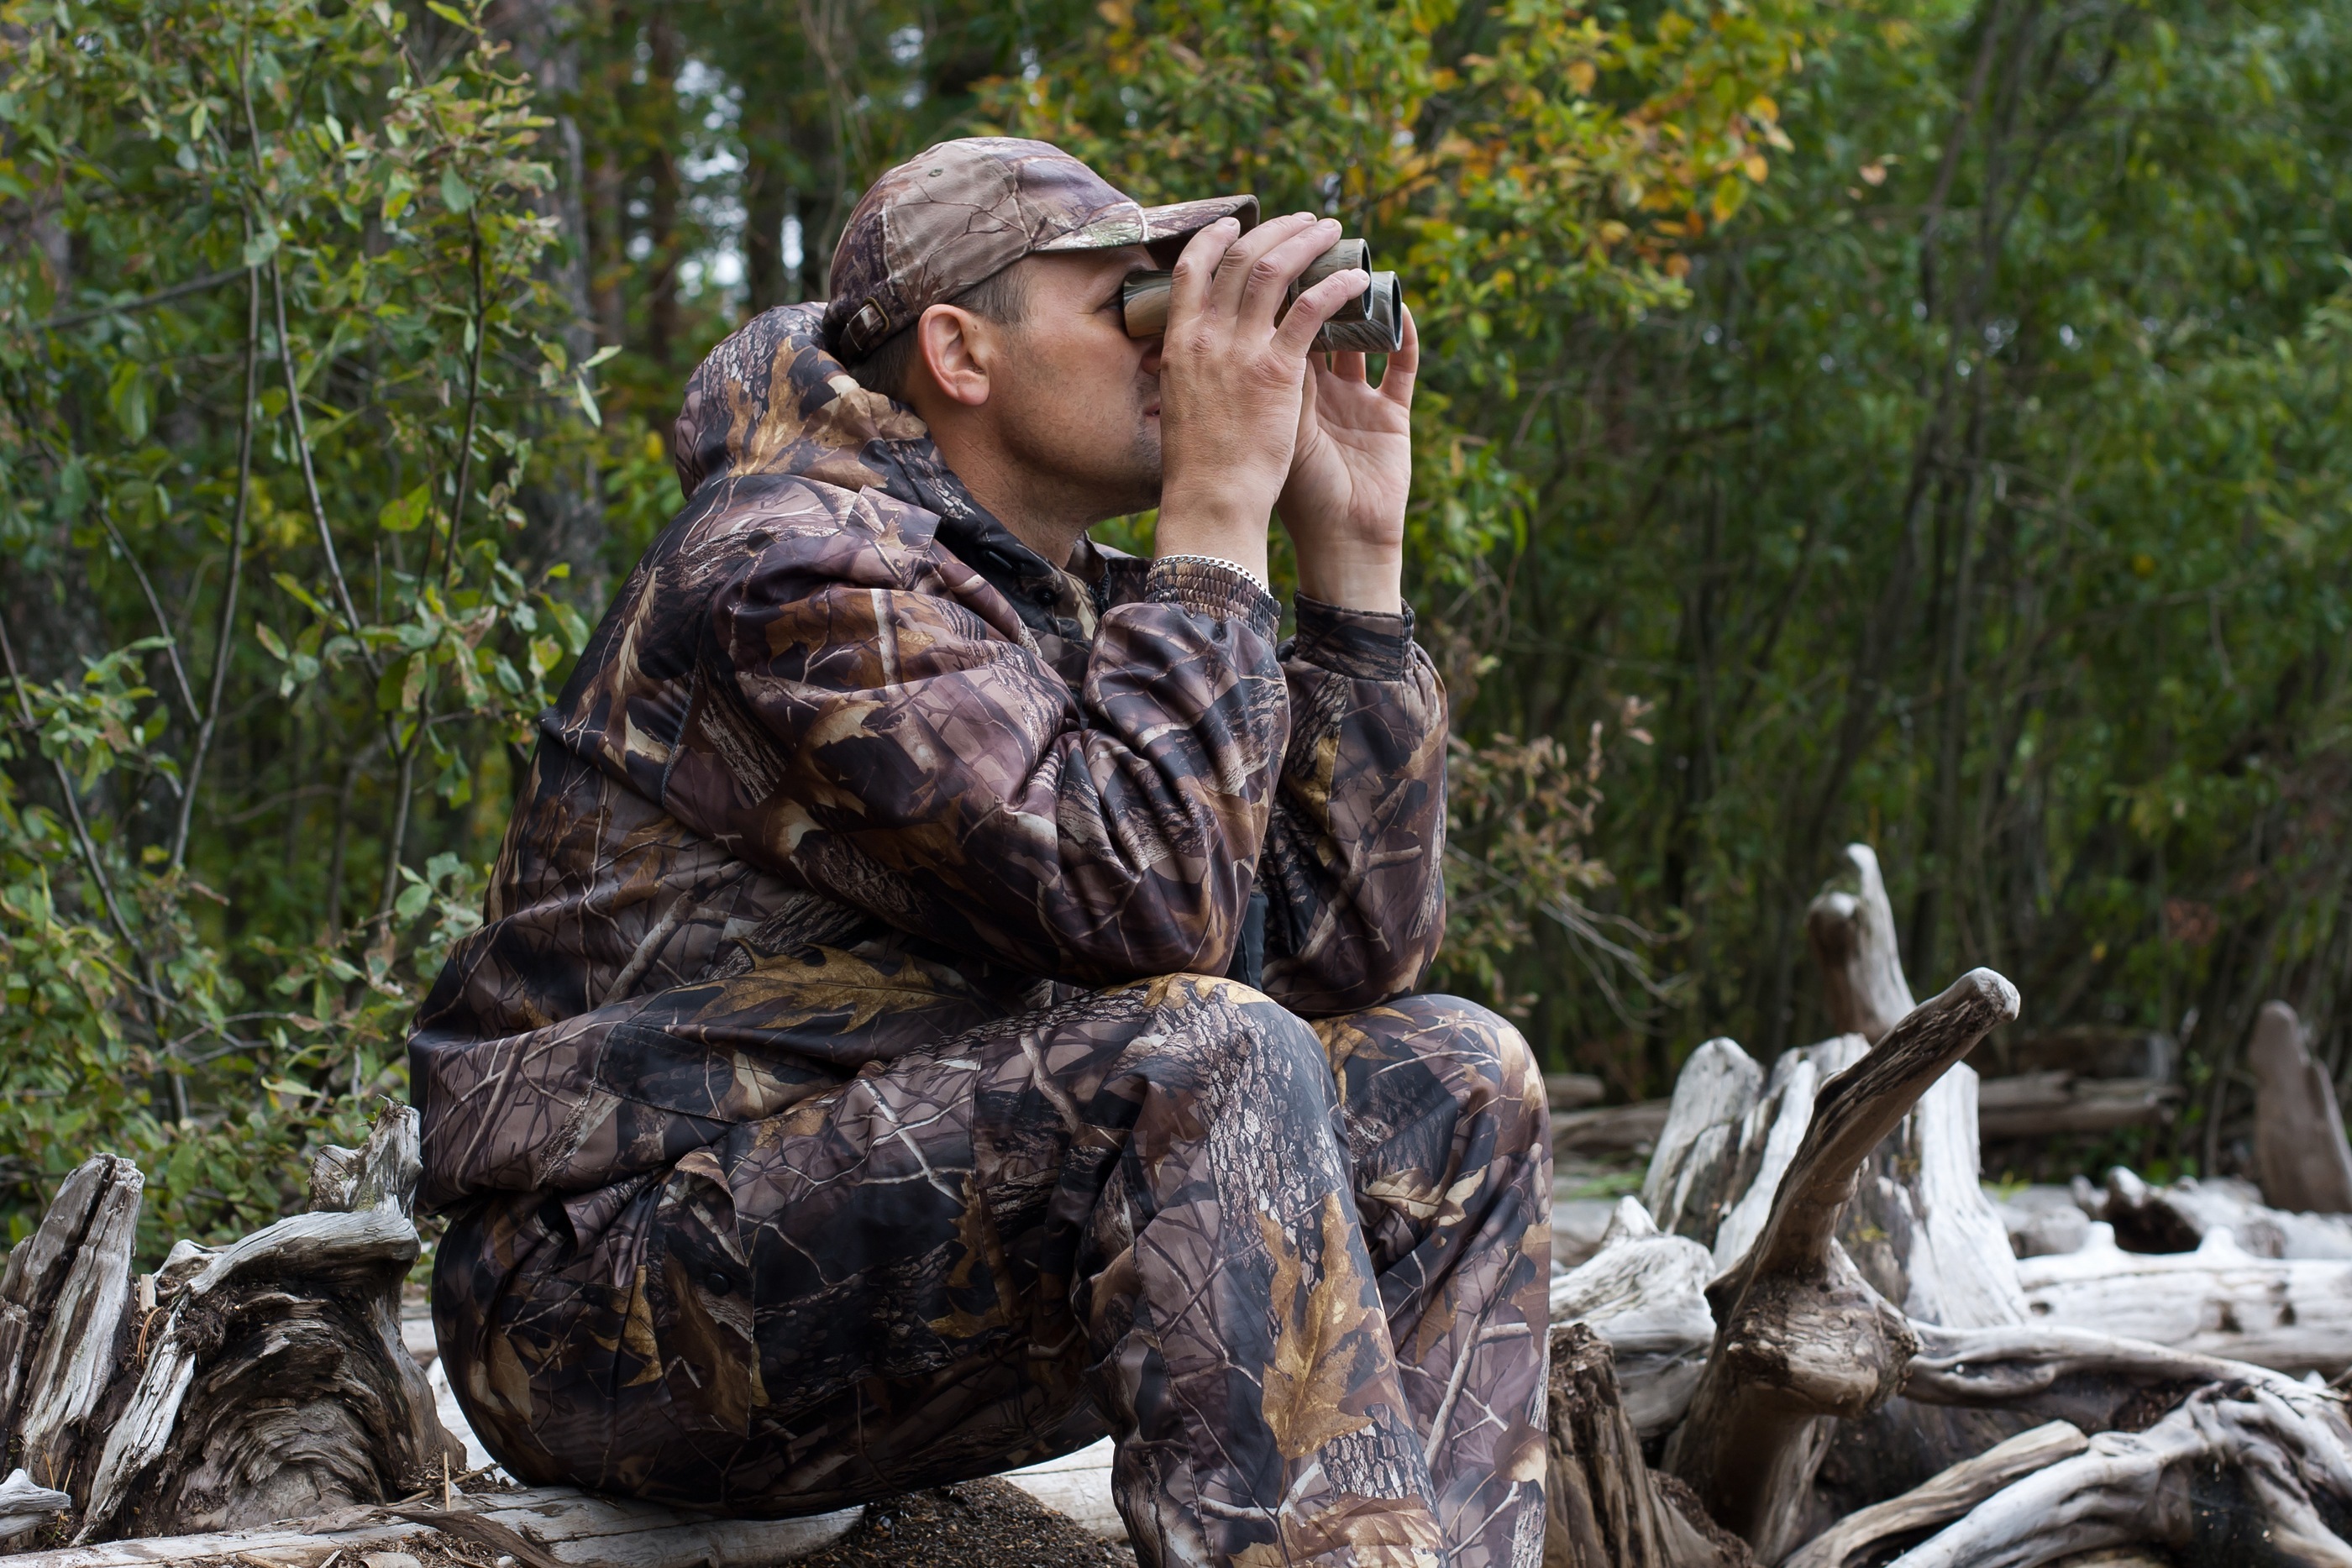
By now, your food plot should be in full swing. If so, a trail camera set up along the fringes would be a great way to capture that nocturnal buck who only hits the fields at night. In areas where baiting is legal, trail cameras could be set up over bait to get the same results.
Either way, food will be the primary driving force for deer movement, so it only makes sense to hang your trail camera in areas where deer will be feeding. Summer is also a good time to consider staking out a water source with your trail camera to help deer movement. Don’t dismiss the value of a central hub of H2O in your hunting area. Hang that trail camera.
On a side note, this is also a great time to conduct a trail camera survey if you have a private tract of land you will be hunting on. It’s hands-down the best way to monitor your deer herd population. You’ll be able to estimate your deer density, fawn recruitment, sex ratio, the age structure of your bucks, and more.
Early Fall Trail Camera Strategies
As I eluded to earlier, things change. Those locations that proved so good in early and late summer are now proving to be different. This is simply due to changes in food and cover. Leaves are turning and falling, and deer are ready to find alternate food sources – like acorns!
In addition, testosterone is gradually starting to build in male deer. This causes a variety of behavioral changes, which will ultimately change deer movement and sightings. To keep up with these changes, you must move your trail cameras.
Food sources can change throughout the course of a season, so become familiar with all types, especially those that appear naturally in your hunting area.
Food can still be a hot ticket, but bedding areas, travel routes, and staging areas are usually where you will find a lot of buck movement. Some of the images you capture will be in daylight but expect many of them to occur under cover of darkness. That’s just the nature of the beast when you’re dealing with mature bucks.
Nevertheless, you can’t formulate a plan of attack until you get confirmation a big buck is in the area – day or night. So start by capturing the image first, then move on.
Pre Rut/Rut Trail Camera Strategies
Things get hectic during this time frame as bucks move with reckless abandonment, looking for a hot doe. In the weeks leading up to the actual breeding phase, bucks will leave a bevy of signs announcing their aggression and intentions. Look for that sign and consider hanging your favorite trail camera somewhere nearby.
Once the actual breeding begins, you can expect a drop in mature buck movement as they are pushing does into more secluded areas to not only avoid the pressure from other bucks but the onslaught of hunting pressure as well. Your trail cameras and treestands should be moved as well.
I like pinch points, oak flats, logging roads, secluded ridge top saddles, field edges, and the fringes of doe bedding areas or anywhere else the females congregate. A camera hung somewhere along my entry, and the exit route means I can check it on days that I hunt without disturbing the bucks I am chasing before the hunt. This also allows me to decide if the area I am hunting is worth returning to or if I should pull up the stakes and move on.
Post Rut/Winter Trail Camera Strategies
Everything old is new again as the urge to breed is over, and the focus once again shifts to food. And while you may want to keep a few cameras hanging over remaining food sources, it wouldn’t hurt to keep one in the areas you used during the rut. There is always the chance that the buck you’re after hasn’t given up hope and is still searching for love. Only your trail camera will tell you if that is the case or not.
In addition, this is a great time to conduct an end-of-the-season or winter trail camera survey. With deer searching for food, you’ll be able to get a tally of the bucks that made it through the year, as well as an understanding of your property’s deer density, buck to doe ratio, age structure, and more. Just like the trail camera survey you should run in late summer, this information is critical to understanding how you should approach the upcoming season.
Conclusion
Deer movement is one of the most important keys to getting the most out of your trail camera. Adjust your trail camera strategies to match each phase of the whitetail season, and you will gain a plethora of knowledge that will ultimately lead to more filled tags. The trick is finding a way to manage all of that trail camera knowledge and data. Once that happens, all of the puzzle pieces will start to fall into place—best of luck.
PS – If you’re using trail cameras and haven’t tried DeerLab’s trail camera photo management service, we invite you to sign-up for our free 30-day trial. We think it will completely change the way you view trail camera photos.
The most common question people tend to ask when they first experience a CO2 air gun, is how many shots they can get from one cylinder. I would like to be as specific as I possibly can drawing my experience from the use of air guns. However, there is no single answer to this question. It varies depending on the air gun and the size of the CO2 cartridge you are using.
There are also so many other reasons that may lead to a long-winded answer. In this article, we will highlight everything you need to know about CO2 cartridges so that we can understand how CO2 air guns work and how to get the most from a single cartridge.
The number of shots one expects from a CO2 vessel ultimately depends on the amount of gas used to create the velocity in each shot. The general rule that follows is that a CO2 canister powered pistol will give anywhere between 50 to 100 if all parts are functioning at top levels. However, you should expect far fewer shots when using a CO2 powered rifle as it takes more power hence more CO2 to give greater velocity and range. A rifle powered with CO2 gas will deliver between 40 to 50 shots per canister.
When considering CO2 powered air guns, you should note that it is a refrigerant gas and will therefore cool as it expands. What this implies is that when you fire your air gun in quick succession the canister will become cooler and hence lose velocity on subsequent shots. The gas in the cylinder loses its pressure as it becomes cooler.
As a rule, air gunners avoid rapid shooting when using CO2 powered air guns. Once pressure decreases and velocity falls it becomes more challenging to hit the same targets at the same distances which make target training almost impossible.
However, when using CO2 powered air guns, the ability for it to get back to its normal temperature is not long. Some take between 11-15 seconds while others may take an even shorter time if the temperature is ambient enough. But do not let temperature dissuade you from getting a CO2 powered rifle. Besides these minor setbacks, CO2 powered air guns have consistent velocities if you can keep the CO2 in its liquid state.
How Long Will my 12-gram CO2 Cartridge Last?
Again, the answer varies and you will see why later in the article. But the answer is not a fixed number and one 12-gram CO2 cartridge can, therefore, deliver around 30 to 200 shots from an air gun. The reason there is so much variation has everything to do with the nature of the CO2 gas and how other factors influence the outcome of your shots.
Factors That Determine How Much Co2 Used While Shooting a Co2 Air Gun.
Temperature
Temperature affects the number of shots a Co2 canister can deliver. The reason is simple, for Co2 gas to expand, there must be heat. Therefore, the more heat there is available the more shots you will get from your air gun. The reverse is also true. When shooting your air gun in extremely cold weather there are chances that the CO2 will freeze up and your air gun fails to fire.
The warm temperature will give you more power and also probably more shots from your CO2 canister. Therefore, it is advisable to consider the area you live in before investing in a CO2 air gun.
CO2 Canister Size:
When using a CO2 air gun, the more shots you take consistently the cooler the canister and the CO2 inside the canister become. As already discussed, each time you fire your CO2 powered air gun the canister becomes cooler as it gets used up.
What this implies is that when you have a smaller canister it will cool much faster than that with a higher capacity. So, when using a smaller canister like the 12-gram CO2 cartridge, always take rest between shots to make the air gun more efficient and achieve consistent velocities. A 12-gram CO2 cartridge may only give you between 20-30 good shots before you must let it warm up a bit and then take other shots.
Some CO2 air guns in the market can deliver more shots and probably take longer to cool down. An example is the 88-90-gram CO2 tanks that allow users to enjoy a rapid-fire in target shooting before having to wait for it to warm up again. Some manufacturers still maintain the 12-gram size tanks but offer a dual canister. The result is that you will fire better and probably more than a single 12-gram cartridge would. Also, there will be more shots between each warm-up time because of the dual capacity.
Semi and Full Auto
The market has both semi and full auto CO2 powered air guns. It sometimes beats logic as one might wonder how effective a full-auto CO2 powered air gun would be if rapid-fire affects the velocity leading to poor performance.
It is tempting to shoot fast anytime you have a semi or full auto air gun and this is a great dilemma for rapid shooters. One reason that makes full auto air guns ineffective is when they use CO2 to power the shots. It gets worse if you consider a full auto air gun that uses a 12-gram Co2 canister to power its shots.
For instance, let’s consider the KWC Mini UZI that can fire both in the semi-auto and full-auto mode yet it uses only a single 12-gram CO2 canister. When using the KWC Mini Uzi in semi-auto mode, you should expect at least two rounds of 25 shots only if you allow it to warm up between reloads.
The same KWC Mini Uzi when shooting in full auto mode you should only expect one magazine of shots before it cools down. After the reload then you should consider switching back to semi-auto mode. Well, this is if only you want to get half a magazine of shots before the canister becomes depleted.
Shooting Pace
When shooting in semi-auto or full auto mode, you can decide to take time and fire single shots to become more precise. The more pace you have in between shots the lesser shots you will get from a single canister.
You should take time between shots if you want more power from your air gun. The only way to avoid getting fewer shots is to also avoid the temptation of blasting shots regardless of the air gun you are using. An alternative is enjoying your blast from your semi or full auto air gun but stocking up more CO2 cartridges.
CO2 Valve Settings
On almost all CO2 air guns there must be a valve that regulates how much CO2 will be used. The valve setup is a simple one that opens up once the hammer is dropped for only a brief period to allow CO2 to escape the canister and into the barrel and breech area. What follows is that the gun propels the air pellet, BB, or Airsoft round in the chamber.
The power of the shot is determined by how long the valve stays open and the amount of CO2 used. The higher the CO2 the valve releases, the higher the velocity but also fewer shots from a single cartridge.
How Exactly Does the CO2 Work?
Understanding CO2 Cartridge Pressure
There are many air gun enthusiasts that feel the pressure concerning how a CO2 powered rifle works. Even though many understand that they need pressure some do not think beyond loading the cartridge and taking shots.
Now that we already know how to maximize your CO2 cartridge to get more shots, we must understand how the process begins.
When CO2 gas is compressed in a canister it can power an air gun to fire pellets at significant velocities. CO2 is a gas that can turn to liquid when mechanically compressed. Because of this unique nature, the CO2 gas can achieve higher pressure of up to 852.8 psi especially if it combines with an ideal temperature of about 70 degrees Fahrenheit.
If you have an air gun, the ideal pressure should be a minimum of 850 to 900 psi. Therefore, the CO2 powered air gun can reach these pressures comfortably. The pressure is also affected by temperature and the state of the CO2 when fired. You will get higher pressures from your cartridge if the CO2 is mostly liquid compared to gas when you fire.
CO2 is a complex substance that can form solid to a gas without necessarily passing through the liquid state. What this means is that the pressure inside the canister is a result of the temperature of the gas. Therefore, when you mechanically compress the CO2 in its gas state it turns to liquid when the right pressure is attained. It explains why the pressure will remain constant in the canister until all the liquid is finished. Hence no CO2 air gun will lose its velocity because there is little liquid CO2 left in the canister.
CO2, Pressure, and Temperature
The general principle of CO2 and temperature is that when it reaches around 70 degrees Fahrenheit the gas will obtain a pressure equivalent to 852.8 psi and this can be contained in a vessel. If the canister still has more CO2 it is converted into a liquid state.
Hence inside the canister is a pressurized gas that sits above the liquid when at room temperature. The process that follows each shot means that some gas is released and immediately converts the remaining liquid into gas for subsequent shots. All this time, ensuring that the pressure is equalized for the right temperature.
What this means, is that pressure inside a CO2 canister is directly dependent on the temperature. Warmer temperatures are the best, and cooler temperatures affect velocity as well.
Understanding CO2 and Velocity
As mentioned at the beginning of the article, velocity and CO2 are related. You can see this as you reach near the end of your CO2 in the canister. You will notice that the pressure slightly drops and the velocity becomes compromised as well.
To adjust the velocity of your CO2 air gun when it is almost finished, consider taking shots in warmer temperatures. As a general rule, never fire your CO2 air gun below 60 degrees Fahrenheit as this jams the projectile.
Conclusion
CO2 is among the simplest ways you can power your air gun. It requires little expertise to operate, and enjoy lots of years of target shooting with fewer hassle in between.
8. Best Spring Piston Air Rifle for Pest Control: HW50S
The HW50S spring piston air rifle from Weihrauch Sport is a high-quality gun perfect for plinking and hunting small rodents. With a state-of-the-art German design and construction, this gun is built to last.
The HW50S features a precision rifled barrel, making it accurate and reliable. The rugged stock is made from durable hardwood, making it sturdy and stable.
The HW50S also has an adjustable trigger, so you can customize it to your specific needs. Whether you’re looking for a gun for plinking or hunting, the HW50S is a perfect choice.
10. Best Value Air Rifle for Pest Control: Air Venturi Avenger
With high-end features at an entry-level price, the Avenger sets a new standard for similarly priced PCPs to live up to.
Featuring an externally adjustable regulator and externally adjustable hammer spring, the Avenger provides the user with a seemingly infinite amount of performance adjustability never seen at this price point.
A smooth side lever action allows for quick follow-up shots, and the fully shrouded barrel keeps your shooting quiet. Available in .177, .22, and .25 caliber.
Features
Pre-Charged Pneumatic
Sidelever Cocking
Synthetic Stock
Externally Adjustable Regulator (Up to 3,000 PSI / 210 BAR)
Easily accessible Hammer Spring Adjustment Screw
Two-Stage Adjustable Trigger
Max Fill Pressure: 4,351 PSI (300 BAR)
Fully Shrouded Barrel
Picatinny Rail on Fore-end of stock
Holes in front and rear of stock for mounting swivel studs for a sling
Dual Gauges – Reg Pressure (RH Side) and Fill Pressure (LH Side)
With so many air rifles out there, it can be a bit confusing to keep up with all the information around.
But fear not! Just read the article according to the problem at hand.
Pests are sneaky little creatures that can destroy your backyard in no time.
More and more people are choosing to sell their firearms in exchange for air rifles because when no other method for pest control works, turning to air rifles is the best option for you.
Frequently Asked Questions
Can You Use an Air Rifle in Your Background for Pest Control?
Yes, you can use an air rifle to hunt for pests in your backyard.
But you will have to check the gun laws of your area before doing so.
In a lot of countries and cities, there are very strict laws regarding air rifles and their usage.
Additionally, you should be 18 or above to use air rifles.
Do check on your town’s laws and regulations before you use an air rifle.
How Much Air Rifle Power Is Needed for Pest Control?
This completely varies according to the pest situation.
However, one important factor to keep in mind is the FPE, also known as muzzle energy.
The muzzle energy is dependent mainly on FPS and the pellet weight.
Typically, you require an air rifle with 1000 FPS for pest control.
But, you also need to know how much energy is required to kill each pest in one clean shot.
You can also refer to the table above to get a better idea about the FPE required for each type of pest.
Do Chipmunks Bite?
Chipmunks are definitely not friendly as they are a house of deadly diseases.
But they bite in rare conditions such as when they are provoked unnecessarily.
Otherwise, they’ll probably run away if they sense the slightest danger.
Do Chipmunks Carry Rabies? What Disease Do Chipmunks Carry?
Small pests such as chipmunks have a relatively low chance of spreading rabies.
It’s almost equivalent to zero.
But chipmunks do carry diseases like plague, hantavirus, and salmonella which are harmful to both babies and adults.
How Can You Kill a Rat in a Humane Way?
Using an air rifle is the most humane way to kill a rat since the rat will die in a second.
Rat poison and rat traps are more cruel methods.
Which Animal Is More Dangerous, Possums or Raccoons?
Possums are docile animals who try to avoid confrontation as much as possible.
But if cornered or provoked, they can attack.
On the other hand, raccoons are aggressive creatures and would defend themselves in the first go.
They would try to bite you or attack you, sometimes even viciously.
Will a BB Gun Kill a Raccoon?
No, a BB gun will not kill a raccoon because it does not produce the kind of energy required to kill a raccoon.
It will only injure the raccoon which is inhumane as it will die a slow death.
Or it can become too aggressive and attack you.
Are Iguanas Poisonous?
Iguanas produce a venom that is generally harmless but they do have sharp teeth.
Although there have been a few cases where iguanas have bitten humans, this is rare.
Their bites can give serious injuries to your face, ankles, fingers, etc.
Do Iguanas Change Colors? What Causes an Iguana To Change Colors?
Iguanas often change colors but not like chameleons.
They turn orange during mating season and dark green as they age.
In low temperatures, they turn black or brown to absorb heat and in hot temperatures, they turn to pastel colors.
Is it legal to shoot a skunk with a pellet gun?
As we mentioned before, shooting any kind of pest has to be mandated by law.
If your district or town’s law states that you can shoot any pest with a pellet gun or air rifle, then you can do so. In a lot of places, it is legal to shoot pests like skunks in your backyard.
Can a .22 Kill a Coyote? What Size Air Rifle Can Kill a Coyote?
No, a .22 rifle will hardly injure the coyote, and so will a .177.
They will either just run off in a distance or towards you for hurting them.
You can go for a .25 air rifle which will impact them more.
With a good distance and muzzle energy, a .25 will definitely work for you.
How Many Times Can a Skunk Spray? Is Skunk Spray Toxic?
Skunks spray only in dire circumstances like when they feel threatened.
They can spray 6 times in succession.
Skunk spray is toxic for both dogs and humans, for the former it may cause diarrhea and vomit but for the latter, it will cause irritation.
What does Inguana taste like?
Iguana meat is often described as similar to chicken but more tender, with a mild flavor profile that some compare to frog legs. The white meat is high in protein and low in fat, and is typically prepared by stewing, grilling, or adding to soups and traditional dishes in parts of Mexico, Central America, and the Caribbean. Due to its taste and texture, iguana is sometimes called “chicken of the trees,” with the tail and legs being considered the prime cuts.
The Shagbark Hickory Nut Is It the Finest Native American Nut?
By Amy Trubek
“They are the nobility of nuts,” the chef Odessa Piper says, “what the black truffle is to mushrooms.” Shagbark hickory nuts have “more flavor… more snap, more tooth-feel than either pecans or walnuts.” Unlike most nuts, toasting is required to intensify their flavor and create the shattering texture that makes them unique. Shagbark hickory (Carya ovata) is a relative of the pecan and a North American native, widely found in Ohio, Indiana, Illinois, Wisconsin, and Iowa. It’s hard to miss because the unique bark peels away from the tree in thin strips from six inches to four feet long. The trees are often found along roadsides. On the small dairy farms that dominate the rolling hills of southern Wisconsin, the cornfields and cow pastures mingle with stands of oak and hickory.
Gathering hickory nuts has long been part of rural Wisconsin family life. I went looking for hickory nuts late one fall, when the leaves had turned a vibrant mustard yellow. The nuts had dropped to the ground, their moist green husks now hard and black, having split open along four ribs to expose thin but strong inner shells. Several people told me that when they were young, their families would take a drive in the country and pull over when someone spotted a tree. The kids would pile out of the car and race to see who could pick up the most nuts the fastest. These people recalled with pleasure the nut’s luscious combination of sweet and smoky. But as to shelling… on that subject their eyes tended to glaze over.
Shelling the nuts is drudgery. Once the hard shell is broken, typically with a hammer, the meats have to be pried out. One serious harvester I met uses a dental pick. A pound of nutmeats takes a lot of cracking and picking and scraping — up to four hours’ worth — which explains why hickory nuts are rarely found in supermarkets or restaurants. Conventional wisdom in Wisconsin holds that this activity is for old-timers.
The main place to find shelled shagbark hickory nuts for sale is at farmers’ markets. At the one in Madison, various stands sell them. Harvey Ruehlow of the Nut Factory says, “The old guys are dying off, and the young people don’t have time.” He and his wife, Beverly, learned to forage and pick from Harvey’s dad, who loved to eat cinnamon rolls topped with chopped hickory nuts — it used to be that the nuts were used only for baking.
Note on toasting from Edward Behr
Eaten raw, shagbark hickory nuts have an echo of the curious rancid fruit flavor of another North American native, the black walnut — most people don’t like it. But shagbark hickory nuts respond unusually well to toasting, and they require a degree of it to taste their best. A mere light toasting causes the odd fruitiness to disappear and a superior taste to emerge, like a cross between a regular walnut and a pecan. Enough toasting also gives a satisfying, soft, oily crunch. The effect is so good that either the shagbark hickory or the wild pecan, another member of the hickory family, is the finest native North American nut. (A competitor, once, would have been the American chestnut, before the chestnut blight eliminated it.) To toast the nuts, heat the oven to 250 degrees F, spread them on a metal baking sheet or pan, toast for two minutes until they show some color, stir, and then toast for at least a minute or two longer. The longer the time, the stronger the flavor and the more crunch. Our small group of tasters preferred them after 10 or even 15 minutes. ● From issue 68
Question: “We deer hunt in Uvalde County and have been trying to manage our deer. This year we have seen a 3 1/2 year old buck that would be a main frame 7 point deer if he had brow tines, but he is missing his G1s. The buck has decent beam lengths and the mass is pretty good. Will this whitetail buck ever produce brow tines in the future? The guys on our deer lease are trying to decide if we want cull this buck or leave him until next year. Should we shoot all bucks that have no brow tines to improve the deer herd or should we just wait until they are at least 4 1/2 years old?”
Response: The only way to improve the buck component of your deer herd will be to remove the bucks with unwanted antler characteristics. These deer that hunters refer to as management or cull bucks. Young bucks that have missing brow tines turn into old bucks with missing brow tines. But it gets worse. They breed each fall, spreading the gene for missing brow tines. I’ve seen ranches where most of the bucks had missing brow tines. Don’t go there!!!
The presence or absence of a brow tine, or the G-1 as they are referred to on a score sheet, are the most inheritable trait for antlers. Bucks that are missing one or both brow tines should be candidates for management by harvest. You don’t want the gene for missing G-1 passed on. The next time one of the hunters sees him while deer hunting they need to remove this buck as quick as possible.
Buck management or culling must begin as soon as possible. The big mistake in letting undesirable bucks get to 4 1/2 years of age or older before removal is that they have at least 3 years to spread their unwanted genes around the deer herd. Judge all of the bucks on your deer lease against one another by age and remove the animals that are obviously lower in quality. Deer management only works when the entire herd is managed, but decisions must be made on an animal by animal basis. Shoot your buck with missing brow tines the next chance you get.
Last week, former NFL defensive lineman and Super Bowl 50 champion Derek Wolfe killed his first-ever mountain lion with his bow and some help from a buddy’s hounds — and the cat is absolutely massive.
The photo Wolfe posted to Instagram garnered plenty of attention. It takes a big guy to be an NFL defensive lineman, and at 6 feet 6 inches and 280 pounds, Wolfe is no exception. The photo (full version below) shows an absolute beast of a cat that practically dwarfs the retired football player.
“Gutted, he was 174 pounds,” Wolfe told Free Range American. “Obviously, I couldn’t weigh him up there on the mountain, so I’m guessing he had to be 200-plus.
“He was 8 1/2 feet long,” Wolfe added.
By mountain lion standards, Wolfe’s cat is an absolute monster. According to Colorado Parks & Wildlife, adult males on the large side reach 8 feet in length and weigh an average of 150 pounds.
But the cat isn’t only a trophy for Wolfe with an incredible hunting story attached to it — he actually did the local community a service by taking out this particular mountain lion.
As Colorado cat populations thrive, interactions between people and mountain lions have become tenuous, with family pets often ending up on the big cats’ menu. Before the hunt, Wolfe and his buddy tracked his big cat to a den under a residential porch, and two neighborhood dogs had recently fallen prey to an area cat.
It appears the local pet population and the owner of the house attached to that porch owe Wolfe a little extra gratitude. Here’s how he got on the cat, tracked it through a residential area, and treed it, and how the former pro athlete crawled on his hands and knees to make the shot after climbing a rocky slope completely smoked him.
GOOD GEAR – Look Badass at the Shooting Range With the BRCC Black Rifle AR Cuffed Beanie
Wolfe played college football as a defensive lineman for the University of Cincinnati and was drafted by the Denver Broncos in 2012. He played eight years with the Broncos, helped the team win Super Bowl 50, and then finished out his career with the Baltimore Ravens.
Wolfe said he grew up hunting and killed his first whitetail with a bow when he was only 13. However, football demanded so much time, energy, and focus that he didn’t have much left for hunting. Wolfe left the NFL just before the 2022 season. While he regularly spent the off-season chasing wild hogs and axis deer, now that the 32-year-old has retired from professional football, he has plenty of time to pursue his passion for hunting.
There’s even a YouTube video series in the works, titled Wolfe Untamed, highlighting the former NFL player’s efforts to tackle new hunting challenges.
RELATED – New Knives From the 2024 SHOT Show
A Mounting Mountain Lion Problem
Wolfe bagged his colossal cat in Game Management Unit 46, which includes parts of Clear Creek, Park, and Jefferson counties. The unit is not far from Nederland, where mountain lions have terrorized the small town by killing at least 15 neighborhood pets, including a 100-pound Doberman pinscher.
“We were like, ‘Oh, man. This isn’t good. This cat is way too comfortable being near people. He’s stalking something here, coming up on the porch and looking in windows. He’s looking for pets or people.’”
— Derek Wolfe
“People in parts of Colorado are really dealing with this, and [Colorado Parks & Wildlife] is only supposed to help when it comes to livestock, and they have to follow the law,” Wolfe said. “There’s nothing that protects pet owners from mountain lion attacks. If a mountain lion attacks your pet and you kill it, you could be ticketed for that.”
Wolfe had been waiting for the opportunity to get a mountain lion with his bow, partly because he had heard about the animals harassing residents and killing their pets. He passed his mountain lion certification exam and bought his license, so when his buddy Alex Nestor called him up after a fresh snow and asked him if he wanted to cut tracks on a big cat, he was ready to go.
On the morning of Jan. 18, Wolfe and Nestor drove along back roads looking for a cat sign. They found evidence suggesting a mountain lion in the area may have been targeting pets, just like the mountain lions stalking Nederland cats and dogs.
“This was for sure a mature male,” Wolfe said. “We looked to the left as we were walking up on the tracks, and there was a full-grown 300-pound 4×4 mule deer lying under a tree that this cat had dragged across the road. It was still a little warm, so we knew it was fresh from that morning.”
They followed those monstrous tracks through someone’s yard and up under their front deck.
“When we looked under there, you could see that the cat had made a little bed in there. It looked like it had been living under there,” he said. “When we knocked on the door to see if anybody was home, we saw that the cat had walked right up onto their porch.
“We were like, ‘Oh, man. This isn’t good. This cat is way too comfortable being near people. He’s stalking something here, coming up on the porch and looking in windows. He’s looking for pets or people.’”
GOOD GEAR – Make the Perfect Cup of Coffee With the BRCC Fellow Clara French Press
The Hunt and the Climb
After two hours of calling around trying to get the landowner on the phone, the two hunters finally got permission to track the cat through private property up into the adjacent public land.
“We put the dogs on the tracks, and where is the first place they went? Boom. Right under that porch. That’s where the scent was heaviest,” Wolfe said. “It’s insane. Any time this guy came walking out of his house, this 8 1/2-foot, 200-pound cat could have been lying under there.”
The dogs eventually followed the cat tracks up into the surrounding mountains, and Wolfe and Nestor followed.
“This area is super mountainous, with straight up-and-down cliffs. There was 2 to 3 feet of snow on the ground, and once the dogs were on him, we went straight up to the top and then straight down the other side.”
Wolfe described how rushing up a nearly 4,000-foot elevation change was one of the most physically and mentally challenging things he’s ever had to do.
“It took me forever to get to the top on the first climb because I was just slipping and sliding on these rocks. It’s all rocks, straight up and down, and you can’t post into it because of the snow,” he said. “The rocks just slip out from under you. So I’m crawling up the hill on one side, then basically sliding down on my back the whole way down the other side, and then trying to get up through a ravine.”
Nestor, still following his dogs, had managed to get ahead of Wolfe, so he dropped him a pin on his phone, marking the spot where the hounds had the cat treed.
“I go straight to the pin and just come out on the road. Then I got the message that said, ‘Dude, you’re, like, 1,000 yards below me.’ I could hear the dogs howling their heads off up there.
“By this point, my legs were cramping. My hamstrings, my calves, and my quads are locked up, and I could hardly walk without being in a full-body cramp. I’m gassed and sucking air. The muscles in my rib cage just locked up on me because I was sweating. It was a crazy sweat, too, because it was so cold.
“Then Alex said, ‘Dude! Get. Up. Here.’”
As a retired pro football player, Wolfe is no stranger to hard work and physical exertion, but this hunt beat him up.
“I’ve had death threats. I would definitely say defamation,” Wolfe said. “It’s these animal rights groups coming after me, trying to say I had no right to do this, that I’m a murderer, or that I’m trying to compensate for something.”
“It was the hardest hunt I’ve ever been on,” Wolfe said. “It felt like I just did a full padded practice in 90-degree heat, but it was cold and snowy somehow. It’s all right, though. You’ve got to pay the price to get to them, man. That’s just the way it goes, especially with a bow.”
Wolfe crawled on his hands and knees the rest of the way up the ridge to get to where Nestor’s dogs had the cat snagged in a tree.
“When I got to the spot, I was just laying there looking up, and there’s the mountain lion above me in the tree. And I’m like, ‘Oh, god. Don’t fall on me, please.’”
Wolfe was so exhausted he wondered if he could pull the 80-pound draw on his Hoyt Highline. Somehow, he managed to stand up and reach a good spot about 12 yards from the tree. Then, he lined up the pin on his Spot Hogg sight and sent a Sevr broadhead straight through the big cat’s vitals.
“I made a really good shot, an ethical shot, and that cat dropped right where I had just been laying.”
RELATED – New Optics From the 2024 SHOT Show
The Real Work Begins
Any rocky hill that can smoke an athlete like Derek Wolfe is a serious fucking hill.
As every hunter knows, there’s only a small moment of celebration after a successful shot, and then the real work begins.
“After all that, I still had to get the cat out of there,” Wolfe said.
“We gutted it and stuffed it, long ways, in my Kifaru pack. His head was hanging out on my right side, and the tail and hinds were flapping out on my left. I put my bow on my back. Then, I got down on my hands and knees and crawled out of there backward, all the way down.
“I couldn’t stand up and walk because my legs were just locking up on me,” Wolfe said. “At one point, I fell about 10 feet down a rock face.
“Everything was straight up and down, I couldn’t get any traction, and I had to wrestle with 180 pounds of cat the whole way.”
He focused on taking one little backward step at a time, mostly on his hands and knees, until he finally made it back to the truck with his cat.
“CPW came out and checked the animal. I was laying on the side of the road because I was just wrecked,” Wolfe said.
GOOD GEAR – Conquer Your Taste Buds With the BRCC AK-47 Espresso Roast
Keyboard Warriors Target Derek Wolfe
Now, as Wolfe spoke to me over the phone from his home in Denver, the hunt is almost a week behind him, and the cat is in various places. The mountain lion’s meat has been sent to a processor, his skull shipped off for scoring, and the hide sent to the taxidermist.
“I haven’t [eaten] mountain lion before, but I hear it’s really sweet meat, so I’m looking forward to it,” Wolfe said. “I had some breakfast sausage made so we can eat biscuits and gravy.”
While Wolfe admits this was one crazy hunt, he said the craziest part is the hate that’s been spewed at him online after the fact, despite the hunt being 100% legal. Major media outlets have been quick to cover how social media keyboard warriors have attacked everything from Wolfe’s character to his masculinity.
“I’ve had death threats. I would definitely say defamation,” Wolfe said. “It’s these animal rights groups coming after me, trying to say I had no right to do this, that I’m a murderer, or that I’m trying to compensate for something.
“I’m not trying to compensate for anything. I just love doing this. This is a lifestyle for me,” Wolfe explained. “Leave me alone. I did everything right. I did everything legal. I’m not out here poaching animals. I’m doing it the right way, the ethical way, and the way it’s meant to be done.
“It’s important to manage any herd, whether it’s deer, elk, bear, or mountain lions. They all need some kind of management because they will starve themselves out, they’ll get diseases, they’ll overkill, and they’ll harm people. There are lots of reasons.
“Hunters are conservationists. That’s what we are. We love animals, and we want them to be around for generations.
I do this because I want my kids to be able to hunt, and I want their kids to be able to hunt. I want them to be able to enjoy it as much as I do.”
READ NEXT – Polar Bear Attacks Remote Alaskan Village — Kills Woman, Toddler
In this Penn Conflict II Spinning Reel Review, we’re presenting one of the lightest weight spinning reels ever to hit the market from Penn.
This reel was released in 2017, and it is available in the 1000-5000 range. The Conflict II is ideal for lightweight anglers looking for a high performing freeshwater reel. This is the lightest reel in the Penn family, and when you stack it up against some of the previous reels from Penn, there is no comparison.
If you enjoyed the Conflict spinning reels before, you’d love this one because of it’s lightweight and durable design. The reel looks great, and it features a super smooth and strong HT-100 drag system. Along with that, they pair in a wide assortment of other features that are unique to this reel, and we’re going to dish them out for you.
A solid choice in the medium priced spinning reel category
Proven HT-100 carbon fiber drag system
Solid reel that is not to heavy
Very durable anodized body
The Penn Conflict II is a solid choice and is available HERE.
The Penn Conflict II has a smooth HT-100 carbon fiber drag system that has been proven in many other Penn models such as the famous Penn Battle II and the much more expensive Penn Clash
The Conflict II is the lightest reel from Penn to this day, and there are a few different reasons for that.
First, you have the RR30 Rigid Resin body and rotor that make up a majority of the weight. This material is incredibly lightweight and durable. It’s even 20% lighter than the original Conflict. If you felt that the first-generation was a little bulky or too heavy, you’ll love the weight and feel of the newer Penn Conflict II.
If we take you inside the reel, you’ll find Penn’s CNC gears using a 7+1 stainless steel ball-bearing system with an aluminum pinion and main gear. These reels offer the ultimate in lightweight inshore fishing while still providing resistance to saltwater.
You also get the Conflict Superline Spool which takes mono backing out of the equation due to a rubber gasket that keeps the line from slipping on the spool. In many reels you will need to use mono to go from the spool to the braid line as braid has a tendency to slip on the spool, this solves this problem.
Something else that really separates the Conflict II from the original model and most other reels for that matter is the lightweight braid Leveline System. The reel provides a slow oscillation system which ensures that your line lays evenly on the spool.
This feature also prevents friction on the line, and the result is one of the longest casting spinning reels on the market today. With this feature, they recommend using a lightweight braided line only for the Conflict II.
Features
Rigid Resin RR30 Techno-balanced rotor – Penn is able to dramatically reduce the weight of this reel compared to the original Conflict primarily due to the design of the body. Using their RR30 Rigid Resin, they lower the overall weight of the reel by 20% which makes this the lightest Penn reel on the market today. Along with weight reduction, the Rigid Resin is also durable and long-lasting.
CNC Gear Technology – They continue to impress with their CNC crafted aluminum pinion and main gear found on the 1000-4000 sizes. The Penn Conflict II 5000 features a brass pinion and aluminum CNC machined main gears.
These are durable and paired alongside high-quality stainless steel ball bearings. Put it all together, and you have a great inshore reel worthy of large trout, redfish, and even sea bass.
HT-100 carbon fiber drag washers – The carbon fiber drag system is the epitome of smooth even when battling larger fish. Having the HT-100 Versa drag washers in the spool allows Penn to use both sides of each washer providing the angler with higher max drags, improved range, and smoother start-ups when stacked up against the original Penn. These washers receive a coating of Penns proprietary grease for longevity.
Heavy-duty aluminum bail wire – The thick aluminum bail wire is durable and long-lasting. It perfectly rounds out an already strong reel.
Superline spool – Another feature that is unique to the Conflict II is the Superline Spool. This design eliminates the need for backing because of the rubber gasket that keeps your line from slipping on the spool. The end result is improved line capacity and a smooth retrieval and cast.
Leveline system – In addition to the superline spool, you also get the Leveline system. The feature differs from the original model by providing anglers with a slower oscillation to improve the way your line lays on the spool. The line creates less friction this way and provides you with a longer cast. Penn states that the Conflict II is the longest casting spinning reel on the market.
Features at a Glance
Rigid Resin RR30 Techno-balanced rotor
CNC Gear Technology
HT-100 carbon fiber drag washers
Heavy-duty aluminum bail wire
Superline spool
Line capacity rings
The Penn Conflict II comes in six different sizes starting with the 1000 series and working it’s way up to a 5000 series. They don’t have a 6000 or anything higher, and that is why they primarily recommend this reel for inshore fishing only.
For the 1000 model, you get a max drag of 9 pounds and a gear ratio of 5.2:1. The reel weighs in at a measly 6.3 ounces, and it has a braided cap of 160/6, 130/8, and 110/10. You’d want to pair this reel with an ultralight rod like the St. Croix Trout Freshwater spinning rod or the St. Croix Mojo Inshore for inshore fishing.
Next, we have a 2000 model which has a max drag of 10 pounds, and it weighs in around 7.4 ounces. You’ll get a braided cap of 210/8, 180/10, and 165/15. For this reel, it comes with a gear ratio of 6.2:1. You’ll still want to pair this reel up with a lightweight, fast action rod to give you the most pop and the greatest level of sensitivity.
For the 2500 model, you have a max drag of 12 pounds, a gear ratio of 6.2:1, and a reel that weighs just below 8 ounces at 7.9. With a 10 pound braid, you’ll get 240 yards of line, and I’ve had much success pairing this reel with the St. Croix Mojo Inshore.
Something incredibly impressive and it speaks volumes for this reel is stacking the previous Conflict up against the Conflict II. The same 2500 model that offers the same max drag and line capacity weighs two ounces more. The Conflict I 2500 weighs 9.8 ounces. As you get up in the models into the 4000 range, the weight of the reel becomes significant but not with the Conflict II.
Even at the 4000 mark for the Conflict II the reel still weighs less than the Conflict 2500. When they say that they took steps to reduce the weight of their premium reels, they were not kidding.
For those of you who want all the details I have provided the chart below.
Over the years, I’ve leaned more and more about my lighter tackle gear. I’ve had a lot of success with reels like the Shimano NASCI 1000 and the Daiwa Fuego LT. I was incredibly excited when I saw that Penn was going to design a reel to replicate the original but at a fraction of the weight.
When I think of Penn reels I think “heavy” and now there is a model that I do not have to feel that way about.
For inshore fishing, I prefer to fish for trout, redfish and flounder. I’m somewhat young, but even I have fond memories of fishing trips with rods and reels that looked like my dad dug them out of a cave man’s chest. With the incredible growth in technology, manufacturers are able to make reels much lighter while actually making them stronger as well.
The Penn Conflict II is a reel that maximizes the amount of strength and durability it provides. It doesn’t compromise your comfort and enjoyment with a big bulky and uncomfortable reel that feels like you have been fishing it all day even though you just got on the water.
I favor a 10 to 15 pound braided Berkley Fireline with whatever live bait I can get my hands on. It might be more of a pain, but it pays off in the long run for me: the trout and redfish hammer finger mullet and eels like crazy around the waterways of South Carolina.
Pros
20% lighter than the previous Conflict
One of the bestter inshore reels on the market
Leveline system maximizes casting distance
Proven HT-100 drag system
Cons
Bland appearance; nothing flashy
Not the lightest in its class for the price
Alternatives
If you’re still looking for some different options, we’ve got them. Sticking with Penn, we’ll look at the Penn Battle II. This reel is going to save you some money, but you’re going to pay for it in the weight of the reel. Each reel model weighs about two ounces more with the Penn Battle II. Read the complete Penn Battle II Review HERE.
Next, we have the Penn Clash. If we were comparing the Clash with the original Penn Conflict, we’d have to give it to the Clash. The whole theme of this review is weight, and even though the Penn Clash is more expensive than the Conflict II, it still weighs more by about an ounce.
With the Clash, you might see a slight improvement in smoothness during the retrieval due to an extra bearing, and you also get the leveline oscillation system and CNC gear technology. Read the complete Penn Clash Review HERE.
If you’re looking to go more affordable with your reel, you could opt for the Daiwa Fuego LT. You can get this reel for under $100, and the weight is even less that the Conlict II. The Daiwa Fuego LT is smooth and offers plenty of corrosion resistance and waterproofing features such as the Mag sealing making it one of our favorite reels. Read the full Daiwa Fuego LT review HERE.
Rolling along we’re going to hit you with a reel that is as light as the Penn Conflict II, and it’s more affordable. So what’s the catch? It’s an Okuma. The Okuma Helios SX is a good quality lightweight reel with a carbon fiber drag, eight corrosion-resistant bearings, and a lightweight carbon frame.
For the price, it’s hard to go wrong, but it doesn’t have the durability and presence of a Penn reel. For the complete Okuma Helios SX, review CLICK HERE.
The last comparison we have is the Shimano Stradic FK. This spinning reel is one of the best inshore reels priced below $200, and it competes with the Penn Conflict II in the weight department. It cost a little more than the Penn Conflict II but for you Shimano fan biys and fan girls its a great reel. For the complete Shimano Stradic FK, review CLICK HERE.
In Conclusion
Overall, the Penn Conflict II is a serious step up from the previous reel. They’ve taken all of their best models and combined it into one to make this reel. While doing that they’ve also incorporated a lot of new technology and features that make this one of the best inshore spinning reels available on the market today in this medium price point.
You thought that you knew your hunting and fishing terms, but you were wrong.
Whether you have a fishing rod in your hands, big game hunting, slinging flies, or sharing in an upland hunt, you need to know what your hunting and fishing terms are. Sometimes the English language can fool us into believing that a slang term is actually the real phrase, and vice versa.
We’re declaring it an open season to jump on your hunting buddies and let them know that what they are saying really means something else. Maybe you’re in the bar discussing game birds or bag limits, or maybe you’re talking with your tree hugging cousin who wonders why you’re hunting with an “assault rifle.”
Face it, a lot of us have been using these hunting and fishing terms wrong all this time and didn’t know it. Here’s where the rubber meets the road and you can find out what you’ve been missing.
Keep these in mind when your know-it-all friend starts talking in the blind.
Snort: The sound you make when your buddy swears it was a 10-point that he missed.
Wheeze: The sound you make dragging a deer through the woods.
Grunt: The sound you make when you see that gun you’ve been wanting is discontinued.
Rabbit-in-distress: When you step on your wife’s ankle biting dog’s tail.
Crankbait: That expensive bass boat with all the bells and whistles.
Buzzbait: Those ice cold brewskis in the cooler.
Buck-in-rut lure: That new tight dress your girl is wearing.
Honker: That jerk at the boat launch that’s totally impatient.
High-ball: Whisky or rum?
Swamp donkey: What you call your buddy when his new 4×4 gets stuck.
Tree rat: That dude sitting in your stand.
Smokepole: That stick of salami/pepperoni you put in your backpack.
Kicker: When the kid finds out he can’t go fishing with you.
Kentucky windage: When you aim a little right or left of where you’re trying to walk after too much bourbon at deer camp.
Robin Hood: That dude pitching the timber that can’t miss.
Burn a hole in the yellow: Peeing in the snow.
Glassing: The reason why a dude wears dark sunglasses to the beach with his girl or wife.
Bluebill: What your buddy gets when he falls in the water in January.
Chuckle: What you do before, during, and after your buddy falls in that cold water.
Boar: That dude that can’t stop talking about his skill.
Deep diver: That guy that can’t stop telling fishing lies.
Brow tines: That buddy that always wears his shades on his forehead.
Bull: What you’re thinking when your buddy tells his fishing stories.
Call-shy: When you can’t get up the nerve to call that gal you met at the boat show.
Cape: What your buddy thinks he wears when he scores a nice buck.
Gobbler: What your buddy turns into over that first fresh venison steak of the year.
Confidence decoy: Your pal who’s the wingman tonight.
Cow: What your wingman is helping you to avoid.
Pointer: That dude your friend brought along that wants to try every spot he sees.
Furbearer: What you didn’t know about that guy until he took his shirt off at camp.
Shaker: Your buddy when he sees a buck.
Greenhead: What your buddy gets when your buck is bigger.
Gutshot: That feeling you get when the neighbor scores the buck you’ve been hunting all year.
Inside spread: The distance between you and the other guy working a shoreline.
Jump shoot: When you come up too fast to another angler working a spot.
Limb saver: When your friend helps you drag your deer.
Locator call: When you have to call from the driveway to wake your buddy up early because he stayed out too late.
Pass shoot: What that one buddy seems to do every time you kick a deer by him.
Quiver: Every time that same guy sees a deer.
Shed: What your wallet does every time you go into the hunting/fishing store.
Trapline: That aisle in the outdoor store where everything is marked 50% off.
Shock gobble: What your wife does when you get home from the hunting/fishing store.
Butt out tool: What you say to that friend who wants to know where you caught that bucket of crappie.
There’s a method to our madness when it comes to the outdoor phrases that we use every day. The big fish that got away is usually just a couple of words from the real definition and you didn’t even know it. Now you have the ammunition to block out that one loud guy in your group and make sure that when the trap closes, it’s just his mouth you’re talking about!
You may even be able to get around the game warden with some of this wily jargon, but don’t bet on it. The next time that you’re on a fishing trip or out with the long bow remind your buddy that sometimes a diving duck is really just that thing you do when the guy in the front of the boat casts without looking behind him!
You’ll be better off for it.
Looking for a little more? Follow my webpage, or on Facebook and Twitter
NEXT: TAKE MY QUIZ TO SEE IF YOU ARE INDEED AN OCDH: OBSESSIVE COMPULSIVE DEER HUNTER
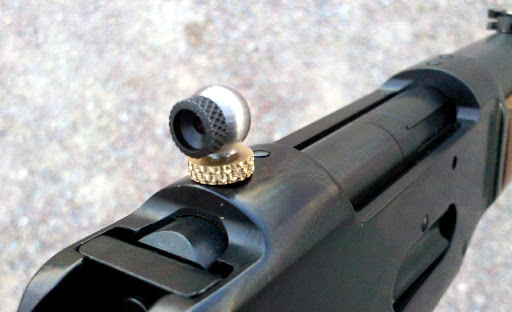
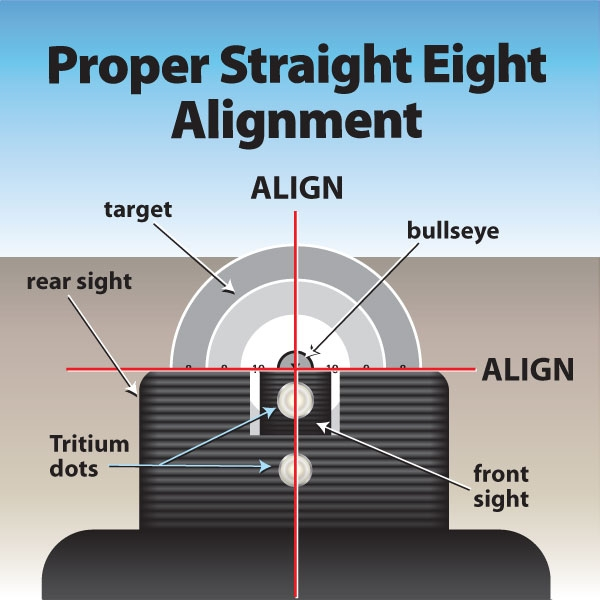
Designers have tried to make use of human nature by combining a circular front sight with a circular rear aperture sight.
It becomes easy for most hunters to fit a circle within a bigger circle.
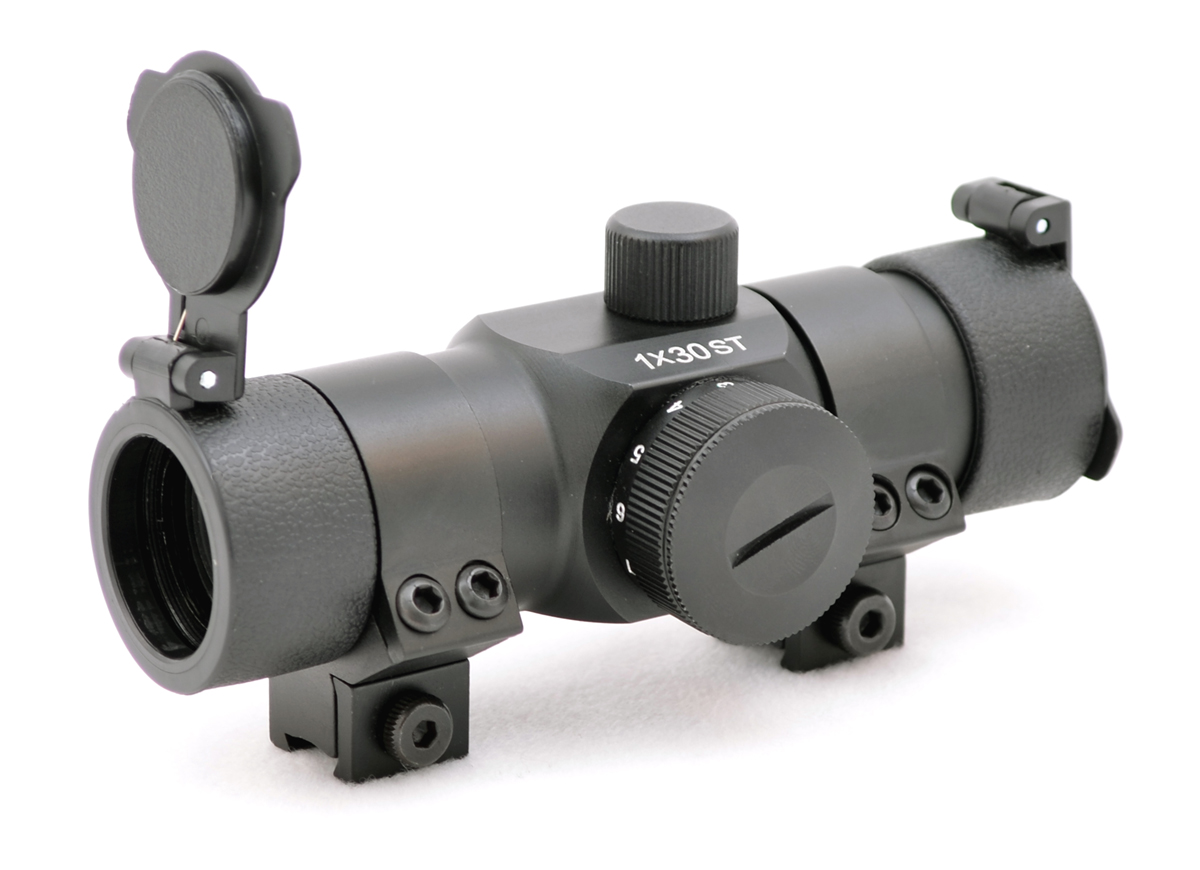
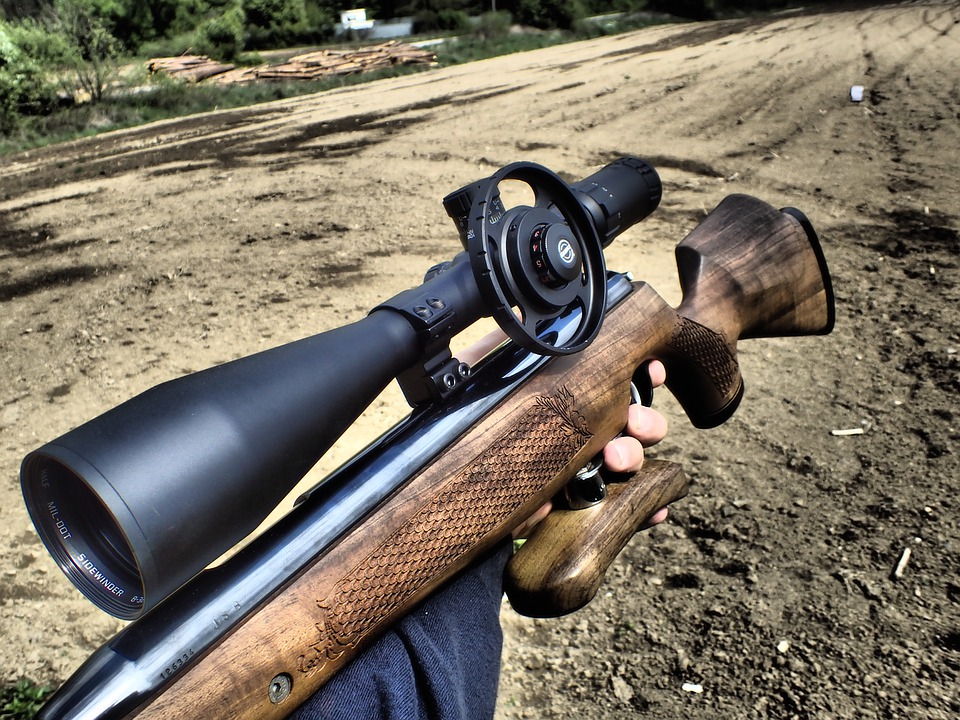
3. Optic sights
These can also be referred to as telescopic sights or simply, ‘tele’.
They are also more popularly known as scopes.
The name tells you its operation closely resembles that of a real telescope.
As such, it consists of two lenses, the front, and the rear.
The front lens, also known as the objective lens, allows light into the scope.
The rear lens, also known as the ocular lens, is the one into which the shooter looks.
Conventionally, both the front and rear ends of the scope are widened to house the lenses.
The two lenses are connected through a narrowed cylinder referred to as the tube of the scope.
Scope tubes are mostly designed to be 25 mm or 30 mm in diameter.
The 1-inch tube dominated the market for decades until manufacturers saw the need for a larger tube to accommodate bigger lenses which are better.
Some have even gone a step further and made scopes with a 34 mm scope tube – e.g. the Discovery HD 3-18X50 FFP SS.
The scope tube houses reticles.
Perhaps a more familiar term is the crosshairs.
Again, there are quite a variety of reticles to choose from.
It all depends on how you are wired.
a. Fine crosshair
This must be the simplest of all, in that it comprises two thin lines intersecting at the center of the field of view.
With this, you can view a larger part of the target without obstruction.
The only downside is that the thin crosshairs may be difficult to view when the target is somewhat dark.
However, they work well in high contrast backgrounds – think of bright targets like a yellow metal plate or a bright green soda can.
To solve the problem of sighting against dark backgrounds, some manufacturers illuminate the reticles with battery power to bright colors such as red, green, or blue.
You can then comfortably switch to the color you see best against the current background.
b. Duplex crosshair
Considering the disadvantages of the fine crosshairs, designers thought of thickening the hairs along the periphery of the field of view and leaving the hairs thin around the intersection.
Small dots are added to the thin hairs towards the intersection, simply to boost visibility against dark backgrounds.
Ted’s HoldOver shows you how to use the mil-dot reticle to determine the distance to your target here:
d. Target dot
This is a modification of the fine crosshairs with a dot added at the center.
The center dot is meant to rest at the center of the target.
This improves the fine crosshairs but it may not prove useful where the target is very small, as the dot is likely to cover the entire target.
c. Circle
Instead of the center dot described above, this comprises a full circle around the intersection of the crosshairs.
This is meant to improve visibility but has the unexpected effect of cluttering the target.
Pros of optic sights
Perfect for long-range hunting
Perfect for tiny targets
Comes in fixed and variable varieties
Hundreds of options to choose from
Easy to use
Cons of optic sights
Can prove difficult to use if the target keeps moving
Adjustment settings change quickly with every turn of the several knobs
Other variations
From the basic optic sights with front and rear lens and reticles, designers have added a whole battalion of features to scopes to enhance the hunter’s experience.
Let us look at some of these.
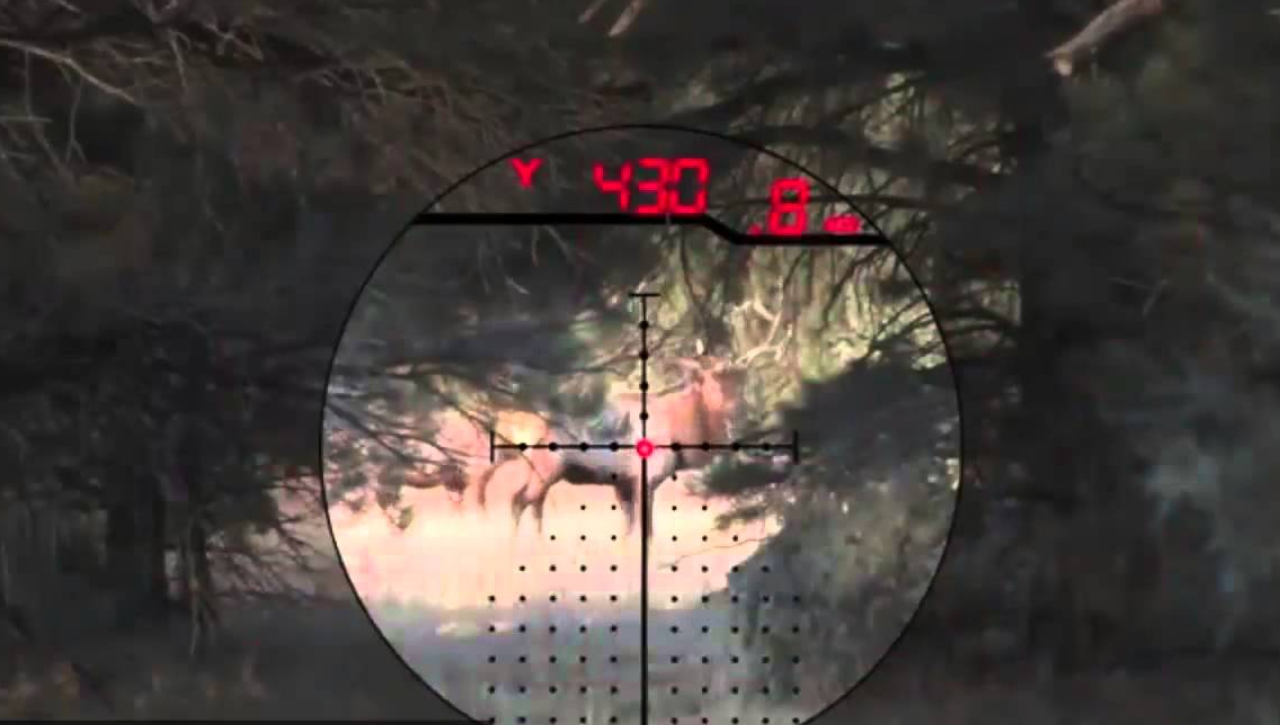
Lasers
These basically project a beam with the aim to assist in rangefinding.
A rangefinder calculates the exact distance between you and the target and additionally presents a crystal-clear image of the target
So that you are not left guessing what you are aiming at.
It enables you to pull the trigger with a high degree of surety.
Pros
Great for situations where you are likely to be jerked out of the shooting position
Gives you a perfect aim at the target in the shortest time possible
Cons
Makes new shooters poor at aiming
Visibility problems arise when the sun shines too brightly
Red dot sight
A red dot sight likewise allows the hunter to view a holographic sight picture of the target within the optic.
It becomes quite easy to place the red dot right on the target.
Depending on the model, you are able to enlarge the target up to sixteen times, or even eighty times for more advanced scopes.
All this does is provide a clearer picture of the target – you see the stomach, head, shoulders, legs, back, etc.
You then narrow down to the specific part you are interested in and pull the trigger with higher chance of hitting the intended part.
To adjust the magnification power, you simply need to rotate the power ring to the desired magnification level.
You will mostly find the power ring at the rear end of the scope near your eye.
Additionally, most scopes with magnification ability come with the ocular focus ring.
This is used to ensure the reticle is in focus, however far or near the target is.
And now to the two variations of scopes in regards to magnification ability:
Variable scopes – This is what we just discussed. You can alter the magnification power to a value of your choice, basically by rotating an adjustment knob.
Fixed scopes – These do not allow you to change the magnification. For this reason, you better use them for targets that are not too far away – preferably for plinking and target shooting practice. If used for hunting, ensure that the prey is at close range.
As much as they seem limited, fixed scopes have the one advantage of requiring no adjustment once they are mounted.
Pros of Red Dot sights
Can be used for varying light conditions
The prey can’t view the red dot and so will never know it’s being aimed at.
Cons of red dot sights
With hundreds of brands and models to choose from, you feel confused right away
Can prove a bit pricey if you fancy more advanced features
Fiber optic sights
The crosshairs for this sight are made of an optical fiber that is transparent and flexible, usually of a diameter next to that of human hair.
The optical fiber allows light to pass through it, thus enhancing the visibility of the target.
It is interesting how optical fibers interact with light.
They’re usually made from an inner core and outer covering.
Both the inner and outer components have a low refractive index, implying that they do not bend light.
However, the outer covering has high reflectivity, so it reflects light along its entire length.
Even in conditions of poor light, the optical fiber is able to pick up the little light and transmit it along the full length of the cable.
This makes it ideal for foresight.
You can place the well-lit fiber on the target without much problem.
As such, they find great use in low-light settings.
Better still, they come in two main colors – red and green.
Which one strikes a chord with you? Go for it!
In case your eyes are not that good, consider purchasing a fiber-optic sight with a bigger circumference.
At least you won’t strain a lot.
Here is a list of some popular air rifles that come bundled with fiber optic sights:
Great for beginner shooters who are just starting out
Very useful in poor light conditions
Budget-friendly
Have easy-to-change rods
Cons
Some are fragile – you can easily break the glass tubes
Fiber optic rods may be affected by a number of cleaning solutions – with some like acetone bleaching the rod
Understanding scope models
You can get easily confused by the numerous numerical numbers you see on different scope models.
Take the example of the CenterPoint 6-20X50 AO Rifle Scope.
The numbers 6-20 mean that you can magnify the target 6-20 times, while the number 50 points to the size of the objective lens in mm.
The larger the objective lens, the larger the objective bell.
You need this information before you make the purchase so that you can ensure the scope will fit onto the mounting rails of your air rifle.
In addition to that, the bigger the lens, the stronger the magnification.
Go for the largest objective lens if you intend to go hunting at dusk or dawn.
Lastly, AO means Adjustable Objective, implying that the adjustment feature for parallax is fitted onto the objective bell of the scope.
You will also find some scopes with the suffix AOE – lightly meaning Around the Objective End.
Other terms you may come across in scopes include:
IR – Illuminated reticle
SF – Side Focus – the turret for adjustment of parallax is mounted on one side of the scope tube.
HD – High Definition
MOA – Minute of angle – refers to the accuracy of groupings at a particular range. MOA is actually 1/60th of a degree. 1 MOA implies groupings of 1” at 100 yards.
SWAT – Special weapons and tactics
Air rifle scopes vs firearm scopes
It would seem an incredible hack to simply mount your old firearm scope onto your new air rifle.
Don’t! Air rifle scopes are specially designed to counteract the unique vibration and double recoil of airguns.
As a matter of fact, spring-powered airguns require especially rated air rifles that can withstand the sometimes high recoil.
Springers are known to easily damage other scopes.
Frequently Asked Questions
1. What is a 6 o’clock sight picture?
There are quite a number of sight pictures that shooters use to improve their shooting accuracy.
This is especially so if you are working with open sights.
Sight pictures are obtained by aligning the rear and front sights in a specific relationship with the target.
The best one is that which allows you to have the smallest groupings.
Some of the popular sight pictures are elaborated below:
Center hold – this involves placing the front sight directly in the center of the target.
6 O’clock – this involves placing the front sight at the lower part of the aiming black.
Sub 6 – this favors those shooters who experience difficulties with the 6 O’clock hold by including a small white line between the front sight and the aiming black.
Frame hold – this involves placing the front sight at the center of the rear sight. In case there is no distinct aiming point, the front sight can be adjusted to the 6 or 12 O’clock position. This works quite well in low-light settings.
2. Why should you aim with your dominant eye?
Think of it this way – you are either left-handed or right-handed.
If left-handed, your dominant hand is the left one, with which you easily handle many tasks.
The opposite is true for right-handed persons.
This concept also applies to the eyes.
FYI, One of your eyes is stronger than the other.
In most cases, right-handed persons have the right eye as the dominant one
But there are instances where the dominant eye can be the opposite of the dominant hand.
To know your dominant eye, Hunter-Ed proposes the 5 steps below:
Use your four fingers and the thumb to create a triangular opening.
Extend the arms away from your eyes.
Try looking at a far object through the opening with both eyes open.
Gradually pull the arms towards your eyes, ensuring your focus on the object does not waver.
The opening will naturally land on your dominant eye.
You may also try closing one eye at a time.
The dominant eye tends to remain focused on the object while the other eye sees the back of your hands.
To keep your shooting as accurate as possible, always use the dominant eye.
I am right-handed and my right eye is dominant. What about you?
3. What is proper sight alignment?
Sight alignment is basically the link between the front and rear sights.
You ideally peep through the rear sight with the intention of seeing the front sight right at the center.
On the other hand, the sight picture refers to the link between the aligned sights and the aiming bull on the target, which may be in the form of a post or bead.
Before I sign off, I’ll add yet another term for your keeps – eye relief. This refers to the distance between your eye and the rear sight.
You should master keeping a relatively constant distance between your eye and the sight.
You don’t want to bump the sight with your eye or place it very far away.
As a rule of thumb, aim at a minimum of 2 inches, and don’t go beyond 5 inches.
"Master the art of precision shooting with dry firing air rifles. Enhance your aiming skills, trigger control, and muscle memory without using ammunition. Discover...
Wyatt Earp has said:
Fast is fine, but accuracy is everything
And I just thought how many airgunners are obsessed with muzzle velocity and muzzle energy,...
")
")
")
")
")


 Review – The Best Name In The Air Rifle Game")


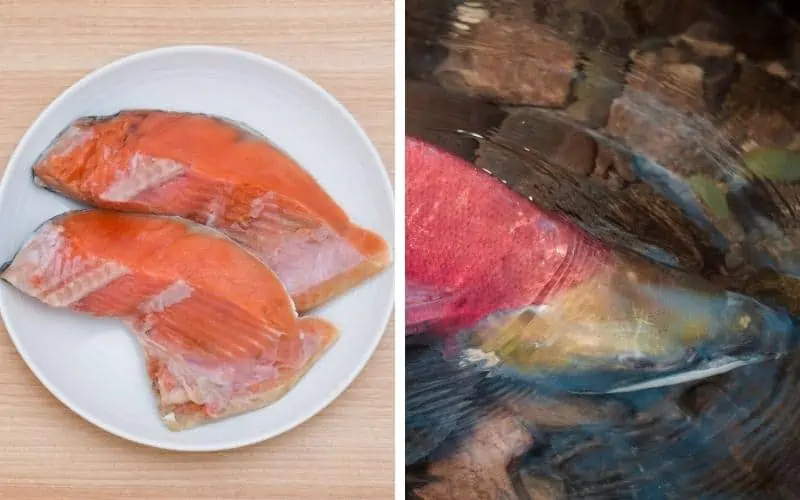

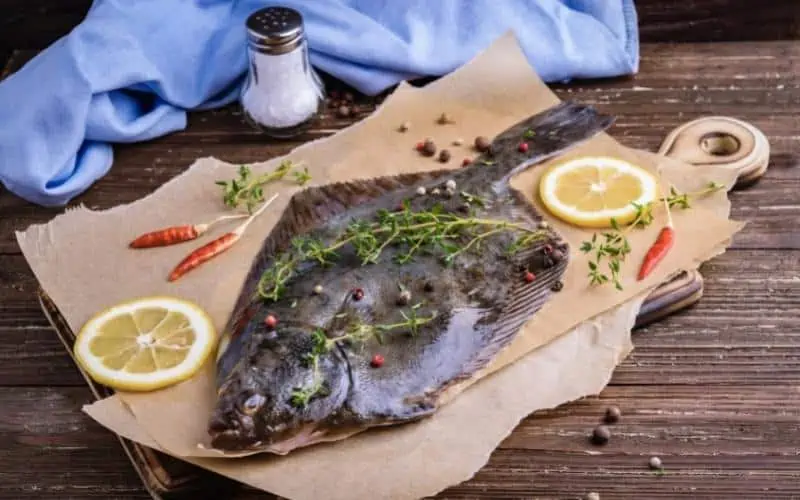
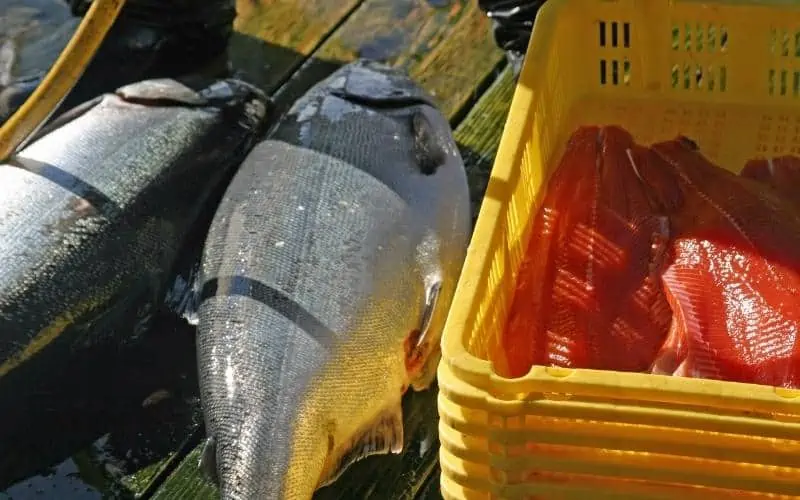
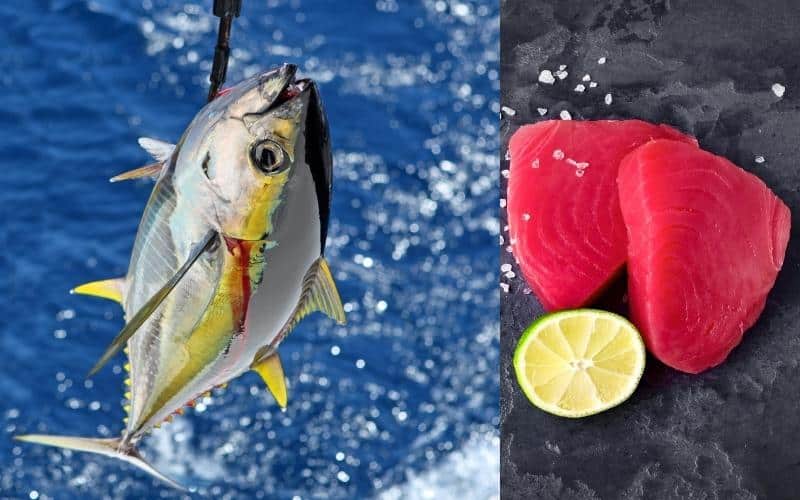
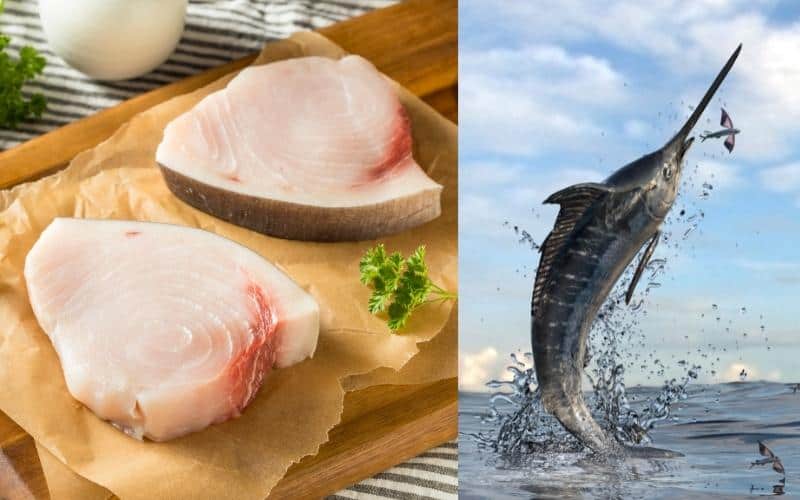
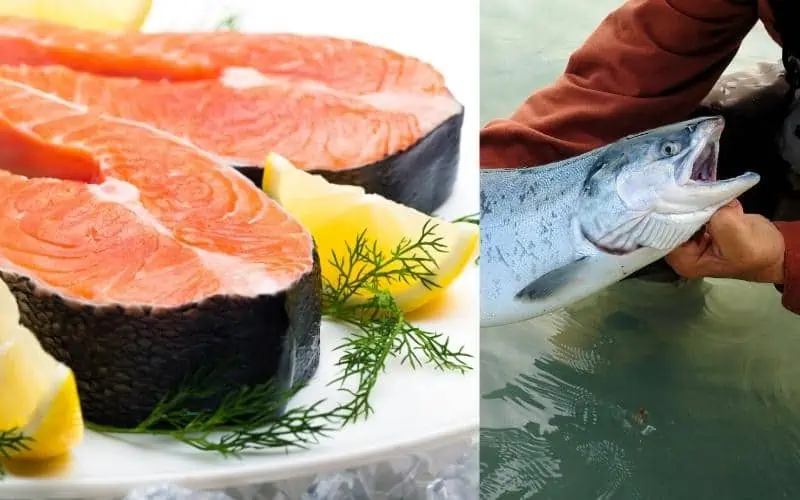
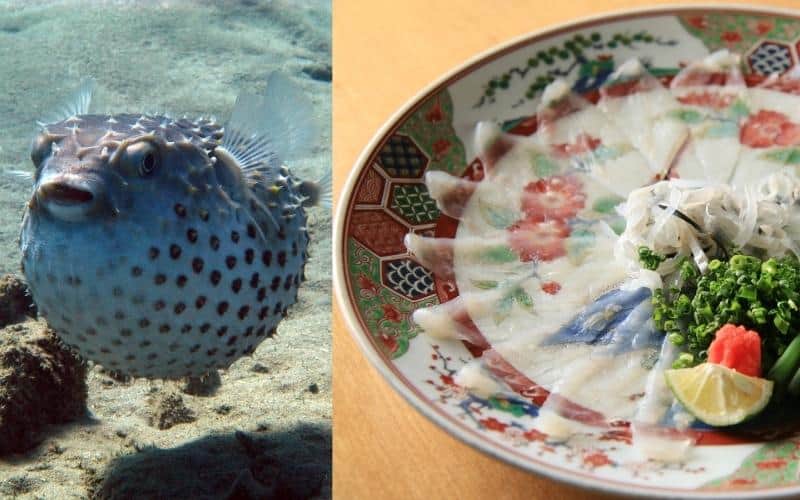

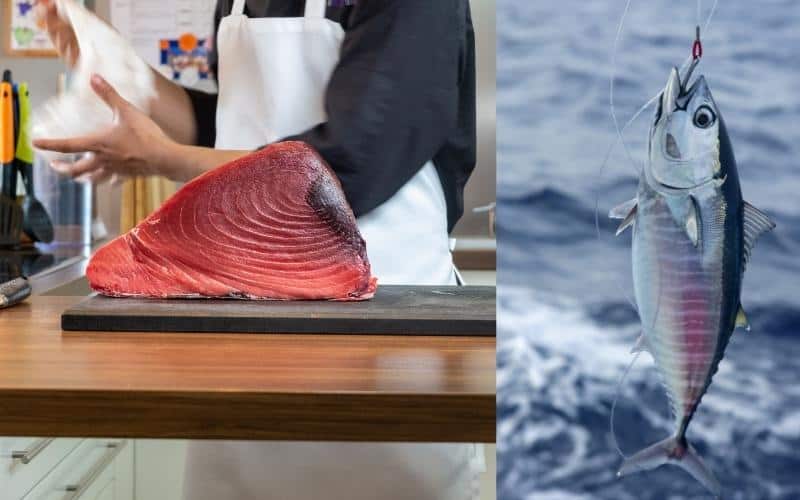


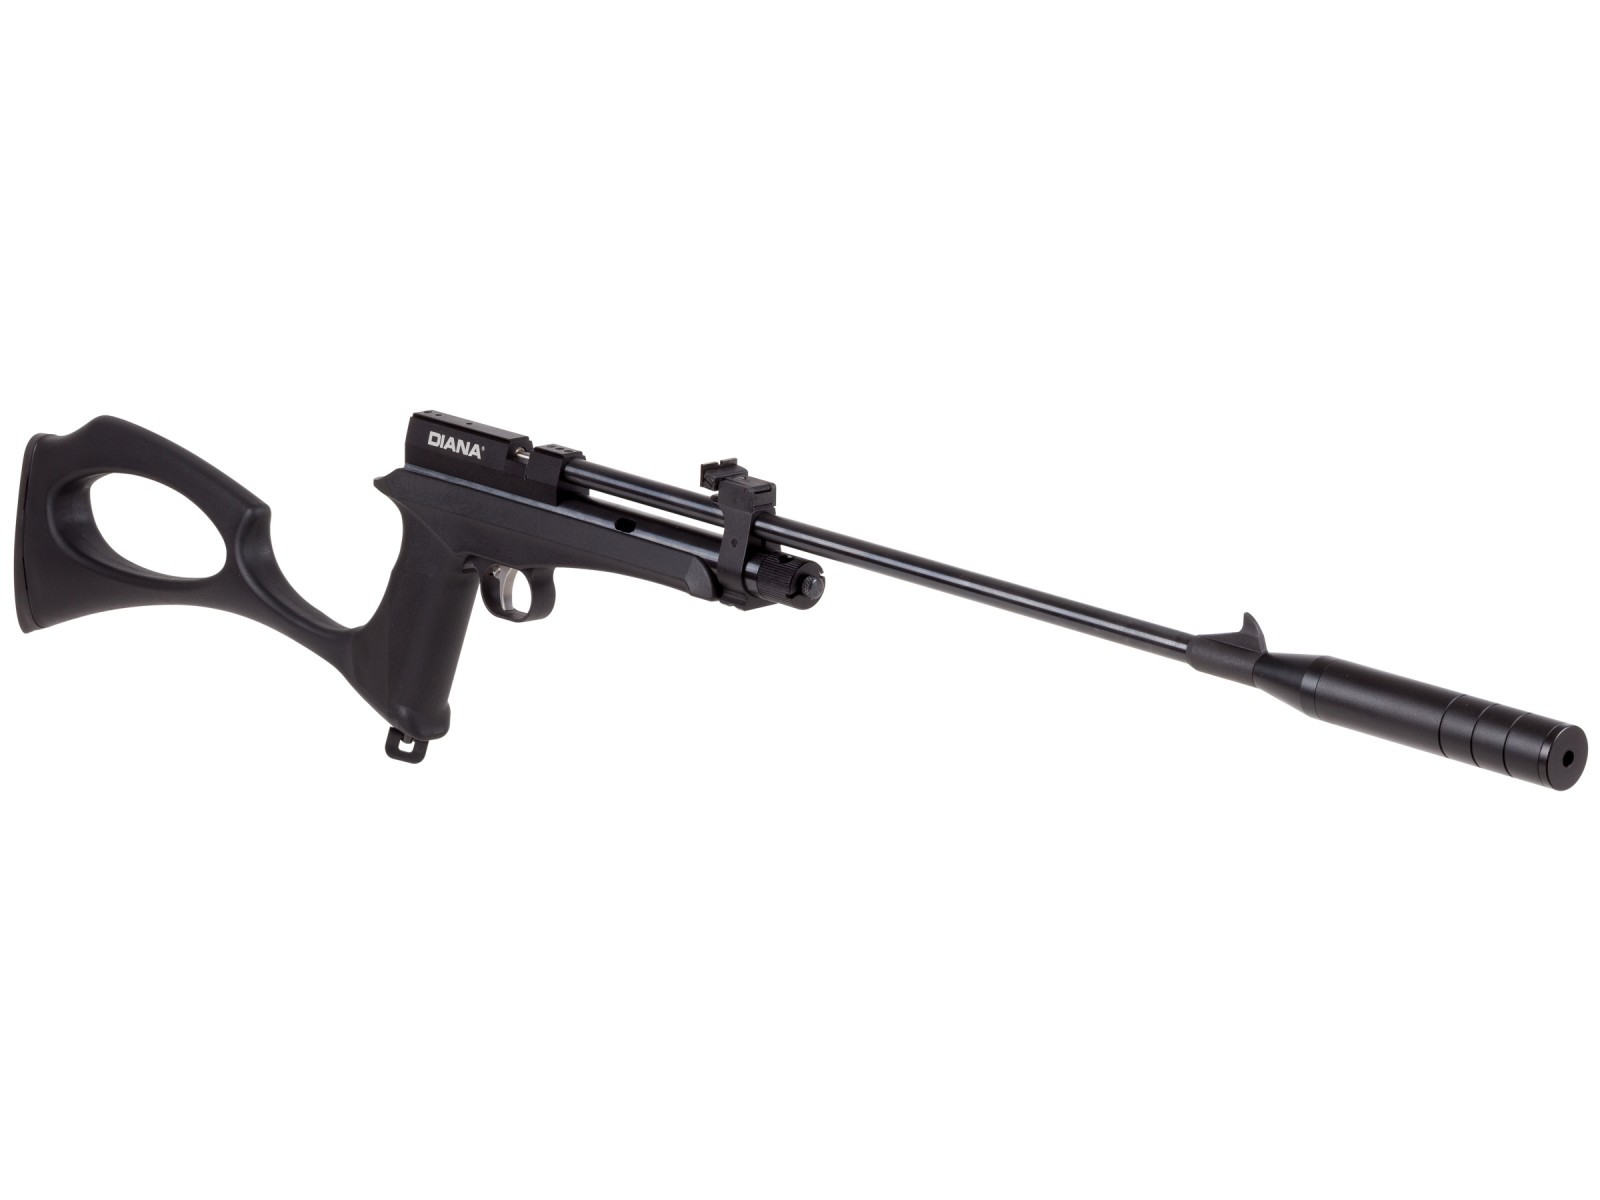


 Amy Trubek
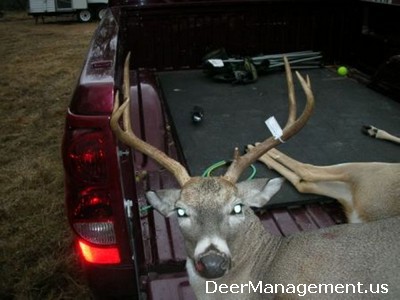 The presence or absence of a brow tine, or the G-1 as they are referred to on a score sheet, are the most inheritable trait for antlers. Bucks that are missing one or both brow tines should be candidates for management by harvest. You don’t want the gene for missing G-1 passed on. The next time one of the hunters sees him while deer hunting they need to remove this buck as quick as possible.