In my younger years, one of my favorite things to do was plop down on a Saturday morning and watch hunting shows with my dad. These guys made it look so easy. It was the same hunters, too, might I add. Time after time, year after year, bucks, bulls and whatever else they were hunting would hit the ground. I felt the same way about flipping through hunting magazines. The same faces graced the pages with each lap the earth took around the sun. Grins from ear to ear sitting behind a set of giant antlers. And, again, I noticed the same pattern on hunting forums and social media. For some reason, it is the same exact people every season filling tags. The old saying goes, “10% of the hunters kill 100% of the game.” I accepted that as truth, but questioned how to become part of that 10%. Were they all just that lucky? I’m a far stretch away from a master, but I’ve managed to maintain a consistency throughout the years with filling tags. I’ve also had the pleasure of observing “the how” of very successful hunters around me. There are no doubt some commonalities I’ve noticed among the “lucky” 10%.
My first years of learning to bear hunt here in Arizona were rough to say the least. I just couldn’t crack the code on these things. So, when a bear hunting mentor of mine offered to come out scouting with me, my truck door flew open for him so fast it dang near came off the hinges. Before that, though, he said, “Meet me at this gas station at 1 a.m.” I’m no stranger to getting up early, but that was next level early or I guess it could be called late at that point. We found a great bear that morning though and that’s when everything started to click for me. This guy was one of the most successful hunters I knew and now it was apparent why.
Nothing is too far and no alarm is too early. The boundaries that most hunters put up are nonexistent among the 10%. I’ve noticed that all of them have a no quit, whatever it takes attitude. If the only way to effectively hunt an area is to hike three hours in the dark before light, then that’s what they do. If an animal is a 45 minute hike away and there is an hour left of light, guess what? They’re making a run for it. I’ve also noticed that most hunters indeed know this stuff. They know what it would take to kill that animal. However, what separates the 10% from them is the 10% are willing to actually do these things and much more. They are relentless and there is no stopping them.
A mind built of steel
Tough hunts have a way of eating away at someone. The day after day grind of no animals, bad weather, hunting pressure, etc., can become all too frustrating. And I can guarantee that every season I’ll witness someone throwing in the towel for one of those reasons or similar ones. Which is a shame really. This thing that we look forward to so much being tossed at the wayside because the hunt wasn’t as smooth as we envisioned. Things are rarely perfect on hunts and tags aren’t going to be filled sitting at home. When that 10% becomes submerged in a pool of adversity is where they really shine. Mental fortitude is a value that is rich among them. They know how quickly things can change and, by merely being present, they are opening themselves up for opportunity. These hunters know how to take a hit and run with it. Which brings me to my next point.
Failure is their friend
With my headlamp bouncing up and down through the high desert of Arizona, I had a smile on my face. I had just experienced the best day of bear hunting ever and while there were arrows missing from my quiver, my backpack was squeaky clean. My arrows indeed took a one way trip to the danger zone, but never connected. Nonetheless, the numerous lessons I learned that evening was worth much more than just my arrow zipping through the lungs of a bear. Don’t get me wrong: that would have provided some much appreciated instant gratification. However, the lessons are part of the long game and are equally appreciated.
If there is just one thing that all of these consistently successful hunters have in common, it’s that they’ve all failed beyond belief in the field. What differentiates them from the rest is that they’ve learned how to take their failures and look at them more as lessons instead of something negative. Failure is often looked at as a bad thing, but in all reality it puts you that much closer to success. Whether it’s missing a shot or blowing a stalk, you just learned something valuable that you didn’t know beforehand. In these moments, genuine gold nuggets of information are bestowed upon us. These are things that we can only learn from being in the moment, in the field. So, no matter how bent you might be about messing up, recognize where you fell short, but let it shine light on what you can do right next time. Failure is a friend, not an enemy.
Preparation meets opportunity
You see it every day. I’m sure you do as your thumb effortlessly glides across the screen of your phone. Some hunters out there are hitting the ground running literally every day in preparation for their hunts. Whether it’s shooting, training or scouting, they’re committed to the game that they play and have every intention of winning it. And, as we’ve established, quite often they do. While some might think it’s for attention on social media, this hunting preparation is far from that. These folks know how stacked the deck is against them and are trying to mitigate that at every turn. Instead of waiting to get lucky, they make their own luck through unwavering effort and dedication. A professional fighter doesn’t sit on the couch eating bags of chips before a fight. Athletes like this train hard with purpose and they train to win. Hunting is no different and that’s why these select few hunters tend to get more opportunities than others. And, just like a fighter, when that opportunity presents itself, they recognize it and capitalize on it.
When the rubber meets the road
Every person I’ve met or talked to in the 10% club shares what I’ve listed above to some degree. What is evident after talking about all of this is that if you want great results, then you need to put out great effort. There are no magic tricks to being part of the 10%. It isn’t a certain piece of gear that will push you into the success bracket. Just choices and acting upon them. Being willing to do what most wouldn’t, go where most won’t and embrace every aspect of hunting from the preparation to pulling the trigger. Revel in both failure and success. Enjoy the whole process. That’s the secret. 10% of the hunters do kill 100% of the game, but they put in 90% more effort to get there.
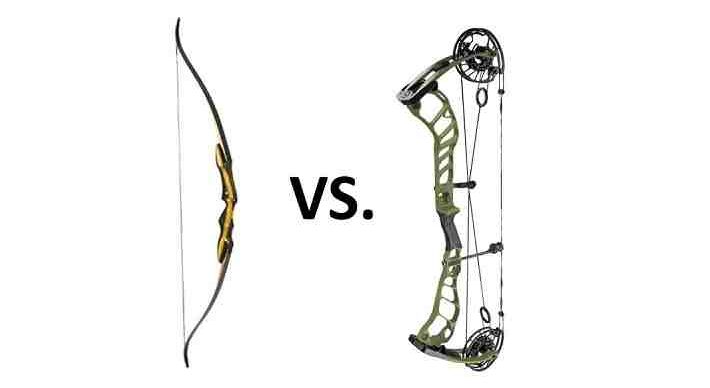
Compound bows are becoming increasingly popular nowadays. With the advancement of modern technology, compound bows are becoming more robust, flexible, and accurate.
However, a large portion of bowhunters still uses traditional longbows for archery and hunting. Now the question is, why? What is the difference between these two? And how to distinguish which one is an ideal piercing weapon?
That’s what we’re going to discuss today in our “compound bow vs longbow” guide. We’ll explore the key difference between these 2 bow types, and help you choose the best one for you.
Compound bows use a pulley system to store potential energy, resulting in high-velocity (up to 370 ft/sec), and high-powered arrows whereas traditional longbows feature a traditional outlook, are low-maintenance and are easy to carry around. Which one you’ll end up choosing depend largely on your preference.
Let’s explore more in our in-depth “Compound Bow vs Longbow” comparison:
The traditional, good-old longbow comprises a bowstring that’s tied to a bowed implement. Usually, the tool is a single unit from top to bottom. To lurch your arrow far, you need to pull the bowstring back significantly.
This action requires a lot of energy and concentration. Therefore, you have to lug your entire weight backward. Besides, you need to stay upright for improved accuracy. If you have less weight, however, this action is awkward.
It’s even more difficult if your hands are unsteady. Therefore, a better contraption has replaced this mechanism in a modern-day compound bow.
Here, a pulley (cam) is introduced to recoil the strings. And to improve the versatility and reinforcement at the center, a thicker and more robust member is fitted.
Therefore, the entire length comprises a short truncated upper recurve segment, and a lower one coupled together with a much stronger middle unit.
The advantage of this new design is that it allowed for a more significant backward movement without the bow breaking apart.
What’s more? the archer now needs to spend less energy, and yet, the accuracy of the arrow has significantly improved.
Compound Bow vs Longbow: Key Differences
1. Origins
Bows have been in existence for millennia. A 17,000-year-old arrow discovered in South Africa proved that bow hunting existed even during the stone-age era.
It’s believed that the Egyptians are the ones who invented the bows and arrows. Many pieces of evidence indicate bows were in use around 2,300 BC.
During this period, the preferred construction materials were sticks from hardwood timber such as ash and oak. The string was made of sheep intestine.
Obviously, so many changes have taken place since then. From the rudimentary and inaccurate weapon, you now have an extremely lightweight and powerful tool.
Compound bow
A compound bow is an improvement upon the longbow. It’s fairly intricate. Holless Allen gets credit for the development of the compound bow.
He modified a longbow into the much stronger compound bow we see and love today. He did this by initiating several improvements to the longbow and showcasing it through a patent he applied for in 1966 and received in 1969.
The new compound made its debut in the US National Archery Competition in the 1970s.
Longbow
Bowhunting enthusiasts Baer, Hiyt, and Mathews refined the longbow using new and modern materials. They transformed the hitherto wood frame and sheep intestines elements previously used for these longbows.
But even before the new revolution in the manufacture of the longbow, a previous one had already occurred.
The most advanced modernization of medieval archery goes to the Welsh. It appears that they manufactured the longbow into a tactical offensive weapon.
Their archers managed to withhold a large regime of British soldiers in the Battle of Waterloo in 1066. But the first recorded use of a longbow was during the battle of AD 633 during the war between the Welsh and Mercians.
Since then, this particular longbow earned the name of the British longbow. It’s been used in numerous battles with the French both on land and in the sea.
2. Design
The design of a longbow varies from that of a compound bow. Let’s see what our “compound bow vs longbow” comparison guide points out about the design differences between these two types of bows:
Compound bow
The high-quality compound bows are sophisticated. They have two sewn recurve ends fitted with pulleys at the end (limb). Either or both cams feature one or more cables attached to the opposite limb.
These cams provide the pivot needed when you pull back the bowstring. This action (let off) enhances the accuracy of the arrow while giving a more natural aiming response.
The center of the compound bow (riser) pivots the limbs, bow sights, bow stabilizers, and quivers. This section required greater flexibility to transfer as much of the stored energy from the bow to the arrow as possible.
This segment curves out towards the target, making it exert more force, which is subsequently transferred to the arrow.
Newer models of compound bows have cables and cable slides as well as a higher brace height. This is the length between a grip throat and the bowstring.
Longbow
The longbow, on the other hand, comprises a long weapon measuring about four feet long. Its stave was from a D-shaped section of a hardwood branch.
It has a singular and long limb. Typically, it’s made from a single material. There is no reinforcement or clamping along the entire stretch.
Even if the bowstring structure is the same as in a compound bow, the longbow still shoots slower and requires more force.
As a result, the arching process is also more strenuous than the former. This is due to the lack of a bow curve, the absence of cams as well as a more prolonged and weaker limb.
3. Material
The elements that make the longbow and compound bow affect how these two tools perform. Let’s look and the material composition of compound bow vs longbow.
Compound bow
Previously, compound bows comprised plastic-coated steel. However, due to lower tensile strength and flexibility – that decreased the arrow’s overall accuracy, – they now feature more suitable materials.
The more prominent material currently is the high-modulus polyethylene compound. It offers higher tensile strength as well as maximum energy transfer.
Longbow
The ancient longbows were constructed mostly from yew. However, hazel and elms were occasionally used. It was then coated with resin, wax, or excellent tallow to improve its tensile strength.
Currently, however, composite materials of laminated fiberglass and tampered wood are now used to make recreational longbows.
4. Uses and Benefits
Long ago, bows and arrows were used for hunting and conquering. But presently, they are used primarily in sports hunting and bow shooting competitions. Archery has grown as a favorite pastime as well as a game in all major tournaments.
Compound bow
A compound bow has a more significant benefit due to its design. The robust cams allow for a higher energy reserve. You only draw a portion of the energy and the rest remains at the front where it’s needed most when shooting.
The horizontal limbs also reduce the vibration and recoil intensity before shooting the compound bow, improving the accuracy of the shot as a result.
Further, modern compound bows have sighting devices to improve aim, as well as mechanical release to retain shot consistencies. Therefore, you are likely to shoot accurately using less effort.
Longbow
Longbow proved challenging to use since it required an inertia of over 65 lbs to deliver the necessary projectile power. This posture is also more strenuous since you’ll have to arch significantly back to convert sufficient energy needed by the arrow.
Different types of longbows were used for assorted arrows. There existed fight arrows, with chisel arrows. Other bows accommodated hunting arrows. Even within them, they also vary between animal and bird hunting types.
When you compare a longbow vs. a compound bow, you find that a longbow is lighter and quicker to shoot. Besides, it’s also quieter.
Additionally, the longbow is easy to make since it needs just one or two tree branches.
5. Draw Length
In archery, you need to be sure about a bow’s draw length. Typically, a draw length has a close correlation with your overall body size.
Take the distance from the tip of a nocked arrow to the tip of your draw-out hands. Divide this distance by 2.5, and you’ll get your draw length,
Compound bow
For a compound bow draw length, measuring the arrow tip should ideally be around two feet beyond the riser at full draw. When you hold this position and measure the arrow length, you get the draw length by adding one foot to the computed distance.
Longbow
The draw length of a longbow is usually more than five feet. Many of the early models had their measures reaching up to 12 feet. But they commonly averaged six-and-a-half feet long.
6. Limitations
Even the best-functioning longbows or compound bows have their drawbacks. Below are some of the shortfalls that are apparent in both the compound bow and the longbow.
Compound bow
By design, compound bows have many moving parts. This structure makes them susceptible to breakages and parts malfunctions. Further, having many elements make compound bow maintenance and handling a bit expensive.
Replacement is also intensive. It requires special tools to replace and repair damaged parts or strings of the compound bow.
Longbow
The longbow stretches more slowly and unsteadily. When you draw it backward, your arms move with the full energy you are exerting. You need more power to hold back your hands firmly.
At the same time, during the process of drawing your bow, less energy is available at the point where the bowstring meets the arrow.
This has the dual effects of releasing less punch directly to the arrow, as well as exacerbating your unstable hold. Hence when you release the arrow, it first, only moves a short distance and is less linear in its movement.
Further, it’s more likely to miss its target due to a weak trajectory caused by less force.
7. Care and Maintenance Requirements
Proper care for your bow is vital. You appreciate that owning a modern compound bow may cost you up to $1,000. Even with the composite material, they have many parts and accessories that need tender care.
Compound bow
Compound bows have sights, pulleys, limbs, cables, and cams. All these are made of different materials. Further, their assembly is delicate. Hence you ought to maintain each component individually:
Cables: Waxing protects your cables when not in use. Do this once a month or after every exposure to the elements.
Limbs: Laminated limbs are susceptible to cracking under various layers. Do a thorough inspection (by rubbing with cotton wool) to identify such defects.
Frame: This component suffers from a lot of tension. Inspect it routinely for cracks and twists.
Cams: Visually check on the cams before using your compound bow. To prevent corrosion and discoloration, wipe this part clean after every use.
Accessories like bow-sights rest and quivers also require regular maintenance. Accurately mount them to avoid any damage through colliding with other surfaces.
Longbow
Longbows are made from composite frames or laminated timber. Run periodic inspections to identify damages to the fame and the bowstring.
Apply remedial measures similar to those on frames and limbs and accessories in the compound bows. Don’t store limbs in a hot compartment. Keep your longbow in a cool dry place. Better still, afford similar treatment to bolts and nuts.
Are Compound Bows Better Than Longbows: Which One to Get?
Compound bows and longbows have been used for centuries in hunting and archery. Now, you might be thinking Is a compound bow better than a longbow, or is it the other way around?
That’s a question that has been debated by hunters, archers, and outdoor enthusiasts for many years. Let’s find out which is the better option for you.
When a Compound Bow Is Better
Compound bows are becoming increasingly popular due to their superior accuracy and power compared to traditional longbows. While some people will always prefer the classic look of a longbow, it’s hard to deny the benefits of a compound bow.
Compound bows have several advantages over longbows. They are capable of higher draw weights than traditional longbows, allowing for greater accuracy, longer range, and more penetrating power.
The cams on a compound bow also make it easier to shoot with a consistent draw length, which can be very helpful for novice archers.
Additionally, compound bows are usually easier to maintain and tune than longbows. This can be a big plus for people who aren’t as experienced with bow maintenance and tuning.
When a Long Bow Is Better
Longbows have several advantages over their modern counterpart that make them attractive to traditionalists.
Their simpler design makes them lighter and easier to carry, making them a popular choice for hunters who must traverse long distances.
Longbows can also be more durable than compound bows since they are less complicated and require fewer parts. They don’t usually require as much maintenance or tuning either, which can be a plus for those with limited technical skills.
Finally, traditional longbows are often more aesthetically pleasing than compound bows, which can be a plus for those who prioritize looks.
Longbow vs Compound Bow: Which One You Should Get
The choice of whether to get a compound bow or a longbow is up to the individual archer or hunter. Both have their advantages and disadvantages, so it’s important to weigh all of the factors before making a decision.
Some archers may prefer the classic look and feel of a longbow, while others may be drawn to the power and accuracy of a compound bow.
Ultimately, the choice is yours, so do your research and find the option that best fits your needs. Good luck!
Conclusion
And with that, we’re at the endgame of our in-depth “compound bow vs longbow” comparison. Let’s do a quick recap.
You understand that compound bows offer better performance than longbows. However, you may still come across diehard fans of traditional bowing techniques.
To them, using both a compound bow and a longbow propel the arrow to the ordinary distance of 22 feet. But the inclusion of modern technology into bowing has made significant strides that you can’t ignore.
In fact, the new construction and materials have made bow hunting a more comfortable sport for everyone.
So, whether you aspire to hunt elks, deers, or any other small-medium game animal; or win a trophy at an archery completion, you have to start by learning how to use, differentiate and care for your bows and arrows.
Either way, you still need to practice consistently to perfect your pull, nock, aim, and shoot.
FAQs
Which Type of Bow Is More Accurate: Longbow or Compound?
Compound bows are generally considered to be more accurate than longbows as they feature a system of pulleys that help create consistent draw weight throughout the shot.
Is It Easier to Shoot a Longbow or Compound Bow?
In most cases, compound bows are easier to shoot than longbows since they feature a system of pulleys that help make the draw weight consistent throughout the shot. Compound bows also tend to be less affected by wind speeds, giving them an extra accuracy boost.
How Much Draw Weight Should I Use With Each Type of Bow?
Generally speaking, recurve bows require more draw weight than compound bows, with 40-50 lbs being the standard range for recurves and 25-45 lbs being the usual range for compounds.
For safety reasons, it is important to never exceed the maximum recommended draw weight for either type of bow.
We caught up with Jay Scott of Colburn and Scott Outfitters and learned about his well-earned success on the trickiest turkeys out there. He’s the host of the Jay Scott Outdoors Western Hunting & Fishing Podcast, but he is also a passionate hunter, angler, and big game guide.
Read on to learn about his relentless turkey hunting process and what it takes to get birds on the ground with his top spring turkey hunting tips and tricks.
Table of Contents:
Introduction 1. Better to Be Early Than Late 2. Carry More Calls Than You Need 3. Locator Calls Don’t Have to Be Perfect 4. Don’t Blow a Coyote Howler at Roosted Birds 5. Pinpoint Where They Roost 6. Tactics Once They’re on the Ground 7. Play Hard to Get! 8. Be Patient 9. Go for Round Two 10. Use the Roads to Your Advantage 11. Get As Close As You Can 12. Calling Cadence Outweighs Tone and Sound 13. Decoy Positioning SHOP THE FULL GEAR LIST
SPRING TURKEY HUNTING IS ONE OF MY FAVORITE SEASONS OF THE YEAR.
For many years as a beginner turkey hunter, I really struggled with calling birds into archery or shotgun range. I’ve been schooled by so many birds that it would seem silly for me to even write an article on bowhunting or shotgun hunting turkeys.
But like lots of other things in life, it seems that persistence usually pays off. I’ve been taught many things by veteran turkey hunters whom I have constantly bombarded with questions on the “Do’s and Don’ts” and “Tips & Tricks” of turkey hunting.
I’ve also learned a lot from trial and error with the turkeys themselves. I’m constantly learning something new about spring turkey hunting every day that I pursue them. One thing I’ve learned is that no two wild turkeys act the same but there are some turkey hunting tactics that can be repeated which will increase your odds of harvesting this magnificent animal.
I’ve attempted to outline some things to remember when chasing these weary longbeards. I hope that one of these turkey tactics will be something you can latch on to and incorporate into your turkey hunting routine.
1. BETTER TO BE EARLY THAN LATE
I always try to set my alarm 30 minutes earlier than my calculated time to get to the roost tree. Usually my alarm goes off around 3:00 AM during turkey season.
I like to be sitting in the dark waiting for the grey in the eastern sky and set up in my position at least 30 minutes before the first call of the hens or first gobble. It gives the woods some time to settle down after I just walked into the roosting area.
It also gives you time to go to plan B if something goes wrong prior to your setup. Another advantage to being early is usually that puts me ahead of other hunters. Being early will never work against you.
2. CARRY MORE CALLS THAN YOU NEED
It is good to have several diaphragms, slates, and box calls. Sometimes the birds will especially like one call or another. The worst feeling in the world is not having the right call.
Don’t be afraid to take a gobble call either (be very careful using the gobbler call on public land).
3. LOCATOR CALLS DON’T HAVE TO BE PERFECT
Locator calls such as coyote howler, owl hooter or peacock don’t have to sound exactly like the natural thing to be effective in getting birds to gobble in the roost.
Quite the contrary, I’ve found that my external reed coyote howler by Primos which does not sound near as natural or authentic as my diaphragm coyote yelp, seems to get more of a response by roosted gobblers.
Remember, you are looking for a shocking response so sometimes the worst shrieking noise you can make will be the best for getting a gobbler to answer.
4. DON’T BLOW A COYOTE HOWLER AT ROOSTED BIRDS
In the morning when you’re too close, the roosted male turkey might answer but they will be very leery to come into your hen yelps because they think a coyote is close and they don’t want to get eaten.
An owl hooter is a much better choice when you are close to the roosted bird. When I say close, I mean within 200 yards of a rooster gobbler.
5. PINPOINT WHERE THEY ROOST
When roosting a gobbler in the evening, make sure you try to pinpoint the exact tree that the gobbler is roosted in. Often, I will get them to shock gobble and then I will sneak in as close as possible.
I then plan my setup for the morning. Things to be looking for while pinpointing the exact tree are:
• easiest way into the setup since it will be pitch dark.• exactly which tree you want to be leaning against and set up under.• which way the bird will fly down.• which way the bird won’t go, etc.
I like to mark the spot where I will setup on my GPS and allow the breadcrumb feature to bring me right into the setup spot the following morning. Be careful not to let the roosted gobbler see your light on the GPS.
6. TACTICS ONCE THEY’RE ON THE GROUND
In the morning or afternoon, when the birds are already on the ground, and you are just prospecting for gobblers by walking ridges, if you get a gobbler to respond move as close to his position without being detected as you can.
Once in close to the gobbler (within 100 yards) set up and try to call again. This works way better than calling from the original position. Now, if you are moving towards his direction and he gobbles loudly and in your direction like he is coming immediately get setup.
7. PLAY HARD TO GET!
Make the gobbler want to come to you. If you get a bird gobbling sometimes just shutting up is the deadliest tactic. I like to fire them up and then shut up.
I usually let them gobble twice before I call again. Usually, they will come hard if you use this tactic. You may risk a bird walking off because you shut up but if they are halfway interested, they will be headed your way. This may be the single best bit of information I have learned over the years.
8. BE PATIENT
In the evenings be in the roost area and be patient. I like to get in areas that I know birds like to roost. I sit and call about every fifteen minutes. The last 30 minutes before fly-up is primetime. Let’s say it is 30 minutes before fly-up and you make a series of yelps and a gobbler answers off in the distance.
I might hit him right back with a series of excited cuts and then just shut up. More than likely he will come to inspect. If they come in but not in shooting range just sit still and watch they fly up into their roost trees. Then you can attack in the morning.
One thing to keep in mind while hunting Merriam’s turkeys is that they typically like to roost on a ridgeline or at least where there is a contour break. The birds like to walk uphill from their roost tree and then coast horizontally into the branch.
This tactic helps them conserve energy by less flying. Sometimes you can roost turkeys without hearing them gobble by just listening for the ruckus of their wings flapping when they fly up.
9. GO FOR ROUND TWO
When the evening hunt does not produce a roosted gobbler for the next morning. There are several options for the following early morning hunt.
Go into an area where you have heard gobblers before and sit tight. Listen at prime time for gobblers in the area. If you can move while it is still dark, then pursue them. If not, wait until they hit the ground and sneak in close to them.
10. USE THE ROADS TO YOUR ADVANTAGE
Another option is to cover as much country as possible in hopes of hearing a roosted bird. This can be done either on foot or in a vehicle.
Wake up extra early and drive to an area where you have seen or heard turkeys. Stop every half a mile and blow your peacock or coyote howler.
11. GET AS CLOSE AS YOU CAN
Always try and get as close to a gobbler before calling to him. If you spot a gobbler with your binoculars try and move in very close to him without being detected.
I will try to get within at least 100 yards or closer if the terrain and vegetation will allow prior to making my first call. Your success goes up tenfold if you practice this method.
12. CALLING CADENCE OUTWEIGHS TONE AND SOUND
The cadence of your calling is more important than the tone and sound of your call. This opinion is debatable but I noticed a big difference in my success when a friend of mine showed me the correct cadence to my hen yelps.
He told me I sounded decent, but my rhythm was off. As soon as I changed my rhythm and cadence it was like a light switched on and the gobblers became way more consistently responsive to my calling. The key is to listen to the hens and focus on the cadence or timing/rhythm of their call.
13. DECOY POSITIONING
Position your turkey decoys at a 45-degree angle from the hunter on the opposite side of where you think the gobbler will come in from. Decoys can be a huge asset if you use them correctly.
On the flip side, they can hurt you if they are positioned on the wrong side of where you want the birds to end up. An example of the correct way to set them up would be: If the gobbler answers your calls to your left it would be best to set the decoys out to your right about 25 yards.
In this case, the bird will come to your call but when he gets close, he will see the decoys and walk right by you (or the hunter) on the way to the decoys to your right.
Remember when the gobbler gets close to remain silent and very still because he will be really looking for the turkey he heard. He should then spot the decoys. You will then be able to have a clear shot as they focus on the decoys.
WRITTEN BY JAY SCOTT
Host of Jay Scott Outdoors Hunting and Fishing Podcast with over 34.5 million downloads.
Professional hunting guide for 24 years in Arizona and Old Mexico.
Has harvested many trophies around the west, which include several animals that make the Pope and Young and Boone and Crockett record books.
Learn more about what KUIU gear Jay Scott thinks is best for hunting turkeys in his turkey gear list.
Visit Jay Scott’s Youtube to see him in action.
Read more about the Gould’s Turkey, the least known subspecies of wild turkey.
Shop KUIU’s top turkey hunting gear list for the spring and fall turkey seasons.
Learn about turkey hunting camo and gear with more top turkey hunting picks for the active turkey hunter.
So you’re heading out on your big elk hunt and considering which caliber to use. Whether you’re a beginner or an experienced hunter, choosing the right one for the job is essential. After all, your success depends on it! To help make this decision easier, we’ve compiled a comprehensive guide outlining some of our favorite — and the best — calibers for elk hunting.
How we determined the best caliber for elk hunting.
There’s not a single rifle cartridge that can be called the “best” for elk hunting. The perfect rifle cartridge for the hunt depends on various factors, including the terrain, the type of game hunting, and personal preference. However, after much research and discussion, we’ve identified a few top categories that stand out from the crowd regarding elk hunting.
Best caliber overall. This one is a bit of an all-rounder caliber and can be used in various hunting scenarios. We wanted to find an elk cartridge that could cover everything, so we focused on several calibers widely accepted and proven to work well in different scenarios.
Best caliber for long-range elk hunting. Long-range shooting is a popular way of taking down game from a distance. We had to consider bullet drop, wind drift, and the effective range of the cartridge.
Best caliber for brush hunting. Brush hunting requires staying essentially relatively close to your prey while stalking them. As such, recoil becomes an important factor when selecting a cartridge. We prioritized calibers offering minimal recoil and fast follow-up shots.
Best lightweight caliber. One of the most important things to consider when elk hunting is weight. You’ll carry your rifle for extended periods, and a light caliber can make all the difference in how much you enjoy the hunt. We looked at calibers that offered good power without the extra bulk.
Best caliber for take-down power. If you’re hunting elk, especially in the western states with large herds, you want a caliber that will pack enough punch to take down a big bull. We looked at calibers with proven knockdown power and deep penetration capabilities.
Now that we’ve established what we were looking for in these categories let’s discuss why finding an elk cartridge that is perfect for you is crucial.
The importance of finding the right caliber for your elk hunt.
For elk hunting, accuracy and consistency are king. You need a cartridge to do the job without being overly powerful or cumbersome. An elk cartridge that is too slow will leave you with meat damage, while one that’s too fast can cause excessive recoil and shoot through the animal instead of stopping it in its tracks.
The right caliber for you depends on the type of terrain and game you’re hunting, your budget and preferences, and your shooting skills.
Range.
One of the most critical aspects of elk hunting is the range you will shoot. If you’re hunting in an open field, a long-range cartridge like the .308 Winchester or 6.5 Creedmoor might be your best bet. Not only is the bullet weight important, but you’ll also need to consider an optic for your elk rifle.
Environment.
Another important factor to consider is the environment in which you’ll be hunting. A light caliber might be best if you’re hunting in dense brush or woods since you won’t have to lug around a heavy rifle all day. If you hunt in open country, a heavier caliber will give you more power at longer ranges.
Take-down power.
When it comes to elk hunting, take-down power is key. The right cartridge should offer enough energy to penetrate the animal deeply and cause an instant kill. Bullet construction is also important here; some cartridges are designed with controlled expansion to penetrate deeper without damaging too much meat (this is called a controlled expansion bullet).
Weight.
Finally, you’ll want to consider the overall weight of your rifle. If you carry a gun all day, you’ll want something lightweight but still packs enough punch to finish the job. If you’re patiently waiting in a stand or a blind, a heavier rifle might not be an issue.
Breaking down the best elk cartridge.
With all that out, let’s get into our top picks for the best elk cartridges. We think you’ll find something that fits your hunting needs here.
Best caliber overall — .338 Winchester Magnum.
For the best overall elk cartridge, we selected the .338 Winchester Magnum. This powerful magnum packs a serious punch and can take down large game at long distances. It offers great accuracy and consistency, making it an excellent choice for hunting in open fields and brush. Plus, with its recoil-taming features, the .338 Win Mag is still relatively easy to shoot accurately.
What we love the most about the .338 Winchester Magnum is its versatility. This big-game cartridge is suitable for elk and moose, giving you plenty of options for hunting large game. Whether you’re taking down the biggest bull elk you’ve ever seen or even going deer hunting, the .338 Winchester Magnum is up to the task.
Best caliber for long-range elk hunting — .300 Winchester Magnum.
Easily one of the most popular cartridges for long-range elk hunting, the .300 Winchester Magnum is an ideal choice. This classic magnum cartridge offers power and great accuracy at extended ranges. It’s also relatively easy to control in various shooting positions, making it a top pick for experienced hunters who want to take their shots from a distance.
Its ability to handle strong winds sets the 300 Win Mag apart from other long-range cartridges. It’s high ballistic coefficient and flat trajectory make it an excellent option for hunting in windy conditions. And with its controlled expansion bullets, you can expect deep penetration and minimal meat damage.
Best caliber for brush hunting — .30-06 Springfield.
Sometimes, elk hunting in the brush can be a challenge. You need a powerful cartridge to take down your prey but still lightweight and easy to maneuver in tight quarters. That’s where the .30-06 Springfield comes in. This classic deer and elk cartridge is an excellent choice for brush hunting due to its moderate power and low recoil. Plus, with its flat trajectory and controlled expansion bullets, you can expect good accuracy and deep penetration in tight spots.
Our favorite thing about the .30-06 Springfield is its affordability. The factory ammo offers great performance at a reasonable price, and it’s also widely available and easy to find in most gun shops.
Best lightweight caliber — .270 Winchester.
The .270 Winchester is a great choice for hunters who need a lightweight cartridge with plenty of power. This classic deer and elk cartridge offers moderate recoil and excellent accuracy at extended ranges. It’s also quite versatile, as it can be used for various game animals, including elk and deer.
The thing we love the most about the .270 Winchester is its recoil. Compared to other elk rifles, a rifle chambered in .270 Winchester has mild recoil. Hunters of all experience levels can accurately shoot their target with manageable recoil. And with its excellent accuracy, you can be sure to take down your elk in one shot.
Best caliber for take-down power — 7mm Remington Magnum.
Finally, we have the 7mm Remington Magnum. This popular elk cartridge is known for its unmatched take-down power and flat trajectory, making it an excellent choice for long-range hunting. It has superior ballistics and offers excellent accuracy, allowing you to take down your target precisely.
With the high muzzle velocity of the 7mm Rem Mag, this wouldn’t be a good choice for close-range hunting. But if you’re looking for a cartridge that can easily take down a big bull elk at extended ranges, then the 7mm rem mag is your best bet.
Pro tips for finding the perfect elk hunting rifle.
Finding good elk cartridges is only half the battle; you must also find the perfect elk hunting rifle. Here are some pro tips for finding the right setup:
Understand Your Hunting Environment: The terrain and environment where you’ll be hunting can significantly impact the type of rifle you need. For instance, a lighter, more maneuverable rifle might be your best bet if you’re hunting in dense forests with shorter sight lines. On the other hand, if you’re hunting in open spaces where longer shots are expected, a heavier, more stable rifle that’s accurate at long distances would be ideal.
Consider the Caliber: As discussed earlier; some calibers are better suited for elk hunting than others. Powerful rounds like the .338 Win Mag, .270 Winchester, and .300 Winchester Magnum are all good choices. Consider what you feel comfortable shooting and what will effectively take down an elk.
Choose the Right Action: Bolt action rifles are popular among elk hunters because they’re reliable, accurate, and can handle powerful rounds. However, lever action and semi-automatic rifles can also be suitable, especially if you anticipate needing quick follow-up shots.
Check the Weight: Remember that you’ll likely carry your rifle for a long while hunting. Balance the need for a powerful, stable gun with the practicality of hauling it around all day. Lightweight rifles are easier to carry but might have more recoil.
Look for Quality Optics: A good scope can make a huge difference in successful elk hunting. Look for optics with clear, bright images and a good magnification range. A quality scope can help you make accurate shots at various distances.
Our hunting experts have bought countless rifles over the years and agree that following these tips can help you pick the perfect elk hunting rifle. You’ll be ready to hit the woods and bag your next big bull with the right setup.
FAQs for elk hunting Calibers.
To round off our comprehensive guide to elk hunting calibers, here are some frequently asked questions—
What is the best caliber for elk hunting?
The best elk hunting calibers depend on your hunting style and environment, but some of the most popular options include .300 Winchester Magnum, .30-06 Springfield, .270 Winchester, and 7mm Remington Magnum. These are all great choices for taking down an elk at extended ranges.
What is the most accurate caliber for elk hunting?
The .300 Winchester Magnum is widely considered one of the most accurate cartridges for elk hunting due to its flat trajectory and high ballistic coefficient. It’s also a powerful round that can effectively take down large game animals.
How far can you accurately shoot an elk?
The effective range for taking down an elk will vary depending on the caliber, shooter experience, and environmental conditions. As a general rule of thumb, most elk hunters should have no problem making accurate shots out to 500 yards with the right rifle and optics. Of course, it’s always best to practice shooting at various distances to develop good shooting habits and accuracy.
Is a .308 big enough for elk?
A .308 Winchester is generally considered big enough for elk hunting. The rule of thumb for the minimum amount of kinetic energy needed to kill a mature elk is 1500 ft-lbs, which a .308 can deliver. However, it’s important to consider shot placement and the hunter’s ability to shoot accurately.
Is 6.5 Creedmoor or 308 better for elk?
The debate between 6.5 Creedmoor and .308 Winchester for elk hunting is a topic of much discussion among hunters. Both bullet weights have strengths and weaknesses, and their choice largely depends on your needs and circumstances. The 6.5 Creedmoor has a slightly flatter trajectory, less wind drift, and less recoil than the .308 Winchester, making it easier to shoot accurately, particularly at longer ranges. However, it’s worth noting that some hunters consider the 6.5 Creedmoor too light for elk, with most suggesting a minimum of 1,500 ft-lbs of energy for a clean kill. On the other hand, the .308 Winchester is known for its superior frontal surface area and wound channel creation, which can lead to more effective kills. Its ammunition is also more widely available and typically cheaper, making it a more economical choice for many hunters.
What is the preferred rifle shot for elk?
The preferred shot on an elk is a broadside shot. This shot placement affords the best chance of striking the animal’s vital organs while still allowing for maximum penetration. Ideally, you should aim for the highest point of the shoulder to ensure a clean kill.
Can you shoot a bedded elk?
Yes, you can shoot a bedded elk, but it is important to ensure an ethical shot. This means considering the wind direction, background noise, and the animal’s position. If you doubt whether your shot will be ethical, it’s best to wait until the elk stands before taking the shot.
What is the best follow-up shot for elk?
The best follow-up shot for an elk depends on the initial hit placement and the circumstances of your hunt. If you’ve made a clean kill, there’s no need to take additional shots. However, if you haven’t achieved a clean kill with your initial shot, you’ll want to take another shot as soon as possible. A quick follow-up shot can help ensure the animal is taken down humanely and quickly.
Finding the right caliber.
The quest for the perfect elk hunting rifle and caliber is a personal journey heavily influenced by your unique hunting style, environment, and comfort level.
Whether it’s the .338 Win Mag with its sheer stopping power, the .30-06 Springfield’s brush hunting prowess, the .270 Winchester’s light recoil, or the 7mm Remington Magnum’s exceptional take-down ability, each caliber offers unique advantages.
Remember, a critical part of your success in the field is not just the rifle and its caliber but also understanding your hunting environment, the rifle’s action type, weight, and optics quality. And never underestimate the power of trying before buying.
Armed with these insights, you’re on your way to finding the perfect partner for your next elk-hunting adventure.
↬ The Benelli Super Black Eagle 2 is a popular shotgun for hunting both ducks and geese, and with the right choke tube, it can deliver consistent patterns with non-toxic shot. The SBE II’s versatility allows it to function in even the most challenging environments, but it needs the right choke tube to function effectively.
The Patternmaster Code Black and Carlson’s Cremator are two of the best choke tubes for the Super Black Eagle 2. They can deliver results of over 80% pellets inside a 30-inch circle at over 40 yards with the right ammo. Their ported design helps reduce recoil and muzzle jump, making follow up shots quicker and more accurate.
In this guide, we’ll discuss in more detail why you should consider these chokes, the features behind them, and what to expect at certain hunting distances. And remember, always pattern your shotgun to see how it performs with the ammo you plan on hunting with so adjustments can be made prior to using it in the field.
These are the three choke tubes you should consider that can provide more consistent and dense patterns downrange. The SBE II is compatible with the Crio Plus choke system.
1) Carlson’s Cremator Non-Ported Choke
The Carlson’s Cremator choke tube is an excellent choice for hunters who need a versatile choke that can perform well with a variety of shotshell loads. This choke tube uses a unique design that consists of multiple tapers, which work together to provide a consistent shot pattern. This makes the Cremator ideal for hunting situations where you need to be able to adjust your shooting style quickly and accurately.
The Benelli Super Black Eagle 2 works especially well with the Carlson’s Cremator. This choke produces dense patterns between 30 and 40 yards with steel shot for hunting over decoys. The Cremator can put 80% of pellets inside a 30-inch circle at 40 yards with the right ammo. It has a diameter of 0.697″ which is close to an improved modified. This is the BUDGET pick.
2) Patternmaster Code Black Choke
The Patternmaster Code Black is a top-of-the-line choke tube that provides unmatched performance in long-range hunting situations. This choke tube uses a specialized constriction design that helps to control the spread of shot at longer distances. This makes it an ideal choice for waterfowl hunters who need to take shots at moving targets from a distance.
The Patternmaster Code Black choke tube fits the Benelli Super Black Eagle 2 perfectly. This all-around choke is great for field hunts, ponds, lakes, and rivers where the range of shots varies, and you’ll be able to handle it all without having to change chokes mid hunt. The internal rings help halt the wad from the shot column in a controlled manner to reduce pellet disruption during wad separation while giving better patterns downrange. Expect it to pattern closer to a full choke. This is the TOP pick for MAX range.
3) Carlson’s Cremator Ported Mid Range
Carlson’s ported version of the Cremator choke series is another good option for the Super Black Eagle 2 in that it can help reduce recoil and muzzle jump, while the internal stud design works to reduce pellet deformation. This mid-range choke tube is perfect for decoying birds in tight or for quick passing shots at medium range.
Consider the ported Cremator choke if you want a slight reduction in muzzle jump and getting on targets faster for follow up shots due to directing some of the gases and pressure outwards. However, ported chokes can be louder and may throw more gun powder residue outwards, so keep that in mind.
Why you should choose the Cremator for the Benelli SBE 2
Made from high-quality stainless steel
Specifically designed to provide superior performance
Features a unique design that allows for tighter shot patterns and improved accuracy
Unique wad tapering system as the shot exits the barrel
Less fouling and improved consistency
Black oxide finish that provides superior durability and corrosion resistance
Improved accuracy and performance
What is the best Benelli Super Black Eagle 2 choke for steel shot?
The Benelli Super Black Eagle 2 shotgun works well with a wide variety of choke tubes and shot types. This is true with steel shot used mostly for waterfowl. Steel shot loads can all be fired through certain models of the Super Black Eagle 2 which it is specifically designed for.
The best Benelli Super Black Eagle 2 choke tube for steel shot is the Patternmaster Code Black choke. It provides dense patterns with short shot strings that are capable of hitting fast moving birds. It works especially well over decoys out to ranges of 50 yards.
Other great options for choke tubes that work well for the Super Black Eagle 2 are the Carlson’s Cremator series of chokes. These choke tubes are highly customizable as they are available in long range and mid-range options depending on the hunting situation.
Are Benelli factory chokes good enough?
Often overlooked are the factory choke tubes that are included with the Benelli Super Black Eagle 2 when bought new. The choke system is installed on most Super Black Eagle 2 shotguns and can be customized with interchangeable choke tubes built for it.
Factory Benelli chokes tubes can be good enough, but it depends on the application it’s being used for (e.g. timber hunting vs pass shooting) and the shotshell loads. These factors will determine if the factory choke you have is capable of performing for any given hunting situation.
Once you’ve determined that the factory choke size and constriction is right, then patterning the Super Black Eagle 2 with the loads you intend to hunt with will let you know if it’s good enough to use in the field. If patterning can’t be done, then an aftermarket choke tube like the Patternmaster will most likely perform better right out of the box.
Is the Benelli Super Black Eagle 2 modified choke the most versatile choke size?
Yes, the modified choke tube is the most versatile choke tube for the Benelli Super Black Eagle 2 and its choke system. It may not be the best performer at all ranges, but over a wide range it can’t be beat.
This includes close decoy shooting, birds skirting the edges of the decoys, and that occasional long pass shot. A modified may be too tight of a choke for timber hunting since shots are under 30 yards. A light modified, improved cylinder, or skeet choke may be a better option.
Regardless, if you’re in a field hunting situation where the shots on birds will be at varying ranges from 20 yards to 50 yards, the modified is a good choice for versatility.
How It Compares
When it comes to choosing the right choke tube for the Benelli Super Black Eagle 2, Carlson’s Cremator stands out from its competitors. The Carlson’s Cremator is engineered with a unique design that provides consistent and even shot patterns, resulting in better accuracy and a higher precision. Unlike its competitors, the Cremator is built with Triple Shot Technology, which ensures that the shot is evenly distributed, reducing the chances of having holes or gaps in your pattern. Additionally, the Cremator’s longer parallel section helps to reduce recoil, which in turn leads to more controlled shots and better follow ups. Overall, the Carlson’s Cremator is a top performer, delivering outstanding results that set it apart from the competition.
Bottom Line
Several factory choke tubes come with the Super Black Eagle 2, but they aren’t always the best. After market premium choke tubes are available to provide enhanced features and better patterning results that translate to better success in the field.
The Patternmaster Code Black and Carlson’s Cremator are two of the best choke tubes to consider using when hunting with the SBE II. These ported chokes are extended for easy removal in the field and are designed to produce more consistent and dense patterns between 30 and 50 yards.
As always, you should pattern your shotgun to see what ammo and choke combinations work the best out of it. One shotgun may not perform like another. Test it out and develop a system that will work well throughout the hunting season and give you the best chance of success when birds are hovering over your decoys.
Related
Benelli Choke Tube Chart – Comparision Guide
Best Chokes for the Benelli Super Black Eagle
Are Benelli and Stoeger choke tubes compatible?
What does BER/BEN mean on a choke tube?
Latest Posts
Best Waterfowl Choke Tubes for Duck Hunting Success
Choke Tube Diameter and Constriction Table
7.5 vs 8 shot: The 3 Key Differences to Know
Last update on 2024-11-05 / Affiliate links / Product Images from Amazon Product Advertising API
I will always remember telling a hunting story to a non-hunting co-worker a few years back. I was rambling on about the specific details of a deer hunt over the weekend using all the fancy deer hunting lingo. He graciously let me continue.
But when I had finished, he smiled and said, “That’s great; could you repeat that in English?”
I’m not sure if it actually happened, but it feels to me like I stood there with my mouth agape for about 5 minutes before I could muster an intelligent response.
Needless to say, I was a little embarrassed.
It had literally not even occurred to me that the deer hunting slang and hunting terms I had grown so used to would be so foreign to someone who had not hunted before.
As with any community or group, there is always a certain level of technical jargon to understand. But if you’re learning to hunt, there is a ridiculous amount of hunting terminology slang words to wrestle with. Trying to understand someone who uses these deer hunting terms and phrases might seem like you’re trying to test out of a college language requirement (and not doing well, either).
I felt it was about time I write an article to define some of these deer hunting terms for you. Reference it whenever you need to. When you’re done, check out the list of small game hunting terms too.
Common Deer Hunting Terms
Antlers The bony growths on a buck’s head. They’re called racks or horns too, but horns do not fall off; it’s just a misnomer. Deer, elk, and moose have antlers. Bag / daily limit The legal number of animals of a certain species you can kill each day. Bed Where a deer actually lays down, they leave an oval depression in the grass or snow. Larger beds usually belong to bucks. Bedding area A place where deer will rest and sleep during the day; usually this is found in dense thickets or places where they can easily hide. Bleating Does make a whiny bleat noise to communicate with each other and signal they are in estrous. Blowing Often following a “white flag”, deer will snort loudly (i.e., “blow”) to alert other deer about a threat. Broadside The most ethical shot at a deer is when they are standing perpendicular to you so you can see one entire side of their body. A broadside shot to the vitals is a quickly-killed deer. Brow tine The first antler tine nearest to a buck’s head. Browsing Deer are adapted to eat woody shrubs and herbaceous plants quickly by roughly tearing off large chunks and continuing on their walk. Buck A male deer. Busted / spooked When deer or other game smell, see, or hear you, they will get nervous and/or leave the area quickly. Button buck A male fawn deer that only has little bumps for antlers in its first year. These are generally considered legal does because their antlers are less than 3 inches long and can be confused for does in the field. Can call An accessory piece of hunting equipment, this call is typically in the shape or a small can and sounds like a doe bleating, which they use to communicate with other deer. Climber / climbing tree stand A tree stand that wraps around a tree trunk and has a seat section and foot-hold section. You use leverage to climb the tree. Doe A female deer. Estrous When does are ready to mate, they are “in estrous”, much like a dog is “in heat”. Fawn A fawn is a deer that was born the spring of the same calendar year. Can be a newborn with spots or look like a small deer at 6 months old. Feeding area A place where deer will eat during the night, whether that includes a corn field, food plot, young forest, or shrub patch. Field dressing After shooting a deer, you need to remove the entrails quickly so the meat doesn’t spoil. Also called “gutting”. Fork buck / forkhorn A male deer with a forked tine on each side of its head, but no more than 4 points or tines. Funnel A narrow area where topography and/or habitat features cause deer to converge on a single trail. For example, where a forest is pinched by fields on each side. Glassing Using binoculars or a spotting scope to look for wild game from a good vantage point. Grunt tube A tubular deer call that sounds like a buck grunting, which they typically do during the rut. Grunting Bucks make a low-pitched grunt at each other to signal aggression, especially during the breeding season (rut). Gut shot The region of a deer that holds the stomach, intestines, liver, and various other organs. A gut shot is to be avoided as it is likely to slowly kill a deer, but it is extremely difficult to find them. Hang-on tree stand A tree stand base that connects to a tree via a ratchet strap. It also requires separate ladder sections to be attached to the tree so you can access it. Harvest A popular term in wildlife management circles, the act of killing or “taking” an animal. It’s unpopular with many hunters due to the gardening analogy, whereas hunting is the act of taking a life. Horns A permanent bony protrusion from an animal’s head. See the difference from “Antlers” above. Cows, sheep, goats, or antelope have horns. Hunting weapons Generally defines any guns (rifle, shotgun, muzzleloader, or pistol) or bows (bow or crossbow) used to hunt animals. Different from tactical weapons, which are used more for target shooting. Ladder tree stand A tree stand that props up against a tree, using multiple connected ladder sections. License A hunting license should be purchased for each species or type of hunting you do. It is granting you the privilege to hunt. Mast The fruit or nuts of trees, including apples, pears, berries, grapes, acorns, walnuts, etc. Mature A deer is considered mature by most people when it reaches 3 1/2 years old. Nubbin buck See “Button buck” above. Paunch See “Gut shot” above. Pinch point See “Funnel” above. Possession limit The legal number of animals of a certain species you can physically have in your possession (in the freezer, canned, etc.). This may be more than the daily bag limit. Processing The process of skinning, quartering, and cutting all the meat off of a deer carcass. Doing this yourself can be intimidating, but you know exactly how the meat is treated this way too. Quartering (butchering) The act of cutting the “quarters” off of a deer while processing/butchering it. The quarters include all four legs. Quartering (shot) When a deer is slightly facing away from or towards you. Quartering away shots are great for bow hunters or gun hunters, but a quartering to shot should be avoided. Rack See “Antlers” above. Rattling A hunter uses two antlers to make it sound like bucks fighting, which can lure a mature buck into shooting range. Generally more useful in areas with little hunting pressure and lots of mature deer. Rub When a buck rubs its antlers against a tree to mark its territory, strengthen its neck, or remove its velvet, it scrapes the bark away. Commonly found in areas bucks like to hang out. Ruminant Like cows, deer quickly feed on plants while they can, and then lie down to chew their cud. This cud-chewing, combined with their four-chambered stomach, digests the food when they’re in the safety of their bed. Rut / pre-rut / post-rut The rut is when deer enter the peak of their breeding season (i.e., they breed the most). The pre-rut includes the weeks leading up to the rut, while the post-rut includes the weeks after it. Scent drag A piece of rope with a cloth at the end. The cloth is usually sprayed with a deer scent and drug through the woods behind a hunter to make it smell like a deer traveled the same path. Scope Magnifying optics usually mounted to the top of a rifle that allow you to make an accurate long-distance shot at an animal. Scouting The act of investigating a hunting property before you actually hunt it. A scouting trip helps you to find good hunting locations based off of wildlife sign. Scrape A scratched area on the ground (usually about 1-3 feet across) where a buck or doe leaves scent from its hooves and urinates into it to communicate to other deer in the area. Seasons The time allotted to hunt a certain species, usually open for a set number of days. Shed / shed antler As bucks enter late winter, the antlers on their head will fall off so they can start growing new ones in the spring. Shooter Usually used to describe a deer you would kill (one of legal status and to your liking). Sign The evidence left behind from animals, including tracks, trails, beds, rubs, scrapes, etc. Spike buck A male deer with only one tine on each side of its head, forming a spike. Stamp Some wild game species (e.g., waterfowl, pheasants, etc.) may require you to purchase a special additional stamp. The proceeds from these stamps will generally support additional conservation efforts for that species. Still-hunting Walking very slowly through the woods, trying to ambush an animal before they see/hear you. Tag In addition to your hunting license, you will have a field tag. This paper slip will contain basic harvest data about your animal, and serves to validate or fulfill your license. Tines The single bony extensions on an antler. Also called “points”. For example, an 8-pointer would have 8 tines (4 on each antler). Velvet In the spring and summer, velvet is living tissue that covers the development of deer antlers, making it one of the fastest-growing tissue in the world. They usually shed this tissue before hunting season. Venison Meat from a deer is called venison. Vitals The chest cavity of a deer that holds the heart and lungs. A shot with a bow or rifle in the vitals will usually quickly kill a deer and is the most ethical shot. White flag When white-tailed deer retreat, they raise their white tails to show a predator they were spotted. Not a good sign.
Using This List of Hunting Terms
Clear as mud?
As you can see, the deer hunting vocabulary is full of odd hunting terms; some make sense and some just don’t. I hope this hunting terms glossary will help you sort through that confusion.
It’s important to note that the hunting terms listed above really just scratches the surface for deer hunting. Besides that, there are specific bird hunting terms, turkey hunting slang words, and various other hunting phrases. If it’s helpful, I’ll add a list for those someday too.
I didn’t want to overwhelm you with one post!
The next time you hear another hunter talking in hunting slang, I hope you can use this list as a helpful resource to engage in the conversation.
If nothing else, feel free to call them out on it like my co-worker did to me. It will probably open their eyes to start using more inclusive hunting language going forward.
Anything I missed? Send me a quick message with deer hunting terms you’ve heard that boggled your mind.
Have you ever wanted to go on an iguana hunt? Florida is the perfect place to do it! With its warm climate and abundance of iguanas, the Sunshine State is a mecca for iguana hunting. In this ultimate guide, we’ll show you how to plan and execute a successful Iguana hunt in Florida. We’ll cover everything from equipment and supplies, to where to find the best hunting spots. So whether you’re a beginner or a seasoned pro, this guide will help you have a successful and enjoyable hunt. Let’s get started!
Yes, iguana hunting is legal in Florida. Green iguanas are an exotic reptile species that, other than Florida’s anti-cruelty law, is not safeguarded in the state. On private properties where landowner permission has been granted, this species can be kindly euthanized year-round without a permit or hunting license on 25 designated public lands throughout South Florida.
Are Green Iguanas an Invasive Specie to Florida?
Yes, green iguanas are an invasive specie in Florida. They were first introduced to the state as pets, but they have since become naturalized and now pose a threat to native wildlife. The green iguana is disruptive to local ecosystems and studies show that their population size has increased exponentially over the last decade. They are capable of destroying vegetation and may even spread disease. Therefore, the green iguana is considered a pest species in Florida and their population is actively managed.
Why are Green Iguanas Invasive to Florida?
Green iguanas have been found to out-compete native wildlife, including birds and small mammals, for food. They also eat plants that are important to the local ecosystem, such as fruit trees and sea grape bushes. Additionally, green iguanas can carry salmonella bacteria which they can spread through their droppings. Studies have even shown green iguanas to be implicated in the transmission of other diseases, including chytridiomycosis. All of these factors have led to green iguanas being labeled as an invasive species in Florida and actively managed by state wildlife authorities.
Where are Green Iguanas Native to?
Green iguanas are native to Central and South America. They are most commonly found in tropical forests, but have been known to inhabit other habitats such as grasslands, marshes, rainforests and coastal areas. They can be found from Mexico down to northern Argentina. In recent years green iguanas have been introduced to parts of the US, including Florida and Hawaii. As an invasive species, green iguanas can be found in many areas where they are not native.
Did Green Iguanas come from a Cuban Cargo Ships in the 1960s?
There is a popular theory that green iguanas were introduced to Florida from Cuban cargo ships in the 1960s. However, the truth is that green iguanas have been present in the US for much longer than that. As early as 1910, green iguanas had been imported into the US and kept as pets. It is possible that green iguanas have been released into the wild due to their popularity as pets, and it is likely that they were first introduced to Florida in this way. Regardless of how green iguanas got to Florida, they are now firmly established in the state and actively managed by wildlife authorities.
Are iguanas aggressive?
Green iguanas can be very aggressive when they feel threatened. If a green iguana feels cornered, it may strike out with its powerful tail or bite. Bites from green iguanas can draw blood and even cause severe lacerations in some cases. Therefore, green iguanas should be approached with caution and given plenty of space. In general, green iguanas are not dangerous to humans, but they should still be respected and given the space they need.
How painful is an iguana bite?
Iguanas have sharp teeth and strong jaws that can deliver a bite that is both painful and dangerous. The pain of an iguana bite can range from mild to severe, depending on how deep the bite penetrates the skin. In some cases, green iguanas may even cause lacerations or puncture wounds due to their sharp teeth. Additionally, green iguanas may carry salmonella bacteria which can cause illness if ingested through an open wound. Therefore, it is important to seek medical attention right away after being bitten by a green iguana.
What is the biggest iguana in Florida?
The green iguana is the largest iguana species found in Florida, reaching lengths of up to 6 feet. This makes green iguanas one of the biggest lizards found in the state and they can be a scary sight when encountered in the wild. In order to protect against green iguanas and their potential damage to local ecosystems, they are actively managed by wildlife authorities in Florida.
Is it beneficial to join an iguana hunting Florida Safari with an Expert?
Absolutely! Joining a Florida Safari with an expert provides safe and productive hunting experience. The experts are knowledgeable about the local environment, have in-depth knowledge of iguanas and can teach safe handling techniques. With their guidance, you will be able to hunt green iguanas safely while learning more about this fascinating species as well as its importance to the local ecosystem. It is also important to remember that green iguanas are an invasive species and it is beneficial to help reduce their populations when possible. An expert guide will ensure that your hunting experience is safe, educational and beneficial for both yourself and the environment!
What kind of gun is used to hunt iguanas?
The most common weapon used to hunt green iguanas is an airgun or pellet gun. Airguns are becoming increasingly popular for hunting small game and reptiles, due to their accuracy and low levels of noise. Pellet guns are similar to airguns but fire smaller pellets at higher velocities than airguns, making them even more accurate and effective. It is important to remember that airguns and pellet guns should only be used in accordance with local laws and regulations. Additionally, airguns are not recommended for use near populated areas due to the potential for injury or property damage. When hunting green iguanas, it is important to make sure you have the proper safety equipment and airgun or pellet gun. With the right knowledge and equipment, hunting green iguanas can be a safe and enjoyable experience!
Can you shoot iguanas in Florida with a pellet gun?
Yes, pellet guns can be used to hunt iguanas in Florida. However, it is important to remember that pellet guns should only be used in accordance with state and local laws and regulations. Additionally, pellet guns are not recommended for use near populated areas due to the potential for injury or property damage. It is also important to make sure you have the proper safety equipment and pellet gun before going hunting. When used safely, pellet guns can be an effective tool for hunting green iguanas to help reduce their population in Florida.
Can you shoot iguanas in Florida with an air gun?
Yes, air guns can be used to hunt iguanas in Florida. However, it is important to remember that air guns should only be used in accordance with state and local laws and regulations. Additionally, air guns are not recommended for use near populated areas due to the potential for injury or property damage. It is also important to make sure you have the proper safety equipment and air gun before going hunting. When used safely, air guns can be an effective tool for hunting green iguanas.
What is the Most Popular location to go iguana hunting Florida?
The most popular destination to go iguana hunting in Florida is near Davie. Davie is one of the best locations in Florida to hunt the Green Iguana. This area is home to large populations of iguanas and provides plenty of opportunities for safe, successful hunts. With its diverse habitats, including mangroves and wetland environments, south Florida is the perfect place to hunt green iguanas. The experts found in this region are knowledgeable about the environment and can provide advice and guidance on how to safely handle your prey once it has been captured. Whether you’re a novice or an experienced hunter, south Florida offers a unique opportunity to learn more about these fascinating creatures while helping protect ecosystems against their invasions.
How far is Iguana Hunting near Orlando?
Iguana hunting near Orlando is approximately 80 miles away. Davie, Florida is the most popular destination for iguana hunting in the area and is only an hour and twenty minutes from Orlando when driving. Davie offers a diverse landscape with mangrove swamps, wetlands, and other areas that provide plenty of opportunities to successfully hunt green iguanas. Davie is also home to trained experts who are knowledgeable about the environment and can provide advice and guidance on how to handle your prey once it has been captured. If you’re looking for a unique hunting experience, Davie is the perfect place to go!
How far is Iguana Hunting near Fort Myers, Florida
Davie, Florida is the most popular destination for iguana hunting in the area and is only an hour and forty-five minutes from Fort Myers when driving. Davie offers a diverse landscape with mangrove swamps, wetlands, and other areas that provide plenty of opportunities to successfully hunt green iguanas.
How far is Iguana Hunting near Tampa
Davie, Florida is the most popular destination for iguana hunting in the area and is only about one hour and fifty minutes from Tampa when driving. Davie offers a diverse landscape with mangrove swamps, wetlands, and other areas that provide plenty of opportunities to successfully hunt green iguanas.
How Many Iguanas can you get in one Hunt?
The number of iguanas you can get in one hunt will vary based on the size of your hunting party, as well as the skill level of each member. Generally speaking, its not uncommon to bring back an average of 10 iguanas harvested by a single group in one outing. However, this range can fluctuate depending on the weather, season, and other factors.
Can you eat the Iguana Meat?
After your hunt, its a great idea to toss your game into an iced cooler if you are planning to cook the iguana meat. Thats right! Iguana meat is delicious and can be used in a variety of dishes. The most popular way to cook iguana meat is by grilling or roasting the whole animal. You can also use iguana tail meat to make delicious tacos, burritos, stews, soups and more. However, it is important to note that wild-caught iguanas should never be eaten raw due to the risk of salmonella contamination. Additionally, when handling iguanas for consumption, always wear protective gloves and thoroughly wash your hands with soap before cooking the meat. Finally, remember to discard any leftovers promptly after consuming as they may still contain harmful bacteria. With these precautions taken into consideration, you can enjoy delicious iguana
What is iguana meat called?
Iguana meat is sometimes referred to as chicken of the trees. This nickname alludes to the fact that iguana meat provides a similar texture and flavor profile to chicken, but with an exotic twist! Additionally, it is an excellent source of protein and other nutrients like iron and vitamin B12, making it a great addition to any diet. So next time you’re looking for something new, why not give iguana meat a try? You won’t be disappointed!
What part of the iguana do you eat?
The tail of the iguana is the most commonly eaten part. The tail meat can be cooked in a variety of ways such as grilling, roasting, or boiling. Additionally, you can also use the tail for soup, tacos, burritos, stews and more.
What does iguana taste like?
Iguana meat has a light and mild chicken-like flavor with a slightly gamey taste. It is also firm and chewy, similar to chicken thighs or wings. The mildness of the flavor allows it to take on an array of spices, making for delicious dishes such as fajitas or tacos.
What is the best recipe with Iguana meat?
One of the most popular recipes for iguana is Iguana Fajitas. This delicious dish combines grilled iguana tail with bell peppers, onions, garlic, tomatoes and spices to make a flavorful and unique fajita filling. For an even more exotic twist, try adding some diced mango or pineapple to the mix! To make this dish, simply marinate the iguana in some lime juice, garlic powder, and chili powder for at least an hour before grilling. Once cooked, combine the tail with sautéed vegetables and serve over toasted tortillas. Enjoy!
Alternatively, try making a traditional Iguana Soup by combining diced iguana tail with potatoes, tomatoes, onions, bell peppers and garlic in a broth of your choice. Simmer the ingredients until they are cooked through and then garnish with fresh cilantro or diced avocado before serving. Enjoy! Regardless of which recipe you choose, iguana meat is sure to be a hit at your next dinner party!
Is there any iguana hunting Florida outfitters?
Yes! Rockon Recreation Rentals is a 5 star-rated iguana hunting outfitter based in Florida. Their expert guides will help you plan your hunt and provide you with the necessary equipment to ensure a successful outing. Additionally, Rockon Recreation Rentals is dedicated to responsible harvesting practices which protect local wildlife populations. So if you are looking for an adventurous experience that won’t break the bank, rockon recreation rentals should be your first choice! Whether you are planning on eating the iguana meat or simply going for the experience of hunting, rockon recreation rentals has got you covered.
Beware of outfitters with low or no ratings, as several have popped up as people lost their jobs in the pandemic, and have little to no experience. Feel confident booking with a company like Rockon Recreation Rentals who has hosted hundreds of successful hunts with 5 star reviews from Google that you can rely on.
How much does it cost to hunt iguanas in Florida?
Typically, a half-day hunt with Rockon Recreation Rentals will cost around $500 – $600 depending on the size of the group. A two-person party would be in the $500 range, while adding a third person to the party is just $100 more. This includes all necessary equipment, guidance from experienced guides, and access to exclusive hunting sites across Florida.
Have a larger group? No worries, we can accommodate two parties of up to three people each party for a full party of six to enjoy in on all the fun.
With rates like these, you can be sure that you’re getting the best experience at an affordable price! So if you’re looking for a unique outdoor adventure that won’t break the bank, iguana hunting in Florida with Rockon Recreation Rentals is definitely worth considering!
Where can I book iguana hunting near me?
If you’re looking for a top-notch iguana hunting experience near you, Rockon Recreation Rentals is the perfect choice! They offer half-day and full-day hunts. If you think Florida Iguana Hunting might be your next big adventure, you should book one today! Booking your hunt with Rockon Recreation Rentals is easy – all you need to do is visit their website and fill out the online form with your personal details. Once done, they will be in touch within 24 hours to confirm your booking and provide further information about the hunt.
If you’re pressed on time, here’s a quick list of the best 22LR scopes:
Leupold VX-Freedom Rimfire: Best Overall 22LR Scope
Vortex Crossfire II 2-7×32 Rimfire: Best Close-to-Medium Range Scope
Bushnell Drop Zone-22 2-7×32: Best Short-range Varmint Hunting
Athlon Argos BTR 6-24×50: Best Short-to-Long Range 22LR Scope
1. Leupold VX-Freedom Rimfire: Best Overall 22LR Scope
The Leupold VX-Freedom Rimfire is the best overall 22LR scope.
I’ve used it for hunting, target shooting, night time hunting and more.
What makes it so versatile?
Keep reading and I’ll show you…
Glass Clarity & Reticle
Here’s the thing:
When a scope is positioned at a low price point like the Leupold Freedom Rimfire, it usually equates to reduced quality.
But that’s wasn’t the case here.
In fact, the glass on this scope is just as crisp and clear as the glass used on more expensive Leupold sights.
It’s also great in low light conditions, making the visibility problems I usually face with early morning shooting nonexistent.
But what about the reticle?
It’s a standard duplex reticle set in the second focal plane.
This allows you to have a strong and easy to see reticle at all magnifications.
Eye Relief & Eye Box
It has a whopping 4.1” of eye relief!
That’s more than any other scope on this list.
The best part?
You can shoot with both eyes open, and accurately hit your target without worrying about getting a black eye 🙂
Durability & Weight
The VX-Freedom Rimfire is well built.
It’s crafted with lightweight aluminum that is O-ring sealed and nitrogen purged.
In other words:
It’s completely shockproof, waterproof and fogproof.
In the dead of winter, with snow actively falling, I didn’t have a single temperature or fog related problem.
Elevation & Windage Knobs
The dials worked correctly, and are set at ¼ MOA with audible clicks to ensure precision.
However, the knobs feel cheap. The plastic used on the knobs is soft and feels like something you find in a dollar store.
Don’t get me wrong:
The knobs work fine and do exactly what they are supposed to do. I just wish Leupold used a higher quality plastic or even aluminum for the knob.
That being said, they are accurate, easy to use and track true. It’s also easy to zero, and holds zero even with strong recoil or accidental drops.
Magnification & Parallax
The 1.5-4x magnification is perfect for hunting and target shooting.
In fact, I’ve used it up to 200 yards without a problem. Further than that would require more magnification. I’d recommend checking out myVortex Viper HST 4-16×44 Review.
Although parallax is fixed, I experienced no blurriness or fuzziness when shooting within 100 yards.
Leupold VX-Freedom Rimfire Review: Is It Worth It?
If you’re looking for the best overall 22 LR scope that will work in almost any situation, then the Leupold VX-Freedom Rimfire is for you.
Here’s why. It’s:
Affordable
Clear glass
Lightweight
Works well in low light
Short-to-medium range magnification
In short:
The Leupold VX-Freedom Rimfire Riflescope is budget friendly and easy to use scope. Plus, it’s backed by Leupold’s lifetime guarantee.
You break it, they’ll fix it…free of charge.
2. Vortex Crossfire II 2-7×32 Rimfire: Best Close-to-Medium Range Scope
Looking for the best close-to-medium range scope for target shooting? Then get a Vortex Crossfire II 2-7×32.
Not only is it affordable, but the scope’s features is built with quality.
Like what?
Keep reading to find out…
Glass Clarity & Reticle
Glass clarity is always one of the defining features on a Vortex optic and the Crossfire II 2-7x is no exception.
This scope has a fully multi-coated lens that provides a stunningly bright and clear view of your target.
The lens also has an anti-reflective coating. This reduces light absorption to minimize any glare that could appear in your sight,
What’s better is the V-plex reticle.
It’s a popular hunting reticle that can be used for about any hunting applications. That’s why I recommended it in my 4 best scopes for Ruger 10/22 guide.
However, it’s wire constructed. Although it’s not bad, it can break and occasionally lose their position.
This reticle is a second focal plane (SFP) which lets you increase or decrease magnification without changing the size of the reticle.
So the reticle gets to do its job without obstructing your view of the target.
Eye Relief & Eye Box
One sure sign of a quality optic is the eye relief.
A good scope should allow you to have a comfortable distance between your eye and the eyepiece while still being able to clearly see the full field of view.
The Crossfire II really delivers in this area. It offers a very forgiving 3.9 inches of eye relief at the lowest magnification and 4.7 inches at the highest magnification.
The eye box (range of positioning behind the eyepiece) is also really generous. This allows for faster target acquisition and is a big reason why this optic can be recommended for both tactical use as well as for hunting.
Durability & Weight
The Vortex reputation is built on the company’s resolve to make a product that endures.
Crossfire II displays all the signs of the vortex standards
Like other Vortex products, the Crossfire II has been designed to surpass the standards of similarly-priced riflescopes.
The hard-anodized tube is made from aircraft-grade aluminum which protects it against scratches and dings.
The design is also shockproof, ensuring that the components aren’t easily jumbled by the movement of your gun. Not to mention movements that come with normal use, such as, having it packed up with the rest of your gear in the back of your truck, or even accidentally knocking it over or dropping it.
The scope is O-ring sealed and nitrogen purged, making it both waterproof and fog proof.
If for some reason any of these features fail or your scope is damaged in any way, Vortex covers it with its VIP lifetime warranty.
The company will either repair or replace your Crossfire II, no matter what the problem is or how long you’ve had it.
To top it all off, this heavy-duty scope weighs just 14.3oz. — a comfortable addition to most rifles.
Elevation & Windage Knobs
The turrets on the Crossfire II are medium height and finger adjustable.
The knobs have a sturdy feel to them and can be easily manipulated, even with a gloved hand. Both turrets are capped to protect your settings and can be reset back to zero after sighting in.
Windage and elevation can both be adjusted to 60 MOA with each click measuring ¼ MOA.
Magnification & Parallax
With a magnification of 2-7x, this is a scope meant for close to medium-range shooting.
The parallax adjustment is fixed up to 100yds which is a good fit for this level of magnification.
Vortex Optics Crossfire II 2-7×32 Review: Is It Worth It?
With a price tag of only $129, you are getting a great scope with quality features that many people pay twice as much for.
Not only that, but when you take into account the lifetime warranty, it’s almost a no brainer.
In short:
If you’re looking for a solid tactical scope that excels in hunting, then I’d recommend the Crossfire II.
3. Bushnell Drop Zone-22 2-7×32: Best Short-range Varmint Hunting
Want to do short-range varmint hunting?
Or rimfire tactical matches?
Then take a look at the Bushnell Drop Zone-22 2-7×32. It’s literally designed for the .22 LR round.
The best part?
It’s super affordable. Let’s take a closer look…
Glass Clarity & Reticle
The glass is surprisingly good.
In fact, I didn’t notice any tunnel vision from the bezel like I do with other similarly-priced optics.
But what’s even better is the Drop Zone-22 BDC reticle.
It’s specifically engineered for 38-40 grain, .22 LR high-velocity loads, with a 50-yard zero.
What that means is it specifically measures the .22 LR’s trajectory, giving you completely accurate bullet drop estimates.
This is perfect if you do short-range varmint hunting or rimfire tactical matches.
Eye Relief & Eye Box
The 3.6” of eye relief is very forgiving — even at full magnification.
Also, the eye box is generous. I didn’t experience any eye fatigue.
Durability & Weight
The Drop Zone-22 is built like a tank.
It’s O-ring sealed, argon purged and crafted from durable aluminum. Which means, the scope is waterproof, fogproof and shockproof.
However, it comes at a hefty cost:
Heavy weight.
At about 19.5 ounces in weight, the Drop-Zone 22 is one of the heaviest scope in its class.
Elevation & Windage Knobs
The exposed target turrets are reliable.
They produce positive, crisp clicks. No tools are required. And the ¼ MOA is very precise.
However, the dials are a bit stiff to turn…at first. With usage, it’ll loosen up.
Moving on, zeroing was easy. After 7 rounds, I was zeroed in. It also held zero like a champ. 82 rounds and a few hikes later, I still haven’t lost zero.
Magnification & Parallax
Just like the turrets, the power ring is also rather stiff.
The solution?
Use a throw-over lever. This makes turning the knob a breeze.
No products found.
The scope is also equipped with an adjustable side parallax knob. This is gold…considering the price of the optic.
It can adjust as low as 10 yards to infinity. A plus if you’re plinking, engaging close targets or rimfire shooting.
In short:
The 2-7x magnification and parallax adjustment is clean and precise.
Bushnell Optics Drop Zone-22 Review: Is It Worth It?
If you’re looking for a budget-friendly 22LR scope, then get a Bushnell Drop Zone-22.
Here’s why. It’s got:
Durable
Clear glass
Long eye relief
22LR BDC reticle
Side parallax adjustment
It’s literally designed for small game hunting, plinking and rimfire shooting.
The best part?
It’s backed by Bushnell’s lifetime warranty. So if ANYTHING happens to the scope, they’ll fix er’ up for free.
4. Athlon Argos BTR 6-24×50: Best Short-to-Long Range 22LR Scope
The Athlon Argos BTR 6-24×50 is the best short-to-long range scope for your 22lr rifle.
In fact:
The Argos BTR packs in many of the features of top-dollar scopes, but for a fraction of the cost. Like what? Keep reading to find out…
Glass Clarity & Reticle
The glass on the Argos BTR is very high quality, which means the image you see through your scope is clear and crisp. In fact, the Argos BTR excels in low-light conditions.
I’ve found that it’s the perfect scope for dusk and dawn hunts. This is because the BTR is made with a fully multi-coated lens which provides fantastic light transmission.
I’ve noticed that when I zoom in to 18-24x, I get a little bit of blurriness. That said, for under $400, you really can’t beat the image clarity of the BTR.
Now let’s take a look at the reticle.
I was expecting a pretty basic reticle from this scope, especially considering the price. However, the BTR uses an illuminated, etched APMR MIL reticle. It’s anything but basic!
Here’s a look at the APMR MIL reticle:
I really like the illuminated reticle, especially when I’m shooting in low-light conditions. There are 11 brightness settings which means that I can find the perfect illumination level every time.
I do wish that the BTR had an auto-shutoff feature to help save on battery life, but I tend to keep an extra Lithium battery in my bag just in case.
Also, since the reticle is etched into the glass, you don’t need to turn on the illumination at all if you don’t want to. The etched reticle is also much more durable than a wired crosshair, so you don’t have to worry about your wires getting knocked off center.
One of the best things about the Argos BTR is that it is a first focal plane riflescope, which means that the reticle grows as you zoom in on your target. No more calculations for holdover or windage when you change your magnification.
I love that the MIL reticle works at all ranges, and this feature usually only comes in scopes that cost over $1000.
Eye Relief & Eye Box
The eye relief on the BTR is a nice, comfy 3.3 inches. This is perfect for low-to-zero recoil calibers like 22lr.
The eye box is also nice and generous, although I’ve noticed it does shrink a little as you zoom in to max.
Durability
The Argos BTR is incredibly durable. The tube is made from heat-treated, aircraft grade aluminum and is sealed with O-rings.
As if that’s not enough, the whole tube is made from a single piece of metal, which makes it stronger and more waterproof than multi-piece scope tubes. The BTR is also argon-purged and uses an etched reticle.
All of these features mean that the scope is able to handle any kind of conditions and take any kind of punishment that I might throw at it.
Elevation & Windage Knobs
Here’s the scope’s biggest con…
The turrets move very easily, with almost no resistance…which can lead to over adjusting.
However, I spent about ten minutes re-greasing the turret caps. When I was done, the turrets felt much less mushy and the clicks were a lot louder.
If you’ve never regreased turrets before, here’s a quick video showing you how to do it:
Zeroing was a very easy process. I was able to zero the scope in less than ten rounds once I was hitting paper.
And I’ve put hundreds of rounds through my 22lr since, and the zero has held true.
In my experience, these turrets have proved to be very reliable.
Parallax & Magnification
The parallax adjustment knob works very well. It’s easy to turn and accurate. This makes for easy adjustments in the field.
The 6-24x magnification is probably my favorite thing about this scope. Whether I want to shoot something ten yards out or plink a target at 1000 yards, the BTR is my go-to.
The scope image is very clear up until about 20x. After that it gets a little bit blurry, so you may want to invest in a higher-end scope if you want to do a lot of extreme distance shooting.
That said, I’ve found that the Argos BTR still functions well at 1000 yards, especially when you consider the price.
Mounting & Rings
The Argos BTR doesn’t come with any rings or a mount, so I’d suggest getting a set of High Scope Rings that fit your 22lr.
The scope does come with a set of lens covers, which is nice. It also includes a battery for the illuminated reticle.
I went ahead and bought a 50mm Athlon Sunshade to use for my daytime shooting.
It helps a lot with glare and reflections.
Is the Athlon Argos BTR 6-24×50 Worth It?
If you need an all-range scope for your 22lr, you can’t go wrong with the Argos BTR.
Here’s why. It has:
First focal plane
6-24x magnification
Excellent in low-light
Reliable, hand-adjustable turrets
Illuminated, etched BTR MIL reticle
Fully multi-coated glass for clear, crisp image
And all of this comes in a package that costs a fraction of what other competing scopes cost.
If all of that wasn’t enough, the BTR comes with Athlon’s Gold Medal lifetime warranty, so you know you’re covered if anything happens to your riflescope.
If you want all these features in a low-cost riflescope, then the Argos BTR 6-24×50 is for you.
Looking for a riflescope for your AR? Here’s our list of the 7 Best AR-15 Scopes and Optics.
Now It’s Your Turn
I hope you enjoyed my best 22LR scope for target shooting guide.
So as a recap:
If you’re looking for the best overall .22LR target shooting scope, then get the Leupold VX-Freedom Rimfire.
What about the best close-to-medium range optic? The Crossfire II 2-7×32 is for you.
If you’re into short-range varmint hunting, then opt-in for the Bushnell Drop Zone-22.
Or if you’re looking for the best short-to-long range scope, then get the Athlon Argos BTR 6-24×50.
Whichever .22LR scope you choose, you’re bound to hit a reliable, yet effective optic. I’ve spent hundreds of rounds through each one with no failure.
Now I want to turn it over to you:
Which rifle scope will you pick for your .22LR?
Let me know by leaving a quick comment down below.
Catching stocked trout can be easy if you know what the best bait is that stocked trout respond to. Some baits for catching trout from shore and on the water. Factors such as the weather to how long the trout have been in the water can affect the choice of the best lure.
PowerBait Mice Tails are worm shaped rubber lures that have a round “head” in a contrasting color.
They are called Floating Mice Tails because they are meant to be fished with a slip sinker rig that lets it float 8 to 16 inches from the bottom of the lake, reservoir or pond.
PowerBait Floating Mice Tails
White, pink, fluorescent green and orange are top fish catching colors for me. Brown is a good color if fishing clear water and the day is cloudless.
Read More: PowerBait Mice Tails
In addition to fishing these with a slip sinker rig, they can also be put onto a line that has a split shot sinker tied to 8 to 16 inches above it.
What that means is you tie the hook at the end of your fishing line, slip the mice tail onto the hook, then about eight to sixteen inches above that, you crimp on a split shot sinker.
It’s a fast way to rig up mice tails but it could result in some line twist.
Fishing Spoons for Catching Trout
One of my favorite ways of catching trout is with a spoon. What I do is set up a PowerBait rig on one pole then with another pole start casting a spoon.
In my personal experience, catching stocked trout with a fishing spoon can be one of the most effective ways to catch fish.
Top Fishing Spoons for Catching Trout in a Pond or Lake
Kastmaster Spoons
Mepps Little Wolf
Thomas Buoyant
Super Duper Spoon
Spoons have different qualities and uses. Here’s a list of the best spoons for catching trout and with a description of how the fishing spoons work.
Super Duper Trout Spoon
The Super Duper is, in my opinion, a finesse type spoon. They’re very light and require ultralight fishing gear. In my experience, trout seem to attack it aggressively when nothing else seems to be working.
Thomas Buoyant Fishing Spoons Trout Lure
The Thomas Buoyant spoons are great spoons for catching trout. Use a small size like about 1/8 ounce or even lighter if you have ultralight fishing gear. I have caught countless trout with the Thomas Buoyant spoon.
The reason it works so well is because the shape of the spoon allows it to be fished relatively slowly without it sinking to the bottom. That’s something that cannot be done with a Kastmaster.
Kastmaster Spoons
Kastmaster spoons are fantastic spoons, too. What makes these spoons useful for catching trout is that they cast very far. Their aerodynamic shape helps them fly through the air farther. But that ability to cut through the air also makes it sink faster, as well.
That means you must reel it back to shore fast, which may or may not be the presentation that excites the trout. That said, I’ve caught so many fish with a Kastmaster, it really is a “must-have” lure.
Gold, silver/blue, and fluorescent orange/gold are top colors for brighter days. Firetiger is my go-to secret weapon for catching trout on cloudy days.
Mepps Little Wolf Spoon
The Little Wolf fishing spoon is one of my favorites because it has a fantastic tail-wagging action that trout seem to find irresistible. It darts left to right in a searching pattern.
Read More: Catch More Fish with Fishing Spoons
Drop Shot Fishing for Freshly Stocked Trout
An interesting way to catch stocked trout is to tie weight at the end of the fishing line, then add a hook about 12 inches above it so that the weight is at the bottom and the hook is higher up. That’s called a drop shot rig. Onto the hook you can put a three inch worm.
Then you can cast and retrieve. This works great for when trout have been freshly stocked and are swimming together in schools.
Stocked brown trout & brook trout
Brown trout & brook trout respond better to the instinctual trigger of a fleeing bait that is presented by an inline spinner, minnow shaped lure or a casting spoon.
Brown trout also more readily associate a worm with food than a stocked rainbow trout.
A meal worm or a hook laden with squirming little worms will trigger an enthusiastic lunge from a brown trout or a brook trout.
How to Catch Freshly Planted Trout
Notice how I keep repeating the phrase, freshly planted? When you read that phrase, please take it to mean that what I’m writing doesn’t necessarily hold true for trout that have been planted a month or more previously. A rainbow trout that has been in the lake or river for a few weeks will respond to real food like a worm.
How Stocked Trout Behave
Freshly stocked trout tend to swim in schools. If you are at a stocked reservoir, pond or river and see schools of trout swimming by, odds are that the lake has recently been recently stocked. Schooling is a behavior that comes from habit. Trout are raised in long oval shaped pools about two feet high. There is an artificial current in it and they tend to swim in circles, often counter clockwise. There is also netting above their pools to prevent birds of prey from swooping down on them.
The above is important information to know. It explains the behavior of trout after they’re planted. Stocked trout tend to keep close to shore, perhaps seeking the comfort of the edge they had been used to from being in the pool. They also tend to prefer swimming about eighteen inches from the surface or eighteen inches from the bottom. This means that if you are going to float a fishing fly or other bait under a bobber, rigging the lure about eighteen inches below the bobber is a good start. This is true when the temperature of the water is optimal.
When it starts to get warmer or time passes, trout tend to hover about eighteen inches to two feet above the bottom of the lake, often just a short cast from shore.
If you’re fishing a sliding slip sinker rig and are not sure at what depth the trout are holding at, start at twelve inches for one pole and eighteen inches for another pole. Then gradually increase the length up to about two feet.
The thing about trout swimming counter clockwise is also important, particularly to anglers who are trolling bait.
If you want to trigger an instinctual chase response, try circling your boat or kayak in a counter clockwise direction, that way your lure will pass them from behind.
If you are drifting bait with a current, particularly in a river, then the natural movement is casting upstream and allowing the bait to float and tumble downstream to where the stocked fish are holding.
After time has passed, rainbow trout begin to regain instinctual behavior such as shyness, staying close to the bottom, feeding on insects and relating to structure.
Examples of structures that fish seek are steep drops from shallow to deep, boulders, underwater trees, underwater currents, breaks in currents that create an area of calm water, shade etc. After time has passed, a rainbow trout will be able to be caught with lures with lively action and live bait. Stocked brook trout and brown trout consistently respond to movement, the action of a lure, as well as to the size.
What Fishing Flies to Use to Catch Stocked Trout
For fly fishing, flies such as the Cove Pheasant Tail, brown Wooly Bugger, natural colored Gold Ribbed Hare’s Ear fly, AP Emerger and other similar nymph type flies will take trout.
I think it’s because, combined with the way they are presented in stillwater (i.e. lakes and ponds) they resemble the general profile of trout food. Both the Cove Pheasant Tail fishing fly and the AP Emerger are well regarded flies for stillwater, with the Cove having been created specifically for stocked trout in reservoirs. In my opinion it’s no coincidence they resemble in color, size and presentation the general profile of trout pellets splashing down, particularly when two or three flies are tied in tandem.
What is Best Color PowerBait Dough for Catching Stocked Rainbow Trout?
There are many colors to choose from. Just keep in mind that white is a color that can be seen regardless of depth, regardless of how sunny or overcast the weather and without regard to whether the water is clear or murky. If you can only choose one color, white is the best color to choose because of how visible it is- and getting your bait noticed is one of the important keys to catching fish with dough since dough does not have fish attracting action. Other colors can be useful too, such as fluorescent for overcast days and pretty much anything for clear water.
Perhaps just as important as color is how light your hook is (will it float when smeared in trout dough?), making sure your bait ball isn’t too big, floating it at the right depth and casting it not too far from shore (although sometimes a long cast is necessary). These are rigged using a slip sinker rig.
Best Time of Day to Catch Stocked Trout
The best time to fish for stocked trout is during the early morning hours or about three hours after the brightest time of day, roughly between 3 PM and sundown. Stocked brown trout are especially active in the early morning and closer to sundown. Stocked rainbow trout can be triggered to bite bait all day if it’s cloudy.
While stocked trout can be caught at most times of day, anyone who is observant will notice that there are certain times of day where the fishing seems to “turn on” and many around a lake begin catching.
These are the best times to catch trout:
Trout Dislike Bright Sun Fish during times of day when it’s not bright.
Bugs tend to hatch at certain times of day, triggering feeding behavior
Stocked trout are fed once a day, usually in the late afternoon. They are conditioned to be fed at this time of day.
Rule of thumb, fish for stocked trout on either side of high noon when the sun is at its brightest.
If you have any questions please contact me. I would be more than happy to write a post answering your questions!
After months of filming wildlife, it’s time to see just what your trail camera captured. Here’s how to view trail camera photos on your computer. The methods vary from simple to fastest. Some methods are automated and require monthly data plans.
There are 4 ways to view your trail camera photos on a computer. They include using a USB cable, using an SD card reader, connecting via WiFi, or syncing photos with a cellular trail camera. Each method will connect your camera and upload your footage to a computer.
Here’s how to view and upload your photos and videos to your computer.
They are listed in order of easiest to more complex. It’s worth noting that the easiest method isn’t the fastest.
1. Connect With Supplied USB Cable (Easiest)
This is an easy method because most trail cameras ship with a USB cable.
This cable is for viewing your photos on a computer. It isn’t for charging, because trail cameras recommend against using rechargeable batteries.
Once connected, your trail camera should automatically display in File Explorer. Your trail camera will display “Mass Storage” or an equivalent term.
Most trail cameras will automatically turn on when connected via USB, regardless of the position of their power button. If it doesn’t power on, turn the power switch on.
Connect your USB cable to your trail camera.
And insert the other end into your computer. If the camera isn’t recognized automatically, press Window Key + E. This will open File Explorer.
Navigate to “This PC”, in the left sidebar. Your trail cam should be visible under this header. It will likely show as “USB Drive”. One folder should be visible: DCIM
Open the DCIM folder. You’ll likely see two folders: Movie and Photo. The number of folders may vary, depending on the manufacturer of your trail camera.
From here, just drag and drop the files to your computer.
Two Requirements: This method requires that your trail camera have a battery charge. And that you know where your USB cable is.
These are two reasons I prefer the next method. It cuts the camera right out of the equation. This means that battery levels don’t matter. And I don’t have to worry about locating that random cable.
Plus, the next method is faster too.
2. SD Card Reader (Fastest)
This is also a pretty simple way to view your trail camera footage. And if your computer has an SD card reader you won’t need any additional gear.
If you swap out SD cards, your camera can continue to film with its new card, while you’re uploading footage from the old one.
Just pop out your SD card and drop it in the SD card reader. If your computer doesn’t have one built-in, you’ll need to pick one up.
I’ve been using this one by Anker for a few years and I love it. It is USB 3.0 for fast connection and it has slots for standard SD and Micro SD cards.
Here are the steps to view and upload your trail camera footage:
Remove the SD card from your trail camera. Make sure that the camera is powered off.
Insert the card into either a USB card reader or SD card adapter.
Now insert this into your computer. If the card isn’t recognized automatically, press Window Key + E. This will open File Explorer.
Navigate to “This PC”, in the left sidebar. Your trail cam should be visible under this header. It will likely show as “USB Drive”. One folder should be visible: DCIM
Open the DCIM folder. You’ll likely see two folders: Movie and Photo. The number of folders may vary, depending on the manufacturer of your trail camera.
From here, just drag and drop the files to your computer.
This is my favorite method. I have an SD card reader on my desk. And it’s also how I connect my other cameras (GoPro, Canon, Sony, and Olympus) to my computer.
If you don’t love waiting for file transfer, you should consider using an SD card reader. This method is faster than using a USB cable. This is because transfer rates are faster with the USB 3.0 reader than with the supplied cable.
How much faster is a SD card reader? In my test, the USB cable method averaged around 9 MB/s. And the SD card reader transferred the same set of photos and videos (14.1 GB) at a speed of 88 MB/s. That’s almost 10X faster.
Via USB Cable: 26 minutes
Via SD Card Reader: Under 3 minutes
Variables: I used the same USB hub and the same SD card (rated for 80 MB/s.
Once you have your SD card connected to your computer, it’s a good idea to format it. Make sure you do this AFTER you upload your footage!
Here’s more about how to properly format your SD card for a trail camera.
3. Connect via WiFi
If you have a WiFi module on your trail camera, you can try to connect this to your home network, and to your phone, via the manufacturer’s app.
A few notes about viewing via WiFi. Your camera will need to be close to your connection. This feature is not made for long-range transmission. Or to deal with physical barriers, like a few trees.
The WiFi module in the camera is underpowered because the batteries are small and power is reserved for filming, not transmitting.
4. Sync Footage From Cellular Trail Camera
If you’re using a cellular-connected trail camera, the images are automatically uploaded to cloud-based storage, where you can access them from your phone or computer.
This is a pretty great option if you have the budget for the purchase of the cellular trail camera and the monthly fee for the data plan. Here’s an explanation of this by Moultrie.
The Final Result
Follow these simple steps and you’ll have your footage and photos uploaded and ready to view.
Here are some clips that I uploaded this morning from some birds this past winter.
Keep reading: Here’s how to troubleshoot a trail camera that won’t turn on.
Your Turn
How do you view trail camera photos on your computer? Have a tip to share? Let me know below!
An air rifle's effective shooting range depends on various factors, including the type of rifle, the caliber, and the power source. Generally speaking, most...
Wyatt Earp has said:
Fast is fine, but accuracy is everything
And I just thought how many airgunners are obsessed with muzzle velocity and muzzle energy,...
"Master the art of precision shooting with dry firing air rifles. Enhance your aiming skills, trigger control, and muscle memory without using ammunition. Discover...
")
")
")
")
")


 Review – The Best Name In The Air Rifle Game")