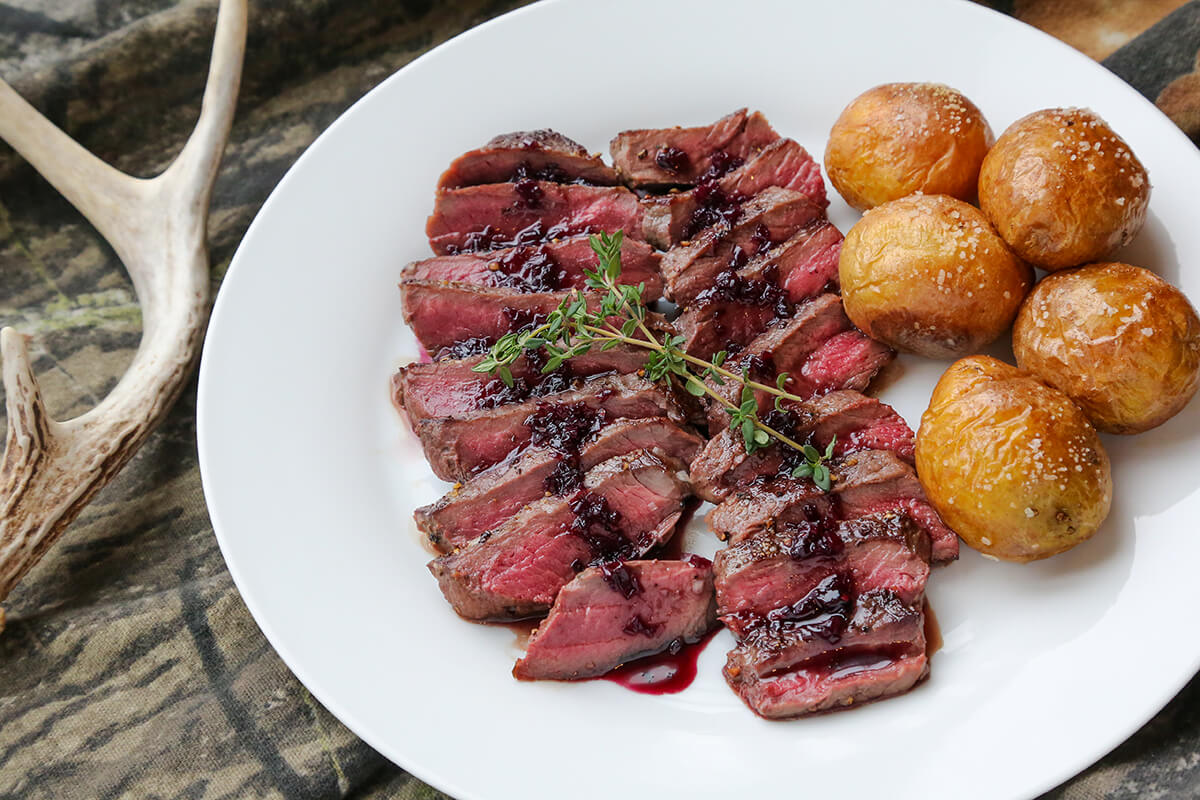
After wet aging your deer, cook it into something delicious, such as this venison eye of round with elderberry pan sauce. (Photo courtesy of Jenny Nguyen-Wheatley)
Dry aging may be getting all the attention, but don’t overlook wet aging as a way to tenderize and bring out more flavor in venison. In fact, most grocery store meat has been wet aged, and you can use the same technique on deer. I find that just a few days can help make a difference.
Benefits of Wet Aging
Aging is the process in which the natural enzymes in an animal’s muscles break down connective tissues; this helps to tenderize the meat and develop its flavors. While you won’t get the intense flavors characteristic in dry aging, there are other benefits to wet aging.
Wet-aged meat does not lose moisture and there is no rind to trim off, therefore resulting in no loss of weight and meat.
Dry aging should be done with primal cuts only, while wet aging allows for cuts of any size.
Wet aging does not require any special equipment – a cold refrigerator, refrigerator thermometer and vacuum sealer are all you need.
Takes up less space than dry aging.
Can be done after the meat has been frozen.
The entire animal does not have to be wet aged all at once. Thaw out meat and wet age as you plan your meals.
While wet aging does not concentrate flavors, it does help to tenderize and bring out delicate flavors that has yet to develop in freshly killed venison.
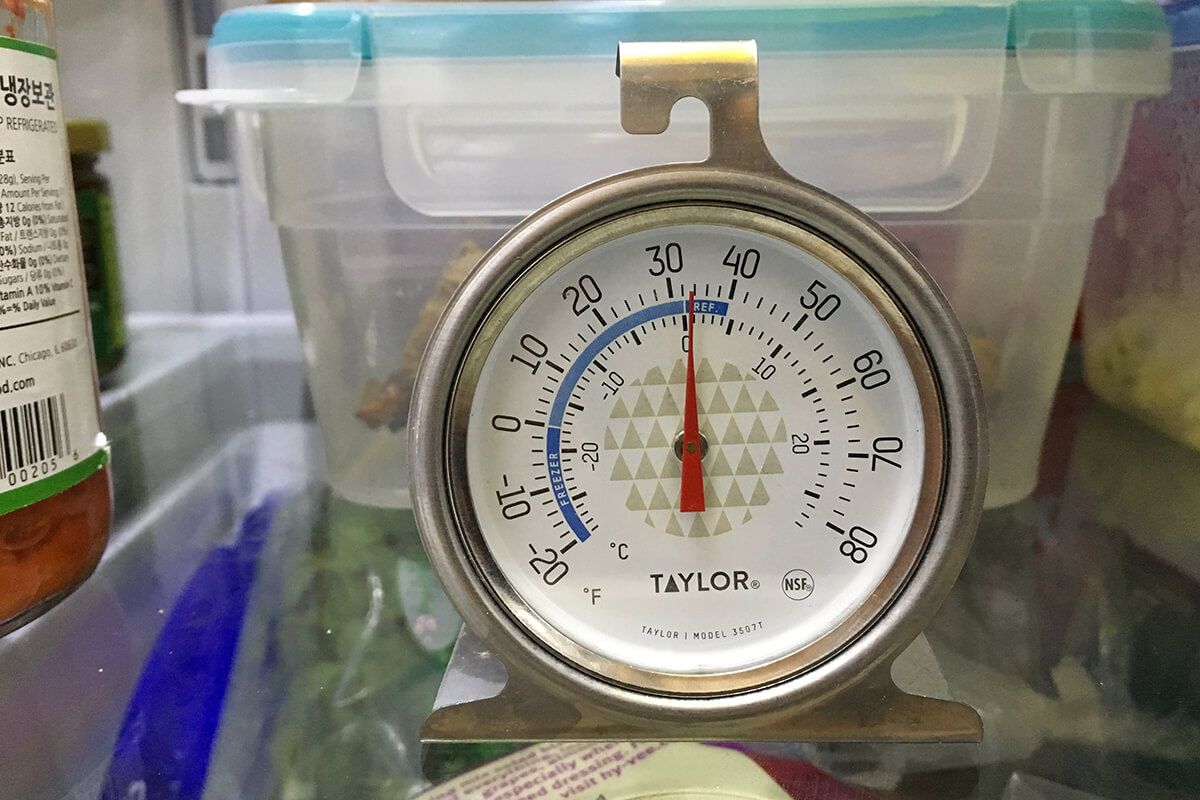
Use a refrigerator thermometer and place it on the shelf where you plan on wet aging meat. Refrigerators may not cool accurately. (Photo courtesy of Jenny Nguyen-Wheatley)
Cons of Wet Aging
You cannot wet age meat for nearly as long as you can dry age meat. The moist environment in wet aging will eventually turn to rot.
There is no moisture loss in wet aging, therefore no flavor concentration.
Mold is not a factor in wet aging, which is credited for bringing out nutty, cheesy notes possible in dry aging.
Prepping Venison for Wet Aging
Before aging meat, be sure to follow best practices for handling meat in the field. Because aging requires you to hold meat at temperatures above freezing, any cross-contamination can quickly turn into unwanted bacterial growth.
Remember to use clean tools and keep the meat away from dirt and debris. Also, avoid cutting into any scent glands and puncturing intestinal organs. Keep the meat cool at all times.
If you accidentally make a gut shot, use two sets of gloves and knives: one set to handle meat that you suspect may have come into contact with gut material and the other to handle meat you are positive did not. Keep both piles of meat separate to avoid cross-contamination. Only age meat that you know, without a doubt, did not come into contact with intestinal content.
Cuts to Wet Age
Cuts of venison used for grinding or stew do not benefit from aging. Freeze and use these cuts as usual.
For cuts that you plan on searing, grilling, sautéing or smoking, wet aging can be useful. The cuts I recommend for wet aging are the tenderloin, backstrap, bottom round, top round, eye of round and in younger animals (under 2½ years old), the sirloin tip.
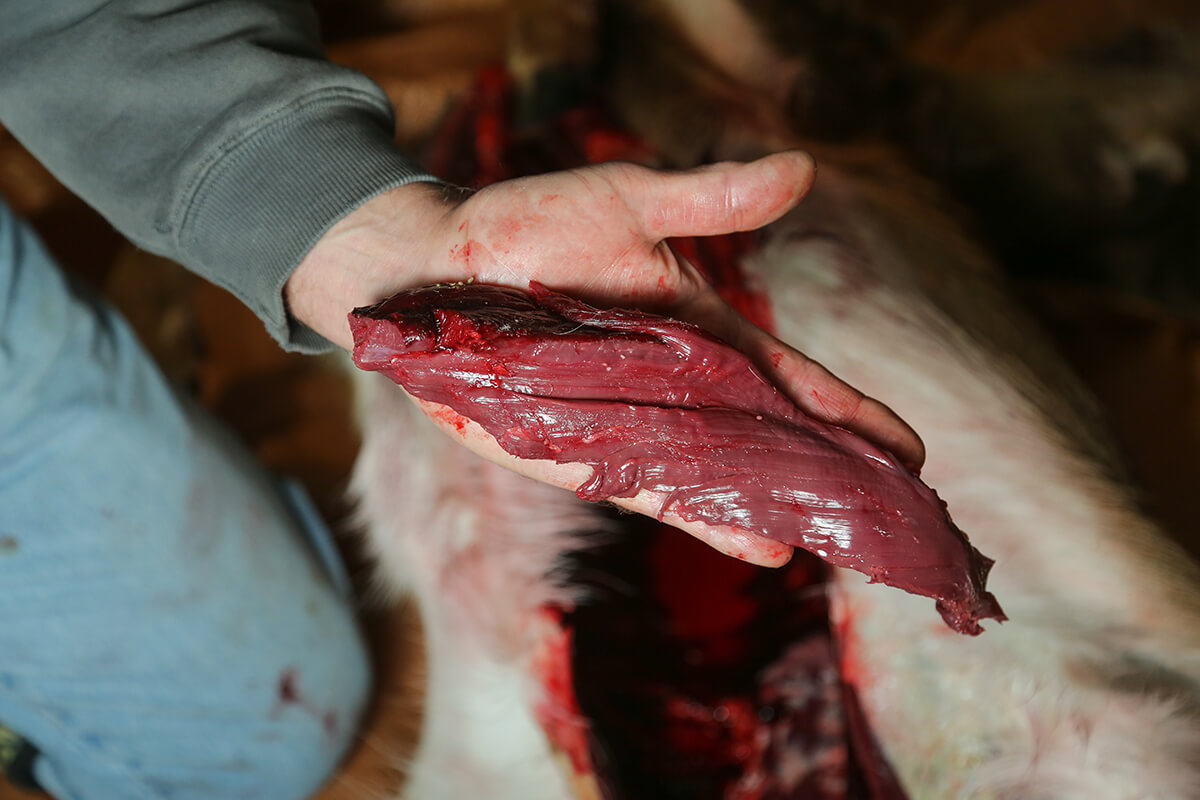
Already tender, the tenderloin, or inside strap, only need a few days of wet aging to improve its flavor. (Photo courtesy of Jenny Nguyen-Wheatley)
Vacuum Sealing
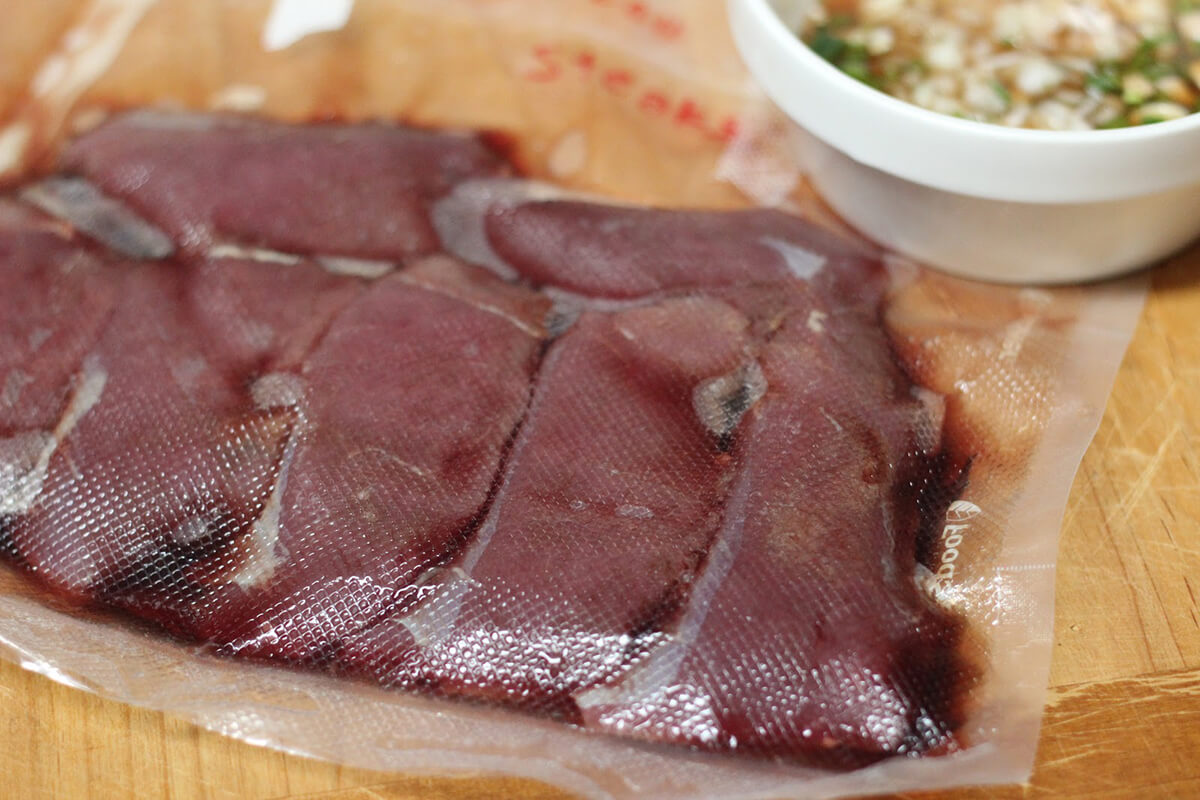
Vacuum-sealed bags keep out oxygen, which slows down bacterial growth and prevents discoloration on meat. These bags also hold in the meat’s juices, which contains enzymes that will help break down the meat, thus tenderizing it.
Before you start vacuum-sealing meat, make sure there are no stray deer hairs or debris on the meat. If the meat is wet, pat it dry with paper towels—excessively wet meat will not vacuum seal correctly. Next, break down meat according to how much you and your family can eat in one sitting, and then vacuum seal into individual packages. At this point, freeze to wet age later or wet age all of the packages now.
To wet age venison, vacuum seal meat and store it in the refrigerator for several days to several weeks. (Photo courtesy of Jenny Nguyen-Wheatley)
To Wet Age
Buy a refrigerator thermometer to make sure your fridge is cooling accurately. Adjust the temperature to somewhere above 32 but below 40 degrees Fahrenheit—I shoot for 35 degrees. Place desired vacuumed-sealed packets of venison on the lowest – coldest – shelf, and leave it alone for a few days to as long as 3 weeks.
Tenderloins: How long you wet age meat will depend on the cut and your taste. Located inside the body cavity and just underneath the rib bones, the tenderloins do little work and therefore come out tender already. I mostly wet age tenderloins for flavor rather than texture; three to four days will usually suffice.
Loins: For backstraps, wet aging time is determined by the age of the deer. If the loin came from a doe or young buck, I shoot for at least five days to a week of wet aging. For older deer, I recommend two weeks. You could wet age the backstraps longer, but being an already tender cut, you could risk the meat becoming mushy. Again, it depends on personal preference, so experiment to see what works best for you.
The bottom round, top round and eye of round in a deer’s hindquarters are good candidates for wet aging. (Photo courtesy of Jenny Nguyen-Wheatley)
Rounds: The cuts that may benefit from longer wet aging are those from the hindquarters of the deer, including the rounds and sirloin tip. On a 1½-year-old deer, you may not have to wet age long at all – perhaps a week. On older deer, I would shoot for 2 weeks. On mature bucks – I typically turn these animals into hamburger, but if you want to try wet aging, 3 weeks would be desirable.
There are hunters who have successfully wet aged venison for a lot longer, but I personally have not tried it.
After wet aging, cook the venison or freeze it to enjoy later.
Creating a backyard space takes planning and effort, so it’s a shame that you can’t use it as often when temperatures drop. If you’re tired of letting winter’s icy grasp drive you inside, a kerosene heater could be a solution. A kerosene heater on a patio or deck can keep you and your family warm so you can enjoy the great outdoors. These cold weather wonders are available in different types, sizes, and capacities. Learn why the following models are considered among the best kerosene heaters on the market.
BEST OVERALL: DuraHeat Portable Convection Kerosene Heater
RUNNER-UP: Sengoku Kerosene Heater, White
BEST BANG FOR THE BUCK: Sengoku HeatMate 10,000-BTU Indoor/Outdoor Kerosene
UPGRADE PICK: Dyna-Glo Delux KFA80DGD Kerosene Forced air Heater
BEST MIDSIZE: Mr. Heater MH75KTR kerosene heater
How We Chose the Best Kerosene Heaters
Since there are multiple types of kerosene heaters on the market, we provide a list of recommendations that covers as many options as possible. Our top picks include a selection of the best forced-air, radiant, and portable kerosene heaters for shoppers to choose from. Depending on what you’re looking for, our list can provide solutions for smaller areas, all the way up to a powerful 80,000 BTU heater that can heat up areas of up to 1,900 square feet.
During our research, we made sure to only include top brands that use the highest quality materials. Most importantly, we ensure that each of our top recommendations include common safety features such as tip-over and high-temperature shutoff.
Our Top Picks
Kerosene heaters aren’t new technology, but some improvements have been made to safety and efficiency, so keep the considerations detailed above in mind while comparing products. This list of some of the best kerosene heaters on the market helps streamline the shopping process.
Jump to Our Top Picks
What to Consider When Choosing the Best Kerosene Heater
Kerosene heaters produce plenty of heat, which can make them ideal for outdoor applications. Kerosene is a relatively inexpensive fuel, so burning a kerosene heater on “high” in an outdoor space may be more affordable than using another type of heater. When shopping for a kerosene heater, keep in mind their specifications, such as tank size, heat type, and the all-important safety features.
Type
Kerosene heaters are available in various models, each of which produces a different type of heat. Some are more suitable for specific applications than others. Note: All kerosene heaters run on a liquid fuel, which can be messy. If that’s not a task you want to undertake, other non-electric heaters use propane, natural gas, and easier-to-manage fuels.
Convective kerosene heaters use convection to heat a space. They produce warm air that rises and pushes cold air down toward the heater. The heater then draws in the cold air and heats it, which rises and pushes colder air down again. This produces a very even heat within a space, and they run quietly.
Radiant kerosene heaters produce localized heat, essentially warming the objects in front of them. They don’t do a particularly good job at heating a larger space evenly, but they’re ideal for targeting a specific area, such as a table or sitting area.
Forced air kerosene heaters (also known as torpedo heaters and salamanders) heat air and force it into the area, much like a furnace. They’re suitable for heating large outdoor tents and gazebos, but they can be quite loud.
Portable kerosene heaters come in both convection, forced air, and radiant models, though the latter type is the most common. These heaters are small and easy to transport. Take it outside to refill the fuel tank, which helps minimize potential mess or dangerous accidents.
Tank Size
Kerosene is a liquid fuel, so tank sizes are measured in gallons or liters. The ideal tank size is relative, so consider these factors:
Heat output: Large heaters burn more fuel, so they need a larger tank.
Portability: Smaller heaters need to be light and portable, so they have a smaller tank.
Fixed vs. removable: Fixed tanks are usually larger, while removable tanks must be small and manageable.
In general, larger wheeled kerosene heaters have fuel tanks that hold up to 15 gallons (roughly 56 liters) of fuel, while smaller models may hold only 1 or 2 two gallons (about 7 to 8 liters).
Heating Capacity
Kerosene heaters also come in a variety of outputs, which are measured in BTUs (British Thermal Units). The higher the number of BTUs, the more heat a heater can produce.
Smaller heaters that produce heat within the 10,000 to 25,000 BTU range are ideal for smaller rooms, patios, or porches. Depending on the model, they can heat between 300 and 1,000 square feet. Midsize heaters (roughly 50,000 to 75,000 BTUs) warm spaces between 1,000 and 2,000 square feet.
Larger models—typically forced hot air—can pump a lot of hot air throughout a space. These heaters, which sometimes produce more than 150,000 BTUs, work well for large backyard parties and semi-enclosed tents.
Efficiency
Anytime energy is a factor, efficiency must be considered when choosing the product. Since kerosene heaters burn fossil fuels, make sure the model you choose is efficient and wastes as little fuel as possible.
Many kerosene heater manufacturers list their products’ efficiency rating, describing it in percentages. The best kerosene heaters burn around 99 percent of the fuel, passing less unburnt fuel through the exhaust.
But for a heater to work efficiently, it must be the correct size for the space. A 10,000-BTU heater may never heat a large garage, for example, which means fuel is wasted. Heating a small patio might not require a 135,000-BTU heater, as it will burn more fuel than necessary to keep the space comfortable.
Run Time
Run time is directly related to the size of the fuel tank, the heater’s output, and its efficiency, the most important of which is tank size. The larger the tank, the more fuel it uses, so the longer the heater will run. A heater that runs for several hours without refueling is a convenience worth shopping for, but manufacturers aren’t always forthcoming with this information.
Some of the best kerosene heaters can provide heat on a low setting for up to 12 hours before running out of fuel.
Safety Features
Kerosene heaters have the potential to be dangerous. If left unattended or used incorrectly, they can start a fire or cause burns. Many heaters have an overheat switch that shuts down the unit if it gets too hot. Also, compact kerosene heaters can tip over quite easily if inadvertently bumped. An anti-tip switch shuts off the heater if it tips over.
Moreover, any machine that burns fuel—kerosene, gasoline, wood, or any other type—also produces carbon monoxide. The best kerosene heaters are extremely efficient and designed to emit very little carbon monoxide, which makes them safe even for indoor use. However, when used indoors, it’s a good idea to install a functioning carbon monoxide detector as a safety precaution.
FAQs
If you have concerns about running a fossil fuel-burning heater in an enclosed space or want more info about kerosene heaters, check out the answers to the common questions below.
Q. How big of a kerosene heater do I need?
This depends on the space you’re heating. In most cases, a 50,000-BTU heater is effective at heating a small porch, while a 100,000-plus-BTU unit might be necessary for a large open space such as a wedding tent or barn.
Q. How many square feet will a kerosene heater heat?
The amount of space a kerosene heater heats depends on BTU output. Low-output heaters, in the 25,000-BTU range, may heat 1,000 square foot spaces, while 135,000-BTU units can heat over 3,000 square feet.
Q. Do kerosene heaters give off carbon monoxide?
Yes, carbon monoxide is a by-product of the combustion process. Generally speaking, these heaters produce levels considered safe, but users should have a functioning carbon monoxide detector when running a heater indoors.
Q. Is it safe to run a kerosene heater all night?
Kerosene heaters are not as safe as a furnace or boiler, but they could be the only heat source in a power outage. While these heaters may be considered safer than sleeping without heat in subzero temperatures, you should never leave a kerosene heater unattended.
Why Trust Bob Vila
Bob Vila has been America’s Handyman since 1979. As the host of beloved and groundbreaking TV series, including This Old House and Bob Vila’s Home Again, he popularized and became synonymous with “do it yourself” home improvement.
Over the course of his decades-long career, Bob Vila has helped millions of people build, renovate, repair, and live better each day—a tradition that continues today with expert yet accessible home advice. The Bob Vila team distills need-to-know information into project tutorials, maintenance guides, tool 101s, and more. These home and garden experts then thoroughly research, vet, and recommend products that support homeowners, renters, DIYers, and professionals in their to-do lists.
You may know about a few expensive mushroom varieties like truffles, but there are also some very rare and expensive mushroom varieties you may not have heard of.
This article will teach you about a dozen of the most expensive mushrooms in the world. You’ll learn how much each type costs and why they’re so expensive.
Why Are Some Mushrooms So Much More Expensive Than Others?
The most expensive mushrooms in the world only grow in the wild and are difficult or impossible for farmers to cultivate.
Since they can’t be mass-produced and only grow for a certain period of the year, they’re more scarce.
Varieties of fungi like truffles also grow under the ground, which makes them even harder to find, and therefore more costly (in time and money) to extract.
What Are the Most Expensive Mushrooms?
How many of these costly mushrooms have you heard of?
1. Kalahari Truffles
Cost: $4 per pound (£6.45 per kilogram)
Truffles have a reputation of being some of the most expensive types of fungi.
But though these truffles grown in the Kalahari Desert in Namibia, Africa may run slightly more expensive than your average grocery store button mushroom, they’re actually quite affordable.
Compared to the more popular white or black truffles, they have a more mild flavor and scent.
Their cheaper price is based on the fact that they grow in more sandy ground. They’re easy to find by looking for cracks in the sandy earth, so there’s no need to use truffle dogs or pigs to locate them.
2. Enoki Mushrooms
Cost: $8 per pound (£12.90 per kilogram)
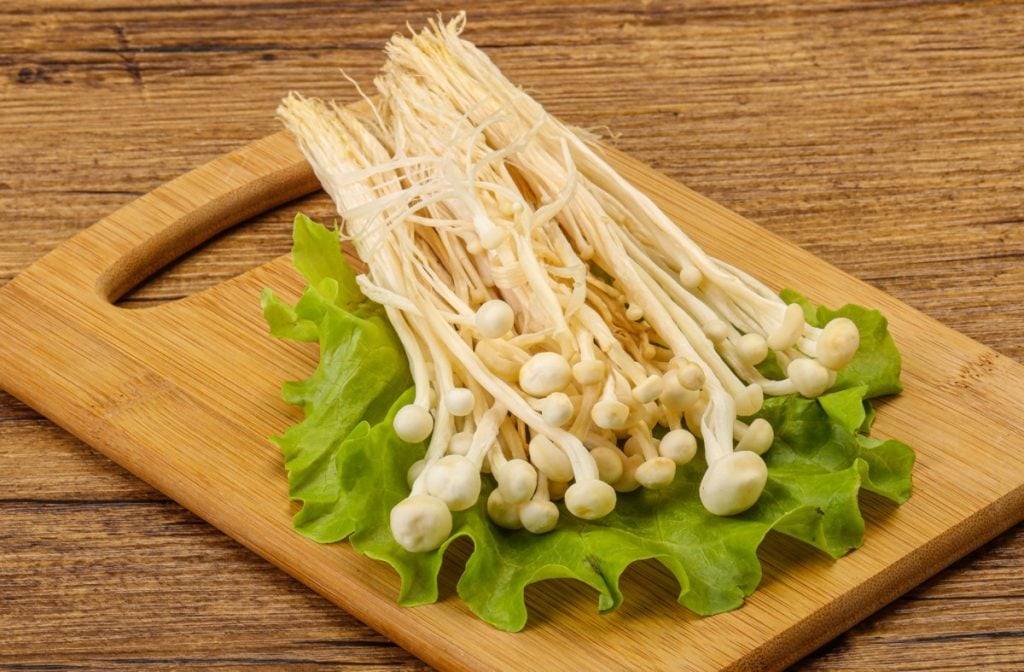
Enoki mushrooms are now widely available in many grocery stores in North America and Europe. However, they don’t look like most other types of mushrooms that you can buy.
They have long, thin white stems with very small caps. They also tend to grow in clumps.
These little mushrooms have a mild flavor and make a nice addition to stir-fries. As long as they’re not overcooked, they tend to retain a lot of crunch.
3. Oyster Mushrooms
Price: $5 to $15 per pound (£8 to £24 per kilogram)
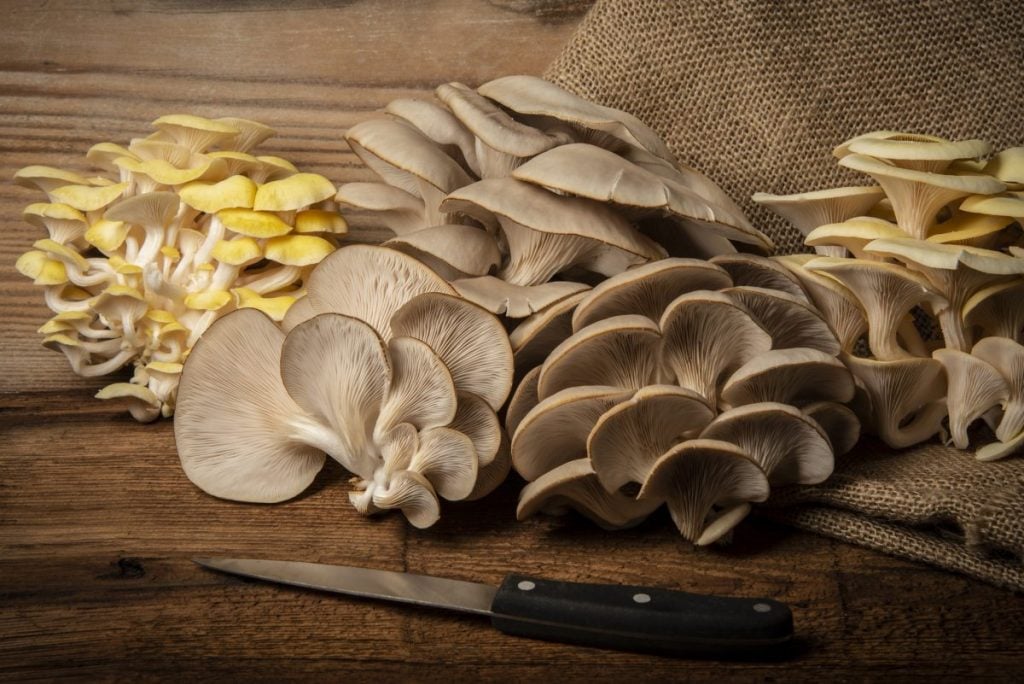
Oyster mushrooms are the second-most-common mushroom in North America and Europe.
They are exceeded in popularity only by the agaricus bisporus mushroom (which includes button mushrooms, cremini and portobello).
Oyster mushrooms are one of the easiest mushrooms to grow at home. Many mushroom farmers now grow them and they can even be grown from kits right on your kitchen counter.
Since they’re so easy to grow, they’re naturally the least expensive mushroom on our list.
These fungi are available in a wide range of colors including grey, white, pink, blue and others.
They’re best used fresh within a few days of harvesting, but they can also be dried.
Learn the easiest way to grow oyster mushrooms at home.
4. Lion’s Mane
Price: $10 per pound (£16 per kilogram)
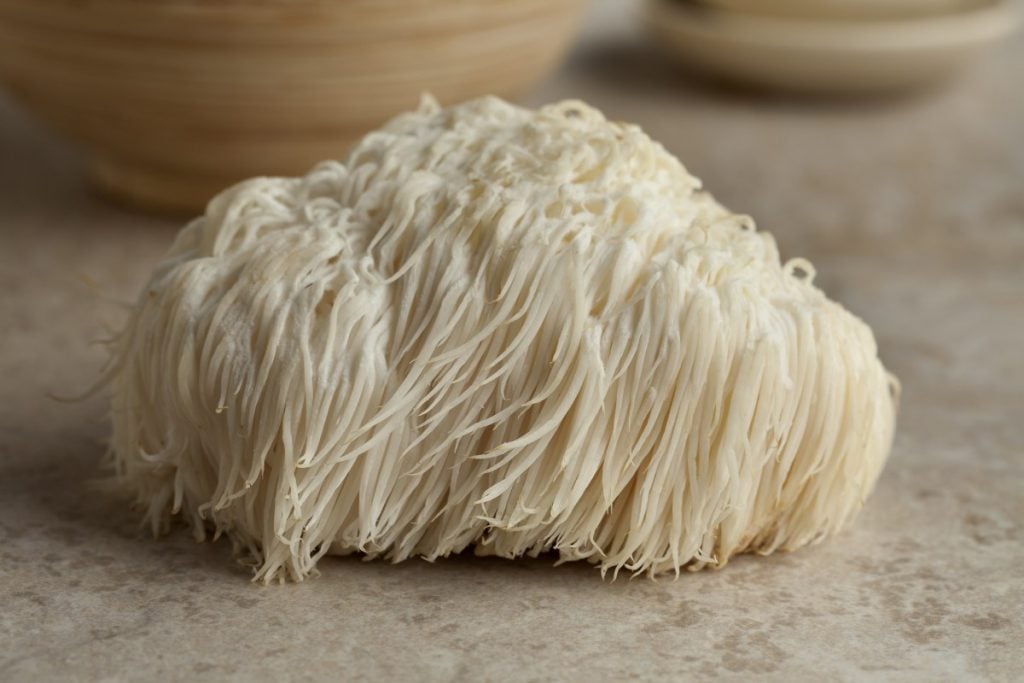
Lion’s mane is an interesting-looking mushroom with long, white spines. It looks a bit like a tiny mop, clump of hair or a little white hedgehog.
The flavor of lion’s mane is said to be similar to lobster or crab meat. You can eat these mushrooms raw but cooking lion’s mane enhances their flavor and texture.
Historically, lion’s mane was harvested from the wild. Now it’s fairly easy to cultivate in controlled environments.
Aside from being edible, lion’s mane is also used for its medicinal properties.
While lion’s mane sells for about $10 per pound when fresh, it can sell for significantly more when dried and powdered for use as a supplement.
Check out Growing Lion’s Mane Mushrooms: The Ultimate Guide if you’d like to try growing some for yourself.
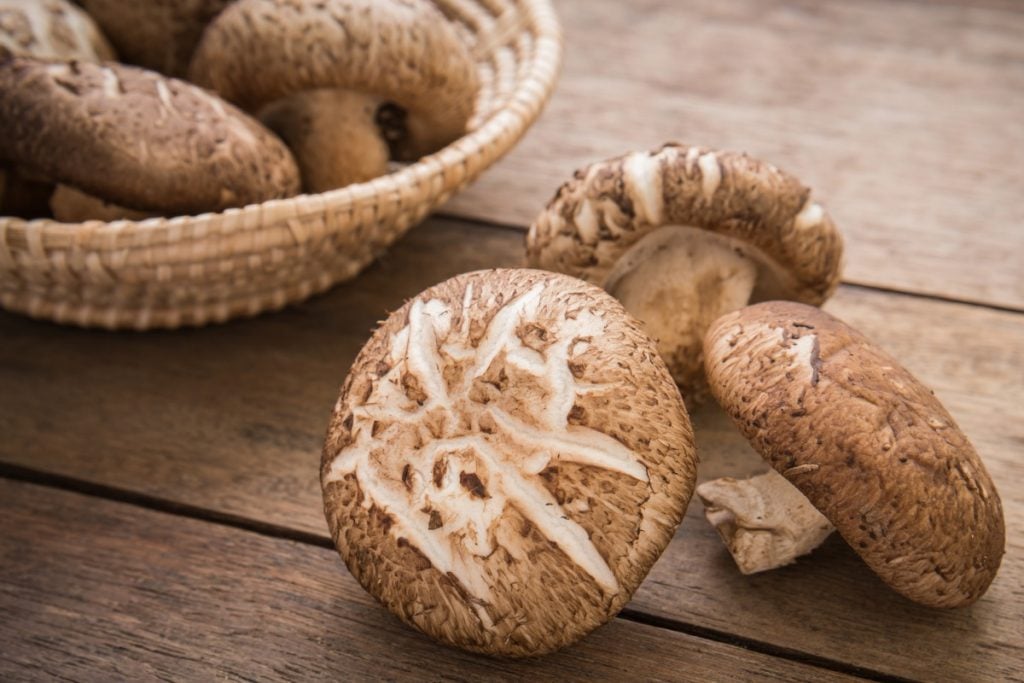
5. Shiitake Mushrooms
Price: $7 to $15 per pound (£11 to £24 per kilogram), fresh
Shiitakes have been the favorite variety of mushrooms in many Asian countries for a while. They’re now quite popular in the west as well.
These fungi have a firm texture and a meaty flavor, which makes them great as a meat alternative in vegetarian recipes.
Many supermarkets and grocery stores now carry fresh shiitake mushrooms. They can also be found dried in bulk as well.
Shiitake mushrooms can be fairly easily cultivated, either indoor under controlled conditions, or outdoor when grown on logs. So they’re less expensive than most varieties on this list.
Although shiitake is mostly grown as an edible mushroom, it’s considered to have some medicinal benefits as well.
If you’ve got some spare logs laying around, try growing some shiitake using our resource How To Grow Mushrooms On Logs: The Ultimate Guide
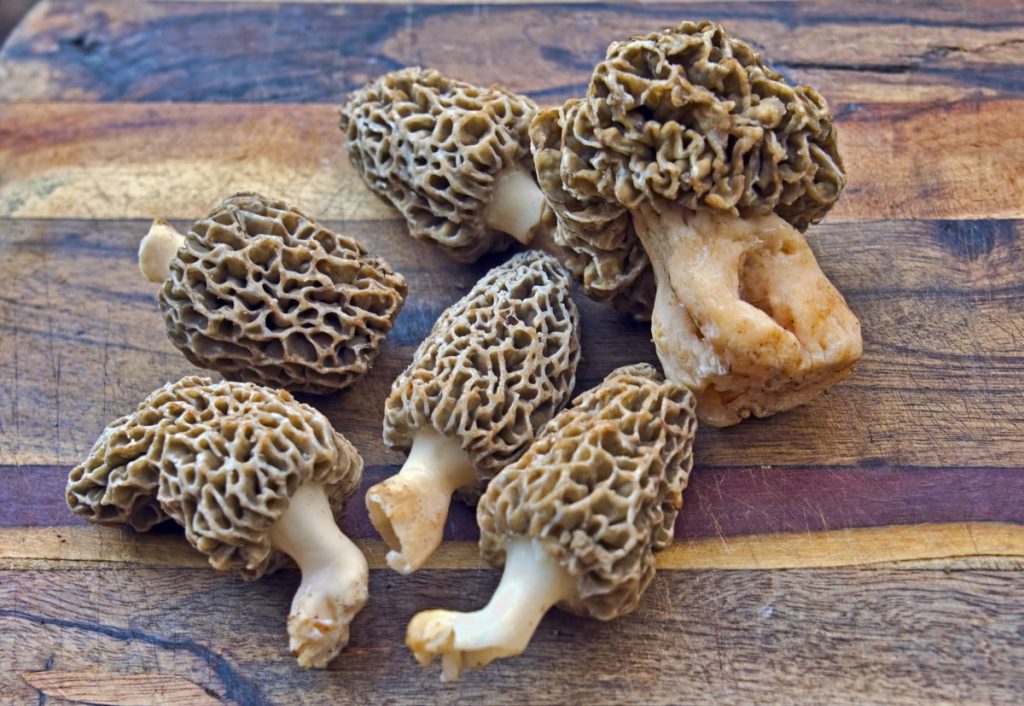
6. Morels
Price: $30 to $90 (£21 to £65) per pound when fresh, $250 (£180) per pound or more dried.
Morels are some of the most sought-after varieties of fungus by mushroom hunters.
Once a mushroom hunter locates an area where morels grow, they’ll tend to keep it secret for just their family and friends. Morels will continue to grow back in the same place year after year.
Morels are very difficult to cultivate and they’re only available fresh for a few months each year in the wild. So they tend to command a high price.
They’re one of the most expensive mushrooms in the USA
7. Porcini Mushrooms
Price: $50 to $70 per pound (£80 to 112 per kilogram), dried
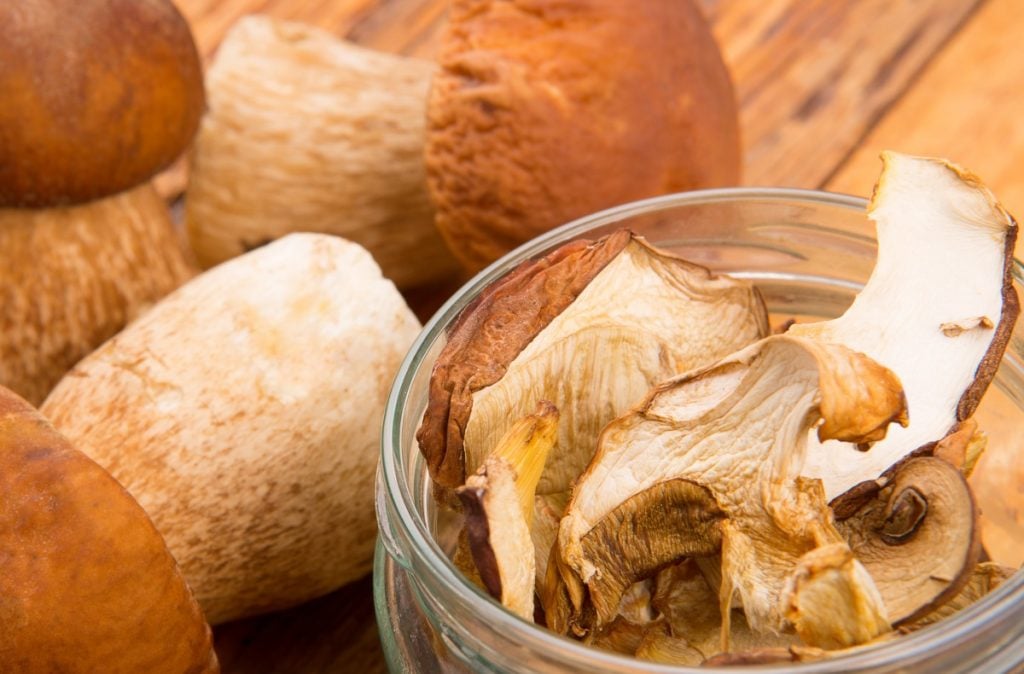
The porcini or king bolete mushroom is found in hardwood forests across Europe. They’re most common in Italy, although they can also be found in parts of North America as well.
You can recognize porcini mushrooms by their oversized caps and thick stems.
As with most expensive mushrooms, porcinis are difficult to cultivate.
So they’re harvested from the wild when they’re in season and then dried out to be sold around the world during the rest of the year.
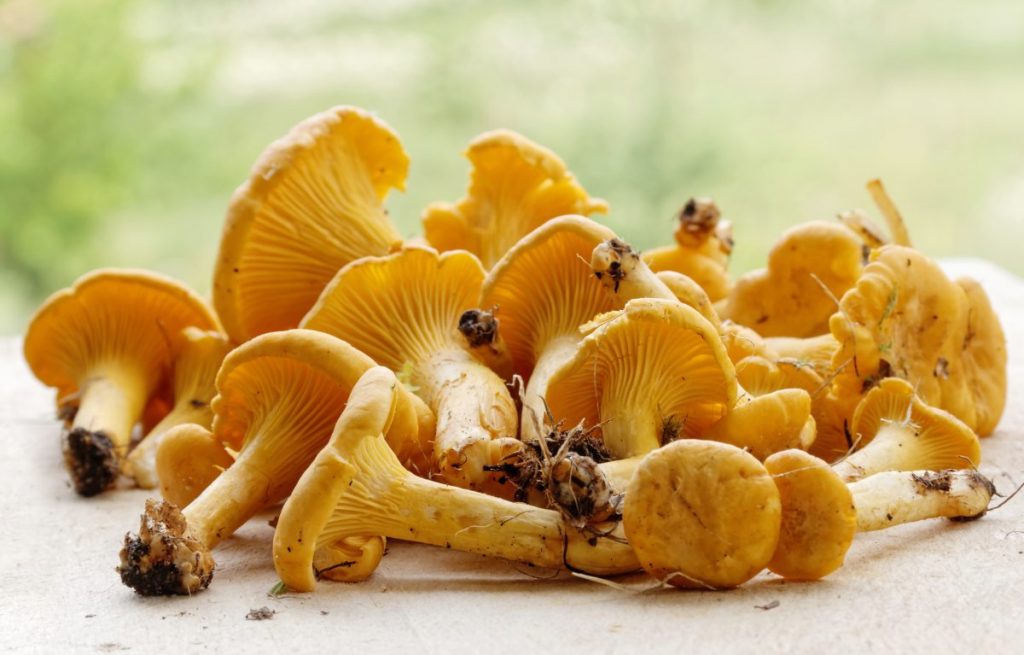
8. Chanterelles
Price: $200 per pound (£320 per kilogram), dried.
Among most mushroom hunters, chanterelles are second only to morels.
These golden-yellow mushrooms are distinct and fairly easy to spot, without many look-alikes. However, they can cause illness and discomfort when eaten raw and need to be cooked.
They tend to pop up on warm humid days after rainfall.
Like most expensive mushroom varieties, they’re very difficult to cultivate and the majority are harvested from the wild.
If you happen to get your hands on some tasty chanterelles, be sure to read 30 Of The Best Mushroom Recipe Ideas to make the most of them.
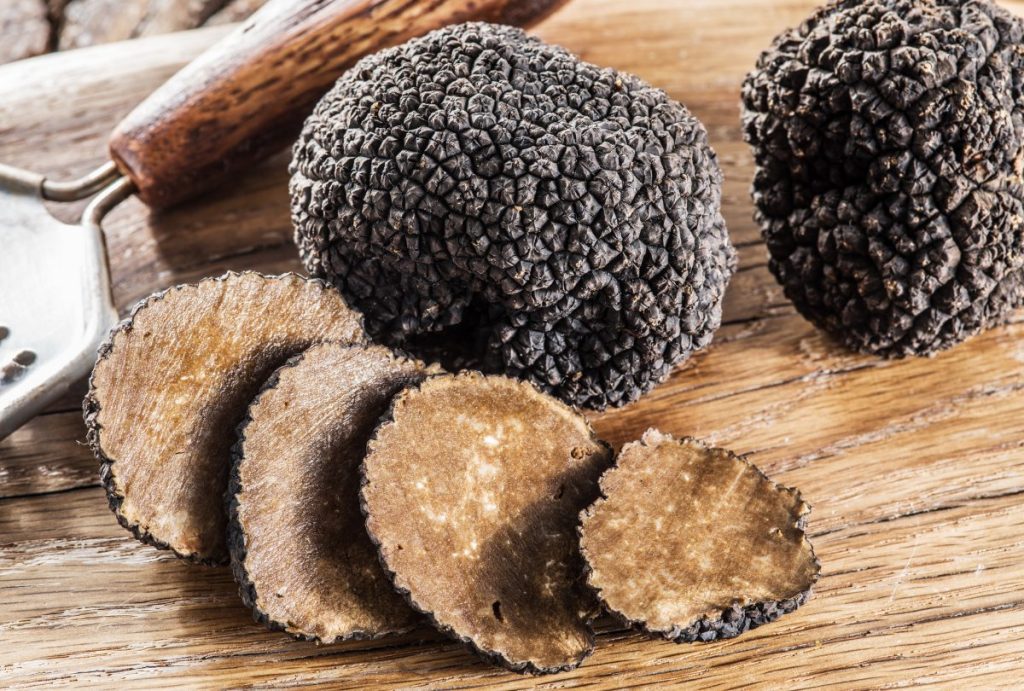
9. Black Truffles
Price: $800 per pound (£1290 per kilogram) fresh
Black truffles are the most well-known type of truffle. Even though they aren’t as expensive as white truffles, they still come with a hefty price tag.
Like their white counterparts, black truffles are mostly found in the wild using pigs and dogs.
Some American and Australian mushroom producers have attempted to grow black truffles with limited success.
Since these fungi tend to grow at the base of mature oak trees, it’s a time-consuming and expensive endeavor.
That also makes black truffles some of the most expensive mushrooms to grow.
Most black truffles are bought by chefs at high-end restaurants.
There is even a bit of a “black market” for these truffles. There are numerous fake “black truffle oil” products on the market that are actually made from synthetic chemicals, rather than fungi.
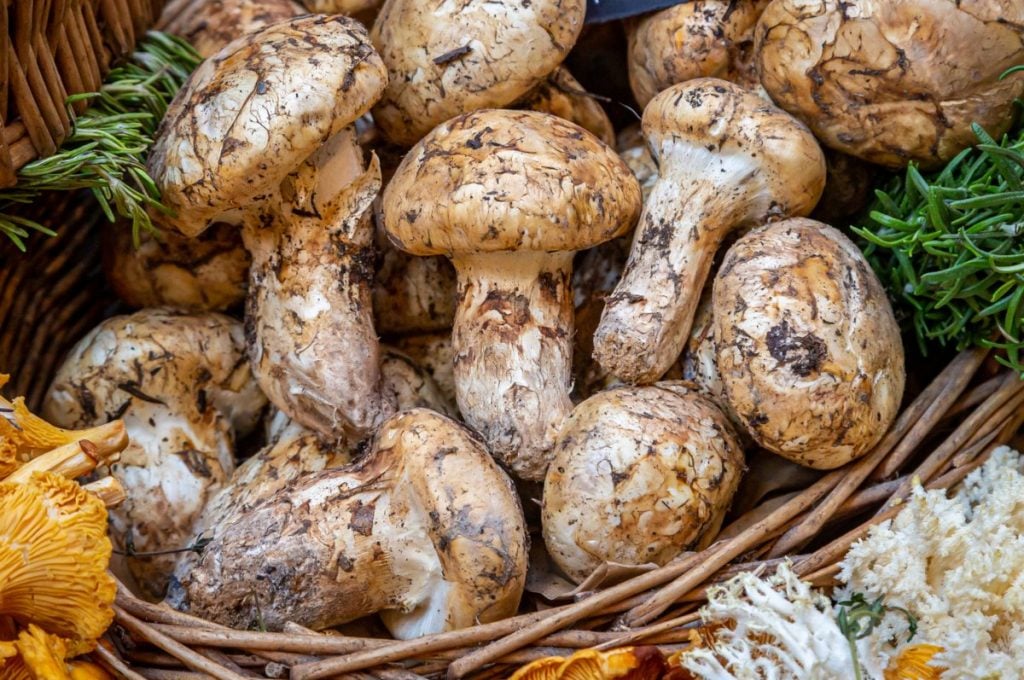
10. Matsutake Mushrooms
Price: $1,000 to $2,000 per pound (£1600 to £3200 per kilogram)
Matsutake mushrooms are native to Japan. They look a bit similar to shiitake mushrooms, with shaggy brown caps. However, they have longer stems.
This Japanese mushroom has a distinct spicy smell and taste.
Like with products such as green tea, there are varying degrees of quality when it comes to matsutake mushrooms.
The best-quality mushrooms at the beginning of the harvest season command the highest prices.
Within Japan, you may be able to find them toward the end of the season for as little as $2 per pound, though.
For importing matsutake mushrooms into Europe or North America, the average cost is about $90 (£65) per kilogram.
The matsutake harvest has been drastically reduced over the past 50 years due to a pine-killing pest that affects the trees that matsutake grows around.
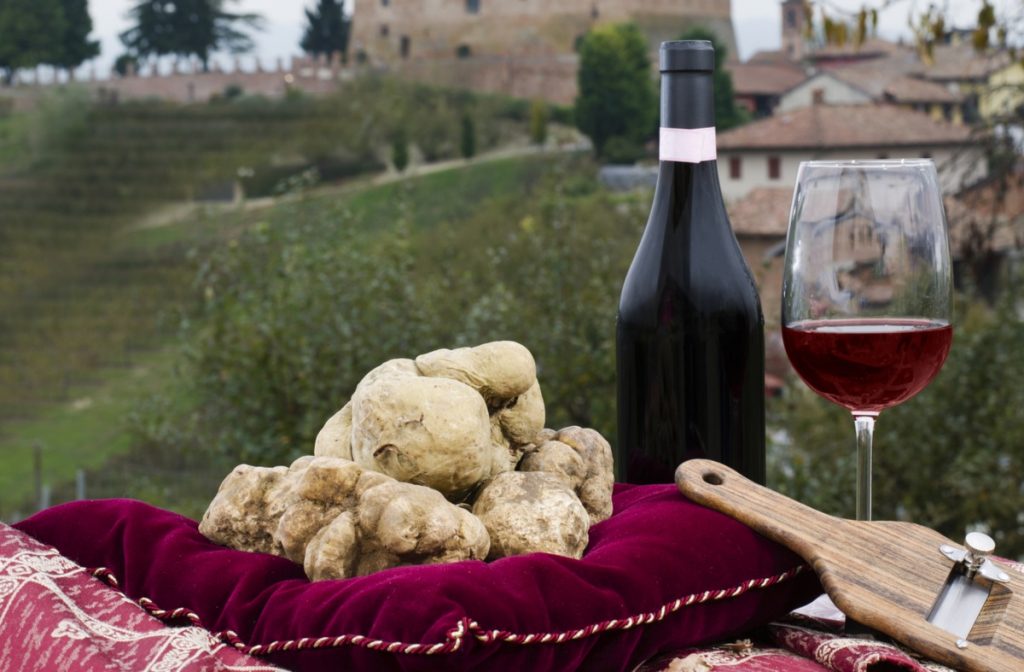
11. European White Truffles
Price: Anywhere from $1,000 to $4,000 per pound (£1600 to £6445 per kilogram), depending on the harvest that year.
White truffles are the rarest and most expensive of all the truffle varieties.
Although white truffles are actually quite common across Europe, they’re notoriously hard to find. Truffle hunters will often employ trained truffle dogs or pigs to help locate these expensive fungi.
So far, no farmer has successfully cultivated white truffles. That’s why the price still remains so high.
What Is the Most Expensive Mushroom in the World?
So what’s the most expensive mushroom in the world? The winner is…
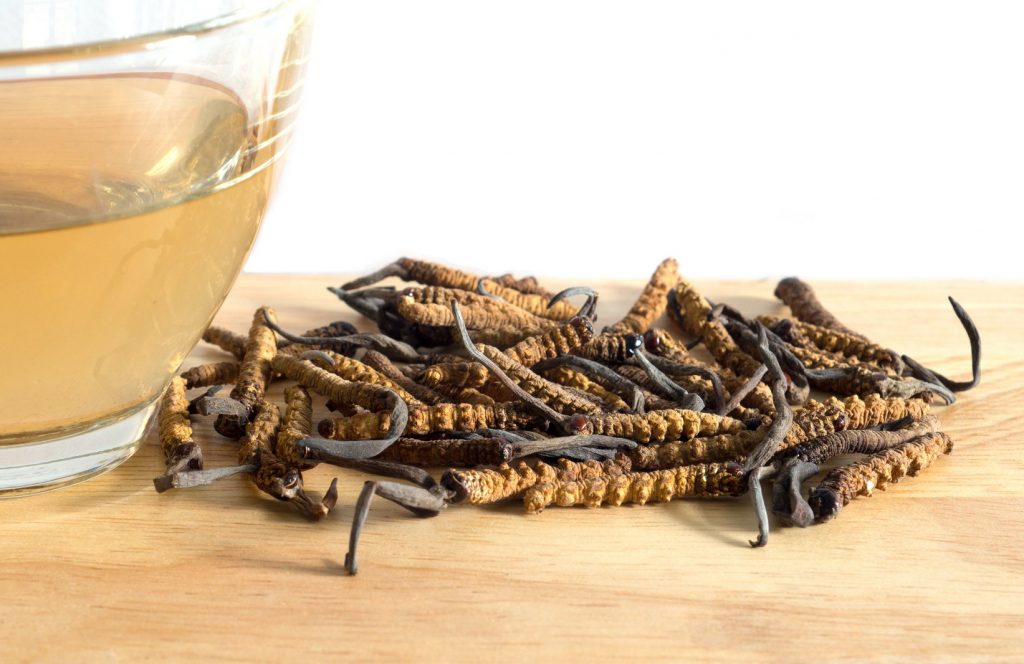
The yartsa gunbu mushroom (Cordyceps sinensis).
Price: $50,000 per pound (£80,500 per kilogram), or $2,000 for a single ounce.
If you clicked this link while wondering how to grow the most expensive mushrooms in the world, things are about to get a little weird.
This mushroom is also known as the caterpillar fungus and for good reason. It infects the bodies of a specific species of caterpillars.
The fungus kills its host and then grows out of the caterpillar.
As you can imagine, these little mushroom fungi are hard to locate in the wild.
The caterpillars typically bury themselves a few inches into the ground before they die.
These mushrooms have also never been cultivated in a controlled environment.
Yartsa gunbu or cordyceps mushrooms are believed to be an aphrodisiac. It’s claimed to have other medicinal benefits as well.
Many people also simply eat them as a status symbol because of their rarity and cost.
Want to try growing something a bit more straightforward? See our article The five Easiest Mushrooms to Grow.
What Is the Rarest Mushroom?
The yartsa gunbu also wins the prize for rarest mushroom.
It’s not just that these mushrooms are only found in the wild growing out of caterpillars. They also only grow in a specific area as well.
These exceedingly rare and expensive mushrooms are mostly only found around the Himalayas, at altitudes from 3,000 to 5,000 meters (9,000 to 16,000 feet) above sea level.
Is There Any Cheaper Alternative?
Very few people are willing to pay $50,000 per pound (£80,500 per kilogram) for some mushrooms that grow out of caterpillars.
Luckily, there’s a much cheaper option.
While cordyceps sinensis is extremely rare and needs to be harvested from the wild, it does have a close relative that offers most of the same benefits.
Cordyceps militaris can be easily cultivated on much more conventional growing mediums (rice and soy) without the need to sacrifice insects to get it.
That means you can buy bottles of cordyceps militaris capsules for about $20 (£14.40), when the same amount of cordyceps sinensis would cost over $1,000 (£720).
Final Thoughts
There are some truly rare mushrooms out there, including some that cost thousands of dollars or pounds per serving.
What makes a particular type of mushroom expensive is usually an inability to cultivate it. Wild mushrooms only grow during a certain part of the year and they’re difficult to find.
Growing mushrooms doesn’t need to be expensive though.
If you’d like to try growing oyster mushrooms, our GroCycle Kits allow you togrow your own delicious mushrooms at home in just 14 days. They also make a great gift.
Or to grow them from scractch, check out ourmushroom growing courses.
Whether you just want to grow a small amount of mushrooms at home or start a Low Tech Mushroom Farming business, we offer something for everyone.
It’s exciting to buy your very first air rifle. However, once you go out there and start hitting targets that are further away from where you are, you’d realize that it’s not enough – you need to get the best air rifle scope!
Unfortunately, choosing the best one isn’t easy. With so many options, you can easily feel overwhelmed and confused. In the end, you may even pick the wrong scope and that’s just a waste of money.
To help make the process easier, here are seven things to look for when choosing a rifle scope:
1. The Right Type of Scope
For you to find the perfect air scope rifle, you need to focus on picking the right one not just for your gun but for your needs too. In general, there are two main types you can choose from: variable and fix.
A fixed air rifle scope is set to just one magnification. Because of that, you can’t make any adjustments.
Most scopes under this type have low magnification. Usually, they’re at 4×32.
Although fixed air rifle scopes don’t have great magnification levels, they have a large field of view. This makes them highly recommended for close-range shooting.
A variable air rifle scope, on the other hand, lets you adjust the magnification range. This allows you to get a larger field of view when you’re target shooting and zoom far enough to hit targets in the distance.
2. Magnification
When you’re considering magnification, you have to understand how much your target can be magnified when you compare it with how it looks without your scope.
Consider this:
If your scope has 3x magnification, it means that it’ll let you see targets as though they are four times closer.
If you are using your rifle to hunt a target that’s about 100 yards away from you, the scope can make it appear as if it’s only 25 yards away.
3. Reticle
This feature allows you to aim at your targets with your scope. It’s also a big help when it comes to estimating the wind.
Some scopes have the standard crosshair which offers one of the best accuracies. They are highly recommended for target shooters. Other scopes have the mil-dot which is good if you’re hunting in dark environments.
4. Lenses
When it comes to picking lenses, there are two things you need to think about.
The diameter of the objective lens affects the amount of light that’s allowed in.
The bigger the lens in diameter, the heavier the overall weight of the scope gets.
Another thing you have to consider when picking scopes is the coating of the lens. Since glass has this ability to reflect light, you’d want coated lenses.
Also, make sure that it’s a high-quality coating so you can enjoy less glare and better light transmission.
5. Construction
Obviously, when looking for the best air rifle scope, you’d want something that can keep up with you.
Scopes vary in the diameter of their main tubes. You can get one from 25mm to 34 mm, depending on the brand you’re considering.
When you buy a scope with a bigger tube, you’ll have more space for its interior compartments. And because of that, you’ll get a better adjustment range as well. This is a big factor you need to consider when you’re doing long-distance targeting.
6. Eye-relief
The last thing you want to happen is to get yourself injured while firing your gun. While hunting and target shooting are exciting activities, getting a bruised eye isn’t.
To avoid that, consider investing in an air scope with higher-eye relief. The standard is around four inches while scopes of lesser quality can give you around 3 to 3.5 inches.
7. Turrets and Adjustments
When you’re hunting, you want everything to be all set. The last thing you’d want is to have turrets that fail halfway through your activity.
Turrets’ primary function is adjusting windage and elevation. The first one refers to the horizontal adjustment while the latter refers to the vertical adjustment of your scope.
Usually, these knobs are located on the right and top parts of your scope. You’ll find non-tactical models advertising turrets at 1/4” or 1/8”.
In Conclusion
The factors mentioned above can help make the process of picking the best air rifle scope easier and less stressful for you. However, ultimately, the best one will still depend on what you are planning on using your scope for.
If you’re shooting just within 100 yards, you can go with a scope with a magnification of 1x to 4x. If you’re aiming for something at more than 200 yards, it’s a good idea to go for a scope with 9x magnification.
For the other factors, consider picking based on what you need and what fits your air rifle.
The stock shoulder is removable so people of all sizes can comfortably shoot the Crosman Comrade AK-177.
Furthermore, the magazine can be removed, too: you can use it as a storage compartment for BBs or extra CO2 cartridges.
Ammo
The Crosman Comrade uses BBs as its only source of ammunition.
BBs are dirt cheap: you can buy thousands of rounds of premium BBs for just a few bucks to shoot all week long.
Sight
The front sight is fixed whereas the rear sight is adjustable for windage (allowing you to adjust the sight left and right)
And for elevation (allowing you to adjust the sight up and down).
In case you want to put a scope or red dot on this gun, the rail is designed in the Picatinny style to help you do just that.
Compared to a weaver rail, a Picatinny rail shares plenty of common characteristics but there is a series of ridges located in precise intervals along the rail.
This type of rail gives you lots of benefits:
First, you have more mounting options and you can swap scopes from one gun to another, using different scopes in one air rifle.
And yes, no more worrying about tube length, eye relief, etc. since you can place a scope ring at any point you want.
Pressurized air is also not affected by temperature changes like CO2 is.
These rifles are powerful, consistent, and accurate.
The gas piston air rifles have attempted to reduce the recoil effect by eliminating the double hit and spring torque associated with steel spring air rifles.
However, the recoil effect is still a little bit greater than that of PCP air rifles.
For the variable pump air rifles, you have to master the cocking action since the power of the shot depends on how strong your pump is.
This is not the case with the PCPs – once filled with air to the maximum fill pressure, all you have to do is pull the trigger, and the pellet fires.
However, a PCP air rifle tends to be more expensive than a CO2 or spring-powered air rifle, and more expensive to refill too .
With high-end features at an entry-level price, the Avenger sets a new standard for similarly priced PCPs to live up to.
Featuring an externally adjustable regulator and externally adjustable hammer spring, the Avenger provides the user with a seemingly infinite amount of performance adjustability never seen at this price point.
A smooth side lever action allows for quick follow-up shots, and the fully shrouded barrel keeps your shooting quiet. Available in .177, .22 and .25 caliber.
Features
Pre-Charged Pneumatic
Sidelever Cocking
Synthetic Stock
Externally Adjustable Regulator (Up to 3,000 PSI / 210 BAR)
Easily accessible Hammer Spring Adjustment Screw
Two-Stage Adjustable Trigger
Max Fill Pressure: 4,351 PSI (300 BAR)
Fully Shrouded Barrel
Picatinny Rail on Fore-end of stock
Holes in front and rear of stock for mounting swivel studs for a sling
Dual Gauges – Reg Pressure (RH Side) and Fill Pressure (LH Side)
Its weight of 5.9 lbs is simply the best as you try your hand on PCP air rifles.
Even young shooters can handle this rifle with great prowess.
In addition to the lightweight, the Hatsan Flash features the popular Picatinny rail which allows you to mount the rifle on a bipod .
This will guarantee you much-needed stability when shooting.
Hatsan did not take any chances regarding the safety of the air rifle.
With the 2-stage Quattro trigger fitted on the Hatsan Flash, there are very little or no chances of misfiring the rifle.
Also of importance to the beginner is the Dovetail mount for fitting a compatible scope.
With this, you can easily master the basics of sighting and be the pro you desire within a few days of practice.
Accuracy
Calibers
Pellets
Distances
Groups
.22
JSB Match Diabolo Hades 15.89 Gr
45 yards
1/2"
.22
Air Arms Diabolo Field Heavy 18 Gr
30 yards
one hole
.22
JSB Diabolo Exact Jumbo Express 14.35 gr
50 yards
0.6"
.22
JSB Diabolo Exact Jumbo 15.89 Gr
25 yards
3/4"
.22
Beeman Crow Magnum 18.21 Gr
20 yards
0.317"
.22
JSB Diabolo Exact Jumbo Heavy 18.13 gr
40 yards
5/8"
.25
JSB Exact King Heavy 33.95 Gr
50 yards
quarter size
.22
JSB Exact Jumbo 15.89 gr
30 yards
dime size
.25
JSB Exact King Heavy 33.95 Gr
35 yards
0.9"
.25
H&N Baracuda Hunter 27.47 Gr
50 yards
quarter size
.22
H&N Baracuda 21.14 gr
10 yards
one hole
.25
JSB Match Diabolo Exact 25.39 gr
20 yards
one hole
.25
JSB Match Diabolo Exact 25.39 gr
37 yards
3/4"
.22
H&N Baracuda 21.14 gr
45 yards
1.15"
.22
Crosman Premier Domed 14.3 gr
45 yards
1"
.22
JSB Exact Jumbo Domed 15.89 gr
45 yards
5/8"
.25
JSB Exact King 25.39 Gr
50 yards
0.38"
.25
JSB Exact King Heavy MKII 33.95gr
50 yards
0.65"
.25
H&N Baracuda Hunter 27.47 gr
50 yards
0.78"
.25
JSB Exact King 25.39 Gr
100 yards
1.97"
Chrony tests
Calibers
Pellets
FPS
FPE
.25
JSB Match Diabolo Exact King 25.39 Gr
854
41.13
.22
Crosman Premier Hollow Point 14.3 Gr
960
29.27
.25
H&N Baracuda Hunter 27.47 Gr
815
40.53
.25
JSB Match Diabolo Exact King 25.39 Gr
837
39.51
.25
H&N Grizzle 31gr
763
40.08
.25
H&N Field Target Trophy 20.06 gr
877
34.27
.22
Crosman Premier 14.3 Gr
970
29.88
.22
JSB Diabolo Exact Jumbo 15.89 Gr
902
28.71
.177
Crosman Premier Ultra Magnum 10.5 gr
918
19.65
.177
JSB Exact Monster Diablo 13.43 gr
845
21.3
.25
H&N Baracuda Hunter 27.47gr
825
41.53
.25
JSB Exact King Heavy MKII 33.95gr
760
43.55
.177
JSB Exact Monster 13.4 Gr
820
20.01
.22
JSB Exact Jumbo Domed 15.89 gr
925
30.2
.25
JSB Exact King 25.39 Gr
691
26.93
.25
JSB Exact King Heavy MKII 33.95gr
627
29.64
.25
H&N Baracuda Hunter 27.47 gr
787
37.79
Coming to its power, the Hassan Flash will shoot pellets at a speed of 1250 fps for the .177 caliber, 1120 fps for the .22 caliber, and 900 fps for the .25 caliber.
In terms of muzzle energy, the air rifle manages up to 29, 38, and 40 FPE for the .177, .22, and .25 caliber respectively.
Such energy is enough to bring down the fox-sized games and other smaller games, including the rabbit, squirrel, raccoon, birds, and possum.
What’s more, this air rifle is relatively quiet, thanks to Hatsan’s QE
Suppression technology, so you won’t scare away every other animal before taking them out.
Fill the 165 cc air cylinder to a maximum of 2900 psi and you are good to go with this best starter PCP air rifle.
Features
Precharged Pneumatic
Bolt action
Skeletonized synthetic stock
QuietEnergy fully shrouded barrel
Includes 2 indexing magazines and single-shot tray
Includes quick-fill nozzle
Precision rifled and choked barrel
Anti-knock system prevents gas wastage when rifle is knocked or bounced
Combo Picatinny and 11mm dovetail rail
Quattro Trigger: 2-stage fully-adjustable match trigger
Fixed 165cc air cylinder, 200 BAR, 2,900 psi
Recommended uses:
Target shooting/plinking
Pest control/small game hunting: pigeons, starlings, grackles, squirrels, rabbits, raccoons, groundhogs, snakes, armadillos
Pros and Cons
Pros
Cons
Great entry level rifle
Lightweight and portable (6 lbs without rings and scope)
This is one of the best-rated PCP air rifles at $500.
Features:
10-shot repeater with auto-indexing feature
Uses compressed air: 2,000 to 3,000 psi (make adjustments as shown in the owner’s manual)
Can be adjusted for different velocities
Internal shroud makes this a VERY quiet gun
Choked barrel delivers superior accuracy
2-stage adjustable match trigger…and the trigger is metal!
Raised aluminum breech for easier loading of circular magazine
11mm dovetail on original/ Lothar Walther Barrels include a Weaver/Picatinny Rail
Turkish Walnut stock with adjustable comb
Reversible bolt — switch from right to left side (with our special service)
Built-in air pressure gauge (manometer)
215cc air reservoir
42.8″ long*
8.2 lbs.*
Air reservoir ends with a male quick-disconnect Foster fitting for fast refills (requires a female Foster quick-disconnect adapter to fill from a scuba tank or hand pump)
Includes one magazine and sling swivel studs
Recommended uses:
Target shooting/plinking
Pest control/small game hunting: squirrels, rabbits, crows, starlings, groundhogs, raccoons, tree rats.
6. Best regulated PCP air rifle: Umarex Gauntlet 2
It is worth pointing out that most PCP air rifles do not operate at the peak value of pressure of the gas tanks.
If the capacity of the gas tank is 3000 psi, the rifle may work best at around 2000 psi.
This means that the rifle will fire the first set of shots at varying velocities until the optimum pressure is reached.
With a regulated air rifle, the pressure of the reservoir is lowered before it gets to the valve.
This way, the air rifle works at the ideal pressure right after refill.
You can therefore fire shots at a relatively constant velocity.
The regulator also increases the capacity of the gas tank to some level.
This increases the number of shots you can fire before having to refill the gas tank.
Regulators can be added to PCP air rifles, but again not all of them.
The Umarex Gauntlet 2 comes specifically regulated by the manufacturer.
The manufacturer once claimed that their Gauntlet model has similar capabilities to other rifles over $1000.
At a retail price of less than $300, you may doubt their claim, but let the features speak for themselves.
The 3000 psi capacity gas tank shoots up to 70 pellets in .177 caliber, and 60 shots for the .22 caliber.
Using the JSB Jumbo Exact 14.35 grain pellets, the Gauntlet air rifle achieves muzzle velocities of up to 807 fps, with an energy outcome of about 21 FPE.
This is certainly enough power in your hands for simple target shooting.
Lighter pellets can achieve speeds of up to 1000 fps, but with reduced energy.
Tests with the Umarex Gauntlet 2 reveal great accuracy up to 80 yards. Quite a great value for money.
Introducing the FX Airguns Impact M4 PCP Air Rifle – a cutting-edge air gun manufactured by Swedish experts.
The Impact M4 breaks through industry boundaries, boasting unmatched precision and performance like no other.
Perfect for precision shooters or anyone looking to improve their rifle’s accuracy, the Impact M4 contains dual Adjustable Match Precision (AMP) regulators for effortless adjustment based on your shooting needs.
Its external micro- and macro-hammer spring tension adjustments allow you to customize the optimal setting for each round of shots you take.
For maximum control, try out the valve control adjustment system which is externally accessible so you can always monitor the internal pressure systems and make tweaks whenever needed.
Furthermore, the new FX Airguns Impact M4 PCP air rifle is the latest breakthrough in airgun technology.
The new dual regulator system pre-reduces air pressure, providing superior regulated power and consistency with fewer standard deviations from shot to shot – a must-have for any serious shooter.
In addition, the unique Power Plenum 720 offers an increased diameter and 72cc volume for efficient and powerful projectiles every time.
Combined with the rifle’s specially designed porting and valving system, the FX Airguns Impact M4 is perfect for precision performance in competition or out on the field. With its maximum output pressure of 250 bar, this top-of-the-line rifle ensures the accuracy you need when it matters most.
The FX Impact M4 comes in 5 different calibers available: .177, .22, .25, .30, .35 , with Black/Bronze colors.
Accuracy
Calibers
Pellets
Distances
Groups
.177
JSB Match Diabolo Exact 8.4 Gr
50 yards
3/4"
.30
Slugs 67 Gr
50 yards
3/4"
.30
Slugs 67 Gr
100 yards
1 1/2"
.30
JSB Match Diabolo Hades 44.75 gr
50 yards
.557"
.25
JSB King Heavy Mark II 33.95 gr
100 yards
1"
.30
Nielson Slug 47 gr.
50 yards
one hole
.22
JSB Diabolo Exact Jumbo Heavy 18.13 gr
50 yards
one hole
.30
JSB Diabolo Exact 50.15 Gr
60 yards
one hole
.25
JSB Match Diabolo Hades 26.54gr
35 yards
one hole
.35
JSB Match Diabolo Exact 81.02 Gr
100 yards
1"
.22
JSB Diabolo Exact Jumbo Heavy 18.13 gr
95 yards
3/4"
.177
NSA Slugs 12.5 gr
50 yards
nickel size
.22
JSB Match Diabolo Exact Jumbo Heavy 18.13gr
50 yards
dime size
.25
JSB Exact King 25.39gr
50 yards
3/4"
.22
JSB Exact Jumbo 15.89gr
50 yards
1/2"
.25
JSB Exact King Diabolo 25.39gr
50 yards
0.37"
.25
Air Arms Diabolo Field 25.4gr
50 yards
0.47"
.25
JSB Diabolo King Heavy MKII 33.95gr
50 yards
0.71"
.25
JSB Exact King Diabolo 25.39gr
100 yards
1.34"
.30
JSB Exact 44.75 gr
50 yards
0.557"
.177
NSA Slugs 12.5 gr
50 yards
Nickel-size
.25
JSB King Heavy Mark II 33.95 gr
100 yards
1.5"
.30
JTS Dead Center 45.06 gr
45 yards
5/8"
.30
FX Hybrid Slugs 44.5 gr
45 yards
5/8"
.30
H&N Slug HP II 50 gr
45 yards
3/4"
.30
Zan Projectile 45.5 gr
45 yards
3/8"
Chrony tests
Calibers
Pellets
FPS
FPE
.35
JSB Match Diabolo Exact 81.02 Gr
845
128.49
.30
JSB Match Diabolo Hades 44.75 gr
870
75.23
.177
JSB Exact Heavy 10.34g
900
18.6
.25
JSB Diabolo Exact King Heavy 33.95 gr
875
57.73
.35
JSB Match Diabolo Exact 81.02 Gr
915
150.66
.35
JSB Match Diabolo Exact 81.02 Gr
877
138.4
.22
JSB Diabolo Exact Jumbo Heavy 18.13 gr
940
35.58
.177
NSA 12.5 gr
977
26.5
.22
JSB Diabolo Exact Jumbo 15.89 gr
940
31.18
.22
JSB Jumbo Express 14.35gr
1003
32.06
.22
JSB Jumbo Heavies 18.13gr
863
29.99
.25
JSB Exact King 25.4 gr
893
44.99
.25
JSB King Heavies MKII 33.95gr
849
54.35
.30
JSB Exact 44.75 gr
829
68.31
.25
Air Arms Diabolo Field 25.4gr
938
49.64
.25
JSB Exact King Diabolo 25.39gr
907
46.39
.25
Air Arms Diabolo Field 25.4gr
897
45.39
.25
JSB Diabolo King Heavy MKII 33.95gr
816
50.21
.25
JSB Exact King 25.39 Gr
1100
68.23
.30
JSB Exact 44.75 gr
675
45.29
.177
NSA Slugs 12.5 gr
977
26.5
.25
JSB King Heavy Mark II 33.95
748
42.19
.22
JSB Exact Jumbo Diablo 15.89 gr
940
31.18
.30
Zan Projectile 45.5 gr
813
66.8
Recommended uses:
Pest control and Small/medium/large game hunting: coyotes, iguanas, groundhogs, rabbits, squirrels, gooses, woodchucks, prairie dogs.
One of the most common questions we get at M.O.R.R. is, “What is the best ham radio to get?”. Which is like answering the question from your tailor of whether you dress to the left or to the right. (Btw, the correct answer is “Yes”) There are literally hundreds of awesome ham radios on the market that will do long range communications extremely well.
The big players in the radio industry are Icom, Yaesu, Kenwood, Alinco, and now Baofeng. Each company will have ham radios very similar in functionality to each other, but with slight stylistic differences. What you get to figure out is what functionalities do you want in your ham radio.
Chances are, you are just starting into ham radio and you have no clue what possibilities are even out there. So, we will help you narrow it down. We are going to go over such things as what you are doing with the ham radio, budgets, functionalities, and, in Part 2, some great ham radios that we have found work well to get you going.
Step 1: What is your Ham Radio Purpose?
First off, you need to ask yourself, “What am I going to be using the ham radio for?”. Are you going to be hiking and camping? So you may need something portable, preferably with an antenna already built into it like an HT (Handie Talkie! Think of a walkie talkie… but a little more complicated).
Maybe you are going to be backpacking away from a vehicle. So, you may want something lightweight, weather proof, and a little more power since you might be in some more remote locations.
Do you want something to install in your vehicle? Do you volunteer with a Search and Rescue team? Maybe you want something to put in your house so you can monitor nearby ham radio repeaters or trails? All of these things are going to impact what ham radio you ultimately choose. So figure out what purpose you are trying to fill before moving on to the next step.
Step 2: What Functionalities Are You Looking For In Your Ham Radio?
Ham Radio – Bands
One of the great things about ham radio as a hobby, is that there is very little oversight. Hobbyists are encouraged to dream up and create whatever they can come up with. This means that some pretty cool features make their way into ham radios sold to the mass public.
Starting at the basic things to look for, you will want to look at what band(s) the radio will operate on. Does it only operate on 2meter? Does it only operate on 70cm? Does it operate on 2m and 70cm? Maybe 3 bands? The best way to figure out your needs is figure out what ham radio repeaters are in the area that you get lost in the most.
On the left coast, 2meter repeaters are everywhere, but there are still some areas that are only covered by 70cm. On the east coast, there are more options of ham radio repeaters. The 1.25m and 6m bands are becoming more popular for backwoods adventures. (A Band is just a section of radio spectrum that tells you what frequency range the radio can operate on)
Ham Radio – Dual VFO
Having a “Dual Band” radio will go a long way to ensure that you can hit a ham radio repeater in an emergency situation. However, do not confuse “Dual Band” with “Dual VFO”. Dual VFO means that a ham radio can listen to and monitor 2 different frequencies at one time. All Dual VFO radios are Dual Band, but not all Dual Band radios are Dual VFO. Just because you can operate on two different bands, doesn’t necessarily mean you can operate on 2 different bands simultaneously.
As people who get lost regularly, we highly recommend getting a Dual VFO Ham Radio such as the Alinco DJ 500T, TYT TH-7800 Mobile Ham Radio, or the Icom IC2730A Mobile Ham Radio. Having the ability to monitor 2 frequencies simultaneously will allow you to monitor a repeater and talk to your buddies on simplex at the same time. Or listen to 2 separate ham repeaters at one time for when someone calls in.
Ham Radio – Power
How much power does the radio operate at? Most ham radio handhelds will transmit around 5 watts of power. Most mobile ham radios will operate around 50 watts of power. Most home ham radios (or base ham radios) will operate around 100 watts of power. You can find some bulletproof mobile ham radios that operate at more than 50 watts, but they will generally only be single banded like the Yaesu 3200 or Kenwood TM-281A.
You can also find a couple of ham radio handhelds out there, like the Baofeng BF-8HP 8W that do more than 5watts of power, but then you start sacrificing battery life and will need to carry extra batteries. Which, may be worth it if you are backpacking and need the extra range of more power.
Ham Radio – Crossband Repeat
One of the more useful ham radio features for the backwoods adventurer, is crossband repeat. Crossband Repeat allows you to turn your mobile ham radio into a mobile repeater! This is awesome for hiking and camping adventures. Or if you help out running communications for a bike race, or race of some sort.
A regular ham radio repeater will take your incoming signal and boost it out from a higher elevation, at a higher power. This effectively increases the range of your signal by as much as 300 miles! Sometimes though, if you are going on a day hike, you may venture outside of the signal range of your 5watt ham radio handheld as you get down into a valley near a river.
You can start the day by parking your vehicle on the ridge, and hike down into the valley. As long as your handheld ham radio can hit your vehicle, then with crossband repeat, your vehicle can then hit a repeater using its 50 watts. The repeater in return talks to your vehicle, which then talks to you off on your hike or geocaching adventure. We use this feature all the time on our TYT TH-7800 Mobile Ham Radio and Icom IC2730A Mobile Ham Radio.
Ham Radio – APRS
One great function for people that are like us and get lost regularly, is GPS. Having a GPS built into your ham radio opens up a whole new world to you called APRS (Automatic Packet Reporting System). APRS is a complex system that takes your GPS coordinates, and reports them to the internet via mini APRS repeaters called digipeaters. Digipeaters are usually placed in key locations, like mountain tops or high elevation ridges. So, if you can get yourself to the top of a ridge or mountain, you have a very high chance to hitting a digipeater.
Having your GPS coordinates and GPS track posted to the internet can come in handy when venturing out away from cell reception. If loved ones or a search and rescue team need to come find you, they will have your last known coordinates and know where to start looking.
Along with your coordinates, APRS can also send emails, send out broadcasted bulletins to others in your vicinity, and text messages!
The Garmin InReach is a neat unit that will send text messages via GPS satellites, but it charges you a monthly fee to do so. APRS works in the same way, but it also does a little more. The only down side to APRS enabled ham radios, is they will cost a little more (50-100$), but, 100% worth it when you need it.
The Kenwood TH-D72A Is an awesome outdoor, IP54 weatherproof ham radio handheld with APRS built in. And the Icom ID-5100 Mobile Ham Radio is perhaps our favorite mobile radio on the market.
Ham Radio – Repeater Book and Programming
Some other great functionalities are repeater directories and ease of programming repeaters. There is an app you can get on your phone called Repeater Book (iPhone, Android). This app has a massive directory of every repeater in the United States. The app will take your GPS coordinates from your phone and list the nearest repeaters to you.
You can then export repeaters over to your radio if it is bluetooth enabled! If you hate programming repeaters (they can be a pain! Which is why we offer our Ham Radio Programming service!), then check out some mobile ham radios like the Yaseu FTM-100DR for a nice, clean, dual band radio. Or check out the Icom 7100 Mobile Ham Radio for an all band, 100w radio that works great in vehicles.
Or, you can check out one of our favorites, the Icom ID-5100 Mobile Ham Radio and its ability to come with a repeater directory built in from the factory. It will then take your coordinates and automatically select the repeater closest to you! Very cool technology.
Ham Radio – Digital or Analog
A big question that has become more of a topic in the past couple of years is, “Do I want a digital or Analog ham radio?” If you are going to be doing any kind of backwoods adventuring, we highly recommend to stay away from digital only radios like Yaseu’s C4FM, or Icom’s D-Star. In flat lands and cities, digital works amazing. You get an always crisp, clean, clear signal no matter how far you get from the repeater or the other person you are talking to.
Analog will fade in quality as you get further away from the repeater. This sounds great in theory, but the problem is that when you do venture far enough away from the repeater that you can no longer hit it, with digital, you simply drop signal. It is like a switch, there is only on or off.
If you are in the backwoods, hiking or backpacking, this can be a huge issue because you will not get any warning when your signal is going to drop. And, if you are not paying close attention, you may not be able to figure out which direction to go in order to get your signal back.
With analog, your signal will start fading and you will be able to know when you are reaching the edge of your signal. Having a ham radio like the Yaesu FTM-100DR that does both digital and analog, can be really nice to have.
There are a few other functionalities and options that ham radios will have. Some of them include the ability to take a picture, and then send it via radio waves to someone. You can also have hands free bluetooth capabilities in your vehicle radios. You can have full colored displays with maps that overlay your gps coordinates. There are waterproof and shockproof radios. And more.
Continue onto What Ham Radio Should I Get Part 2 to see our favorite beginner ham radio picks, why we like them so much, and why you need them in your adventurous life right meow!
Step 3: The Ham Radio Options!
That’s it for Part 1! This ended up going on longer than we anticipated, so head to Part 2 to see Step 3: The Ham Radio Options! and what our radio recommendations are for the outdoors adventurer!
Continue to What Ham Radio Should I Get Part 2!
Thank you for reading! Feel free to leave any comments or questions below! If you want to keep in touch with us when we add new content, join our newsletter! We do special offers that only show up in the newsletter, so make sure you sign up below!
You can also join the community forums and ask questions and see what adventures everyone else is up to!
Join the Off Road Ham Radio Community!
Also, if you don’t have your Ham Radio Technician License, head over to our Online Ham Radio Class and study up! Remember, 15% of your class registration goes back to one of our partners!
And, of course, don’t forget to check out our MORRFlate 4 Tire Off Road Inflation Deflation™ Kit!
Themed parties are a great way to bring friends and family together for an unforgettable experience. If you’re looking for some unique ideas that will make your next themed adult party stand out, we’ve got you covered! We’ve gathered 6 unconventional themes perfect for getting everyone in attendance excited about the upcoming festivities. Whether you want something more subtle or outrageous and over-the-top, one of these six ideas is sure to be just what you need!
Mystery Dinner
Step back in time to the roaring 1920s where dinner parties were the events of the year. But this isn’t just any ordinary dinner, it’s a mystery dinner. As you indulge in a delectable three-course meal, you’ll work alongside your fellow guests to solve one of the most intriguing mysteries of the year. Who committed the heinous crime? Was it the sly butler? Or perhaps the sultry singer? With clues hidden throughout the room and red herrings designed to throw you off course, it’s up to you to put your detective skills to the test. So don your finest flapper dresses and fedoras, and join in on the thrilling fun of the mystery dinner.
Movie Night
Are you a die-hard fan of movie characters like Harry Potter, Luke Skywalker, or even the Joker? Well, get ready to bring those characters to life! It’s time for a movie night that’s unlike any other. You won’t just be watching your favorite films, you’ll be able to dress up as your favorite characters and even recreate some of the most memorable movie scenes of all time. This is your chance to unleash your inner actor and show off your creative side. So grab your popcorn, get your outfit ready, and get ready for an unforgettable movie night that will transport you into the magical world of the big screen.
Game Night
Looking for a fun and social activity to enjoy with your friends? Consider hosting a game night! Whether you prefer classic board games or challenging card games like poker, there’s sure to be something for everyone. You could even mix it up with a gel ball gun game for a futuristic twist! With snacks, drinks, and a little friendly competition, game night is the perfect opportunity to unwind and spend quality time with your friends. So clear your schedule, set up a game table, and let the fun begin!
Sing-Along Party
Get ready to belt out your favorite tunes with a sing-along party! All you need are some karaoke versions of your go-to songs and a group of enthusiastic friends. With each person taking turns to showcase their singing skills, it’s sure to be a night of non-stop laughter and fun. Whether you’re hitting those high notes or singing along to the classics, a sing-along party is the perfect way to spend an evening. So dust off your vocal cords and get ready to sing your heart out!
Old-Fashioned Tea Party
Step back in time with an old-fashioned tea party, where you can indulge yourself in an elegant and refined atmosphere. Bring out your fanciest tea set and set the table with elegant linens to create a vintage vibe that will transport you to a bygone era. Add a touch of sophistication with a selection of scrumptious scones, perfect for savoring with a generous dollop of clotted cream and jam. Sip on a cup of your favorite brew, and enjoy a delightful afternoon in the company of loved ones. Celebrate tradition and the finer things in life with an old-fashioned tea party that will captivate your guests and leaves them feeling thoroughly spoiled.
Art Show
There’s nothing quite like appreciating the creativity and talent of your friends. Hosting an art show is the perfect excuse to invite your creative pals over and showcase their latest masterpieces. From stunning paintings to intricate sketches, the possibilities are endless. And what better way to add some competitive flair than by offering a prize for the best artwork? It’s not just about winning though, it’s about sharing the joy of art and creating an environment where everyone feels inspired and supported. So why not gather your friends, break out the easels, and let the art judging begin?
No matter what type of themed adult party you’re looking to host, there are plenty of unconventional ideas that will make your event a hit. From movie nights and mystery dinners to art shows and old-fashioned tea parties, these six unique themes offer something for everyone. Not only will they create an unforgettable experience for the guests, but they’ll also give them an opportunity to show off their creative sides in a fun and supportive environment. So don’t be afraid to think outside the box when it comes time to plan your next themed adult party! With any one of these six ideas, you can rest assured that your gathering will be talked about long after it’s over.
If you are interested in making homemade sausage, you are in the right place. I have been making sausage for decades, and I’d like to share with you my comprehensive tutorial on how to make sausage at home.
Photo by Holly A. Heyser
I’ve learned a lot in the decade-plus since I first wrote instructions on how to make sausage. Each year I learn a new tip or trick, a bit more about meat science, how to get a better bind, which casings are better than others, etc.
This will be a fairly comprehensive article on homemade sausage, meant to get you started, with a sample sausage recipe at the bottom. But understand that making sausage is a process, one you will not perfect the first time out. Perfection comes with practice, precision, plus a little luck.
Why Make Homemade Sausage?
Fair question. After all, even small supermarkets sell several kinds of sausages. The reason is that making your own gives you control. Control over the meat and fat, control over the seasonings, control over the grind, the size and thickness of the links, control over whether your homemade sausages are smoked or fresh.
Anyone reading this who hunts or raises livestock will also want to learn how to make sausage. After all, it’s a wonderful thing to make when you bring home a deer, or some ducks, a mess of pheasants, or after your annual hog slaughter.
Making sausage can be as easy or as hard as you want. Whipping together a batch of homemade sausage without casings is as easy as making meatloaf, which is very similar actually.
Casing links is a little trickier, but it ain’t rocket science. Oh, and yes, there is a little science to know about sausage making.
Basics
At it’s core, sausage is meat + fat + salt, kneaded until it binds to itself. That’s it.
Obviously most of us want to add more seasonings, or maybe stuff the sausage into casings. Or smoke it. We’ll get to all of that below. Let’s break the magic equation above down to its components.
Meat for Homemade Sausage
Any meat will do. I’ve made sausage with lots of weird things, from woodcock and beaver to standards like pork, beef and chicken. I’ve even made fish sausages. My collection of sausage recipes is broken down by general meat type, so that should help you choose one after reading this tutorial.
Unfrozen meat binds to itself better than thawed meat, and pork binds to itself better than other meats. A good compromise is to use your thawed game meats and some never-frozen pork shoulder or belly.
The gnarlier the meat in terms of connective tissue, the more times you will want to grind it. Most sausages I make are ground twice. More on that in a moment.
Fat in Making Sausage
Let’s talk fat. Homemade sausage almost always has pork fat in it, because, well, it’s superior to other fats in terms of melting point, availability and flavor. The best pork fat is fatback, off the back of the hog. Belly is OK, but a little soft. Shoulder is a nice compromise and easy to get.
Leaf lard, or any fat from the interior of any animal, will be harder than fat on the outside of the animal. It’s so hard — meaning it has a higher melting point — that I won’t use it from lambs, goats or cattle, whose fat has a higher melting point to begin with.
Oh, and if you want to use fat from deer, elk, moose or any other cervid, read my article on cooking deer fat here. Short version: Use very little in homemade sausage. Note: pronghorn aren’t cervids, so their fat is fine to use.
Photo by Holly A. Heyser
Beef fat, or that from other bovids like bison, nilgai, oryx, yak or musk ox, is perfectly fine when harvested from the outside of the body cavity. It can be too hard when taken from the inside, but it does depend on the animal’s diet.
Bird fat is too soft for making sausage, unless you are making an emulsified sausage, like a hot dog.
Never use lard. Previously rendered fat won’t work in normal homemade sausage.
In terms of percentage, you will want no less than about 15 percent, and no more than about 35 percent. I shoot for about 20 to 25 percent normally.
Salt and Curing Salt
You need salt to make sausage. Period. The very word sausage comes from the Latin salsus, meaning “salted.” My recipes use kosher salt because it’s readily available and lacks additives like anti-caking agents, which can mar the flavor of your links.
I use Diamond Crystal kosher salt. If you use it too, my volume measurements will be the same. Morton’s kosher salt is cut differently, so volumetric measurements won’t be the same — you’ll have to go by weight.
Which is why salting by weight is way, way, way better. When you do that, you can use whatever salt you want in homemade sausage. I really like using salt I’ve harvested from the Pacific Ocean for this, because, well, I am weird like that.
Photo by Holly A. Heyser
Along those lines, avoid weird salt. Like those black and bright red Hawaiian salts. Or flavored salts. Also avoid salt with really big crystals because it won’t mix evenly in your sausages.
A general rule for fresh homemade sausage is to use between 1 and 2 percent salt by total weight of the meat and fat. So for a standard 5-pound batch, which is 2268 grams, at minimum, I’d use about 23 grams of salt, which is about 5 1/2 teaspoons. In reality, I prefer my sausage saltier, so I add about 1.5 percent by weight.
Curing salt is not evil. There, I said it.
For the purposes of this discussion we’re talking about sodium nitrite, which is used in smoked sausages. It is there for food safety — it can prevent listeria and botulism — as well as flavor. It’s why hams, pastrami and corned beef have that rosy, hammy flavor.
And for everyone who thinks they’re not getting nitrites by eating “uncured” products, know that the manufacturers are lying to you. There’s a loophole in the regulations that says if you use celery powder, you can say you aren’t curing meats. Well, celery powder is loaded with sodium nitrite, so there you go.
Anyway, rant over. Use one or the other when you are making smoked sausages.
Additives
Not all additives are bad in sausage. I’ve used a lot of them, rejected most, and a few I have turned to repeatedly because they give you a better link. What I am talking about are things like vegetable fibers, dry milk, binders, etc. that can improve the texture of homemade sausage.
Dry milk and a product called C-bind, from The Sausage Maker (it’s carrot fiber) will both help your links retain more moisture. Not usually a problem with fresh sausages, but very useful for smoked sausages.
Butcher and Packer has a “special meat binder” that is really good, and you only need tiny amounts to improve the bind of your sausage. They don’t say what it is, but I imagine it’s ground up fairy wings or gold dust or something…
Photo by Holly A. Heyser
Equipment for Homemade Sausage
Alas, you cannot make homemade sausage without equipment. At the very least you need a grinder. I will not condone making sausage with a food processor any more. I used to, and you might see it as an option in some old recipes here, but it’s gross. Don’t.
Can you make homemade sausage without a grinder? Um, you can, but it’s a terrible process. You need to hand mince pounds of meat and fat without it heating up, then jam it into casings through a wide funnel. I’ve done it, and it sucks.
Grinders
At the very least you need the KitchenAid grinder attachment, which is fine for very small batches. I have used mine, off and on, since the early 2000s. But it’s not for anyone serious about things.
I use a Weston 1/2 horsepower commercial grade grinder. I like it a lot because it’s sturdy and it’s all steel. Some cheap grinders have plastic innards that will die if, say, you get a piece of bird shot jammed in the blade; good grinders have an emergency shut off that prevents the motor from seizing.
Another good grinder I’ve used is a LEM grinder. I recommend the 1/2 horsepower and the 0.35 horsepower models. Don’t bother with dual grind grinders. They jam easier and are hard to clean.
Photo by Holly A. Heyser
Stuffers
For the love of all that’s holy, don’t use your grinder as a stuffer! Running finished sausage that you worked so hard to get a good bind through an augur that shears apart that bind is crazy. Buy a stuffer or just make uncased sausage.
I hate the Weston stuffers because they leave too much meat in them when the plunger is all the way down. A few other companies use this design, and it’s silly. Butcher & Packer, the Sausage Maker and LEM make good stuffers.
Yes, it’s a few hundred bucks, but they last forever, are easy to clean and they make really good links.
Casings
I only use natural casings. I don’t like collagen casings because they are barely edible, if at all, and when they are they taste nasty. But you do you.
Hog casings are the norm, and they come in a variety of widths, which have some traditional recipes associated with them. Bockwurst, for example, needs a wide casing. Weisswurst needs a skinny one, or even a sheep casing.
Sheep casings are awesome when you are done making sausage with them, but they rip easily and will cause you to swear while trying to fill them. Consider getting “pre-tubed” sheep casings, which are easir to put on the stuffer.
Beef casings are very wide and are only really used in fresh sausages for recipes where the eater can’t eat pork. They’re mostly used in salami.
The gold standard of casing companies is Butcher and Packer. No one else comes close.
Photo by Hank Shaw
Other Random Stuff
I like to have a big needle or a sausage pricker (cue Beavis and Butthead laughter) to pierce the casings of the finished sausage to remove air pockets.
You’ll want something to hang your links from. I use a wooden clothes drying rack.
Spice grinders are useful for, well, grinding spices. Freshly ground spices make a difference.
Actually Making Homemade Sausage
OK, you’re all set. Now what?
A really short tutorial on how to make sausage would look something like this:
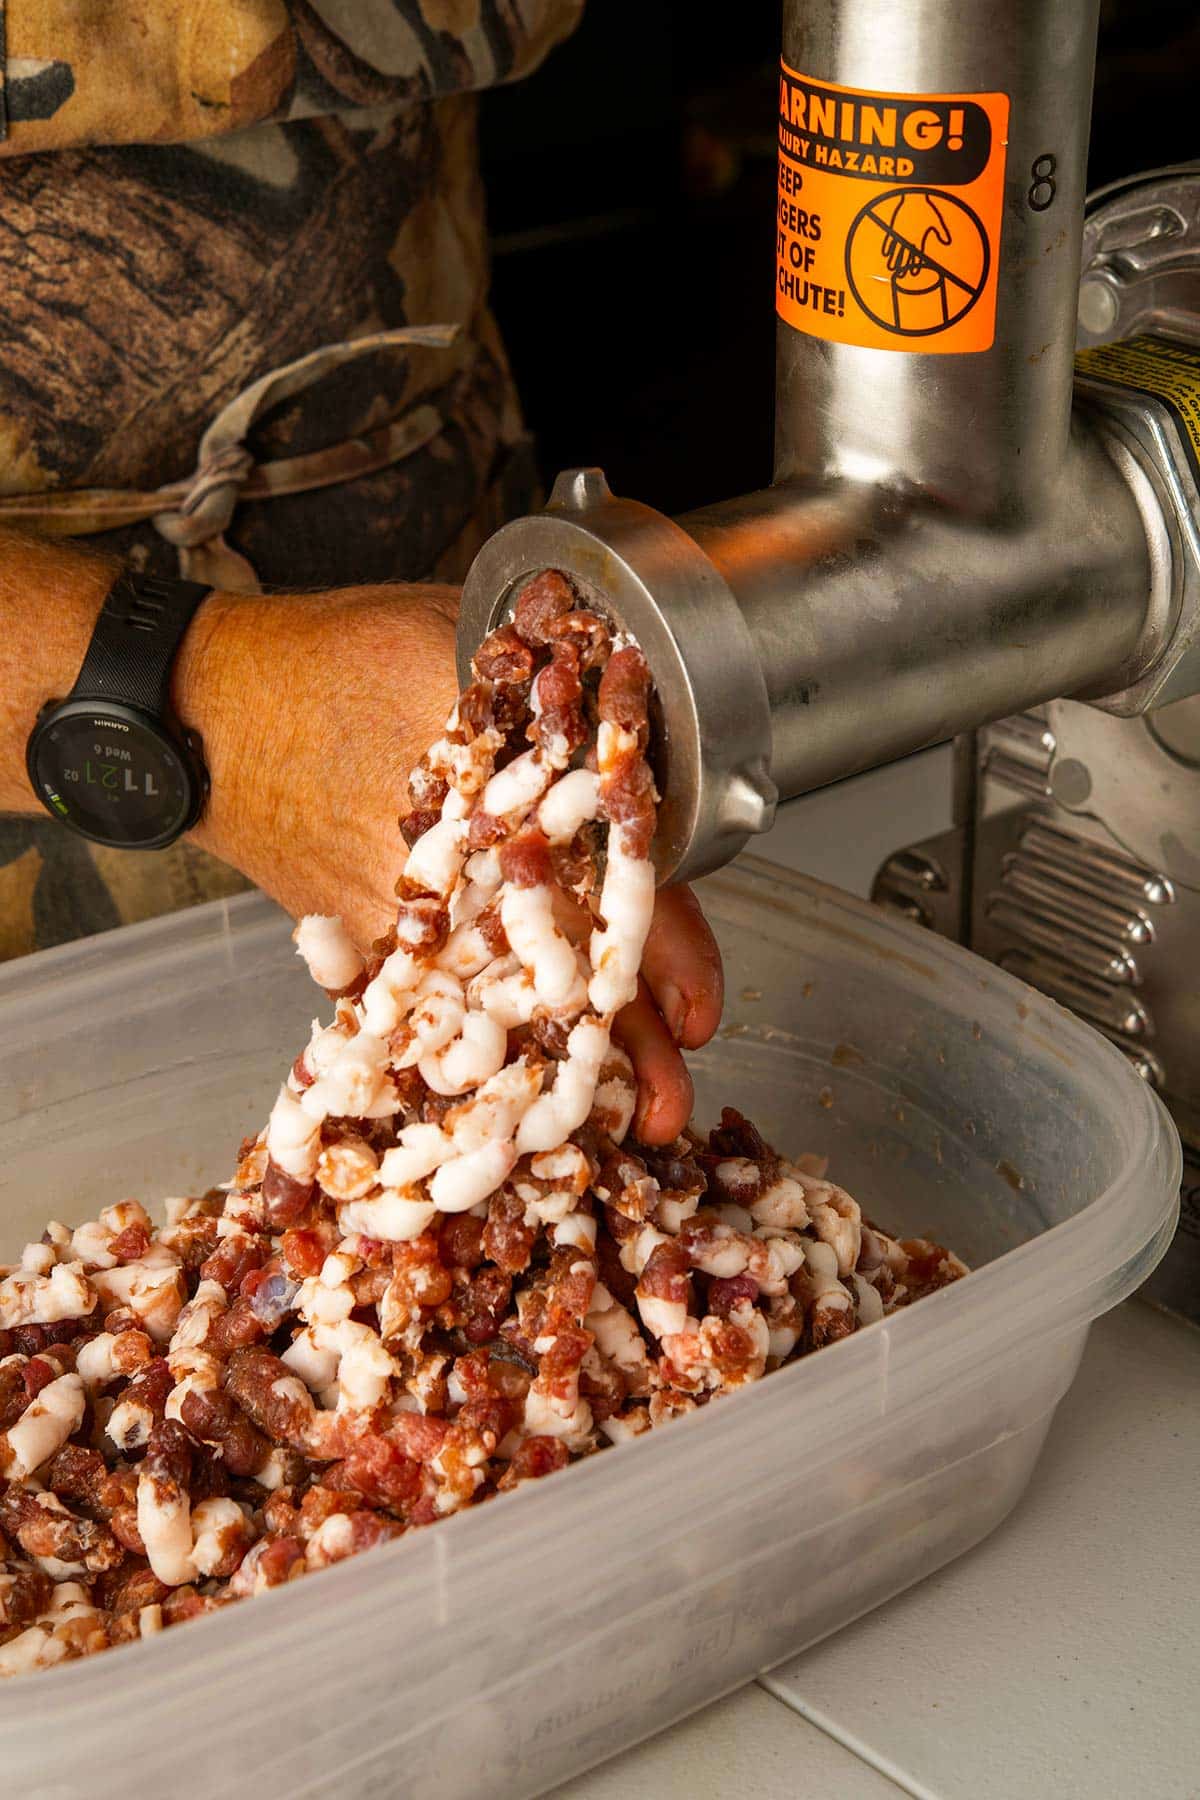
Cut meat and fat into pieces that fit into the grinder.
Add the required salt and/or sugar, mix then put in the fridge overnight
Grind once coarsely
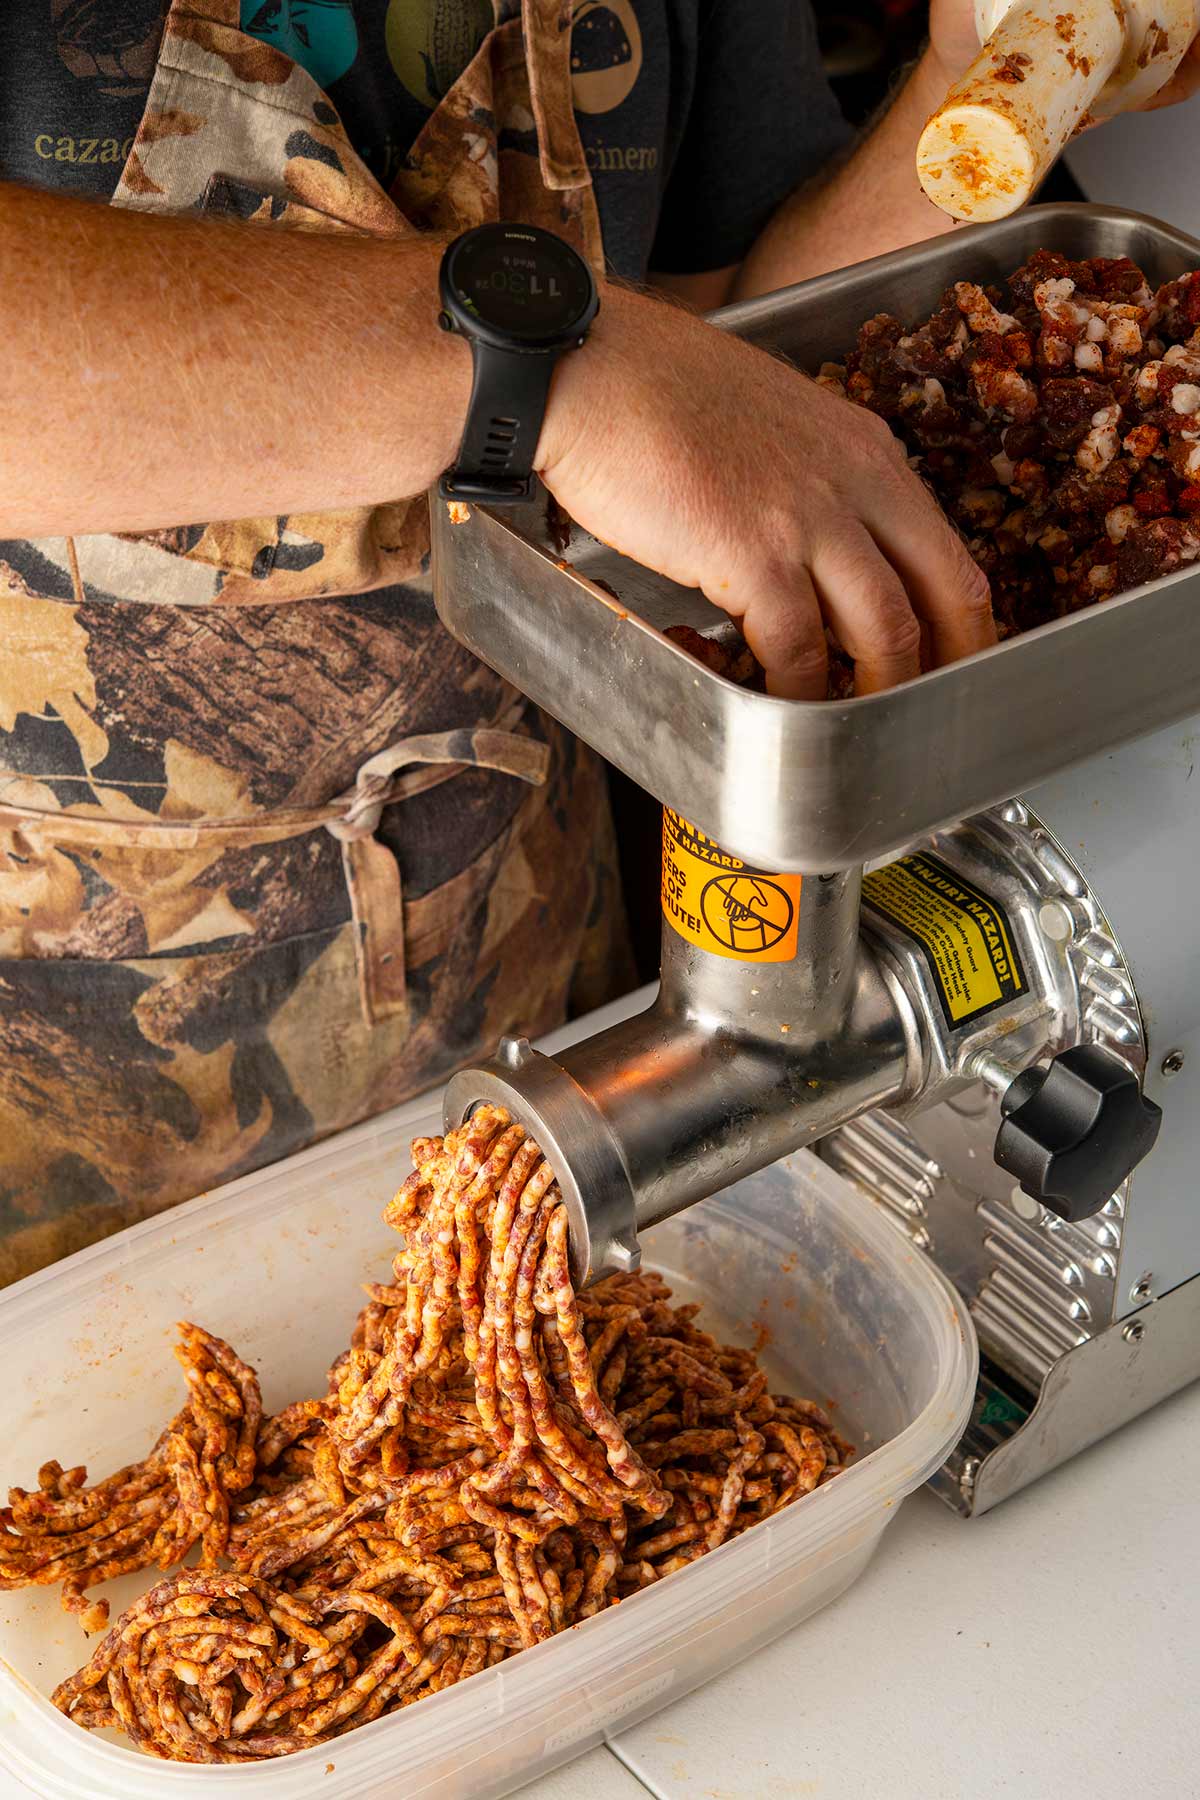
Grind a second time with lots of seasonings.
Chill the meat well, then add liquid, whatever seasonings you didn’t want all ground up, and mix really well for a couple minutes. You’re done if you are making uncased sausage.
Put the mix into the stuffer, put the casings on the stuffer, then make a big coil.
Make the links from the coil. Tie them off. Hang for a while to “bloom.” Cook and eat.
Before we get into the basic recipe below, I’ll walk you through it in pictures.
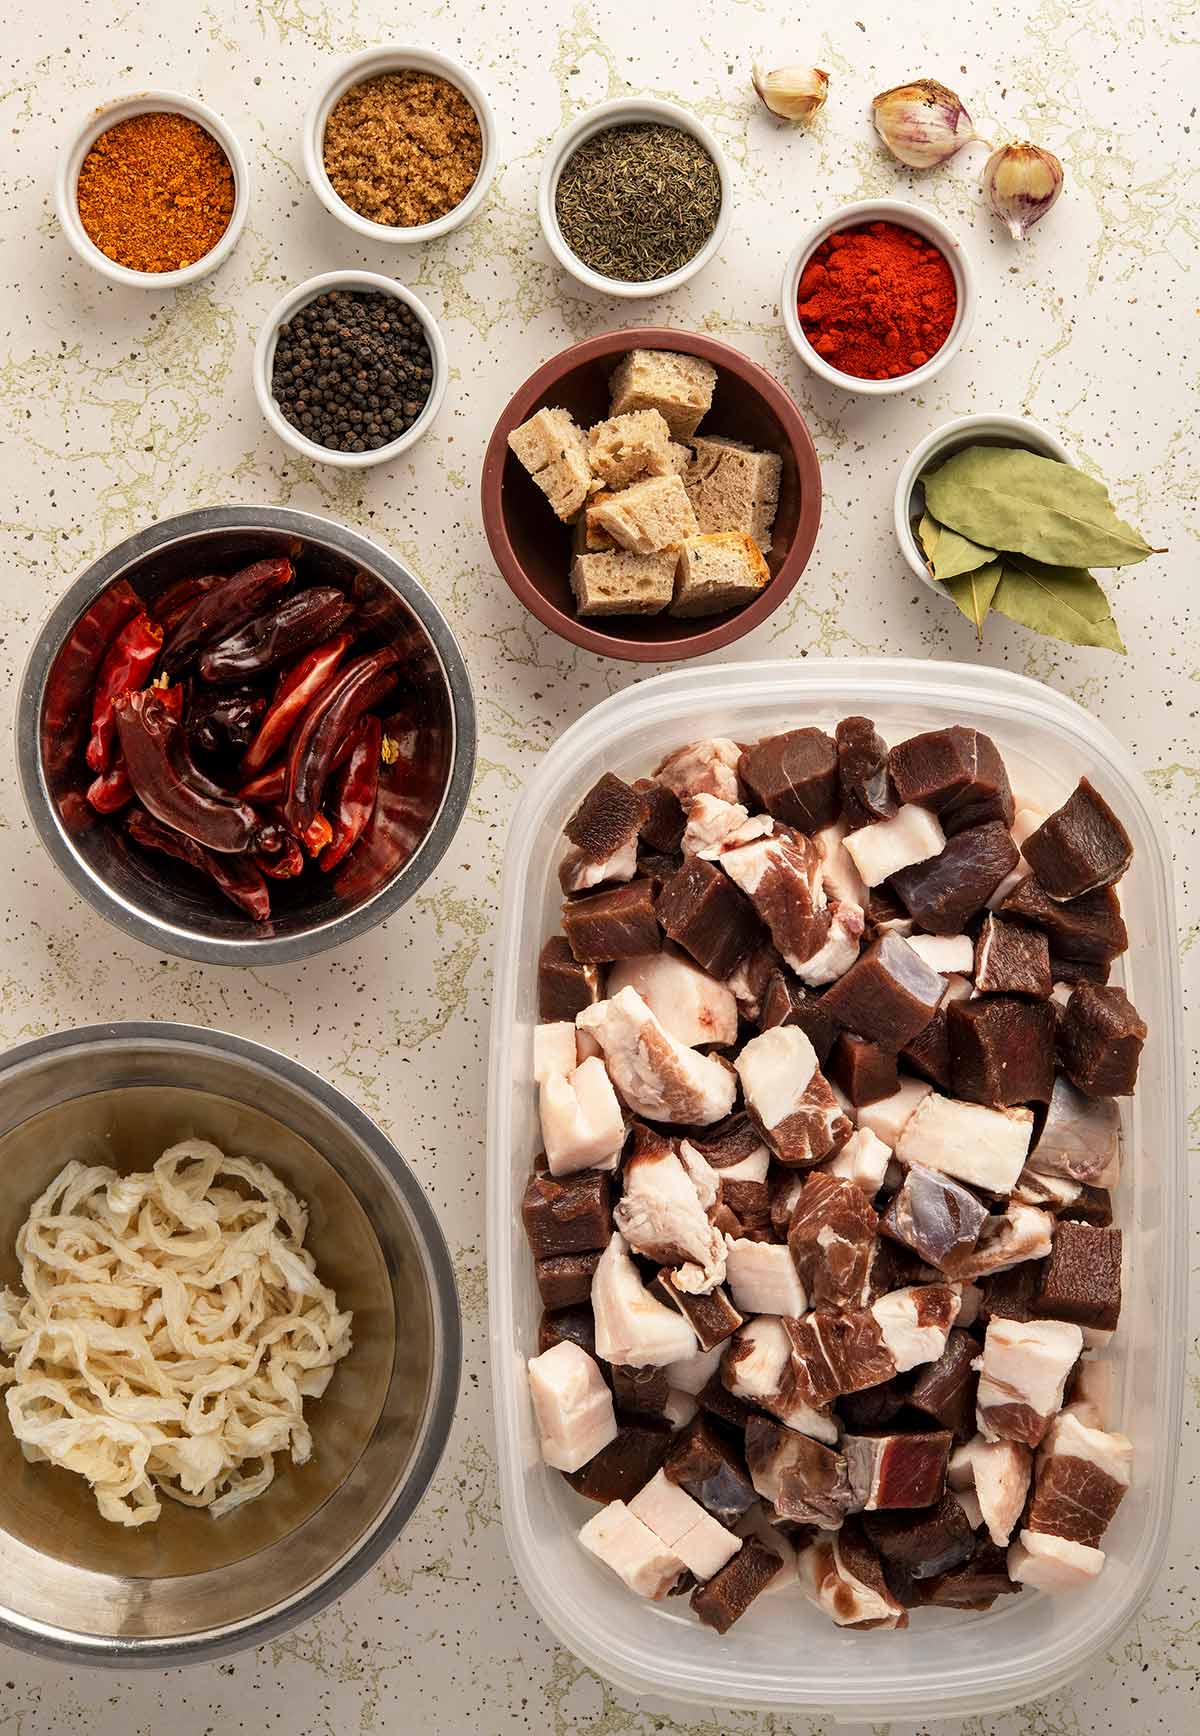
Start with meat and fat. Usually with game, the meat is super lean, so I will go something like 3 pounds of this lean meat (venison, duck, pheasant, etc.) with 2 pounds of something fatty, like pork shoulder. Another good option is 4 pounds of lean and 1 pound of pure fatback.
Cut this into chunks that will fit in your grinder, then add the salt and mix. Set this in the fridge overnight. It will change color and get sticky.
Photo by Holly A. Heyser
Soak some casings in warm water and get your seasonings ready. I like to freeze my blade, dies, augur and hopper for an hour or more before grinding, to keep things cold — more on that in a bit.
Grind through a very coarse die; I prefer a 10 mm die, but you could go higher if you have one.
Photo by Holly A. Heyser
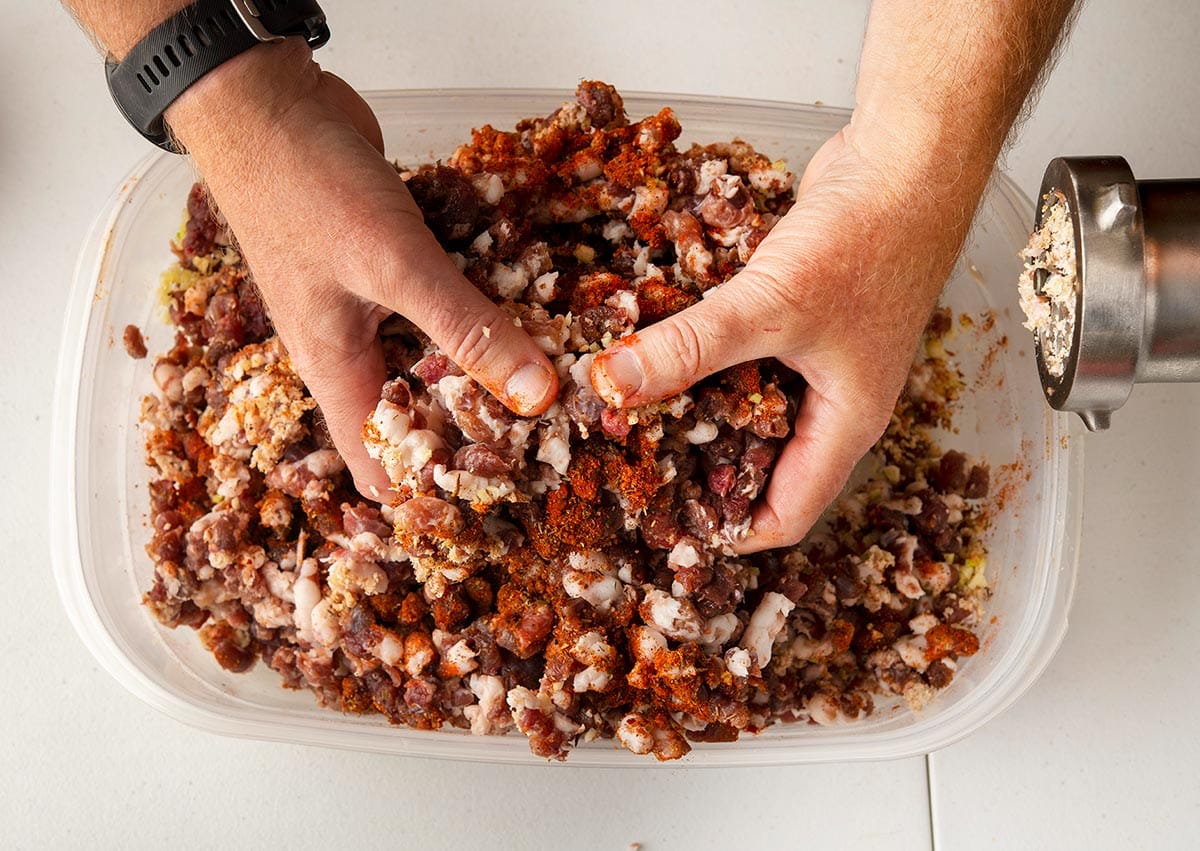
Mix all the spices you want fully integrated into the sausage with the meat and fat. Do this carefully, and don’t squash the mix.
Photo by Holly A. Heyser
If the mixture is still cold, as in less than about 37F or so, you can grind it again immediately. I do this a lot because I am fast and I start with cold gear.
Beginners with homemade sausage should play it safe and freeze the mixture for 20 minutes or so while you clean up and get ready to grind again.
It is vital for everything to stay cold in this whole process to prevent “smear,” which is when the fat partially melts and coats the meat, breaking its ability to bind to itself. You see this when your sausage comes out crumbly.
When you’re ready, grind again.
Photo by Holly A. Heyser
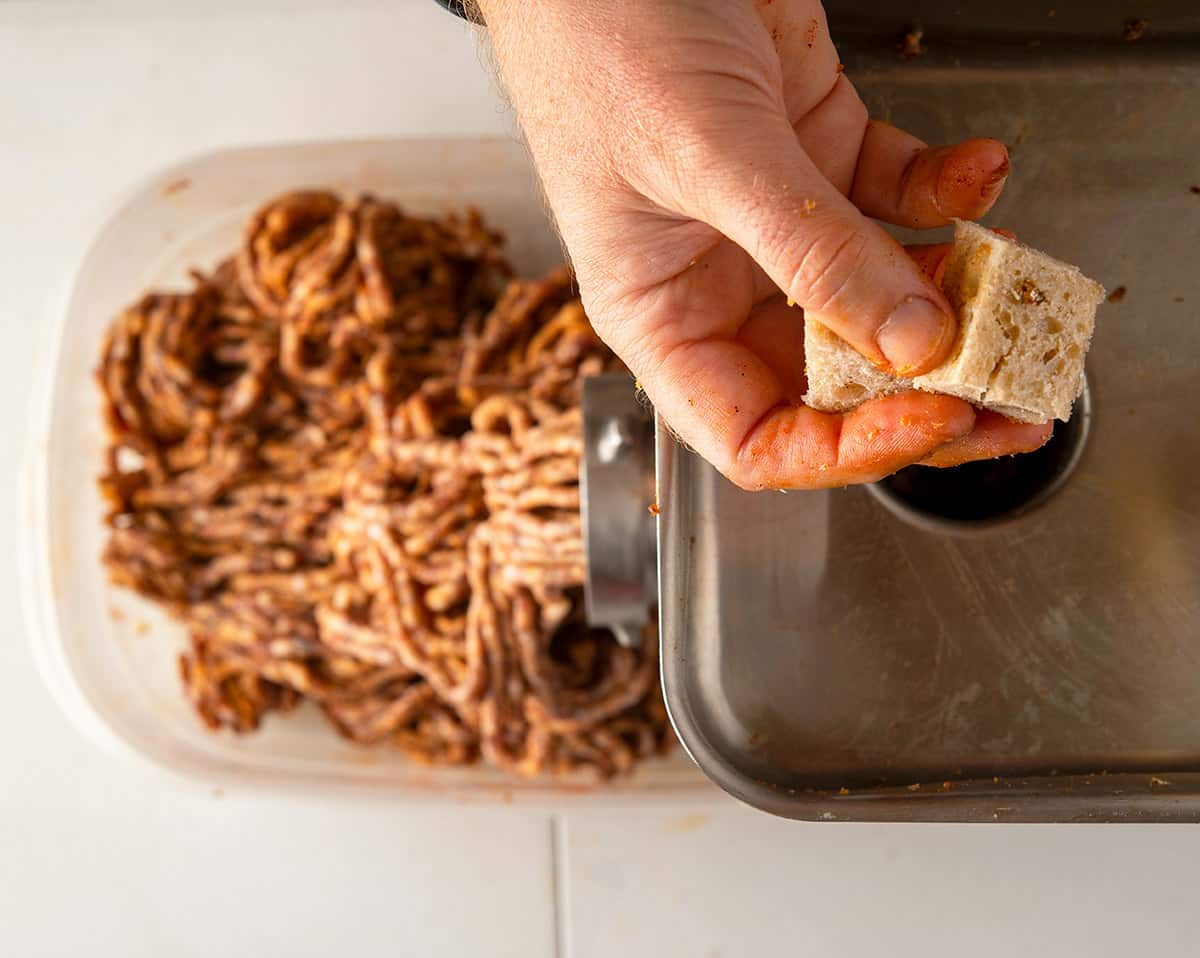
Have a couple pieces of bread, a hamburger roll or something similar handy to finish out your grind; skip this if you are celiac.
The reason is that the bread pushes every last bit of meat through the grinder, so you don’t waste any.
Photo by Holly A. Heyser
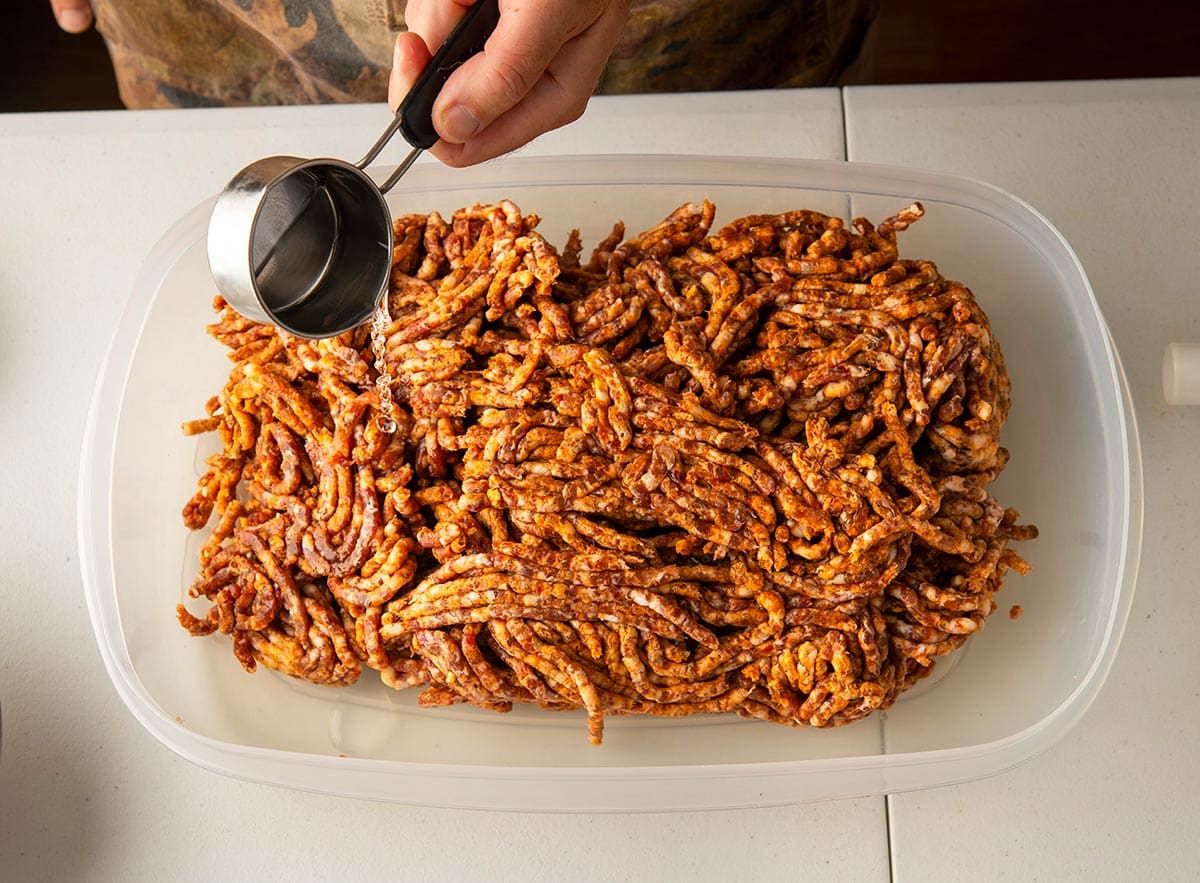
Once you’re all ground, chill the mixture while you clean up. This is important not only to have cold meat and fat, but also because you really do want to clean your grinder right away, or it becomes a nasty, sticky mess. Ask me how I know…
Now you are ready to create the bind in your homemade sausage.
This is when you add ice cold liquid, usually water. Wine, beer, juice, cream are all common in various recipes. Be aware that acidic things will break your bind, so go easy on vinegar if you want a tight, snappy sausage; this is called knacken in German.
Photo by Holly A. Heyser
You’ll also add any herbs or spices you want the eater to see, like cracked peppercorns or parsley or fennel seeds.
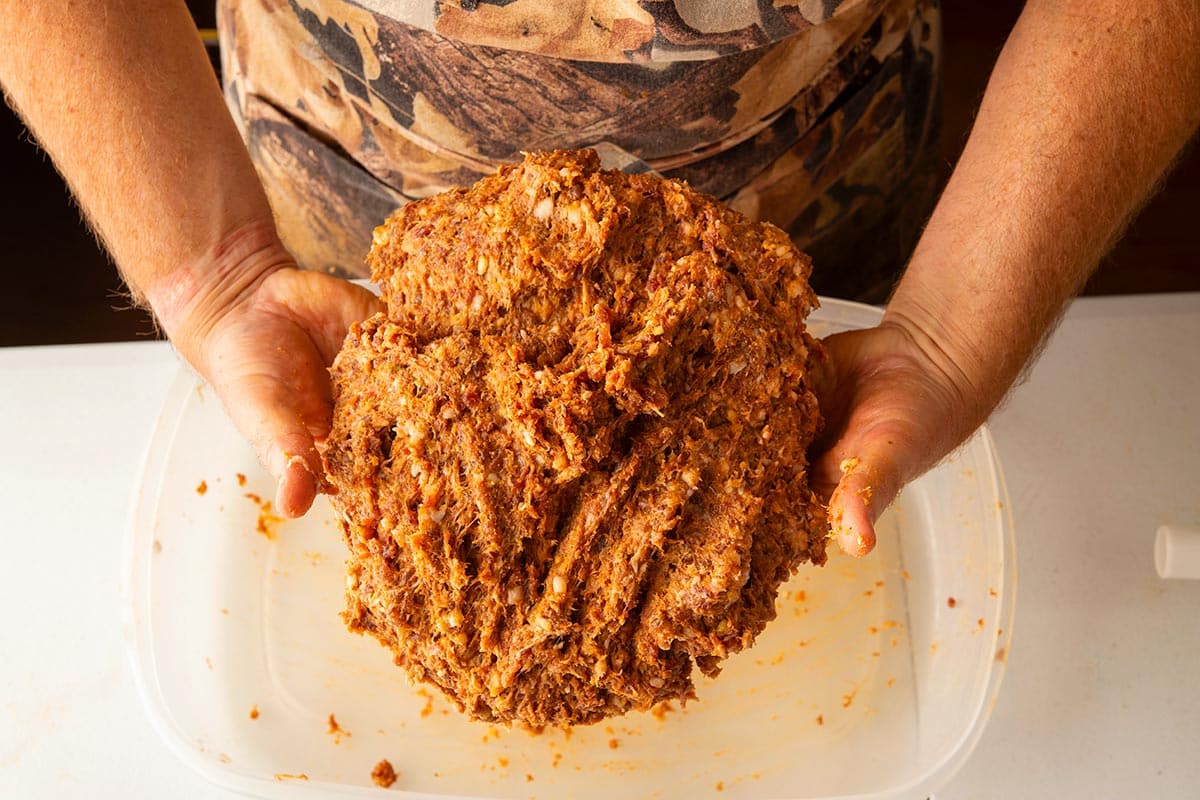
Mix, mix, mix! I do this with my (clean) hands for about 2 minutes. Knead like bread. As it so happens, you are creating the same sort of protein bind that exists in bread. It’s gluten in bread, myosin in meat.
This is the moment in making sausage where meat temperature is most critical. If the fat warms and smears here, you’re cooked. Crumbly sausage. What you’re doing is making myosin that forms a network around the fat, and that won’t work well above 40F.
Photo by Holly A. Heyser
You’re done when you see white streaks on the bowl, and when you can pick up the whole shebang in one piece.
Now put the mix in the fridge and clean up again.
If you are not casing your sausage, you’re done! Portion out your sausage into blocks or make patties.
Casing Homemade Sausage
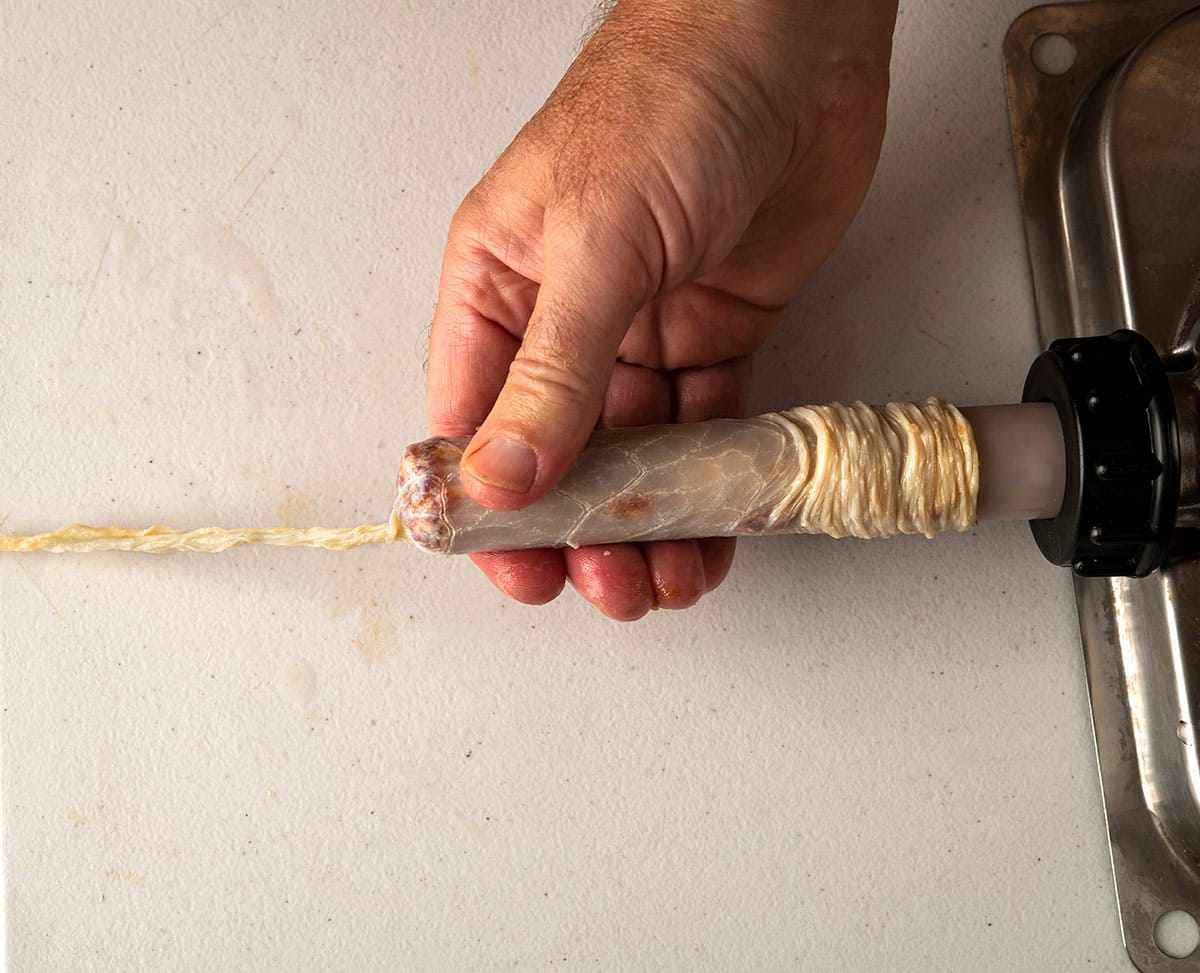
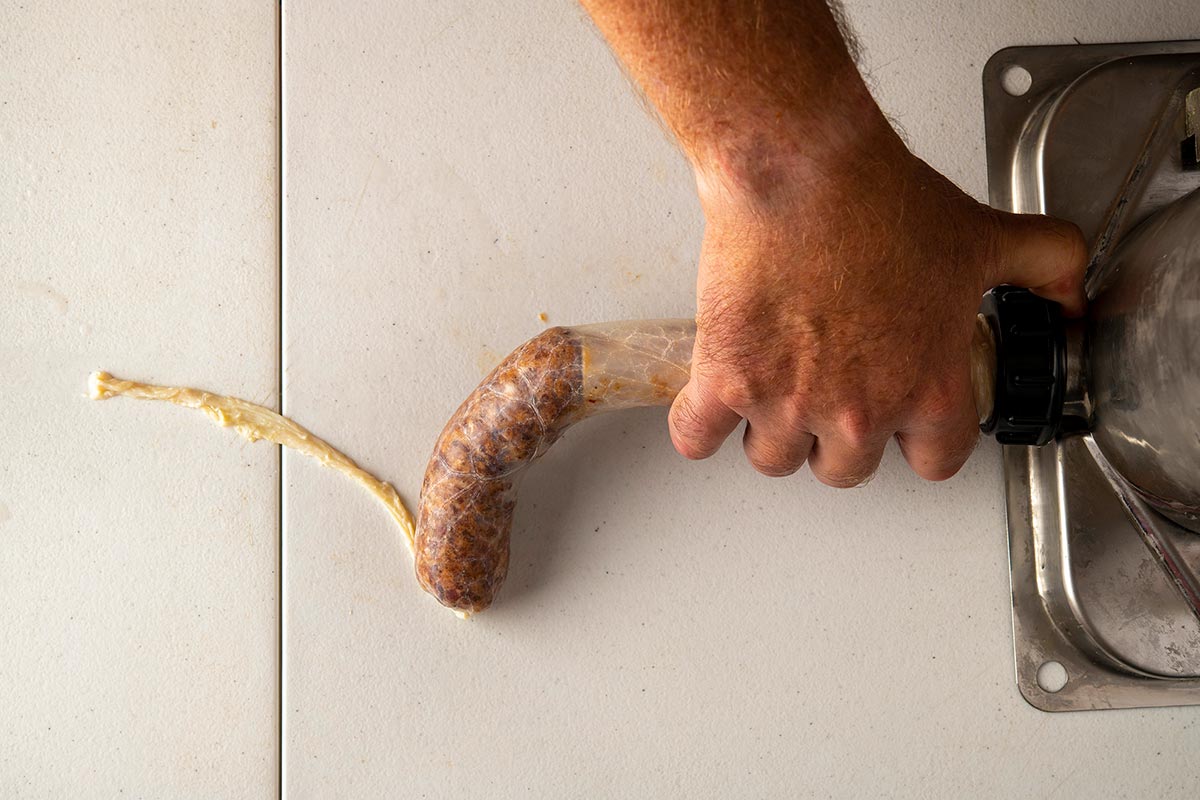
On to casing, which gives people fits until they figure it out. Casing is arguably the hardest part of making sausage, because you need the casings to be tight, but not to burst when cooking. Oh, and by the way, the most common reason your sausage bursts while cooking is high heat, not an over-stuffed sausage.
As I mentioned above, I prefer natural casings, usually hog casings. They’re versatile for most styles of sausage, and are by far the easiest to find. Many supermarkets have them (you’ll have to ask the meat counter people), and all butcher shops will have them.
First off, you will need to soak your casings in warm water to loosen them up; they’re usually stored heavily salted, and often frozen.
If you want, you can run water through your casings to check for leaks. I used to do this when I bought cheap casings, but I’ve never had a leak in any I’ve bought from Butcher and Packer.
Thread a long length of casing on the stuffer tube; they come in different sizes for different casings. Most are fine for hog casings, but if you work with narrow sheep casings, you’ll need a narrow tube.
Photo by Holly A. Heyser
Leave a long “tail” on the end of the casing; this is so you can tie it off easily later. Get the condom jokes out of your system for a while, then crank the stuffer down until you see the end of the sausage come out the tube. Cue scatological jokes, which will remain funny for a half hour or so…
Photo by Holly A. Heyser
Crank out a full coil, fully but not overly tight — you’ll need to twist off links in a moment. Stuff everything before you make links.
There are a few ways to make links, from tying them off with twine to elaborate twisting tricks. The method I use is simple and it works. The end of the coil is one link. Then you pinch off the next link, spinning it so it will hold.
Photo by Holly A. Heyser
You move down the coil and spin that one the opposite way; this keeps the links from unwinding too easily.
Photo by Holly A. Heyser
If this is confusing, I made a short video on making sausage links.
Work all the way down the coil until you get to the end, then tie off both ends after gently compressing the meat within those final links.
Now you need to compress the meat in each link, looking for air pockets. This is important for a proper bind and snap in homemade sausage, as well as to prevent boiling fat from spraying you when you slice into a link.
Photo by Holly A. Heyser
When you find air pockets, use a needle or the awesomely named sausage pricker to remove them. Pierce the casing, then gently compress the meat in the link to fill it.
Photo by Holly A. Heyser
Now, hang your homemade sausage so it can “bloom,” which is the word we use when the links change color a bit, tighten in their skins and dry out just a little.
It’s a good idea to wait a day after making sausage before eating them, as this blooming process really improves the links.
Storing Homemade Sausage
Once made, homemade sausage will keep a week in the fridge. I like to let them sit there a couple days, then I’ll separate the links and vacuum seal them in packets I plan on eating.
I do not recommend pressure canning or pickling sausages, although people do. Just not a fan of the results.
Originally published on February 2,2023, this article has been updated on June 4, 2024 to reflect the latest research and statistics.
The International Shark Attack File (ISAF) from the Florida Museum of Natural History looked into 120 reported shark-human interactions across the globe in 2023. Among them, there were 69 unprovoked shark attacks, exceeding the five-year average of 63 attacks per year. However, experts stress that this doesn’t necessarily mean shark attacks are on the rise.
Many people have a firm view on sharks; however, the following shark attack numbers will highlight the truth behind these majestic creatures.
Sharks are intensely beautiful creatures. I have long been fascinated by them, from the monstrous creatures of Jaws and the Meg to the real creatures that gracefully dominate our oceans. Sharks are all around tremendous animals.
Peter Benchley, the man behind Jaws, wrote his book about the killer shark but spent the rest of his days undoing the devastating image he created. Sharks have a fearsome reputation, and while they are undoubtedly apex predators, they are much more than that.
Key Facts You Need to Know
In 2023, There Were 36 Unprovoked Shark Bites on Humans in the US
16 Cases in Florida Represent 44% of the US Total Shark Attacks in 2023
Stats Show There Were 69 Unprovoked Bites on Humans and 22 Provoked Attacks in 2023
The Number of Highest Unprovoked Shark Attacks in the US
The Second Place with the Highest Number of Shark Attacks after the US Is Australia
One of the Most Dangerous Shark Beaches in the World Is Gansbaai
The Likelihood of Fatal Shark Attacks Is 1 in 4,332,817
Shark Attacks Are Highest in the Month of September
Most of the Fatalities in 2023 Were Due to White Shark Bites
The Biggest Shark in the World Is the Whale Shark
Why Do Sharks Attack People?
The main reason sharks attack people is because of curiosity. While it doesn’t make a very good catchphrase, curiosity is what draws sharks to humans. When humans enter the water and start swimming, paddling, or splashing around, they draw a shark’s attention.
There is no objective evidence to suggest that sharks actively hunt humans in the water. More attacks usually happen because more people are in the water, not because sharks are getting more dangerous. It’s all about the numbers. The more we swim in their home, the more we might run into them.
Below are some statistics discussing why sharks attack people.
How Many Shark Attacks Happen Each Year?
On average, there are about 63 unprovoked shark attacks each year, with 5 to 6 of these attacks resulting in death. In 2023, there was a slight increase to 69 attacks, but this number still fits the average trend over the past five years.
In 2022, attacks dropped to 57, marking a 10-year low. The ISAF’s annual report mainly looks at unprovoked shark attacks, where sharks bite without human provocation, like approaching them or swimming near the bait. These incidents help us understand shark behavior better. So, although attacks by sharks do happen, the overall risk remains quite low.
Shark Attacks in the US
In 2023, There Were 36 Unprovoked Shark Bites on Humans in the US (ISAF)
Shark attack data confirms that the US is the geographical home for shark bites. In line with ongoing trends, the United States had the highest number of unprovoked shark bites in 2023, with 36 confirmed incidents.
This figure is a slight decrease from the 41 cases in 2022, accounting for 52% of the global total number according to a report of all known attacks by sharks compiled by Florida’s Museum of Natural History.
In 2022, there were 108 shark interactions reported worldwide. Of these, the ISAF recorded 73 unprovoked shark bites or attacks in the United States.
There Were Also Two Confirmed Deaths in the U.S. (ISAF)
Last year, the number of fatal unprovoked shark attacks increased to ten, doubling from five the previous year. In the US, two of these attacks resulted in deaths, with one occurring in California and another in Hawaii.
In 2023, Hawaii Recorded Eight Shark Attacks, While California Recorded Two Attacks (ISAF)
In 2023, Hawaii had eight shark bites, with one being deadly. This is a bit more than usual, but the number of bites in Hawaii changes a lot each year.
California had two shark bites, one fatal. New York saw four bites, North Carolina three, South Carolina two, and New Jersey one.
A Fatal Shark Attack Occurred in Massachusetts for the First Time Since 1936 (CNN)
As reported by CNN, 2018 saw the first fatal shark bite recorded in Massachusetts in 82 years. Before the attack on the 15th of September 2018, the most recent fatal attack was recorded in 1936.
Many believe the surging population of seals on the coast has beckoned more Great White shark populations to the area.
Shark Attacks Florida
16 Cases in Florida Represent 44% of the US Total Shark Attacks in 2023 (ISAF)
Florida continued to lead the world in shark bites in 2023, with its 16 cases making up 44% of the U.S. total and 23% of the global unprovoked bites. This number is below Florida’s recent five-year average of 19 incidents.
23% of the Unprovoked Shark Bites Worldwide Occur in Florida (ISAF)
The same source data can be used to determine that Florida is responsible not only for 44% of unprovoked shark bites across the US but also for almost a quarter (23%) of unprovoked bites worldwide.
Volusia County in Florida Had the Highest Number of Shark Bites (8), Representing 50% of the State’s Total (ISAF)
The same ISAF study examined the total number of unprovoked shark bites in Florida to determine that Volusia County is the hotbed of Floridian shark activity, accounting for 50% of all Florida’s attacks. This represents a slight increase from 44% in 2022, indicating a modest uptick in shark activity in the area.
In Florida, Volusia County recorded the highest number of shark bites at 8, accounting for half of the state’s total. This matches the area’s five-year average of 9 incidents.
Of the Eight Remaining Bites, Two Were in Brevard County, Two in St. Lucie County, and One Each Occurred in Miami-Dade, Palm Beach, Escambia, and Pinellas Counties (ISAF)
Of the remaining bites, Brevard and St. Lucie counties each had two, while Miami-Dade, Palm Beach, Escambia, and Pinellas counties each reported one.
Most Shark Attacks Worldwide Statistics
Stats Show There Were 69 Unprovoked Bites on Humans and 22 Provoked Attacks in 2023 (ISAF)
In 2023, there were 69 shark attacks worldwide, similar to the average of 63 a year from 2018 to 2022. However, there were 14 deaths from attacks this year, with 10 considered unprovoked, which is higher than the usual annual average of 6 unprovoked deaths.
It’s normal for the number of attacks and deaths to vary each year. Even though there were more deaths in 2023, similar spikes have happened before, like in 2011. The recent increase in deaths, especially from white sharks, might be due to more sharks gathering near popular beaches, especially in Australia, where many surfers go.
The Number of Highest Unprovoked Shark Attacks Are in the US (ISAF)
According to data from the ISAF, the US has the highest rate of unprovoked bites in the world, and within that, Florida accounts for 44% of all US-based shark bites.
The USA reported 1640 attacks since 1580, which is almost double that of Australia, which is the country with the second most attacks.
The Second Place with the Highest Number of Shark Attacks after the US Is Australia (ISAF)
An attack map published by ISAF confirmed that after the US, Australia is the second most active country for shark attacks.
However, while it may rank second for activity, Australia is the number one country for fatal attacks.
Australia accounted for 22% of Attacks, Resulting in 40% of Fatalities. (ISAF)
Australia recorded 15 unprovoked shark incidents in total, matching the region’s five-year average. Australia experienced a higher number of shark bite fatalities, making up 22% of all global attacks and resulting in four deaths, which is 40% of the total fatalities.
Of these, seven happened in Western Australia, with one fatal incident involving a bull shark, and five occurred in South Australia, where three were fatal and involved white sharks. Additionally, there was one shark bite each in Queensland, New South Wales, and Tasmania over the year.
From 1931 to 2022, Brazil Had 111 Shark Attacks (ISAF)
In 2023, Brazil reported three bites, none of which were fatal. Research collected in the International Shark Attack File confirms that between 1931 and 2021, Brazil saw 111total attacks by sharks.
Out of those 111 incidents, 65 occurred off the coast of the state of Pernambuco.
One of the Most Dangerous Shark Beaches in the World Is Gansbaai (American Oceans)
Sharks are found in seas and oceans the world over, and despite the record number of attacks and incidents in the US and Australia, one of the most heavily shark attack hotspots of the world is off the South African coast.
Getaway reports that Gansbaai sees anywhere between 5 to 10 shark attacks per year. Sharks have become one of the key tourist attractions in the area.
In 2019, 2 Fatal Shark Attacks Occurred in the Bahama Islands and Reunion Island (Florida Museum of Natural History)
According to data gathered and published by the ISAF at the Florida Museum, 2019 saw a drop in the total number of shark-related incidents. Only 64 unprovoked bites were reported.
However, two particular bites proved fatal – one in the Bahamas and one on Reunion Island. Interestingly, this also represented a 50% decrease compared to the average.
Shark Attack Statistics
The Likelihood of Fatal Shark Attacks Is 1 in 4,332,817 (Florida Museum)
According to the Florida Museum of Natural History, it was revealed that the odds of dying as a result of a shark attack in the USA is 1 in 4,332,817.
This means that you are more likely to die from an attack from wasps, dogs, or snakes than you are from sharks.
The Rate of People Getting Drowned Is Higher than Getting Bitten by a Shark (Florida Museum)
As per a study by the International Shark Attack File, you are more likely to die by drowning than be bitten by a shark. To further quantify those statistics, you are 3,820 times more likely to drown than die from a shark bite.
The chances of drowning are 1 in 1,134 compared to the 1 in 4,332,817 odds of being bitten by a shark.
Shockingly, Deaths Due to Selfies Are Higher than Being Eaten by Sharks (NY Post)
In an article published in the NY Post, more people have died while taking a selfie in recent years than from attacks by sharks.
Between 2011 and 2017, 259 people died while taking a selfie, as opposed to just 50 shark-related deaths in the same time span.
Board Sports and Surfing Are Involved in 42% of Shark Attacks (ISAF)
In a report published by the ISAF, more than half of all reported shark attacks are a direct result of board sports and surfing. The article specifies that swimmers and waders were involved in 39% of the incidents, while snorkelers and free divers accounted for 13%.
Shark Attacks Are Highest in the Month of September (ISAF)
The ISAF is the only known repository for shark altercation statistics. According to their research, the most active month for shark attacks is September. The data relates to attacks in Florida, which is the most active location in the US for shark bites.
Stats Show Several Factors, Including Climate Change, Are Involved in Shark Attacks (BBC)
A BBC report concludes that a rise in the rate of attacks on humans is related to a number of different factors. As the number of unprovoked shark bites worldwide seems to be on the increase, the reasoning behind it is linked to multiple environmental factors.
Climate change is altering water temperatures worldwide, and as a result, shark’s natural habitat and shark attack migration paths are growing. In addition, conservation efforts are seeing seal colonies and other shark prey populations increase, thus luring even more sharks into coastal waters.
There Are Three Types of Unprovoked Shark Attacks (ISAF)
The ISAF curator, George Burgess, documented that there are three different types of attacks by sharks. These were examined in detail by Wildlife Online.
The three types of shark bites are:
Hit and Run attack: Often unseen, a shark will attack quickly, take a bite and disappear. A hit-and-run attack is the most common shark interaction.
Bump and bite attack: The bump and bite is most commonly related to feeding. These are most often severe or fatal attacks. Sharks bump their prey before circling back for multiple attacks.
Sneak attack: Sneak attacks are a combination of the above. They occur without warning and often result in multiple bites.
Shark Attack Statistics by Species
There Are Almost 500 Known Shark Species, among Which Only 30 Are Involved in Attacks on Humans (Florida Museum)
Between sharks and rays, there are approximately 1,000 different species on the planet, yet according to statistics from the Florida Museum of Natural History, only 30 have ever been involved in unprovoked bites on humans.
This means that only between 3 and 5 % of shark species have ever attacked a human.
Since 1580, 949 Unprovoked Shark Attacks Have Been Documented Globally. (ISAF)
Since 1580, there have been 949 unprovoked attacks globally. Great white sharks were involved in 37% (351 attacks) of these, with 59 being fatal.
Most of the Fatalities in 2023 Were Due to White Shark Bites (ISAF)
In 2023, most fatalities were caused by white shark bites, with three in Australia and one in California. According to the Florida Museum, the Great White is the most dangerous shark to humans.
Most unprovoked attacks by sharks are test bites, where a shark senses humans (mistakenly) as their usual prey and often leaves after one bite. However, because of their size, many species, like white and tiger sharks, can cause fatal injuries with just a single bite or two bites.
Since 1580, 351 Unprovoked Bites Have Been Attributed to White Sharks. (ISAF)
The Great White has been responsible for a record 59 fatal human bites over the centuries. They have also been involved in a staggering 351 unprovoked shark bites, which accounted for 326 attacks and 52 fatalities earlier.
The Bite Force of a Great White Shark Is More than 4,000 PSI (American Oceans)
According to American Oceans, the great white shark has a bite force of 4,000 pounds per square inch (psi).
To add some perspective, the force of a Great White shark bite is approximately 10 times more than a lion!
The Second Most Dangerous Sharks in the World Are Tiger Sharks (ISAF)
While Great White sharks are regarded as the most aggressive ocean predator, they are followed close behind by the Tiger shark.
Tiger sharks are, according to the ISAF, unaggressive and often docile sharks; however, they are still second in the number of human attacks and shark-related fatalities. Tiger sharks have been involved in 103 unprovoked attacks and caused 39 fatalities.
Stats Show the Incidence of Bull Sharks Attacks Is Highest in Shallow Waters (NWF)
Bull sharks are clever creatures that can move from freshwater to saltwater without issue. As a result, they often move into shallow rivers and bodies of water. This brings the bull shark into close contact with humans.
According to NWF, Bull sharks are also naturally inquisitive and use their mouth as a way of exploring and investigating.
Tiger sharks caused 142 unprovoked shark bites, and bull sharks caused 119 during that period since 1580. (ISAF)
ISAF warns that shark unprovoked attack figures might not be precise due to misidentification. Yet, bull sharks, tiger sharks, and great white sharks, known as “The Big Three,” cause about 65% of attacks worldwide. They’re known for serious injuries and often roam near human areas.
Hammered Shark Attacks on Humans Didn’t Cause Any Casualties (Newsweek)
According to an article in Newsweek, Hammerhead sharks have not been the cause of human fatality for over 120 years.
While the Hammerhead is the most recognizable of all shark species, it is highly placid. There have been just 16 incidents involving people, and none of them have been fatal.
The Biggest Shark in the World Is the Whale Shark (Oceana)
The largest shark in the world is the Whale shark. However, as confirmed by Oceana, despite being the largest living fish, the whale shark is utterly harmless. One of three filter-feeding sharks, Whale sharks pose no threat to humans.
Interestingly, the spotted pattern on a Whale shark’s hide is as unique as a human fingerprint.
How Many Sharks Are Killed by Humans Statistics
Globally, There Are More Than 100 Million Shark Deaths (American Oceans)
While sharks kill around 10 people a year, humans are responsible for killing tens of millions of sharks. According to American Oceans, approximately 6.4 to 7.9% of all shark species are killed each year.
To further quantify that, there are approximately 11,000 sharks killed every hour!
1.3 To 2.7 Million Sharks Are Killed To Fulfill the Fin Soup Demand (Smithsonian Ocean)
In a piece published by the Smithsonian Ocean, it was reported that anywhere between 1.3 and 2.7 million sharks are killed every year for their fins.
In shark finning, sharks are caught, their finds are removed, and the shark is returned to the ocean, alive, and left behind to drown. It is the major cause of shark mortality.
Overfishing Has Dropped the Level of Sharks by 71% Since 1970 (Nature)
Research released in 2021 and published by Nature confirms that wild shark populations have dropped by 71% since 1970. The main reason behind this is the continued expansion of commercial fishing zones.
Overfishing of the oceans has seen a vast reduction in the amount of food available for most sharks. The follow-up from this is that more sharks are dying, which, coupled with the relatively slow reproduction rate, means there are fewer sharks swimming in our oceans.
Ten Critically Endangered Gray Nurse Sharks Were Killed in the Nets in New South Wales from 2017-2018 (The Guardian)
As part of a shark deterrent system, nets were used around beaches in New South Wales with a focus on catching rogue tiger or white sharks, which pose the greatest risk to humans.
However, according to research and an article in the Guardian, between 2017 and 2018, the nets caught and killed 6 critically endangered gray nurse sharks.
Between 1950 to 2008, 577 Great White Sharks And 353 Tiger Sharks Were Killed in Nets (Taronga)
Shark attack mitigation nets in New South Wales, Australia, have caused the deaths of almost 1000 sharks between 1950 and 2008. These deaths were not the goal of the nets but an unfortunate consequence of them.
As discussed on Taronga.org, there are better and more humane ways to limit interactions between humans and sharks, especially when you consider that there were over 15,000 other marine mammals also killed in the same nets during that time.
FAQs
How many shark attacks per year?
In 2023, there were 69 unprovoked attacks, while 2022 saw 57 worldwide. This marks a change from the 10-year average of 63 attacks per year, as noted by the University of Florida.
How many people are killed by sharks each year?
On average, less than 10 people are killed by sharks worldwide each year.
How many shark attacks in 2022?
During 2022, there were a total of 108 shark interactions worldwide, and ISAF documented 73 unprovoked shark bites or attacks in the United States.
What state has the most shark attacks?
Florida has the highest number of attacks.
What are the chances of getting attacked by a shark?
As per ISAF, the odds of being killed or even attacked by a shark is one in 4.3 million around the world. You are 1500 times more likely to be attacked by a bear than a shark.
Conclusion
Sharks are an often misunderstood species that are viewed as nothing more than cold-blooded killers. Yes, sharks are effective eating machines, but they are so much more than that. As per ISAF, the risk of death from a shark attack is one in 4.3 million around the world.
"Unleash the Power: Mastering Break Barrel Air Rifles for Maximum Performance. Discover expert tips and techniques to enhance the power and precision of your...