Do you have an open area on your hunting property you wish you could screen off in order to get to or from your stand without bumping deer? Or maybe you’ve got a crop field or food plot you wish you could block from the road or section off from a larger field. Or perhaps you just want to break up a monotonous landscape to make it hunt bigger. If any of these thoughts have crossed your mind, chances are you googled something like ‘screen trees for hunting property’ or ‘best tree/shrub/plant to create a screen’ or ‘fast growing screen trees’.
That last one is especially relevant because in today’s world, we want everything NOW!
Well . . . not gonna lie, we are in the same boat for our hunting property. We have a low-lying swamp just off the road, which sits a good 4 feet higher than the swamp, so spotting deer from a vehicle is a breeze. Also, the swamp is not your typical cattail and dogwood type swamp, it’s mostly medium height grasses with a few willow clumps scattered throughout – so you can see deer when they are up and walking. During hunting season, we’d constantly see vehicles slowing and stopping to observe deer from the quiet country road, eventually they’d run off and seek better cover – obviously, this wasn’t a positive thing. Not to mention, the increased possibility of poaching, especially with us being absentee landowners. Thus, I began my search for a fast-growing screening tree or shrub that was water tolerant (because we’d have to plant them along the edge of the swamp).
A general planting map showing our line of trees to obstruct view into the swamp. The separate clumps are to break up the openness and hopefully act as buck bedding areas.
I started to research screen tree varieties and species online. I came across several sites that offered what I was looking for, but ultimately the price was more than we were willing to pay. Keep in mind, we were looking to screen off approximately 425 yards of road frontage, which with one tree every five feet (1 tree/5 ft.) we needed approximately 300 trees to create a thick enough screen to create a visual barrier into the swamp – multiply that by $6-$10 per tree and it adds up really quick. Nonetheless, most of these sites were offering similar varieties of trees, so I had a good starting point. Now it was time to search deeper into the interwebs to find a tree farm or nursery with an affordable price.
If you’re after a fast-growing screen tree, you’ll likely have two options to choose from – a hybrid poplar or a hybrid willow of some sort. Long story short, we finally stumbled across Kelly Tree Farms, based out of Clarence, Iowa and they offered the details, photographs, pricing, and fast growing screen trees we were looking for. We opted for 300 of what they call the Austree Hybrid Willow. At a $1 per tree (or cutting) it seemed reasonable.
Before showing you pictures of our plantings, I wanted to mention that we intend to plant another row of these Austree willows staggered behind the first row using clippings from this year’s willows (free). Also, we plan on planting some type or variety of coniferous trees (likely spruce) behind the willows to provide a long-term, year-round screen for the deer in the swamp.
We will be updating this blog throughout the year to track the progress of the living and supposedly fast growing whitetail screen. But first, here are a few things I learned along the way when trying to purchase the perfect screen tree for deer online.
It’s hard to find a website with good images of what the screen tree will look like down the road (we plan on changing that with this blog). Kelly Tree farms showed nice examples as well.
There’s no “perfect” screen tree out there.
Don’t expect a screen the very first year.
Think about future plantings and a more permanent screen.
Get creative. Along with planting the line of screen trees we planted several clumps of seven willows to break up the openness and create more preferred bedding areas.
The hybrid willow screen trees came packaged in bundles of 100 cuttings. After a week of soaking in a bucket of water, roots were nearly two inches long and buds were sprouting from the tops.
We used an auger planting bit ($10 from hardware store) to drill the pilot holes for the cuttings. One thing to note, site preparation is key and they recommend a weed/grass free planting environment. A healthy dose of RoundUp (glyphosate) should take care of any competing vegetation.
Planting instructions said to leave 2-5” of the top unburied. Fill in around the roots to provide good soil contact.
Just a stick in the mud… hopefully it’s a couple feet tall the next time we see it. And that’s it, with four guys we had 300 trees planted in 3 hours.
Check back often as we will be updating the blog monthly with progress photos.
June 9th update. Growth after 2 weeks.
July 20th update. About 3 feet tall.
July 20th update. Multiple stems about 3 feet tall.March 21, 2018 update: They survived the first WI winter and starting to bud. Most of them have multiple stems and stand about 4 feet tall. We planted the hybrid willows on the outer edge of the screen to create a fast and more immediate screen, while the spruce trees grow up and create an evergreen screen for the future. Tallest tree is about 6 feet tall.
The afternoon sun was settling westward behind a bank of disconsolate grey clouds, as I worked my way across a huge flat-topped mesa just north of Texas’s famous Big Bend country. A huge javelina boar showed briefly through the short-brush. Readying my handmade Osage self bow and stone-pointed arrow, I moved to intercept him. The hunting gods must have been pleased, for the big boar continued his swaggering path directly toward me. My bow was raised, my fingers tight on the string as he crossed behind some brush. Seven short yards were all that separated us when he emerged, broadside, beady-eye gleaming and razor-sharp cutters lifting his lip in a perpetual good-natured snarl. I dropped the string and watched my stone point bury behind his shoulder. It was the second-largest archery-killed Javelina in Texas that year.
Life and Times of JavelinaJavelina (pronounced Hav-uh-leen-uh), or Collared Peccary, reside stateside only in Texas, southern New Mexico and Arizona. Hunting opportunities vary from state to state. Arizona offers the best access to good public-land hunting, but javelina numbers are not terribly high, and in many areas, tags must be applied for and drawn lottery style. Texas is in many ways the reverse—in certain areas of Texas, javelina numbers are super high, and it’s possible to see half a dozen troops in a winter morning’s hunt, with 30 to 40 javelina per band. Most of Texas is private land, however, so you’ll need permission from the owner to hunt just about anywhere, and good properties may require an access fee. Licenses are easy to obtain though, and every hunter is allowed two javies each year with the purchase of a regular Texas hunting license. I’m not familiar with hunting javelina in New Mexico, so I am not in a position to offer an opinion on hunting quality and opportunity there.
Stink Pigs—so called because of the strong musk emitted by a scent gland located atop their hindquarters—are really fun to hunt, especially with a bow. Their sense of smell is superb but their eyesight is pretty bad, so as long as you keep the wind in your face it’s relatively easy to close within 10 or 15 yards of a band of pigs. Their hearing is pretty good, too, but most of the time they make so much noise shuffling about, grubbing for food, smacking their lips and quarreling with each other they rarely hear you. Only pay real attention to being quiet if you’re stalking a lone pig or a herd bedded down for a siesta. If the herd is quiet, you’d better be, too.
Peccary TeethPeccary possess long cutters (or teeth) that protrude fang-like from both top and bottom jaws. These continuously rub against each other, creating razor-sharp edges. Javelinas are tough, courageous critters, very dangerous to dogs and even humans at times, due to their tendency to attack anything that bothers one of their own. When following a wounded javie be careful, and approach any shadowed thicket with caution. If your pig is still alive, you’ll likely hear it popping its teeth at you—a loud, rather intimidating sound—before you see it. Best to put another round (or arrow) into the pig at your first opportunity in this scenario.
Dogs can experience especial problems in confrontations of the javelina variety. A big courageous dog will likely be killed, because he’ll put up a fight and be cut to pieces by the herd. A little dog with more bluster than bite can get its owner in real trouble by picking a fight with a pig, then running to hide behind his owner’s legs when the pig’s buddies all show up with blood in their eyes.
In Texas, Javelinas are scored exactly like a bear or lion, by measuring the length and width of the cleaned skull, then adding the two measurements together for a final score. The biggest, oldest boars usually have worn or broken their cutters down short, so often the best skull mounts come from middle-aged boars that still possess long, impressive fangs. Live weight usually ranges from 35 to 55 pounds. The two biggest Texas boars I’ve weighed pushed the scales to 65 pounds. Females are usually more petite than boars, but still sport long cutters and make admirable shoulder, full-body or skull mounts. Indeed, unless you’re very experienced, it can be quite hard to tell male and female apart while hunting.
Hunting JavelinasFinding javelinas is sometimes the toughest element to hunting them. If you’re new to an area, I suggest spending a day scouting for sign left by the little pigs before getting serious about hunting them. Look in dry washes and arroyos for little blunt tracks—somewhat reminiscent of deer tracks, just much shorter. Keep an eye out for chewed-up prickly pear cactus; javelina love to eat the pads, leaving bite-shaped chunks missing. The bite edges will be ragged and stringy, since stink pigs don’t have cleanly meshing front teeth. Look for water sources with sign around them, for though javelina don’t need to drink much when feeding on prickly pear, they prefer to stay hydrated, and will frequent seeps, water troughs and such. In hot or buggy weather you might find evidence of wallowing activity in muddy areas. Also, if there are corn feeders around (as are common in Texas), keep an eye on them. Stink pigs love corn, and will drive deer away and take possession of the area around a feeder.
Once you’ve located an area with plentiful Javelina sign, ready your bow or shoulder your rifle. It’s not super important to be hunting at the crack of dawn; javelinas are not very early risers, and are more likely to be moving once sunshine warms the area a little. Hunt your area from downwind so the pigs don’t scent you, and keep your own sniffer busy—many times I’ve smelled a herd of stink pigs before I’ve seen them. Keep your ears open, too; occasionally javelinas bark or huff at each other, the sound giving you another way to locate them.
If there is a mesa, ridge, point or other vantage overlooking the area where you found javie sign, it’s a good tactic to sit atop the point and let your binocular do the walking. Be patient and spend plenty of time glassing; an entire herd of javelinas can be hidden in a tiny draw for a couple hours, and you’ll think there’s not a pig for miles. Then suddenly, they stroll out into the sunshine and it seems as though there are pigs everywhere. While sitting and glassing, you can listen, too—you might locate javelina by their sounds.
Once you’ve located a sounder of peccary, it’s time to make your move. Make sure you keep the wind in your favor and approach cautiously, but not too cautiously. Javies stay on the move most of the time, and if you take too long, they may have vacated the area before you arrive. Once you’re within 40 yards, you can slow down and stalk with care. If a pig spots you, just freeze and wait till it relaxes. Then resume your stalk.
Bullets and Broadheads for PeccaryYour regular deer-hunting rifle or handgun will work fine on javelina, just make sure you use a tough bullet. Stink pigs are dense and hard-boned, as you’ll see from the story below.
I almost simply wrote the same advice regarding archery gear—that the same gear you use on deer will work on pigs—but in good conscience, I can’t. From personal experience guiding peccary hunters in Texas, I believe they are tougher to kill than deer. In my opinion you need a really tough, cut-on-contact, one piece broadhead like a Woodsman, Montec G5 or similar. Here’s a true story to illustrate my point:
A friend who guided for me had never killed a peccary before, so we went out one evening to try to get him a pig. He was carrying an archery setup with which he had recently killed a huge bull elk, shooting expandable points. I told my buddy I had previously seen expandable heads fail on javelina, and suggested he use something else, but he was confident in his setup so we went hunting. His bow pulled 70 pounds of draw weight at 28 inches.
We soon located a troop of stink pigs, with one big boar sniffing around the females. The boar crossed in front of us, stopping broadside at 32 yards. My friend is a crack shot, but javies are pretty small and his arrow impacted about an inch and a half forward of the crease, with a sound like a baseball bat hitting a light pole. We tracked the boar over 450 yards up the side of a mesa before leaving him to live another day. The arrow had penetrated only an inch and a half beyond the broadhead ferrule, stopped cold by the peccaries scapula. It is my belief that a solid, cut-on-contact broadhead would have penetrated that scapula and double-lunged the pig. The moral of the story, of course, is that javelinas are small and very tough. Choose your gear and shots accordingly.
Shot PlacementWith a firearm and a tough bullet, you can down a peccary from any angle, but with archery gear the ideal shot angle is broadside, or slightly quartering away. The vitals are small, so take your time and make a careful shot. One helpful tip to remember is that javelinas can’t flex their neck very far to the side, so anytime they hear or see anything they must turn toward the source to investigate. This usually leaves you with a quartered-to angle. That’s fine with a firearm, but don’t risk it with a bow; wait for a better opportunity. Due to the same characteristic, it’s not helpful to make a sound to try to stop a moving pig for a shot—the animal will invariably stop quartered-on.
Following UpWell-hit javies usually (though not always) tip over quickly. The same rules you’d use when hunting deer apply to any blood trail, except for one: if you believe that the pig is wounded and potentially alive, consider him dangerous. Exercise caution, and if possible, carry a hard-hitting firearm to use if he comes at you. A mad peccary is not likely to kill you, but he sure might leave some cool scars on your legs. Just be careful.
Processing MeatThere are two very important elements to keeping peccary meat tasty: keep it clean and cool it quick. When you approach your first stink pig, you’ll wonder how anyone could possibly eat something that smells like that. Get the skin off and away, exercising real care to keep the scent gland with its oily musk off the meat, and the carcass will look and smell fresh and tasty. Get the meat on ice in a cooler and you’re all set. Grind into breakfast sausage or chorizo, or slow-cook for a pulled-pork barbeque. Bon Appétit!
Outdoor enthusiasts that enjoy activities like shooting and hunting know that there’s more to their equipment than just gun choice. Choosing the proper optic to pair with your gun is an important step in gathering all the necessary equipment for your next outing. During the decision process, one common debate we come across is choosing between FFP vs. SFP scopes. Before we dive into the difference between FFP scopes and SFP scopes, let’s cover the basics of scopes as a whole.
Understanding Scopes
Choosing the right optic for our individual needs all comes down to our activity of choice. For instance, take spectator sports viewing. These activities require us to move our point of view in different directions in order to keep up with the activities in front of us. In cases such as these, a nice set of binoculars would be our best choice in optics.
Now, for the professional target shooter or hunter, the preferred optic device would be a top-quality riflescope. Riflescopes allow us to attach the scope directly to our gun. This helps us to optimize our viewing capabilities, especially at long distances, all while keeping our hands open and available to operate our gun.
Riflescopes come in many different sizes, shapes, and qualities, so it’s essential to understand the differences available to us as no two riflescopes are the same and each outdoor activity requires specific equipment to get the job done.
Types of Riflescopes
There are many different types of riflescopes that are currently on the market. While there are some that are considered rather standard, each one presents its own unique qualities that attract professional and amateur hunters and shooters. Some of the most common riflescopes include:
●Hash Reticle – These reticles are often preferred amongst hunters and long-distance shooters because they help create a more precise shot thanks to the ability to take into consideration the approximate range of your target.
●Bullet Drop Compensating (BDC) Reticles – BDC reticles take bullet trajectory into consideration. While this seems like a rather high-end option, reticles being manufactured today have some sort of BDC reticle integrated into them.
●Illuminated Reticles – These scopes are just what they sound like, illuminated. They allow us to better see our scope’s crosshairs in lower lighting situations. They come in both high-end and budget-friendly options, so we have to take our time researching different models to see which will best suit our needs.
Understanding the Difference Between FFP Vs. SFP Scopes
When it comes time to understand the difference between FFP vs. SFP scopes, it’s essential to cover some basic information. What differentiates these two devices is the positioning of the reticle in the assembly, which we will cover below.
First Focal Plane (FFP) Scopes
For a first focal plane (FFP) scope, the reticle is placed towards the front of the erector tube assembly, which is located in the back portion of the actual scope. One common misconception is that the reticle is placed in the front of the scope, when it’s placed in between the erector tube assembly and magnification lenses. This would place it towards the middle of the scope, not the front.
Since the reticle is placed in the front of the magnification lenses and erector assembly, it allows us to look through the device and grow the reticle size in the same exact relation as the image being viewed. This not only allows us to bring our target into a clearer view but allows us to see the crosshairs of our reticle better since they will increase and decrease in size simultaneously with the target.
Pros:
Many hunters and long-range shooters prefer FFP scopes because the subtensions are accurate across all magnification settings. That said, here are a few other pros of using a FFP scope:
●The crosshairs are easily visible at higher magnifications
●The subtension remains constant across all magnification settings
Cons:
One of the most significant issues with FFP scopes is the fact that they aren’t that great in poor lighting conditions. It’s also worth noting that at low magnification, and when the target is smaller, the reticle can be difficult to use properly.
●Price if often higher as they are typically associated with higher-end scopes
●The reticle can be considered pretty small when being used at low power
●Difficult to see in low light at low power
Second Focal Plane (SFP) Scopes
Second focal plane (SFP) scopes aren’t all that different than FFP scopes, besides the fact that the reticle is behind the magnification lenses on the erector tube assembly. It is located in between the eyepiece/erector tube assembly. What makes this different from the FFP scope is the fact that the crosshairs of the reticle will remain the same size through the lens, no matter the magnification setting you’re on.
Pros:
While FFP scopes are a favorite among many outdoor enthusiasts, SFP scopes are more commonly seen in the average riflescope. Some common pros of the second focal plane scope include:
●Easily visible crosshairs across all magnification settings and no change in crosshair size, making it easier to see, especially for those using these scopes for hunting
●Easier to use in lower magnification settings
●Cheaper since they are easier to produce
Cons:
While these are more commonly seen amongst outdoor enthusiasts, they do come with their downsides as well. Some of which include:
●Altering subtensions makes them accurate only at predetermined magnification levels
●Not always reliable for variable long-range shooting
Bushnell Has the Tactical Gear You’re Looking For
Knowing the different types of scopes available, as well as the difference between FFP vs. SFP scopes, is essential for all outdoor fanatics, especially when their passions involve hunting or professional shooting. We’ve outlined the pros and cons of both first focal plane scopes and second focal plane scopes for you above, however if you still have questions, then feel free to contact our team today by calling (800) 423-3537.
No matter which scope you prefer, Bushnell has a scope designed with you and your outdoor needs in mind. With over 70+ years of experience, the Bushnell team has the knowledge to help you find the gear you need for your outdoor activity of choice.
Looking for a new scope to add to your equipment? Then make sure to check out our selection of Elite Tactical scopes today!
With an even longer riser to axle-to-axle ratio than the previous V3 31, the V3X has a two inch increase out to 33in and a brace height increase from 6in out to 6.5in.
The V3X is offered in two axle to axle lengths, 33in for maximum stability and string angle comfort at full draw for longer draw lengths. The 29in, which is sold separately, is tailored towards ultimate agility in tight spaces; the V3X gives hunters a compact rig without compromising Mathews industry leading accuracy.
The V3X 33 sports a 6.5in brace height and delivers speeds up to 336fps. The geometry of the V3 platform opened up a new threshold of capabilities, allowing Mathews to increase the overall riser length while keeping an ultra compact frame with unmatched stability.
Being paired with the 740 harmonic damper for ultimate stealth and Centerguard technology for perfect timing, the V3X gives gave hard core bow hunters more function than ever before. Now with the introduction of the V3X we get to see the most advanced hunting platform Mathews has created.
Centerguard Cable Containment system places the roller guard in the true centre of the bow, resulting in optimal cam timing and a balanced draw cycle to maximise tunability while also adding additional vane clearance.
Extended Bridged Riser – stability is the key to accuracy, taking a strategic approach to the riser design led to a platform that cut weight while maximising length and rigidity in critical areas. The V3X sports the longest riser to axle-to-axle ratio Mathews has ever built.
Limbs and Limb Cups – deflected limbs and past parallel geometry, paired with a redesigned limb cup, cuts weight while increasing performance and efficiency.
Nano 740 Stealth remains a top priority on the V3X. The riser platform and limb geometry also increased cam efficencies and enhanced the effects of 3D damping for less noise and vibration than ever before. The V3X deploys the Nano 740, which is calibrated and tuned to the specific harmonics of this model. The extended position also provides added balance at full draw.
Since its inception SwitchWeight Technology has been extremely convenient and allows shooters not only the ability to change draw length but also peak draw weight in 5 pound increments via the cam’s module instead of changing limbs. Available in 60, 65, 70 and 75 pound peak weights. Each set of modules are programmed for an incredibly smooth draw and maximum efficency. For further customisation, modules are available in 85% let-off. Also comes in 80% let-off which is not a stocked item but can be special ordered. Please enquire.
Silent Connect System is compatible with the V3X. This optional kit enables hunters to attach Mathews genuine bow rope and bow sling in the field quickly and silently.
Specs at a glance
IBO Speed up to 336 fpsWeight ranges 60lbs, 65lbs, 70lbs, 75 lbs. Please specify weight required. All bows are adjustable 10lbs down from the peak draw weightDraw length range 27.5in-31.5in. Please specify draw lengthBrace Height 6.5inAxle to Axle 33inMass weight 4.67lbsLet-Off 85% standard. Also comes in 80% let-off which is not a stocked item but can be special ordered. Please enquire. Switchweight modules for the ultimate ease in changing the bow’s peak weightMathews genuine bowstrings and cablesExtended bridge riserCenterguard Cable Containment system3D Damping TechnologyAvailable in Right Hand and Left Hand. Please specify RH or LHMade in USA
Imagine for a second you’re a big bass, just hanging out on a deep water weed line. You’re not particularly hungry, as you’ve got an ample baitfish supply and fed well earlier in the morning. All of a sudden, something peaks your interest – it’s a large gizzard shad (or a big bait) swimming by, seemingly injured.
Do you strike it? Or do you let it swim by?
On one hand, you’re not particularly hungry, so you would be fine letting it swim. However, you didn’t get to be a big bass by passing up easy meals – and at 7 or 8 inches, a gizzard shad will provide enough energy to really last…
Although a bit satirical, situations like these are every day occurrences for bass. Unlike us, they don’t have a supermarket available to them 24/7/365. If they want to eat, they’ve got to do it themselves.
For that reason, bass (and most wild creatures) are extremely opportunistic when feeding, and will seldom turn down a big, energy packed meal if it’s right in their face. This is the reason why big baits are becoming increasingly popular – even in parts of the country not known for giant bass.
If you replaced the big gizzard shad in the above story with a small baitfish, would it have changed the reaction?
Probably so, as the caloric reward for the meal wouldn’t necessarily be enough to justify the chase – particularly since the bass wasn’t actively feeding.
The theory behind big bait fishing is that in order to catch big bass – you need to show big bass something that interests them enough to strike, regardless of whether they’re actively feeding or not.
Despite its popularity, “big bait” angling doesn’t come with a user’s guide, and the tools and techniques can be downright confusing to the novice angler.
For that reason, we’ve put together the following guide to four common “big baits” – and how to rig and throw them.
1. Big Bait Swimbaits
The original “big bait” – swimbaits have become such a diverse category that it’s hard to lump them all into one. However, in this context we’re talking about larger, paddle-tail baits (hard or soft) that are designed to imitate a large gizzard shad, stocker trout, or hitch. Popular brands include Huddleston Deluxe, Triton Mike’s Bull Shad, the Spro BBZ series, or the – Optimum/Osprey series of line-though and top hook swimbaits – in large 6-10 inch sizes.
Gear up:
The ideal swimbait rod will be long (at least 7 foot 4 inches), heavy duty, and have a sensitive tip. For 6-7 inch baits that weigh between 1 and 2 ounces, you can probably get away with repurposing a flipping stick, but for the heavier stuff – up to 5 ounces, you’ll need a custom purpose stick. Most die-hards rely on something in the 7 foot 6 inch or 8 foot range, with an extra heavy power and a long enough handle to get good leverage while working the bait. For reels, use a low-gear ratio (5.4:1) high capacity reel spooled with either 50-60 pound braid (for braid lovers) or 20-30 pound monofilament or fluorocarbon. Some swimbait anglers swear by braid for its lack of stretch, and other think it costs them fish by ripping too big of holes in bass mouths – so experiment and choose what you prefer.
How to use:
Swimbaits are designed to do just that, “swim” so they are best utilized in places where bass would encounter large prey fish in a natural setting. Structures like deep weed lines, points, humps, and ledges are all ideal. Concentrate on learning how to keep you r chosen bait at specific depths, and try to visualize where on the structure your bait is during the entire retrieve.
2. Big Bait Glide Baits
A relatively new category, glide baits are large, hard plastic jointed swimbaits designed to “glide” from side to side on a steady retrieve – and they’re the hottest thing since sliced bread across much of the country. Top choices include the River2Sea S-Waver, the Deps Slide Swimmer, and the ABT Lures Suicide Glide.
Gear up:
Glide baits work a pretty wide path, and for that reason most anglers use some type of monofilament, copolymer, or fluorocarbon, rather than braid. For 5-6 inch baits, opt for 17-20 pound line, and for larger baits, don’t be afraid to go up to 30. For reels and rods, the same type of rods that work well for swimbaits work well for glide baits – just make sure to match the rod to the weight of the lure.
How to use:
To get a big bait glide bait to work, all you need to do is steadily retrieve it, and it will automatically do its thing. Once you’ve caught a few fish, though, the opportunities are endless. Experienced glide baiters will routinely work in pauses, twitches, pops, and jerks to make the action more enticing. Glide baits excel in pressured situations, in clear water, and any time the bass are feeding up. Something about their erratic “glide” just draws strikes when nothing else will – including other big baits. Gliders are quickly becoming legendary in their reputation for strike drawing, even from smaller bass – so don’t be afraid to throw one under just about any circumstances possible.
3. Big Bait Spoons
We’ve come a long way from the days of the old Johnson Silver Minnow… Giant spoons have become standard equipment for most anglers in the Tennessee River ledge fishing community, and they’ve already been responsible for a number of top tournament finishes in the highest levels of the sport. The Nichols “Ben Parker” magnum spoon was the original – but there are now several companies making spoons up to 9 inches and a full 3 ounces. They work by simulating a large gizzard shad in its final death throes – and can often trigger a reaction strike that fires up a massive offshore school of bass.
Gear up:
Big bait spoons should be fished on stout tackle, with heavy action swimbait rods getting the call from most anglers. Reels should be super-high speed, to catch up with fish that bite on slack line, and line choices are most commonly 20-30 pound mono or fluorocarbon.
How to use:
To catch bass on a big spoon, it’s all about the fall. Make a long cast, and free spool the reel so it falls vertically to the bottom on or past the structure you want to fish. Once it hits bottom, engage the reel and “rip” your rod tip to 12 o’clock, then allow the bait to fall on slack line while following it down with your rod tip. Most bites occur on the fall, so watch your line for tics, and set the hook hard. Repeat the “hops” all the way back to the boat.
4. Big Bait Bucktails
Another “big bait” invention of the ledge fisherman is the bucktail jig – a repurposing of a saltwater and striped bass bait, just recently applied to bass fishing. The bucktail jig is just that – a one or more ounce lead head jig with a long, 6-8 inch piece of bucktail or feathers tied to it, creating the profile of a large shad or baitfish.
Gear up:
Because they’re so streamlined, you can work a bucktail jig like the Wahoo Super Striper on lighter equipment than many of the other “big baits” on this list. Repurpose a flipping stick, or pick up any other long rod that’s heavy enough to handle a 1 or 1 ½ ounce lure. Reels should be super high speed (to deal with fish running towards the boat), and spooled with heavy (17-20) pound fluorocarbon or copolymer.
How to use:
Fish a bucktail jig just like you would a flutter spoon – by stroking it hard off the bottom, and letting it fall back on semi-slack line. You really can’t work it wrong though, as there are times when offshore bass will eat them when just wound steadily back to the boat.
Interested in pushing past the 100-yard line? Want to get into long range shooting but are confused with all the terminology and myths surrounding it?
Today’s goal is to get you to a solid starting place to build and improve on for years to come.
A herd of long-range rifles means a good day no matter where you are!
We’ll lay out some of our recommended rifles for beginner precision shooters as well as point out other considerations to think about when choosing your first precision rifle.
So, keep reading to learn more about what you’ll need to get those long-range shots!
THE QUICK LIST
Best Long Range & Precision Rifles
1. Tikka T3X CTR
From the factory, the CTR comes with quite a few desirable features.
A hammer-forged and threaded barrel makes for an accurate shooter ready to accept a suppressor. That’s almost a requirement these days.
The action is straight enough to accept aftermarket pre-fit barrels without any machine work needed.
Not to mention, the scope base uses lugs and screws for attachment. This creates a rock-solid attachment system.
The safety locks the bolt in place, preventing any unwanted opening, and that’s especially handy if you use it as a hunting rifle.
Its stock is a bit basic, but it’s sturdy enough to prevent flex, lending to an accurate rifle.
Personally, I consider the CTR a phenomenal starter rifle since they’re very accurate out-of-the-box.
But don’t worry; you can upgrade this series with a plethora of aftermarket parts.
2. Tikka T3X TAC A1
The T3X TAC A1 is the bigger, more well-featured brother of the CTR.
It uses the same action and barrel but adds a few tricks…
Starting from the front, it sports a threaded barrel with a large 3-port brake. This brake reduces recoil but can also be removed for suppressor use.
A 2-stage, adjustable weight trigger, replaces the standard Tikka trigger.
But the biggest and most noticeable feature is the chassis. It offers an M-LOK forend upfront for attaching all the accessories you want.
This rifle also brings aluminum bedding blocks for the action.
And the factory grip is comfortable but can also be swapped for your favorite AR-pattern grip. We prefer versatility at PPT!
The rear end features a folding stock that is adjustable for length-of-pull and comb height. But it uses a standard AR-15 interface…you know that means…
It can be swapped for your preferred stock.
3. Ruger Precision Rifle
Ruger jumped into the precision rifle world with the Ruger Precision Rifle, and they knocked it out of the park!
With the growing popularity of precision rifle matches, Ruger reached out to some of the experts in the field to collaborate on a rifle. And the RPR was born.
Ruger Precision Rifle
This is truly the AR-15 of the bolt-rifle world…a list of aftermarket parts would require its own lengthy article.
From the factory, it comes with a threaded barrel, all sitting on a cold hammer-forged 5R rifled barrel.
An aluminum M-LOK forend accompanies the front of the gun for attaching accessories.
One of the key features of this rifle, though, is its magazine adaptability. It will easily handle DPMS pattern, Magpul PMAGS, and industry-standard AICS mags.
An adjustable trigger, standard AR-15 safety, and grip complete the fire controls.
Moving on, it comes with a fully adjustable, folding buttstock. This stock is adjustable for both length-of-pull and comb height.
And it uses a standard AR-15 interface, so the RPR works with any aftermarket option.
Oh, and did we mention that the Ruger Precision Rimfire makes an excellent trainer rifle that will keep things consistent but cut down on ammo costs.
4. Bergara B-14 HMR
The Bergara B-14 HMR rifle hits every mark for anyone that wants a solid crossover platform.
A number of people have gotten into the precision rifle game to further their skills in the field, and instead of building two separate rifles…why not buy one that can perform at the distance range and the hunting field? It just makes sense.
Bergara B-14 HMR and B-14r
Like some other models, the B-14 HMR offers a match-grade threaded barrel with a thread protector. You’ll have to supply your own break if you want one, though.
The receiver is patterned after the Remington 700, which means it accepts any Remington 700 base or aftermarket stock.
A match-grade trigger adds to the features.
Bergara B-14 HMR
Its factory stock features an aluminum mini chassis for accuracy and molded-in QD flush cups for your favorite sling.
Length-of-pull and comb height adjustments help fit the rifle to any shooter. Bergara also offers a matching .22 LR training rifle for cheap practice.
5. Accuracy International AT
Alright, guys, here it is, my one wild card…
Accuracy International’s AT is the next generation of the wildly popular Accuracy International Arctic Warfare — one of the most widely issued military sniper rifles in the world.
While many aftermarket parts are available right out of the box, this rifle needs no improvement.
For starters, it provides a match-grade threaded barrel fitted to the receiver with AI’s quick loc system.
Ever wanted to change calibers at the drop of a hat?
Well, now you can. The quick loc system barrels make swapping calibers easy with just a 4mm hex key and about two minutes of time.
This rifle’s receiver is flat-bottomed and bonded to a rigid aluminum chassis, and the bolt features six lugs and a short and fast 60-degree throw.
A match-grade 2-stage trigger helps you realize all of the rifle’s accuracy potential.
The AT also delivers a 3-position safety with some unique features. Position one is safe, locking the bolt in place and rendering the trigger safe, while position two keeps the trigger safe but allows you to run the bolt to safely unload the rifle. And position three is fire.
Covering the aluminum chassis is a set of molded plastic skins that users can switch out for any color they desire.
The stock also features multiple sling attachment points in either a folder or fixed version.
You can even add your own PPT sling!
If all you want to do for a rifle is mount a quality optic and get to shooting, the AT proves hard to beat.
Dependability and consistency are the hallmarks of the AT line of rifles.
.308 Winchester vs. 6.5 Creedmoor: Which Caliber Is Better for Long Range Shooting?
.308 Winchester has been the go-to standard in long range shooting for the last half-century for a few reasons…
Popular .308 Winchester and 7.62x51mm Ammo
Tons of available match ammo and regular plinking ammo exist for it — from match grade to surplus. If you decide to reload your own ammo down the road, an abundance of bullets and reloading data is available…more so than nearly any other round.
But how do you save money when shooting this round? Keep your expensive match ammo for the longer distances and use cheaper surplus ammo for close-in positional work.
6.5 Creedmoor
What about 6.5 Creedmoor?
6.5 Creedmoor is the newer, cooler kid on the block. It pushes out farther and drops less than a .308.
Assorted 6.5 Creedmoor (L to R: Federal FMJ, Soft 129gr, Ballistic Tip 120gr, Gold Medal 140gr)
Factory match-grade ammo is available with good quality. While overall ammo choices and reloading data aren’t as prevalent as a .308, quality ammo is still readily available.
So, which do you choose — .308 Win or 6.5CM?
Honestly, both options are proven choices for beginners.
Twist Rates & Precision Shooting
I’m sure everyone has seen the markings on the side of a rifle barrel — 1/10, 1/8 — but what do these numbers mean?
Basically, it refers to the length of the barrel required to make one full turn of the rifling. So, 1/10 would translate to 1 full turn in 10 inches of barrel length.
Rifling (Photo: Wikipedia)
Twist rates are important because they stabilize the bullet at longer ranges, especially when it starts going into the trans-sonic and sub-sonic territory.
For a beginner rifle, you want something with a very versatile twist rate as you try different ammunition or handloads to find your preferred ammo.
Match-grade and handloads
With a .308 Win, a 1/10 twist is generally preferred. Over the course of my career with precision rifles, I’ve never run across a bullet that won’t perform well in a 1/10.
On the other hand, with a 6.5 Creedmoor, a 1/8 twist will be your most versatile option. All of the lighter weight hunting bullets up to the heavier precision rifle bullets will perform well with this twist rate.
Upgrading a Precision or Long-Range Rifle
This is going to be a big one…
Since this is a beginner rifle article, you’ll probably want to upgrade and accessorize. One trip to your local, long-distance range or precision rifle match, and you’ll be dreaming of new parts.
From stocks, chassis systems, magazines, triggers, and even barrels…using a rifle platform that can be upgraded with aftermarket parts is huge!
Accessories like bases, rings, bipods, and stocks can make or break a rifle. I’m not saying you have to buy the most expensive accessories, but solid quality parts will keep your rifle performing, and you focused on the target.
Bergara B-14r on the ShadowTech PIG0311
Since you need to see what you’re aiming at, a good scope is an absolute must.
Yet again, the most expensive is not always needed. With the rising popularity of distance shooting, a lot of companies have started to produce solid optics at very reasonable pricing.
When shopping, match the reticle to the task — a duplex hunting reticle will not do any good when trying to do holdovers at distance.
Oh yes…we love optics!
And try not to overdo the magnification — believe it or not, too much can hinder you. A good 3-18 or 5-25 can cover most situations.
Lastly, repeatable adjustments are a necessity. They keep your rifle and you consistent at longer distances.
Things to Consider When Choosing a Precision Rifle
Know Your Goal
My best piece of advice for anyone wanting to get into the long-range game is to have a clear idea of the end goal.
I’ve seen many people buy the hot commodity of the week that doesn’t fit with what they need in a rifle. This is a costly, aggravating path to take.
Easy Maintenance
One of my biggest priority’s when it comes to rifle selection is being able to maintain it.
That means having the ability to swap major parts like triggers, barrels, and stocks without taking it to a gunsmith.
Can you swap triggers easily?
Maintaining out-of-the-box accuracy without any additional expenses accurizing or bedding is a big factor. Personally, I want the ability to do the work at my own workbench, and you probably do too.
Price
Long range set-ups can run a little more than your average rifle, but with the out-of-box features and adaptability, a little investment up front will save you a lot of money in the long run.
Conclusion
With a bit of planning and forethought, the path to precision rifle shooting can be a fun and rewarding journey.
.223 Long Range Shooting Setup
Hopefully, we’ve given you a good list of rifles to consider when shopping and some other considerations to factor in when making that final selection.
What are your favorite long range rifles? Let us know in the comments below. Need some scope recommendations? Check out our guide to the Best Long Range Scopes.
In the late 1890s, the U.S. military began using a newly developed round that would command the battlefield all the way to World War II. The .30-06 caliber was a cutting-edge ammunition technology now that smokeless powder had almost completely replaced blackpowder. It served well on the battlefield chambered in the 1903 Springfield bolt-action rifle during the First World War and, of course, in the M1 Garand during the next World War.
With new advancements, forces needed the performance of the .30-06 150-gr. load, but in a shorter cartridge — which required a shorter action. That is how the 7.62x51mm NATO round, and its .308 Winchester civilian sibling, was born. In 1952, the round was introduced commercially after being developed for the military. Two years later it was adopted by NATO with its new designation being 7.62×51 NATO.
Different .308 loads can affect the long-range accuracy of the round. Additionally, matching the ammo to the rifle can improve your effective range.
The United States has long loved the .30-caliber round and it has been used in standard-issue rifles and machine guns for decades. In fact, militaries around the world have used guns chambered in .308. Popular guns like the M14, M60, M1919 and countless others. The .308 caliber is fast and carries one heck of a punch. But how effective is the caliber at distance?
In this video and article, I explore the effective range of the .308.
Reaching Out
The .308 Winchester is the most popular sniper/counter-sniper round by far. It far outweighs any other caliber when it comes to standard-issue rifles.
.308 Winchester is the most popular counter-sniper round by far. It far outweighs any other caliber when it comes to standard-issue counter-sniper rifles.
But first off, let’s define what “effective” is. When we talk about the effectiveness of a caliber, we are usually referring to the distance that the round can still humanely kill.
In a hunting scenario, it’s not good sportsmanship to wound your game, only leaving them to die a slow death or live the rest of their lives maimed. If you are hunting prairie dogs, .308 would be lethal easily out to a mile. However, if we are talking about shooting that medium-size North American game like a whitetail deer, the distance would be much closer. In fact, I argue that the effective range of .308 on deer is 300 yards.
308 has a maximum range that is relative to the type of animal you are hunting. A prairie dog could be hit at a mile while a grizzly bear would need to be much closer.
The round easily has enough energy to kill whitetail deer at 300 yards. But by 500 yards, the bell-shaped trajectory of the .308 makes the shot unethical for the majority of shooters. Now, before you .308 lovers hate on me, that doesn’t mean you couldn’t do it. But if your skillset doesn’t include high accuracy at that distance, it wouldn’t be right for you to take the shot.
We asked Maximum Life Expectancy’s Chief Instructor, Grant LaVelle, about his past as a Marine and SWAT sniper. In the Marine Corps, they would shoot .308 to 1,000 yards; however, in SWAT it was much closer. What was preached to SWAT snipers was that in a law enforcement capacity there were no second shots. In certain military situations, that might be acceptable. But in law enforcement, snipers need immediate incapacitation to save lives.
In the U.S., .30 caliber rounds have been used in standard-issue military rifles and machine guns for decades. The .308 is extremely effective in many roles, including sporting purposes.
When a sniper fires a round, he needs complete de-amination of the threat. So, we are talking about 100% accuracy in the cranial vault that houses the brain. If hostages are involved, which they often are, the police can’t have there be any chance of causing harm to innocent lives. Grant stated they were never granted clearance to take a shot over 200 yards. In most cases, that would require a special circumstance, special permission and thoughtful consideration.
Conclusion
So, what is the effective range of .308? It depends on the need.
If we are talking about putting down a moose versus taking down a prairie dog, the distance will vary. Can it kill at one mile? Yes, but it depends on what you’re shooting.
If you want to just hit a steel target it could even shoot farther than a mile. In a law enforcement sniper application, however, it seems they won’t take a shot over 200 yards unless absolutely necessary.
Editor’s Note: Please be sure to check out The Armory Life Forum, where you can comment about our daily articles, as well as just talk guns and gear. Click the “Go To Forum Thread” link below to jump in and discuss this article and much more!
Editor’s Note: Bob Judkins, an experienced crappie fisherman and member of the Oregon Bass & Panfish Club, offers his favorite equipment and tackle choices as well as some tips about where to catch local crappie, especially in the spring.
This rod is really light, so you can fish all day without much arm fatigue. That’s a great plus for older anglers like me.
My other rod is a Wally Marshall Signature Series WM80CP-2, 8′ light-action, 1/16 – 1/4 ounce lure weight, 2 – 6 pound line. That rod is good for fishing brush piles because it has a longer reach and a good backbone for lifting big slab crappie out of the nastiest brush pile.
Ultra-lights and micro-lights are fun rods for crappie fishing. I don’t use them anymore. I’ve lost too many big fish such as bass and channel cats while fishing for crappie with those rods, and you will probably hook one of these monsters while crappie fishing.
If you are a first-time crappie angler, you don’t have to go out and buy a dedicated crappie rod. The rod that you may have been using for trout fishing will work just fine.
Recommended Crappie Reel: Wally Marshall Pro WP30 Spinning Reel
This reel has a larger spool than most small reels. The larger spool helps reduce line twist, a common occurrence when using monofilament line and light jigs. The drag of this reel is really smooth and it will handle the largest of fish.
Recommended Crappie Line: Bass Pro Shop Premium Excel Monofilament Line
6-pound test, clear blue fluorescent (for high visibility)This is the fishing line I always end up using. It’s easy to see and “line watching” is important when you fish for crappie. Also, the memory of this line is not bad at all.
As far as super lines are concerned, I have used the Fireline Crystal in 6-pound test. It handles great and casts a long distance with no line twist, but I recommend that you tie on a clear monofilament leader.
The reason is as follows: A few years ago, I was fishing for crappie at Brownlee Reservoir with a friend. We were fishing the same depth, using identical jigs and bobbers, but we had on different fishing lines – mine was monofilament and his was a “superline.”
I was catching fish on every cast, but my friend was not. We then switched rods to see if that would make a difference. It did – no fish for me, but a fish on every cast for my friend. The conclusion was very clear to us: If you use a “superline,” tie on a clear leader.
Recommended Crappie Bobber: Weighted Torpedo Foam
Length: 1 ½” or 2”
There are so many types of floats to choose from – balsa, plastic, foam – and they all work well. I prefer the weighted torpedo foam for a longer cast.
This Northland jig is my favorite “go to” jig in color and size. I like its slow fall and small profile. It is a good jig for all panfish. My second “go to” jig is a Northland Gypsi Jig with crystal-flash in chartreuse and in 1/16 to 1/32-ounce sizes.
I use this jig in late summer and fall. It has a bigger profile with lots of flash. Soft plastic crappie jigs of different shapes and colors work well, too. If that’s what you have, use them.
COLOR?I’ve asked lots of crappie anglers, “What color is your favorite?” Their answers covered so many different colors. It may be that when crappie are on the bite, color may not be that important. But, when the fishing is tough, I “go to” the small Fire-Fly and white Crappie Nibble.
Recommended Crappie Bait: Berkley Crappie Nibbles
Color: White.
Crappie Nibbles come in other colors – pink, chartreuse, glow-in-the-dark. I’ve used them all. But WHITE nibbles are the ones to use and “I don’t leave home without them!”
Crappie Nibbles are really soft. If you take them out of the jar, spread them out and let them air-dry for 24 hours, they will firm up a bit and stay on your jig longer when used. But, if you dry them too long, they will become rock hard and you would not want that to happen. I keep two jars of “cured” nibbles ready to go.
When and Where to Catch Crappie in Oregon
For the beginner, the best time to fish for crappie is during spawning time in the spring. This is one of the easiest times to catch crappie. Spawning takes place when the water temperature is 62 – 65 degrees. Around Portland, this may be in May and June (give or take a couple of weeks). Small shallow ponds and lakes warm first.
My favorite small body of water is Vernonia Lake, located just south of the town of Vernonia, Oregon. To get there, take Highway 26 west to Highway 47; turn right; follow Highway 47 to Vernonia. Continue driving through town and you will find the lake to your right.
The travel distance from downtown Portland is about 50 miles. This lake is very people friendly. It has wheelchair accessibility, a small gravel boat ramp (boats with electric motors are allowed). Special Regulation: The limit is 10 crappie per day; no minimum length.
When I fish Vernonia, I go to the left of the parking lot and down to the wheelchair dock.
Most anglers will be fishing for trout in the main lake. I turn around and fish back toward the bank. I also fish the shade under the dock.
Use a 1/64 ounce Fire-Fly with Crappie Nibbles, a bobber, and jig it 2-3 feet down. This is a good place to start. If you don’t catch fish here, just move around the lake and try different spots.
In the Portland area, Swan Island Lagoon (on the lower Willamette River) can be a good spot. It’s a popular place and if your timing is right, you will have lots of company! It has good bank access.
Fish the west side of the Lagoon. Look for logs, pilings, docks and shade. They are all good spots to fish.
The Oregon Bass & Panfish Club is involved in a variety of angler education and fisheries enhancement activities. See their club page on this website.
Gripping a compound bow is probably one of those things you don’t worry about or notice until it becomes an issue. I’ve had my fair share of grip issues and sometimes still tweak it slightly.
There are three stages you’ll need to go through to fix your grip:
Good and bad grip
Proper bow hand grip
Making your grip you’re own
In this post, I will take you through what a good and lousy grip placement looks like, how to improve it if you’ve got a wrong placement, and finally, how to make your grip comfy. We’ll cover Good and bad grip placement; How to grip the bow properly, Making your grip your own.
Good And Bad Grip
So to understand what makes a bad grip ‘bad’ and a good grip ‘good,’ I’m going to talk about both so that you might be able to recognize if these are some of the things you do or don’t do. I believe it’ll be easier if I talk about the lousy grip first.
Bad Grip Placement
Incorrect bow grip
You’ll know a lousy grip placement when you see a guy holding onto his bow tight. The best comparison I can make to a wrong grip placement is gripping your bow as if you were gripping a baseball bat, knuckles out, fingers wrapped around, lots of tension in your hand. (pic number 1)
On paper, it sounds like it should work, right? Well, this couldn’t be further from the truth. The reason some guys do this is simply an anticipation of the shot. When their trigger goes off, they want to grab the bow subconsciously. What it’ll do is create torq in your shot. From the moment the trigger goes, your brain tells you to grip the bow.
This happens in split seconds. So the arrow is still in the bow. Your bow hand is the last thing to touch the arrow before it leaves the bow. So if you go from not gripping the bow at all to gripping it really tight, it’s going to torq the bow and change the flight of the arrow.
Good Hand Placement
Correct bow grip
So the opposite, good grip placement can be done in a multitude of ways, but the one common denominator is that the bow isn’t being gripped super tight. The bow is being held by the thumb and fingers pressing on either side of the bow.
What this does is it doesn’t create any form of tension in hand, and you are keeping the bow steady with the thumb and fingers (picture 2). Now, you can position your fingers in a load of different ways, but we will get into that later in the article.
Proper Bow Hand Grip
So here I’m going to walk you through how to get a good consistent handgrip placement. I’ll be explaining as if you are a right-handed archer (swap hands for left-handed archers). With your left hand, make an L shape with your fingers and thumb 90 degrees, then turn your hand about 30 degrees to the left.
Get your bow and slot your hand in (picture 3). Try to get some contact with the palm of your hand with your bow grip. Then what your going to do is your going to curl in all your fingers and run them at a 45 degree down from the shelf of your riser, then push your thumb along the inside of your riser.
You will achieve the best handgrip when you try to squeeze your thumb and fingers together without them actually touching. This will put pressure on both sides of the bow, putting a little torque in the bow.
Let’s say that previously you were gripping your bow last second in anticipation. You can follow the steps above to try and get used to the new idea. You can place your fingers straight out instead of curled. However, ultimately you want to be able to have your fingers curled for a better and more consistent pressure in hand.
Making Your Grip Your Own
Once you’ve gone and practiced the steps in my last heading, I almost guarantee you you’ll have said something along the lines of ‘I wonder could I move my…’, and the answer will usually be yes! A person’s grip is as individual as their thumbprint. You can move the angle of your hand down or out, move your first finger and your second finger around the front of the bow.
Like I said before, there is a multitude of things you can do. Once you’re keeping that squeeze instead of gripping, you can play around with it. All I’ll say is once you find something that you find a comfortable stick with it.
There’s no point in changing the way you hold your bow 24/7. At first, it might feel like a conscious effort to get your hand in the same spot. Over time, practice will make it subconscious action.
To give you an example of a grip, I’ll explain mine. Place the first two fingers around the front of the bow and the last two pushed up against the edge of the grip, thumb pushing onto the grip on the other side. I also use some sticky grip tape which I highly recommend.
Related Questions
Are shot trainers good? Shot trainers are suitable for practicing the execution of your shot, but sometimes, since it’s not the same pressure as a bow, the timing of your shot can be different.
Rifle barrel life – How fast will your barrel reach retirement age?
In this age of increasing retirement age, it seems we’re expecting our rifle barrels to follow suit! In the world of high-performance rifle cartridges, barrel life maybe a short season. This month we look into rifle barrel life with 3 top gunsmiths on both sides of the Atlantic to get a shot at this highly energized topic amongst competitors, hunters and ELR shooters alike.
We spoke to three top gunsmiths in the game to find out how it effects competition shooters, ELR shooters and hunters, all after the ultimate performance for their intended game.
Left to right: Mik Maksimovic presenting a new rifle to a customer, Ryan Pierce out hunting and Harry Drescher from Solid Solution Designs
Rigby: Barrel life with traditional rifles like this Rigby in 375H&H is almost infinite. You will probably never wear out this traditional hunting rifle’s barrel.
Rifle barrel life is a topic I come across often when discussing some of the long-range cartridges both online and in gun shops. A few have also asked me about the barrel wear on the 300 Norma Mag cartridge so I thought I will put out a few thoughts about it as well as reeling in the thoughts of some top gun smiths in the process. What do they have to say?
For this we have reached out to Mik Maksimovic at Dolphin Gun company in the UK that has built more F-Class rifles than he cares to forget about.
We also spoke to Harry Drescher in the Netherlands from Solid Solution Designs that builds many large bore rifles for long range and ELR (exlrs.com) as well US based gunsmith Ryan Pierce, who has probably built more 300 Norma hunting rifles than anyone else and is a well-respected knowledge source on the respective 300Norma Facebook group. Among other things, Ryan builds 300 Normas that are meant to hunt with. This means that weight is usually on a premium and the overall balance of the gun important.
In this way we shall get 3 expert views on the important topic.
Why do barrels burn out?
Barrel wear or rather barrel burning comes from the immense heat that is generated whenever a cartridge is fired and you’re effectively channeling all that energy through a small hole hence coining the term for some cartridges as ‘over-bore’ cartridges. This creates immense heat and friction inside a small bore, pushing a bullet along the lands of the rifle barrel. The more powder you burn through a small hole, the more your barrels burns out. Shoot a few rounds fast, any you will feel that barrel steaming! All this in the name of Long Range Performance. Check out the video below of the high performance 338LM at 1 mile that we shot in Sicily.
Rifle barrel life in perspective
A 308win cartridge will burn circa 42grains of powder for a 30 caliber bullet. A 300 Norma is burning 90 grains of powder for the same 30 cal. bullet.
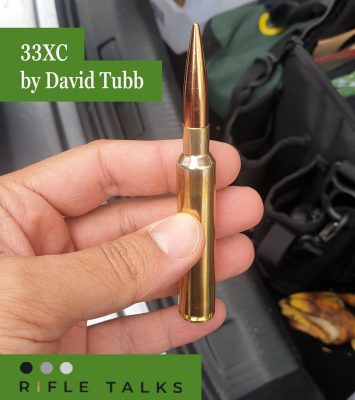
A 338 Lapua burns circa 90grains of powder under a larger .338 bullet. David Tubb’s 33XC is burning close to 125grain of powder, that’s 38% more than the 338Lapua for the same bullet diameter. Those big numbers you see on your chrono have an effect on your shoulder as well as your barrel life :_)
Does short barrel life hold you back from that shiny new cartridge you’ve been craving for?
Voere X3 rifle topped with leading Steiner tactical optics on offer
If you’re reading this, it probably concerns you. Rifle barrel life puts many prospective shooters off a high-performance cartridge. But should you really be concerned with barrel life? Here’s one way of seeing it. If burning barrels concerns you more than the performance you can achieve, than that level of performance is probably not for you or you don’t need it. High performance cartridges are created for specific tasks. If I’m using a 37XC cartridge to take out a high value target, the cost of my round is virtually negligible. If I take a 300Norma on my next Ibex hunt, the cost of the barrel wear and the lifetime of that barrel is virtually negligible too compared to the cost of my hunt. In the same way, if I’m a prospective F-class competitor and absolutely want the top cartridge I can manage to shoot that could help me achieve a marginal advantage to WIN, then 500 rounds of barrel life maybe just the ticket to achieve that. Are you still with me? If yes, keep reading.
300 Norma cartridge
Let’s take a hunting rifle chambered in 300Norma such as those built by Ryan Pierce. Let’s say we get 1000 rounds of tip top accuracy, 1/3 MOA accuracy shooting a 215gr at 3100ft/s without pushing it. We’re going to get impressive performance that will put meat in the freezer for years to come. It requires less than half the windage of my 308win seen below making my shots more forgiving in the same wind condition. If you take it out for practice once a month and fire 30 controlled rounds each time, that’s 360 rounds of practice in a year. That’s 3 years of practice with enough life in the barrel to bag tons of meat. Being a more wind forgiving round, it allows you make the same shot with half with difficulty. If you’re doing an Ibex hunt and absolutely must connect at any feasible distance you may be shooting, you can’t go wrong with a 300 Norma. You’re spending a few thousands on that trophy Ibex, barrel life in comparison is nothing, you guessed it! If you want to read more about the 300Norma, we prepared this in detail write up.
I’ve also noticed that the users after specific cartridges often are trying to achieve very specific goals and understand this principle better than others who just go to the range to plink and have fun burning a few rounds of ammo. Typically these rifle cartridge users build rifles around the bullet and cartridge they want to use or otherwise rechamber an existing rifle for a specific rifle which entails a new barrel and set of dies in most scenarios (as is the case with 338LM users shooting a 33XC) Typically these shooters are more involved with their goals and objectives and want to achieve specific goals.
How much barrel life are you happy with?
Above: A 308Win round is often thought of having some of the best barrel life available. 10k rounds is not unheard of in service rifles. Burning barrels is not an issue with such volume to bore ratio as found in the 308win. Get the March Scope 2.5-25×56 with upto 100MOA of elevation
View your barrel with a borescope as we did here https://www.instagram.com/p/CEGVveyJi9U/
If like us you enjoy Ultra long range, the 300 Norma Mag is a fantastic contender for 1-mile shooting as you can see here and even a few hundred yards further in the right conditions. Mine is doing 3250ft/s with a 215berger, it’s no slouch. My shooting buddy Robert is running 230s at 3050ft/s from a 29inch barrel.
Above: At these velocities, a rifle barrel may only last a few hundred rounds.
Above: Pushing the limits during ladder testing of the 300Norma Mag before taking it for the King of 1 mile competition in France.
If you shoot 3 rounds and let it cool, you’re looking at 900-1200 rounds of barrel life maybe more.
“The other question I ask shooters that write to us at rifletalks.com is, do you want a 1-mile rifle or a rifle that can potentially shoot 1 mile?”
What’s the difference some ask me?
A 300win mag can shoot 1 mile as will your 30-06 and your 284Win as I saw at the king of 1 mile with the excellent shooting of Cap Beng from France. The guy is a phenomenal army shot but under gunned with a 284win at 1 mile. Had he been running a 300Norma, the outcome could have been very different.
A one mile rifle cartridge like the 300 Norma and similar cartridges have what it takes to connect at 1 mile. They are still supersonic at the distance, their windage correction will be relatively low say 6-8MOA of wind in 10mph full value which makes it easier to connect in changing winds.
If you want to shoot 1 mile in Europe, join this facebook group, Trapani one mile shoot with more info about the next one mile shooting weekend in Sicily, Italy coming March 2021.
Considerations around rifle barrel life
Below are some questions you may want to ask yourself when deciding about a new high performance cartridge.
String of shots – how many rounds are you expecting to shoot in a string?
What are your objectives with this cartridge?
Are you in for competition or a high-performance hunting cartridge?
What is the cost of your barrel wear?
What is the cost of ammo before you wear out the barrel?
How can you extend the lifetime of your barrel?
Are the achievements worthwhile for you?
How can I see what’s going on in the barrel?
I suggest you get yourself this borescope, for $129 it will give you a good idea what’s happening inside your barrel as you shoot your way through its lifetime as well as seeing what’s going on after you actually clean your barrel. Take the guess work out of the equation.
Above: a bartlein 308 barrel just before engaging the rifling forward of the lead, it’s brand new, only fired a proofing round through it.
Above, a 308barrel with about 200 rounds of 300 Norma Mag through it at 3250ft/s. Surprised?
How much does your rifle barrel wear cost?
Often, shooters take this to be the rifle barrel cost. If you’re in Europe you’re looking at £900-£1300 per barrel depending on configuration, length, fluting, finish, muzzle break etc.
When you consider a high-performance cartridge doing 1000 rounds of peak performance before it drops off, you’re looking at about £1 per shot in barrel wear plus whatever it costs you to assemble your ammo. I can see some of you raising their eyebrows. If you consider the cost of 1000 high performance rounds, you’re looking somewhere at £2-3 a pop if you handload and £6-8 if you shoot factory for the big magnums and ELR rounds. That’s £2-3000 in ammo consumed before replacing the barrel…. Still interested? Ok once we’re over the financials, let’s speak to the experts.
Chat with Mik Maksimovic
What does Mik Maksimovic have to say about rifle barrel life and burning barrels? (Dolphin Gun Company UK)
Producing some of the largest volume of F-Class rifles in Europe, Mik knows barrel life as the palm of his rifled hands 🙂
Rod: What kills rifle barrelsfast when shooting strings?
Mik: Hey Rod, firstly, rifle barrels don’t wear out they BURN out. Heat from repeated firing burns barrels out slightly quicker
Rod: How many rounds do you expect your F-open gun to go?
Mik: I expect 2000 rounds from my 300 WSM and 1200 to 1500 from my 7-270 WSM
Me at the 2019 Fclass European Championships shooting a custom 284Win built by Dolphin Gun Company in a Fox Barrel Block Chassis
Rod: Do you see any big changes in F–open calibers?
Mik: F-Open is always evolving calibre wise, we have gone from 6.5-284 to 7mm to 30 Cal, but it’s restricted to 8mm and no one has gone down that route yet, no really good bullets in 8mm avail yet. (editor: similar challenges lie with the .408 round, not enough high performance bullets to choose from restricting the popularity of the cartridges)
Rod: What can help shooters in getting the most out of their barrels?
Mik: Using single based powders and cleaning correctly and regularly will give you the best barrel life, double based or high energy powders will burn a barrel out quicker
Rod: How far off is an FTR 308win barrel in terms of barrel wear from an open gun by today’s performance standards?
Mik: FTR 308Win barrel burns out the same as an F-open barrel, they use 20% or so less powder so they get longer barrel life, the barrel life is dependent on the calibre, and amount/type of powder burnt down the barrel.
You can email Mik [email protected] if you need more info referring to this article
Your’s truly running my 284Win F-open at Bisley Ranges, UK
Ryan Pierce on High Performance hunting rifles
Next: Ryan Pierce from Piercision rifles, USA
Above: Ryan doing what he enjoys best with his own high performance hunting rifles
Rod: What kills a barrel fast when shooting strings?
Ryan: There’s quite a few variables that come into play for killing a barrel. How hot you get the barrel. Are you shooting at a pace similar to F-class? (editor: 1 round every 80 seconds or so) That will cut barrel life in half easily if you get the barrel really hot all the time. I keep my barrels cool whenever possible. During load development I’ll wait a couple minutes between shots and use a chamber cooler during that time. The type of powder used will have an effect on barrel life also. I generally don’t let the barrels on my big magnums get really dirty. Extreme spread and accuracy opens up when that happens, due to carbon build up etc.
Rod: How many rounds do you expect your high performing 300Norma/ 28Nosler hunting rifles to go?
Above: High performance rounds can help you half your windage hold offs.
Ryan: Round count is pretty subjective. Accuracy requirements play a big role in that as well, along with the above-mentioned variables.
For instance, if a guy shoots a bunch of rounds through his 28 Nosler all the time and gets the barrel smoking hot while doing so he could shoot a barrel out in 3-400 rounds pretty easily. However, if you keep it cool and clean you can get 600 or more rounds down it. That’s pushing a 195gr at 3100+ fps. The Norma and Norma improved I am telling guys to expect 1000 rounds or more of good accuracy if the barrel is taken care of. I have a barrel with 800 rounds through it that still hammers. A customer sent me some groups from his awhile back that were still 1/8 moa at that round count. It all comes down to how the barrel is treated.
Rod: Do you see any big changes in high performing hunting calibers or barrels used for them?
Ryan: I did hear about Bartlein’s new steel they’re offering. Sounds like a good deal. Time will tell on the new steel.
As far as new cartridges go there’s always going to be the “latest and greatest”. “I’ve obviously built quite a few 300 Norma and Norma improved. The fact that Lapua makes the brass is a huge bonus for it. I have 28 WARM firings on a single piece of brass and the primer pocket is still tight. Feels almost brand new. Its a great round. Extremely accurate and wide nodes. Capable of sending a 230 berger over 3000 fps in a 26″ barrel and still fit in magazines while throated for heavy bullets.”
I’m currently messing with reloader 50 in my heavy 30″ barrel setup and have a node at 3150 fps with a 230 berger and no pressure signs. Its offering much better case fill than N570 also. Another one of the popular cartridges I’ve chambering for guys is the 30-28 Nosler which is simply a 28 Nosler necked up to 30 cal. It has more case capacity than the 30 Nosler. My personal rifle in it has a 26″ proof carbon and is pushing a 230 Berger at a little over 2950 fps with h1000. It’s mind blowing accurate as well. The last two groups I shot at 580 yds had .6″ vertical. I also shot a cold bore 3 shot group over 3 days at 580 yds. One shot per day. Each day had 10 mph winds from different directions. The 3 shot group was 1.7″ tall x 6″ wide. I misjudged a fishtail wind and opened the group up to 6″. The first two days the group was under 2″ and perfectly centered. It also shoots the 215 Bergers lights out at a little under 3100 fps with h1000. I’m guessing optimal barrel life for it will be 1200-1500 rounds.
Above: Nowhere is the game more life and death than when hunting in the mountains. High performance cartridges may just be your ticket to success!
Rod: How far off are these cartridges in terms of barrel wear from traditional cartridges like 300win mag by today’s performance standards and materials?
Ryan: Both those 30 cal magnums mentioned are quite a bit faster than the 300 win mag. 300 win mag is gonna get 1500+ rounds of good barrel life if its taken care of.
Another somewhat new and great option is the 131 gr Blackjack bullet with its sky-high BC. Its been out over a year now. I’ve done a few for guys and they’ve hammered. I’m finishing up a 25 SST for myself in the next week or two and will be using that bullet with it on deer/antelope size game. Not sure how long the barrel will last but seeing as its predominantly a hunting rifle it will last a long time.
That’s the same with my bigger magnums. Remember 600-1000 rounds of barrel life in a hunting rifle is a really long time. That’s a lot of meat in the freezer, haha. If the new steel ends up offering 50% or more-barrel life in big magnums, then the 33XC might start picking up popularity in hunting rifles. My current setup has quite a bit of throat erosion at 190 rounds. My buddy said it looked like his 6XC at 2000 rounds LOL.
The funny thing is the 33XC barrel is consistently holding 2-3″ vertical at 1000 right now. How much longer it will do that I have no idea but I’m guessing the barrel will give up peak accuracy around 400 rounds or maybe a hair less. I’m going to try a different powder in my next barrel and see if that helps with throat erosion etc. Currently using N570 and pushing a 300 gr berger at 3225 fps in a 30″ proof carbon barrel. That combo definitely isn’t going to be easy on barrels!
Rod: What can help shooters in getting the most out of their barrels?
Ryan: My advice to new shooters on allowing the barrels to last as long as possible is to keep them cool. Don’t shoot 5-10 round strings. Let it cool between each shot to maximize barrel life.
Ryan is extremely knowledgeable and helpful, you may contact him here [email protected]
Remember, keep load development short when testing hi performance rifle cartridges. Learn how to load develop in < 50 rounds here.
Dutch Rifle smith on ELR rounds
FOR SALE MARCH GENESIS 6-60×56
Read about the March Genesis ELR scope.
Next from the Netherlands, is Harry Drescher (Solid Solution Designs)
Rod: What kills a barrel fast during shooting strings?
Harry: In order to answer this question, we should think about how the barrel is built and how it is constructed, that is a free-floating match barrel in a MTU style profile. Let’s take stainless steel barrels, Single point cut rifling. The critical part of the barrel is the first 10 inches from the chamber into the barrel. This is exposed to a lot of pressure, heat, carbon and coppering. It is the area where the bullet spins for the first time in the lands and grooves of the barrel. If you shoot a fast string,and repeat this, the internal surface wears fast and the heat stress will cause deformities also known as heat cracks or snake skin. In time when these deformities grow, the accuracy can drop off.
Rod: How many rounds do you expect your high performing ELR rifles like 33XC and 375chey to go?
Harry: If the customer chooses the type of barrel and the type of rifling as mentioned in option 1 we can expect loss off accuracy after as much as 1200 rounds in high performance mode. This means monolthic bullets, with speeds over 960m/s
Rod: Do you see any big changes in high performing calibers or barrels used for them?
Harry: Recently we have seen a massive increase of sales of replacement barrels in 33xc, and 37xc as well as 416 Barret. The main brand chosen is in our view Bartlein, Krieger, and Proof research. Runner up is Benchmark and Rangemaster Precision Arms barrels being both top notch supplier of button rifled barrels.
Rod: What can help shooters in getting the most out of their barrels?
Harry: Choose a matching finished length and twist rate that really helps you achieve your ULR goals. Lower twist rates can really make the difference in the subsonic phase.
First accuracy, then speed we always say. Off course it’s a relative thing.
When your barrel is freshly cut, and you start using it, it will wear out. The first few hundred rounds will be the best that you get. A good tip might be to focus your cleaning more on carbon removal and less on copper removal. In this way you maintain the performance level even better.
And for projectiles, please choose a good High BC bullet like WTC, Berger solid, Cutting Edge, SSD Holland.
Rod: How far off are these ELR cartridges from introductory cartridges like 338Lapua when it comes to burning barrels?
Above: Courtest of PGM Precision Rifles showing a 338LM barrel’s throat after 4000rounds of CIP factory ammo in military use with about 5mm of erosion.
Harry: The true ELR cartridges are reducing rifle barrel life fast. That is absolutely true. We have seen that already with the good old 300rum back in the days.
33XC by David Tubb: A true high performance round with heaps of potential having conquered 2020 King of 1 Mile in France competition! Rifle barrel life is not very important when you only need 20 rounds to conquer the European title!
Where a 338lapua magnum can do easily 3000 rounds without loss off accuracy, Formula 1 cartridges like 375CT, 33xc, and the others mentioned will engage your barrel rapidly. I have even had a customer who did 600 rounds laser-style in his 416Barret, ending the rifling for a good 45 percent…….. I must admit that he used a brass solid over a copper solid, but still. Yeah!
Unlock the Perfect Shot: Discover the Best Scope for Break Barrel Air Rifles. Enhance your shooting experience with precision and accuracy, as we delve...




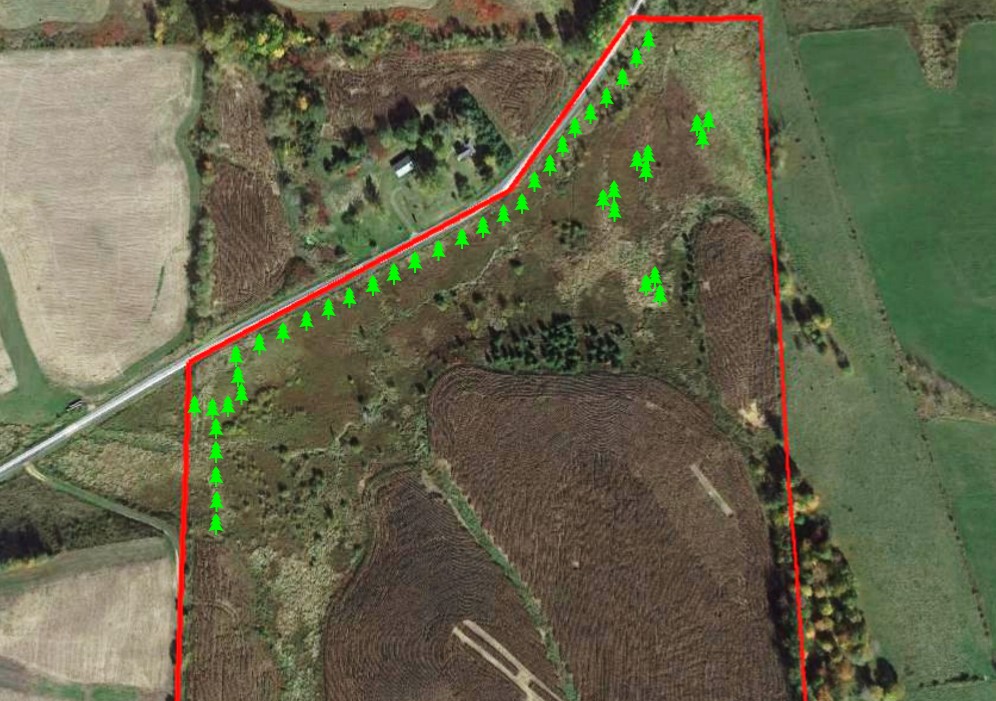
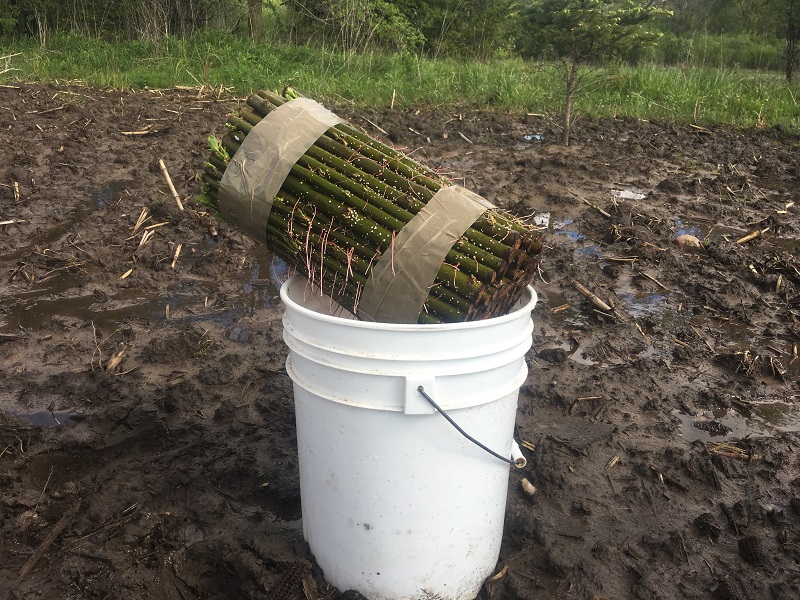
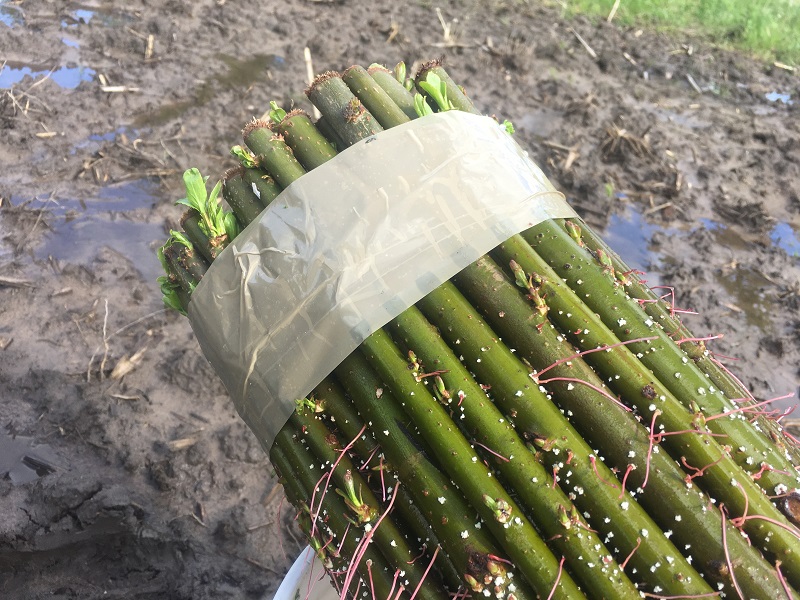
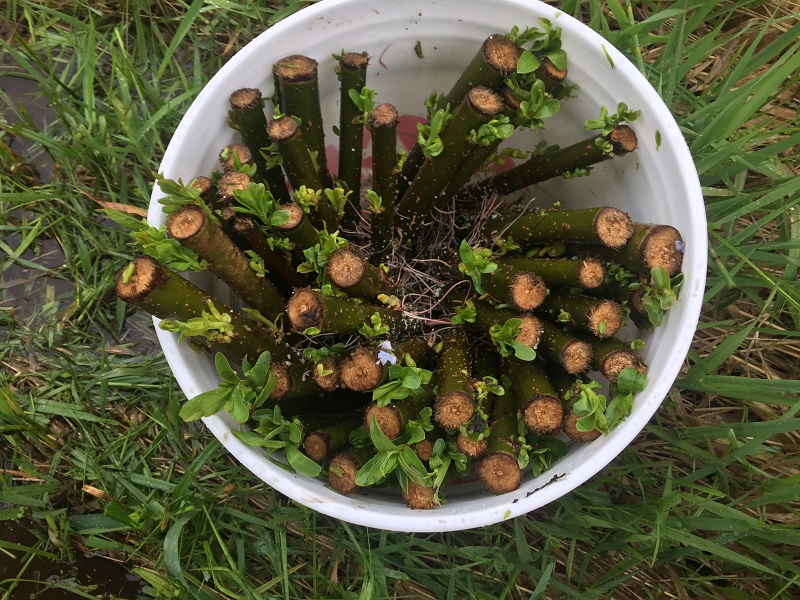 June 9th update. Growth after 2 weeks.
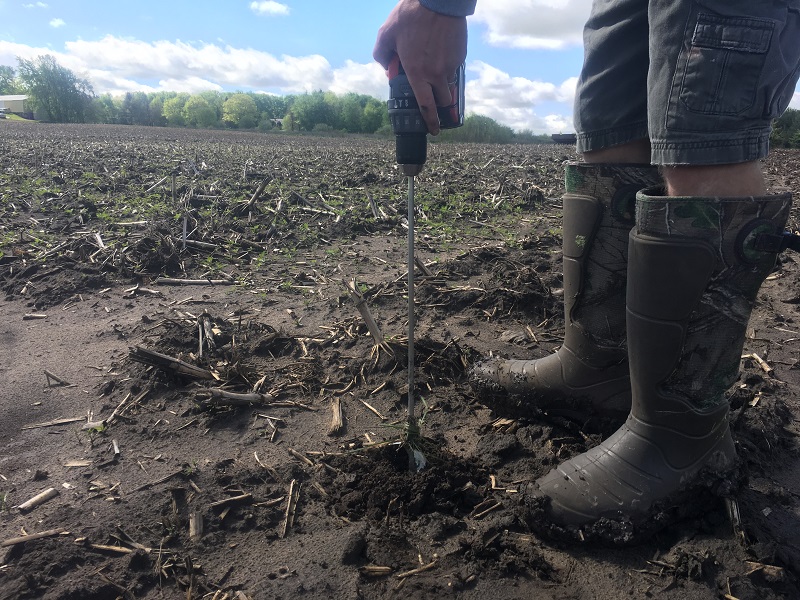 July 20th update. Multiple stems about 3 feet tall.March 21, 2018 update: They survived the first WI winter and starting to bud. Most of them have multiple stems and stand about 4 feet tall. We planted the hybrid willows on the outer edge of the screen to create a fast and more immediate screen, while the spruce trees grow up and create an evergreen screen for the future. Tallest tree is about 6 feet tall.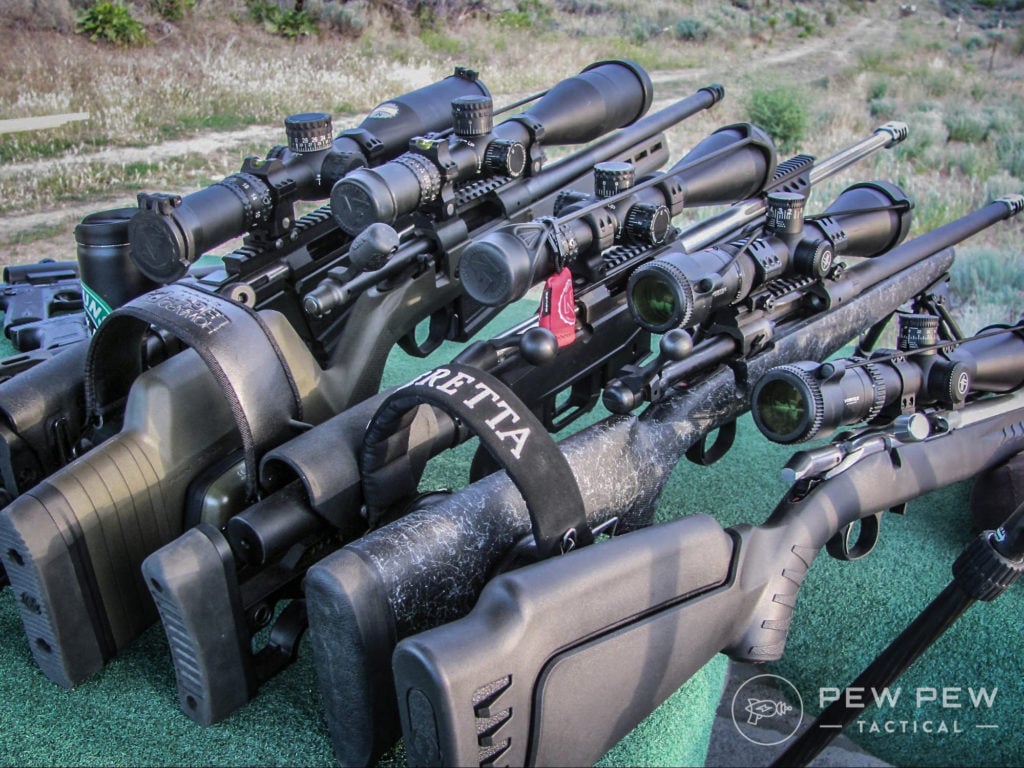

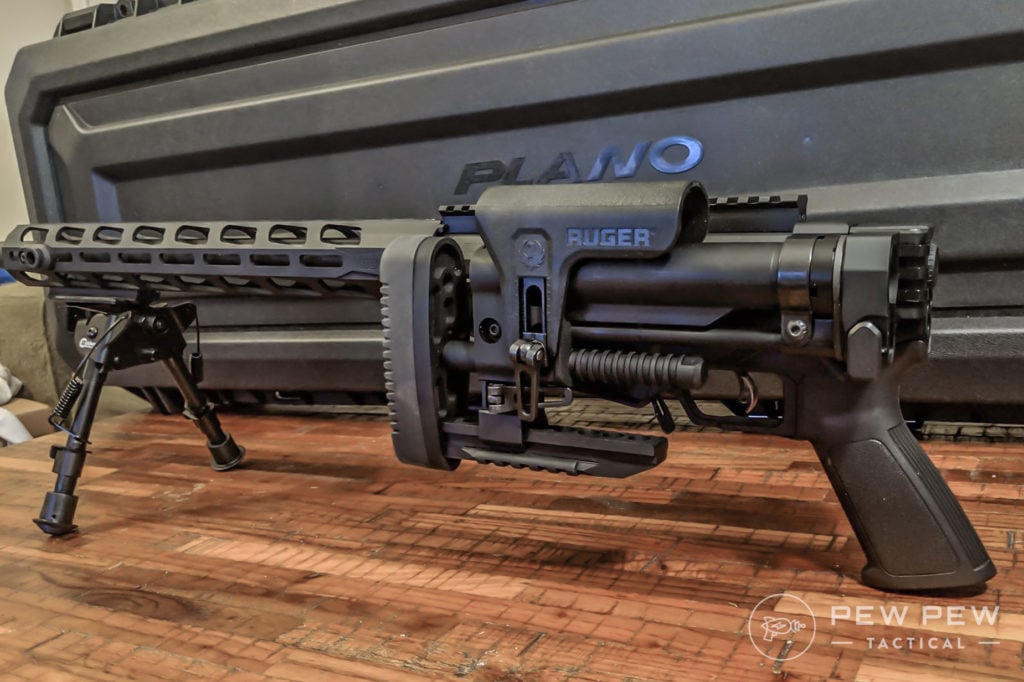
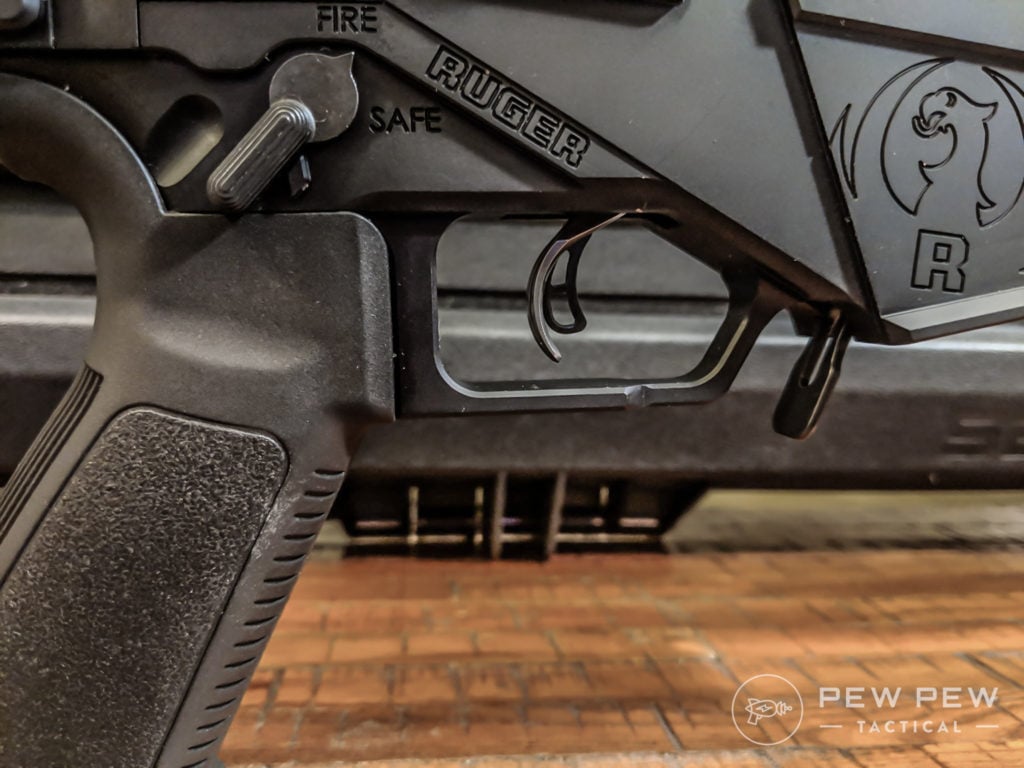
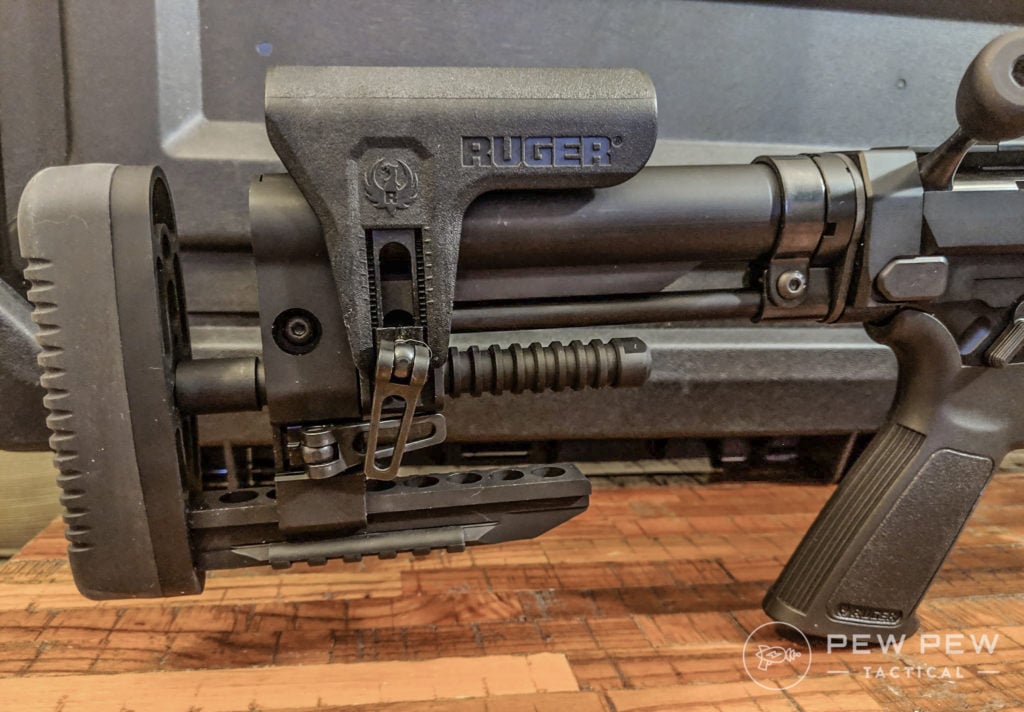
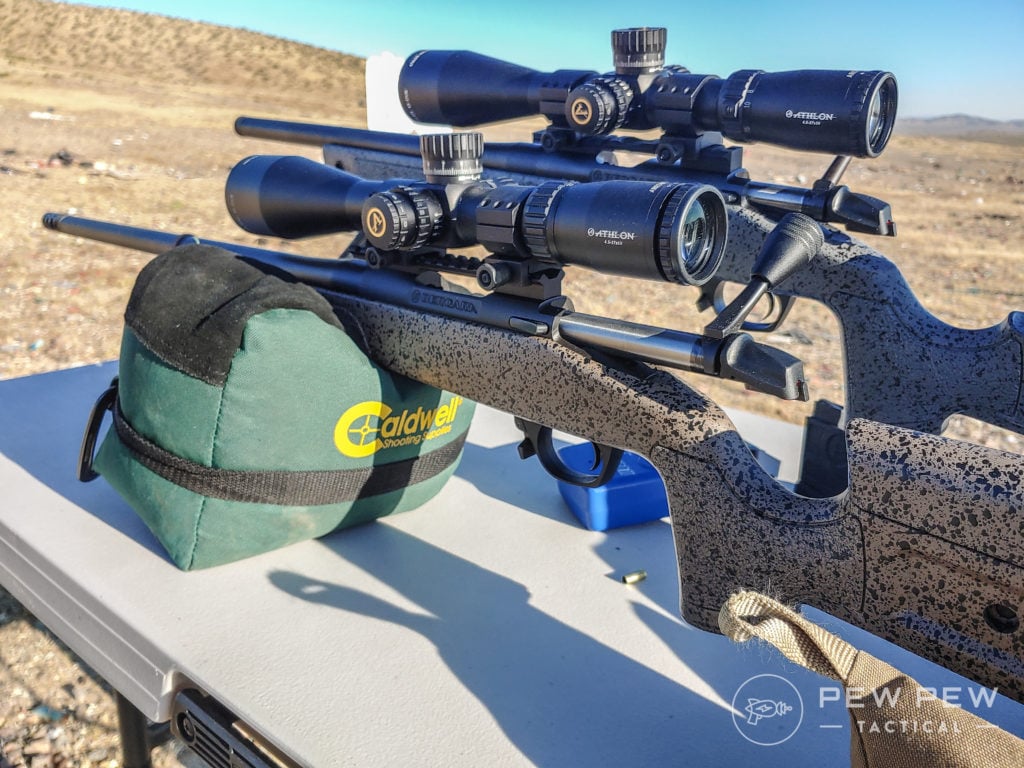
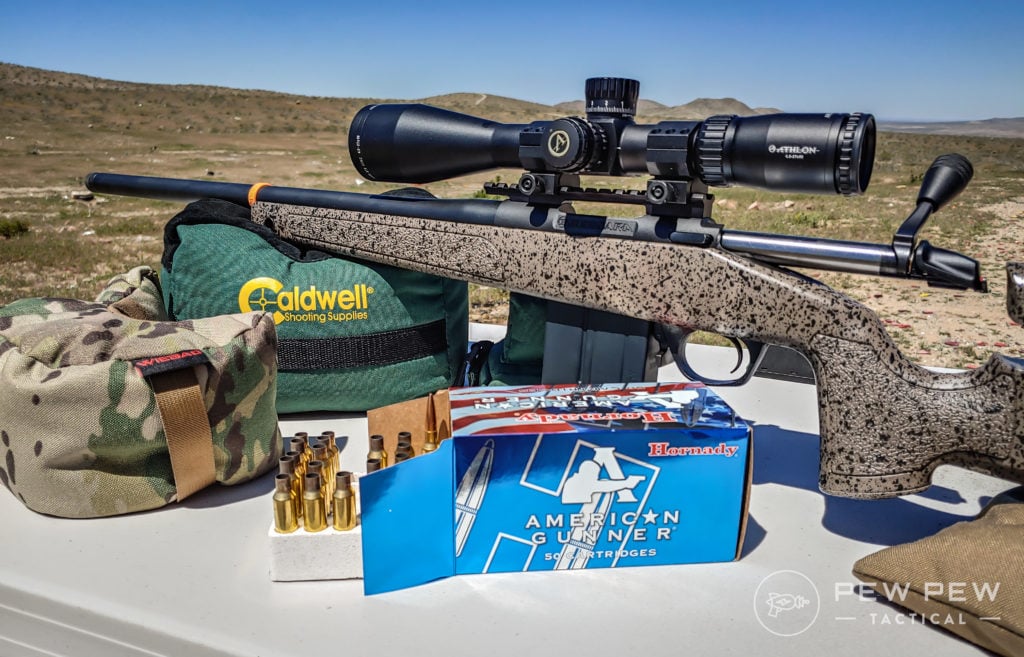

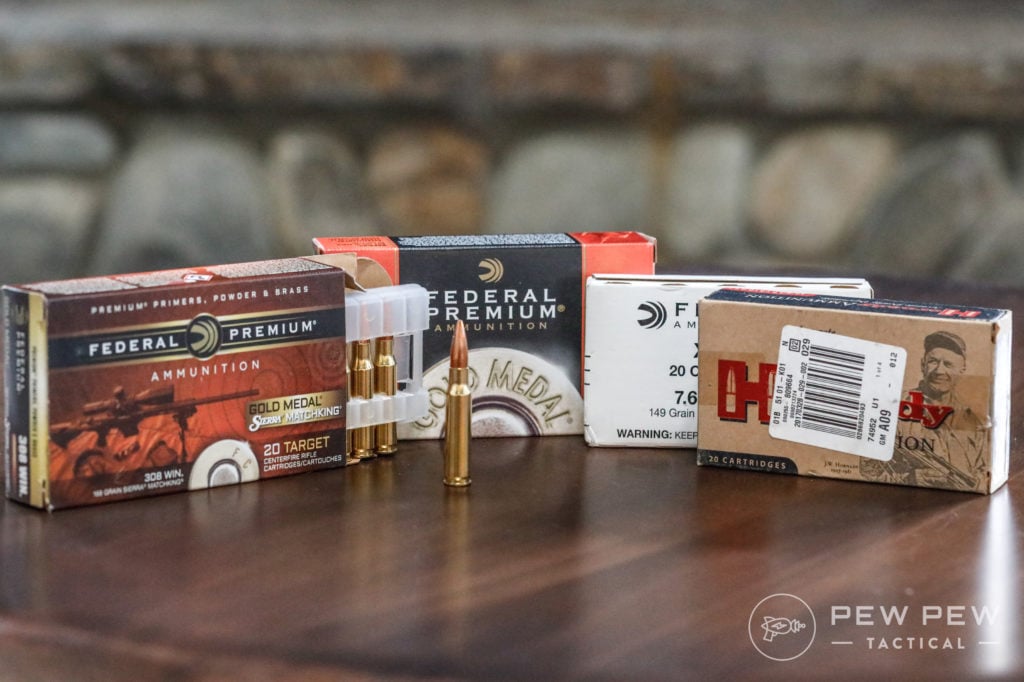
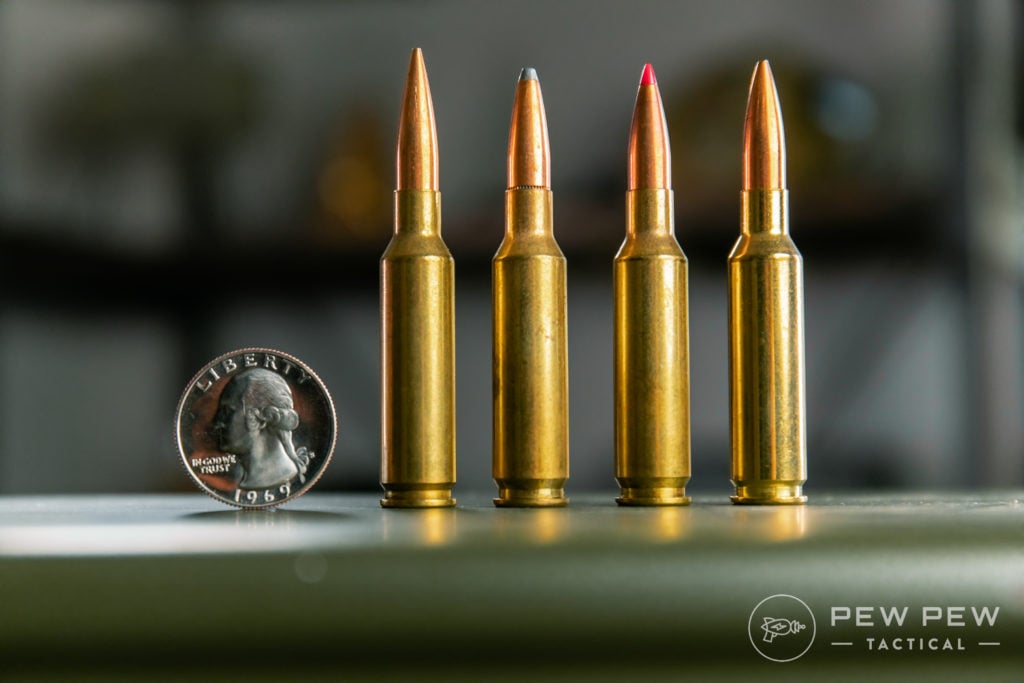
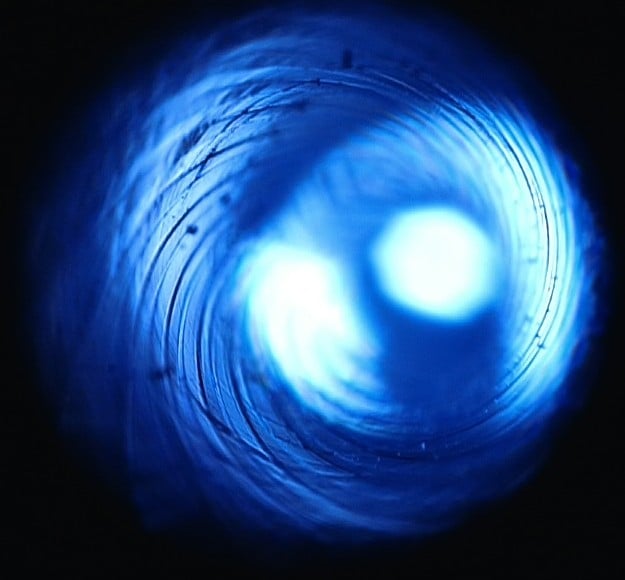
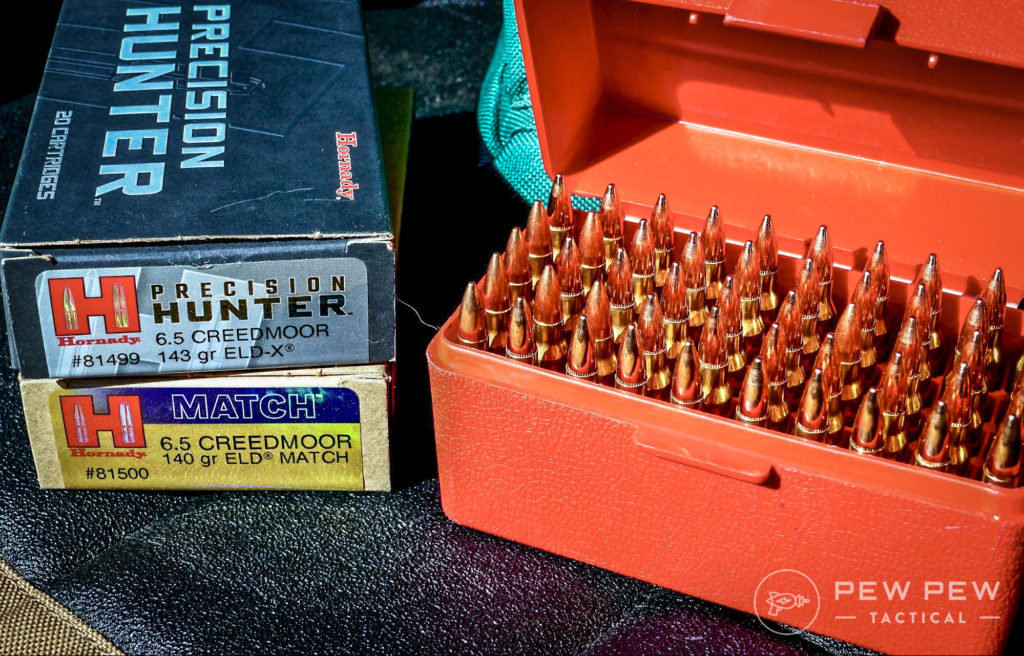

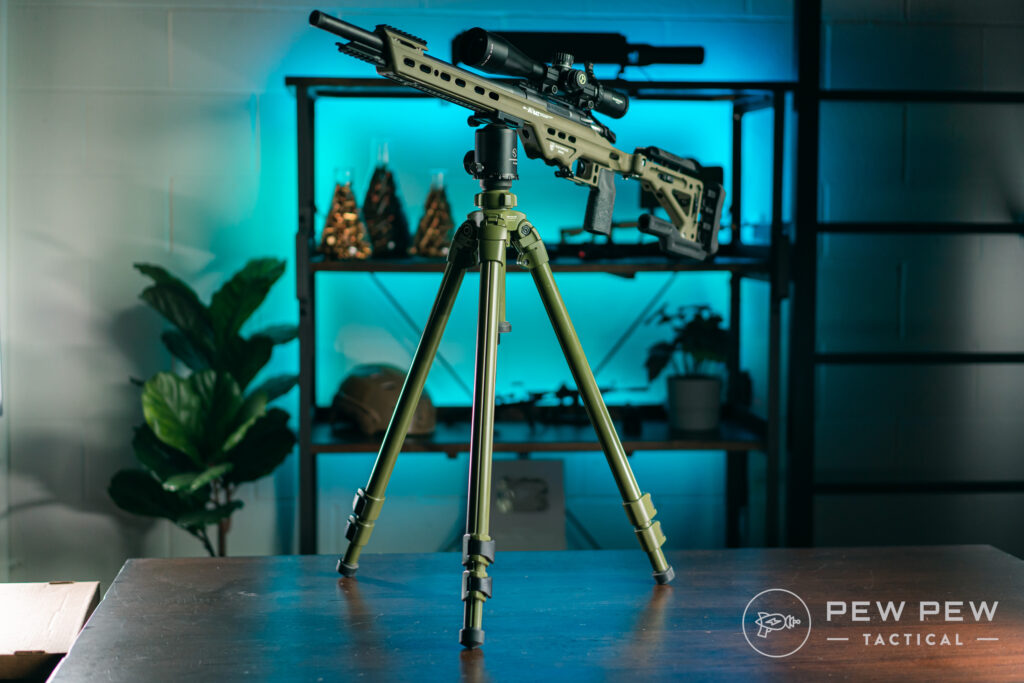
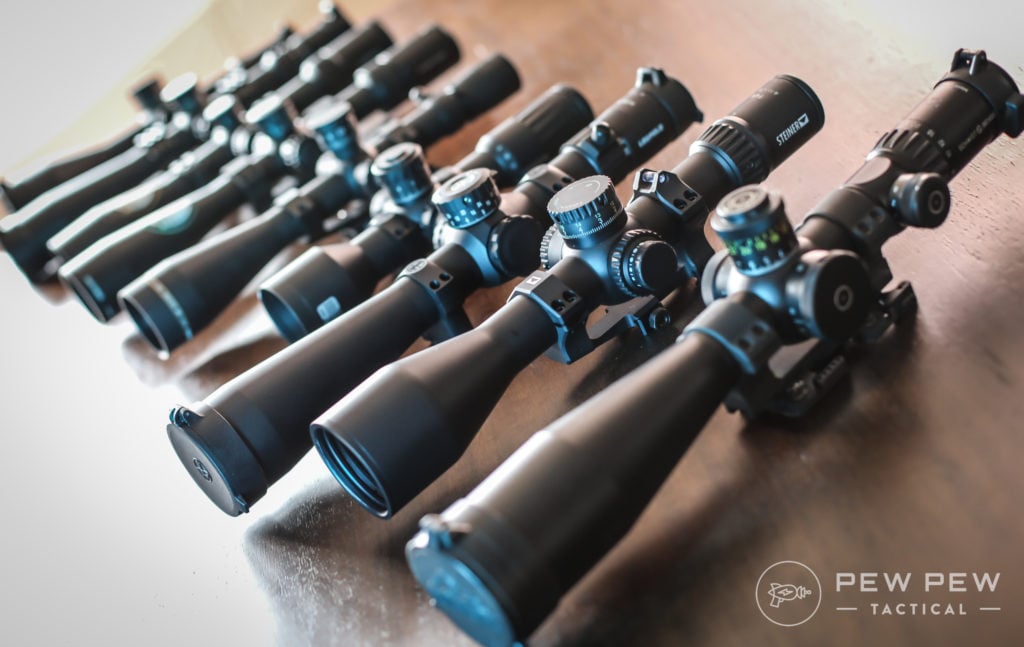

![Best Sniper & Precision Rifle for Beginners [Ultimate Guide]](https://www.pewpewtactical.com/wp-content/uploads/2018/02/1.1-13-Test-AR-15-Triggers-1024x683.jpg)
![Best Sniper & Precision Rifle for Beginners [Ultimate Guide]](https://www.pewpewtactical.com/wp-content/uploads/2022/01/Cash.gif)
![Best Sniper & Precision Rifle for Beginners [Ultimate Guide]](https://www.pewpewtactical.com/wp-content/uploads/2019/11/223-Long-Range-Shooting-Setup-1024x683.jpg)