www.remiwarren.com
In our opinion there are few things as inspiring as the stories of those willing to take the path less traveled. The history books are full of examples of explorers, prospectors, pioneers, and mountain men that chose to lead a different life. But in a modern world increasingly living a digital reality, and many of us neck deep in the rat race, these stories are becoming less and less common. The outdoors industry, by nature, attracts a relatively high proportion of men and women that have charted a less than common course through life. One that doesn’t necessarily follow today’s conventional definition of “normal”. But then there are those that take this to a whole new level, that somehow manage to keep one foot in the digital age, while truly blazing trails across a variety of mediums with an incurable desire to push their limits and question what’s possible. They may use modern technology to tell their stories in print, film or online but their spirit is as “pioneering” as that of the first human’s to cross the Bering Land Bridge. These outliers live on the fringes of their industries, unwilling to accept the status quo, and coast through their day to day lives.
Remi Warren is without question one of these outliers. From guiding and outfitting hunters in the mountains of the West to print, photography, TV and film projects, Remi has amassed a resume that most people would dream of. All before the age of 30.
Well known for his role in the award winning Solo Hunter TV show, his latest project Apex Predator, is not to be missed. One part Animal Planet, one part hunting show and one part human performance experiment it is without question one of the most unique concepts to hit ANY media scene in recent memory. We caught up with Remi in one of his rare down times between hunts and his various projects, so read on for one of the more inspiring interviews we’ve published to date. We cover everything from filming, to New Zealand, and hunting like a wolf so this installment of Blazing Trail is about as eclectic as it gets. Enjoy!  Remi, you’ve had and continue to have a diversified career in hunting and outdoors media: guide, outfitter, writer, TV personality and now producer of your own show Apex Predator. How did it all start?
I really just started out guiding. Outdoor, TV and all this stuff was something that I always wanted to do and my thought starting out was I’d get into it by guiding. After high school I went up to Montana where I’d grown up hunting with my grandpa and took the Spring and Summer semesters off in college. So I had about six months to guide and work and I really had no plan; I just packed up my truck and headed to Montana. I figured if I had no other choice but to figure it out, I’d figure it out. I was there hunting a lot and didn’t have a job and kind of living in a tent, and because I was hunting so much, I ran into a guide who was working in the same area.
I was actually stalking a deer and these guys kind of messed up my stalk so I talked with them for a little bit and the next day I was on this group of elk in a completely different area and some guys came up behind me but I was way in front of them, so I’d kind of “claimed” the herd in terms of hunting etiquette. They said hey, didn’t we see you yesterday? I said yeah. And then they said wait, were you here two days ago? I again said yeah. So three days in a row I was in the same place as these guys and the guide asks if I was interested in talking to the outfitter about working for them. So I agreed to talk to the outfitter and the outfitter says hey instead of working against me, do you want to work for me? And that’s how I got started guiding!
That sure worked out in your favour!
Yeah, exactly. But when you’re out there, when you give yourself no other option and trust that you’re going to figure it out things will work out, that’s my philosophy. On the writing side of things, I’ve always enjoyed writing so I honestly just started writing. I worked for a small publication in Montana for a while called Real Hunting. It’s no longer around but I got hooked up with them, by again running into the owner out in the hills. I was guiding and I used to keep this photo album, both of the stuff I’d shot and scenery and client photos as well, in my truck for when I pick up clients to give them something to thumb through and get excited about.
So I was just talking to this guy and he asked me some questions and so I showed him this photo album and he was impressed with the photos. I mentioned that I did some writing and that was pretty much it. I started working with them but quickly kind of ended up being the main editor and did essentially everything for the magazine from graphic design to laying out stories to writing about half the content. That probably gave me years worth of magazine experience in a pretty short period of time. It was a lot of hard work and not a lot of pay but it was worth it because I was building a resume and by that point, I was 22 years old and had a repertoire of running a magazine and hundreds of articles and stuff that nobody else my age had. I really just dove headfirst into the industry, but my philosophy is just work hard and don’t ask for anything and that’s worked so far.
A lot of people ask what’s the easiest way to have a hunting TV show and I used to absolutely hate that question because I don’t know the easiest way. I did it my way and my way wasn’t easy!  The easy way usually doesn’t get you where you’re going or where you’re wanting to go. Unfortunately, I think a lot of people see all the shows and see how affordable filming equipment is and think it is easy but it’s obviously not. But that doesn’t mean you shouldn’t just dive in and bank on the fact that you’ll adapt and figure it out if that’s what you really want to do.
Yeah. Exactly. I think that’s my big thing, if you commit to doing it, you’re going to do it. It’s not that hard but it’s really hard for people to commit to something that’s scary or unknown. Nobody is going to give you anything, you’ve just got to realize that and go and work hard. Don’t ask for anything and prove that you can do it and people will start giving you what you need. For me, that’s how it worked out. It involves a lot of work for not much initially but for me, I didn’t care. I was doing what I loved. And that’s why I was a guide and then outfitter so I could make my own living and not have to rely on something else working out.
So from running that publication or doing the bulk of the work for that publication, when did you actually make the jump into your other projects? Obviously you now have the outfitting business and then on the writing side you write for Western Elk Hunter and more recently you branched into Solo Hunter and now Apex Predator. We’d probably need the entire interview to tell the story behind all of that, but what’s the brief timeline?
I was just finishing up college and it ended up that the guy who bought the outfitting business from my grandpa back in 1980 called me up as he knew that I was looking to stop guiding for another outfitter, that I wanted to go out on my own. I was planning on actually trying to buy out the guy that I worked for but one of the other outfitters in the area called me up and said I’ll sell you my business for what I bought it for in 1980. That sounded pretty good so it ended up that in the year I graduated college I bought the outfitting business and getting my own Forest Service permit, etc. for the area. I was about 22 at the time and so I’d been guiding, now had my own outfit and then at the same time, I was really working hard on the magazine in the off season. The magazine was pretty much what I did for the bulk of the off season and then in the Fall I guided. So this all led into just buying some cameras and I honestly just started filming my hunts. I’ve actually filmed my hunts since I was probably 15 years old, so I filmed my own hunts, I filmed clients’ hunts and I filmed pretty much everything I could, I just loved filming things. I just filmed and filmed and filmed for years. I wasn’t even sure I was ever going to do anything with the footage but I saw it more as practice. One day I wanted to have a TV show so, in my mind, I was just practising for that day. I couldn’t even tell you how many hours of footage I had but it was a lot!
Then one day, I saw something online, I don’t even know where it was, probably on YouTube, called Solo Hunters. By this point I rarely if ever watched TV so it was the first I’d heard of it and I thought it was a really cool show concept. So I called them up and told them I had a lot of footage and listed off some of the better hunts and footage that I’d taken. The guy that owned and ran the show ended up living not very far from where I live. We were about four miles apart!
I assume you mean Tim Burnett?
Yep. So he suggested that we meet up and he asked if I really had all the footage I said I did. I told him of course I did so he asked me to bring it to his office one day and when I did he was like holy smokes! He was looking for some additional content at the time and I was literally thrown into the show. But I’d filmed for no other purpose other than the practice film. I wasn’t trying to make an “audition” tape or anything like that. Obviously the footage wasn’t as good as when I now go out with the intent of filming for Solo Hunters, I was just filming for YouTube clips really. But we used it for the show and I kept filming and kept pushing myself to make it better and better and over time, it kind of morphed into the Solo Hunter episodes that you see today.
Ok, let’s jump into your most recent project: Apex Predator. For the record, what an awesome show, really such a cool concept. For our readers that haven’t seen it the wolf pack episode is literally must watch TV for the outdoorsman or woman.
Thank you very much. It’s a tactic that my brother and I wondered about for a while now. And as you saw in that episode, it definitely works. It’s not for everyone obviously but goes to show that humans are pretty crazy hunters in their own respects. The human body is capable of a lot more than we give it credit for most of the time. We just don’t realize it when we’re stuck in our own little worlds. But when you go out there and try something a little bit different, something that maybe isn’t mainstream or something people think about as a valid technique and it turns out to be successful that’s pretty cool. Especially when it’s modelled after a highly adapted and successful predator that we as humans assume we can’t compete with.  If you look at some of the anthropological data that’s emerged from the barefoot running movement in the past few years, the prevailing theory is that’s how we initially hunted, by running animals down, literally to the point of exhaustion. Combined with our brains, our physical attributes make for a pretty lethal combo.
Yeah, exactly. That’s the thing too. We can run a lot smarter. Elk can run fast but we can run smart. So in that particular episode it worked because the elk ran down below the road for a few miles before cutting back uphill to use their planned escape route. We instead ran up to the road and used the road to cut across and headed them off, we ran a fraction of what it did and exerted half the energy by just thinking a little bit.
So what was the inspiration behind Apex Predator?
The show is inspired by nature and my fascination with the natural world, plain and simple. I was out hunting in an area where I hunt all the time and I was walking up the ridge and noticed some wolf tracks. It’s a certain route that I follow and have figured out over the years that it was the best way to approach this one great elk spot due to how the wind typically behaved, the terrain, the cover, and everything else. So I noticed on this one particular day in the snow, that there are wolf tracks and the wolf tracks are following the exact same route that I am, literally to the tee and it’s not the most natural or easy route. It’s not like following a corridor, it’s following a ridge at then at one point it ducks off the ridge and goes into this thicket of trees and then it comes back up and then drops back down into this other valley and it comes back up to this other meadow. So I stop and I think about it and that wolf knows exactly what I know. It’s amazing! We were both hunting these elk the exact same way!
And I think a lot of us wonder am I hunting this animal right? So when you’re out there and have this sort of scenario, here is an animal that hunts day in, day out and they do they’re doing the exact same thing that I’m doing? I must be doing something right! It knows what I know and vice versa and that was a pretty cool experience. In another instance, actually the first time I saw a live wolf, I was out elk hunting with my bow and I this wolf pops up right in front of me, and this is before we ever really saw them in our area, so I was pretty excited about it. It was only about 40 – 50 yards away so I got my camera out and filmed it a little bit and then got back to hunting. I was hunting this pretty big elk and drew up back around the ridge I knew they were on and started to put a stalk in on this herd of elk. But before I get close – I’m about one ridge away – the wolf runs up from the bottom at the side and starts chasing them. At this point I figure well, my stalk’s already over, so I might as well try to cut them off as I had a feeling I knew where they were going.
With the wolf chasing them the elk headed up and I knew the better route so I started sprinting up the hill. I could see them most of the way. Their tongues were hanging out. It was a hot day. I was drinking water out of my hydration bladder as I was running and they were just beat and I ran right up and stood behind a big ponderosa tree and these elk were walking by pretty much close enough to touch. I snapped a few pictures with my camera and the bulls never came out. A couple of smaller bulls did but the bigger bulls didn’t and my assumption was that their antlers were so heavy that they had to turn and cut away from the herd before the younger bulls and cows did which I later saw (the bulls) down the ridge.
But it was eye opening! It showed that it’s actually possible to keep up with elk in steep terrain. I’d always heard growing up, “well if an elk runs away, they’ll go for ten miles.” And that’s just not necessarily true. But those things you grow up with are in your head and I was just like, wow. From that moment everything I’d ever known about hunting was in question. I decided I just needed to experience it for myself and find out what is true and what’s not. That was a real eye-opener. I looked at it as, that’s how the wolf would hunt and for us to be able to do that same thing, that’s pretty crazy. I thought what other animal could we emulate or learn from? So those ideas had been in my mind for a long time and I thought about the show for a really long time and thought about the other animals out there that we as humans might have similarities to or are so specialized in one task or skill that we could learn from? Or maybe we can’t do it all but it’s something that we need to learn and so that’s where Apex Predator came from. 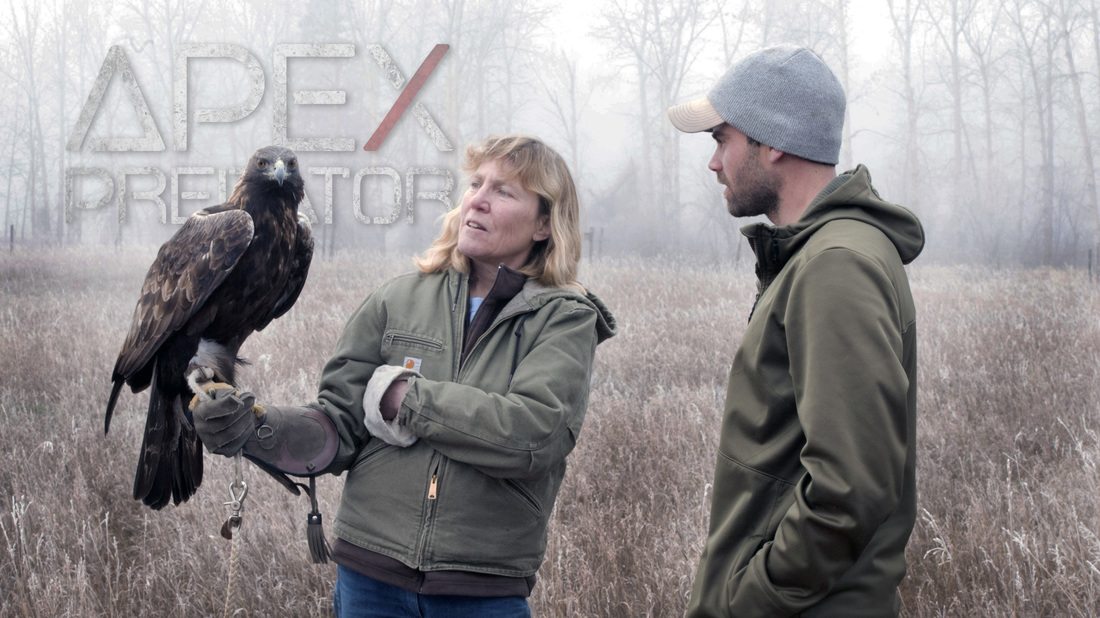 Awesome! That was going to be one of my questions: how did you go about picking the various species that you ended up deciding on for each episode. It’s such an interesting mix and a truly unique concept. Even if someone isn’t that into hunting, there is some very cool stuff in the series. For instance, the free diving training you went through was incredible. To be able to learn to hold your breath that long is impressive and most people would say there is no feasible way the human body can do that. But as you found out, that’s just not true.
Yeah. Exactly. I think almost everyone can do exactly what I did. One of the things I wanted to do with the show was show others that we can do a lot more than we think. I’m not necessarily anyone special. I’m in good shape and I have certain genetic capabilities and qualities and accumulate a lot of training time because I’ve spent so much time in the field, I’d say the better part of my adult life. So I have a few things stacked in my favour but when it comes to stuff like holding the breath, I have no experience and any single person out there can do exactly what I did in that episode.
All of our bodies are designed naturally to handle much longer under water than we think. It’s just whether you can get past the mental threshold or barrier. So I think that’s one of those things I would have never understood. I would have heard about it and probably thought it was cool but until I tried it I wouldn’t have really understood it. I learn through experience. I’m not stubborn but I don’t necessarily take things entirely at face value. I try to take good advice when it’s given but I also need to learn things on my own sometimes and this is one of those things. For me it’s always been better to learn through experience and I think by showing the experience through the show, people will get a better appreciation for what is in fact possible and gain a better understanding of the concepts. I love to learn new things and so any time I can learn something new myself or share some kind of learning, I think that’s pretty awesome.
That is the power of video. Our publication obviously is written content only and for the most part, long form written content which has been well received but ultimately, when people SEE it, like you said, it’s a whole other game. It’s one of the most unique “hunting” shows – it’s a biological case study.
Exactly! A human biology case study through the lens of our abilities as hunters. To me that is the human story and a lot of people don’t grasp that. To hunters that’s not necessarily news. I think a lot of hunters probably don’t have as deep of an appreciation for that aspect of hunting but, in particular, the non hunters or of course the anti-hunters don’t see it as a natural human activity which of course is the farthest thing from the truth.
Yeah, and that’s another reason I wanted to do it. It opens it up to a broader spectrum of people and it’s not that I’m trying to cater to people who don’t hunt, but I’m just showing people who don’t hunt and people who do hunt that we’re not that much different from many of the animals out there. To be honest, I learned a lot from the animals we covered in the show and I use techniques that we (humans) learned from animals a long time ago, every day. Whether you’re sitting in a tree stand hunting deer or crouching in a ground blind, these are tactics adopted from animals.
Or in the buffalo episode, where we looked at the Plains Indians and how they figured out the relationship between the wolves and the bison. With humans, if the bison run they’re safe, as at that time our weapons were pretty primitive and we needed to get close. But with the wolves, they kill by chasing. A wolf would not attack a standing bison because they just aren’t strong enough. So they need to get them to panic and run and then they can catch them. So the bison wouldn’t run where possible when wolves approached but would when a bipedal human did. So the Plains Indians developed a technique, later made famous in a classic Western painting, where they would wear wolf skins and crawl within shooting distance of the bison herd. And again, as we show in the episode, it’s a tactic that works.
It just speaks to the power of the adaptive human mind and body. I think that’s one of the things you covered really well in Apex Predator, the mental aspects of it. The ability to do it physically still boils down to the mental aptitude and willingness to just go out and try it.
Absolutely, you have to be willing to try new things and fail sometimes if you want to learn. 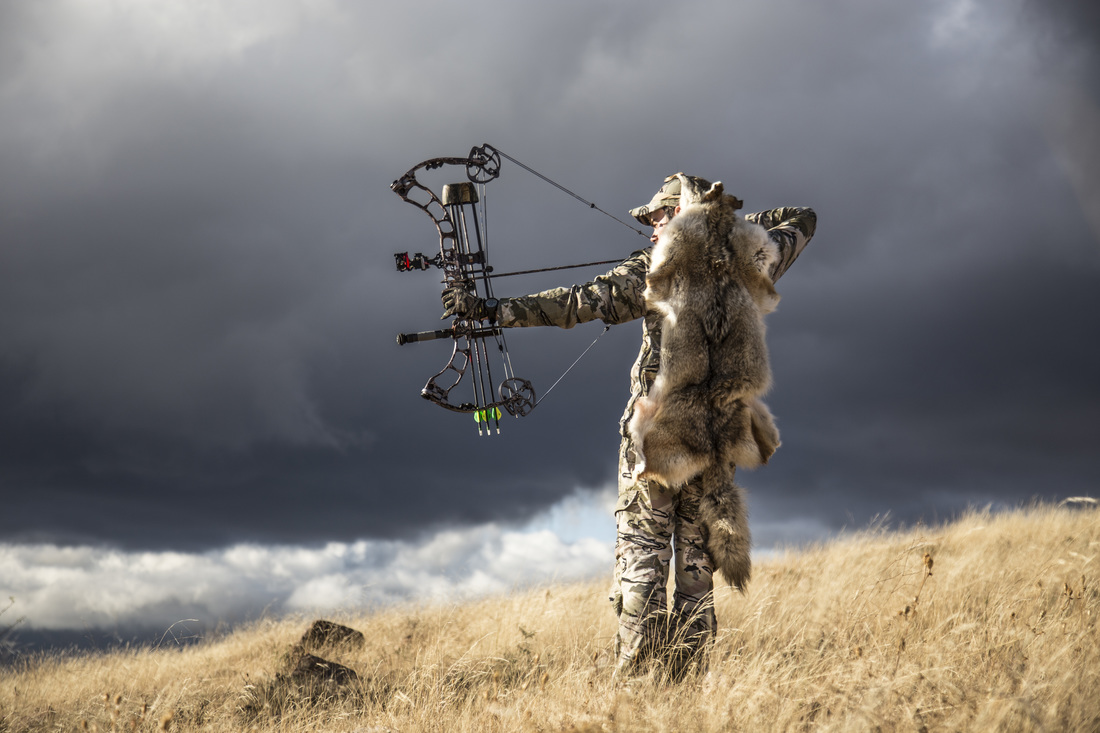 You seem to have a definite affinity for the wolf and I couldn’t agree more, for me the wolf is one of the most fascinating animals on the planet. But the wolf issue is very different in Canada than it is in the US given the history of their near eradication and then the ill-planned re-introduction. What is your take on the wolf situation in the West? You guide and outfit in Montana and there are many people that call the West home who believe that the whole “smoke a pack a day” approach is the most appropriate response. I’m going to go out on a limb and guess that you don’t agree with that?
As hunters, we get all up in tiffs about the anti hunters and non hunters being so emotional but then on the wolf issue the same emotional reaction is happening with hunters as well. When we go that route, we lose all of our bargaining power, all of our credibility. We really lose everything that we stand for and that really bugs me because if we’re going to stick to a model (the North American Wildlife Model), then we need to stick to that model.
Sometimes that model doesn’t necessarily go with what we personally and emotionally feel. But if we start managing animals based on emotions and not science, then what are we doing? We’re no different than everybody that’s against hunting because the only argument they have is an emotional one. We can’t “cherry pick” our stance and handle things emotionally for one situation and then when it’s in our favour, fall back on the science and conservation based approach and say this is what we stand for. I think we stay a lot more credible if we just pick our management strategy and go with it. So I think the predators need to be managed, and I think the non-predators need to be managed but we need to stay aligned with the model we know is the right model and not get caught up in these emotional arguments. It really hurts our cause.
I couldn’t agree more. Eradication is no different than outright protection. Those are logically identical mindsets and emotionally identical mindsets, and as hunters our number one counterpoint to the anti-hunting groups is the scientific, rational, unemotional benefits of hunting, which we know to be irrefutable. There is no debate on the balance of science and logic, we win. We win every time. But when we get drawn into these emotional battles, as you said, it ruins our credibility.
Yeah, exactly. When did you start outfitting in New Zealand?
I started going over there… I don’t even know now… about five years ago probably.
So, being a guy who has outfitted in New Zealand now for a number of years, for somebody who is looking at New Zealand as maybe their first international hunt because it is quite a popular spot it seems these days, do you think DIY is a realistic way to go for your first hunt, or do you think that’s biting off a little more than they can chew?
It’s definitely biting off more than they can chew and that’s just my honest opinion. But it does depend where you’re from and what your experience is. I’m just going to be blunt about it. If all you’ve ever hunted is deer from a tree stand, you’re not ready. You won’t handle it and you’ll probably die. It’s serious stuff in NZ.
Let’s say we’re talking about a Rocky Mountain US or an Alberta, BC, or Alaska resident who’s hunted sheep, goats or high country elk and mule deer?
I think that if you have a lot of mountain goat and sheep hunting experience, you’ll be fine. I know a lot of guys who have a lot of experience but it’s a lot harder to hunt than anywhere else I’ve ever hunted, physically, and I think the problem is there are shortcuts with the helicopters. So you see all these people, say on TV or in magazines, who probably shouldn’t be in those kinds of mountains shooting animals and you assume that it’s easy. And the assumption that it’s easy is what gets people in trouble.
I think if you have experience you’d be fine but if you don’t have that true mountain hunting experience, on a level of skill from one to ten, NZ is a ten! It depends where you go too. I hunt areas that are really hard to hunt and it’s where I like to hunt but it’s dangerous and it’s hard but those are the areas that I like. The mountains are steep and they’re big and sometimes the weather can be pretty bad with floods and even simple access is tough. If you don’t have experience it’s not for you – you probably shouldn’t try it on your own – but if you’ve been hunting a lot and if you’re smart and you realize that it is going to be difficult and you come prepared, then it shouldn’t be a problem. It’s really on an individual basis so I can’t really say one way or the other but I will say if you don’t have any true mountain hunting experience, it’s probably not a place to start off with or, it wouldn’t be something that I’d go out and do by myself. 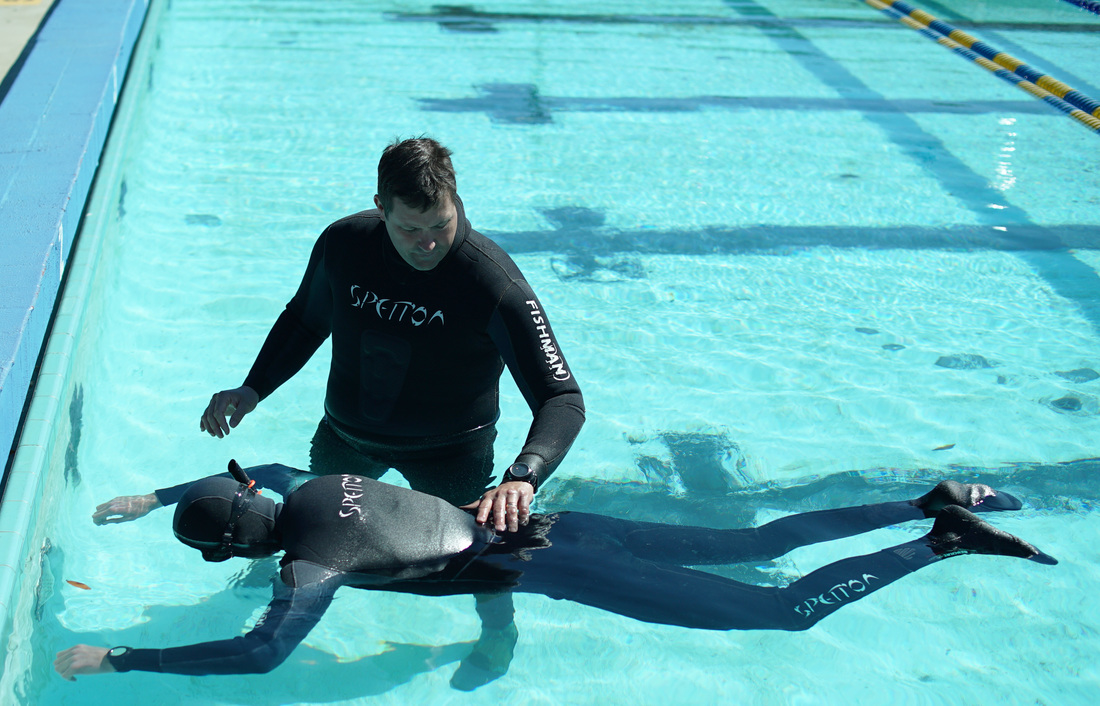 Great input. Let’s move on to some filming questions. There a lot of people these days really into self-filming and documenting their hunts and adventures, whether it’s with a GoPro or other products, but it’s not as easy as it looks. What are some tips, say three to five tips for people that want to go out and film their hunt and get more experience with that side of things?
The most important thing is get a camera you’re not afraid of thrashing. Everybody always asks about the most expensive camera. My feeling is, only get a camera that you’re comfortable having out 100% of the time. If it’s in your pack, you aren’t going to use it. I’ve gone through that – it needs to be accessible. Some people worry it’s an expensive camera and just keep it in their pack. That’s the worst place. If you have a camera and you keep it in your pack, you might as well leave it at home. So have your camera at ready, that’s number one. The most important thing is you can’t share anything you don’t film. Don’t forget to hit the record button, I’ve done that I don’t know how many times. Just be familiar with your gear because a lot of times, things happen in the moment. Something will always go wrong at crunch time like a battery dying. If you’re really familiar with your camera and use it all the time, you’ll know all the settings, every function. People just grab them and flip them open and know how to record and that’s it but things can go wrong. You should know how to quickly fix things not necessarily mechanically but operationally. Those are pretty much the main tips. Oh, and always bring extra batteries!
I think the ‘be familiar’ tip is really good one because. I’ve only taken my GoPro on a couple of hunts and you’re spot on, number one it was in my pack and I didn’t bother using it 90% of the time but then when I did take it out I wasn’t familiar enough with its functions to capture all the things I wanted to capture!
Exactly. A good way to look at it is take the camera out on as many non-hunting outings as possible. I would just go out and every time I shot my bow, I’d film because setting up a camera with a tripod fast, especially with bow hunting, is the hardest thing I’ve ever done in my life. So I’d practice the camera part (setting it up, getting it ready) outside of hunting situations.
I used to shoot a lot of big mule deer and since I started self-filming, I’ve shot maybe one or two big mule deer because it’s just that hard. I actually didn’t really rifle hunt very much until I started doing Solo Hunters because the challenge is now the filming. When you’re crawling in close and it’s difficult to do so the more you practise with it in a controlled environment you’ll learn the easy things that make it even easier.
Of course, makes sense. Every hunt you go on, film your friends. I’ll bet if I put all my videos that I had just on one timeline and let it play, it would probably play for a year straight without stopping.
Wow! That’s a lot of film.
I’ve had that much time behind the camera and just over the years, it’s just filming, filming and filming. Maybe not that much, that’s probably an exaggeration but I don’t even know how much footage I have or had or erased. Quite a bit but it feels like I’ve got so much footage I could never even comb through it all.
Exaggeration or not, the bottom line is the point you’re making is you have practised a lot. Non-stop, every chance you get. If that’s something you actually want to go after then get out there and practise.
Yep, exactly. Even on my off days, I’ll go film… I’ll just film some random thing. I’m on the road all the time but I meet up with a friend who is a photographer and we’ll go out and take pictures or videos of even non-hunting stuff. Just film whatever. Practise wherever you can.
I think that brings up a good point too. Hunting seasons are only so long and if you only film when you’re hunting then you’ll be figuring out the filming half the time if not 75-80% of the time as opposed to getting good footage or at least getting the practice in whether it’s fishing or hiking or trail running or climbing. Just get out there and do it.
The other thing too with filming is, the way I am, you have to have a goal. If your goal is to film a hunt, then that’s your goal. You pass up opportunities that are not going to be filmed. It has to be your number one priority, and it’s very hard for people to do that and so that’s another reason it’s so hard to capture great footage. They want to get into filming but then a big buck walks out and they shoot it. If you really want to get into filming, then that is your most important goal and that’s really hard to commit to but once you commit to it, then you get things on film. 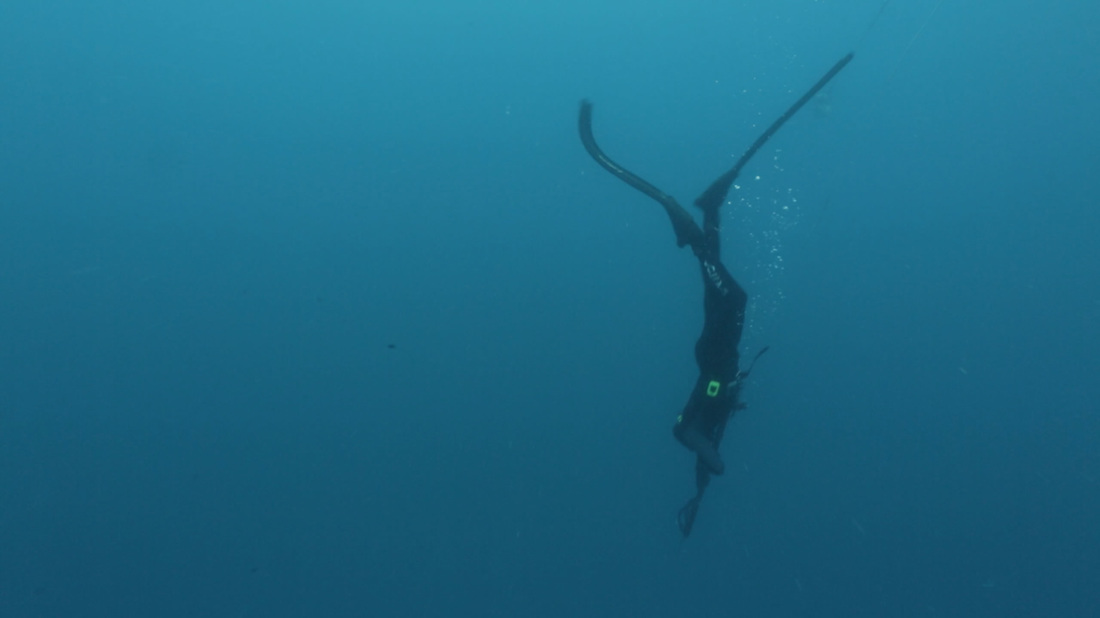 Great insight, OK last few questions. For someone going on their first international hunt, what would you say is the best bang for their buck? What’s the best mountain hunt out there outside of North America?
Definitely New Zealand. It’s just accessible and there is a lot of opportunity. If you’re English speaking it makes it nice. Compared to other places in the world, it doesn’t have the cultural troubles or political troubles. It’s got wild species, wild places. It’s a pretty cool place.
You’ve got a lot of good footage from there so it seems like a hell of a place to go and hunt if you’re into that style of hunting.
As always, let’s finish with some rapid fire questions. You’ve been to a lot of places – so you can answer this question in one of two ways – what’s your bucket list hunt or what’s one you have done and you would give anything to do again?
I want to hunt Stone sheep in BC and I want to hunt ibex in one of the “stans”.
What’s the toughest or most satisfying hunt you’ve been on?
The most satisfying for me is big mule deer with a bow. The challenge is a big part of it and for me it’s just one of those animals that I really get into. I think it’s pretty challenging to get a really big, high country mule deer with a bow. So that’s one of them for me for sure, and then I’d probably say tahr in New Zealand. I’ve got a lot of respect for those animals and that hunt. I like the country you find them in and it’s a truly fun hunt.
You’re known for being willing to eat just about anything. What’s the gnarliest game animal or species you’ve ever gone out on a limb and tried?
I’ve got to think about that. There is something and I always forget what it is. I was thinking about it the other day, I had something that was really bad. It wasn’t the coyote you ate on Meateater with Steven Rinella was it?
The coyote wasn’t bad while we were eating it but it’s not necessarily something I want to keep eating all the time. McDonald’s is probably the worst thing I’ve eaten in a long time. There is actually a lot of times that I’ve been on the road and pulled off and got something at a rest stop and thought, I would rather eat coyote.
The pink slime, Slim Jim type of stuff?
Yeah. Those processed, mystery meat products are just disgusting, I would definitely rather eat coyote than a lot of that stuff.
And last one, as a longstanding writer, what are some key book recommendations? These don’t have to be ‘how to’ books, they can just be really good historical accounts but what are some really good books that you have loved, or gifted that’s from the hunting or outdoor-adventure realm?
One of my all-time favourites is Peter Capstick’s Death in the Long Grass. I’ve probably read that book about a hundred times. I did it for every book report in school growing up. I’ve read all of his books and that made me want to go to Africa so when I turned 18, that’s what I did, I went to Africa. I just really like those kind of stories. When I was growing up, I read Cameron Hanes’ bowhunting books and was really into those as well. I really enjoyed his books and they really helped me formulate my plans for the kind of hunting I was into. I basically read his Bowhunting Trophy Blacktail book and was like, “I’m going black tail hunting!” He put some really great stuff in all his books. Those would be my top recommendations.
From the Editors:
Apex Predator is one of the most unique “hunting” shows to hit the air in a long time. Remi’s insatiable curiosity, and obvious respect for the animals he’s studying is rivaled only by his willingness to dive in and get dirty in his attempt to learn from and mimic some of the world’s top predators. If you have even a passing interest in animal biology and human potential, it is literally must watch TV.
To learn more about Remi and his various projects or to download episodes of Apex Predator go to either www.remiwarren.com or www.apexpredator.tv for episode listings and more info.
")
")
")
")
")