When it comes to the art of long-range shooting, snipers reign supreme.
Operating as a sniper is one of the most challenging and rewarding roles in any field or sport involving firearms.
The primary objective of this profession is to shoot accurately at a distance while maintaining safety and control.
To that end, sniper rifles are built for this purpose — to shoot from a distance with precision and accuracy, making them an ideal weapon for anyone interested in taking down distant targets.
This article will list some of the best models on the market today and what are some of the key features that make them so great.
Below are the 10 best sniper rifles for 2024.
Note: There is STRONG evidence that the Biden administration is steadily working towards the banning of ALL long rifles. These include ALL rifles that they deem an ‘assault weapon‘, many of which are listed below.
It is STRONGLY recommended that, if you’ve been on the fence on buying a long gun, you get off that fence and buy one ASAP.
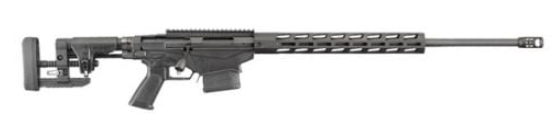
#1. Ruger Precision 6.5 Creedmoor 24” M-LOK Bolt Action Rifle
- Caliber: 6.5 Creedmoor
- Action: Bolt
- Barrel Length: 24”
- Overall Length: 42.45” – 45.75”
- Capacity: 10-Round
- Weight: 10.7 lbs.
The Ruger Precision .6.5 Creedmoor 24” M-LOK Bolt Action Rifle offers premium features that will enhance your accuracy and precision down range.
This rifle is chambered in 6.5 Creedmoor making it perfect for taking down any target, including elk, boars, and deer.
It also features several features to provide you with consistent shooting down range, including a 24” cold hammer forged Chrome Moly Steel barrel, a hybrid muzzle break, and a Ruger Marksman Adjustable trigger.
Its hybrid muzzle provides enhanced recoil mitigation and reduced noise.
The Ruger Marksman Adjustable trigger provides you with a customizable trigger pull between 2.25 and 5 pounds for smooth pulls and improved control.
Another prominent feature is the Ruger Precision MSR stock with an assault rifle-style grip, an adjustable length of pull, and an adjustable cheek comb to get a customized fit for any shooter.
It also includes a 15” M-Lok handguard and a Picatinny rail up top for your favorite accessories and optics for the perfect loadout.
If you are looking for a premium sniper rifle that can easily take down your target at any range, the Ruger Precision .6.5 Creedmoor 24” M-LOK Bolt Action Rifle is an excellent choice.
It is available from Palmetto State Armory. Here’s where to buy it: www.PalmettoStateArmory.com
#2. Springfield Armory 2020 Waypoint .308 WIN Bolt-Action Rifle, Evergreen Camouflage
- Caliber: .308 Win
- Action: Bolt
- Barrel Length: 20”
- Overall Length: 41.5”
- Capacity: 5-Round
- Weight: 6.56 lbs.
The Springfield Armory 2020 Waypoint .308 WIN Bolt-Action Rifle is the perfect rifle for those who want a lightweight yet rugged rifle that has guaranteed accuracy.
Springfield Armory guarantees a .75 MOA because of its precision craftsmanship.
Weighing just 6.56 pounds, it is perfect for going deep in the backcountry.
Also, the hybrid profile stock and 20” barrel are crafted from durable carbon fiber and can withstand the harshest environments.
It features a Cerakote finish on the barrel and the stainless steel receiver for even more durability and longevity.
To provide over-the-top precision, it also features Springfield’s TriggerTech adjustable trigger.
The Springfield Armory 2020 Waypoint .308 WIN Bolt-Action Rifle is your best bet if you want a lightweight rifle that can handle any environment.
It is available from Palmetto State Armory. Here’s where to buy it: www.PalmettoStateArmory.com
#3. Springfield Armory M1A Loaded National Match
- Caliber: .308 Win
- Action: Semi-Automatic
- Barrel Length: 22”
- Overall Length: 44”
- Capacity: 10-Round
- Weight: 9.3 lbs.
Springfield Armory’s M1A Loaded National Match has the legendary M1A platform with modern features that will give you a competitive edge over your competition.
Winning competitions is all about consistency and reliability, and the Loaded National Match has everything you need to get a tight shot group.
It features a 22” National Match air-gauged premium barrel with a 1:11 twist ratio with a six-groove rifling.
The barrel also features a classic M1A Loaded long-slotted flash suppressor.
You will have precision shooting out of the box by combining the National Match .62” front sight post and a non-hooded aperture rear sight.
It also features a 2 stage Military Trigger that is fine-tuned for a consistent 4.5 to 5-pound trigger pull.
If you are looking for a sniper rifle that is custom designed to provide you with match-grade performance at a reasonable price, the Springfield Armory M1A Loaded National Match is an excellent choice.
It is available from Palmetto State Armory. Here’s where to buy it: www.PalmettoStateArmory.com
#4. Bergara Premier HMR PRO 308 5 Round Bolt Action Rifle, Mini-Chassis With Adjustable Cheekpiece
- Caliber: .308 Win
- Action: Bolt
- Barrel Length: 20”
- Overall Length: 40”
- Capacity: 5-Round
- Weight: 9.3 lbs.
The Bergara Premier HMR PRO 308 5 Round Bolt Action Rifle is an excellent rifle for those who want a premium shooting experience for hunting and matches chambered in .308 Winchester.
It features a Synthetic stock with an adjustable pull length and cheekpiece to get the perfect fit for any shooter.
With a 20” free-floating barrel, you will have consistently accurate shots down range.
With an upgraded bolt and feeding system, it has a premium 2-lug system that separates the floating bolt head for smooth action.
The bolt has a one-piece design and comes with a full nitride finish for enhanced durability.
The rifle also features a premium TriggerTech trigger that offers a consistently smooth pull.
It also comes with a 5-round capacity AICS-style magazine.
If you are looking for a high-performance rifle designed for hunting and matches, the Bergara Premier HMR PRO 308 5-Round Bolt Action Rifle is an excellent choice.
It is available from Palmetto State Armory. Here’s where to buy it: www.PalmettoStateArmory.com
#5. Ruger Predator 6.5 Creedmoor Moss Green 22” Rifle
- Caliber: 6.5 Creedmoor
- Action: Bolt
- Barrel Length: 22”
- Overall Length: 42”
- Capacity: 3-Round
- Weight: 6.6 lbs.
Ruger Predator 6.5 Creedmoor Moss Green 22” Rifle is the perfect rifle for those wanting premium features without a premium price tag.
It features a one-piece three-lug full-diameter bolt with dual cocking arms for smooth cycling.
The rifle also features a soft rubber butt pad, providing better control and recoil mitigation.
For accurate shots down range, it features a trigger with an adjustable pull between 3 and 5 pounds and a 22” threaded cold hammer forged steel barrel.
The Ruger Predator’s synthetic stock and alloy steel hardware can withstand the harshest environments.
Also, it only weighs 6.6 lbs making it perfect for long trips in the backcountry.
The Ruger Predator 6.5 Creedmoor Moss Green 22” Rifle is your best choice for a budget-friendly sniper rifle that can deliver consistent performance.
It is available from Palmetto State Armory. Here’s where to buy it: www.PalmettoStateArmory.com
#6. Sauer 100 Silver XT 6.5 Crd Bolt Action Rifle
- Caliber: 6.5 Creedmoor
- Action: Bolt
- Barrel Length: 22”
- Overall Length: 42”
- Capacity: 5-Round
- Weight: 6.68 lbs.
The Sauer 100 Silver XT 6.5 Crd Bolt Action Rifle is an excellent entry-level rifle that is perfect for taking your targets down at a distance.
It is chambered in 6.5 Creedmoor and has several features to provide an excellent shooting experience.
With a synthetic fixed Ergo Max stock, it will provide enhanced comfort and control.
It also features a 22” cold hammer forged steel barrel with a Cerakote finish for improved longevity and durability.
Other features include a three-position safety, an adjustable single-stage trigger, and steel hardware.
The Sauer 100 Silver XT 6.5 Crd Bolt Action Rifle is a top choice if you are looking for a solid-performing entry-level bolt action sniper rifle.
It is available from Palmetto State Armory. Here’s where to buy it: www.PalmettoStateArmory.com
#7. Savage Arms Axis II Precision 6.5 Crd Bolt Action Rifle, Matte OD Green/Black
- Caliber: 6.5 Creedmoor
- Action: Bolt
- Barrel Length: 22”
- Overall Length: 42.5” – 43.5”
- Capacity: 8-Round
- Weight: 9.88 lbs.
Savage Arms partnered with Modular Driven Technologies to introduce the Savage Arms Axis II Precision 6.5 Crd Bolt Action Rifle.
It includes an exclusive MDT chassis and many other features to provide precision shooting without destroying your bank account.
It features an aluminum stock with a beautiful matte olive drab green/black finish.
The stock features an adjustable comb height and length of pull spacers to get an excellent fit for enhanced control and comfort.
It also comes with a 22” carbon steel barrel that is button rifled for improved durability and accuracy.
An excellent feature is the M-Lok forend that allows you to customize your loadout.
With a 2.5 to 6 lb adjustable AccuTrigger, you will have smooth and consistent trigger pulls that ensure you will take down your target.
With its many features at an excellent price point, the Savage Arms Axis II Precision 6.5 Crd Bolt Action Rifle is a top pick.
It is available from Palmetto State Armory. Here’s where to buy it: www.PalmettoStateArmory.com
#8. Howa M1500 Australian Precision Chassis 6.5 Crd Bolt Action Rifle
- Caliber: 6.5 Creedmoor
- Action: Bolt
- Barrel Length: 24”
- Overall Length: 44.5” – 47.5”
- Capacity: 10-Round
- Weight: 10.8 lbs.
The Howa M1500 Australian Precision Chassis 6.5 Crd Bolt Action Rifle specializes in modularity and accuracy with its fine-tuned components.
It comes with a LUTH-AR MBA-4 fully adjustable stock with a variable length of pull of 12” to 15” for a precise fit.
With a 24” threaded precision barrel, ten-round capacity, and an M-Lok free float handguard, you can have the perfect loadout to keep a target engaged no matter the distance.
Howa backs its product with a lifetime warranty and a sub-MOA guarantee.
If you want guaranteed performance with tons of customization, the Howa M1500 Australian Precision Chassis 6.5 Crd Bolt Action Rifle is a perfect fit for you.
It is available from Palmetto State Armory. Here’s where to buy it: www.PalmettoStateArmory.com
#9. Daniel Defense Delta 5 Pro 6.5 Creedmoor Rifle 24”
- Caliber: 6.5 Creedmoor
- Action: Bolt
- Barrel Length: 24”
- Overall Length: 40.25”
- Capacity: 10-Round
- Weight: 11.4 lbs.
The Daniel Defense Delta 5 Pro 6.5 Creedmoor Rifle 24” has custom enhancements that you will not find in your average long gun.
It features an interchangeable 24” proprietary steel blend barrier with a Cerakote finish and an Area 419 Hellfire Muzzle Brake.
The Area 419 Hellfire Muzzle Brake provides reduced recoil and muzzle rise, allowing you to reengage your target quickly.
It also comes with an adjustable Timney Elite Hunter single-stage trigger, an M-Lok handguard, an AR-15 grip attachment, and an ergonomic thumb rest.
The synthetic stock also has an adjustable length of pull, butt pad height, and cheek riser for a fantastic fit.
Pair all that with an included ten-round PMAG, and you get an excellent package.
A downside to the Delta 5 Pro is its price, but every inch of it is well worth the price tag.
If you want a feature-rich sniper rifle perfect for newcomers or professionals, the Daniel Defense Delta 5 Pro 6.5 Creedmoor Rifle 24” is an excellent choice.
It is available from Palmetto State Armory. Here’s where to buy it: www.PalmettoStateArmory.com
#10. Springfield Armory M1A SOCOM-16 .308
- Caliber: .308 Win
- Action: Semi-Automatic
- Barrel Length: 16.25”
- Overall Length: 37.25”
- Capacity: 10-Round
- Weight: 8.8 lbs
The Springfield Armory M1A SOCOM-16 .308 brings everything shooters love about the standard M1A and makes it compact.
This version has a shorter 16.25” barrel and gas system with an overall length of 37.25”, making it perfect for maneuvering in tight spaces.
Its black composite stock is impervious to harsh weather and is comfortable to fit in the pocket of your shoulder.
The iron sights on the M1A SOCOM-16 are top-notch, with an XS Tritium front sight and a classic M1A rear sight.
One of the best things about this rifle is that it is semi-automatic with a ten-round capacity that enables you to continually engage your target without interruptions.
A unique feature of the M1A SOCOM-16 is that it comes with a forward scout-style Picatinny rail to accommodate close-quarters optics.
It also features a two-stage match-grade tuned trigger for crisp trigger pulls.
If you are looking for a premium rifle that will deliver at short or long distances with a semi-automatic action, the Springfield Armory M1A SOCOM-16 .308 is a clear winner.
It is available from Palmetto State Armory. Here’s where to buy it: www.PalmettoStateArmory.com
Semi-Automatic Vs. Bolt Action
Based on the shooter’s preference, they may desire a bolt action or semi-automatic rifle, but what is the difference?
Fire Rate
The most significant difference is that semi-automatic rifles can fire follow-on shots much faster.
In the long run, you can engage a target more effectively with a Semi-automatic sniper rifle.
Recoil
Bolt action rifles will tend to provide more accurate follow-on shots because of the way gas is expelled differently between the two.
Semi-Automatic rifles use some of the gas for expelled rounds to charge the weapon for another shot.
While doing this, the gas is pushed back towards the rear, and the bolt slams into the buffer spring.
Bolt action rifles only have one stage of recoil, where the recoil is pushed directly into the shooter’s shoulder pocket.
Moving Parts
While a high-quality semi-automatic rifle will have consistent performance, it is still more likely to malfunction due to having more moving parts.
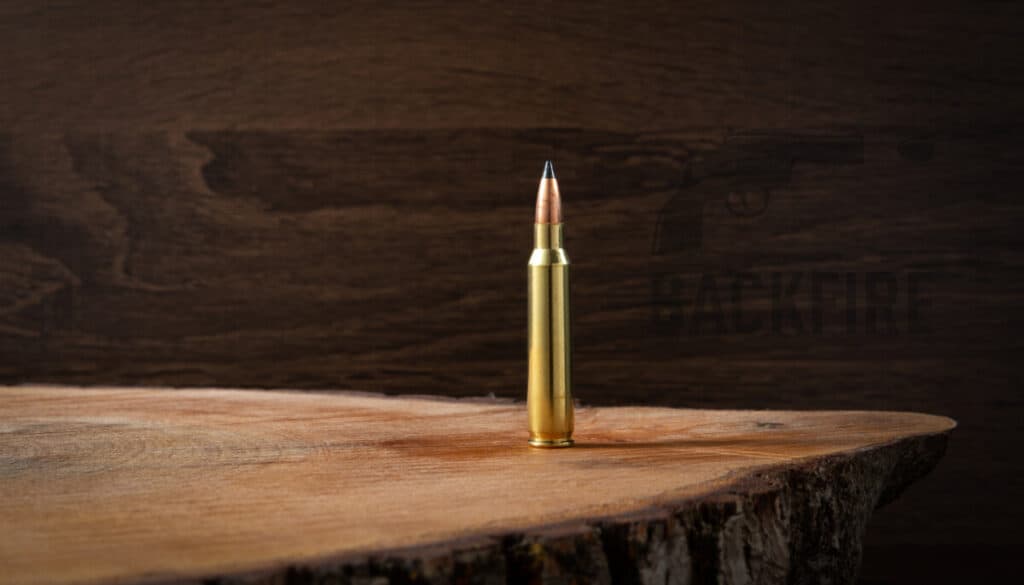
.308 Winchester Vs. 6.5 Creedmoor
.308 Winchester and 6.5 Creedmoor are two of the most common rounds fired by snipers and for a good reason.
They offer plenty of power to take down your target at any range.
What Is The Difference?
Round Variety
The .308 has been around for decades with plenty of different variations in weight and complexity from lightweight 125-grain to heavier 180-grain rounds.
With the 6.5 Creedmoor, the heavier rounds are typically 1437-grain.
The .308 Winchester will generally be easier to get and is cheaper.
Recoil
The 6.5 Creedmoor has slightly less recoil than the .308 Winchester.
Ballistics
Both .308 Winchester and 6.5 Creedmoor do an excellent job at providing the ballistics you need to take down your target.
However, the 6.5 Creedmoor has better ballistics, allowing the round to have a flatter trajectory for long distances.
Final Verdict
For long-range precision shooting, the 6.5 Creedmoor is the way to go.
However, if you are the average hunter who will engage their target at less than 300 yards, the .308 Winchester is a better choice.
References
Bolt Action or Semi-Automatic for Long-Range Competition?
6.5 Creedmoor vs. .308 Winchester
See Also
12 Best Long Range Rifles
9 Best AR-10 Rifles
12 Best 308 Rifles
10 Best .22 Caliber Rifles
9 Best Rifles For Home Defense
Featured Image: GetArchive.net
Affiliate Disclosure: This post may contain affiliate links. If you click and purchase, I may receive a small commission at no extra cost to you. I only recommend products I have personally vetted. Learn more.
")
")
")
")
")


 Review – The Best Name In The Air Rifle Game")