It seems as though there aren’t many new methods for taking a buck these days. It almost seems as though every tactic for killing big bucks has already been brought to the table. That is what I thought until I spoke with Iowans Todd Pringnitz and Ted Miller from White Knuckle Productions. What they taught me was that there is an exciting new method out there for drawing in bucks. It is the horizontal rub post. That’s right. Horizontal.
We are all familiar with rubs. They are as commonplace in the deer woods as the deer themselves, but rarely does hunting rubs alone bring in a buck. Horizontal rub posts do. They were the creation of Ted Miller, and he actually discovered them by mere happenstance.
While filming elk in Yellowstone National Forest nearly ten years ago, Miller got repeated footage of bulls that were attracted to certain areas with blown down trees. They would rub their antlers on those trees or on branches shooting out horizontally. He wasn’t looking for this behavior at all. He was just observant enough to pick up on what the elk were doing, and it got him thinking, “I wonder if I can try this at home on whitetails.”
When he returned home he started putting his idea to work. What he found was pretty interesting. “I didn’t have any experience making these posts, so for my very first one, I went to one of my food plots and drove two posts into the ground and wired a limb to the posts about knee high or a little higher,” he recalls. “That was back when trail cameras were really just catching on. I didn’t have a trail camera at the time, so I just went back two or three days later and checked on it.” The limb had been worked.
So, he set up a ground blind at that spot, and on his first night sitting in the blind with his son, a large buck came and worked the post right in front of them. They got some good video footage of the deer working the rub but when it came time to shoot, the deer spooked. Regardless, the experience was one Miller will never forget, and is likely the very first time a hunter has ever used a horizontal rub post. It set the stage for many more such encounters for Miller. “That was the very first one I ever did and over the years I have figured out what the deer like and want out of them. I have been able to improve them along the way.”
The Limb Matters
The main thing that Miller found was that the type of limb can make all the difference. “Most hunters in Iowa were using cedar trees in their posts. The adage is that bucks prefer to rub on cedars, but they weren’t having a lot of success with them. I have found that Scotch pine limbs work the best.” The reasons are brilliant when you think about it.
First, when using scotch pines, there is no need to cut down the whole tree as you would with a cedar. Mature scotch pines are bigger, allowing you to simply cut off a limb rather than take the whole tree. Plus, they are not native to the area. They are more of a Christmas tree and are planted and easy to find if you look around. Miller has several planted in his yard, making finding them a cinch!
He also notes that the limbs should be about the size of your wrist or slightly larger in diameter so they won’t break when a buck gets aggressive with it.
Another thing that he has learned over the years – and probably the most important thing – is that once you find the limb you are going to use, cut it longer than the gap between your posts. “I like to run my limb about two feet or so past one end of my posts so it sticks out from the end on the side I want the bucks to work. I found that they prefer working the end that is sticking out past the posts much more than they do the part of the limb that lies between the posts. I think it is just more convenient for them.”
Another trick that he has discovered is to attach the limb loosely to the posts so it has some play in it. “Different bucks have different personalities. Some like to get aggressive and fight with it a little bit, so when I wire my limb up, I do so that it will move up and down about six inches to a foot or so. This gives it some give and allows the limb to rock up and down when a buck wants to fight with it and such.”
The last couple of years Miller has been adding a licking branch to his horizontal rub posts. “I just run another limb above it to act as a sign post. I’m just trying to give a buck everything that he wants in order to hold his attention.” He usually just attaches the licking branch above the end of the limb that sticks out past the post, but he says that if your posts are tall enough you can attach it to one of them and have it hang down. Or, you can also position your set-up underneath a tree that has a limb hanging down above your horizontal limb. Any situation will work.
An Added Benefit
A really great thing about using these rub posts is that they actually hold a deer in a certain spot for a while. A great plus for Miller who enjoys getting video footage of deer. “It’s really hard to get a buck to stop long enough to get any decent footage of him, but with these rubs, they tend to stay there and work it for a little bit. This really helps me out when I am filming. It also allows you to learn a lot about buck behavior.”
What Bucks Use It?
Miller has seen everything from spikes to Boone and Crockett bucks use his horizontal rubs, so no matter what type of buck you are after, it will work. He does note, however, that some bucks, especially smaller ones, will come in cautiously as they might be intimidated at first. But nonetheless, it attracts bucks of all calibers.
Scent?
Nope. Miller doesn’t use any on his limbs, noting that the Scotch pine itself is a sticky, sappy type of tree anyway and will absorb and hold the scent of the deer that use it. That is all that is required to help draw more deer in.
Where and When to Use It
Obviously they are most effective towards the rut, but they are effective earlier than that as well. Miller notes that bucks will begin hitting them as soon as they shed their velvet, although the most active times are from mid-October until the rut is completed, so be sure to set yours up around the first of October or so.
As for where to place your horizontal rubs, Miller doesn’t feel that a buck is going to get up and walk a half-mile just to hit it, so he says to set them up anywhere you feel that bucks want to be or in areas where you plan to hunt and see high buck activity. Food plots and staging areas are prime examples.
The Bottom Line
Miller found his horizontal rub post system by accident, and he has perfected it over the years. In my opinion, this may be one of the most under-utilized tactics for drawing in bucks, and perhaps, one you should be trying this fall.
To learn more about Miller’s horizontal rub posts, check out www.whiteknuckleproductions.com.
This review started when I said mean things about Turkish shotguns online. My comments were generally targeting the gas-operated bullpup magazine-fed guns, but I have had a generally negative view of most Turkish shotguns. That opinion is based on a parade of Turk shotguns that have come through the shop where I work. As a category, they have more issues than shotguns of other origins. But they also have price points that tend to be much lower. I was soon contacted by a VP at Four Peaks Imports who threw down the gauntlet. He offered to send out a shotgun from their lineup because he thought shooting one would change my mind. I respect his approach of choosing a public hater as a potential reviewer, and letting the product speak for itself. I selected the Aksa S4, and in short order, it showed up at my FFL.
Semi-Auto Shotguns @ TFB:
Mossberg 940 Pro Turkey Shotgun in Mossy Oak Greenleaf
Weatherby Expands Element Lineup with New Element Turkey Shotgun
New Enhanced Girsan MC312 Tactical Shotgun from EAA
Mossberg Unveils The New 940 Pro Tactical Semi-Auto Shotgun
Attack of the Clones?
The Benelli M4 is a legend. There can be no debate on that point. It has been used by militaries, police forces, competition shooters, and people who just like nice shotguns. It has graced the silver screen and been used in Triple-A video games.
Whenever a gun reaches icon status, there will be clones. Some clones are more of an homage to a design, others are quite literal “clones” of the original. The Aksa S4 is the latter. Parts are generally interchangeable, including common upgrades like magazine tubes or stocks. It is not a Benelli but is impressively similar to the original.
My negative view of Turkish shotguns generally stemmed from the obscene gas-operated bullpup magazine-fed guns that clutter the shelves of too many retailers, but the actual range of Turk scatterguns is very broad. There are pump guns with prices so low they look like misprints, and there are CZ-branded guns competing in the higher tiers. As a whole, this category of shotgun tends to cost less than comparable models made in the USA or places like Italy and Japan.
The S4 In Action
Gun reviews are intrinsically limited by (usually) having a sample size of one, and by not having unlimited time or ammunition. Multi-year, 10,000-round reviews across 20 sample guns would be an incredible source of data, but it is simply not feasible unless you are running some type of government procurement program. I was footing the bill for ammo and I most certainly do not have a Department of Defense budget. With those caveats in mind, it was time to start shooting.
I did not lubricate anything, clean the gun during the review, or put thread locker on any screws before the initial break-in. Some reviews of similar models insist that these steps are necessary before shooting a Turkinelli. Instead, I stuffed shells in the magazine tube and started shooting. Gas-operated shotguns usually need some rounds through them before they operate reliably. That was true for the Aksa S4. In the first 50 rounds or so, there were a few failures to feed and failures to extract. After the first few boxes of shells, it smoothed out and operated normally.
I wanted to put a wide range of shells through the Aksa S4 because semi-auto shotguns can be picky with ammunition. I fired 550 rounds of birdshot, primarily 1 1/8oz and 1oz Winchester and Federal as found in your local Walmart. Outside of the initial break-in and one hang-up in the burndown (discussed below), it ran this ammo 100%. Some semi-automatic scatterguns struggle with this cheap ammo, but the Aksa S4 ran it like a champ.
I also fired 110 mixed rounds of buckshot, slug, and turkey shells. The loads fired included Federal Law Enforcement buckshot and slugs, Fiocchi buckshot and slugs, cheapo no-name buckshot from a baggie in my basement, Winchester military 00 buck, and the least-expensive turkey shells from my local Sportsman’s Warehouse. Everything cycled fine, with the exception of Fiocchi low recoil buckshot. It did not like that load at all. Thankfully, that was the outlier.
The manipulations are exactly the same on the Aksa S4 and the Benelli M4. I have shot Benelli shotguns in the past and there were no differences in the manual of arms. Both the M4 and S4 benefit from larger aftermarket bolt release buttons and extended bolt handles. Extended magazine tubes can also be added, though that can trigger 922(r) compliance issues. I chose to stick with basic upgrades for this review, which would not change any functional parts of the Aksa S4. I added a piece of industrial Velcro to the left side of the receiver for use with Esstac Shotgun Cards, and a Vortex Crossfire red dot on the factory optics rail. Some reviews of similar guns reported that the optics rail came loose after firing. This gun did not have that issue.
The BurnDown
James has a history of blasting shells through shotguns as fast as he can to see what survives. Some guns handled it well, some did not. I wanted to do something similar, but with 200 rounds due to scarce ammunition and high prices. I did the burndown toward the end of the review, with about 325 rounds through the gun already. If something was going to fail, it would be more likely to fail with preexisting wear and tear before the real pain commenced.
The burndown was pretty simple. Load up 5+1, fire as fast as I could, load up 5+1 more, and do it again. There also were some top-off single loads mixed in too when I dropped a shell or missed the count on a reload. This was a truly unreasonable sustained rate of fire. The Aksa S4 got so hot that it scorched the leather glove on my lead hand through the handguards. My wife asked if I had eaten barbeque for lunch that day because the burning smell was so pronounced.
How did the Aksa S4 fare? Excellent. It has one hiccup, a failure to feed at round 178 of 200. I pressed the bolt release button and the round fired and cycled normally. Once the gun cooled off a little, I fired the remainder of the buckshot, slugs, and turkey shells. All fired normally with no drama, including some 3″ magnum Ultra Turkey 1 3/4 ounce loads that damaged me, but not the gun. I was able to land a head shot on a 2/3 IPSC steel target at about 60 yards with a 3″ Federal slug as well.
General Thoughts
A few sources had suggested that these guns were prone to parts breakage around the 500-round mark. I did not find that to be the case, but this is only one sample gun. What I can say from my totally non-scientific-definitely-not-an-engineer perspective is things look pretty good inside, and nothing looks like it is on the way to breaking.
The Aksa S4 includes 3 chokes (1 in the gun, two in a case), as well as a choke tube wrench. The wrench is pretty flimsy but it was able to remove the choke for the last few shells of the review. I did not see any marking on the chokes, so I used the age-old method of putting my finger in the front end to see how constrictive they were. I installed the most-constrictive one, and the patterns did shrink. Detailed patterning of shotguns is time intensive and beyond the scope of this review. What I can say is the chokes are there and if you feel like changing it up and looking at patterns, that option is available to you out of the box.
Conclusion
“Is it just as good?” is the wrong question. A clone that costs 70% less than the original Italian masterpiece will never be just as good. This is true with Italian guns, motorcycles, and food.
The real question should be “is it good when judged on its own merits?” and my answer is yes. It is a lot of gun for the money. Unlike many budget-oriented guns in its class, there is an aftermarket thanks to the M4 parts interchangeability. And it just might make you pick up a Benelli to round out the set some day.
I’ve been fly fishing in southern Virginia for more than 15 years and ever since I first started trolling with my dad from our small 50hp boat when I was 12, I’ve fished with a fish finder.
Picking out the best fish finder for small boats will not only help you find fish more effectively from smaller vessels but also locate and save key areas where fish could be hanging out in the future.
So, it will help you catch fish now, and you can also mark key spots on the river or lake. That way you can always come back and try those spots.
Quick Answer: Best Fish Finders For Small Boats
1. Humminbird Helix 5 Series
2. Humminbird Helix 7
3. Lowrance Hook 2 GPS
4. Joywee Phiradar
5. Lucky Portable Fish Finder
If you’re looking to find fish and locate habitat, then check out the article below. I’m going to go over some of the best small boat fish finders.
We also have a “Best Fish Finders Overall” article if you’re looking for all types of fish finders.
Check Out Our Video
What is a Fish Finder?
A fish finder is able to tell you several pieces of information that will be critical for helping you find and catch fish. It’s possible to fish without one, but it can make a world of difference.
Fish finders can tell you the depth of the water and the temperature, along with where the structure, bait fish, and game fish you’re after are. Plus, some different models also have GPS.
Types of Fish Finders
There are several different types of fish finders. Each has its own pros and cons, so you should do careful research before you purchase one, as it may not work well for your style.
So, below I’ll go over a few different kinds to help you figure out which one will work best for you. Check them out and then see which one you can best utilize.
Mountable
These are great because they come with a bracket that’s fixed onto the boat. However, the actual unit can be taken on and off. So, the next morning, it can easily be mounted back on.
This is great for travel or if you have your boat parked outside. You can now take off your electronics and keep them safe inside your house or your truck.
Fixed
If you have a boat that you know will be safe and secure, then a fixed fish finder will be fine. These are great because it’s just one less thing you have to worry about taking on and off the boat at the end of the day.
These are also great if you’ll be fishing in choppy conditions. Since it’s fixed onto the boat, it has a low likelihood of falling off from waves crashing and bouncing off the boat.
Portable
Portable fish finders are great for when you have a smaller boat or a kayak. These can be easily installed before getting to the lake, or right at the water’s edge.
The portability factor makes it easy to transfer to and from your boat and reduces weight. This is great when you’re fishing from a kayak or float tube that may have a weight limit.
Handheld
These are similar to portable fish finders. They can be very easy to travel with and can also be lighter, making them great for use on smaller boats that have a weight limit.
Typically, these aren’t as nice as some of the bigger units that you mount. However, I think you’ll find that these will capture all the information you need and help you catch more fish.
Castable
These are great for shore anglers. Since you’re not actually in the water, you can cast out the transmitter and see the depth, water temperature, and even if there are any fish below the transmitter.
You can also use this when fishing out on boats too. They’re typically not as efficient as some of the handheld models out there, but are a great option for a cheaper model.
When to Use a Fish Finder
You can use a fish finder whenever you want to. Since you can now utilize castable fish finders, anyone can go out to their favorite water and have some sort of idea of what the bottom of the lake looks like.
The only time you may not need one is when you’re floating a shallow or clear river. Typically the water depth will change rapidly, and the only thing you may need to know is the water temperature.
Do You Really Need a Fish Finder?
If you want to go fishing, then you don’t actually need a fish finder. You can find success without one by looking for lay downs and other structure that your naked eye is able to find.
However, it will make a world of difference if you use a fish finder. It can help you locate bait fish, humps, drop-offs, sunken structure, and even schools of game fish.
5 Best Fish Finders for Small Boats
Below, I’ll go over five different products. These are the best fish finders for smaller boats. Kayaks, jon boats, paddleboards, and all other small vessels will be able to utilize the products below.
Check them out and see which one will work the best for your fishing style. Each has its own pros and cons, so take a close look and figure out which one will be the best for you.
1. Humminbird Helix 5 Series
Pros: Has sonar and comes with a transducer, great value
Cons: Smaller screen, not as bright, older model
The Humminbird Helix 5 is a great overall fish finder. It can be mounted onto smaller boats and even comes with its own transducer. Setting it up is a breeze.
It has side imaging, down imaging, speed, and GPS. It comes with sonar, water temperature, and a depth indicator, meaning this isn’t just a barebones unit. But, it has everything you need to locate fish.
It comes in at a solid price point, so a beginner angler can purchase this and learn how to use a fish finder properly without having to spend too much on a unit.
Product Specifications
5 inch color display
Dual beam sonar
4000 watts power output
Comes with a transducer
Broadband CHIRP
Easy use and set up
VIEW ON AMAZON
2. Humminbird Helix 7
Pros: GPS and down imaging
Cons: No SD card with loaded maps
If you’re looking to take the next step in purchasing a fish finder, then the Humminbird Helix 7 is a great option. It won’t break the bank but it has a solid price point, especially considering what it can do.
With down imaging, this unit can tell you exactly what’s beneath your boat. It’s ideal for fishing in deep lakes, rivers, or in salt water. You can easily tell the water temperature and the depth as well.
The device can give you coverage up to 125 feet, which is more than enough for most anglers out there. If you plan on taking this into really deep salt water, then maybe another unit would be better.
Product Specifications
7 inch screen
Mega down imaging
125 feet depth
Low Q CHIRP transducer
Dual spectrum CHIRP
Two display modes
Includes transducer and mounting hardware
VIEW ON AMAZON
3. Lowrance Hook 2 GPS
Pros: Comes equipped with GPS and wide sonar coverage
Cons: Can have issues with consistent depth readings
If you’re looking for a unit that has GPS capabilities, then this is the one for you. A GPS unit on your boat is great for when you’re fishing big water that may be new to you. This allows you to traverse the lake without getting lost.
The Lowrance Hook 2 is also very easy to use, which makes it ideal for someone who may be new to the world of fish finders. You can easily mount it, set it up, and learn to use it out on the water.
It gives you traditional CHIRP sonar, so you can tell if there is any structure below you. It also tells you the water temperature, depth, and if there are any schools of fish beneath your boat.
Product Specifications
Auto tuning sonar
Easy to use menu options
Wide sonar coverage
Easy setup
Mount on transom, hull, or trolling motor
GPS
Transducer included in the package
VIEW ON AMAZON
4. Joywee Phiradar
Pros: Small and compact size, accurate depth readings
Cons: Can be a pain to install and set up to a battery
If you’re looking for a great fish finder that can be used on a kayak, then this is the one for you. The Joywee Phiradar is small enough that it won’t add too much extra weight, which is important when kayak fishing.
Installation can be a bit of a pain, but once you have it set up and ready to go, then it’s fine. You can easily paddle around the lake on your kayak utilizing the great work this fish finder does.
It’s extremely accurate and outworks the price, making this another great deal. It’s perfect for someone who doesn’t want to drop a crazy amount of money on a fish finder.
Product Specifications
3.5 inch screen
Depth reading from 1.8 to 900 feet
Auto zoom tracking
Bottom contour and temp readings
Multi-language settings
Big or small fish indicator
Dual beam sonar frequency
VIEW ON AMAZON
5. Lucky Portable Fish Finder
Pros: Small and easy to use and transport
Cons: Slow readings and no bells and whistles
For the price, the Lucky Portable Fish Finder is pretty incredible. Don’t expect too much, though, as this is a very barebones fish finder. It will tell you depth, water temp, and fish location. It seems the fish location can be slow sometimes, though.
This can be taken out in just about any type of watercraft you can think of and be utilized. So, if you don’t want to pull the trigger on something crazy expensive, then this is the one for you.
Ideally, this is best suited for a kayak. Since it’s so small and lightweight, it won’t take up much extra space in the boat. It’ll deliver all the essential information you need to catch more fish, but nothing more.
Product Specifications
Portable
Streamlined shape
Real-time water depth
Background light
Fish detector
328 feet max depth
Extremely easy to use
VIEW ON AMAZON
Features of a Good Fish Finder (Particularly Those For Smaller Vessels)
Below, I’ll go over some of the best features of fish finder for small boats. Each has its own pros and cons, so think about what you want and then apply it to the list below.
GPS Integrated
Having GPS on your fish finder can be the ultimate game changer. Most of these have waypoint settings that will allow you to plot exactly where fish have been hanging out or where you think they will be.
It’s also great if you plan on fishing large waterways for the first time. This way you can easily plot your way back to shore or the boat ramp without getting lost.
Cone Angle
The cone angle is the sound generated by the transducer that works its way towards the bottom. The sound wave looks similar to an upside-down ice cream cone.
Some fish finders have a wider cone than others. The wider cone will allow you to see more of the bottom, thus allowing you to see more drop-offs, bait fish, or anything you may want to key in on.
Side Scan vs Down Scan
Side-scan gives you an image of what is on the sides of your boat. It shoots out an image a number of feet and allows you to see a lay down or brush pile that may be off to the side.
Down scan allows you to see directly beneath your boat. This is ideal when fishing in deep water, such as lakes or oceans. It’s especially effective if you plan on jigging beneath your boat.
Mounting Type
The mount type for your fish finder should depend on what type of boat you want to use. A small vessel would do well with one that can be removed or something that’s handheld.
Larger ships do well with fixed units. These are usually locked up and can’t be taken off without power tools and either lifting the boat out of the water or getting in the water to take them off.
Vessel Specific Fish Finders
If you have a small boat, then something that can be easily taken on and off would be great. Also, something small and lightweight would be best because smaller boats can’t handle as much weight.
Larger boats can handle much more weight, so 12 inch screens and large electronics won’t weigh down the boat. These are best when you’re using a larger ship.
Transducer
A good fish finder will have an even better transducer. The transducer will send and receive signals, and it acts as the heart of the echo sound system.
It changes electrical pulses into sound waves and then back again, so that the machine can accurately read what’s beneath the boat.
Display
The display of the fish finder depends on the size as well as the backlight. Some are made to be used in all different lighting conditions, from midnight darkness to the brightest of conditions in the middle of the day.
The size of the screen is also important. The bigger it is, the easier you’ll be able to spot different fish attractors or baitfish on the screen. You’ll need to find a screen that’s large enough to see but not too big to weigh down a smaller boat.
Frequency
Ultrasound frequency usually ranges from 15 kHz to 200 kHz. The majority of fish finders out there usually only have a range of 50 kHz to 200 kHz.
Some expensive or commercial fishing vessels may have a fish finder with a frequency that’s much higher. This isn’t needed for a recreational angler.
Some of My Favorite Fish Finder Brands
If you’d like to know who makes great small boat fish finders, then check out the section below. I cover several different brands that should meet your needs.
Take a close look at each brand before purchase, though. Each has its own pros and cons, and it could hinder your style of fishing if you purchase the incorrect one.
Humminbird
If you want to make the most out of your time on the water, then it’s hard to go wrong with a Humminbird. They have all of the high tech features needed to enhance your fishing experience.
It doesn’t matter what type of water or what type of boat you have. Humminbird makes a fish finder that will help you catch more fish.
Lowrance
One of the best-known names in the world of fishing electronics, Lowrance is regarded as one of the best companies out there in terms of producing high-quality fish finders.
It doesn’t matter the size, color, frequency, or cone angle. Lowrance creates a fish finder that will work perfectly for the style of fishing you plan on doing.
Joywee
Joywee is not a household name the way that Lowrance or Humminbird is. However, they make great fish finders that can be utilized by both professionals and amateurs.
Look to them if you want something that works well but won’t cost an arm and a leg to get. These are great for smaller vessels.
Lucky Fish Finders
Lucky fish finders are in the same vein as Joywee. This a newer company that makes great fish finders. They may not be well known, but they sure do work well.
Most of these are smaller and cheaper, making them ideal for anglers who may be new to the fish finder game and don’t want to spend too much. These are ideal for the angler who uses kayaks, canoes, or float tubes.
Review This Post
Conclusion
Fish finders are a great way to get you out on the water and improve your chances of catching fish. There’s only so much your naked eye can see, and there’s so much beneath the surface.
The items above are a great start, but feel free to use them as a jumping-off point to help find the right fish finder for you and your way of fishing.
If you want more success on the water, then you need to be using a fish finder. It doesn’t matter by who or how big. As long as you have one, then you’ll catch more fish than you did before.
A reliable camping hatchet or axe can be the difference between mere survival and a truly memorable camping experience
Do any sort of camping and you’re more than aware there truly are the right tools for the job. While implements such as a bushcraft knife are an absolute must to get you out of a backwoods switch, they are, at best, only adequate for certain tasks. Chief among these is processing any amount of wood.
This, when your kit requirements allow, is where the good old camp hatchet or axe comes into play. Antiquated for large tree-felling projects nowadays, these lightweight and heavy-duty tools bring your woodcraft abilities to a new level. From facilitating more elaborate shelter-building attempts and arming you with the ability to collect a magnitude more firewood, hatches and small axes prove a godsend in the harshest environments.
Let’s hack away at what goes into the best of these sometimes overlooked camping and survival tools and what presently are some of the top choices in the wilderness tools.
Camp Axes vs Hatchets
While there is no bright line from when you crossover from an axe to a hatchet, there is a generally safe rule of thumb. Axes sport enough handle to facilitate a two-handed grip, while hatchets are generally wielded with one hand—hence their moniker “hand axe”. Most times too, axes boast a slightly larger and heavier head with a slighter taper. Hatchets, you’ll find, have a much more pronounced taper to their heads in addition to some having other functions incorporated—such as a hammer.
Given this, axes provide more striking power, thus a bit more versatility since they’re capable of heavier work than hatchets, in addition to all the tasks the smaller tool is proficient at. Bushcraters have understood this for some time, with some favoring relatively small axes that make shelter building and wood splitting much less labor intensive. There is a tradeoff in going the axe route, however—no matter what, the great majority of axe options will weigh more than a hatchet.
A hatchet, aside from convenience, has some underlying benefits. Splitting wood in camp is much easier and safer with the hand axe given it’s more controllable and can function in smaller spaces. Many—as mentioned—are tailored to the tasks of camping with multiple functions engineered into them—a tent stake puller is always nice. And even in the realm of bushcrafting, the hatchet proves nimbler than the axe on many tasks—such as using it to whittle wood.
Which is Right For The Wilderness?
Overall, the winner of axe vs hatchet debate when it comes to the outdoors is only something you can determine by analyzing exactly what your needs are when out in the wild.
If your outdoor plans require a deep push into the backcountry, where woodfires are a secondary source of heating and cooking, a hatchet seems more logical. The same goes for excursions where you plan to collect fuel wood immediately around your campsite, as opposed to cutting down a tree.
Conversely, if wood fires are your main source of heat and cooking, even in deeper parts of the forest, and you’re on extended trips an axe might prove more useful. Furthermore, if you are going straight up Grizzly Adams and virtually living off the land, building your own shelters, well an axe provides an advantage. Hunters too, in blind building from fallen trees, could also benefit from the extra leverage allotted by an axe.
Again, these are not hard and fast rules, simply examples of where a hatchet might trump an axe and vice versa. Using each as well as understanding your needs and capabilities in the wilderness will likely point you to making the right choice.
Best Hatchets And Camp Axes
ESEE Gibson Axe
The hatchet is a James Gibson design which is now offered by ESEE. A knifemaker, flintknapper, and bushcraft instructor, James originally designed the Gibson Axe for himself, something to throw into a backpack as he tramped the hills and hollers of East Tennessee. As he tweaked his design, eventually cutting out a prototype made from thin plywood, he focused on its balance and “rocker.”
“An axe with perfect rocker is one of the best handling axes you can handle,” James said. “And I got the rocker perfect on this axe.”
And just what is rocker?
Gibson explains it’s when you take the hatchet and stand it up edge down on a straight surface. As he puts it, the bit’s edge should meet the surface in the “middle of the blade, the cutting edge and its dead center, and the handle [butt] should touch at the same time.”
When he showed a couple of prototypes of the axe to the folks at ESEE at a BLADE Show one year, they decided to add it to their lineup. At the time, ESEE was hearing from its customers that they wanted the company to offer an axe—and Gibson’s hatchet fit the bill.
James designed the handle to have finger grooves and a knob to secure the hand while swinging it. After the axe was made, he learned a hidden feature of his design: it has enough finesse to carve smaller objects. He says he sharpens pencils with it and once cleaned a trout with it. The result “is capable of doing some real work as well. It also has exceptional balance and you can choke up on it and use it like a knife for many applications,” explains Shane Adams, ESEE’s marketing director.
Of course, it being ESEE, the hatchet comes in the company’s oft-used blade material: 1095 carbon steel. “It’s us,” Adams said. “We know 1095 well.” It’s a steel that handles all the variables of the outdoors. “You can sharpen it with a rock if need be,” the marketing director advises. “Stones or systems, it doesn’t matter. I always like to finish on a loaded leather strop when possible.”
Charles Allen, president and owner of Knives of Alaska (KOA), knows the importance of being prepared. The Alaskan master big-game guide who has flown in the Alaskan skies professionally for almost three decades always keeps a hatchet stashed in his bush plane—and for good reason.
“When you look back at the old photos of the early trappers and hunters, you will see three things: a rifle, a knife, and a hatchet or tomahawk on their belts,” he said. “Hatchets are still one of the most useful tools a real outdoorsman can have in the field, and they can save your life by enabling you to quickly make a warming fire or emergency shelter.” When consumers demanded a multi-purpose hatchet, Allen studied the designs carried by the folks who make preparedness their motto: the Boy Scouts. “I looked at the historic Boy Scout’s hatchet I grew up with and know that it is a proven design that is hard to improve on,” he says.
But improve on the Boy Scout model he did with the KOA Hunter’s Hatchet. The hickory handle remains tough yet easy on the hands. Heat-treated properly, the S7 tool steel is designed to absorb the shocks of hard blows. With a Rockwell hardness of 50-54 HRC, the edge of the Hunter’s Hatchet is intended to dent if it collides with something hard, Allen says, such as bone while butchering game. And the head can be returned to a razor-sharp bite with Allen’s recommended sharpening tool: a flat, fine-toothed file.
When designing the Hunter’s Hatchet, Allen was sure to include a wide-enough poll so that users could pound stakes, nails and the like with it, too.
Hunter’s Hatchet SpecsCompany: Knives of AlaskaCutting Edge: 4.25″Head Material: S7 tool steelHandle: American red hickoryWeight: 1 lbs.Overall Length: 11″Sheath: LeatherMSRP: $169
Outdoor Edge Wooddevil
David Bloch, president and founder of Outdoor Edge, wanted a hatchet that could out-cut its class: Something small enough to carry easily but with enough heft to take down a medium-sized tree.
“I looked at and tested a number of compact hatchets on the market and came to the conclusion that most full-size hatchets were too large and heavy to take on outings where weight and volume were limiting factors,” Bloch said. “I also found that most every compact hatchet I tested, while cute in appearance, was not an effective chopping tool.”
During outdoor treks when the quality of your tools will make or break thetrip, the Outdoor Edge WoodDevil may be a guardian angel, made possible by the marriage of a combination of the right balance, a good handle and a wide cutting head.
“The WoodDevil stands up to its name,” David said. “With a 4-inch cutting surface, it has the ability to cut through large diameter material with the respect of its compact size.” Plus, its compact size makes it unobtrusive in the camping bin or pickup truck until needed for whatever task—from hammering tent stakes to “slicing tinder shavings,” he adds.
The 3Cr13 stainless steel in a Rockwell hardness of 52-54 HRC is malleable and resharpens easily, and the black oxide finish allows it to better resist corrosion. The TPR rubber handle provides a non-slip grip that soaks up the shock and vibration during use. It’s packaged in a nylon sheath retained with a fabric fastener that can hang from a belt.
Wooddevil SpecsCompany: Outdoor EdgeCutting Edge: 4″Head Steel: 3Cr13 stainlessHandle: Red ABS plastic with black rubberized TPRWeight: 1.2 lbs.Overall Length: 10″Sheath: NylonMSRP: $40
APOC Double Mukk
As Blake Pogue, product manager of CAS Iberia, tells it, the creation of the Double Mukk started with some pencil, plenty of erasing, and an idea.
“We wanted to bring a full-tang hatchet to market with some unique features at a good price point,” he said. Double-bit axes don’t seem as common as they used to be, but the Double Mukk’s design is grounded in some very real field experience. In fact, it is a design championed by George Sears, the famed outdoor writer with the nom de plume of Nessmuk.
“George Sears was an avid outdoorsman, canoe enthusiast, writer, and conservationist in the late 1800s,” Blake said. “He famously employed a trio of tools for woodcraft —a small folding knife, a thin-bladed belt knife and a short, double-bit hatchet.”
Pogue said after some field testing of their own, the makers learned they didn’t need to tweak much from Nessmuk’s favorite design. APOC Survival Tools makes the hatchet at a forge in Dalian, China, and it’s distributed by CAS Iberia. The blade is 9260 carbon steel, the same material used for swords, among others.
The double edge grants the hatchet additional versatility, as one side is flat ground for delicate carving tasks. The other side is convex ground to better slam through tough cutting jobs. Pogue recommends sharpening a hatchet with a hockey-puck-style sharpener designed for axes because it can easily follow the tool’s convex edges.
“I wanted one tool that could readily build a shelter, prep a fire for a meal, and do the intricate work required to make traps like the figure four,” he said. “If we can accomplish those three requirements, there isn’t much else you’d need but a small knife for food prep, and even then the carving side of the Double Mukk is no slouch!”
The Halfbreed is a very heavy-duty piece. It is thick and hefty, and capable of taking a serious beating and dishing one out. This variant is finished in a dark earth color and comes with a substantial sheath that allows for secure carry adaptable to a variety of belts and packs.
Notable is how heavy the little hatchet is. It feels very nice in the hand and allows for either a low or high grip depending on the task. The grip is round in profile and consists of somewhat smooth scales. The edge out of the box was shaving sharp and easily removed hair from the arm.
The high, comfortable grip allowed for great control when scraping tinder. It also was a beast breaking bricks to make a windbreak for small fires. That said, it is not great for splitting tasks and, due to the thickness of the edge, does not bite deep for chopping. The grip is very comfy for general chores, though because the hatchet has equal weight dispersion along its length, it can fatigue your hand in use. It can be swung quite hard but there is a great deal of wasted energy in each strike because the head doesn’t carry the bulk of the forward momentum.
The dark earth finish was also the fastest to come off in heavy use. This is to be expected; however, be aware that if used heavily, the hatchet head likely will show wear far more than the other review subjects.
In terms of fire-starting ability, the CRA-01 proved mediocre as a striking tool, though it was very easy to control the direction of the sparks. Overall, it is fine for small fire-starting work and if it was what I had, I could easily make it work.
HALFBREED BLADES CRA-01 SPECS: Style: Tomahawk Head Style: Curved edge w/hammer poll Blade Material: K110 D2 tool steel Head Thickness: .31” Blade Finish: Dark earth (available in Ranger green and black) Handle Material: G-10 Weight: 1.7 lbs. Sheath: Kydex w/safety strap, belt and PALS/MOLLE mounting optionsOverall Length: 9.52” MSRP: $400+
Winkler Knives Highland Hatchet
The Winkler has a full tang with scales attached. Worrisome for fear of the handle cracking in hard testing but it held up nicely. The finish is matte and held up well. It has a durable sheath that is simple and intuitive to use.
Despite the edge angles, it bit right into most wood, easily de-limbed trees and handled very light splitting. It stood no chance of taking a large log apart, though anything under 3 inches in diameter was taken to task.
For hammering and strength testing the Winkler held up extremely well. It broke bricks in a single strike and took very little finish damage in the process. Tent stakes were easy to drive in and were barely worth a mention, as a nice part of this little hatchet is it handles just like a 4-ounce tack hammer.
The Highland is a reliable fire maker, generating a showers of sparks and getting a flame going given equal materials. The edge showed no handicap in making kindling.
SPECS: WINKLER KNIVES HIGHLAND HATCHET Style: Camp hatchet Designer: Daniel Winkler Head Profile: Hammer poll Blade Material: 80CrV2 carbon steel Blade Finish: Black oxide Head Thickness: .336” Handle Material: Maple (laminate and walnut available) Weight: 20 ozs. Overall Length: 10 7/8” Sheath: Lined Kydex MSRP: $550
Condor Tool & Knife Mountain Pass AXE
The Condor Tool & Knife Mountain Pass might be classified as a jungle hatchet. It has a low beard and narrow thickness that is arguably much better at cutting wet wood, vines and bamboo in fast, repeated swings. For all intents and purposes, it is a foliage tool. As such it isn’t something for heavy splitting and camp chores. It ships with a very nice sheath of brown leather.
Swinging the Mountain Pass allowed for fast, accurate strikes. It bit in deep with each blow and was easy to withdraw. The edge was perfect for a camp axe when it arrived—not too sharp, not too obtuse. It handled limbs like a pro but was not up to heavy splitting. It sank in but lacked the mass to deliver sufficient splitting energy on the strikes.
A downside to hitting hard wood and other materials is Condor’s profile of the grip. It is visually appealing and very functional but narrow in cross section and wide front-to-back, thus making the impact of each hit apparent in a smaller area of the hand. If the grip was even 1/16 inch wider on each side it would have been an easy favorite in this test.
As far as hard camp work it broke brick easily with one hit, took little damage and easily drove tent stakes. It is not intended for either of these roles, but it did just fine considering it lacks a hammer poll.
The Mountain Pass was not particularly good at splitting fine kindling, but it did well and was easy to strike on, if not a bit large. Putting it in this role immediately made me realize it was really not meant for the work; it’s far better for clearing brush and gathering medium branches to process with a smaller tool.
The Ucon Hawk from TOPS Knives is probably the most visually striking hatchet in the evaluation, as well as the sharpest. It’s large with a wide cutting edge and deep belly. It has a long, very pointy and sharp beard and a substantial grip. It’s questionable the edge needs to be as sharp as it is; a dull knife is clearly a danger but an extremely sharp, full-size hatchet can be a hazard.
The Ucon’s size makes it adept for general camp tasks. However, when it came to splitting, the deep belly and sharp tips made pulling it out of a stubborn log relatively dangerous as the blade rarely penetrated all the way, thus leaving the tips exposed. If you were to put your foot on the log to apply pressure to withdraw the head, a possibility exists that you could injure your foot in the process.
That said, performance was fantastic as a camp tool and it could simply lop off branches in a single swing. The finish held up nicely and the edge stayed sharp even after hard use. It should be noted that only the TOPS and the Winkler had edges unaffected by use. The Ucon ships with a two-part sheath—one part goes over the blade and the other is a belt loop the hatchet can slip through.
For heavy-duty tasks it did well, easily passing through limbs. Splitting was possible, though the hatchet was a bit thin and grip-heavy to dive deep enough to separate a full-size piece of firewood. Breaking brick with the hammer poll was easy; it left virtually no damage to the tool. Driving tent stakes also was easy.
Making fire was a challenge in that you had to be extremely aware of where the tips of the edge were at all times. If you get in the mode where you’re striking rapidly, say if you’re cold and frustrated, you need to calm down and take your time (as you should always do when using any sharp edge). The Ucon produced the finest kindling of the bunch by scraping with its sharp edge. The hatchet needs to lose the super-pointy beards—otherwise it is a great performer.
SPECS: TOPS KNIVES UCON HAWK Style: Camp axe Designer: Leo Espinoza Blade Material: 1095 carbon steel Blade Finish: Tumble Head Profile: Curved blade, hammer poll Head Thickness: .25” Handle Material: Orange and Black SureTouch G-10 Weight: 1.94 lbs.Overall Length: 15” Sheath: Black leather MSRP: $330
A.G. Russell Pocket Safety Axe
The fold-out blade shield of the Russell Pocket Safety Axe is pure wizardry, especially considering the design is well over 100 years old. You won’t be caught saying “Where did I put the sheath?” with this one.
The A.G. Russell Pocket Safety Axe is a Marble’s design from circa the early 20th century. Marble took a small hatchet, 10.6 inches overall, and designed a fold-out metal shield in the handle to cover the bit in lieu of a sheath. Simply ingenious. The A.G. Russell version has a 4.5-inch 1070 spring steel head with a 2.4- inch cutting edge, and a typical old-school hammering base at the rear. The head has a distinctive three-slot mounting system Marble deemed superior to the standard oval style. The 8.8 inch handle is hickory and the whole kit and caboodle weighs 1 pound. Manufacturer’s suggested retail price: $79.95.
With much of its overall weight in the head, this is a very top-heavy hatchet—which can work to its advantage. In the bite test on the privet log, the Pocket Safety Axe finished first simply because the business end has a lot more weight (see the side-by-side comparison image on head thicknesses). Consequently, it chopped each test material well.
The fold-out bit shield has pluses and minuses. On the upside, it’s very convenient and there’s no sheath to keep up with. On the other hand, you have to pack it since there’s no belt-sheath option. Also, you’ll want to wear gloves for extended use, as the hinge mechanism in the handle can dig into the inner fingers. All in all, though, the Pocket Safety Axe is a stellar performer.
SPEC CHECK: A.G. RUSSELL POCKET SAFETY AXECutting Edge: 2.4” Blade Material: 1070 spring steel Head Width: 4.5” Head Thickness: .7” at the thickest Blade Coating: None Handle Material: Hickory Special Features: Metal blade cover in handle Carry: Pocket or pack Weight: 1 lbs. Overall Length: 10.6” MSRP: $80
Boker Plus Escape Hawk
Designed by Australian knifemaker/ designer Peter Fegan, the Boker Plus Escape Hawk is tactical in design. Hawks are primarily used for breaching and combat but can full other chores as well. Only 9 inches overall, the Escape Hawk has a 4.75-inch head of quarter inch-thick SK5 tool steel and a 2.56- inch cutting edge. The head has enough beard to be used for carving, and the curved 7-inch handle is adorned with nicely sculpted, diagonally grooved FRN ( berglass-reinforced nylon) scales. The butt can be used for hammering. The steel is protected throughout with a powder coat. A dual-strap Kydex sheath covers the head. MSRP: $189.95.
The Boker Plus Escape Hawk is a hatchet in disguise. The small hack-it’s 2.56-inch SK5 tool steel bit chopped rope in nice, clean lops, and hacked off nice-sized cedar tinder chips with ease.
Due to its small size, you won’t be doing much breaching with the Boker Escape Hawk, but the pint-sized hack proved its worth. The SK5 steel had plenty of hack, chopping rope in nice, clean cuts, and knocking out chunks of seasoned cedar for tinder. Though the bearded bit can be used for carving, the inward slant of the handle mounting to the head impedes its effectiveness for the purpose a tad. The handle has full-length scales—a bonus for freedom of grip—and the diagonal grooves afforded it the best purchase of the bunch. The Boker Escape Hawk is a hawk that thinks it’s a hatchet.
At 11.5 inches, the Western Blackriver Long Hatchet from Camillus is, indeed, the longest of the test hack-its. It sports a 4.5-inch-wide head with a 2.5-inch chopping edge. On the back side of the head is a gimped flat edge for hammering and a sharpened diagonal slot for cutting cord. The 9.5-inch handle has 5.25-inch black checkered rubber scales, and there is a shaving slot midway between the handle and the head. A ballistic nylon sheath with a firesteel pouch—with firesteel—is included. MSRP: $31.98.
The Western Blackriver Long Hatchet from Camillus is the batonner of the bunch. The thin bit cleaved into the tight hardwood grain like a thief in the night. Once the head was in, the final splitting was done by batonning the upper handle.
The Blackriver has the lightest head of the test group so it didn’t win the chopping wars, but its length and handle design give it a leg up on the others in some functions. The thin head is ideal for batonning, enhanced by the 4 inches of exposed steel below the bit, which can be used as a striking surface. The grip is very comfortable, the rubber scales aiding in impact absorption. The Blackriver will handle many chores around the camp, and the bonus firesteel and pouch on the sheath add value. It’s also by far the most affordable of the group.
Camillus/Wester Blackriver Long Hatchet SpecsCutting Edge: 2.5” Blade Steel: 420 stainless Head Width: 4.5” Head Thickness: .2” Blade Coating: Titanium bonded Handle Material: Rubber Special Features: Firesteel included Carry: Ballistic nylon belt sheath Weight: 1 lbs. Overall Length: 11.5” MSRP: $32
Winkler Hunter Axe LT
At only 9 inches long, the Winkler Hunter Axe LT is a small hack-it, but packs a full 19 ounces of weight—and that’s with a skeletonized handle tang. The Hunter Axe LT has a 3.5-inch-wide, bearded 80CrV2 carbon steel head with 2 inches of cutting edge, and there’s a hammering base out back. The steel thickness is a healthy .25 inch and is coated head to toe in Caswell black oxide. The scales are full-length, highly attractive curly maple. A padded Kydex sheath with nylon belt loops covers the head, and employs a shock-cord retention system for a quick draw. MSRP: $450.
The Winkler Hunter Axe LT’s Kydex sheath has a bungee-style tension cord for quickly releasing the axe from its housing. The sheath as a whole is very well made—a Daniel Winkler trademark.
The Hunter Axe LT may be short but at 19 ounces is the heaviest of the test hack-its—a full 2 ounces more than its nearest rival. The LT almost won the bite contest but didn’t due in part to its weight being more equally distributed than the top-heavy Russell Pocket Safety Axe. The 80CrV2 steel chops extremely well and the Caswell finish is very tough. Though not a carving axe per se, the LT was our best candidate for the chore and would have performed even better with a lower grind angle on the lead edge. The price is high but the Winkler is as close to a custom as you’ll get—plus, the sheath is a marvel in itself.
WINKLER HUNTER AXE LTSpecsCutting Edge: 2” Blade Material: 80CrV2 carbon steel Head Width: 3.5” Head Thickness: .28” Blade Coating: Caswell black oxide Handle Material: Curly maple Special Features: Skeletonized handle Carry: Kydex belt sheath w/tension release Weight: 1.9 lbs. Overall Length: 9” MSRP: $450
Gerber Freescale Axe
Gerber has had a successful series of axes and hatchets made in Finland that feature one-piece, hollow, molded handles for lightweight, optimum strength. An example is the 23.5-inch model in its Freescale series. The forged steel head is mated permanently to a lightweight composite handle, so there is little worry the handle will come loose during use. The oblong profile handle is hollow, which shifts the balance of the axe to being head-heavy. It is very forward weighted and that is a good thing. Use gravity to your advantage as you employ the axe, allowing it to fall naturally as you guide it. A tactile gripping surface in a contrasting green graces the handle. The handle flares at the butt, allowing your bottom hand to hook into it, trapping the handle in your hand so it doesn’t go flying. The handle style reportedly is virtually indestructible during heavy use.
The forged head exhibits a nice, steep “V” profile to help bite hard and deep into wood. A primary edge bevel thins the edge some and makes resharpening easier. A black PTFE coating provides additional corrosion resistance as well as a nonstick surface. A poll is designed as a hammer.
The Freescape is among the least expensive of the review axes, though don’t discount its performance based solely on price. Truth is, this axe is devastatingly effective. With each swing you can feel the forward-weighted balance power the Freescape through wood. The thickness and shape of the handle are just right, allowing a secure grip with both hands. Gerber includes a plastic caddy that seals the cutting edge and protects you and your belongings from being cut. The caddy has a large handle to carry the axe safely, as well for hanging on a pegboard in your garage or utility shed. For how it performs versus what you pay, it is an excellent value. If you’re a frequent axe user or just an occasional one, the Freescape will serve you very well.
A spike model, the RnD Compact Axe is the smallest in the Winkler Knives (WK) axe line, though that doesn’t mean it’s the least capable. The hatchet-like head is only 5.5 inches long. The 80CrV2 carbon steel head is ⅜ inch wide. The tang sports a distal taper toward the handle butt to improve balance and shift weight distribution toward the head. The spike is commonly found on tomahawks and does everything from prying to puncturing. WK also offers a front spike option integrated into the head’s main cutting edge. A black oxide finish helps resist corrosion.
The 80CrV2 offers extreme toughness and edge retention. It withstands an impressive amount of abuse yet remains easy to resharpen, even in the field. Daniel Winkler is a fan of 80CrV2 and uses it a lot for both his knives and axes.
The handle features two prominent grip positions. One is the traditional axe grip held close to the butt. A series of subtle finger grooves seats your fingers, and the butt has a bird’s-beak design that hooks the handle into your hand to prevent it from sliding from your grip. A secondary close-quarters grip is below the axe head at the handle’s humpbacked portion. This facilitates choking up for control in carving, whittling and using the cutting edge like a knife. The RnD feels very balanced and agile in the latter grip, one the other review axes don’t offer. The Winkler would be great at processing kindling and bushcraft chores that require more control with close-in cutting or whittling. Due to its length and weight, it would not be a primary use axe but maybe a complement to a larger model that does heavy splitting or felling chores.
A secondary close-quarters grip is just below the head of the RnD Compact at the handle’s humpbacked portion. This facilitates choking up to provide control for carving, whittling and using the cutting edge like a knife.
The walnut handle looks luxurious but pay heed to where you lay it down in the woods. The walnut’s color blends in well with leaf ground cover and you might lose it easily. Thread a loop of brightly colored pink, red or yellow paracord through the lanyard hole to make the handle stand out. The RnD comes in three handle materials: black Micarta®, maple and walnut.
A molded form-fitting sheath of Boltaron encloses the head. A thick shock-cord-quick-release-retention device secures the sheath in place, yet releases easily and quickly. An interior felt lining facilitates the easy slipping on/off of the sheath, as well as muffling the sound. Two nylon webbing belt loops enable the RnD to ride comfortably at your side. MSRP is $815, the most expensive of the test group. WK is very well known for manufacturing excellence and attention to detail, and the RnD Compact is no exception. For a bigger axe in the same design, check out the full-size model.
The TOPS Knives High Impact is a full-sized hatchet/small axe hybrid that packs a punch. At 20 inches overall and around 3.5 pounds, it is a formidable chopping tool that can be used with two hands as a traditional axe or one handed a la a hatchet.
Starting with a backbone of .38-inch-thick 1075 carbon steel, the High Impact’s main cutting edge is a little over 5 inches—plenty of cutting surface for large and small chopping jobs alike. The Black Traction Coating creates a layer of protection against corrosion and wear. The ergonomic handle is tan Micarta®, with a diagonal machined groove pattern for hand traction. Five pairs of large hex head screws fasten the Micarta scales, and there are two large brass-lined lanyard holes. The handle has a distinctive bulge that helps seat your grip, especially for one-hand use. The handle flares at the butt, creating a comfortable seat for your bottom hand when using two hands.
The first thing you notice is the High Impact’s weight. It’s impressive but will take some getting used to. Once acclimated with the heft, you will discover it is also an advantage for getting momentum in your swing. And when it hits, it lives up to its name. The High Impact takes out chunks of wood with each blow. TOPS has the heat treat on the carbon steel dialed in perfectly. The 1075 retains an edge really well but sharpens easily and quickly.
I tried both grip styles. With one hand, this is where the weight takes some getting used to. Due to the axe’s weight, one-handed use might be limited to short spells. Conversely, using two hands is where the power of this beast is unleashed. You can put power behind the swing and each blow is devastating. You can feel the axe head bite in with each blow. It’s a sure bite as well. The performance with one or both hands is equally impressive. Due to its weight, it’s a great candidate to store in your truck or ATV.
A nicely made leather holster fastens over the head, sealing the edge. Two button-snap straps secure it, though only the one at the end needs to be undone to slide the sheath off. Note the absence of a belt loop attachment to carry the axe. It’s just too heavy. Despite the weight being a factor, the High Impact packs a serious punch and is the heavyweight champ of the test bunch. MSRP: $360. TOPS makes the axe in its factory in Idaho Falls, Idaho.
TOPS Knives High Impact SpecsCutting Edge: 5.75″Head Material: 1075 RC 56-58Head At Its Thickest: .38″Handle: Tan Canvas MicartaWeight: 3.7 lbs.Overall Length: 20″Sheath: LeatherMSRP: $420
Wolf Valley Forge Camp Axe
The Wolf Valley Forge axe ate bundle after bundle of firewood like there was nothing to it.
The Wolf Valley Forge Camp Axe is in a class of its own. It came not with just a functional sling and cover, but also a small whetstone and a jar of wax by Axe Wax to help preserve it. Carrying the Camp Axe is comfortable and allows for a free hand while trekking. The handle is perfectly shaped and came with a leather strike guard.
Ike Bullington is the maker and the quality is immediately noticeable the second you unpack it. It is all properly shaped, textured and balanced for real work and has a very pleasing appearance. However, it is not a wall-hanger. The head is of a traditional profile and designed for a lifetime of work.
The edge arrived razor sharp, easily sharper than most knives. Not only that, but the edge is extremely durable and completely dispels the notion that you need a wedge-shaped splitter.
A sharp axe truly cuts the work in half and this one almost effortlessly passed through wood regardless of grain angle. In taking down bigger trunks it drove in the deepest and was the easiest to free. Chips flew with each chop and it made very short work of even the toughest test materials.
In addition to cutting wood, it was tested driving tent stakes and making kindling, which it did easily. As a camp axe it is very nice in the batoning role, and yes, you can baton an axe the same as you would a knife—so long as you grip it high up to the head and perform the task in a safe standing position as to not deflect the blade into your knee.
Wolf Valley Forge Camp Axe SpecsCutting Edge: 4″Head Material: 4142Head At Its Thickest: N/AHandle: HickoryWeight: 2.5 lbs.Overall Length: 23.62″Sheath: LeatherMSRP: $375
Fox Sekira
Considering what you get, the Fox Sekira is a great axe and relatively inexpensive. It handles like a traditional axe in the swing but has a crescent-profile edge that is shaped much the same as a carpentry axe, though with a longer handle. The head is wide at the cheeks and quite narrow in the blade. It splits very nicely though isn’t particularly deep-biting on each swing.
The head, while substantial, isn’t overly massive and there is a large concentration of weight in the handle. The weight is distributed across the axe, which could lend to some of the increased effort in getting it to send splinters flying.
As far as general performance, the Sekira is about as good as a traditionally constructed axe gets, and lacks nothing in utility. It stayed sharp and experienced no edge chipping, even after quite a bit of heavy use. The only noticeable downside is that the handle, while comfortable and very nicely finished, is somewhat on the large side and rounded from front-to-back.
When hands get wet or cold the axe has the tendency to want to rotate, which can be dangerous if you’re not holding on tight. Other than that minor issue, the Sekira is a fantastic axe that should offer years of hard-use service.
Fox SekiraCutting Edge: 4.33″Head Material: Carbon Steel C45Head At Its Thickest: N/AHandle: HickoryWeight: 3.35 lbs.Overall Length: 23.62″Sheath: LeatherMSRP: $150
Editor’s note: Dexter Ewing, Josh Wayner and Daniel Jackson contributed to this post.
More Axes, Hatchets And Tomahawks:
Bearded Axe: Best Bashers From Here To Valhalla
Best Tomahawks: Our Top Hawks For Backwoods To Battlefields
Wicked Breacher: Ben Seward’s SWAT Axe
Awesome Axes for Chopping Wood Like a True Lumberjack
Vacation days are put in at the beginning of each year with anticipation building for the next cup of Grandpa’s “Joe” and maybe a shot at the big one Uncle Scott missed last year. Small towns close school the day before opener and sales for HotHands and propane soar. Gas stations staff up for the big push and supermarket delis are fully stocked to supply the masses. Step outside the eve before opening day and draw a deep breath, the smell of burning log fires infuse the air from chimneys of nearby deer camps around each bend, over the next hill, and across the way.
The crew from Schumacher’s deer camp
Deer camp is more than a “place”, it’s a tradition with generations of history in the making. The story of Uncle Jack shooting a doe from the hip never gets old, that dusty bottle of Peach Schnapps hasn’t moved since he took his last pull. Big John’s triple extra-large orange parka has hugged the same bedpost since the season before his heart attack, no one moves it, and no one complains. A broken aluminum arrow shaft with a two-blade broadhead rests across the rack of small buck Cousin Nick took years ago when tree bark camo looked like tree bark and big bucks meant big bodies.
Submitted by Lucas Karls. The cabin was built from the trees on the property over 30 years ago. Each log was handled 14 times before the project was complete.
Cousin Tommy always shows up early to sweep out the ladybugs and stack the wood stove for heat before the rest of the party arrives. It will be cold beers and highballs over ice while the night is young, and fingertips will trace the property map, pausing over who’s sitting where and rekindle stories of what went down in years past.
Keep Deer Camp Alive
The tradition of Deer Camp has grown roots across much of the upper Midwest, but a tree only grows if it gets water and light is cast upon it. As generations come and go, the legacies they leave behind influence new stories and inherited tradition. If you let the tradition die with the loss of members who carried them, the leaves will fall from the tree and its roots will dry up and wither away.
My Grandpa, Tony Ubl, made the finest corned beef. He’d make a couple roasts before opening weekend, slice them against the grain a quarter-inch thick and serve it cold every opening day after the morning sit. As the family would return to “the shack”, the corned beef would be gone before the air had time to touch it.
Mitch Goeck’s Wisconsin Deer Camp
Tony slipped on a snow-covered log and hurt his shoulder while still-hunting his way back to the shack one morning. The fall reminded him of his age and Tony decided it would be his last weekend of Deer Camp. It wasn’t a decision he let be heard, he just didn’t show up the following year. The corned beef everyone loved so much was sorely missed, but not as much as Tony.
Deer Camp is something to look forward to, it’s something everyone can count on. Friends and family come together for more than the hunt, they do it for the comradery of doing something different than the everyday norm. It’s the stories re-told year after year, moms chili and Grandma’s cookies. It’s the pile of ladybugs swept outside next to the shoe rug, and the stinky outhouse that accounts for more jokes than anyone can keep track of.
We know that Uncle Kenny takes hunting less seriously than the rest of us, but he still comes up and sits opening morning. Dad and the twins always get the back room because they snore so loud, but without the hum keeping everyone up at night it would be too quiet. Henry always has the latest gadgets he likes to show off, and it’s always a conversation to have on the drive into camp – what will Henry bring this time?
Garrett Meilinger’s family deer camp
Encourage the Next Generation
Don’t let Deer Camp become a thing of the past. Introduce your children to Deer Camp and influence them with traditions of your own. Modern-day deer registration has already taken away a cornerstone from the structure Deer Camp was founded upon, where visiting the local registration stations was always a place to see deer taken over the weekend, shake hands, and tell stories. Keyboard cowboys have taken their toll on the principles of hunting, creating a false perception of standards for what is worthy and what isn’t – hunting and competition have no relevance. As a hunting community, I hope we can resuscitate traditional Deer Camp and introduce future generations to these topics we continue to write about.
The Glock 43X is the reverse stretch of Glock pistols. Glock took the wildly successful Glock 43 pistol and stretched the grip to accommodate a newer 10 round magazine. The Glock 43X became a very popular concealed carry pistol and opened up a new market for Glock slimline pistols. We will explore its various features in this Glock 43x MOS review.
The Glock 43X has recently gotten a welcome addition in the form of a MOS model. The new Glock 43X MOS is hitting shelves now and will likely be a huge hit.
MOS stands for Modular Optics System. This pistol bears the name MOS, but the MOS system on these guns is much different from the standard MOS system.
The standard system comes with a multitude of plates to accommodate tons of red dot optics.
The Glock 43X is a superbly small handgun, so it can’t accommodate bigger red dot sights. This MOS system is cut for the Shield RMSc pistol red dot.
This is one of the smallest pistol red dots on the market, and the footprint of the optic is quickly becoming popular.
This opens it up for the Shield RMSc, SIG ROMEO Zero, SwampFox Sentinel, and Holosun 507k, and a few newer models hitting the market hard and fast.
That’s not the only change Glock made to the 43X series pistol though so let’s dive in and check out the Glock 43X MOS and how Glock made a micro fighting pistol a bit more capable.
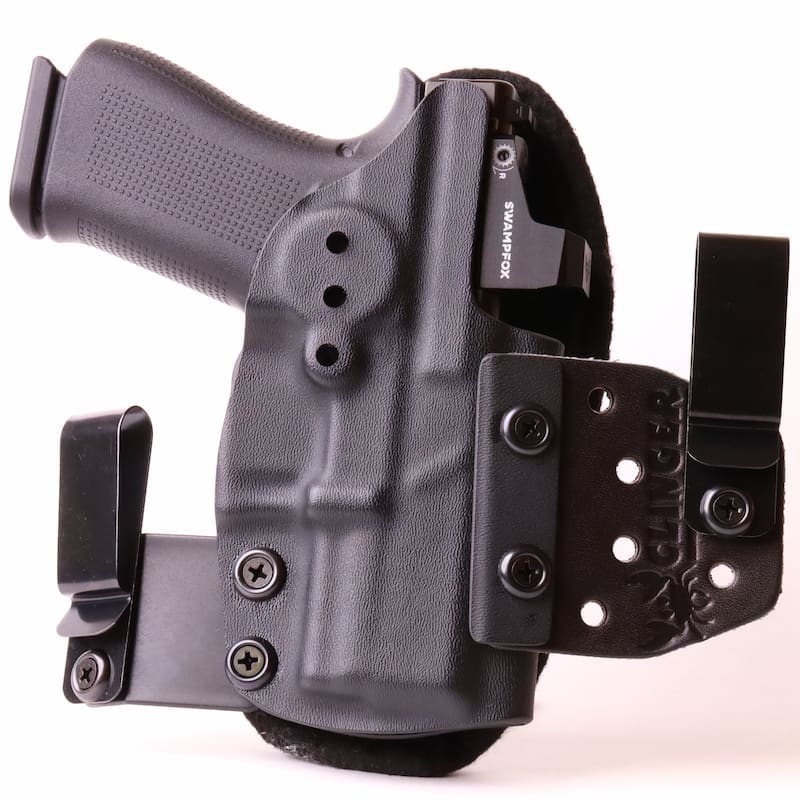
While these new small optics have yet to prove themselves, they are becoming increasingly popular. Especially when you pair it with a great Glock 43X MOS holster.
Fit and Finish
A big change Glock made to the Glock 43X MOS was changing the slide color from stainless steel to a traditional black nDLC finish. The guns came out in a black finish prior to the MOS series, but the MOS series will be exclusively nDLC.
This diamond-like coating is ultra-strong and proven to be durable on the vast majority of Glock pistols. The hardness level is extreme, and it doubled from the older tenifer finish.
I can’t lie, I like the stainless steel coating, and I think it makes the plain Jane, Spartan Glocks stand out a little, but I understand the change.
Stainless looks good, but the black is less reflective and will create fewer reflections on the lens of your red dot optic. The black finish gives the gun a more discrete look and allows it to disappear a bit better under a cover garment.
Silver does tend to stand out a bit more than most.
The frame is the traditional Glock black polymer frame. It’s a bit blocky and plain, but looks professional and is molded precisely. The Glock frame isn’t fancy but is perfectly suitable and well made.
You won’t see issues with the frame’s molding marks or texture.
The appearance of the Glock 43X demands a black optic to keep the black on black theme going. Luckily, black is the most common color in the tactical optics world. It’ll also match your shoes.
Specs
The Glock 43X MOS is a superbly thin and lightweight handgun designed with concealed carry in mind. The G43X MOS has an ultra-short barrel, and this makes OWB carry possible and makes the 43X MOS easy to carry IWB and AIWB (Appendix Inside the Waistband).
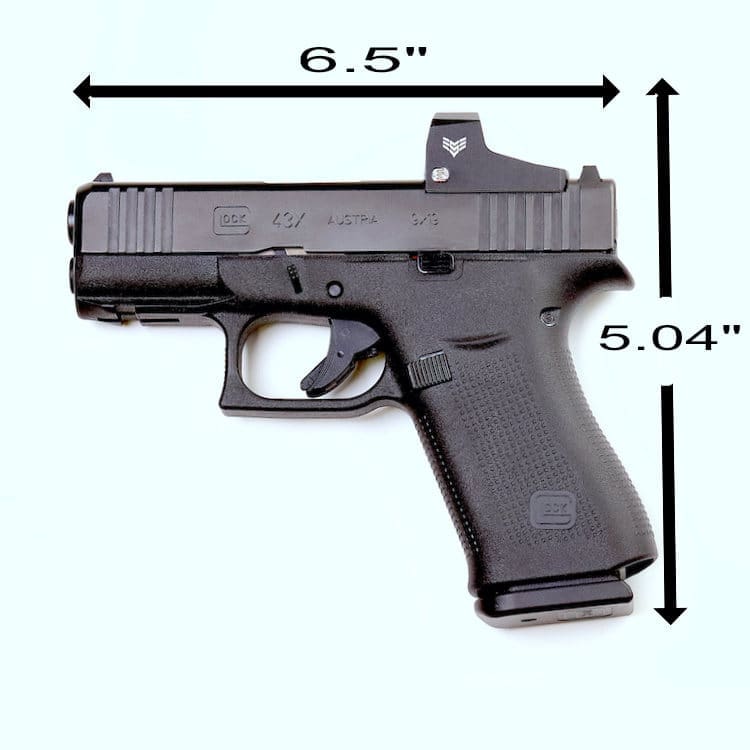
The overall length is 6.5 inches long, and the overall height is 5.04 inches, including the magazine.
The overall width is a slightly chunky 1.10 inches, and the slide is .87 inches wide. The gun weighs 23.07 ounces fully loaded. The gun isn’t the thinnest option, but it’s still exceptionally easy to conceal.
The gun is remarkably balanced, and those of us who want something small and light to carry but still want a full grip will love the Glock G43X MOS.
As you add an optic, the gun’s height and overall weight will change, but not significantly. The modern micro red dot is a super small and lightweight design that barely adds bulk to your firearm. The G43X MOS is one of the smallest optics-enhanced guns on the market.
The gun comes with ten-round magazines, and it cannot take magazines made for the G43. This cuts off a lot of extended magazines made for the G43. However, a company called Shield Arms makes a 15 round magazine that fits flush with the G43X MOS and Glock 48.
This adds five rounds of flavor to your Glock series pistol. I have no personal experience with these magazines, so I cannot speak to their reliability, but they do seem to be well-loved by Glock 43X MOS and Glock 48 owners.
Ergonomics
The Glock 43X MOS offers a much better grip than the original G43. The longer grip fills the hand better and allows the gun to fit the 10 round single stack magazine with ease. Another major improvement is the slight beavertail that provides some protection for my hand.
Me and Glocks sometimes don’t get along because I’m a victim of constant slide bite from the Glock series. The Glock G43X MOS is different and provides a nice little overhang that allows me to have a nice high grip and keeps my hand from getting bit.
The Glock 43X MOS is a very simple gun. Glock has a reputation for making guns as simple as possible, and admittedly simple is good in a pistol designed for combat. The 43X MOS features three safety devices, but not a single one is a manual safety.
The only thing close to that is the trigger safety, which will not allow the trigger to fall without a complete and purposeful press. This keeps things quite simple and allows a shooter to have a gun they can instantly engage with without much thought behind it.
The G43X’s hand-filling design does help with recoil and control. The grip allows you to comfortably control and handle the gun.
It’s much more comfortable for rapid-fire training and long days at the range than the standard 43. This is a must-have for an optics-enhanced gun.
A real grip ensures you can hold the dot steady and take full advantage of all the benefits a red dot has to offer you.
The G43X MOS isn’t perfect ergonomically.
One of the issues with the gun is the slide lock. With a good, thumbs forward grip, the slide lock will be pinned down and fail to engage when the gun is empty.
This might be a problem associated with my sausage-like fingers, but it’s one that plagues every Glock I’ve ever shot, including the G43X (non-MOS version).
That’s the life of dudes with 2XL sized hands.
Features
Red Dot Cut Out
The star of the show is clearly the gun’s ability to utilize an optic. An optic on a handgun might seem silly to some, but they’ve been proven by reputable trainers around the industry to be a drastic improvement on your handgun’s potential.
A dot equipped handgun is faster, more precise, and allows a shooter to hit targets at further distances with ease. On the G43X MOS, the optic makes a ton of sense.
Small guns typically have a short sight radius, and the presence of a dot completely erases the sight radius issue. This allows a small gun to be as precise as a large gun. Although learning to use the red dot takes some extra practice. It’s well worth the investment in the end.
The red dot cut cuts in the slide aren’t the only big change.
Picatinny Rail
Glock also added a small Picatinny rail on its new G43X MOS model. This small Picatinny rail allows users to attach any number of devices. This includes lasers, small lights like the Olight Mini Valkyrie, or even training devices like the MantisX.
The Picatinny rail is a nice touch, and as red dots and lights become more mandatory on guns, more companies will embrace small rails on their carry guns.
The G43X MOS also comes with most of the updates Glock made for the Gen 5 guns. This includes a high visibility follower in the magazine, a smooth finger groove-less design, front serrations, and a reversible magazine release.
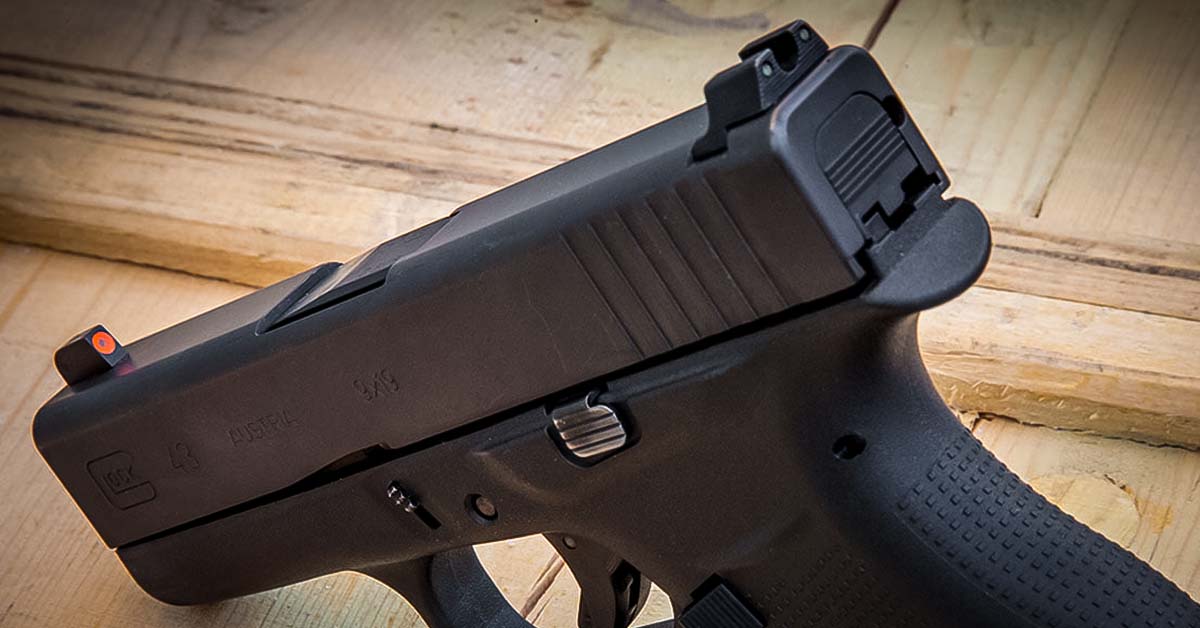
The front serrations are an important touch and allow you to easily manipulate the slide when the gun is wearing a red dot. They’ve been on the gun since the original G43X and are more important on the MOS system.
Front serrations ensure you can manipulate the weapon without gripping the optic. You can grab the optic to manipulate the slide but you’re likely to smudge oil from your skin on the glass when you do so. A smudge-free optic works much better.
The below image shows a big thumbprint on the Swampfox Optic.
Shooting Characteristics
The Glock 43X is a weirdo, and the MOS model is also still a weirdo. The short slide combined with the compact-sized grip makes the gun interesting, to say the least.
The Glock 43X MOS fills the hand nicely, and the beavertail extension allows for a nice high grip on the gun. This allows you to maximize control over the gun and keep it on target, even when firing rapidly.
The original 43 used to bite the hell out of my hand, and I hated it. I would start flinching just a bit between each and every shot. That is long-gone with the Glock 43X MOS.
The iron sights are like all Glock iron sights, and they are made from plastic and kind of suck. Toss on a red dot and replace the sights with suppressor height sights for co-witnessing asap.
The recoil is minimal, especially with 115-grain loads. You’ll feel a bit more snap with self-defense loaded +P loads. This snap is notable, but not uncontrollable or even painful.
It has some jump and kick to it, but it’s not like a 357 from a snub-nosed by any means.
The gun cycles just about anything you could put through it. The G43X is built to the same standards as all Glocks, and a big part of that is reliability.
You can say a lot about Glock pistols, but you can’t say they aren’t reliable.
They eat everything without complaint and just keep on going even with poor maintenance.
You can say the trigger is average at best, the grip is blockish, and the magazine release needs to be bigger. All are very true, and the Glock 43X MOS carries all the issues the regular G43X has.
The good news is these problems are very small in the grand scheme of things.
Concealment
As a gun designed for concealed carry, size matters, and the Glock 43X MOS is not necessarily a big gun, but it’s not the smallest either.
The G43 is admittedly easier to conceal just by design. However, the G43X MOS is far from difficult to conceal. However, the addition of an optic will make it a slightly bigger gun height-wise.
The G43X’s light weight makes it a comfortable gun to carry, and it won’t sag or pull at your waist.
It’s a gun that’s easy to forget you’re even carrying. The G43X MOS disappears easily under a T-shirt. The shorter barrel design allows it to be comfortably carried OWB, and that’s my preferred method of carry.
The shorter barrel means you won’t have to wear a tall shirt to make it disappear.
The gun is also quite comfortable for appendix carry and traditional IWB. IWB is typically an easy way to carry almost any gun, but AIWB can be trickier with long guns.
I haven’t mastered AIWB with a full-sized gun just yet, but a nice short gun like the G43X MOS is the perfect AIWB companion.
All in a Day’s Work
The Glock 43X MOS is a helluva upgrade to the G43X. The presence of a rail and optic allows the gun to step into the territory of full-sized guns. The extra presence of an optic and light makes the guns all the more capable, and Glock made some wise choices with the Glock 43X MOS.
The Glock 43X MOS is a very capable, but also easy to conceal weapon. With the right holster and belt combo, you’ll be able to pack the G43X, spare magazines, and a good attitude due to your comfortably concealed weapon.
Check out the Glock 43X MOS and take a peek at the Glock 43X MOS holsters.
Let us know below if the G43X MOS is for you, or are you a G48 MOS kinda person?
Please comment to let us know if you liked our Glock 43x MOS review. Also Checkout our Taurus G3c Review
One of the first upgrades you can do to a Glock is adding the best Glock sights. The standard Glock sights are lacking, and many people do not like them.
Adding the best Glock sights will increase your accuracy and be able to shoot quicker, especially if you are used to a three-dot sight setup.
Because of the popularity of Glocks, there are a lot of options, and this post will recommend the best Glock sights you can buy.
This post will review the best Glock sights for every generation and model.
Why Upgrade Your Glock Sights?
Nothing is better than upgrading and modifying guns and especially Glocks. Now I will say from the factory, out of the box, they are great guns, and you can take it to the range or use it for home defense, and it’s ready to go as is.
However, upgrading your Glock will make it better and more user-friendly to your specific preference.
Swapping out the sights is a quick and easy upgrade. There are a lot of different options to choose from.
If you are getting older and your eyesight isn’t as good as it used to be, getting some bright or high-contrast iron sights will help you aim.
Also, adding a night sight is great for home defense or concealed carry.
Upgrading your sights can be done fairly inexpensively and are worth it.
Increased Accuracy
You can shoot what you can’t see, and having some high-visibility sights will help you shoot more accurately.
The square notch that comes standard on all Glocks as a rear sight is okay. It leaves a lot of room for improvement.
The more traditional three-dot sight setup and is what comes on most pistols and is what most shooters have become accustomed to.
Again, higher visibility iron sights and better contrast from the front to rear sight will increase your accuracy potential. This also depends on the shooter. If you can’t shoot, to begin with, then you need to practice the fundamentals, and no amount of accessories or upgrades will fix bad techniques.
Shooting Faster
You can pick up a sight picture quicker if you have better aftermarket sights on your Glock.
This will allow you to get on target quicker and transition between multiple targets quicker. Again, being able to see the sights and line up the front and rear is easier with raised or high-visibility sights.
With proper training and practice, you should notice a significant difference in your shooting speed with upgraded Glock sights.
How To Replace Your Glock Sights
There are two ways to change out your Glock sights. First, you can take your slide to a gunsmith or certified armorer, and they will do it for you.
This is easy, but they will charge you a fee, and you might have to wait a while, depending on how many work orders they have ahead of you.
The other option is to do it yourself. This is fairly easy as long as you have the proper tools, and I can’t stress that enough.
Being the way I am, impatient, the first time I swapped out pistol sights, I didn’t have the proper tools, and it wasn’t pleasant. I almost destroyed my sights and slide.
I pretty much beat the sights off with a hammer and punch. Almost destroyed both.
So learn from my mistakes and but the proper tools if you are doing it yourself.
You will need a sight pusher tool and a vice installed on a workbench. You may need a small punch set and a screwdriver set.
Be aware that the rear sight groove is thicker on one side, so when removing and installing the rear sight, it will only come off one way and go on that same side.
Click Here to check the current prices of the Trijicon Glock Sight Tool
For any shooter, the best air rifle is that which fulfills their personal core requirements like accuracy, power, and affordability.
There are plenty of air rifles on the market, so many in fact that you might get confused and even buy the wrong one due to the lack of proper guidance on the rifle.
However, there are gun experts who know the worth of buying an air rifle.
The demand of every person is different as some cannot deal with a heavy rifle,
Some dislike noise, some prioritize accuracy and power, people have different budgets, and of course, there are different tastes in style.
If you are searching for the best CO2 air rifle, here are the best choices for you.
From your wish to enjoy yourself on weekends in your backyard by target shooting or your wish to go small game hunting or even pest control, you will have options to choose from.
So sit tight as we take you through our list of best CO2 air rifles in 2025 at pocket-friendly rates.
Top 5 Best-Rated CO2 Air Rifles On The Market
If you are in a hurry, here is an overview of the highlight candidates in our list of best CO2 air rifles:
If versatility is what you’re after, the Diana Chaser is one of the most clever CO2 airguns on the market. Rather than being locked into a single format, the Chaser ships as a modular kit that converts between a compact pistol, a micro-carbine, and a full-length rifle — all using the same core action and just a few tool-free (or nearly tool-free) swaps. For shooters who want one gun that can do several jobs, or families who want a platform that grows with a new shooter’s skill level, the Chaser is hard to match at its price point.
Build and Design
The Chaser is built with metal where it counts: the receiver, CO2 chamber, barrel, and trigger mechanism are all metal, while the grip is a textured composite. In pistol form it weighs a mere 1.9 pounds, and even fully dressed as a scoped rifle it tips the scales at under 5 pounds — genuinely light enough for younger or smaller-framed shooters to handle comfortably. The rifle conversion swaps in a 17.7-inch rifled steel barrel, while the compact pistol barrel stays threaded for an aftermarket silencer if you want to quiet things down even further.
Power and Performance
A single 12-gram CO2 cartridge powers the Chaser, delivering up to 525 fps in .177 caliber (a bit less in .22), and testers have gotten as many as 50 to 60 shots out of one cartridge before needing a refill. That’s respectable efficiency for a gun in this class, and it means a single CO2 cartridge can carry you through a solid backyard session without constant reloading.
Calibers and Ammo Handling
The Chaser comes in both .177 and .22, with indexing magazines holding 9 rounds in .177 and 7 in .22, plus a single-shot tray included for those who prefer loading one pellet at a time. This flexibility makes it equally suited to casual plinking and more deliberate target work.
Noise
This is arguably the Chaser’s standout feature. The rifle barrel includes a built-in, non-removable silencer, and combined with its modest power output, the report is remarkably quiet — genuinely one of the most backyard-friendly airguns available. Even in the unsilenced pistol configuration, it’s still relatively soft-spoken compared to most CO2 guns.
Accuracy
Reviewers have consistently found the Chaser accurate enough to justify mounting a scope, with velocities ranging from around 605 fps with lead pellets up to 676 fps with lighter alloy pellets in testing. One quirk worth knowing: since the stock was designed with open sights in mind, adding a scope raises your eye line enough that you get more of a chin weld than a true cheek weld — a minor ergonomic tradeoff for the added precision.
Who It’s For
At a street price around $140–$150, the Diana Chaser kit is an easy recommendation for beginners, families, or anyone who wants a quiet, accurate, and endlessly adaptable CO2 platform without buying three separate guns to get there.
During the ’60s and ’70s, the Winchester M14 CO2 air rifle is was seen as a tribute to U.S military veterans.
The most potent Winchester M14 pellet bb gun is a semi-automatic that can shoot both steel bbs and .177 caliber pellets.
The Winchester model M14 semi-automatic CO2 air rifle has two cartridges of 12g CO2.
The cartridges are stored in the lower clip, so you can easily access them for reloading.
There are 8 round magazines on each end which allows you to have 16 rounds before reloading.
Under supervision, young shooters can quickly learn and hone their abilities, and they would love it.
It is light in weight, and the whole family can handle it quite easily .
The Winchester M14 semi-automatic CO2 air rifle is your choice if you are not just looking for a target shooting weapon, but to experience a rifle that resembles the military rifle.
Specifications
Semi-automatic air rifle
Manual safety guide
The front side is fixed
Adjustable sight
Synthetic stock
Sling swivels
Steel barrel
12g CO2 cartridge
.177 caliber
Manufacturer is Winchester
700 fps velocity
Ammo type is Pellet & BBs
Gun weight is 2.9 lbs.
Length is 44.5
Barrel length 21
Loudness is four medium-high
Magazine capacity 16
Warranty is 30 days limited
Accuracy, Reliability, and Speed
Below is the table to have an idea regarding the accuracy and speed of the air rifle.
Rifle Pallet
Average Muzzle Velocity
Average Muzzle Energy
Result/Accuracy
Gamo Raptor Platinum 4.7 Grain
549.8 fps
3.13 ft/lbs
POOR
H & N Field Target Trophy Green 5.56 grain
510.5 fps
3.22 ft/lbs
POOR
RWS Hobby 7 grains
447.7 fps
3.12 ft/lbs
POOR
Crosman Premier HP 7.90 Grain
439.1 fps
3.38 ft/lbs
POOR
JSB Exact Diabolo 8.44 Grain
417.4 fps
3.27 ft/lbs
POOR. BEST TESTED
H & N Field Target trophy 8.64 grain
396.2 fps
3.01ft/lbs
POOR
H & N barracuda match 10.65 grain
354.8 fps
2.98ft/lbs
POOR
In the above table, you can see that the highest muzzle velocity is achieved with Gamo Raptor Target Trophy green 5.56 grain, which is 549.8fps.
This speed is accomplished at 61 Fahrenheit.
The highest muzzle velocity can be found at 95 Fahrenheit at the value of 620 fps. After the HAM test, I can say that the accuracy is not as expected.
It was correct at 10 yards but no more than that.
All the targets were vertically displayed, maybe due to the reason for falling muzzle velocity during the shot strings.
Remember that if you choose to shoot at a high temperature, then you may have reduced stringing because the cooling effect of each shot would be less.
Noise
The Winchester CO2 M14 does not come with a silencer.
If you have neighbors then the Winchester M14 is still quite suitable.
Appearance
The Winchester M14 pellet bb gun is designed in the exact same style as the real firearm.
Price
$70 is the price you will pay to buy the Winchester M14 semi-automatic CO2 air rifle.
Given the features mentioned above, this is a very low price.
For those people who have an army background or have done any military-style training, this rifle is of great appeal given its likeness to the real thing.
That it costs so little actually makes the Winchester M14 CO2 air rifle a popular gift for others.
The reviews detail how it is easy to handle above all else.
3. Hammerli 850
The high powered Hammerli 850 CO2 air rifle, by German manufacturer Umarex,
Introduced the world to the first mass-produced, affordable, and full-power 12 ft/lbCO2 hunting rifle — the Hammerli 850 Air Magnum.
Liquid gas powers the Hammerli 850 airMagnum, which is built with synthetic material, is light in weight and economical.
The Hammerli 850 airMagnum has been marketed as a solution for those who want a firearm, but cannot afford or own the real deal.
The Hammerli 850 AirMagnum is famous for small game hunting and pest control.
It comes with a smooth blacked-steel cocking and a generous bolt.
It has just about everything you could hope for in a CO2 repeater!
The Hammerli 850 air rifle not only looks like a firearm, but it works like one in terms of accuracy.
All told, it gives users the feeling of firing a real gun without actually doing so.
Specifications
The manufacturer is Umarex USA (old name Hammerli)
.22 caliber in Hammerli 850 airMagnumxt kit
The Umarex HammerliairMagnum 850 xt has the 650 fps velocity
Ammo type is pellets
The Hammerli 850 CO2 is Bolt-action
Barrel style is rifled
Firing mode is a repeater
Weight of rifle is 5.65 lbs.
Noise is 3-medium
CO2 mechanism
Automatic safety
Fiber option for the rear sight
Trigger pull is 3 in Hammerli 850 airMagnum accessories
Target shooting/ Small game hunting/ backyard shooting/ plinking
1-year warranty
Testers were Doug wall
Model number 2251001
Serial number G038251
Price $250 – 280
200 – 250 shots per cartridge
Quick firing 8-shot rotary magazine
Monte Carlo stock
2 stage adjustable trigger in Hammerli 850 hPa in Hammerli 850 accessories
Product dimensions 12 * 45.1 * 4.2 inches
Accuracy And Speed
The speed of the Hammerli 850 CO2 air rifle can never be compared with the real thing as it does not fulfill the need for the smallest number of shots per fill.
Here is the breakdown of performance for the accuracy and speed of the Hammerli 850 CO2 air rifle.
Pellet
Muzzle Velocity calculated at 67F-Average
Muzzle Velocity calculated at 75 F-Average
Muzzle Velocity calculated at 90F- Average
Gamo Raptor Platinum 9.7 Grain
674 fps
690 fps
720 fps
H & N field target trophy green 14.66 grain
668 fps
684 fps
714 fps
RWS hobby 11.9 grain
640 fps
656 fps
686 fps
Crosman premier HP 14.3 grain
606 fps
622 fps
652 fps
JSB Jumbo exact 14.35 grain
610 fps
626 fps
656 fps
H&N field target trophy 14.66 grain
609 fps
625 fps
655 fps
H&N barracuda match 21.14 grain
519 fps
535 fps
565 fps
The table mentioned above clearly shows an increased muzzle velocity with an increase in temperature.
But there is a limit on the rise, it cannot be said that it would progress ad infinitum.
At around 95 degrees Fahrenheit, there is an enhanced pressure in the “Valve lock”, which makes the muzzle velocity fall rapidly.
Therefore, it is right to say that around 90 degrees Fahrenheit is the high shooting temperature for CO2-powered air rifles.
The Rateagun score is just 4.1, which is a fantastic score.
Stock
The Hammerli 850 air rifle stock is synthetic, making it a great all-weather air rifle.
Noise
No doubt, it makes a bang!
Appearance
The Hammerli 850 AirMagnum combo comes within the forearm, and of course, it is removable.
The CO2 cylinder is well concealed inside, which makes it more appealing-looking.
The finish of the Hammerli 850 airMagnum air rifle is very impressive because of the well-finished metal part and the well-molded black ambidextrous synthetic stock.
The price of Hammerli 850 AirMagnum in the market is $250-$280.
At such a low price, all the tests conducted by the HAM team are very satisfactory even after winning a bronze medal, I would recommend you to buy the rifle as it passes the major tests with good marks.
Customers Reviews
Customers like it for its exceptional accuracy, easy loading, and changing of the magazine.
Moreover, the very smooth trigger pull is also appreciated.
The safety is also well received.
It’s safe to use and this, of course, makes shooting a more enjoyable experience.
It does not leak CO2 even at a lower temperature or pressure.
Rick Eutsler, the owner of AirGun Web, confessed he’s a fan of the Hammerli 850 Air Magnum for many years:
The best accuracy is achieved from 10 meters at 20 inches.
For those who are shooting in their backyard, participating in any sport, or wishing to buy a gun for a child, the Beeman QB78 is the perfect plinker.
While testing the accuracy, we elected to use .177 caliber rounds.
Additionally, the trigger is on the spongy side, with clean engagement and a light break making it good for shooting quickly.
While compared to other low-cost rifles, the Beeman QB78 Deluxe is a perfect choice.
In this table we can see the Beeman QB78 Deluxe 0.22 caliber trajectory, using a fiber optic sight, Crosman Premier HP 14.3gr pellets, and with a sight elevation above the bore of 0.75 inches.
Range (yds)
Trajectory (in)
Velocity (fps)
Energy (ft.bls)
5
0
494
7.7
7
0.2
487
7.5
10
0.4
478
7.2
13
0.45
468
7
17
0.3
456
6.6
20
0
447
6.4
23
-0.4
438
6.1
25
-0.8
433
6
The gun fires round very flatly out to 20 yards, after which there is a drop-off.
For testing hunting capability, we used the Beeman QB78 Deluxe 0.22 caliber, and it was capable of penetrating at 21 yards.
The Crosman DPMS is a short barrel rifle andCO2 facsimile of an AR-15/M4 platform that shoots 25 BBs in either fully or semi-automatic mode at 1400 rounds/minute.
If you are searching for an AR-15 replica for your training purposes or just to have fun, then the Crosman DPMS is the perfect powerful CO2 air rifle for you.
The Crosman DPMS gives you the feel of an authentic firearm.
You can really feel the full blowback with this one.
The DPMS SBR measures 26.5” & weighs in at 6.5 lbs with the stock collapsed, and with the stock fully extended it measures 30.5”.
The Crosman DPMS has a body made of a premium polymer that looks and feels great.
Specifications
.177” caliber
Maximum velocity is 430 fps
Loudness is 3-medium
The overall length is 30.4.”
The shot capacity is 30
Smoothbore barrel
Flip-up front sight
Adjustable for windage rear sight
Weaver scope able mounts
Adjustable butt plate
Suggested for plinking and shooting fun
Manual safety
CO2 power plant
Repeater in function
Blowback
Rifle in body
Adjustment power is fixed
Weight is 6.5 lbs.
Stock is synthetic
Ambi grip
Black in color
Performance And Accuracy
The Crosman DPMS allows you to experience high accuracy and fun at the same time.
Ammo tested
Grain
Shot HI
Shot Avg
Energy
Crosmancopperheated BBs
5.1 gr
420 fps
403 fps
1.84 ft-lbs
Hornady black diamond BBs
5.1 gr
419 fps
395 fps
1.77 ft-lbs
Air venture dust devil BBs
4.35 gr
442 fps
426 fps
1.75 ft-lbs
H&N smart shot BBs
7.4 gr
339 fps
329 fps
1.78 ft-lbs
Noise
On semi-auto, it is not a particularly loud gun, reading 88.5 decibels. This makes it absolutely fine for backyard use.
Trigger
The trigger pull is not light, averaging 10 lbs 7 Oz, which is a speck heavier than typical AR/M4 triggers, which tend to run from 5.5-8.5 lbs.
Loading the CO2
To stack the CO2, lift the front cover off by popping it up.
Insert the initial CO2 cartridge on the left side and utilize the integrated Alien wrench to penetrate it.
If you are not shooting much, then stop here with your CO2 cartridge.
Note that this should be finished in this order or the right cartridge will discharge all of the CO2 at once.
To reduce the loss, warm up the piercing bolt by giving it a quick twist to pierce and seal it completely.
Price
The market price of the Crosman DPMS is about 200 dollars, which is reasonable – neither cheap nor expensive.
It’s a good value though, for the amount of fun you will have with it.
The majority of the customers have been satisfied with the air rifle, as it’s been designed and manufactured for simply having fun in the backyard and scaring off pests.
Moreover, the look of the air rifle has been well received.
This air rifle does not feel cheap in your hands – it’s quite tight and robust to touch.
Overall, customers find that the Crosman DPMS is of high quality.
Fly fishing in the winter can be challenging but, also, highly rewarding. Most people do not venture outside their homes so winter fly fishing keeps the crowds away, and often times you’ll have the water all to yourself.
Generally speaking, trout are a smidge sluggish in the winter as they become less active in, literally, wader freezing temperatures. In certain small streams, we don’t recommend that you fly fish in the winter because it only adds further stress to fish that have not recovered from the summer and spawning season. However, if you know that the stream holds a high abundance of food sources then go for it!
Streams fed by springs and reserviors usually means a constant and stable water temperature that provides a healthy environment for large insect populations.
Table Of Contents
Winter Strategies & Tips
Midge Flies
Egg Flies
Blue-Winged Olive Flies
Aquatic Worms
Scuds & Sowbugs
Streamer Flies
How to use weight in the winter to catch more fish.
If you were to fly fish during the winter, here are our top 15 winter trout flies followed by our best tips and advice:
Midge Flies
When growing up, trout are always reminded by their cannibalistic parents to “eat your midges because they will make you big and strong.” Midges are, basically, the most important source of food for trout. In fact, midges are the bulk of a trout’s diet November thru February. Midges are a major food source year-round for trout.
They hatch in freezing temperatures and hatch by the thousands. Basically cockroaches. When aquatic insects are less inactive in the winter, opportunistic trout key in on drifting midge larvae. Because midges mature and develop year-round, trout depend on them for easy pick’ins.
Here are just a few of our favorite midge flies we recommend fly fishing for trout in the winter.
Griffith’s Gnat
Typically, you’ll find swarms of these guys over slack water. Be sure to use a light tippet and target the slow-moving water following a pool.
Tungsten Rainbow Warrior Midge
One of the most successful searching fly patterns for trout, the Tungsten Rainbow Warrior Midge fly pattern combines a tungsten bead with a bit of flash to produce spectacular results.
Zebra Midge
Zebra Midge flies have been around for decades and for good reason — they catch fish. We love incorporating the Zebra Midge within our nymphing rigs as the first nymph followed by a heavier tungsten beaded fly. Midge larva can be found in nearly every level of the water column at all times so we make sure to keep a good variety of this pattern in our boxes. Across the board, it is a reliable trout fly in streams, rivers, and stillwater.
JuJu Baetis Flashback
Technically, this is considered a mayfly nymph pattern but it easily doubles as a perfect midge imitation. This lightweight midge larva pattern is another wet fly we recommend for our nymphing rigs. While you can fish this fly near the bottom with great success, it is best fished near the surface in slack water. On some days, you may be able to visibility see trout feeding close to the surface and sipping adult midges on the top. A great tactic would be to drop the JuJu Bee off the back of a dry fly pattern and cast to trout feeding both off the top and just below the surface.
Use A Two-Fly Nymph Rig
The Two-Fly Nymph Rig is an important technique that not only helps present subsurface flies better but also improves your chances. Well, sure, with an extra fly in the water you have a higher probability of catching a trout, but let’s not make this into a numbers game. Trout don’t know numbers. It comes down to the presentation of each individual fly. Trout will only move a few inches to eat an insect so you have to make sure that your fly is presented within those few inches.
With the Two-Fly Nymph Rig, both flies work together to get down into those narrow feeding lanes. The heavier larva/nymph pattern pulling the lighter emerger/pupa down.
Eggs Flies
October thru December, brown and brook trout spawn. During this time, opportunistic trout will lie downstream of the reproductive activity for drifting egg clusters. CAUTION: Please do not target trout on a redd. Redd is the spawning bed and is characterized by turned over gravel (usually bright). Please leave these trout alone so we can expect future generations as they are making more trout.
Great Searching Patterns:
Beaded Egg Fly
This fly is extremely effective during the spawning season in heavily stocked streams. Fish this fly downstream of the spawning area to awaiting trout. Although, during an abundant midge or baetis hatch, these will often be ignored.
Beadhead Veiled Cabalerro
The two-toned body with a thin outer “shell” will blend together perfectly in the water to make a realistic offering that trout will find irresistible.
Baetis(Blue Winged Olive)
Baetis (BWO) nymphs are one of the most common nymphs across the United States. During the winter months, you may find BWO’s hatching during a few days of warmer temperatures.
BWO Foam Para Emerger
Foam emergers are great for selective trout, which is great for the winter because most of the activity is found in slower, slack water. These look great with the tapered segmented body and have an amazing profile from nearly every angle. Foam para emergers also sit low in the surface-film, just like the naturals. We love using these blue-winged olive flies in the winter in particularly small sizes and often adding more than one dry fly — a multi-dry fly rig.
Dirty Hipster
This barbless euro nymph is scattered across our entire site and recommended everywhere, and that is for good reason. It catches fish. In this particular case, the olive variation in small sizes is a fantastic blue-winged olive nymph pattern. You can use this however you like but, for us, we like to fish this under a small indicator with smaller midge nymphs tied in above it.
Beaded Soft Hackled Hare’s Ear
This is a variation of the classic Hare’s Ear nymph pattern you commonly know. Tied as a soft hackle, the Partridge Hare’s Ear fly pulsates and moves just like how emerging nymphs wiggle and squirm on their way up to the surface. On the other hand, you can also add a non-beaded version of the Hare’s Ear Soft Hackle into the top of your nymphing rigs or off the back of a dry fly.
WD40 Emerger
WD40 flies are fantastic un-weighted patterns that we fish anywhere in our nymphing rig. You can add it to the top, off a dry fly, or trailing off a heavier nymph, but as long as you have it in the water it works wonders.
Aquatic Worms
Aquatic worms are totally natural and are a select part of a trout’s diet. They are found in sediment on the stream bed and are constant year-round. We prefer the Squirmy Wormy over the San Juan Worm because its flexible body provides more motion. They may not be as durable, but when winter fly fishing gets tough, you call in the big guns. When scouting for trout we use flashy patterns like this to see if fish respond. Once trout become more selective, we switch to more natural-looking patterns like the Pheasant Tail.
Improved Squirmy Wormy
Squirmy Wormy flies are great — they wiggle and squirm like no other worm fly and catch fish like crazy — but the durability of the material they are made from is their downfall. They will degrade even when taking good care of them or even leaving them in mild heat. Trust me, we’ve recycled hundreds of dozens of these patterns before they ever hit the shelves. After speaking with a few fly designers on material options, we’ve made squirmy wormy flies that last longer by using micro chenille on the body rather than the soft plastic worm material.
Firebead Sparkle Worm
A heavy worm pattern we like to use in deep water for big browns and rainbows. The added flash and sparkle creates a wonderful contrast that sparks interest. Sometimes all it takes is a bright fly.
Scuds & Sow Bugs
Trout can be found eating scuds and sow bugs year-round. In streams with plentiful underwater vegetation these shrimp’y thingies usually take up most of the food pyramid (sorry carbohydrates). During winter months, trout heavily depend on scuds to make it through the winter. We tend to find that the most natural colors perform better in the winter: olives, browns, blacks, grays.
Beaded Scud
There are so many scud patterns out there to choose from but this simple design is incredibly effective. It features a streak of flash on the back and copper ribbing for added durability. The presentation of this scud pattern is enough to fool hardy winter trout holding deep. Just get this fly down rolling near the bottom.
Streamers & Baitfish
Trout are known not to chase during the winter. They try to exert as little energy as possible and still get what they need. That being said, you should refrain from stripping and, instead, dead-drift or swing your fly. Think like a baitfish, be the baitfish. Give slight twitches to the line so that it adds a little movement to your streamer. Most trout will not pass up streamers either due to hunger or territorial instincts if presented correctly. Tip: Cast above the pool and allow your line to swing down and across so it looks like your fly is trying to evade being lunch. Following the swing, let your line straighten out and troll your fly for a bit; this pause in motion will give impulsive trout a chance to take the fly.
Beaded Woolly Bugger
Out of all the streamers available on the market, it is hard to beat the classic Bead-head Woolly Bugger. Typically, we like to fish a darker woolly bugger in black or olive in a smaller size by striping and swinging it through deep pools we know trout hold.
Euro Tungsten Jig Bugger
This super buggy jig pattern not only has the pulsating movement from the marabou tail but also the wiggling tags of rubber legs. Masterfully designed, the combinations that make up the Tungsten Jig Bugger makes this one of our favorite winter patterns and flies for our euro nymphing rigs. You can swing, strip, or dead-drift it anywhere.
Winter Fly Fishing & Strategies
Target a specific fish out of a pod rather than fishing blind.
Focus your fishing to actively feeding trout found along the edges, seams, and runs of slower deep pools.
The majority of trout will be concentrated in just a few pools. Find those pools.
Focus on fishing from around 10:00 am to about 3:00 pm. This is when trout become most active during the day.
Best fishing occurs when water temperatures are around 40 degrees Fahrenheit.
Test flies and don’t be afraid to switch patterns frequently.
Dead-drift streamers as baitfish are more inactive.
Nymphs Are More Productive
First things first, winter is not the time of year to adopt the “DryFly or Die” mantra. Now, there is no doubt that dry flies are arguably the most fun way to catch fish, there isn’t an angler out there who doesn’t get an adrenaline rush after watching a trout rise to the surface and aggressive slurp your fly. However, there is a time and a place for all types of fly fishing, from dries to streamers and nymphs. Winter is guaranteed to be most productive when using nymphing techniques.
Nymphing can be extremely effective and relatively easy. By positioning yourself directly across from the fish-if you aren’t able to sight fish, place yourself where the fish are most likely to be feeding, you are setting your flies up to move through the water directly in front of hungry trout. All it takes is roll cast upstream and a proper drift for trout to notice your flies.
Fish Multiple Flies
Trout are significantly less active in the winter which is why it’s a good idea to offer the trout as many delicious food options as possible, this can be achieved by rigging up three flies below a tiny indicator.
Think of this as a juicy buffet line, start your nymph rig with 5x or 6x sized tippet because water in the winter can be low and clear and you don’t want to spook away the chance at a fish. Next, add a very small strike indicator, and micro weight, sometimes two. Add the first fly which should be an attractor pattern such as a San Juan worm. Then below the first fly, add a midge and then a second midge below that. Be sure to keep the heaviest weight midge on the very end, to avoid bird nesting your line.
The other benefit to nymphing 3 flies on a single line of tippet is the ability to try multiple colors and patterns all at once. Then you can dial in the pattern that is producing fish more quickly.
Preventing Frozen Guides
Before your rod even touches the water, spray it down with some PAM cooking spray. Chances are you have some in your pantry and if not you can pick some up for under five dollars at the nearest supermarket. This is a tried and true tactic, that will prevent guides from freezing quickly.
The one thing I never leave home without has major benefits on the water as well, chapstick! Rub a little chapstick on your guides to discourage ice build-up. I prefer either original Burt’s Bee’s or Carmex or any natural based lip balm will do the trick! Loon outdoors makes a non-toxic paste, its safe for the environment as well as your fly line. Just under ten dollars, you can pick up this ice off paste at your local fly shop.
These methods will only work for a short period of time. Your guides will eventually freeze over and more application of pastes and oils will be necessary.
The only true long-lasting method to prevent guides from icing over is to use very thin mono-rigs, such as euro nymphing leaders. Less water is collected on the retrieve with mono-rigs compared to thick fly lines so less water ever reaches the guides to freeze over. You won’t be able to do much dry fly fishing using mono-rigs, however, you’ll rarely ever need to during the cold winter. Give mono-rigs a shot and you’ll notice what we did, less ice and more fish. If you’re curious about using mono-rigs, read this article here about whether Euro Nymphing Leaders are worth it.
What To Wear
That’s the conundrum for so many anglers during the cold winter months. Sure, the fish are out there and probably willing to eat, but is it really worth it during that snowstorm that brings several inches of snow and freezing temperatures? The answer to that becomes much easier when you’re armed with the right gear and clothing to combat the harsh conditions of winter!
Hands
Of all the things that threaten to end the day early, cold hands and fingers is at the top of the list. The inability to comfortably tie on a new rig and the stinging of frozen fingertips grinds a day of fishing to a halt. During these winter months, I like to bring two pairs of gloves with me. The first pair is fingerless wool, which allows me to stay pretty warm and still maintain a level of function. For those extra cold days, the second pair is a wool mitten that flips down into gloves. When I’m casting, my off hand is in mitten mode for maximum warmth, but it’s still really easy to switch into the gloves for retying or unhooking a fish!
Feet
Keeping feet warm in winter is the toughest thing to achieve. Numb toes that feel more like blocks of ice than extremities is a miserable feeling, and it’s really hard to combat. When it comes to dressing for warmth, wear two pairs of socks. Typically my bottom layer is just a regular run-of-the-mill athletic sock followed by thick wool socks. Having two layers helps a ton, and walking around out on the stream keeps blood circulating, which is about the best you can do when water temperatures are hovering just above freezing.
Layers
Dressing in layers, and having more layers available in the car, is key to a day out in winter. Weather can change in an instant, and even a few degree drop can be debilitating to the cold weather angler. Companies like Simms make some fantastic layering options that are lightweight and warm. A classic winter layering system for me is a long sleeve tee, fleece quarter zip, hoodie, and then a jacket to cut the wind and, if necessary, repel precipitation. Another jacket, usually a puffy warmer option, extra hoodie, and fleece layer are stashed in the truck just in case it’s colder than anticipated or even worse, a fall in happens.
Matthew Delorme
How to use weight to catch more fish.
Every fly fisherman, at some point in time, needs a tactical intervention. In my case, it happened to be a depth issue. I needed to properly understand the connection between the weight of my flies, the depth, and flow of the water I was fishing.
The most beneficial advice I have ever received when it comes to technical nymphing was to use more weight! This will help you identify the speed and depth of the current better. Not every hole or riffle should be fished with the same amount of weight or depth. Make sure you are properly evaluating and surveying the stretch you have chosen to fish and adjust accordingly.
A deep plunge pool requires more weight and depth for the flies to get down deeper, but that same approach might not work on a riffle. Less weight and less depth would much more likely cater to that type of water.
So, what does this do? As an avid angler, the most essential and helpful dynamic to technical trout fishing relies on the ability to gauge depth and flow. Take a minute to survey and prospect once you get to the water, don’t just rush into a spot. Look at the water and visualize where the bugs may be, where the fish may be, and where your flies need to be to directly replicate the mannerisms of the natural ecosystem.
Adding supplemental weight to your nymphing rigs is the difference between catching fish and not. Here’s why. The whole idea about split shots and using heavier beads is not only to get your nymphs down faster but to put your flies within the water column that fish most readily feed at—along the bottom.
Knowing when to add and remove weight is the most important thing you have to know when nymphing. Knowing how to use the weight is another.
Believe it or not, there are times when you’ll need to add weight to your nymphing rigs if you ever want a chance of hooking up.
Water is high and fast
Deep pools
Flies are too light
Not getting deep enough
Current is too strong
2 Split Shots are sometimes better than one
One of the best methods of using split shots is to put 2 splits and never just one.
Just having one sinker pulls your nymphing rig down between rocks and boulders like an anchor. Use two sinkers instead. Attaching two allows them to work together and pull each other out of crevices that you would otherwise get stuck in. Water flow catches the sinkers at different angles and pushes them downstream with the current in a rolling motion.
Streamers and split shots
You can so add split shots above streamers to add a jigging – up and down action when retrieved. Placing two split shots above the fly a few inches apart will allow the streamer to roll along the bottom like how a dead minnow or baitfish would.
Add more weight if your flies are going by too fast.
Most flies are pretty light and don’t carry much weight to them. Of course, you can prepare ahead of time by keeping a steady supply of tungsten beaded nymphs and weighted flies. But, odds are that you don’t.
No matter what time of year it is, trout are always feeding along the bottom. It is the perfect place. There is plenty of food and little to no current on the bottom, which allows fish to use very little energy and still continue to scoop up insects floating by. In case you’re wondering, slower currents along the bottom are the result of the friction between the water and the streambed.
Someday you’ll be caught on the stream with a few handfuls of light nymphs and deep, fast water to work. Trout are always feeding along the bottom so this is a perfect time to use tungsten putty or split shots.
Take some weight off if you keep snagging up.
That is the simplest way to put it. If you keep snagging up, subtract some weight.
Now, if you are snagging up every dozen casts or so leave, the weight on. It’s not the best idea to take some weight off unless you’re getting stuck 2 casts out of 3. You can do this in one of two ways.
Remove or replace a split shot with a smaller one
Replace the flies that are the most weight
Do both
Play around with adding weight and remember to always be adjusting. Conditions change from place to place so it’s totally normal to mess around with things to make it right.
With a BB repeater gun, you don’t have to open up and reload or cock every time you want to shoot a BB.
Each time you shoot, a new BB is reloaded automatically.
This air rifle is not only a BB gun but also a single-shot pellet gun. Single-shot rifles tend to be cheap and simple to use.
And you can teach a newbie shooter how to handle a single-shot gun in only a few hours.
Having the ability to shoot both BB and pellet, this Crosman 2100 gives you an awesome option to switch from BB to pellet in case you get bored with shooting BB.
Besides, you can teach your kids how to operate a BB gun and a pellet gun at the same time without having to buy 2 types of guns separately.
The barrel is rifled steel with helical grooves inside.
The stock is made of synthetic material with a metal receiver.
Unlike Woodstock which is heavy and easily affected by moisture and temperature, the synthetic stock is light and functions perfectly under any kind of weather
So it’s a great choice for people who live in a humid place and for shooters who don’t want to bother with stock preservation.
This gun has a textured grip and forearm to add friction to your hand when shooting, prevent slippage from shooter sweat, and add stability when aiming.
Besides, it has a rubber buttpad to absorb recoil so you can enjoy long hours of shooting without getting a painful shoulder from the gun’s kickback.
Ammo
Crosman 2100 uses .177 pellets and .177 BBs as its main source of ammo.
BB is damn cheap: you can buy a thousand rounds of BB for just a few bucks.
And .177 is one of the cheapest pellets you can find on the market.
The open sight is fiber optic, hence you will align the sight faster and more accurately, even in the low-light condition like dusk.
Furthermore, the rear sight has windage adjustment (allows you to adjust the sight left and right) and elevation adjustment (allow you to adjust the sight up and down).
Some can even manage to hit an old car rotor at 80 yards and a water bottle at 100 meters.
As you can see, this rifle is extremely accurate for target shooting on a firing range up to 30 yards and can take down common plinking objects with a shooting range up to 100 meters.
Airgun Evolution used the Crosman 2100 Classic for some much-needed indoor pigeon pest control here:
Loudness
This gun is very quiet. It has hundreds of customer reviews without a single complaint about noise so you can take comfort knowing that your plinking day doesn’t bother your neighbor’s afternoon.
Shooting Ability
The effective shooting range of this gun is 30 yards. You can use this gun for target shooting, plinking, and dropping birds.
Specifications
Caliber: 0.177”
Velocity: 755 FPS
Loudness: 3- Medium
Barrel Length: 20.84”
Overall Length: 39.75”
Shot Capacity: 17
Cocking Effort: 3-10 pumps
Barrel: rifled
Front Sight: Fiber Optic
Rear Sight: Adjustable for windage and elevation
Scopeable: 11mm dovetail
Trigger: Two-stage non-adjustable
Buttplate: Plastic
Suggested for: Plinking/Target shooting
Trigger Pull: 4.75 lbs
Action: Bolt-action
Safety: Manual
Powerplant: Multi-pump pneumatic
Function: repeater
Body Type: Rifle
Weight: 4.81 lbs
Price
The price for Crosman is only $60.
Considering this is a double-function rifle with a metal receiver, high velocity, and remarkable accuracy, this is the best bang for the buck.
And remember that when you buy from AirGun Depot you save $10 more than when buying from Crosman.
"Debate over whether a 22 air rifle can effectively take down a deer has sparked curiosity among hunting enthusiasts. With its lower muzzle velocity...




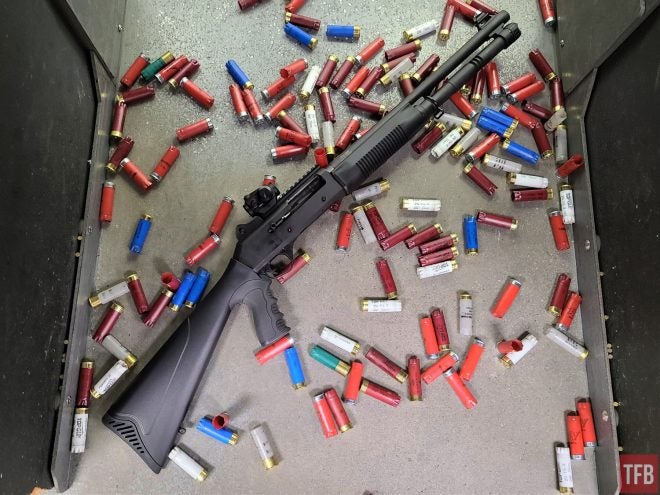
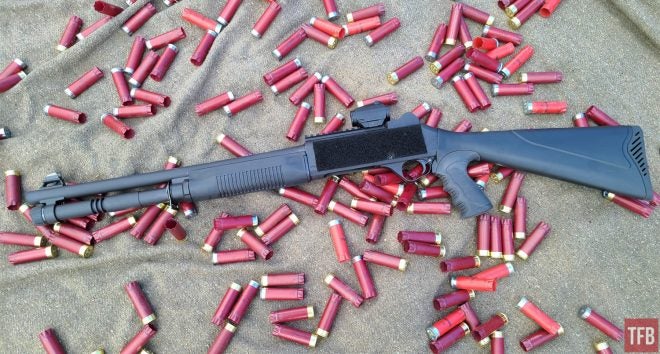
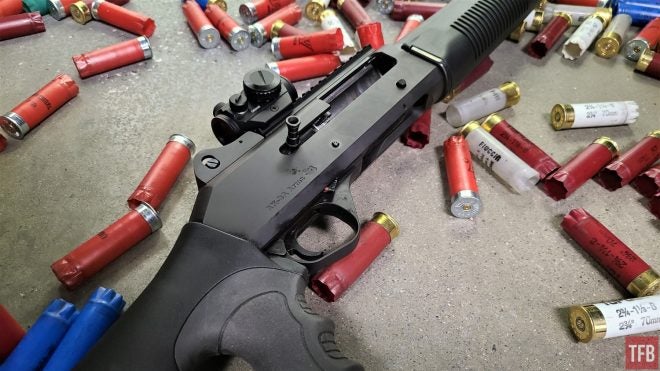

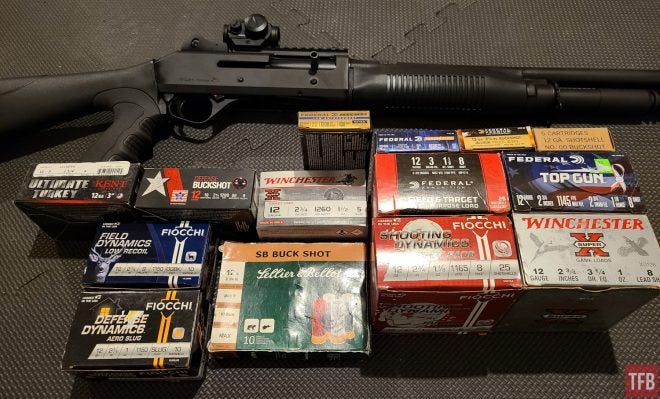
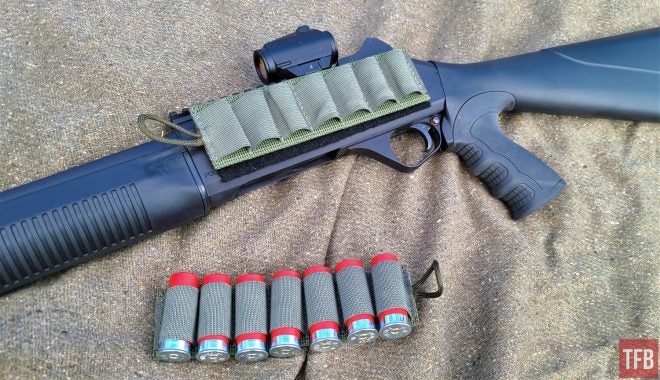
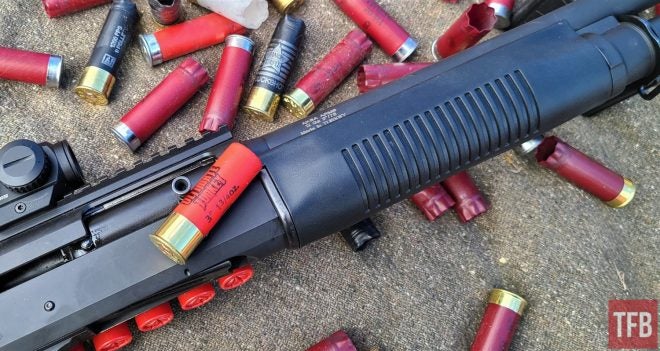
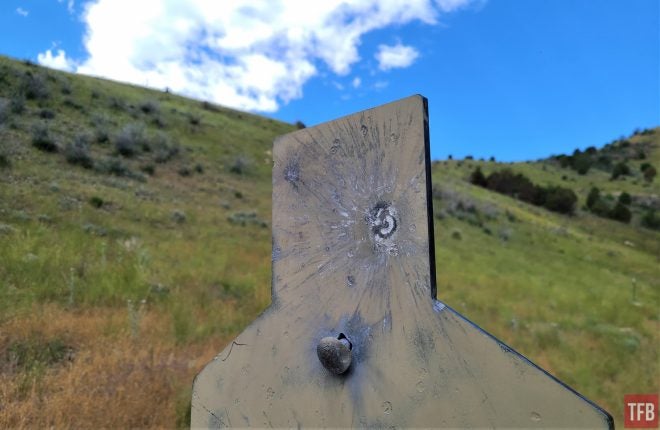
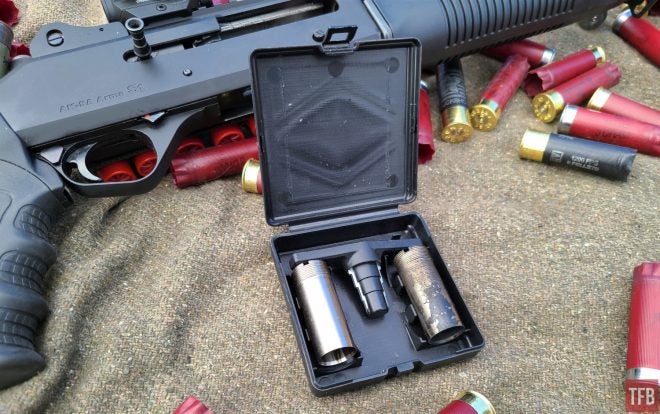
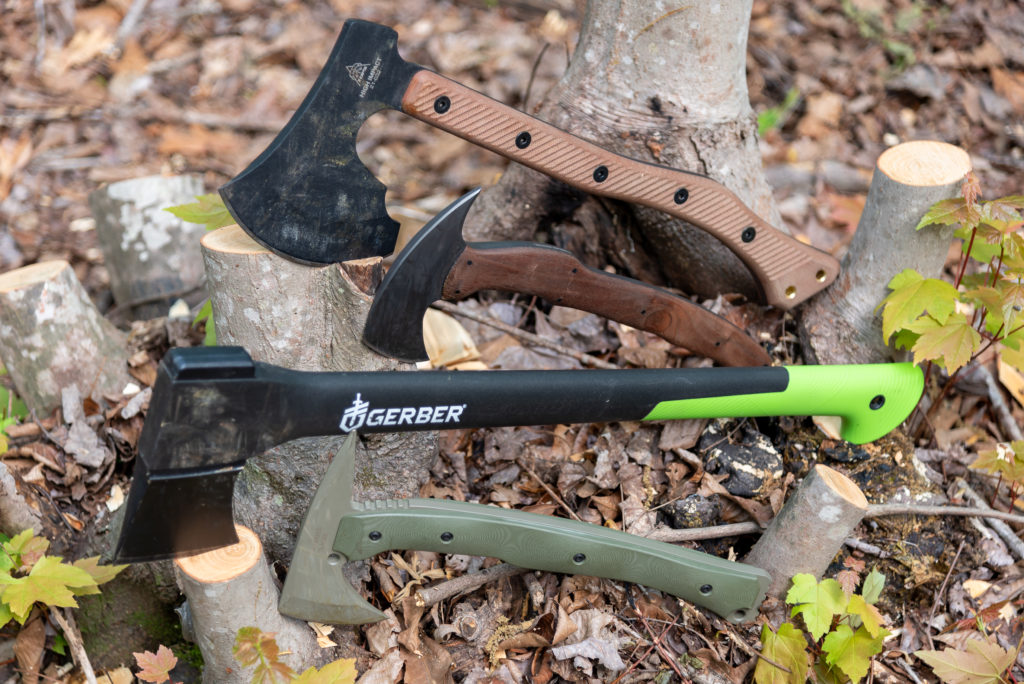
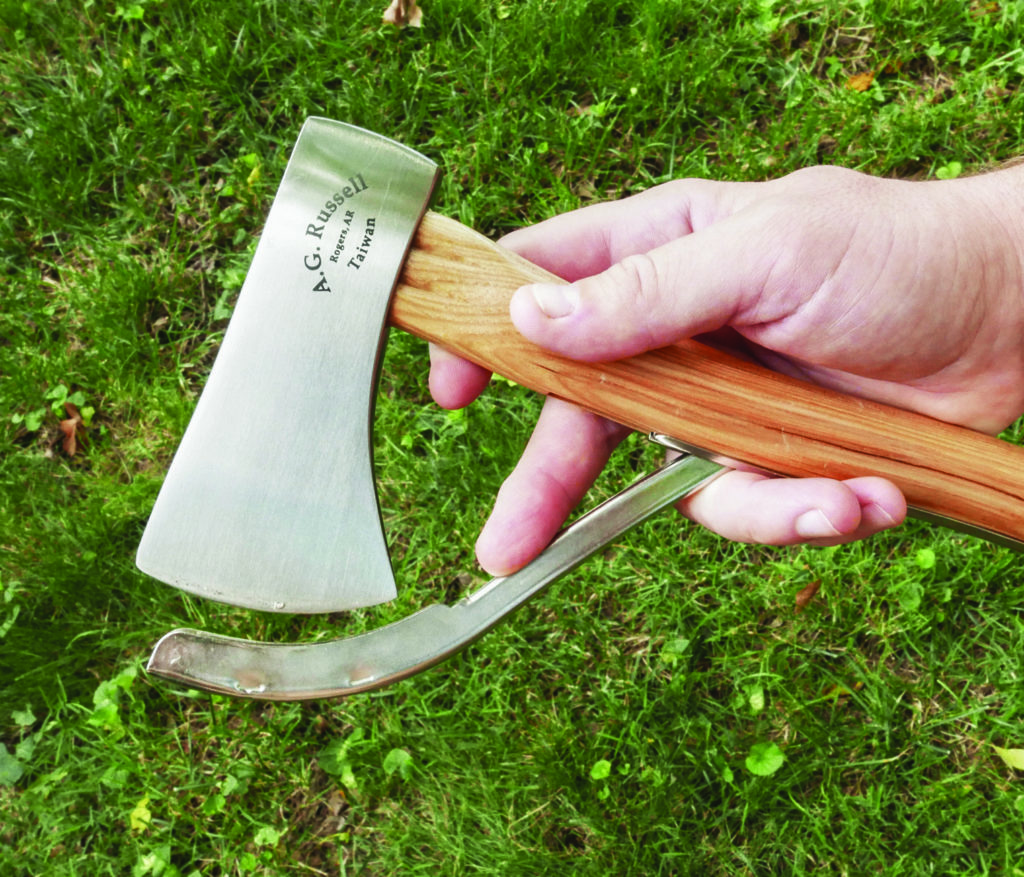
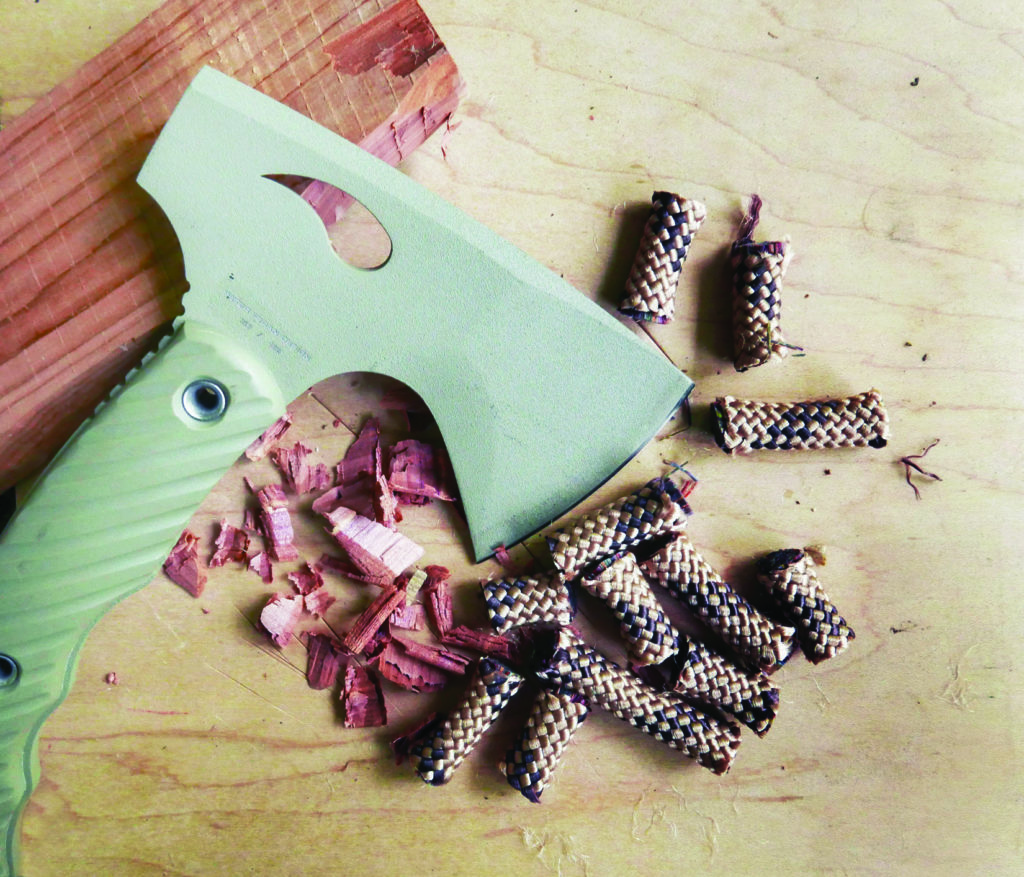
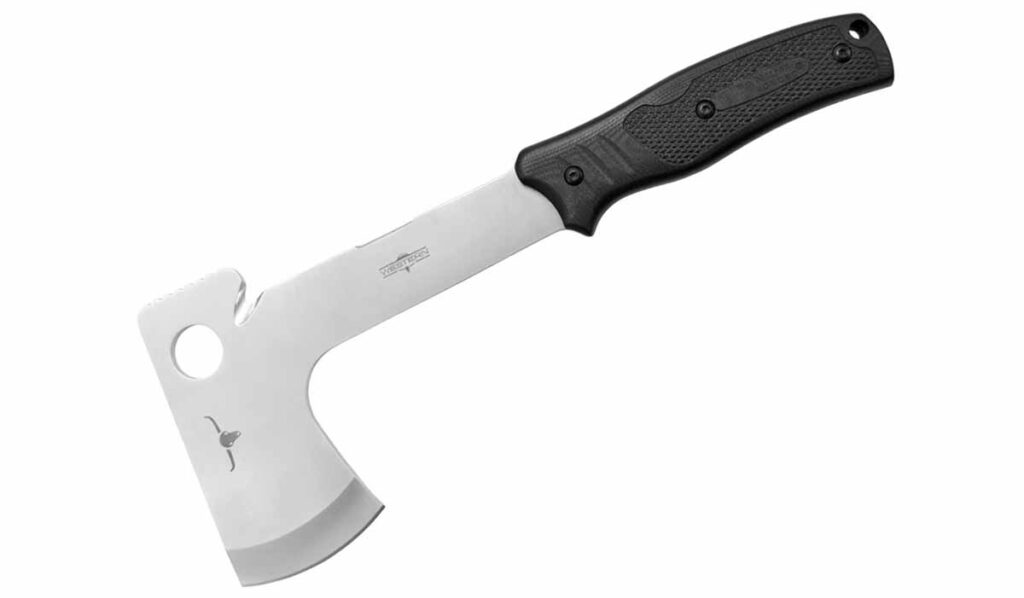
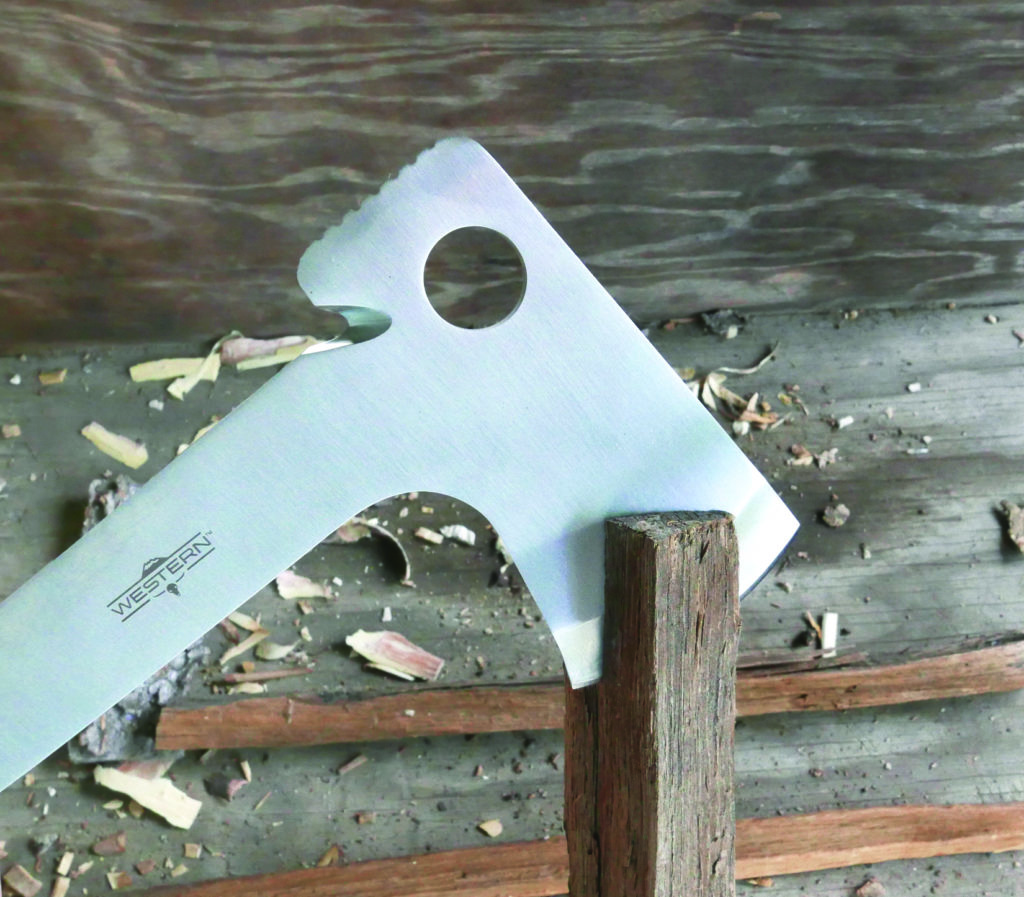
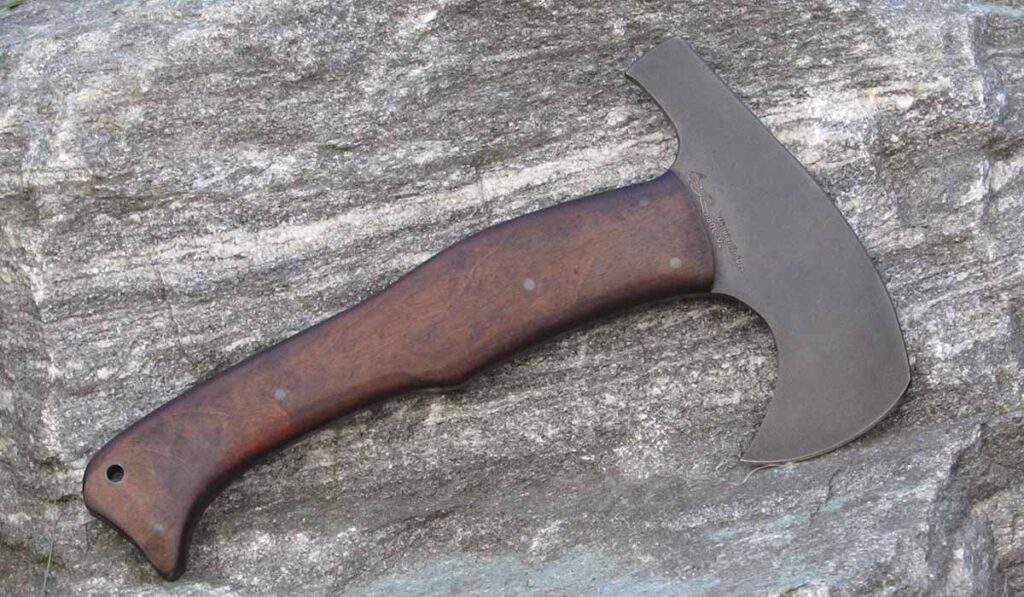
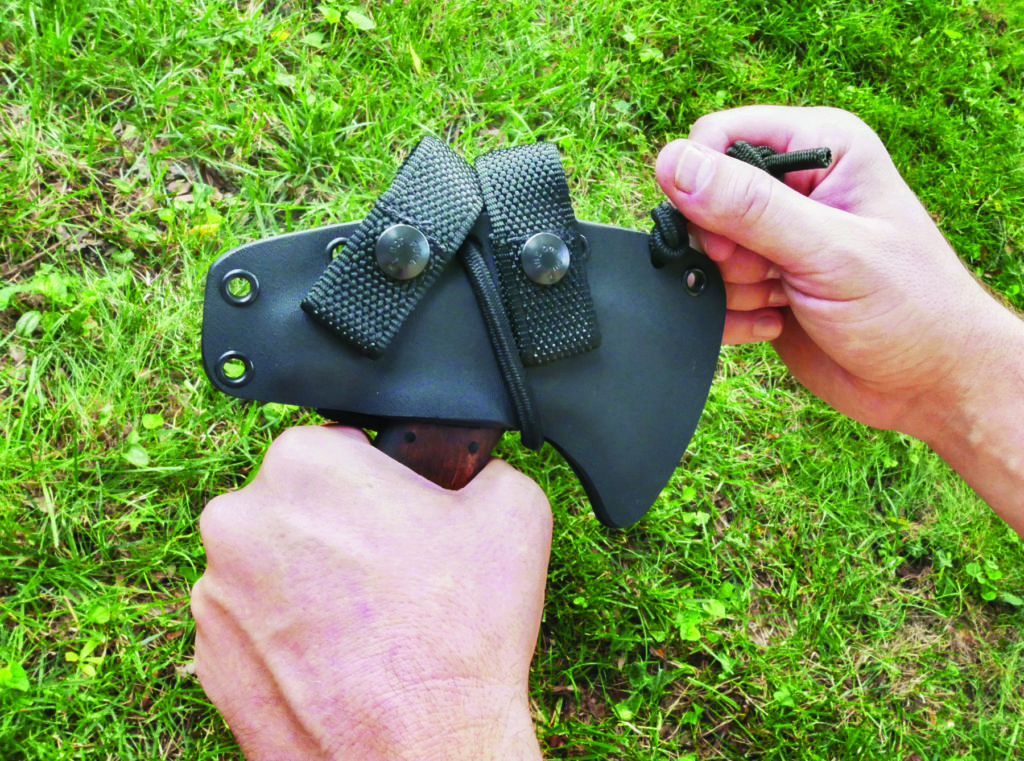
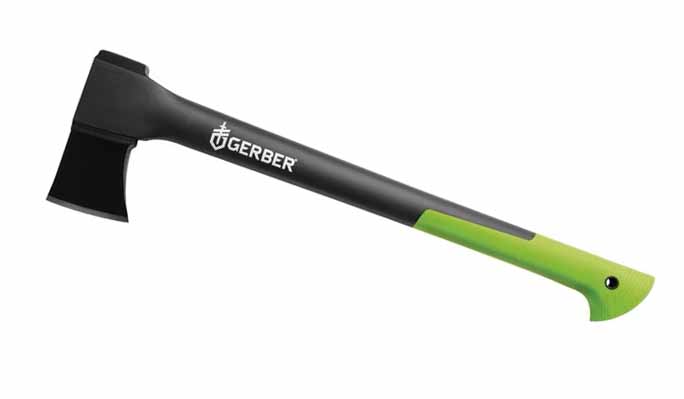
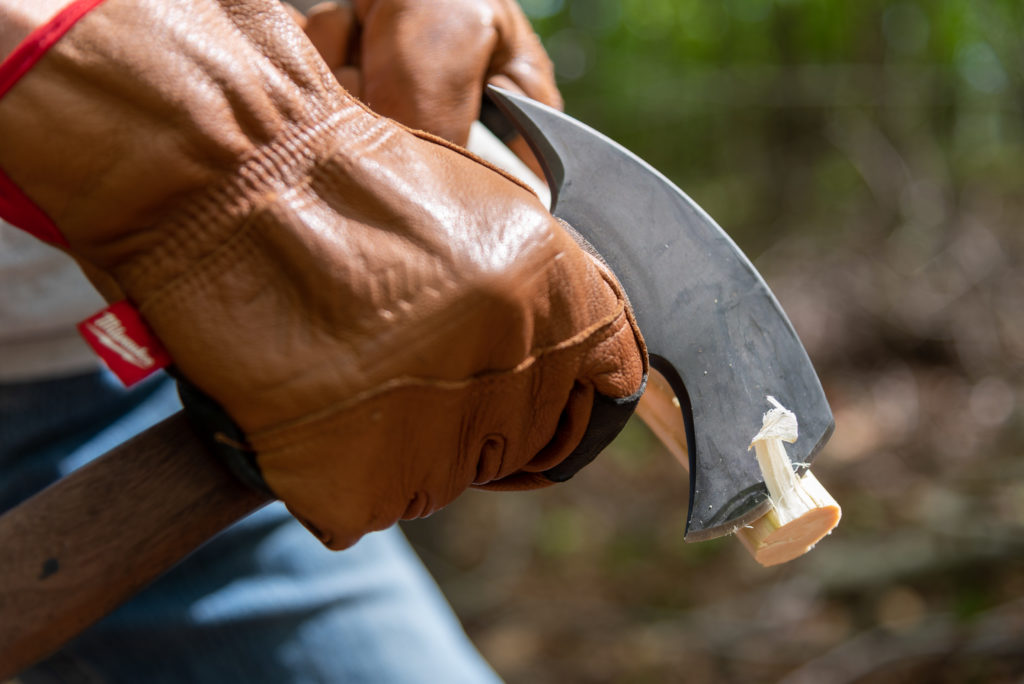
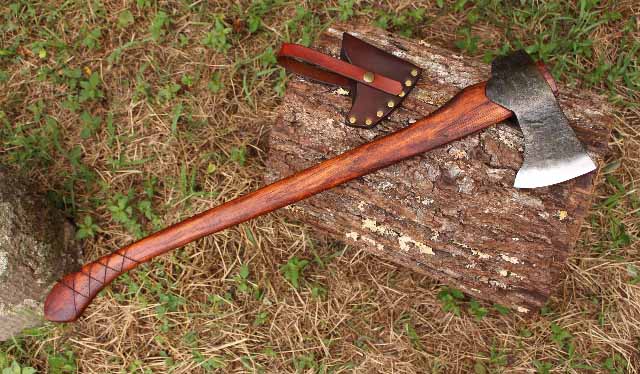
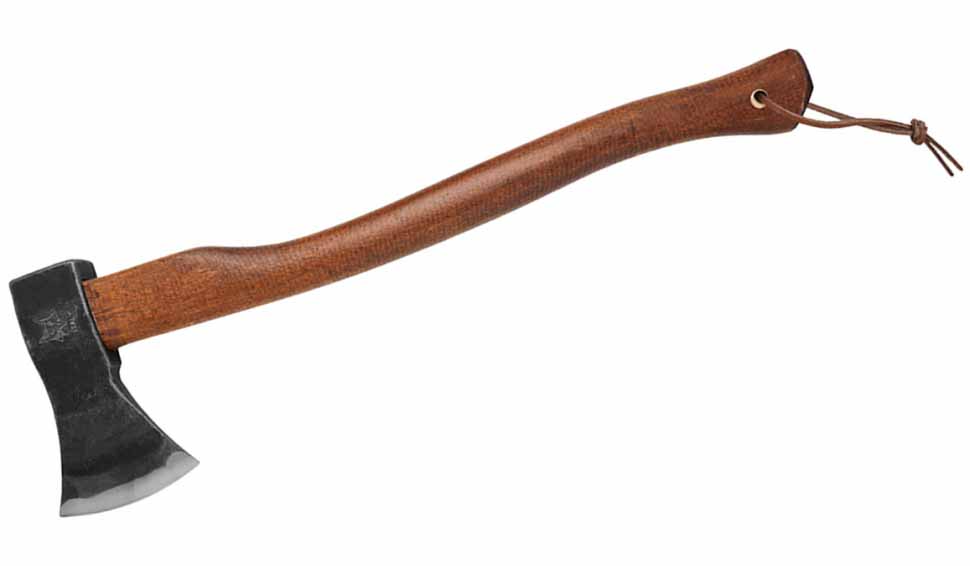
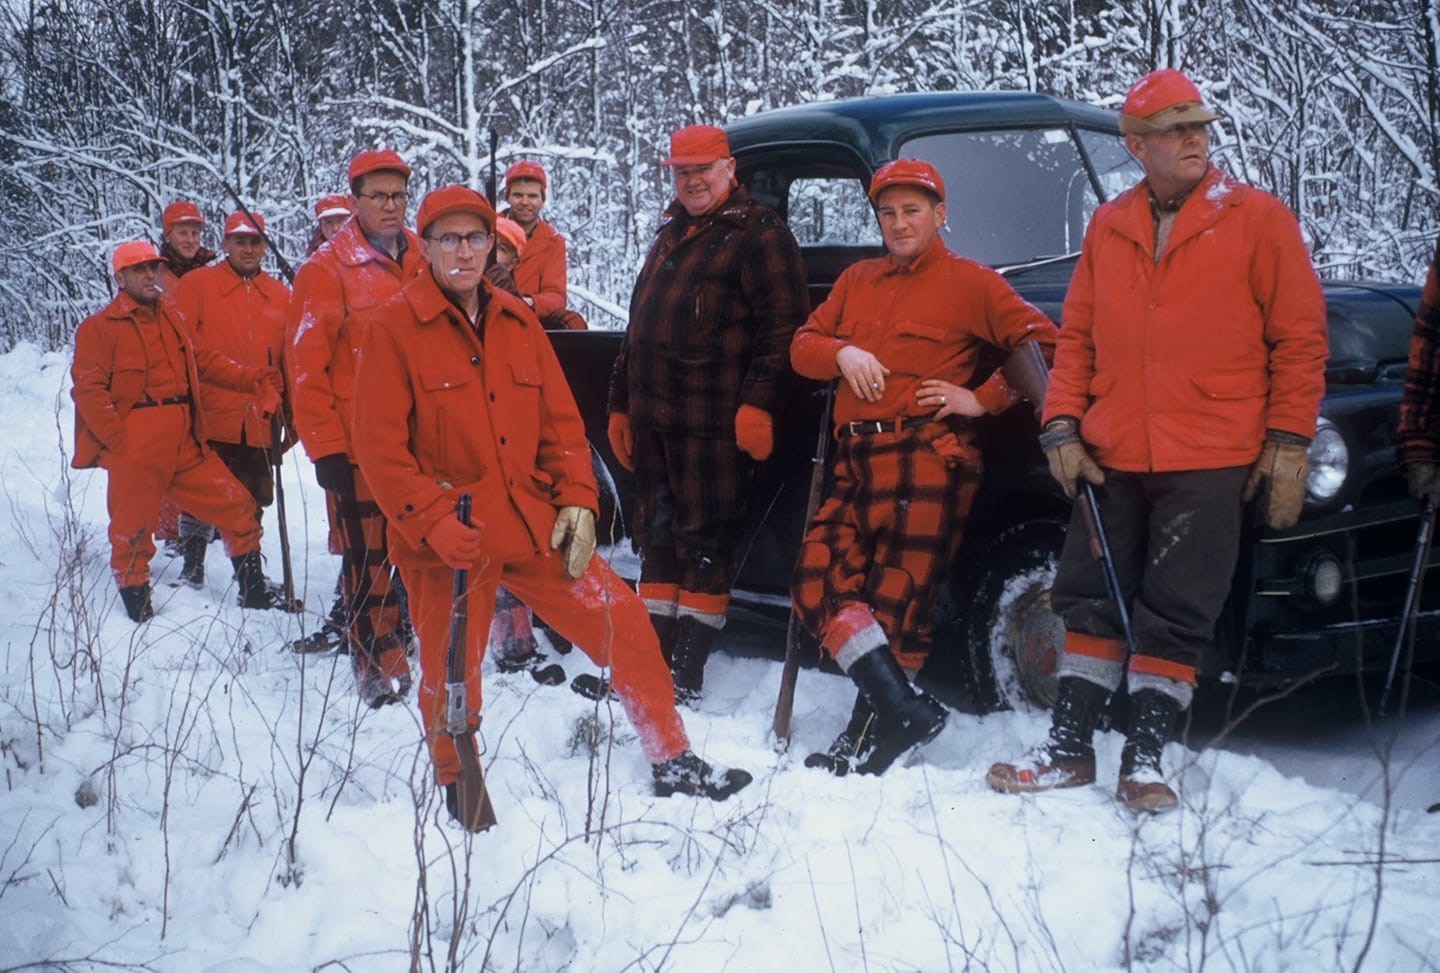 The crew from Schumacher’s deer camp
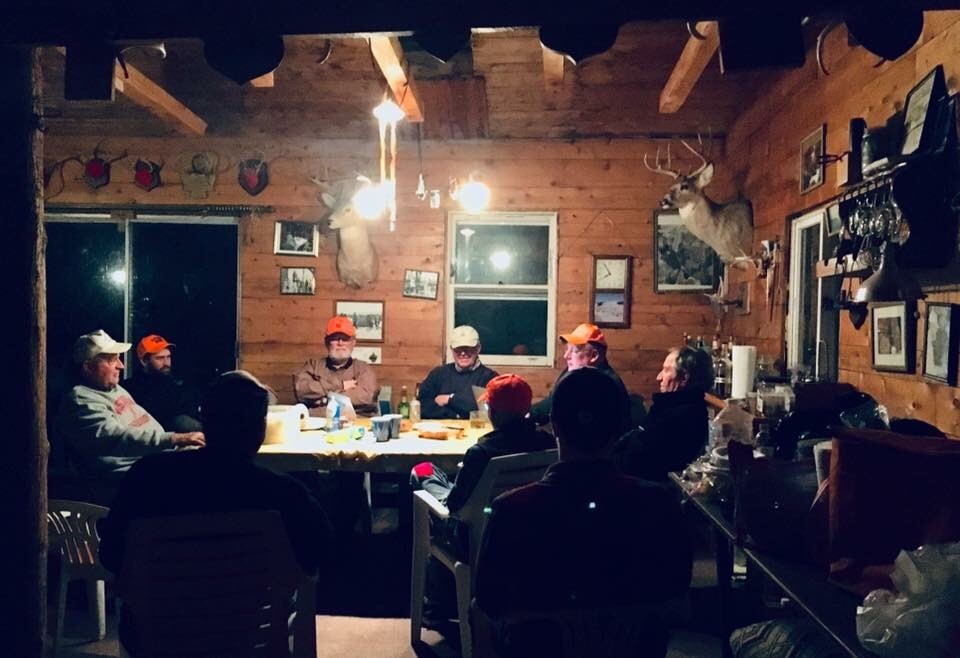 Submitted by Lucas Karls. The cabin was built from the trees on the property over 30 years ago. Each log was handled 14 times before the project was complete.
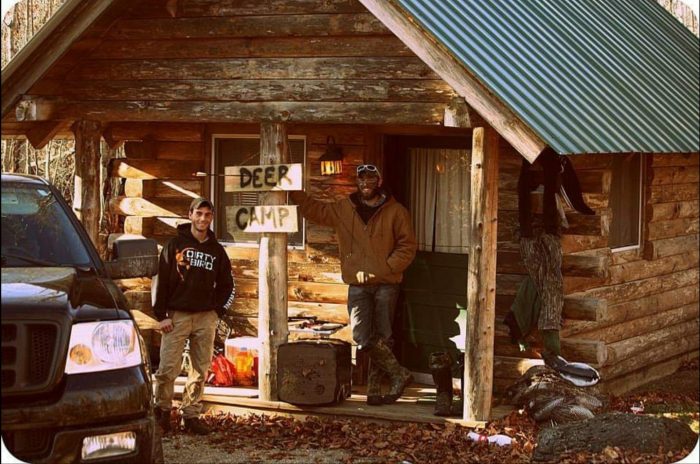 Mitch Goeck’s Wisconsin Deer Camp
 Garrett Meilinger’s family deer camp
 Nathaniel Melton’s family deer camp
 Hamm Camp, Loretta, WI
  Hamm Camp
 The women of the Hamm Camp, Loretta, WI