One of the most important parts of a rifle is something that is often overlooked – the stock. Rifle stocks are one step you can take to customize your firearm to exactly fit the shooter and the uses of the gun. Let’s take a look at some different parts and types of rifle stocks. Read on!
A Rifle Stock is also known as a shoulder stock, buttstock or just the “butt” of the firearm. The receiver and firing mechanism as well as the barrel are attached to the stock which is held against the shooter’s shoulder when fired. The stock of the rifle allows you to firmly support and aim your gun.
It is important to know the parts of the rifle stock to help understand what type of stock will work best for our rifle and chosen application of said rifle. As shown in the diagram above, the parts of the rifle stock’s anatomy are mainly the butt and forend with the butt having a comb, heel, toe and grip.
Butt
The butt of the rifle stock is the part that is held into the shooter’s shoulder. Oftentimes with larger caliber rifles you will notice padding added to it to reduce felt recoil.
Comb
The comb of the rifle stock is the top of the stock where the shooter will rest our cheek to sight down the barrel or optic. Comb is very important as it puts the shooter’s eye into the perfect spot for aiming and eye relief for the optic.
Grip
Grips on a rifle stock are fairly self-explanatory. This is the part the stock the shooter’s hand holds keeping the butt tight into the shoulder.
Forend
A forend of the gun stock is where the shooter’s supporting arm holds the rifle up and maneuvers with the gun to aim it towards the target. It will be important to have a forend with excellent grip that fits the shooter’s body well.
Rifle Stock Construction
Rifle stocks can be made of many different materials and in many different styles. Ask yourself what type of climate you will be shooting in and the purpose of the gun. For instance, extreme temperatures often experienced in big-game hunting could potentially cause wood to warp, so a composite of some nature might be a better choice. Let’s take a look at a few of the material options.
Hardwood
Hardwood rifle stocks can vary greatly in accuracy and are susceptible to changes in temperatures, warping etc. When selecting a hardwood gun stock try to find one in a type of wood that is extra dense and hard. The softer the wood, the more prone to warping, shrinking/expanding and cracks the rifle stock will be.
A Curly Maple Hardwood Rifle Stock. Photo Credit – Accurate Shooter Bulletin
If we want a fancy, beautiful rifle stock we’ll be able to find a hardwood stock in nearly every exotic wood you can think of, making this a great choice for a displayed weapon as well as a great choice for a hunting rifle. Prices can vary from $50 into the thousands.
Laminated
Laminated wood has a very high accuracy potential and is more resistant to changes in temperature and humidity because it is multiple layers of wood glued together and then sealed. This glue binding agent repels moisture and because we aren’t dealing with the natural grain of the wood we don’t have to worry about weak points that can eventually crack usually.
Laminated Rifle Stock. Photo Credit: Eabco
One thing to keep in mind with a laminated stock is that they can be heavier than the other options – one reason you see these stocks on benchrest long-range rifles. Laminated rifle stocks can usually be found under $500.
Injection Molded Synthetic
Injection Molded Synthetic rifle stocks are usually amongst the cheapest we can buy. These gun stocks are produced by injecting molten plastic in a mold. While these stocks might seem appealing due to price there are several drawbacks.
Injection Molded Synthetic rifle stocks are not stronger or lighter than most wood gun stocks and their strength and stiffness can diminish as the thermoplastics used heat up in the summer sun or from the heat of shooting. Less rigid rifle stocks can have effects on accuracy.
Composite rifle stocks are what you will usually see on high-end and military weapons. These are made from resin-soaked fabrics and powders put into a mold, compressed and allowed to cure. Composite Synthetic gun stocks can be made from various materials such as fiberglass, engineered fabrics or carbon fiber.
Rifle Stocks made in this manner and from these materials will often have reinforced stress points with something such as Aluminum. Lightweight, rigidity and chemically inert are the pros of these stocks but be prepared to shell out big money for them.
Bolt Action Stock vs AR Stock
Bolt-action rifles have an endless amount of options it seems but the AR-15 does as well. In general AR-15 stocks are Composite Synthetic or Injection Molded stocks. Typically AR-15 stocks are much more adjustable than your average bolt-action rifle stock. Remember that the AR platform of rifles are incredibly customizable to the shooter and their needs so the stock is going to be no different!
Retractable AR15 Stocks
Quite possibly the most common gun stock you will see on an AR is a retractable stock. This stock can be extended and retracted to fit the shooter’s size, length of pull, etc. With the flip of a lever or push of a button, the stock on your AR15 can be extended. Makes for a handy storage solution too! We like this one from Magpul here.
Fixed AR15 Stocks
Fixed AR15 stocks are what you might see on a vintage pre-ban Colt, similar to the M16 from the Vietnam-era in many cases. Obviously, if this works for a particular shooter more power to them. Modularity is the point of the AR-15 however, so it seems a bit silly not to have a more versatile gunstock. Nonetheless, many people like them. Check one out here.
AR15 Pistol Braces
AR-15 Pistols. Be careful with this one, as our beloved and revered ATF would like nothing more than to wreck your day at the range because you put a stock on your AR pistol, thus creating a Short-barreled Rifle. Thankfully, a pistol brace exists. A pistol brace is meant to be strapped to your arm to stabilize the pistol. Yes, you can shoulder a brace still. Sound stupid? Yeah, that’s because it is.
Left: A stock. Right: A pistol brace. Photo Credit – Shwat.com
Featureless AR15 Stocks
Continuing our trip down Stupidity Lane, we reach peak absurdity. In the United Soviet Socialist Republic of Cali… Errr. Sorry, we meant, in California, some lawmakers got a hair up their booties to make rifles “Featureless.” Not even going to speak about this anymore, we’ll just let the pic speak for itself. Sorry California.
A “Featureless” AR-15. Photo Credit – Caligunner.com
Shop Modulus Arms’ Butt Stocks
The gun world can be a huge rabbit hole when looking for compatible parts. We hope this helped give you some ideas for your next build or upgrading your current rifle! Don’t forget to check back often for helpful articles, tips and tricks etc! Looking for an AR-style stock? We’re slowly but surely expanding our inventory. Check out some of our favorites under parts & accessories! Until next time!
Soon the dog days of summer will be over and our focus will be shifted from mowing the grass to finishing mallards over the decoys. As the season draws near, it is time to start making sure your gear is in working order and your gun dog is tuned up. Also included in your preparation for the 2022 duck season should be an analysis of which gear to add to your arsenal. Perhaps the biggest game changer to your season could be the type of duck call you choose. The growing popularity in cut down duck calls had led to many more options to choose from in 2022. Before adding a new cut down down to your lanyard, review this list of the best cut down duck calls for 2022.
You cannot go wrong with the Ace In the Hole 2.0 from Echo Duck Calls this season. This cut down duck call will allow you to run the entire marsh this upcoming season, and you will look good doing it. The characteristics of this call make it possible to bark at even the highest flying ducks. The sounds this call produces are loud and raspy, which perfectly imitate a mallard hen. Echo Duck Calls has a long standing reputation for making quality duck calls, and the Ace In the Hole is no exception.
Click the image to check out current pricing of the Echo Ace in the Hole cut down duck call on Amazon.
Echo Duck Calls also produces a more budget friendly cut down duck call. Their poly carbonate cut down is perhaps the most bang for your buck on the market. Although the poly carbonate cut down does not offer the same sharpness an acrylic call does, it still gets the job done.
Click here to check out the polycarbonate cut down call from Echo Duck Calls.
Rockin’ R: RNT Duck Calls
The Rockin’ R is RNT Calls’ newest cut down added to their lineup. Its design, similar to the RNT Mondo, allows hunters to be versatile in their approach. From breaking down migrators to finishing them over the decoys, this call can do it all. The Rockin’ R is the king of calls when it comes to hunting public land. If you want to run the pool this upcoming season, add the RNT Rockin’ R cut down duck call to your lanyard.
Click here to check out the Rockin’ R from RNT Duck Calls
Cutdown 00: Slayer Duck Calls
Do not sleep on the Cutdown 00 cut down duck call from Slayer this season. This cut down produces loud, raspy, and realistic sounds that fool even the most pressured ducks. This call is made from Derlin material, which means that when harsh weather comes your way, your call will still perform at the highest level. Unlike most cut down duck calls, this call comes in both a single-reed and double-reed model. Be sure to add this call to your lanyard and make this season the most successful yet.
Click the image above to check out current pricing of the Slayer Cutdown 00 duck call on Amazon.
Brute: Rolling Thunder Calls
The Brute cut down duck call from Rolling Thunder Calls is a surefire way to run the pool this season. This call has been slightly altered compared to traditional cut down duck calls, which has made it much more user friendly. However, it still possesses the ability produce loud barks and finish birds within shooting range. The Brute has become a crowd favorite because of its appearance and the results it produces in the marsh. This call comes in both an acrylic as well as a polycarbonate model. Therefore, if you are on a budget this season, you have the chance to purchase a more affordable but high quality call.
Click here to check out the Brute from Rolling Thunder Calls.
Tomahawk : 737 Duck Calls
The Tomahawk cut down duck call made by 737 Duck Calls is one of the newest additions to their lineup. This call, which is certainly appealing to the eyes, has the ability to reach high flying migrators all while maintaining the finesse it takes to finish the wariest of birds. It is built like most traditional cut down calls with the longer barrel and wide bore through the insert. The call comes in more than 10 different acrylic color schemes. Add the 737 Tomahawk cut down duck call to your lanyard to make the difference this season.
Click here to check out the Tomahawk cut down call from 737 Duck Calls.
Ignition: Power Calls
The Ignition, brought to you by Power Calls, is certainly a game changer when it comes to adding a cut down duck call to your lanyard. Its sturdy design paired with its appealing looks make it a top notch cut down on the market. Not only is the Ignition a quality call, it is also a more affordable way of adding a cut down to your lanyard.
Click here to check out the Ignition cut down call from Power Calls.
In the world of hunting, there is nothing more exciting than calling up a big tom turkey within shotgun range. To make it more rewarding, try making your own call and tricking one of the most cautious and leery game animals in North America. Wing-bone calls are the oldest form of calls, developed by Native Americans and possibly dating back 4,000 years.
During this off-season, why not make your own wing-bone call? They are easy to make but take some practice to be able to produce the sounds needed to fool an old tom.
The wing bones of mature male turkeys are the most desirable for wing-bone calls. Bones from different turkeys make different sounds. Bones from mature toms make a deep and raspy sound. Bones from hens make a higher and crispier sound. Bones from jakes make a sound that falls in between the toms and hens. Because calls made from different turkeys make different sounds, a savvy hunter will have one of each in his or her bag of tricks. Another benefit of the wing-bone call is it is louder and the sound travels farther than any other type of call.
To use the wing-bone call, the hunter places the free end of the radius bone in between their lips. Some hunters place the call in the front and center of their lips, while others place the call near the corner of their mouth. The call is not operated by blowing through it, like most turkey calls. Rather, it makes the yelps and clucks of a hen by a sucking motion. The hunter puckers his or her lips and “kisses” to create the suction. This takes practice, but it is easy to learn. Just like anything worth doing, you need to put in the time to master the sounds.
Step 1 The first step is to remove the wings from the turkey at the ball joint where the wing attaches to the body. The wing must be deboned to save the humerus, radius and ulna. These three bones need to be scraped clean of all the meat and cartilage that can be reached with a knife. When finished with step one, you should have three bones separated from each other and somewhat clean.
Step 2 Next, boil these three bones. Adding a few drops of dishwashing liquid will begin the degreasing process. Wait for the water to boil before dropping in the bones. Do not boil longer than 20 minutes because the longer the bones boil, the more brittle they become.
Step 3 Then, remove the bones from the boiling water after any remaining meat or cartilage has gone. Using a hacksaw or a Dremel tool, remove the ends of the two smaller bones, the radius and ulna, where the bones start to flare. On the larger bone, the humerus, sever the smaller end where it starts to flare. On the larger end of the humerus, sever the flared end at the widest point. This gives the call a bell or trumpet to amplify the sounds. Be careful while cutting the ends as not to splinter the bones.
Remove the marrow from all the bones with a pipe cleaner. The bell end of the humerus needs to be cleared of any thin bones to create a single hollow chamber. The last thing in this step is to lightly sand the cut ends to make them smooth.
Step 4 For step four, first bring some fresh water to a boil. Then, add the bones to the boiling water with a liberal amount of dishwashing liquid to degrease. Then, add a splash of hydrogen peroxide to whiten the bones. Only boil for a few minutes so the bones do not become too brittle.
Step 5 This step is the assembly of the call. You will notice that the radius has a round end and a flat end. The flat end is the mouthpiece, and the round end is inserted into the ulna. The free end of the ulna is inserted into the small end of the humerus. Some turkey hunters do not add the humerus, which makes a smaller call. The addition of the humerus allows the turkey sounds to project for a longer distance because of the trumpet or bell on the end. The ends may have to be shaved a little bit to fit inside of each other. Once you have a tight fit of the connected pieces, mix some epoxy to glue the parts together and fill any gaps to create a seal. Let the epoxy set according to the instructions.
Step 6 Step 6 is optional. Some turkey hunters decorate or add their own finishing touches to their new call. Just remember, these calls are for turkey hunting, so stay away from bright colors, shiny finishes or hanging things such as feathers or beads that can give your position away to a sharp-eyed bird. Most turkey hunters who make their own wing-bone calls wrap dark thread around the bones where they connect. If you spray it with a clear coat, make sure that it is not a glossy finish. You want a dull, flat finish.
Bull sharks and crocodiles are enigmatic oceanic creatures. Let us together draw a comparative analysis on them.
Both bull sharks and crocodiles are powerful predators with excellent combat skills. While sharks keep biting their prey till it is mutilated and dead, crocodiles hang on to their flesh and remove it from their bodies before feeding on it. In addition, crocodiles live on both land and water, whereas sharks can survive only in water.
Today, we will together look at some of the most common questions people ask about the differences between bull sharks and crocodiles.
Image Credits: “Hartley’s Creek Crocodile farm” by Sue Waters is marked with CC BY-SA 2.0.
Image Credits: “オオメジロザメ Bull shark” by ume-y is marked with CC BY 2.0.
Bull sharks and crocodiles are hostile animals, without a doubt. Let us explore whether bull sharks attack crocodiles.
Bull sharks do not attack crocodiles, but the opposite is entirely possible. There have been several recorded instances over the years of crocodiles biting and eating bull sharks, along with other shark species such as lemon sharks. In fact, saltwater crocodiles are notorious for attacking and eating bull sharks.
Crocodiles are aggressive animals known for their ferocity. Therefore, they often prey on bull sharks and other shark species in addition to fishes and other marine animals.
Is a shark stronger than a crocodile?
Sharks are powerful animals with tremendous strength. But are sharks stronger than crocodiles? Let us find out.
Sharks are not stronger than crocodiles, with the exception of the great white sharks. Bull sharks are often attacked by crocodiles, and so are lemon sharks and tiger sharks. Great white sharks are powerful enough to engage in combat with crocodiles, and they are also fast swimmers, which gives them an added advantage.
Crocodiles are massive animals that kill marine creatures quite indiscriminately. From sharks to fishes and seagulls, crocodiles attack one and all because of their tremendous strength.
Saltwater crocodile vs bull shark
Image Credits: “Saltwater Crocodile (Crocodylus porosus)” by berniedup is marked with CC BY-SA 2.0.
Image credits: “オオメジロザメ Bull shark” by ume-y is marked with CC BY 2.0.
Saltwater crocodiles and bull sharks are two distinct species. Let us draw a comparative analysis on them.
Saltwater crocodiles are humongous animals who eat indiscriminately, whereas bull sharks adhere to a very specific diet comprising fishes and smaller sharks. Saltwater crocodiles are powerful and can easily munch through a bull shark. In fact, bull sharks prefer occupying freshwaters and do not thrive in saltwater regions. Therefore, attacking them becomes easier.
Saltwater crocodiles have a tremendous advantage over bull sharks and can easily overpower them. In fact, there have been several recorded instances of bull sharks being eaten by saltwater crocodiles.
Bull sharks vs saltwater crocodile bite
Image Credits: “Crocodiles Mouth-01&” by Sheba Also 18 Million Views is marked with CC BY-SA 2.0.
Both bull sharks and crocodiles have a strong bite that can injure possible victims. Let us learn which of the two has a stronger bite.
Saltwater crocodiles are fantastic biters and have the most powerful bite among all crocodile species, whereas bull sharks have the best bite among the shark species. Although both bull sharks and crocodiles are excellent biters, saltwater crocodiles have a biting force of 3,700 pounds per square inch to bite through hard and soft-shelled prey.
That being said, bull sharks are strong biters, too but lack the force that characterizes crocodiles.
Bull shark vs crocodile appearance
Bull sharks and crocodiles have very distinct appearances, and even a layman can tell them apart. Let us learn more in this regard.
Bull sharks are essentially shark species that are cartilaginous and live in water at all times, whereas crocodiles belong to the family of reptiles and live on land too. Besides, bull sharks grow up to 11-20 feet, whereas most crocodiles attain a similar height and grow anywhere between 10 to 20 feet.
We must mention here that grown up bull sharks weigh slightly more than crocodiles. On average, most bull sharks will weigh 1,000 to 2,400 lbs, whereas crocodiles can weigh 2,000 pounds at maximum.
Bull sharks vs crocodiles teeth
One major point of dissimilarity between bull sharks and crocodiles is their teeth structure. Allow us to tell you more in this regard.
Bull sharks have around 50 odd teeth in the front row itself, and overall, they have 300 teeth on average, whereas crocodiles have around 66 conical-shaped teeth. As some of you might already know, sharks lose and regrow their teeth several times during their lifetime. Even crocodiles shed their old teeth but not as frequently as sharks.
Needless to say, both bull sharks and crocodiles need a strong set of teeth to survive in the ocean and hunt for potential prey.
Bull sharks vs crocodiles lifespan
Bull sharks and crocodiles also vary in terms of their lifespan. Allow us to tell you more on this topic.
On average, saltwater crocodiles can live up to 70 years, whereas bull sharks can live up to 12-16 years. Most crocodile species live merely up to 30-40 years, with the Nile crocodile clocking in a lifespan of 50-60 years. In captivity, bull sharks have been known to live up to 30 years. Most sharks have a similar lifespan of 20 to 30 years.
Bull sharks vs crocodiles movement
Image Credits: “Bull Shark” by Relativiox is marked with CC BY 2.0.
A common question asked about bull sharks and crocodiles is how they vary in terms of speed. Let us learn more in this regard.
Most sharks can swim faster than crocodiles, especially the great white sharks. On average, bull sharks can swim at the rate of 35 mph, whereas crocodiles can swim only up to 15mph when in water and around 22mph when they are on land. Since sharks swim faster in water, they might sometimes escape attacks from crocodiles.
Conclusion
Bull sharks and crocodiles are two of the most fierce, dangerous aquatic species. They have a powerful jaw and can easily bite into and tear apart their prey. In terms of senses, sharks see better when they are in water and can also smell blood. Crocodiles, on the other hand, have better defenses since they can move on both land and water and have really tough skin, which makes recoveries from injuries quicker.
Any bass angler will likely tell you that topwater fishing provides some of the most exciting bass bites to behold. There is nothing like the visual action of an epic topwater blow up, after all it’s one of the only forms of bass fishing where you actually get to see a bass attack your lure.
Which is why most anglers can’t wait for early dawn or dusk hours, and the warm temperatures of spring and early summer, to break out topwater lures and start walking, popping, and buzzing to drive bass crazy. But the truth is, while topwater lures are traditionally best during late spring and early summer, they can be used in most seasons and varying water temperatures and still catch fish.
Rebel Pop-R
Whopper Plopper
Livetarget Hollow Body Frog
Top water lures come in all shapes and sizes, and in most cases float. The bulk of them are made of hard plastic and are equipped with treble hooks. Treble hooks help increase your chances of having a fish get and stay hooked when they strike, since bass can often miss a topwater lure, or barely hit it. This is especially true for the fast moving models.
They’re not all made from hard plastic however, some are made of solid robber, soft hollow plastic, metal, or a combination. A buzzbait for instance is made up of a metal wire, metal/plastic propellor, and a rubber skirt. It’s also one of the few topwater lures that do not float.
When selecting a topwater bait, you should start with fast moving lures and reduce the speed by methodically switching to slower moving ones if your not getting strikes. This is how you find out how aggressive the bass are that day. Sometimes they will chase almost anything, and other times will only go after a very easy target.
Here are five of the best topwater lures that you should be using:
Poppers are floating lures with a cupped mouth, meaning the front of the lure has an indented bowl shape. In the mouth is where the line attaches, and where all the action the lure creates comes from. This is one of, if not the slowest moving topwater lures.
When fishing a topwater popper, you simply cast the lure out and let it float. You then jerk your rod pulling the lure and causing the mouth to plow through the surface of the water. As it’s being pulled it makes a “pop” as water bubbles up over it. Some are designed with bigger mouths for a slower but bigger “chugging” action, while others have smaller mouths and made for working a little faster with smaller pops.
For more info visit the Topwater Poppers page
2. Walk The Dog Lures
These floating topwaters are long and skinny, usually equipped with a pair of treble hooks. Most models are torpedo shaped. Because of their shape they are often categorized as stickbaits, but since their walking action is so unique they have their own category.
They are called “walk the dog” lures because you have to “walk” them across the surface. The walk-the-dog action is created by jerking the rod tip repetitively with your wrist, causing the lure to zigzag from side to side. The motion creates disturbance on the surface and mimics an injured baitfish. It’s one of the best topwater lures because you have a lot of control in the action you want to give off.
For more info visit the Walk The Dog Lures page
3. Frog Lures
Hollow body frogs might be the most weedless lure there is. They have a soft plastic body that is designed to collapse and expose the hook as bass bite down on them. The lure floats and the hooks face upright, leaving very little chances for getting hung up.
This is a great advantage in bass fishing because you can cast in areas you could never with other lures. Lily pads and other floating vegetation are the ideal places to fish topwater frogs. Bass hide out under these types of vegetation as they provide a great source of oxygenated water, shade, cover, and food. So dragging frogs across the tops of them entice the bass below.
For more info visit the Topwater Frogs page
4. Buzzbaits
Buzzbaits are the fastest moving topwater lure there is, so if your looking to cover a lot of water quickly they are your best bet. They come equipped with a propellor designed to make the bait travel across the waters surface while disrupting it and causing a ton of commotion. As the blades of the prop spin and hit the water surface, they create a splashing and rippling that really appeal to bass.
Buzzbaits are great for fishing around cover like along weeds and timber. They’re somewhat weedless since the hook faces upright as it travels through the water so you can cast in a lot of areas other topwaters can’t get to.
For more info visit the Buzzbaits page
5. Prop Baits
These torpedo shaped floaters do all the work for you as you reel them in. They come equipped with one or more propellors that spin as the lure is retrieved. As the propellor spins it disturbs the surface and creates a noise that bass can hear and feel.
They are far from weedless so working them around the edges of cover is best. Typically you would only use these on a calm day when the surface is still. The props are smaller than the ones on a buzzbait so if there’s a heavy ripple from wind on the surface then the action these lures give off is not going to be very noticeable.
For more info visit the Prop Baits page
Spring and early summer are big topwater seasons because water temperatures are just right. Water temps have a big effect on bass behavior and how they feed. In temps less than 55 degrees bass are very inactive, same is said for temps above 80 degrees. When the water is in between those temps bass are energetic and aggressive, the two main ingredients required for good topwater fishing.
The reason dusk and dawn are so well known for being the best times for topwater fishing is they are low light conditions. Bass spend most of their lives staying out of the sun, because unlike humans, their eyes do not adjust to brightness. That’s why they are often found under docks, trees, lily pads, or even in deeper water. Once the sun is down though, they travel to the open shallows in search of food.
The depth range of a body of water, and water clarity, play a big role in topwater fishing. They are also a factor in what is considered “shallow”, but typically one to four feet is the range, and the best depths for topwater bass fishing. Additionally, in clearer waters, bass holding at deeper depths can still see a topwater lure or struggling baitfish on the surface.
A struggling bait fish is most often what bass think they are seeing when a topwater lure is in action, sputtering and slashing on the surface. There are topwater lures that imitate all kinds of prey like frogs, mice, even small birds, but in most cases a struggling baitfish on the surface is what they are targeting.
So when is the best time for topwater bass fishing? In low light conditions like dusk, dawn or over cast days, when the water is warm (60 degrees plus), when the water is somewhat clear, and when baitfish are active. Bass also have to be pretty active to hit topwater. If it’s a slow bite like after a cold front, the topwater bite will likely be very slow.
Micro compact 9mm pistols offer enhanced concealability, making them perfect for self-defense, concealed carry, and even home defense.
With so many unique designs, capabilities, and features available, it is challenging to find the perfect fit.
Whether you are a beginner or an experienced gun enthusiast, there is sure to be a micro 9mm pistol that will meet your needs on the list below.
From top brands such as Smith & Wesson, Springfield Armory, and Sig Sauer, these pistols will offer unique features and durable designs that you can count on.
So, if you are looking for a compact and lightweight handgun that can fit in your pocket, purse, or nightstand, consider these 8 Best Micro 9mm Pistols for 2024.
#1. Smith & Wesson Shield Plus 9mm Pistol With Thumb Safety
Barrel Length: 3.1”
Overall Length: 6.1”
Weight: 20.2 oz
Capacity: 10, 13
For shooters looking for a comfortable micro compact 9mm with plenty of features, the Smith & Wesson Shield Plus 9mm Pistol With Thumb Safety is an excellent option.
With an overall length of 6.1” and weighing just 20.2 ounces, it is perfect for an all-day concealed carry for self-defense.
It also comes with a flush-fit 10-round magazine for improved concealment and a 13-round magazine for improved capacity.
To provide you with enhanced control and comfort, it includes an enhanced grip texture and has an optimal 18-degree grip angle for an ergonomic grip with a natural point of aim.
Smith & Wesson also gave it a flat face trigger for consistent finger placement, and the pistol has a 5.3” sight radius to improve accuracy.
It also includes a tactile and audible trigger reset to give you more control over your shots.
If you are looking for a micro compact 9mm pistol that has an ergonomic design for natural aiming and consistent shot groups, the Smith & Wesson Shield Plus 9mm Pistol With Thumb Safety is a top pick.
It is available from Palmetto State Armory. Here’s where to buy it: www.PalmettoStateArmory.com
#2. Springfield Armory Hellcat 3” Micro-Compact 9mm Pistol
Barrel Length: 3”
Overall Length: 6”
Weight: 17.9 oz
Capacity: 11, 13
The Springfield Armory Hellcat 3” Micro-Compact 9mm Pistol is perfect for home defense, self-defense, and the range.
This pistol is perfect for acquiring your target in a flash with its U-Dot sights.
It includes front tritium and luminescent sights and a rear Tactical Rack sight, providing an excellent sight picture in any lighting condition.
It only weighs 17.9 ounces and has a 6” overall length, making it perfect for a comfortable all-day carry.
The pistol features adaptive grip texture and a dual captive recoil spring system with a full length guide rod to give you enhanced control.
Springfield Armory built the Hellcat 3” Micro-Compact to last with a black polymer frame, a hammer-forged 3” steel barrel with a Melonite finish, and a serrated billeted machine slide with a Melonite finish.
Even with its compact size, it still has an excellent 13-round capacity with the extended magazine, and it comes with a flush-fit 11-round capacity magazine for enhanced concealment.
If you are looking for a quality micro-compact 9mm pistol that offers enhanced sights and a great capacity, the Springfield Armory Hellcat 3” Micro-Compact 9mm Pistol is an excellent choice.
It is available from Palmetto State Armory. Here’s where to buy it: www.PalmettoStateArmory.com
#3. Sig Sauer P365 9mm Pistol 12 Rd RTT TACPAC
Barrel Length: 3.1”
Overall Length: 5.8”
Weight: 17.8 oz
Capacity: 10, 12, 15
The Sig Sauer P365 9mm Pistol 12 Rd RTT TACPAC is a micro-compact ideal for shooters who want a lightweight and compact firearm with tons of features.
One thing that sticks out about the P365 is its patented double stack design, which allows you to have a flush fit magazine for better concealment or a 15-round full-size magazine for an impressive capacity in a micro-compact.
It includes one 15-round and two 12-round magazines to ensure you have plenty of ammo for any situation.
It has a coyote polymer grip module for all-weather use and a Nitron slide with serrations for light deflection and grip.
The P365 also includes Xray3 day/night sights to give you the edge in low light environments.
It also has a striker fire design with a crisp trigger pull you would expect from a Sig Sauer.
When you buy the P365, you also get an ambidextrous IWB/OWB holster for comfortable weapon concealment.
The Sig Sauer P365 9mm Pistol 12 Rd RTT TACPAC is perfect for shooters who want double-stack capacity in a micro-compact frame.
It is available from Palmetto State Armory. Here’s where to buy it: www.PalmettoStateArmory.com
#4. Springfield Hellcat OSP 11/13rd 3” 9mm Pistol
Barrel Length: 3”
Overall Length: 6”
Weight: 17.9 oz
Capacity: 11, 13
The Springfield Hellcat OSP 11/13rd 3” 9mm Pistol is an excellent choice for shooters who want a micro-compact 9mm compatible with micro red dot sights.
The pistol comes with a sleek Desert Flat Dark Earth polymer frame, a Cerakote finished slide, and a 3” hammer forged barrel with a Melonite finish for a worry-free all-day concealed carry.
With tritium/luminescent front and tactical rack U-notch rear sights, you will have an excellent sight picture in any lighting condition.
You can easily install a micro red dot optic if you wish to upgrade your sights with the rear slide mounting platform.
To enhance your shooting experience, Springfield Armory equipped the Hellcat with a dual captive recoil spring with a full-length guide rod for smoother operation and less recoil to provide you with tighter shot groups.
It also includes an adaptive grip texture to provide enhanced control and comfort.
The Hellcat comes with one 11-round magazine and one 13-round magazine to provide you a flush or extended grip for more control or concealment.
It also comes with an accessory rail to equip a flashlight or laser.
If you are looking for a reliable micro-compact milled for optics, the Springfield Hellcat OSP 11/13rd 3” 9mm Pistol is the perfect option for you.
It is available from Palmetto State Armory. Here’s where to buy it: www.PalmettoStateArmory.com
#5. Taurus GX4 9mm Pistol 11 Rnd 3”
Barrel Length: 3”
Overall Length: 5.8”
Weight: 18.5 oz
Capacity: 11
The Taurus GX4 9mm Pistol 11 Rnd 3” is an excellent micro-compact for shooters who want a concealed carry or home defense weapon on a budget.
Even though it is a budget-friendly option, the GX4 9mm is a rugged weapon that can be relied on to defend yourself.
Taurus crafted it with a polymer grip with a comfortable texture and an ergonomic design to provide a micro-compact that feels great in your hands with a natural feel.
It also has two backstrap options to customize your grip for improved control, comfort, and accuracy.
They constructed the slide of durable alloy steel with a gas Nitride coating, and the 3” barrel has a black DLC coating to provide protection against scratches, damage, and corrosion.
It also has an 11-round capacity and includes two magazines out of the box.
The Taurus GX4 9mm Pistol 11 Rnd 3” is an excellent option if you are looking for an affordable micro-compact for self-defense and home defense.
It is available from Palmetto State Armory. Here’s where to buy it: www.PalmettoStateArmory.com
#6. Smith & Wesson CSX 9mm Pistol Micro Compact
Barrel Length: 3.1”
Overall Length: 6.1”
Weight: 19.5 oz
Capacity: 10, 12
The Smith & Wesson CSX 9mm Pistol Micro Compact is an excellent option for left-handed shooters with its ambidextrous slide release, manual safeties, and controls.
The CSX comes with a 12-round magazine for improved capacity and a 10-round flush fit magazine for a custom level of concealment.
To give you better concealment and comfort, the CSX includes interchangeable textured backstraps, and a chamfered ejection port for a no-snag draw.
It also has glare-reducing serrations on the slide for enhanced concealability.
To provide enhanced durability and longevity, Smith & Wesson gave the CSX an Armornite finish to protect against damage and corrosion.
To give you improved control and accuracy, this firearm comes with a single-action flat-faced trigger and has an 18-degree grip for a natural point of aim.
The Smith & Wesson CSX 9mm Pistol Micro Compact is an excellent option if you are a left-handed shooter.
It is available from Palmetto State Armory. Here’s where to buy it: www.PalmettoStateArmory.com
#7. Kimber Micro 9 Two-Tone 9mm Pistol
Barrel Length: 3.15”
Overall Length: 6.1”
Weight: 15.6 oz
Capacity: 6
Gun enthusiasts who want a unique 9mm micro compact will love the Kimber Micro 9 Two-Tone 9mm Pistol.
One of the first things you would love about the Kimber Micro 9 is that it is based on the legendary 1911.
It will turn heads with its beautiful aluminum frame, matte black steel slide, and rosewood grips.
It is more than just looks with the Kimber Micro 9 with its 3.15” stainless steel barrel, aluminum match grade 7-pound trigger pull, and full-length guide rod.
These features will give you the performance you would expect from a 1911, but in a concealable micro compact frame.
A downside to the Kimber Micro 9 is its 6-round capacity, which is plenty for self or home defense, but it has a lower capacity than the other micro compacts on this list.
If you are looking for a micro compact with the look and feel of a 1911, the Kimber Micro 9 Two-Tone 9mm Pistol is perfect for you.
It is available from Palmetto State Armory. Here’s where to buy it: www.PalmettoStateArmory.com
#8. Ruger Max-9 9mm Pistol 12rd 3”
Barrel Length: 3.2”
Overall Length: 6”
Weight: 18.4 oz
Capacity: 10, 12
Ruger’s Max-9 9mm Pistol 12rd 3” is packed full of features that you may not expect in a micro compact.
Shooters will love its rigged design that features a through-hardened alloy steel slide, a glass-fill nylon grip, a 3.2” alloy steel barrel with a black oxide finish, and a precision-machined fire control chassis.
It features tritium fiber optic day/night sights, a short trigger pull with a clean break, and a medium textured grip to give you enhanced control and tighter shot groups.
You could also equip the Max-9 with a co-witnessed Jpoint or Shield-pattern micro red dot sights for even better target acquisition for faster engagements.
It also features a reversible magazine release for improved ambidextrous functionality.
With its included 12-round and 10-round magazine, you can have an extended grip for better control and comfort or a flush fit for improved concealment.
The Ruger Max-9 9mm Pistol 12rd 3” is an ideal fit if you want an optics-ready micro compact with excellent features.
It is available from Palmetto State Armory. Here’s where to buy it: www.PalmettoStateArmory.com
Why Should You Buy a Micro 9mm Pistol?
A micro 9mm pistol is an excellent choice for anyone who is looking for a reliable and powerful weapon to carry for self-defense.
Micro compact pistols are easy to conceal and carry, making them ideal for those who want to keep their weapon hidden while still having enough power to naturalize an assailant.
They are also highly accurate, with various features to help increase their effectiveness.
When it comes to self-defense, the micro 9mm pistol provides excellent protection.
Its small size and light weight make it easy to maneuver and draw quickly, which is essential when facing a threat.
The accuracy and power of the 9mm round also make it an ideal choice for self-defense, allowing you to place shots accurately and effectively.
There is also a massive market of 9mm ammunition, which allows you to equip a 9mm micro compact with scenario-specific ammunition.
Final Verdict
Overall, the micro 9mm pistol is an excellent choice for anyone looking for an effective and reliable weapon for concealed carry and self-defense.
Its small size and light weight make it easy to conceal, and its accuracy and power make it a superb choice for those looking for an effective weapon.
Furthermore, its wide selection of ammunition makes it perfect for any scenario, from home defense to concealed carry.
References
Concealed Carry Pistols: The Hot New Double-Stack Micro-Compact 9mms
Self Defense Laws By State
See Also
12 Best 9mm Pistols For Concealed Carry & Home Defense
12 Best Handguns For Beginners
12 Best Subcompact 9MM Pistols
9 Best Handguns For Women
Affiliate Disclosure: This post may contain affiliate links. If you click and purchase, I may receive a small commission at no extra cost to you. I only recommend products I have personally vetted. Learn more.
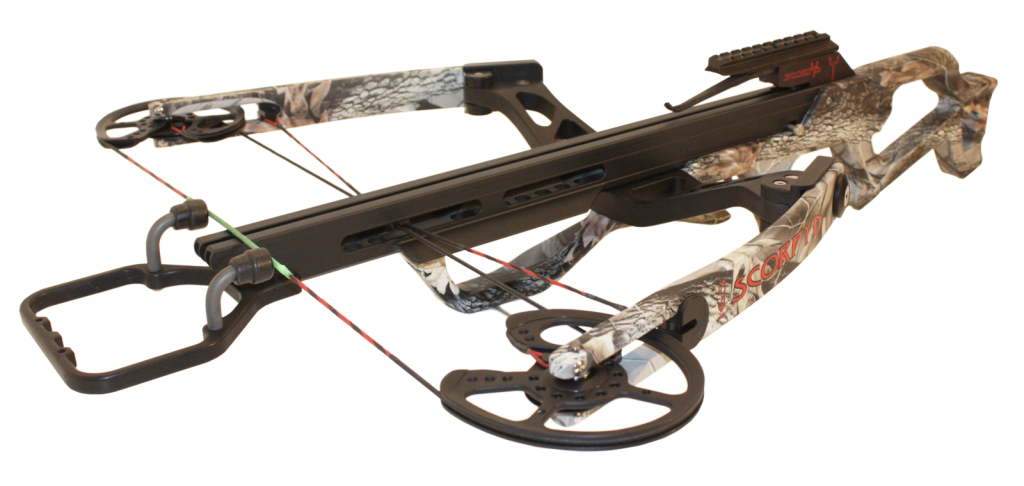
What we’ve done to judge the fastest crossbow in 2024
The fastest crossbow in 2024 is the TenPoint Nitro 505.
My recommendation, however is the Ravin R500 or the R29.
Read on to find out why.
For each crossbow’s FPS (feet-per-second), we sourced information from manufacturers and tests, and are confident it’s the most up-to-date at the time of the review.
Remember that any 400 fps crossbow is already electric, so these crossbows are taking it to another level.
In this article, we’ll be reviewing the following crossbows:
Fastest Crossbow on the market: TenPoint Nitro 505: 505 FPS
Most Accurate Fastest Crossbow: Ravin R29: 430 FPS
Fastest Barnett Crossbow: Hypertac Pro 430: 430 FPS
Fastest Crossbow for the Money/Youth: CenterPoint Wrath 430: 430 FPS
Before we review the fastest crossbows, let’s go over:
the advantages of speed
the disadvantages of speed
the difference between power and speed
one commonality between the crossbows
What are the advantages of a fast crossbow?
Longer range & better accuracy
The distinct advantage to a faster bow is that it creates a flatter trajectory. This improves aim over distance, not having to account for as much drop in the arc of the arrow.
What’s most impressive about performance improvements on the fastest crossbows over the last five years is how much it impacts accuracy over longer distance.
For example, the R500 and the TenPoint Nitro only drop about one inch over 40 yards compared to 20 yards, significantly more than less powerful crossbows.
Less chance of “jumping the string”
Not an uncommon phenomenon when hunting at longer ranges, the snap of the bow string upon firing is enough to startle game into a panic-driven movement reflex which, by the time the bolt arrives, may mean you hit the wrong part of the animal or miss it completely.
An extremely fast bow makes it less likely because, at 500+ FPS, a deer just won’t have enough time to react even at 60-80 yards.
What are the disadvantages of a fast crossbow?
Noise
It seems logical that if you wind a string up further and harder before letting it go, that this cause more vibrations, and therefore make more noise.
This is somewhat mitigated in the case of compound crossbows, as their pulley systems allow the energy to be stored in other parts instead of the string, thus reducing vibration.
On recurve bows – as mentioned later in the Excalibur Bulldog 440 review – vibration is amplified at high FPS, making purchasing a full suppression system worth considering.
Read more: Best crossbows on the market
Read more: Best crossbow for under $500
Read more: Best Women’s Crossbows
Equipment wear
When you build so much power into a crossbow, you are asking the limbs to store more energy when cocked. This will result in the possibility of broken limbs on the one hand, as well as having to restring your crossbow more often.
Not only this, but high speeds wear down the arrows – in fact, you’ll probably have to use manufacturer-specific equipment.
Accessories made for lesser bows are often incompatible, so you may see yourself tied to the manufacturer.
External Influence
Extreme speeds will magnify all of the variables in every shot. You’ll find yourself battling the wind, gravity and operator shakiness in different ways.
You’ll also find that some arrows which shoot fine at lower speeds can’t handle the added pressure of flying at 450-500 FPS – it’s fast!
Difference between kinetic energy (KE) and speed (FPS)
It appears that most hunters thirst for speed in their crossbow. This does makes sense, as more speed means more distance, better accuracy, and less chance for the animal to escape.
On the other hand, it raises questions of ethics as higher speeds at a more considerable distance may make you miss your target (or the intended part of the animal).
What’s more, when you increase speed, you often do so by reducing the mass of the arrow and therefore reducing the energy.
The following analogy may help to understand; first of all, imagine getting hit by a grain of sand at 100mph. Frustrating indeed, but nothing to write home about. Then imagine getting hit by a brick at 20mph. With the latter, you risk death.
The point is, when targeting speed, we should also target increased KE, to take down bigger animals you’re proud to take home.
One Commonality between these crossbows
Almost all of the bows have one thing in common: reverse-draw technology. Reverse-draw technology essentially means that you are drawing towards the riser – the aluminium connecting limb to bow – instead of away from it.
A lot of the crossbow companies pay royalties to Kempf – the designer – to use his patent, as there seems no better way (for now) to get more output from a crossbow.
Improved crossbow balance
The most powerful crossbows generally require longer power strokes, to generate more force.
This usually would create a more substantial weight imbalance toward the front of the crossbow.
Reverse draw technology shifts the risers from the front of the crossbow to its center, to provide excellent balance and reduce front-heavy crossbows.
Exceptional accuracy
The centrally positioned risers mean that the crossbow doesn’t feel as heavy, and you can both hold your aim for longer, or quickly react to unpredictable situations.
Heavily reduced noise
The fact the string pulls through these risers effectively elongates the power stroke, while reducing the draw weight. Aside from generating higher speeds, it also results in significantly less vibration, meaning shots 3x quieter.
Better trigger experience
If you don’t have as much draw weight, the trigger isn’t going to be as strained, and this results in a better, all-round shooting experience.
The Fastest Crossbow Reviews
Ravin R500 Vs TenPoint Nitro 505
Firstly, take a moment to recognize that in 2019 we had just broken the 400 FPS barrier with the TenPoint Nitro XRT 432 (Cabela’s/Amazon). Within a year, the XRT was flying at 470 FPS. Now in 2024, we have two 500+FPS crossbows. An incredible performance leap in just four years.
Secondly – and read this carefully – these crossbows offer more penetration over 50 yards than a compound bow at point blank!
R500 at 50 yards
Do I buy the R500 or the Nitro 505?
If you’re looking for purely the fastest, the Nitro 505 is the fastest crossbow in the world, flying ten feet per second faster than the R500. However, the R500 is a more consistent crossbow when tested with field points, multiple broadheads, and from multiple positions. The R500 experienced ‘flyers’ less regularly and not nearly as wildly as the Nitro 505.
A few poor review comments on the TenPoint website support this, claiming poor grouping and quality control before shipping.
Safety
The R500 also feels like a safer bow thanks to its design – a shroud that covers the string.
Pricing
Pricing is always important. When both crossbows came out, you had to spend upwards of $3000. Check Amazon (R500 / Nitro 505) or Cabela’s (R500 / Nitro 505) for the latest prices.
Performance
Crossbow performance, as mentioned, is improving dramatically year on year. However, the R500 and the Nitro 505 are certainly not the most accurate crossbows we’ve tested. Supporting (yet necessary) accessories, such as bolts, fletchings, broadheads, etc., are not keeping pace. In the next couple of years, this may be where crossbow brands try to make gains, making these bows as reliable as they are powerful.
Fastest Crossbow in the World/Fastest TenPoint Crossbow: The Nitro 505
When you first look at it, it follows the typical TenPoint design, with its ACUslide cocker, reverse-draw technology, and some slightly beefed-up limbs. The knocks on the bolts are also a little beefier. You can use these new knocks on old TenPoints, but you can’t use older versions on the new Nitro 505 because the bolts are designed to perform (or not break!) at extreme speeds.
The ACUslide cranking mechanism feels wonderfully safe. It takes all the weight out of the action and will not unwind on you halfway through. It also decocks so safely that your children can perform the entire process. In comparison, this was a better experience than the original Ravin until Ravin included the automatic e-cocking mechanism, which is another technological leap forwards. The Nitro’s finger shield protects you comfortably from the string.
Although not on par with the crossbow for quality, the package scope has been built by Hawke and is a marked improvement on the typical standard scopes they include.
The S1 trigger is a two-stage zero-creep trigger with a crisp break on the shot at four pounds in testing.
The Nitro 505 was also a little louder than some other bows, but it’s understandable with the power and vibration it generates.
Ravin has developed and introduced a Hex Coil system mounted to a reverse-draw system to reach eye-watering speeds and make their crossbow the best for portability and maneuverability. Uncocked, it’s 7.7 inches, and when cocked, it sits at a streamline of 3.6 inches. With a weight of 8.4 pounds and a length of 28 inches, you never feel hampered by trees and branches and will often find creative ways to aim from cover.
Cocking a crossbow has become painless and automatic. The crossbow has a VersaDrive cocking system with an integral screw drive that has allowed the Ravin team to include an electronic cocking option on a later release without the need for a cocking crank. If this is for you, ensure the version you buy includes it.
I like this design’s safety because the crank is housed in a shroud that protects your fingers and body from accidents around the string.
This crossbow is capable of deadly accuracy of well over 100 yards (although we don’t recommend this for hunting). I loved seeing it tested with the Garmin X1i Crossbow Scope to see what’s possible when the best crossbow and scope technology meets.
This scope isn’t included in a standard package, though! You’ll get a fully-assembled crossbow, six bolts with field points, a removable draw handle, a quiver, and an illuminated speed-compensating scope. I feel that some of these add-ons are a little cheaper than the crossbow itself, which is a shame for such an expensive purchase.
Understandably, the bolts are tailored to the extreme power of the R500; your warranty will be voided if you use any others.
Scorpyd, sadly, decided to recall the Nemesis due to serving wear issues.It’s a shame as the Nemesis flew at a whopping 480 FPS.
The 480 FPS rating was taken with a 400-grain arrow. There are reports of a massive 505 FPS achieved with the 375-grain bolt; which would be the first time a crossbow broke the 500-FPS barrier back in 2019. Was this a 500-FPS crossbow?
At 480 FPS, this crossbow generated a whopping 189.2 FPKE.
Scorpyd knows how to make fast crossbows, and seem to prioritise it over anything else.
That’s not to say though that the bow didn’t have balance, precision and versatility, thanks to its reverse-draw technology and patented SearLoc Trigger System.
Special Mentions
Possibly the first ever 500+ FPS crossbow back in 2019
TenPoint Nitro XRT is one of our favourite crossbows ever. It doesn’t just appear in our review of the fastest crossbows, but in our review of best crossbows, too.
It’s an all-round monster weapon, which hits a crazy 470 FPS, generating more than 185 FPKE.
It has a silent draw system, and an improved trigger with a string-latch design (although we still felt there was room for improvement). It is also comfortable to shoulder for those long days hunting.
It’s excellent weight-distribution with the reverse-draw technology make it a piece of cake to handle and aim. Perhaps the only thing stopping this crossbow being our favourite ever is the expensive price tag.
The Aculeus remains in the top three for speed, and will undoubtedly be available at a discount rate from the new Scorpyd Nemesis. This could work in its favor, given that these crossbow prices range into the thousands.
What’s more, you can enjoy all the typical advantages of a recurve bow, in maintenance and crossbow weight.
We wonder, however, just how long those limbs are going to last on a cocked crossbow 23 inches wide and with a 14.5-inch power stroke.
Another issue is noise. Perhaps you want to try heavier bolts or purchase a full suppression system? This, of course, will take away a little from the 440 FPS – your call!
Can a deer get out of the way anyway if a bolt is travelling 440 FPS? Maybe not, but ethical hunting is important. If you hit the wrong part of the animal, it could end up hurt, or taking longer to die than is necessary.
That’s because they didn’t achieve 430 FPS by compromising other aspects needed for crossbow hunting.
The Ravin R29 sits in at an incredible 5.5 inches shorter than the R20, at 29 inches in length, with a more than reasonable 12.5-inch power stroke to deliver a punishing 164 lbs of kinetic energy.
It has incredible six-inch cocked full width and weighs only 6.75 lbs. This makes it our favourite fast gun for a long day hunting. You can shoulder this crossbow all day, and instantly react to surprises. Wow!
If you’re happy to compromise down to 400 FPS (I mean, come on, it’s not exactly slow…), check out the Ravin R26. This won our best crossbow; with sleeker dimensions and all-round perfection.
With the scope, it showed impressive, tight grouping with field tips over 60-70 yards. Although not pre-installed, I also liked how straightforward it was to set up.
The bow is fairly noiseless thanks to the unique cam design on the inside of the limbs, which reduces vibration (which produces noise).
Its unique integrated string hook system functions well with the TriggerTech Zero Creep trigger, which fires at exactly three pounds. TriggerTech is Barnett’s proprietary technology that drops a free-floating roller between the sear and trigger, making the shot crisp and smooth. It’s better visualized than described:
The Hypertac 430 has a custom feel to it. The buttstock and cheekpiece have micro-adjustment options to set the perfect length of pull. The forend has an optional flip-down Verti-Grip to shoot the crossbow like an assault rifle.
The bow has a cocking crank integrated, which allows you to both cock and decock safely. If you release the crank before it’s cocked, it will not dangerously unload. On the negative side, the crank was unexpectedly loud, as was the removal of the safety.
The package bow comes fully assembled with three 22-inch Hyperflite arrows, a 1.5-5×32 illuminated speed-compensating scope, an integrated cocking crank, a side-mount quiver, and rail lube.
Also, a special mention for the proprietary (and therefore not the easiest to get hold of) Hyperflite bolts. Despite being a little expensive, they have a high-quality feel with a slimmer 204 diameter, 1000 straightness, stiff spine with 60 grains upfront to increase your FOC by 25%, increasing penetration by 30% over a standard crossbow bolt.
Fastest Crossbow for the Money/Youth: Centerpoint Wrath 430
For this reason, I love to recommend the Wrath as the best crossbow for women or youth. Its short length (28,26 inches) and nine-inch Width, when cocked, are the best you will find on a bow two or three times less expensive than most on this list.
The Wrath is attractively priced for beginner hunters at less than $1000. You get a high-quality crossbow at an entry price.
Velocity Outdoor, the parent company for CenterPoint Archery, bought out Ravin in 2018, and we see the Wrath share technological similarities, such as the wheel system the best Ravin crossbows have.
It has a bullpup design, meaning the release lies behind the trigger. This design leads to a longer power stroke and increased speed despite not having a longer bow.
It also has a folding stirrup which is useful when using the rope cocker. There is a package version with a silent cocking crank, too. The cocking crank is useful as a bipod which is excellent for beginners or youth hunters, given the crossbow’s 9-pound weight.
Safety is also a primary consideration, which is wonderful news for beginner/young crossbow hunters. When you cock this crossbow, it automatically assumes the safe position. What’s more, it’s not possible to dry fire.
The package includes a fantastic 4×32 illuminated scope with ballistic aiming points inside, three 400-grain carbon arrows with field points, a quiver, and the earlier-mentioned rope cocker.
Conclusion – the fastest crossbow
The fastest crossbow is sure to be the Scorpyd Nemesis, which may be the first crossbow to break the 500-FPS barrier!
Until it comes out in a few weeks, the champion remains the 470 FPS TenPoint Nitro XRT, not only of note for its speed but for its all-round excellence as a weapon.
All of the above crossbows are excellent over distance, without compromising power.
If you prefer the traditional recurve bow, then look no further than the Excalibur Bulldog 440. We’d be interested in your feedback down below on its durability and how often it needs taking care of.
Hickory nuts and walnuts may look similar, but they are actually quite different. For starters, hickory nuts are much larger than walnuts. Hickory nuts also have a thick, hard shell that is difficult to crack, while walnuts have a thin, soft shell that is easy to break open. The flavor of hickory nuts is also much stronger than that of walnuts. Finally, hickory trees are native to North America, while walnut trees are native to Europe and Asia.
The walnut tree and the hickory tree are both members of the Juglandaceae, or walnut plant family. The USDA categorizes walnuts as being in USDA plant hardiness zones 4 through 9, while hickories are classified as being in USDA plant hardiness zones 4 to 8. Because of its notoriously difficult growing conditions and messy leaves and nuts when it falls, black walnuts make an excellent plant nursery.
The hickory (genus Carya) tree is a genus of about 18 species of deciduous timber and nut-producing trees found in the walnut family (Juglandaceae).
Hickory is rated 1820 by Janka, while American or Black Walnut is rated at 1100, making it one of the hardest domestic hardwoods.
Nut trees come in a variety of shapes and sizes, including walnuts, Hickory, pecans, and persimmons.
There are over a dozen species of hickory trees, including pecans and walnuts. There are many types of leaf and trunk that have similar characteristics, including leaf structure, trunk shape, and average height. Some of the nuts that fall off of hickory trees are inedible, but most of them are safe to consume.
Hard-shelled nuts surround a woody husk in these Hickory fruits. The amount of shear between the species, as well as whether the sutures are winged along the entire length or one or two-thirds of the width, affects how easily they split. They can be eaten, though they vary in size and flavor.
These nuts are edible and have a nutty, sweet flavor similar to pecans. Hickory nuts can also be identified by the way they separate into four distinct segments in the hard shell. When the hicksory tree first starts producing nuts, it takes 25 to 30 years. When harvesting Hickory nuts, one of the issues is that the hard shell is broken. Hickory nuts ripen on the tree’s leaves during the fall and drop to the ground during windy or snowy weather. You can easily cook the nuts and flesh from the tree because the flesh is sweet and nutty. Hickory trees are classified into two types: those with long, pinnately compound leaves and those with lance-shaped leaflets.
Walnut trees have a smoother, gray bark that begins to crack as the tree ages. Other types of hickory nuts can be identified if you look closely at the tree’s characteristics. The shape of the leaf on a shagbark hickory nut can help you identify it. Pinnate leaves are commonly made up of five leaflets with pointed tips, each of which is short and oval. The name mockernut comes from the difficulty of opening a mockernut, which exposes a tiny kernel that is barely edible. Bitternut nuts are not suitable for human consumption because they have a rancid flavor. The diameter of the red hickory nut ranges between 1.5 and 2.5 inches (2.5 to 3.8 cm), and its weight ranges between 0.5 and 1.3 pounds (0.4 to 1.5 cm).
The sand hickories are oblong, flat, and have a thin, hard outer shell that has a sweet flavor. Scrub hicksies can grow to be a shrub-like tree with 10-16 feet (3-5 m) of stems. There are three kinds of Nutmeg Hickory Nut: Hickory Nut, Smoky Nut, and Black Nut. A nutmeg hickory tree is distinguished by its pinnately compound leaves, which can reach 14 (35 cm) in length. The leaflets have toothed margins and are divided into five to nine sections. The pecan (carya illinoinensis) is an herb. A pecan nut has a greenish-gold husk with an oblong shape that denotes an oblong shape.
When the nut is ripe, the larva pupates inside the hard shell of the nut. Adult weevils emerge from their eggs in the spring. The cycle continues as long as the tree is tapped and the nuts are harvested. In the United States, the most popular hickory nuts are shagbarks, but they can be difficult to find. These are also relatively simple to find; however, they are less popular than peanuts. The most common nut weevils are closely related and collectively referred to as “nut weevils.” During the middle of summer, nut weevils attack the nuts that are developing on the tree. The immature nuts contain the eggs of the female adult weevil. An egg is laid and feeds in a creamy white larva that lives inside the nut until the fall.
Are Hickory And Walnut In The Same Family?
There is some debate over whether hickory and walnut trees are in the same family. Some botanists believe that they are in the same family, while others believe that they are in different families.
For a walnut tree, the average cost is about $2,000, whereas the average cost for a hickory nut is around $1,000. Because walnuts are larger and have a higher demand from the food industry, the price difference is due to their size. Hickory nuts and carya fruits are also interchangeable terms.
Difference Between Walnut And Hickory Tree
The main difference between walnut and hickory trees is the type of fruit they produce. Walnut trees produce a round, hard-shelled nut, while hickory trees produce a long, thin nut. Both types of nuts are edible, but hickory nuts are generally considered to be more flavorful. Hickory trees are also taller than walnut trees and have shaggy, dark bark. Walnut trees have smooth, light-colored bark.
Can You Eat Hickory Nuts
Hickory nuts are edible, but they are very hard to crack open. Most people prefer to buy them already shelled. They have a very sweet, nutty flavor that is similar to a pecan.
Although some species of Hickory nuts taste better than others, they are quite tasty. The name bitternut hickory refers to a variety of native trees, including mockernut, pignut, shagbark, and bitternut. A heavy-duty nutcracker, vise, or hammer can be used to open the nuts individually. Despite the fact that hickories can be found everywhere on Staten Island, the majority of them are found in the wooded areas of Greenbelt and Arden Heights Woods. Hickory lumber can be used to make ax handles and baseball bats. It not only creates good firewood, but it also produces fragrant smoke. The hardwood of hickory trees is extremely difficult to cut. Aside from hickories, the walnuts are another native tree that produces nuts.
Michigan produces the largest and most popular Hickory Nut in the state. It can grow in all types of habitats, from dry sandstone ridges in the upper peninsula to moist forests in the lower peninsula. The nuts of the hickory woolly bear are a valuable resource for wildlife, as they are a major food source for birds, squirrels, and other small mammals. The hickory tree is hardy and can survive in a variety of environments. The nuts in the tree are valuable for wildlife, and their wood is used in furniture, tools, and other products.
Hickory Nuts: A Highly Nutritious And Tasty Food
Hickory nuts, in addition to being a high-protein and healthy food, are also a tasty treat. They are high in calcium, magnesium, phosphorous, and potassium, as well as protein, making them an excellent source of minerals. As one of the vitamins recommended for expectant mothers, they are high in folate (folic acid). Toast or lightly bake them for 10 minutes in a 200o F oven; nuts can be eaten directly from the shell (in small amounts), or they can be toasted or baked for a few minutes in a 200o F oven. The nuts can be ground into a raw food by simply picking them out of the shell. Furthermore, a traditional Native American dish (from which hickory derives its name) can be made by cooking the nut meat in water until it becomes a porridge.
Bitternut Hickory Nut
The bitternut hickory is a deciduous tree that is native to eastern North America. The tree grows to a height of 50-80 feet and has a trunk diameter of 1-2 feet. The leaves of the tree are alternately arranged and are pinnately compound with 5-9 leaflets. The leaflets are oblong in shape and have serrated margins. The tree produces small, yellow-green flowers that bloom in the spring. The fruit of the tree is a nut that is enclosed in a thin, green husk. The nut is brown in color and has a bitter taste. The bitternut hickory is an important source of food for wildlife, including squirrels, mice, and birds.
The magnesium content of hickory nuts is especially beneficial to those who suffer from osteoporosis. In a study published in the journal Nutrients, researchers investigated the effects of magnesium on the bone health of postmenopausal women. Women were divided into two groups: the first group received a magnesium-restricted diet, while the second group received a magnesium-rich diet. The researchers discovered that a magnesium-rich diet reduced bone density in the women after six months. Magnesium deficiency in the diet was unfavorable to bones. The benefits of eating chestnut nuts are also demonstrated by their beneficial effects on child development and growth. Children who ate hickory nuts had higher levels of nutrients such as calcium, according to a study published in the Journal of Nutr. Children who ate hickory nuts saw a greater increase in growth and development than children who did not. Furthermore, the study discovered that the magnesium found in hickory nuts was beneficial for the development and growth of the children. In order for a person’s bones to be healthy, it is critical that they have high levels of magnesium. Magnesium also regulates calcium levels in the body in addition to assisting the body in optimizing metabolism and improving enzymes. Because of its magnesium content, the hickory nut is extremely beneficial for people who are osteoporosis patients.
Tree stand selection, placement, set-up and safety all factor into a successful hunt—and each aspect is a never-ending topic of discussion. Everyone has their own opinions on placement, hanging tactics, concealment and even the tree stand itself. While tree stand hunting is a personal decision, there are a few basic principles that can increase a hunter’s odds of seeing deer, having a good shot and make the entire process far more comfortable—and safe.
Portable tree stands come in three main categories, each suited to different uses and hunter preferences. Hang-on stands, the most basic, are simple stands that must be manually moved into place and secured carefully. Just like the name suggests, self-climbing stands allow a hunter to “walk” the stand up a tree and are best-suited to smooth trees with no branches between the hunter and the ground. Ladder stands look like a combined ladder and tree stand, and can be used on a wide range of trees but are often more conspicuous. Of the three options, hang-on stands are the most commonly used.
We covered tree stand placement thoroughly in our recent post How to Hunt Whitetail Deer Using the onX Hunt App, including sitting food, water, cover and seclusion. We also showed how best to enter and exit your stand without disturbing nearby deer and ruining that shot you’ve been waiting for all season. During the summer months, consider clearing multiple trails into your stand so you can walk in based upon deer feeding habits, wind direction and time of day, and mark these trails on the onX Hunt App.
onX Ambassador Steve Tittsworth knows that in his home state of Tennessee, tree stand placement is the most important part of the hunting puzzle. “Over the course of many years, our deer have learned to look up,” Tittsworth shares. “Once I have determined where I need my stand relative to the deer I’m hunting, I look for cover while looking up myself. Be it 30 feet high or only eight feet high, if that perfect tree is a white oak, hickory or hemlock, I’m looking up for the spot that a deer can’t see. Many times I’ve put a set at only eight feet off the ground in a leafed limb cluster and watched deer look right over top of me. I also set these up so I’m completely covered while the deer is directly under me and my opening comes as the deer is passing me. This ensures he’s looking away and the shot is never quartering to me. Higher is not always the best answer.”
onX Community Engagement Specialist Jared Larsen spent his fair share of time in tree stands while growing up hunting both Wisconsin and Iowa. And after years of hunting out of tree stands, he’s finessed his stand maintenance and set-up for maximum safety and comfort. He recommends:
• Oiling moving / connecting parts in the off-season to eliminate creaking in the cold.
• Adding felt tape between metal parts that touch and move (i.e a metal seat that you can fold up when you stand and fold down to sit—where it folds down, tape with felt to eliminate the metal-to-metal contact).
• If you have large feet, invest in a stand with an oversized platform (small platforms are a common issue with ladder stands).
• If you choose to leave your stand up year-round, remove your foam seating pads; otherwise the foam becomes a favored food for mice and squirrels.
• A screw-in bow holder for warmer hands and far more comfortable sits.
Once ensconced in your tree stand, ensure that you place your gear in easy-to-access locations. The last thing you want to be doing when the time comes is scrabbling for binos or rangefinders—a bit of advance planning can keep things calm, cool and collected and ensure you’re not spooking that mature buck that’s finally decided to make an appearance.
Tree stand security is a significant problem in some regions. Consider placing your tree stand away from heavily-used trails in locations where it’s harder to spot (then add a Waypoint in your onX App so you can find it easily, and share with friends if needed). Secure your stand with a highly-visible lock (a log chain or cable lock works well)—often a would-be thief will be deterred simply by seeing a lock. You can also remove the bottom of the ladder, tree steps or climbing sticks, making the tree stand not readily accessible.
Aaron Warbritton, host of the Hunting Public and onX Ambassador, has a few tricks of his own for tree stand hunting in the Midwest. “I use a lineman’s rope to hang the stand. It allows me to safely lean away from the tree and use both hands to set the stand up, making for a much quicker and safer setup,” he shares.
He adds: “Before I leave the ground, I’ll also tie one end of a 30-foot rope to my waist. The other end I tie to my gear (bow, pack, etc.) so I can pull it all up once in the stand. I also use milkweed pods as wind checkers. The seeds float for a long distance so you can watch wind currents away from your stand, unlike powder which only tells you wind direction at your exact location.”
Tom Petry, onX Ambassador and co-owner of Become 1 TV, believes the details truly set apart serious tree stand hunters. He shared a few of his tips with us:
• When transporting stands to and from your location, be sure to keep all straps, chains, etc. secured to the stand. The sound of metal clanging on metal travels a long way and can spook your game before you get a look at it.
• Once hung, be sure to secure all straps, pull-up ropes and loose pieces so they aren’t blowing in the wind. Dangling straps increase your chance of being seen or heard even when you aren’t in the stand. Spook a mature buck once—even when you aren’t there—and they may change their route instantly.
• Always have at least two stand sets for your major hunting areas, and set up accordingly for your two most typical wind directions.
• Be sure that your access to and from the stand is well thought out. From noise to exposure, how stealthy is your approach?
• Choose a location that will provide a good backdrop, especially if it’s a location that you will hunt throughout the year.
• Always check ratchet straps before hanging a stand. If there is ever a doubt as to the integrity of a strap, throw it out and go buy a new one… it will be much cheaper than the hospital bills.
• Never think you are too cool for lifelines and safety harnesses. They will never be as uncomfortable as the result of falling out.
And don’t forget the creature comforts. If the weather is cold, bring along more layers than you think you’ll need—nothing saps body heat like sitting still in an exposed environment. Layer up, keep your head covered to save body heat and never underestimate the chilling power of a persistent breeze during a cool morning. (Or the hot, beating sun in the afternoon.) Even if it’s pleasant in town, weather in the woods tends to have a mind of its own.
Anyone who has spent time in a tree stand will tell you to bring snacks and entertainment. Snacks, hot coffee and something to burn the hours will go a long way once you’re settled in your tree stand and waiting for the deer to arrive to the area. Make sure wrappers are not crinkly and loud—if it sounds loud in your house, it’s going to sound even louder in the woods. Repackage food into quieter containers if necessary.
Basic tree stand safety—wearing a harness at all times, having a lifeline system on each stand, conducting regular maintenance and hanging your treestand at the appropriate height—all factors into your success in the field. Practice your movements of getting in and out of the tree stand and know your personal limits. With a bit of advance research and good, old-fashioned hard work, you can have your most productive hunting season to date.
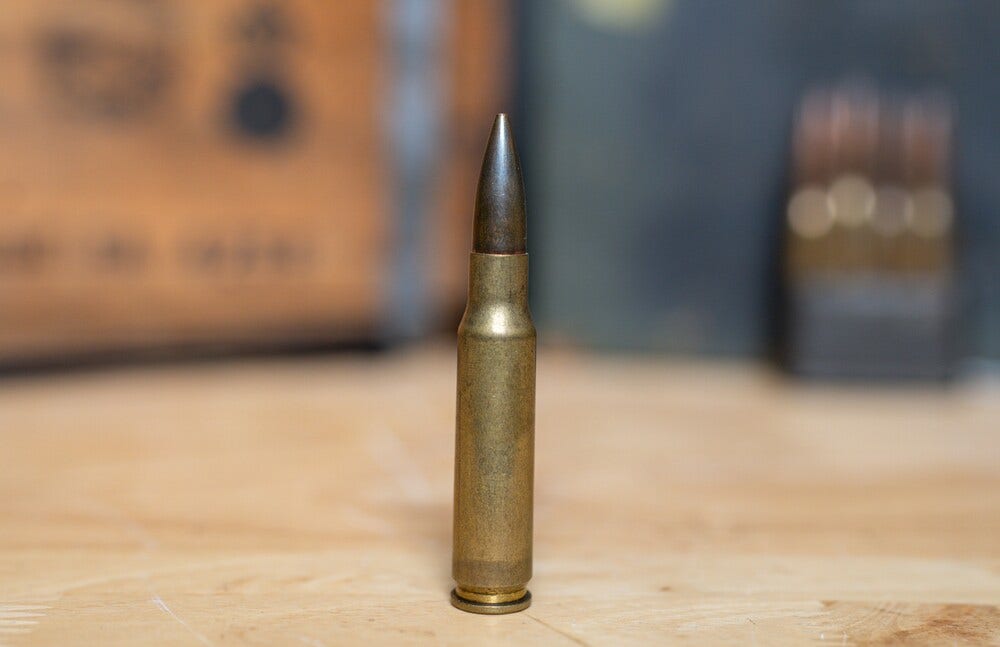
The U.S. military drove the development of both cartridges, but the similarities—other than the mandatory bullet, case, propellant and primer—pretty much end there in a .45-70 Gov’t vs. .308 Win. comparison. The former is one of the oldest designs still in commercial production, with good reason. The other isn’t exactly a youngster, celebrating its 70th birthday this year, but it’s still serves with honor with our armed forces across the globe in its lower-pressure 7.62 NATO iteration.
The secret to their longevity is enviable performance, but in vastly different applications. They rarely, if ever, shine in the same duties. A look at their numbers tells the tale.
The U.S. Army adopted the .45-70 Gov’t in 1873, three years before Gen. Custer’s ill-fated last stand. The military requirements it met prior to approval included 4-inch groups at 100 yards.
Today groups that wide are almost unheard of, even from abused rifles. It was a different time, though, the original cartridges used blackpowder for propellant and gun making wasn’t as precise. Bullet manufacturing was far from scientific, too.
The official designation at introduction was .45-70-450, with the middle number reflecting powder charge and the last indicating bullet weight. Subsequent testing indicated heavier projectiles increased effective range, so in 1879 (too late for the 7th Cavalry, not that it would have helped) the .45-70-500 became standard issue. The military put an end to the cartridge’s 19-year run in 1892 when it adopted the .30-40 Krag, although rifles in the older chambering continued use for some time.
Combine modern smokeless powder, improved projectiles and CNC-produced rifles and one-inch groups at 100 yards are no longer unicorn rare with the cartridge. At long-distance, however, the trajectory and energy still fall in dramatic fashion.
The .45-70 Gov’t term is shorthand for .45-70 Government, but there are other labels. Some call it the .45-70 Springfield (for the first rifle chambered for it) or simply .45-70. Hornady includes it in a parenthetical listing as the 1895 Marlin.
It’s earned a variety of names, likely a byproduct of age., but the same can’t be said for the .308 Win.
.308 Win.
Members of the North Atlantic Treaty Organization officially adopted the 7.62 NATO cartridge in 1954, two years after Winchester introduced the .308 Win. to civilians. The pair are virtually identical, although the former’s slightly lower pressure allows it to run safely in either chambering—.308 Win. ammo, on the other hand, is not ideal for guns chambered for 7.62 NATO.
Accuracy from the cartridge is almost legendary. It’s used in long-distance competition to this day and favored by some of the world’s best precision shooters. The records it set were staggering, although many—likely all soon—are being eclipsed by a new slew of .300 and .338 Magnums, .50 BMGs and others.
Its ageless versatility took the spotlight, however, during the global war on terrorism, when operations began in Afghanistan. Engagements there were often ridgeline to ridgeline, out of the effective range of the standard-issue M4 and 5.56 NATO cartridge. Expensive precision rifles designed for serious long distance aren’t widely available, so armorers came up with an innovative solution.
M14s chambered for 7.62 NATO mothballed for decades were retrofitted with modern furniture. Issued to designated marksmen within platoons they could stretch the distance and neutralize insurgent snipers who, until then, could rain deadly fire on platoons largely unencumbered.
That’s just the primary advantage of the .308 Win. and its 7.62 NATO fraternal twin. Despite the slight and virtually undetectable physical different, both are predictable in flight and deliver fight-stopping energy at distance.
For that reason, and the fact it can run in every firearm design, the .308 Win. is often claimed to be the most popular hunting cartridge in the United States. The short-action cartridge gained a whole new generation of enthusiasts with its uncompromising performance in AR-10s.
Ballistics
Velocity and Energy
The .40-70 Gov’t bullet has a diameter of .458 inch and the projectiles loaded in today’s cartridges are, in most cases, heavy enough to put big game down with one-shot authority—with proper shot placement at moderate distance. Federal Premium’s 300-grain Trophy Bonded Bear Claw load is one of the heavyweights availably today, but it helps illustrate the dramatic ballistic difference for a .45-70 Gov’t vs. .308 Win. comparison.
The bullet leaves Federal’s test barrel at 1,850 fps. The sheer mass of that projectile, however, means it is carrying 2,280 ft.-lbs. of energy at the muzzle.
The .308 Win. has a bullet diameter of .308 inch. Federal Premium’s 180-grain Trophy Bonded load in the cartridge exits the gun at 2,620 fps with 2,743 ft.-lbs. of energy—the winner by a wide margin. At 300 yards it has slowed down to 2,277 fps but still manages to have 1,789 ft.-lbs. of knockdown power. At that point, the above .45-70 Gov’t load’s figure drops to only 797, roughly half.
Even with lighter bullets in the .45-70 Gov’t the drop-off is dramatic. Hornady’s LEVERevolution line includes a 250-grain load that manages 2,025 fps leaving the barrel with 2,276 ft.-lbs. of energy. Despite the higher initial speed, its energy figure still plummets to 636 at 300 yards. At 200, if you’re wondering, it’s 918.
The figures may leave some wondering why the cartridge has survived for nearly 150 years. Its secret lives inside somewhere inside 150 yards, where most hunters in the United States take their big game. It’s there that the energy is sufficient and, when combined with the wider bullet diameter, it’s a combination that fills tags. It really shines for big game up close—tough ones, like American bison and big bears.
At 100 yards the Federal .45-70 Gov’t load carries a 1,569 ft.-lb. punch. Hornady’s lighter bullet delivers 1,450. Add modern bullet design and both hit with tag-filling authority.
Legacy
It also oozes nostalgia. The single-shot Springfield Trapdoor rifles carried by Gen. Armstrong Custer’s troopers at the Little Bighorn were chambered in .45-70-Gov’t. The bullets their cartridges wore weighed an even more formidable 405 grains.
Its design, however, precludes use in semi-automatic firearms. The profile is even a challenge when it comes to bolt-action rifles. Not many exist and their scarcity makes them popular among collectors.
The .308 Win., however, lends itself to reliable feeding and extraction in every method of operation. It’s available in semi-automatics, like the AR-10, bolt actions, single shots and even lever actions.
.45-70 vs. .308 Exterior Ballistics
The .308 Win. also has a flatter trajectory. Zeroed at 100 yards, the Federal 300-grain .45-70 Gov’t bullet drops 13.4 inches at 200 yards and more than four feet at 300. The company’s 180-grain .308 Win. load, with the same zero drops 3.4 inches at 200 yards and 15.4 inches at 300. The difference is huge and widens with distance.
Add a 10-mph full value wind and the .308 drifts 6.9 inches at 300 yards. At that distance, in the same breeze, the company’s .45-70 Gov’t load has moves more than two feet. Doping the wind is not an endeavor easily done by a novice, and a challenge for most experienced enthusiasts.
Any discussion of a cartridge’s potential accuracy is dubious, at best. There’s no doubt today’s cutting-edge CNC gun manufacturing has tightened groups in every firearm, regardless of chambering. One-hole groups are possible with either cartridge, in the right conditions. The exterior ballistics, however, make it obvious that the .458-inch diameter projectile requires a skilled marksman behind the trigger and quality ammo.
As a result, the .45=70 Gov’t has a relatively reputation for being inaccurate. Its origins as an early military cartridge laid that foundation.
Which One is Best?
Deciding which cartridge is best always comes down to individual preference and application. The .45-70 Gov’t is big, heavy and hits with undeniable authority at medium distance. With proper shot placement it will usually convince a big bear that its charge wasn’t such a good idea. It falls off quickly when things get long, although those lever-actions or single-shots are a blast from the past. They also add challenge to many favorite pursuits.
There’s a virtually unlimited number of firearms chambered for .308 Win. Regardless of what it’s in, the cartridge performs, is usually less expensive, much easier to find in the store, and if you’re going to stretch the distance wins by a wide margin. It’s businesslike and precise.
You can’t go wrong with either cartridge, but it’s a rare knowledgeable gun owner who doesn’t have at least one .308 Win. in their gun safe—and there’s good reason for that fact.
")
")
")
")
")


 The first step is to remove the wings from the turkey at the ball joint where the wing attaches to the body. The wing must be deboned to save the humerus, radius and ulna. These three bones need to be scraped clean of all the meat and cartilage that can be reached with a knife. When finished with step one, you should have three bones separated from each other and somewhat clean.