When most people think of slingshots, their heads are probably filled with images of cartoon trouble-makers ala Bart Simpson and Dennis the Menace. And while slingshots can certainly be used for the purposes of making mischief, they were not originally intended for that purpose. Rather, they’re a relatively modern reinterpretation of a much older tool: the sling (like the one used by David against Goliath in the biblical story). And that device, like its modern counterpart, was actually widely utilized for the purposes of hunting and survival.
You might think that, in this day and age, slingshots are all but obsolete — what with guns, bows and arrows, crossbows, etc. But we’d suggest looking at it a different way: using a slingshot is a way of developing better hand-eye coordination, they’re less intrusive and dangerous than firearms, they’re a good deal more approachable from a budgetary standpoint than any of the aforementioned alternatives, and more. If that sounds like something you might be interested in, you’ll definitely want to check out the following guide covering the best slingshots for survival.
Why Carry A Slingshot?
Slingshots as we know them are a relatively modern invention, dating back to just the mid-1800s — a result of the fact that Charles Goodyear invented vulcanized rubber in 1839 and patented the technology in 1844, which slingshots depend upon for their elastic, springy bands. And while they’re typically portrayed in media as the tools of troublemakers, they actually offer quite a lot of genuine value in the hands of a skilled user. We’ve mentioned a few benefits already, but we’d like to take a moment to outline them more in-depth and touch on a few others to better help you understand why you might want a slingshot for survival usage. The following are just some of the reasons you should pick up a slingshot:
Budget-Friendliness: Especially when compared to lethal firearms, slingshots are extremely budget-friendly — both in regards to the initial investment but also in regards to replenishing ammunition (rounds are much more pricey than BBs). In earnest, even the most high-end of slingshots can be purchased for a relatively reasonable price, especially when compared to the alternatives.
Hand-Eye Coordination Development: Target shooting of any kind requires a measure of hand-eye coordination to be done right, but utilizing a slingshot can take even more skill and can help you better develop said skill. Not only does a user need to be able to properly aim to send their ammunition in the right direction, but they’ll also need to properly judge distance, wind resistance, and numerous other factors — much like firing a bow and arrow, but with far less of a monetary investment.
Packability & Portability: The only other projectile weapon that even comes close to the packability and portability of a slingshot is probably a handgun. And, even then, handguns tend to be far heavier, as is their accompanying ammunition. By contrast, there are slingshots (worthy ones) that are small and slender enough to stash in the pocket of your jeans. When it comes to packability and portability, slingshots are tough to beat.
Unobtrusiveness: This ties in closely to the above metric, but we’re including it because it isn’t exactly the same thing. You see, thanks to the fact that slingshots are so compact, they’re also relatively lightweight and easy to use for people of all ages and skill levels. Yes, a professional with years of experience is going to be able to do things a beginner couldn’t fathom, but the learning curve for proficiency is shortened thanks to the manageability of the hardware. Put simply: firing a slingshot is easy to learn but difficult to master.
Marksman Laserhawk III Slingshot
Best Budget Pick: For just a few dollars more than the above option, the Marksman Laserhawk III has some significant upgrades (and one downgrade). These include (but are not limited to) a fully adjustable yoke, a band that’s good for shooting distances of up to 250 yards, and an extremely low weight. As mentioned, there is one downside: this one does not collapse for easier pocketing. Still, if you’re serious about taking your slingshot skills to the next level, this is a superb place to start.
Barnett 16043 Cobra Slingshot
Best with Sight: There is no shame in utilizing training aids, especially when it comes to developing skills that might come in handy in a survival situation. For that reason, we’re fond of the Barnett 16043 Cobra Slingshot. With its metal frame, extended wrist brace, contoured Soft Touch grip, and powerful band, this is an excellent budget-friendly slingshot. But its biggest benefit comes from the included front-end sight, which makes aiming this slingshot even easier and will help you develop your hand-eye coordination faster, especially for beginners.
Hella Flip Folding Slingshot
Best for Travel: The San Francisco-based crew at Hella Slingshots only knows one thing – and that’s how to build a solid slingshot. And, they do so at an affordable price point. Built from a combination of steel and plastic, this slingshot includes a stabilization arm that can fold down for easier transport and comes with a powerful, stretchy band and a faux-leather pouch. As a starter “wrist rocket” style slingshot, this one is an extremely solid buy.
SimpleShot Axiom Ocularis Slingshot
Best for Hiking: As mentioned, there are slingshots on the market that are both high-end and highly compact/portable. The SimpleShot Axiom Ocularis is one such slingshot, measuring up at just 6″ in total height and 2.2oz in total weight. This also happens to be a recreation of SimpleShot founder Nathan Masters’ personal Axiom Ocularis model — which should lend credence to its overall value. Furthermore, it’s built from an injection-molded proprietary thermoplastic material offering “unmatched strength and reliability.” And it can be customized to accept flat bands, tubes, and looped tubes — letting you customize it to your shooting style.
SimpleShot Scout LT Slingshot
Best Small Option: SimpleShot’s Scout XT was one of the brand’s most popular and successful models. But that doesn’t mean there wasn’t room for improvement. Enter the SimpleShot Scout LT you see here, the result of years of work and listening to customer input. This sling is just as capable as its larger counterpart, but measures up at just 5″ in height — making it one of the smallest, best slingshot options available. And since it comes offered with 25 color combinations (five different frames and five different scales), it’s also exceedingly customizable.
Pocket Shot Survival Kit
Best All-in-One Kit: By a wide margin, the Pocket Shot is the most unique and compact slingshot on our list — utilizing a circular frame with a pocket-style pouch that, together, can offer better consistency regarding speed, accuracy, and a shorter learning curve than any other slingshot on our list. But this particular kit is even better, as it actually includes a number of other survival tools, including a fishing line, a saw, a compass, and even a storage tin in which you can store it all. Of course, if you want your pocket shot with a more traditional-style handle, the brand actually offers those, too.
Marksman Pocket Hunter Slingshot
Best for Practicing Your Aim: You can try to fire an arrow with any of the slingshots on this list, but you’ll probably not be very successful. By contrast, however, the Marksman Pocket Hunter Slingshot was actually made specifically with this purpose in mind, marked by a pocket with a paracord pull tab, making it a far superior alternative. In fact, the sale actually includes a 31″ carbon arrow. Whether you’re a seasoned archer seeking out hardware that’s a bit more compact or you’re looking to make the transition into learning how to fire a bow and arrow, this is the slingshot for you.
TOPS Knives Sling
Best Overall: Though the investment comes with a significant jump in price, the overall quality and craftsmanship of the TOPS Sling are more than worth the extra scratch for those serious about their slingshots. After all, it was crafted here in the USA using rugged 1095 carbon steel, which is paired with black canvas Micarta for the handle scales, a top-grain leather pouch, and a powerful band. If you’re the type that had wooden slingshots as a child and you’re looking to recapture those glory days with something a bit more rugged and refined, you definitely can’t go wrong here.
This review focuses on tinder that’s appropriate to keep in a portable kit, such as your go-bag, EDC, or vehicle. They work just fine for home supplies too, but there are a few larger products — such as standard “fireplace starter logs” — that you can add when you have more storage space.
The easiest thing to do is buy an off-the-shelf tinder, practice with it, then throw it in your bags and you’re done.
But this is a category where it’s relatively easy to make your own tinder and save some money. If you’re so inclined, those DIY options are covered below, too.
Igniter reviews:
Lighters
Matches
Ferro rods / fire steels
Tinder summary:
Everyone should have tinder in their primary go-bag — even if you’re comfortable sourcing natural tinder in the field (you might not be able to when you need it!) There’s not much point in carrying an ignition source if you can’t actually turn it into a fire.
Most types of tinder are either a fiber (eg. cotton) or petroleum-based fuel.
You can make tinder at home, and they usually work fine, but the safest and easiest way to prep is to buy an off-the-shelf product. DIY instructions are down the page.
Mix multiple types of tinder so you can cover a wider range of conditions. A common combo is mostly the smaller fiber-based tinder with a few larger fuel cubes to handle harsh conditions.
Good tinder lasts for at least 1-2 minutes and still works when damp.
Remember to practice!
The best overall choice (and what many of us carry in our go-bags) are TinderQuik Firestarting Tabs. This popular product comes as no surprise to experienced bushcrafters and preppers. TinderQuik tabs are waterproof cotton that’s been condensed into a small package. To use, you simply break a tab apart with your fingers, making it fluffy and ready to catch a spark. Works well with all major ignitors.
At roughly $13 for a 50 pack, that’s $0.25 per fire. They’re small and light enough that you could carry all 50, although we generally recommend carrying at least 10-20 in the bug out bag checklist. 20 tabs only weigh around 0.5 ounces. TinderQuik tabs will last a minimum of 5 years, though if stored at room temperature can last a lot longer.
Fuel cubes, like the SOL All-Weather Fire Cube, can be a worthy upgrade when you need a very hot starter flame or expect to be dealing with conditions that make fires difficult (eg. you’re in a permanently-damp part of the world.) Roughly $0.60 per fire, or 2-3 times the cost per fire of the basic fibrous/cotton options. Burns for up to 12 minutes at a whopping 1,300 degrees Fahrenheit — perfect for drying out the wet kindling you’re trying to ignite or for directly heating a small stove or canteen to boil water. The cubes are individually wrapped, and weigh .2 ounces which makes it easy to throw one or three in your kit as a backup for your main tabs. We chose the SOL cubes over similar competitor UST Wetfire because the SOL burns twice as long, and unlike Coughlin’s Solid Fuel, tabs are individually wrapped.
If you like the idea of a larger product that you can cut down to size for each need, check out the Fat Rope Stick, a 6” long by 1.5” diameter tube of cotton rope that has been impregnated with a proprietary wax. The wax makes it waterproof and works as an accelerant. They’re pricey at around $17 for two ropes. If you use a common 0.5 inch per fire, that’s roughly $0.70 per fire. Lasts indefinitely when unopened and stored properly, with a claimed life of five years after the package is opened.
Paracord is already a universal staple used by almost every survival expert we know. Some fancier paracord comes with waxed-jute tinder wrapped inside the multi-stranded cordage — so you use it as plain cordage until you need to make an emergency fire, at which point you split open the cord and pluck out the tinder.
Although we don’t recommend relying on this as your primary tinder, UST’s ParaTinder 550 Utility Cord is one of the products we tested in the paracord review that has such a feature and stood up to our field abuse. So if you want to build in some extra redundancy by combining products / backups, the more expensive cordage is worth a look.
What is tinder and why you need it for fire starting
The easiest way to convince someone of the value of tinder is to ask them to make a fire by holding a match to a log. The match will die before the log ignites 99% of the time.
That’s why people use tinder and kindling as smaller intermediate steps, working their way from a single spark to a roaring flame. Which means the role of tinder is to catch the spark created by your ignitor, ignite quickly, and hold that flame until the kindling catches fire. Think of tinder like the toddler phase of a fire.
Remember the fire triangle:
That’s why tinder (when it’s ready to use) often looks more like a frayed bird’s nest or those hairballs that hide under your bed than a solid chunk of something — each of those little fibers has great exposure to oxygen and can easily “catch” a spark. Most tinder that isn’t frayed or fibrous overcomes that limitation with the help of combustible chemicals (usually petroleum based).
Types of tinder
Humans have used all sorts of stuff for tinder since the discovery of fire. Bark, grass, plants, sap, wood shaving, fungi, dried poop, old bread, and tax returns all work fine — even Doritos and crayons work!
Modern tech has made it easier to carry the most efficient tinder in the smallest, lightest, and/or cheapest package. Most tinder falls into these categories:
Cordage and fiber
Fuel blocks
Metals
Natural biofuels (eg. fatwood)
Cordage and fibers
Fibrous material like cotton balls, cotton rope, char cloth, paracord, hemp rope, and jute twine can all be used as tinder. They’re often coated with a water-resistant and combustion-accelerant material, such as wax or petroleum distillates, which makes them more effective in harsh conditions.
Products in this category typically burn for 1-2 minutes, are lightweight, easy to carry, easy to make, commercially available, and claim a shelf life of five years (although it’s likely longer).
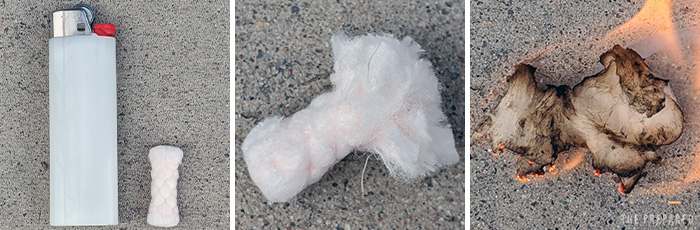
The tab starts small and condensed. Break it up with your fingers, then light.
It’s common to find these products compressed down for packaging and carrying. The TinderQuik tabs, for example, need to be broken up with your fingertips to turn the condensed cotton into that frayed bird’s nest with more volume and oxygen around the fibers.
Some of the top products in this category:
Baddest Bee Fire Fuse
Black Beard Fire
Fat Rope Stick
Live Fire Original
Pyro Putty
TinderQuick
UST ParaTinder 550 Utility Cord
Titan SurvivorCord
Live Fire Gear 550 FireCord
Solid fuel cubes
Individually-wrapped cubes composed of trioxane, hexamine, paraffin wax, and other petroleum distillates.
Some are small and intended to be used as short-term tinder, while others like the Esbit Fuel Tabs can be used as an all-in-one that both catches a spark easily and then burns long enough to be used as a main fuel source — for example, to sit underneath a small camp stove to boil water.
Depending on the size, average tinder cubes will burn for up to five minutes — that extra burn time might make a crucial difference when dealing with wet kindling. They can be extinguished and reused. Solid fuel cubes have a shelf life of 5 years, but during our research, we came across numerous stories of people lighting 20-year-old hexamine bars with no problems.
Top examples:
Coughlin’s Solid Fuel Tabs
Esbit Fuel Tabs
SOL All Weather Fire Cubes
UST Wetfire
Metals
Magnesium, which creates a short and intense flame, is best used when it is shaved on to natural tinder such as grass, leaves, down feathers, pine needles, and bark. Although it may look like a big chunky block of metal, magnesium tinder is deceptively lightweight. Magnesium can be purchased in blocks which can be shaved over natural tinder, or bags of magnesium shavings.
Magnesium is a component in ferrocerium (the alloy used in ferro rods) and often found in hybrid products that combine the ferro rod (ignitor) and magnesium (tinder). The Fire-Fast Trekker is an example that we use and like.
Steel wool (superfine #0000) can also be used as tinder, and like magnesium, it doesn’t burn very long and is best used to complement paper or natural tinder, especially in damp environments.
How can steel burn? Because steel wool is composed of thin carbon steel strands with a lot of surface exposure to oxygen, it only takes a little energy in the form of heat to start an uncontrolled combustion reaction. Energy from a match, ferro spark, or electric current is enough to ignite the steel wool.
Many survivalists will keep a handful of superfine #0000 steel wool and a 9-volt battery in their fire supplies. Merely pressing the battery terminals to the steel wool will ignite the bundle. If you choose to keep steel wool, secure the battery so the terminals are not exposed and be mindful of electricity sources.
Other metallic tinders:
Trolley Shop Magnesium Rod 5-Pack
Hilitand Magnesium Rod
Jets emergency fire starter magnesium bags
Red Devil 0320 steel wool (super fine)
Homax Steel Wool (super fine)
Pandora Steel Wool (super fine)
Natural tinder
Any dry organic material technically qualifies as “natural” tinder, but in practice people usually focus on specific types like fatwood and bagasse.
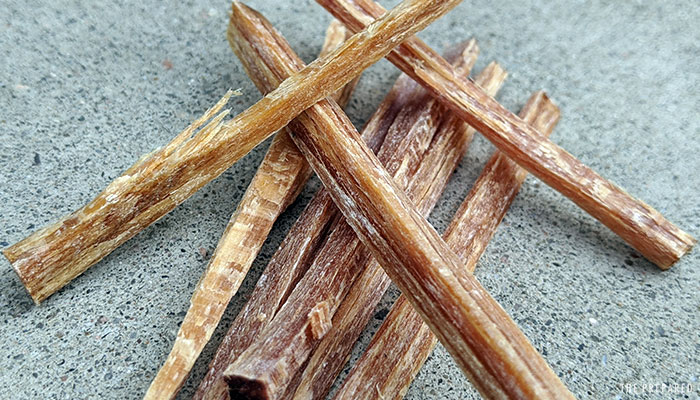
Fatwood, also known as pine knot or rich pine, comes from the stump or heartwood of pine trees. Those trees produce sap, which courses its way through the interior structure of the tree. When the tree ages or dies, evaporation turns that sticky sap into a harder — and very flammable — resin.
You can find fatwood in nature, make it yourself (kind of), or buy it off the shelf. DIY details below, but the punchline is that “forced” fatwood is wood with more of a coating, rather than the natural fatwood that was internally impregnated with the resin.
Bagasse in UCO Sweetfire Fire Starter
Bagasse is a dry, fibrous pulp biofuel that’s left over after sorghum and sugarcane have been processed for their main juices. Bagasse is combined with a wax and formed into individual blocks. Bagasse is a common product in the United States and can be found at any big box store like Walmart. It is also common in outdoor or sporting good stores.
Top products:
Coughlin’s Fire Sticks
Light My Fire Mayadust
Light My Fire Tinder-on-a-Rope
PBL Fatwood
Plow & Hearth Fatwood Fire Starter
UCO Sweetfire Fire Starter Tinder
DIY: How to make homemade tinder
The possibilities are endless — especially when you’re improvising in the field in the moment you need a fire — but there are a few common recommendations for DIY tinder that you can make and store ahead of time for portable kits.
Common stuff you’d find around the house or neighborhood
Pros: Free and easy! Cons: Often don’t work as well as proper tinder products. Dry out and compress any of these into a small container and you’re good to go:
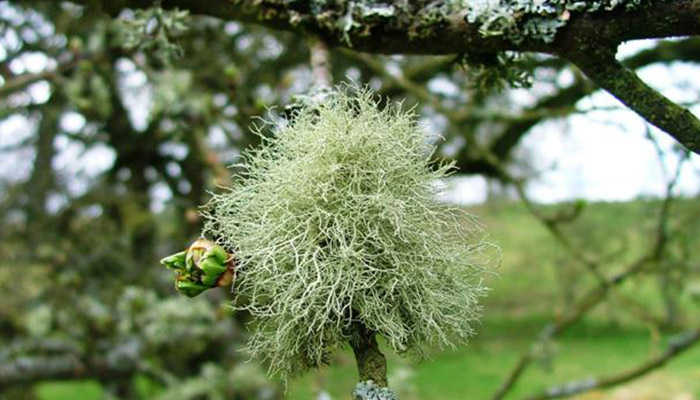
Old Man’s Beard, formally known as Usnea, a type of lichen
Old Man’s Beard and similar moss that’s fluffy and flammable (when dry)
Cedar or Juniper bark. Common in the United States. Shave it or fluff it up for an awesome natural tinder
Dryer lint — from cotton clothing is awesome. Lint from other clothing sources such as wool, microfiber and polypropylene may smolder, so not a great option, but it works
Used wet wipes that have dried out
Biofuels found around your yard, such as dry trimmings
Newspaper, printer paper, junk mail… any kind of paper that doesn’t have a slick/glossy coating (eg. a magazine)
Cotton balls and paraffin wax or petroleum jelly
Both popular options create a waterproof tinder that works well in the field. Using paraffin is a more involved process, but it’s a little less sloppy, and you avoid the problem of jelly-coatings becoming more fluid in the heat. If you use jelly, try to store the coated balls in a waterproof container (eg. a ziploc bag) so that the viscous jelly doesn’t ruin other stuff.
Jelly:
All you need is a 100% pure cotton ball and normal petroleum jelly, like what you find in the pharmacy.
Simply coat a cotton ball in the jelly using your fingers or anything similar. You only need to cover the surface, no need to try and work it deep into the fibers. (You want some internal dry fibers anyway.)
Paraffin:
Buy Gulf Wax (the most common brand, but anything similar works fine) from your local supermarket. It is commonly found in the canning section.
Melt the wax in a double boiler. A double boiler setup is where you take a pot and fill it halfway with some water. Turn your burner on medium heat. Take another pot, preferably an old one, place your wax inside the pot, and set it on your first pot. The steam in your first pot will heat up the second pot, and melt the wax.
Once the wax is melted, turn off your heat source, and stir in your cotton balls.
When the balls are coated, use tongs to remove and place on parchment paper or similar.
Let cool.
Fire rope: natural cordage (eg. rope, hemp, jute) and paraffin
Similar concept to the cotton balls:
Use a natural cord, such as a cotton rope. Be mindful that some cordage already has fire retardant built in for safety, which you obviously want to avoid.
Cut the length you’d like to store. Some people like to make one long rope they cut down in the field before each fire, while others like to pre-cut.
Melt paraffin wax in a double boiler.
Gently swirl in the cord until it’s coated.
Remove, hang or place on parchment paper, let cool.
Fatwood (sort of)
Real fatwood is hard to fake because it takes years for the natural process of impregnation and evaporation to work. DIY methods like this essentially make waterproof kindling, less so a pure fatwood tinder.
Source a piece of pine, and using your favorite hatchet, cut the pine into small strips.
Using your double boiler, melt some paraffin wax or natural tree sap.
Place the small pieces of pine in the melted wax, and stir them around so they are evenly coated. When coated, remove with some tongs and set aside to cool.
In the world of air gun shooting, there is much debate surrounding the best way to hold a springer. Many shooters will tell you that there is only one way to do it, but the truth is that there are many different ways to hold a springer that can lead to successful shooting. One method that has been gaining popularity in recent years is the artillery hold. So, what is an artillery hold? Let’s take a closer look.
History of Artillery Hold
The term “artillery hold” was first coined by American airgun writer Tom Gaylord. Gaylord observed that many artillery pieces remain accurate even after recoil, and he began to experiment with different grip techniques to see if he could replicate this success with a Beeman C1 air rifle. After some trial and error, Gaylord found that loosening his grip on the rifle resulted in tighter groups. He dubbed this technique the “artillery hold” and it has since been adopted by many shooters looking for an edge on the competition.
Basically, the artillery hold is just a loose hold. Instead of gripping the forestock, simply lay it in your open palm at the point where the rifle is balanced. Grip the buttstock as lightly as possible and lay your thumb along the top of the stock instead of around it. The buttstock should rest against your cheek and shoulder as gently as possible.
Benefits of Artillery Hold
So, what are the benefits of using an artillery hold? First and foremost, it helps to reduce muzzle rise after each shot. This allows for faster target acquisition and increased accuracy, as you are not having to fight the natural tendency of the rifle to want to move up after each shot. Additionally, an artillery hold can help to keep your shots consistent, as any variability in grip will be negated by the fact that your hand is not tightly gripping the stock.
If you are looking to improve your shooting skills, then we highly recommend giving the artillery hold a try. It may take some practice to get used to, but you’ll be impressed with the results.
Successful hunting sessions usually require you to bear the stiff North winds or endure the thick fog while paying attention to your goose spread.
The last part plays a quintessential role during any hunting expedition, and the lack of decoy placement knowledge can result in frustrating failed hunting attempts, especially if you are a novice hunter.
To bag multiple geese, hunters must utilize their hunting ground smartly while creating a foolproof strategy.
In this article, we shall peer into five of the most acknowledged decoy spreads for a successful hunting expedition.
5 Best Goose Decoy Spread With Corresponding Diagrams
The following are five of the best goose decoy spreads with matching diagrams to quickly understand the spread’s structure.
We highly recommend trying all five at multiple expeditions while gauging the season, terrain, and topography of the hunting ground.
#1 Classic U-Shaped Decoy Spread
The U-shaped decoy spread is the most classic and loved spread across the United States. The main shape of the setup alongside the decoy resembles a beautiful U, giving it the corresponding name.
Its U shape helps funnel the geese directly into the middle of this design, which falls in front of the shooters.
You can alter the blind placement according to the weather and climatic conditions, but ideally, a center U blind position can funnel all the geese near the shooter.
Hunters can usually benefit greatly when the blinds are placed in the far front area or apex of the spread during strong winds. Similarly, you can place the blinds at the back of your spread design, giving birds ample time to lower their height from the ground.
We highly recommend this position when you go on a group hunting trip.
Always remember that the wind’s strength dictates your blind placement; stronger winds are ideal for upfront blinds, while low wind conditions are preferable for further back blinds.
Also, ensure that you are hiding all the blinds properly by packing multiple decoys around them. We recommend following a random decoy placement pattern instead of a 2-2 ft measured gap.
A little random spread gives a natural look that can fool and lure the geese easily.
#2 Cross Wind + Sideways U Decoy Spread
Understanding the bird’s instincts and habits shall help you hunt better regardless of the season or hunting location. You will also need your best-looking geese for this specific decoy spread, as it is highly focused on the birds’ instincts.
This decoy is a sideways U decoy mostly used when encountered by crosswinds. Remember that hunters need to bring all their baits for this spread and ensure they look natural to perform effectively.
Start placing most of the decoys around the blinds so the spot is relatively hidden. Content decoys can be equally effective when placed nearest to the blinds.
Also, it is known that geese prefer to land in the middle of a group, so using their habit for our benefit can help hunters lure the bird better.
To do that, you can place four to five active geese in the middle of the zone. Try to use your best-looking geese for this action, and it shall be your staple spread during late-season hunting every year.
#3 The Double V Decoy Spread
Our third decoy spread is the double V design that works exceptionally well in water setup for puddle birds. Another fascinating positive of this spread is its ability to attract multiple primary, secondary, and even oddball duck species.
However, hunters must understand how to lure these geese and other birds.
You can start setting your first V slightly upwards where the wind is supposedly blowing parallel to the river/pond bank. For your second set of V, arrange the decoys behind the first V at a safe distance.
We suggest opting for a reasonable 10-20 yards distance between the first and the second V.
To make the spread more natural and attract small flocks or singles, consider placing single decoys between the V at regular intervals.
Furthermore, to increase the chances of attracting more birds, create secondary decoy spreads near the blind, especially between the gap of both the Vs.
Hunters must remember that puddle ducks habitually land behind the V decoy shape instead of landing in front like most divers.
On the other hand, southern waterfowl hunters hunting in November usually have great success with this spread using a mix of green-winged teal and mallards. Even black ducks, gadwalls, and pintails work well in the location.
#4 X Decoy Spread
X decoy setup is one of the most exciting decoy spreads and usually requires a lot of space for proper execution. The blinds are always positioned in the center of the X as the decoy geese extend in four corners.
That positioning is excellent and highly lucrative with little to no wind.
Additionally, this spread is ideal for hunters who want the benefit of shooting from all directions based on the bird’s landing. If you like the freedom to attack from all directions, this X decoy spread will surely be your staple design for future hunts.
Geese, like other birds, enjoy the safety of multiple birds in one place, but fortunately, this decoy is designed to give hunters ample void spaces for the geese to get drawn into. So, when talking about X spread, hunters get four voids covering all directions.
Shooters can begin hunting as soon as they spot the first group coming towards the spread. You can either consider shooting them overhead or allow them to land and then reposition to shoot for the entire day.
X decoy spread requires double the number of the decoy compared to standard or regular setups. However, hunters usually prefer this spread during the late-hunting season with a strong strategy while using their best-looking baits.
Additionally, this spread allows shooters to utilize the decoys collected for the past few seasons. Lastly, try to mud the blinds and brush them to blend well; it can make a lot of difference.
#5 The Crop Circle Decoy Spread
This crop circle decoy setup works flawlessly even during variable and light winds. Harvested grain fields look attractive enough that geese and ducks tend to come down in any direction.
Furthermore, the circle spread allows the ducks to be in the front, making shooting them far easier. .
To create the most authentic crop circle decoy setup, you need to set up a small flock in a circle with an individual decoy in the center of the ring. The geese then target the inside edge of the ring or directly aim at the center decoy.
The most common and successful decoy has to be the mallards; however, even gadwalls, pintails, and other species can entice the geese.
Furthermore, if you spot Canadian geese near your hunting ground, consider setting up a tiny group of goose decoys far from your main circle spread. Those secondary decoys will surely provide a bonus opportunity when you miss out during the crop circle.
How Many Decoys Should I Bring To Hunt Geese?
It varies from one hunter to another. Some people suggest a modest number, while others will spurt an astonishing number of decoys. However, in our experience, we can tell that even a setup of 15-20 decoys shall work in your favor, provided you know what you’re doing.
Similarly, if you wish to opt for more baits, consider sketching our setups that work well with hundreds of lures. The X decoy spread is one such setup that works efficiently with hundreds of lures.
Apart from personal preference and spread selection, three main factors influence the number of your spread:
Hunting Season
As a general rule of thumb, hunters need to increase or decrease their number of decoys based on the season and its progression. That is mainly necessary because as time progresses, so does the size of the flocks due to migration.
Another remarkable observation passed on for centuries is the geese’s preference. Usually, flocks never land towards decoy flocks smaller than the birds flying above. Thus, the bigger the congregation, the more decoys should be shelled out for the display.
Early season hunting is possible with smaller decoy spreads as the flocks are notably smaller. An average of 15-20 decoys will be sufficient for early-season hunting.
Additionally, we recommend limiting your decoy to a smaller number even if you have access to a good number of baits.
A cluster of lures in the early season can look highly unnatural. For mid-season, keep a safe number of 25- 40 decoys as you shall notice geese migrating to multiple hunting spots.
The birds will start feeling the hunting pressure from the mid-season, so to make the flocks comfortable, hunters need to arrange decoys anywhere from 25 to 40. Lastly, late-season calls for the most significant number of bait spread hunters can set.
Geese are usually in complete migration with many birds in their flocks; therefore, we recommend decoys anywhere between 50-80+.
Shooters must remember that birds feel the most hunting pressure in this period, so luring them becomes relatively challenging. You may succeed with smaller decoy setups if the area is filled with solo birds flying by.
Decoy Type
The decoy type that you will operate ends up playing a significant impact on the quantity required. The most popular decoys consist of windsock, shells, full-body, and silhouette decoys.
Hunters who often hunt with full-body decoys can get away with small spreads featuring lesser baits as the full-body ones have the most outstanding visibility amongst all decoy types.
If you are hunting Canadian geese, oversized shell decoys can undoubtedly become your best friend in the fields. However, shooters opting for silhouette decoys need a significant number of decoys for their spreads.
Since these decoys are 2-Dimensional, hunters need to use a massive number of baits facing in multiple directions.
Hunters On The Field
The decoys on the hunting field are directly proportional to the number of hunters on the ground. You might even see hunters preferring to stick to their ‘1 hunter = 2 dozen decoys’ formula. That formula is a safe bet which ensures that every hunter’s blind is well covered.
With each added hunter, the ground needs a group of decoys to hide that particular blind effectively. If hunters set up an X or V spread, then almost every shooter wants to be at the tip of the V and in the middle of the X.
At such times, to mask the uneven bumps and hunter silhouettes, you need to use a lot of decoys. That allows the hunters to have fair and better shooting opportunities as the geese approach their respective decoy spread.
Effective Goose Hunting Decoy Spread Tips
Hunters can successfully hunt even if they lack a massive collection of decoys. All they need is a foolproof strategy that works according to the season.
Ensure to leave enough void for the geese to land perfectly. Decoys that clump too close together usually discourage geese from approaching the spreads. A six to eight feet gap between each bait provides ample space for the birds to land without feeling any suspicion. However, you must place a few decoys together to show a small family grouping. That call is entirely dependent on the type of spread you have chosen in the first place. We recommend using your best judgment with acute observations for a successful trap.
Always use the wind speed and direction to your advantage. Geese are habitual to landing into the wind, so if the wind is supposedly blowing toward the west, these birds will land facing the west cutting the wind. Wind direction is crucial if you wish to bag multiple birds without losing sight of your prey.
Try to observe and replicate the behavior of the geese. While scouting for hunting grounds, consider studying the birds and their habits. Check whether they are flying solo or are always in a group. Also, kindly pay attention to their eating, resting place, feeding time, etc. Use this information to sketch an ideal spread that shall work in your favor on the day of hunting.
Conclusion
With those tips, we have come to the end of our geese decoy spread article. We highly encourage novice hunters to use our recommendations and reliable spreads for successful hunting expeditions.
Even if a spread setup doesn’t work out, opt for another while keeping track of the errors. With some consistent trial and error, you shall be able to master the art of skillful spreads.
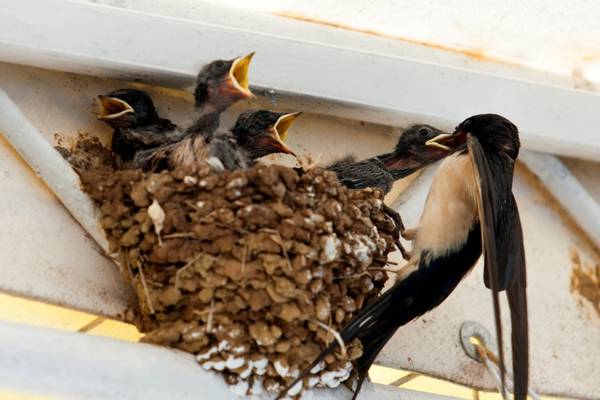
The animal world can seem a little cruel and difficult to understand at times, particularly when it comes to how different species will treat their young. You might have wondered, do birds kill their own babies?
Some birds will kill off their offspring if there are not enough food resources to go around, or if they are likely to cause harm to the rest of the brood. Baby birds can also die from neglect or abandonment, though this is rarely just because they have been touched by a human.
Read ahead in this article to find out why some birds might kill their babies, and whether humans might inadvertently make this happen by interfering with a nest.
Why Would a Mother Bird Kill Her Babies?
It is not a myth that some mother birds will kill their babies, but it is not a very common phenomenon. Birds spend a lot of time and energy caring for their young and are often among the most devoted mothers in the animal kingdom.
Almost all species are instinctively driven to survive and reproduce, so why might a mother bird choose to cause the death of her offspring? There are three main reasons why birds have been recorded as actively killing their babies.
Brood reduction: Mother birds will sometimes kill their babies because they do not have the food resources or nest conditions needed to keep their entire brood alive. Some birds may reduce their brood size so that the limited food or space they have can be given to the healthiest of their offspring, or even be kept for themselves!
Preventing the spread of infection: If a baby bird is sick with an infection that may spread to the other nestlings or the adult birds, a mother may kill the infected baby or discard them.
Reducing the breeding success of competing birds: As with many other species, birds have been known to kill the offspring of other parents that they are competing with so that their own babies are more likely to survive.
To gain attention from dominant males: A rare phenomenon in birds, but the house sparrow females are notorious for killing off other females’ offspring – partly to establish dominance!They do this especially when they replace previous mates of attractive male sparrows with large territories. Partly because they do not want to spend the energy raising other females’ nestlings, but also to demonstrate some kind of dominance over other female competitors!
Bird moms generally love their babies and would never harm them without reason! Only in rare cases where it prevents the death of themselves or their (future) offspring will a bird mom hurt their own kind.
It is actually more common for baby birds to die from neglect or abandonment than it is for them to be killed directly by their mother. These are often accidental deaths, though, as most bird species are very caring and attentive parents.
Which Bird Species Are Known to Kill Their Babies?
Infanticide is a rare occurrence in birds, but some bird species do seem to be a little less caring than others. So, who are some of the main culprits?
Eclectus Parrots
These parrots are known to kill their young if their nests are not able to support the entire brood.
Eclectus Parrots are usually loving parents, but stress or hunger may lead them to sacrifice their young males!
They usually choose to kill the youngest male sibling first so that older female nestlings will develop more quickly. They do this as they know (by instinct!) that females take less work and food to raise!
Black Eagles
Although black eagle mothers are not necessarily killers themselves, they often let their offspring kill each other without interfering.
When baby black eagles fight, they can sometimes fight to the death, and the mothers will rarely intervene. This allows the strongest of their young to survive.
Cuckoos
You’ve probably heard of the strange way that some cuckoos “care” for their young. They can lay their eggs in the nests of other birds, turning their own babies into “brood parasites”.
Cuckoos are notorious for killing other birds nestlings, but rarely kill their own!
Baby cuckoos will often kill off the offspring of the host bird so that they can be raised without competition.
House Sparrows
The males of this widespread bird species are actually known to go out of their way to hunt down and kill the babies of competing males so that their young are more likely to survive. But females will actually do the same, which is unusual for birds!
In fact, more than 10% of new house sparrow nestlings are brought up in a nest where the male (or much rarer, the female) has first killed off the offspring of the previous partner to one of the parents!
House sparrows are common backyard birds all over the world, but they do have a bizarre way of establishing dominance!
Although this behavior is almost always carried out by males in other bird species, house sparrow females are notorious for killing the nestlings of competing females!
They seemingly do this to get more attention from polygamous males and to advance in the social hierarchy.
Do storks kill their babies?
Yes! White Storks have been known to kill their babies and a 3-year-long study found that 9 out of 63 nests experienced infanticide. This means that it only happens in 14% of the nesting couples, but less often if conditions are optimal and perhaps more often if food is scarce.
Why do storks kill their babies?
Storks will kill their babies if they lay too many eggs and therefore have to care for more than they can carry. In other bird species, the nestlings would outcompete each other “naturally” and the parents would not need to intervene, but not in storks.
Stork nestlings are demanding and there are limits to what a couple can support in times of food scarcity. Sometimes it is better to end the life of a nestling early rather than compromising all the chicks.
Therefore, the stork parents will often intervene themselves to put an end to the smallest chick’s misery before it starves to death.
Will Birds Also Eat Their Own Babies?
As a biologist with a keen interest in avian behavior, I can provide insight into the intriguing topic of cannibalism in birds. While it may be unsettling to imagine, yes, there are instances where certain bird species engage in cannibalistic behaviors, including consuming their own offspring.
Although this behavior is relatively rare among birds, it has been observed in various contexts and can serve different purposes depending on the species and circumstances involved.
One important point to emphasize is that the vast majority of bird species do not exhibit cannibalistic tendencies towards their young. Parental care and nurturing instincts are deeply ingrained in most avian species, as they invest significant time and energy in rearing their offspring.
The act of killing and consuming their own young goes against the typical parental behavior observed in birds, which is geared towards ensuring the survival and well-being of their progeny.
Nevertheless, there are several factors that can contribute to instances of cannibalism in birds. These factors include food scarcity, competition for resources, stress, environmental conditions, and even genetic predispositions.
In certain cases, a parent bird may perceive their own offspring as a potential source of nutrition, especially when food availability is limited or unpredictable. By consuming their young, the parent bird gains sustenance to survive during challenging times.
In addition to nutritional benefits, cannibalism in birds can also serve other purposes. One such purpose is related to maintaining the overall fitness of the parent bird. By eliminating weaker or sickly offspring through cannibalism, the parent bird can allocate its limited resources towards raising the healthier offspring, thus increasing the chances of their survival and overall reproductive success.
This behavior, known as “culling,” ensures that the limited resources are allocated to the strongest individuals who have a higher likelihood of passing on their genes to the next generation.
It is important to note that cannibalism in birds is not limited to parents consuming their own young. In some cases, unrelated adult birds may prey upon the young of other individuals within their own species.
This type of cannibalism can occur as a result of territorial disputes, dominance hierarchies, or simply as a opportunistic feeding behavior.
Certain species of birds, such as gulls and raptors, have been observed engaging in this behavior, particularly when food resources are scarce or when defending their nesting territories.
It is crucial to understand that cannibalism in birds is not the norm, but rather an exception to the typical parental care exhibited by avian species. The majority of bird parents invest significant effort in protecting, feeding, and nurturing their young, ensuring their survival and eventual independence. Cannibalism, when it does occur, is generally a result of exceptional circumstances and environmental pressures.
In conclusion, while it may be unsettling to contemplate, cannibalism in birds, including the act of consuming their own offspring, has been observed in certain species. This behavior can be driven by factors such as food scarcity and the need to prioritize the survival of the fittest offspring.
However, it is important to remember that such behaviors are not representative of the broader avian population. Most birds exhibit remarkable parental care and strive to ensure the well-being and success of their young.
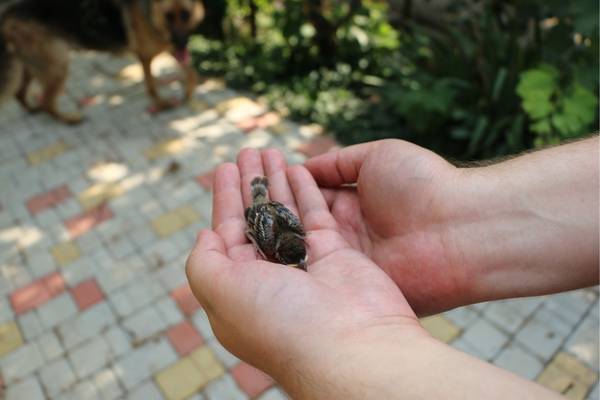
Do Birds Kill Their Babies If You Touch Them?
You’ve probably been told to leave a baby bird alone if you spot one out in the wild because its mother will kill it if it has a human smell, but is this true?
Actually, this idea is a myth, although the advice that it has produced is actually pretty sensible.
Birds will not kill their babies just because they have been touched by humans, and a human smell is not going to cause a baby to be abandoned.
The problem with touching a baby bird is that your presence is likely to scare off the parents, and the adult birds may find it difficult to locate them again.
It is a myth that a bird will abandon a nestling if you touch it, but you have to be very careful not to scare the parents when you put it back into the nest!
It’s best to leave a baby bird where you find it because you want its parents to come back, and they are more likely to do so if you’re not around.
If the birds are older at the fledgling state, the bird might not belong in the nest anymore and will take care of by the parents. In if that is the case, you should not move it or try to rescue it!
What Do Birds Do When Their Babies Die?
When baby birds do die, it can seem very sad to us, but do the adult birds become upset? What do they do when this happens? Well, it’s hard to determine exactly how much emotion birds have.
There is no scientific proof that birds will mourn or grieve, but some of their behavior does suggest a level of sadness.
For example, penguins are known to hold onto their young for a long time even after they have died, crows have been observed gathering around their dead, and magpies will sometimes place objects over the bodies of deceased birds.
No bird parent is happy when their babies die, but birds do not have feelings as humans do!
As for what actually happens when a baby bird dies, things are a little more practical. Dead bodies breed bacteria and attract predators, so they need to be removed from the nest.
The larger the baby is, the further they will be taken away. Many predatory and scavenger birds, like vultures and hawks, will even eat their young, though this does not seem to be done out of maliciousness, but simply because it is expedient.
In the end, though we may never know for sure what goes on in a bird’s mind when its young die, we can see that they do take some actions that could be interpreted as signs of sadness.
What can you do to prevent birds from killing their own babies?
You always have to be careful when trying to help birds as the reason for their behaviour can vary and you might make it worse!
Some possible reasons for bird infanticide include if the bird is sick, stressed or hungy, if the bird feels threatened, if the baby is not healthy, or if the mother bird is simply inexperienced.
If you are concerned about birds killing their own babies, you can try to provide nesting materials and a safe environment for them to nest in.
Making sure that the birds have food, shelter and nesting material will minimize the risk of infanticide.
You can also try putting out extra food for them in your yard. I have already written extensively about how to feed backyard birds in each state of the US here on the site – so just go and find the bird in question and read all about what to feed it in my posts on backyards birds!
I will put some links at the end of this post as well!
Conclusion
As much as we might not understand it, killing babies is a natural occurrence in the animal world. For birds, it usually happens when the mother bird is trying to protect her (future) offspring or ensure their success.
While it’s a myth that human touch will cause a mother bird to kill her baby, it’s best to leave them alone so as not to scare off the parents. And if a baby bird does die, the adult birds usually handle it by removing the body from the nest without measurable remorse.
FAQs
Do blue jays kill their babies?
There are many factors that can affect the behavior of blue jays. Some reports suggest that blue jays may kill their babies if they perceive a threat to their safety, while other reports indicate that blue jays are generally gentle and nurturing parents. Ultimately, it is important to remember that every animal is unique and therefore reactions to different situations will vary.
Do mourning doves kill their babies?
No, mourning doves are not known to kill their babies.
Do quails kill their babies?
There is no definitive answer to this question as different quail species exhibit different behaviors. But some species might do so.
Why do quails kill their babies?
Some quail birds will kill their own babies if they perceive them to be a threat, while others will not. It is speculated that quails may kill their babies if they are sick or deformed in some way, in order to prevent the spread of disease.
Do budgies kill their babies?
Some budgies may kill their babies if they feel threatened or if they are not getting enough food, while others may not kill their babies under any circumstances.
Do geese kill their babies?
No, geese do not kill their babies. They are herbivores and would not normally be aggressive against their young.
Do crows kill their babies?
Crows will gladly eat other bird’s eggs and babies but do rarely eat their own offspring. Some crows may kill their babies if they perceive them to be a threat to their survival during food shortage.
Do Canadian geese kill their babies?
No, geese do not kill their babies. They are herbivores and would not normally be aggressive against their young.
Do swans kill their babies?
Swans, like geese, are herbivorous birds that do not normally have a taste for meat. They have very few babies so they will not let them go to waste. And whereas they will never kill their own babies, they will sometimes kill the nestlings of competing swan couples!
Do parakeets kill their babies?
No, parakeets do not kill their babies. Parakeets are small, gentle birds that typically make great parents.
Do finches kill their babies?
No, finches do not kill their babies. They are small, seed-eating birds that typically have large clutches of eggs (6-8). The female will incubate the eggs and both parents will feed the chicks once they hatch.
They may sometimes peck them by accident and kill them unintentionally. They will then throw them out of the nest where they will day from the fall if not completely dead already.
Do zebra finches kill their babies?
Zebra finches are very similar to regular finches and do not kill their babies on purpose.
Why would zebra finches kill their babies?
Zebra finches would only kill their babies by accident and never intend to do so on purpose. Especially when held in captivity where food is usually plentiful. They may sometimes peck them on accident as they are not the most intelligent birds around!
Do chickens kill their babies?
Chickens only kill their babies if they are hurt or injured. Sometimes they will eat their own eggs if they are free-range. However, they would only do this if they could not lay another egg that day and needed to conserve their energy.Chickens are omnivorous birds, but they mostly eat plants. They will only eat meat if it is available, but they do not hunt for it.
Do cardinals kill their babies?
As cardinals have very strong family bonds, it is unlikely they would kill their babies but it is possible. Cardinals will only kill their babies if they are severely disturbed or stressed.
Do robins kill their babies?
I have never heard any reports of robins killing their babies. So at least, they are not well known to do so.
Do hawks kill their babies?
Hawks are predators and will kill baby animals for food, including other birds, but they rarely kill their own babies as they do not have large broods.
Do sparrows kill their babies?
Yes! As mentioned earlier in this post, house sparrows kill almost ten percent of their total offspring if we count across and between couples!
Do mother ducks kill their babies?
No, ducks do not kill their babies.
Ducks are among the best parents of birds!
And let’s end this post on a happy note: In fact, duck mothers are very nurturing and will often incubate other duck’s eggs and raise their chicks if given the chance!
More About Backyard birds in North America
Are you interested in how the backyard birds in your state compare to other states?
Then check out my other blog posts below:
Backyard birds of Alabama
Backyard birds of Colorado
Backyard birds of Delaware
Backyard birds of Georgia
Backyard birds of Hawaii
Backyard birds of Illinois
Backyard birds of Iowa
Backyard birds of Kentucky
Backyard birds of Louisiana
Backyard birds of Maryland
Backyard birds of Massachusetts
Backyard birds of Missouri
Backyard birds of Nebraska
Backyard birds of New York
Backyard birds of North Carolina
Backyard birds of Oklahoma
Backyard birds of Rhode Island
Backyard birds of South Carolina
Backyard birds of Tennessee
Backyard birds of Texas
Backyard birds of Virginia
Backyard birds of West Virginia
Backyard birds of Wisconsin
Backyard birds of Wyoming
And in Canada:
Backyard birds of Ontario
Backyard birds of Prince Edward Island
Backyard birds of Saskatchewan
Backyard birds of Quebec
Not on the list? Check out the rest of my posts on backyard birds here!
Maybe you would like to know if the Blue Jay or Cardinal dominates in the bird feeder hierarchy or how birds such as seagulls sleep at night? Or why mourning doves poop so much.
My Favorite Backyard Birding Gear:
If you are interested in posters and other wall arts etc. with drawings of all the backyard birds you have just read about, check out my portfolio over at Redbubble:
https://feederwatch.org/
American Museum of Natural History Birds of North America. DK; Revised edition (September 6, 2016). ISBN: 978-1465443991
National Geographic Backyard Guide to the Birds of North America, 2nd Edition. National Geographic; 2nd edition (October 15, 2019)
Birds of North America. National Audubon Society. (Knopf April 6, 2021). ISBN: 978-0525655671
I’ve always associated the plant called deer heart with my times hunting Sitka blacktail deer in Southeast Alaska high country, which is something I’ve done pretty much every August since I was a kid. It’s a small, fragile plant that consists of a single heart-shaped leaf attached to a stem that usually doesn’t grow much higher than six inches. Deer heart grows from sea level, where it’s most tender and nutritious early in the summer, to mountain tops, where it’s best to eat late in the season. Deer follow it and other vegetation up mountains as summer advances. By mid-September, when deer heart is all but dead in the high country, deer descend to lower elevations for better browsing.
Last August, during a hunt, I came upon a deer I’d shot lying on a deer heart-covered bench, with semi-pulverized pieces of the plant in its mouth. There was an ethereal slant to the evening light, the sort that illuminates subtle, hard-to-see details of the landscape. I was surrounded everywhere by deer heart, except where there were cliffs, rockfaces, and the occasional clump of stunted mountain hemlock. I am frequently caught off guard by how something as seemingly simple as shifting light can reveal in an instant how miraculous the world is. I plucked a heart-shaped leaf and stuck it in my mouth. It’s peppery, like arugula, but has an aftertaste that oscillates between good and a little strong. I’d never thought a lot about deer heart, other than using the amount of it browsed as a gauge for where to hunt deer, and to try not to slip on it when it’s raining. I looked from the fields of deer heart to the dead animal, wondering why it’s so easy to become preoccupied with certain things while being blind to so much. I thanked and apologized to the deer, then sliced my knife through the hide along the backbone from the base of the skull to the tail. I cut one side of quarters free, peeled off a backstrap and, before removing a side of ribs, severed the heart and lay it upon its namesake plant.
It was dark by the time I hung my heavy game bags from a branch of a mountain hemlock. During the night I listened as the wind made the tent shudder and bushes crackle. I thought about brown bears. I washed off the deer’s blood the best I could and peed and spat around the tent, but I still smelled “delicious.” Years before, I left a trail camera on a salmon stream that had a high number of bears fishing on it a few miles from where I was hunting. As an experiment, I peed in front of where the camera was pointed to see how animals would react. I returned a few days later and found that most of the images showed bears running away, looking terrified. A young bear even dropped the salmon it was carrying in its rush to get away. One large bear, however, behaved differently. It came during the night and, instead of fleeing, crawled like a cat toward the camera. I imagined that animal crawling toward the tent and thought about becoming meat.
At home, I organized the deer meat in trays divided by roasts, steak, and scraps I’d grind into burger. I trimmed the bones; later, I’d render broth from them. My two young sons—one a toddler and the other three and a half years old—“helped” by sawing on meat with butter knives and dropping pieces of burger meat into the grinder. I sliced a heart thin and doused it with sesame oil and Montreal steak seasoning. When it was done, we snacked as I wrapped meat in freezer paper. Some people do not like the taste or texture of heart. It’s always the first part of the animal I eat, which is in a large part because it does not freeze well. It’s also delicious and, more than that, evocative of much of what I love about life in Southeast Alaska.
Three years prior, my wife and I gave our eldest son his first solid food. We wanted our kids’ first tastes of food to be of something we loved, that came from the streams and forests where we live. First we mashed up blueberries, then we tried coho salmon. It had not gone over well. Not long after, I brought a deer home and fed our son small bits of fried heart. He devoured them.
Once we had a couple of deer, as well as a good supply of salmon in the freezer, it was time to go berry picking. When the next sunny day came, we headed to one of our favorite blueberry patches in the mountains. I carried our toddler in a backpack. As we hiked a trail to a field of deer heart, his brother demanded, and constantly added details to, a story about dragons from his mother. Though it was only the third week of August, most of the plants were showing the first signs of brown. After placing the boys on drier ground where they could play and pick berries, my wife and I set to filling our buckets.
Food gathering, whether hunting or berry picking, is probably the most meditative activity I know. For a while I picked alone, my thoughts quieting as I focused on filling my bucket. Occasionally, the boys would punch or bite each other and scream and cry. Other times they giggled as they wrestled and popped blueberries into each other’s mouth. When I checked on them, they were taking turns smashing blueberries on each other’s heads, both of their smiling faces stained purplish red, sitting amidst deer heart.
The pickings were pretty good and after a couple hours we had a few gallons. I joined the boys and their mother on a small plateau covered in deer heart fringed with bushes heavily laden with blueberries. The light on the mountains had that same ethereal quality, revealing cracks and fissures worn by time in rockfaces and millions of deer hearts surrounding us.
It was hard to walk away from something so good. I placed my younger son in his backpack and, before leaving, searched for a tender looking deer heart. Near where a deer had been browsing, I plucked a leaf and then placed it in my mouth. I slowly chewed, its enigmatic taste engulfing my taste buds, as I followed my wife and older son down the mountain.
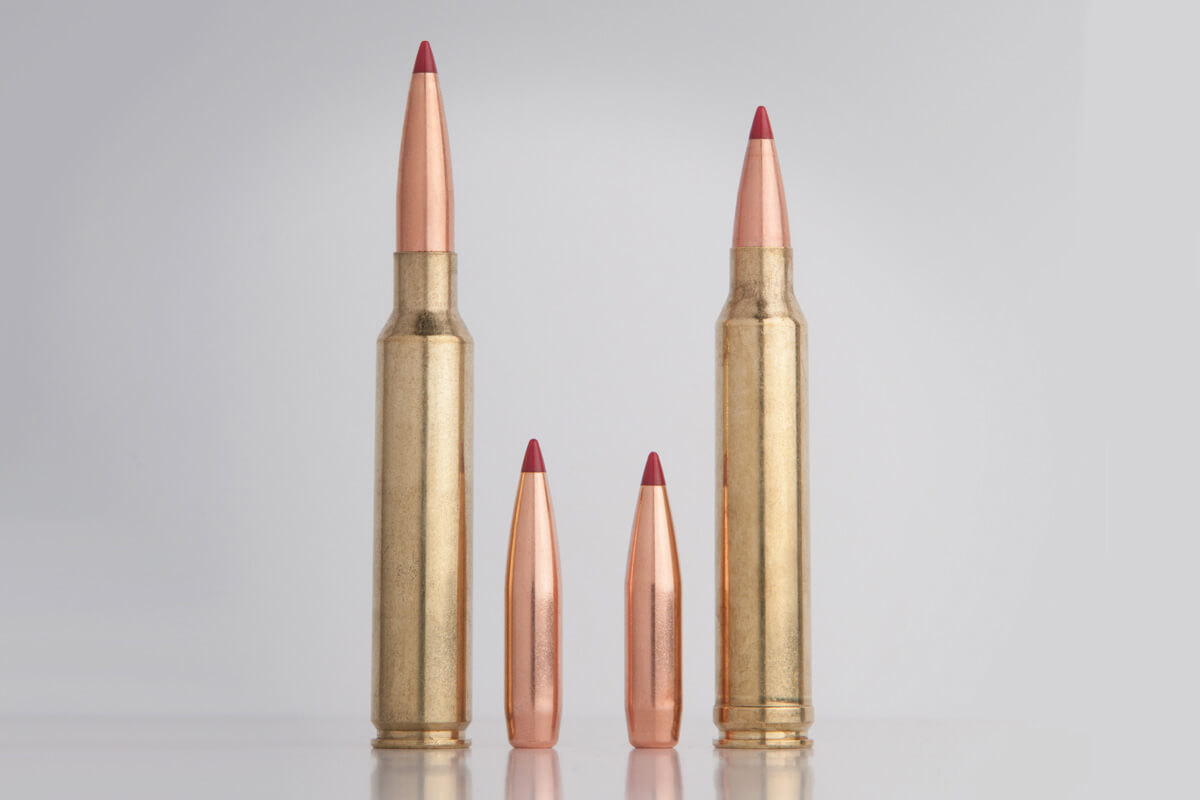
The straight answer to this question is yes, you can fire common 7.62X51 military ammo in any currently produced rifle chambered for .308 Winchester. However, there is more than one reason for this evaluation.
The 7.62×51 NATO cartridge is specific and it is built for military specifications. The reason is to make the round able to operate both belt-fed machine guns and semi-automatic rifles. The current specification for 7.62×51 is a pressure limit of 50,000 psi. And it is best for operating the M14, machine guns, and other semi-auto gas guns that the military uses.
As for the .308 Winchester ammunition, the pressure limit is SAAMI standardized at 62.000 psi. It makes a slight difference in cartridge specs between the military round and the .308 Winchester as currently produced. Therefore, the basic understanding is that the military cartridge will fit and fire in currently produced .308 rifles.
Normally, in a typical gun saloon bar discussion, the most heated debate is asking a bunch of people about the differences between .308 Winchester and 7.62x51mm NATO. There is a variety of responses that often include
They are not different
There is a difference
They might be different
Weirdly all those statements are all quite true. As it may be confusing to grasp, this article will try to explain it in a way that you will not bash your brains out. I will try to be void of making you read all the nuances of things like piezo transducers.
There are only limited categories of comparison and this will pretty much mess things up.
Understanding the Difference Between 7.62×51 and 308 Winchester
Before we delve much further, I must address this often-posed question “Are the 7.62×51 NATO and .308 Winchester the same?”
Again, the answer is NO. It is because of the differences in maximum pressures and the chamber specs. Nobody makes a 7.62mm (NATO) ammo that is not fitting to the .308 ‘headspace’ dimension spec. As a rule, this makes the 7.62mm ammo fit into .308 chambers.
But if you go the other way, you can encounter problems. A commercial .308 Winchester round exceeds the maximum rated pressure for the 7.62×51 ammo. If this is the case, avoid putting full-power .308 Win rounds into military rifles designed for a maximum pressure of 50,000 psi.
7.62 vs .308 – Pressure
The pressure is where most people get confused when analyzing the two ammo. The maximum pressure numbers for the two calibers are 50,000 psi for 7.62 and 62,000 psi for .308. At a glance, it appears to be a big difference and a reason to consider it unsafe to fire. The logic is, do not fire a higher pressure commercial .308 cartridge in a rifle built for 7.62x51mm NATO.
While it is true that a .308 ammo has a slightly higher pressure than 7.62x51mm NATO, the reality is that the brass and chambers are the issues to understand.
Here you must concentrate on the details. I put it that the 50,000 number is an accurate representation of copper units of pressure or CUP. It is a less precise way to measure pressure, as the method relies on looking at how much little copper disks compress when you fire the gun.
As things are, there is no consistent mathematical formula that equates CUP to pounds per square inch (PSI). The difference, therefore, in this specific case lies somewhere around 8,000. What this implies is that the maximum pressure for 7.62x51mm NATO is about 58,000 psi and not so far from 62,000 figures for the .308 Winchester.
If both loads are routinely proof tested at far higher levels, the 4,000 difference will not alter the trajectory.
7.62 NATO vs .308 Winchester – Case thickness
Measuring the thickness of the cartridge is quite challenging. I have developed a simpler way of doing it and it helps explain the difference. The process involves the representation of all sets of ammo. From my big bucket selection, I took both the .308 Winchester and 7.62x51mm NATO brass and weighed them. I further picked several of each from different brands and averaged the weights. I could not measure the cases because I had not fired them yet. And also because it will not tell me much other than the general size of the chamber from which they were fired.
The Winchester .308 weighs 163.3 grains while the Lake City 7.62x51mm NATO weighs 183.5 grains. As you can see this is a significant difference. When the thicker walls combine with similar exterior dimensions this means less powder capacity and the result is a lower- top end. All else the same, the result is a lower velocity and pressure.
The thicker brass of 7.62 cases is a significant factor and you will understand it better in what we discuss next.
7.62 NATO vs .308 Winchester – Headspace
The headspace is where we will get to the real difference. Military rifles for 7.62x51mm NATO usually do have longer chambers. There is a need for reliable feeding and there can be slack if you consider firing a machine gun powered with ammo made from all over the world. The operation needs to be smooth considering all the force used between the feeding and ejection process.
The solution is making the chamber headspace a bit longer. The headspace is the distance from the bolt face to the point in the chamber that stops the forward motion of the cartridge case. Therefore if headspace is too small, the bolt will not close properly or will require excess force to close. And if the chamber headspace is too long for a cartridge, it will float back and forth in the chamber.
The .308 Winchester chamber headspace is between 1.630 and 1.6340 inches. While that for 7.62x51mm NATO is between 1.6355 and 1.6405 inches. The slight difference in size might not seem like a big deal until you fire a thinner brass in a long-chambered rifle. The disaster is that the brass will stretch, perhaps enough to lead to a dangerous case rupture.
However, if you try the same with a thicker military brass, it is no big deal because of the way the system is designed. Using a thicker brass makes it handle the extra stretching into a longer chamber throat. The solution to the title question is to know your rifle and what its headspace is. Once you know this info you will determine if it is safe to shoot a .308 Winchester ammo in a 7.62 chamber.
How Can I Know if My Headspace is Safe?
To know if your headspace is safe is not a challenging task. You can use the set of .308 Winchester Go / No-Go headspace gauges. Use the gauges to check the chamber size. The bolt should close easily on a Go gauge and not close on a No-Go gauge. Also, the field gauge checks the maximum published chamber size. With some 7.62 rifles, you might find that the bolt still closes on the No-Go gauge. As long as the bolt closes, you are still within maximum published limits.
The Technicalities
In terms of specifications, there are differences, more so in the chambers of rifles designed to fire each cartridge. For the 7.62 brass is a bit thicker, and with the .308 is sometimes loaded to be slightly higher pressure. Other than that, the cartridges are pretty much the same.
One way to be entirely safe is to remain conservative and only fire 7.62x51m NATO in 7.62 chambered rifles and .308 Winchester in .308 rifles.
A final risk spectrum is just a scenario. In the case of using 7.62x51mm NATO ammo in a .308 chamber. In theory, you might run across particularly long ammo. Such ammo might not chamber or might require undue pressure to the chamber. The result could be dangerously high pressure. While such a scenario is highly unlikely as the 7.62 ammo to be significantly longer, is a pretty rare thing. It is why not most people will consider it a big deal to use 7.62 ammo in a .308 chambered rifle.
The Reverse Is Not True
However, you need to be careful while using .308 Winchester commercial ammo in a 7.62x51mm NATO chambered rifle. Even though the most modern 7.62 chambers tend to be cut almost closer to match the .308 dimensions, it is always safe to know exactly what you have in terms of headspace. If your rifle has a long headspace, stick to 7.62 NATO ammo. Do not use the .308 Winchester.
Great gear to bring along when visiting the range!
Conclusion
If you put everything else into consideration then the actual pressure differences between the .308 Win. and 7.62 NATO is not that large. However, it is a point of concern. Nonetheless, a tight chamber or an overly dirty chamber could pose a pressure issue. You don’t want to risk damaging a firearm and certainly never wish to see anyone hurt from negligence. It is why it is important to keep the golden rule in mind. A .308 Winchester chamber rifle can handle both .308 Win. and 7.62 NATO ammo safely, but a 7.62 rifle is only safe for a 7.62 NATO ammo.
Now that whitetail season is over, a lot of hunters will be heading out to chase coyotes so they can pass time until spring. Just like with deer hunting, there will be some guys who get really hardcore, but the majority of the folks in the field will be your average Joe schmo. There is nothing wrong with that, but it does mean your success will depend on how you hunt.
Covering lots of ground this time of year will be your best strategy in the woods.
Often times you will see an electronic call on top of a pickup with guys standing around the truck. While this may sometimes work for them, a blind squirrel finds a nut every once in a while, and if your goals are higher than a couple chances every year, you will need to put some miles on the boots. My favorite setups are crick/river bottoms. Coyotes love traversing across frozen bodies of water as they can see distances and travel is relatively easy.
In this setup, we are blowing our call across the open water and anticipating a coyote to circle in between us and the water’s edge.
When you first set up, try doing some sort of a lip squeak or mouse squeak. If you’re walking quietly, you could surprise yourself on how close you can set up. If nothing comes in, use a variation of a coyote locator howl, and then transition to a prey distress call. Probably the most common distress call is a cottontail in distress. This call can be a great sequence to pull in curious song dogs, but it may also not work on some high-pressure areas. My favorite distress call to use is a woodpecker in distress. You can learn how to do this call on a softer open reed with a little practice, and it is also found on most electronic calls.
At this point, if you haven’t enticed anything in, switch it up and go with a fox or raccoon fight followed by a coyote distress call (usually some sort of pup distress). The goal here is to paint the picture that a young coyote came in to the dinner bell, and now is getting his butt kicked by an angry fox or raccoon.
Learning to call with an open reed will give you more variation and life-like calling sequences.
After your last call, wait for 10-15 minutes and keep your eyes peeled. Just like turkeys, some coyotes will come screaming in to the call, and some will sneak in without a noise. Those aggressive screamers would have likely already come in, but the ones who are going to tip toe in will pop up now. If you’re not on your toes, these wary responders may bust you quickly, or get too close for you to move before you have a chance to get your weapon on them.
Now, there’s a couple of very important things to keep in mind before you start your vehicle and grab your gun.
Wind is everything. Coyotes will almost ALWAYS circle downwind of where they hear the calling from. You can use that to your advantage and setup where you can predict them to circle. Fence lines, drop-offs, water dams, frozen bodies of water, etc, are all good travel routes, and you can also use factors like open bodies of water to pinch down the distance a coyote can circle away from you. The goal here is to get coyotes to circle as close as possible to you, and then take your shot before they get down wind.
Blend in. Coyotes can see very well. If there’s snow on the ground, you will stick out like a sore thumb in an open area with regular camo on. Snow camo bibs and a coat are a good idea, but if you’re on a budget, a couple of white bedsheets can definitely do the trick with some redneck ingenuity.
Stay mobile. Try to stay around the half hour mark with each setup. Wait a few minutes between each different call in your setup, and make sure you give coyotes enough time to come in, but don’t make the mistake of staying in one spot too long. Covering a lot of ground will be the most crucial factor to your success.
HAVE FUN. It will be cold and windy, and you will probably be walking a lot, but we are supposed to have fun and enjoy being outdoors. Hunting shouldn’t be a grind. If it gets to that point, you will burn out quickly, and your success will plummet.
Can’t get enough coyote hunting content? Checkout our podcast Calling all Coyotes. Looking for some tips on improving your rifle accuracy? Checkout our blog series on Why You Missed that Deer.
Photos by Ted Zangerle
It’s our hope you can learn and laugh along with the expert voices we feature on this blog. We want to be clear that the opinions you see featured here are just that: opinions. The content belongs to the authors and is not necessarily the opinion of Vortex Optics.
To learn more about what you’ve read, please like, follow, and otherwise support our authors.
Check out our interactive diagram below to test your knowledge!
You might be new to the sport of bowhunting and be looking to learn all you can about it.
Or, maybe you are a seasoned bowhunter wanting to test your knowledge.
Either, way this one’s for you!
In the interactive diagram below, you can click/touch the NUMBER of the parts in the chart below to reveal the names of each item. You can read more about what each part is and does in the sections below the diagram.See how many you can get right!
Interactive Parts of A Compound Bow Diagram
Compound Bow Parts | Piece-By-Piece
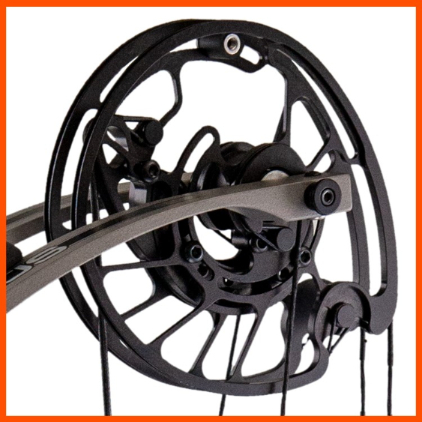
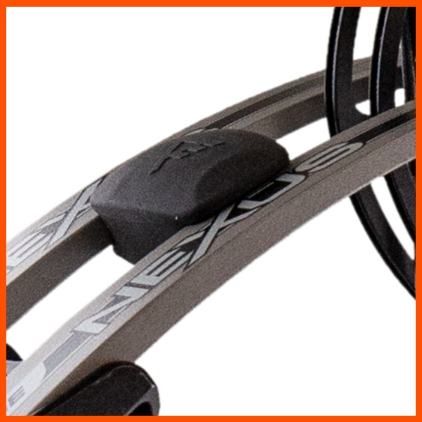
In the above diagram of the Nexus2 by Prime Archery, you can view the parts of a compound bow. Find out more about what each part does by clicking the words below:
Cams
Limb Dampeners
Limbs
Limb Pivot
Limb Pocket
Limb Bolt
Riser
Sight Mounts
Cable Guard
Rest Mounts
Arrow Shelf
Stabilizer Mount
Axle
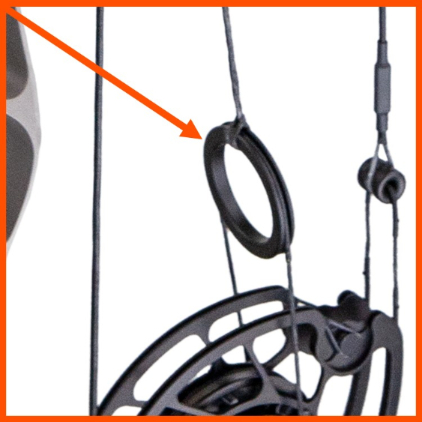
String Splitter
Cables
String
Serving
Nocking Point
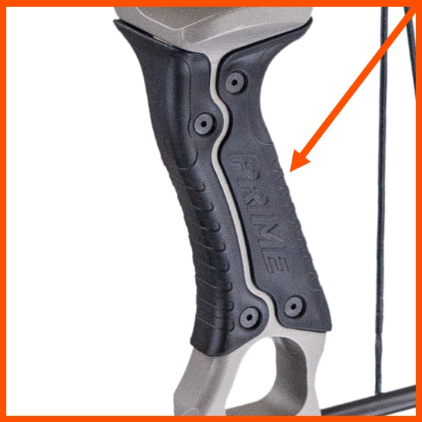
Grip
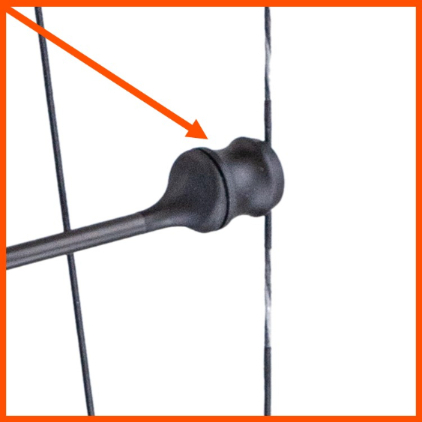
String Stop
Cable Splitter
Axle-To-Axle Length
Brace Height
1. Cams
On a compound bow, the cams are the round, or oval-shaped discs that work much like a block-and-tackle pulley system. The cams are connected to the axles of the bow.
The cams act as the “multiplier” of the energy of the person pulling the bow string. This allows the bow to store more energy than the person pulling the bow string is actually exerting.
The bow has a “back wall” where the cams will not turn any more. This is where the archer is at “full draw.” At this point, there is a percentage of “letoff” that allows the archer or hunter to hold the force of the bow at a fraction of the actual pounds of pull being exerted.
For example, a bow that is set to a 70-lb draw weight with a 70% letoff will only take 21 lbs of force to hold at full draw. The energy is stored in the bow’s limbs until the archer releases, which unleashes the multiplied energery, propelling the arrow toward its target.
So, the cams of the bow are what change the bow in essence from a traditional bow to a compound bow.
2. Limb Dampeners
Limb dampeners reduce the noise and vibration throughout the limbs and riser of the bow.
When the hunter or archer releases the arrow the sudden and powerful uncoiling of the string on the cams produces vibration, which causes noise. The limb dampeners help to absorb that vibration, resulting in a quieting of the bow.
This absorption by the limb dampeners is especially helpful in reducing noise when hunting deer or other wild game and also reduces the amount of vibration that is transferred to the archer.
3. Limbs
A compound bow’s limbs are connected to the riser and store the energy that is collected when the string is pulled and the cams turn. When the string is released, the energy from the limbs is transferred to the arrow, which propels it through the air.
Most compound bow limbs are made up of fiberglass or composite material. Some bow limbs are solid, one-piece limbs. Others are “split,” having a gap between both sides of the upper and lower limbs.
4. Limb Pivot
Where the limbs pivot and flex on the riser.
5. Limb Pocket
The limbs of the bow rest in the limb pocket. These can be made of machined aluminum, ABS plastic or other composite materials. The limbs of the bow are secured in the limb pocket by the limb bolts.
6. Limb Bolt
The limb bolt is the crucial piece in connecting the limb pockets, which hold the limbs of the bow, to the riser.
Limb bolts are typically allen wrenc adjustable. Tightening the limb bolts increases the draw weight poundage of the bow. Loosening the limb bolts will decrease the draw weight poundage.
It’s very important that any adjustment to the limb bolts be made in the same increments. If the adjustments are uneven, the bow’s cams could get out of time, causing an improper tune.
If you need to adjust your bow’s draw weight, it’s a good idea to back the limb bolts all the way down and then start moving them both up the same amount.
7. Riser
The riser is the vertical portion and foundation of a compound bow. The limbs attach to it and it also serves as the fastening point for accessories such as the sight, arrow rest, grip, stabilizer, quiver, etc.
8. Sight Mounts
Sight mounts are holes in the riser that serve as the attaching point for the bow’s sight. The archer will look through the peep on the bow string and at the pin(s) of the sight to aim at the target or game animal.
9. Cable Guard
The Cable guard runs perpendicular to the bow’s riser. It keeps the bow’s cable out of the way of the arrow’s line of fire. It typically has rollers and/or slides attached to it to aid in keeping the cable on track.
10. Rest Mounts
Rest mounts are holes in the riser that serve as the attaching point for the bow’s rest. The rest is what holds the arrow in place while the archer is drawing and releasing the arrow.
There are many different types of rests. Some use prongs that the arrow will rest on, while others hold the arrow up and then fall out of the way when the arrow is released. Others, called containment rests, completely surround the arrow until it is fired and typically have no moving parts.
11. Arrow Shelf
The arrow shelf is the area of the riser where the arrow sits on the rest. While the rest typically holds the arrow off the shelf on compound bows, traditional bows (non-compound) usually have the arrow resting directly on the arrow shelf.
12. Stabilizer Mount
The stabilizer mount is a universal size threaded hole in the riser that is used to attach a stabilizer to.
The stabilizer helps balance and thus “stabilize” the bow when drawing and shooting, and also typically has vibration dampening properties. In essence, it helps the bow resist movement during the draw cycle and when shooting.
The back of the stabilizer also typically serves as the fastening point for the wrist sling.
13. Axle
The Axle is what holds the cams, in the same way a car axle holds its wheels. The cams have a hole in the center. The axle goes through the center of the axle and attach to the limbs.
14. String Splitter
Bows with parallel limbs (which eliminate cam lean) will have a string splitter. On these types of bows, the main part of the string that the archer attaches the release to “splits” just before the cams.
The splitter is what essential turns the single string into two strings, each going around its respective cam.
15. Cables
The cable(s) runs between the bow’s cams. They assist in moving the cams of the bow when the string is pulled back by the archer. It’s important to replace your cable(s) as well as your string as recommended per the bow manufacturer’s instructions or on the advice of your local bow shop.
16. String
The string serves several functions. It is where the archer will connect their release. It is what the archer pulls (or draws) back and releases to launch the arrow.
Many archers will utilize a “D loop,” which attaches to the bow string and serves as a way to quickly attach the release to the string and also improves accuracy.
You should always inspect your string before and after shooting and hunting. A damaged string could end up being a broken string, which could result in serious injury to the shooter or others.
Any cuts or fraying should be addressed immediately and it is recommended that you take to your local bow shop for an assessment.
17. Serving
The “center serving” is coiled thread wrapped around the center portion of your string where you would nock an arrow and attach a D-loop. The center serving protect the center section of the string from wear and tear that results from nocking arrows as well as drawing and shooting the bow.
There is also serving material on areas of your bow string that go around the cams or through rollers that are attached to the cable guards. This helps the bow string stay together, especially in places that are likely to received the most friction.
18. Nocking Point
The nocking point is where the arrow, by way of the arrow nock, attaches to the bow string. The D-loop attaches above and below the nocking point.
19. Grip
The grip is the part of the bow that you hold while shooting. Grips are made of various materials such as wood, rubber, plastic, metal, etc.
The grip can also be a source of inaccuracy. For example, if you hold the grip too tightly, or twist the grip while shooting, you can cause your arrow to go off-course from where you were aiming.
20. String Stop
String vibration is a large cause for noise when a bow fires. A string stop helps dampen that vibration and thus reduces unwanted noise. The string stop is a rubber part that is often mounted on a post that is directly opposite of the front stabilizer.
The string stop not only helps dampen vibration, but also aids in better accuracy for the shooter, often resulting in tighter arrow groups at the target.
21. Cable Splitter
On some bows, the cable splitter is a ring that connects the cable to two separate cables, thus dampening vibration and noise of the cable during shooting.
22. Axle-To-Axle Length
“Axle-to-axle” is not a part of a compound bow, but rather a reference to measurement. Axle-to-axle is the measurement from the center of one cam to the other. The axles go through the center of the cams.
This axle-to-axle measurement is often used to determine how forgiving the bow will be in regards to arrow flight accuracy when taking farther shots.
A bow with a longer axle-to-axle height may be more forgiving that a shorter one, but may also be difficult to maneuver in tight-quarter hunting scenarios.
23. Brace Height
The “brace height” is not a part of the bow, but rather a measurement, in inches, of the distance between the “throat” of the grip to the center of the bow’s string.
A shorter brace height means a longer “power stroke,” which is the distance from the grip to the center of the string when the archer is at full draw. A longer power stroke typically means a faster bow, as it increases the amount of time that the arrow is attached to the string.
Parts Of A Compound Bow Conclusion
Whether you are just a beginner bowhunter or looking to brush up on your bow component knowledge, we hope this has been a helpful tool for you!
There are two big differences between the .300 PRC (left) and the .300 Win. Mag. (right). The PRC shoots high-BC bullets faster and better. The Win. Mag. is readily available anywhere in the world.
When the .300 PRC (Precision Rifle Cartridge) was announced, most shooters scoffed: “Just what we need—another .30-caliber magnum.” It seemed like the proverbial answer to an unasked question.
Then, savvy shooters took a closer look and were impressed. They gave it a try and became even more impressed.
Within three short years, the .300 PRC became the primary .30-caliber magnum challenger to the worldwide king of the .300s: the .300 Winchester Magnum. That’s a meteoric rise in prominence, rivaled only by its own smaller sibling: the 6.5 PRC.
After a lifetime of applying, in 2015 the author drew an exceptional elk tag in Utah. His choice for the hunt was his favorite .300 Win. Mag., and it cleanly killed this monster 402-inch bull. But then, the .300 PRC hadn’t yet been introduced.
Now that we have both “The King of .300s” and this new high-octane modern challenger, the question must be asked: Which is better?
As a philosopher might say, “The answer is very simple, yet also very complex.” Here’s the short version: Which one is better for you depends…on you.
Each .30-caliber magnum cartridge has advantages and disadvantages. Your needs as a shooter and hunter will dictate which is best—for you. But I suspect you already knew that. So, without further ado, let’s dive into the pros and cons.
Because it’s the veteran, let’s accord the .300 Win. Mag. the respect it deserves and address it first.
From Alberta to Africa, the .300 Win. Mag. has served this writer well. This 56-inch kudu bull fell to a 180-grain Trophy Bonded Tip bullet while hunting with Kowas Hunting Safaris in Namibia.
.300 Win. Mag. Pros
The .300 Win. Mag. is the worldwide dominant .30-caliber magnum. It’s cleanly taken every big-game animal that walks American soil and probably every legal species of critter that walks the earth—anywhere. That’s including terrorists at some pretty jaw-dropping distances, in the hands of our sniper boys and their British pals.
Although its stubby neck and belted behind are outdated design characteristics that theoretically are not optimal for accuracy, the .300 Win. Mag. has always confounded its skeptics and shot better than it has any right to.
Powder-capacity-to-bore-diameter ratio is on the top side of optimal, meaning it’s on the cusp of being overbored without actually being overbored. As a result, it’s surprisingly efficient, particularly with heavy, aerodynamic bullets in the 200-grain weight range. As a lovely side benefit, such bullets absolutely wallop big game.
Canada is gnarly and challenging in November. This nice bull moose fell to a couple of .300 Win. Mag. bullets.
On the subject of bullets, you can get factory ammo loaded with a broad spectrum of different projectiles. Light and fast, heavy and tough, heavy and sleek and super-efficient, you name it. It’s easy to find a load tailored perfectly for your purposes, whether that purpose is shooting whitetails way off across a beanfield or moose in an alder thicket or steel targets a half-mile away.
Also, handloading data is widely available and exhaustive in scope. If our selection of factory ammo is broad, handloading potential is truly vast. Pick any bullet from 110 to 250 grains and have at it. Rifling twist rates apply.
Every rifle manufacturer offers myriad models chambered in .300 Win. Mag., so you can be really picky when selecting just the right rifle. Just as important, magazines—whether internal or detachable types—have all the wrinkles ironed out of them. Most .300 Win. Mag. rifles easily contain the advertised number of cartridges and feed them smoothly and reliably.
Because the .300 Win. Mag. is so widely respected and available around the world, it’s an excellent option for travelers—domestic and international—because even if your baggage gets separated in transit and lost, as long as your rifle arrives, you can always find ammo in a local shop.
The combined result of all these advantages stacked up is one of—if not the—best practical choices for hunting any non-dangerous game, anywhere around the world.
Shown here are the two .300 PRC factory loads currently available. By next year, there should be several more from various manufacturers. And, of course, the cartridge is a handloader’s dream.
.300 Win. Mag. Cons
Okay. Here we go. The grand old king of the .30s does have some downsides, too. Mostly, it’s in the fact that many rifles chambered for it have quite loose chamber tolerances. In such, the demons contained in the short neck and belted case design emerge. They can wreak havoc with accuracy.
An old but proven cartridge design rule recommends that the neck of a cartridge be at least one caliber long, meaning that for a .30-caliber cartridge, the neck should be at least three tenths of an inch long. Designers curtailed the neck of the .300 Win. Mag., gambling that it would prove sufficient and the propellant capacity gained by pushing the shoulder of the cartridge as far forward as possible would pay off.
When manufacturing ammo, whether at the handloading bench or on the factory assembly line, it’s harder to hold tight tolerances when the neck is short. Bullet concentricity is at risk. Neck tension is less consistent. And so forth.
The belts on traditional magnum cases were originally designed to give the long, tapered cartridges of yore a predictable surface to headspace against. Holland & Holland’s .375 H&H and Super Thirty have a lot of body taper and shallow shoulders. This enables cartridges to feed like grease on glass and to extract easily and reliably—particularly important characteristics in cartridges commonly used on dangerous game in Africa and India. Easy extraction was a big deal when cordite propellant was the go-to bullet-pushing chemical of the day; it tended to exhibit pressure spikes in tropical weather conditions. Those cartridges needed the belt.
Our .300 Win. Mag., however, doesn’t need the belt. On it, the belt is just a holdover from the parent case. Had designers owned a functioning crystal ball, perhaps they would have seen fit to lathe-turn the belt off of their prototype .300 Win. Mag. cases, which would have created a really optimal cartridge case shape for the embryonic new round.
Here’s the important takeaway, folks. The belt is outdated, yes. It’s useless, yes. But the belt harms absolutely nothing at all. Performance doesn’t suffer, reliability doesn’t suffer, nothing. So quit griping about the belt.
While it will shoot any .30-caliber bullet well, the .300 PRC is particularly well suited for heavy-for-caliber, highly aerodynamic projectiles, such as those shown at left. With such, it’s undoubtedly better than the .300 Win. Mag.
.300 PRC Pros
Ah…here we go. This is the Ferrari of rifle cartridges. Introduced in 2018, the .300 PRC utilizes a .375 Ruger case necked down to hold .30-caliber bullets. This is a broad-based, non-belted, standard-length (.30-06 length) case originally derived from the .404 Jeffery.
Geometrically, the .300 PRC case is as nearly perfect as mankind and computers can achieve. Neck length is ideal. Shoulder angle is ideal. There’s no belt around the case head. There’s little efficiency-robbing taper to the body.
“Against all odds,” naysayers grudgingly admit, “the .300 PRC has a toehold.”
“Thanks to an ultimate combination of refined characteristics,” acolytes claim, “the .300 PRC is rapidly earning the recognition it deserves.”
Both are right.
When the .300 PRC launched, we already had the .300 H&H, the .300 Win. Mag., the .300 WSM, the .300 RUM, the .300 RSAUM, the .300 Norma, the .300 Weatherby, the .30-378 Weatherby, the .300 RCM…my word, more .30-caliber magnums than a beaver could shake a stick at.
However, not one of this long list of cartridges stacks every characteristic in the “positive” column and none in the “negative.” Many have outdated case design features. Some are overbored. Some are underpowered. Some are efficient, but not configured to shoot high-ballistic-coefficient (BC) bullets with best-in-class aerodynamics.
There are very few cartridges about which one can say, “It has it all.” The .300 PRC is one. The few disadvantages associated with it—and, yes, there are some—have nothing to do with design or performance and everything to do with distribution and availability. But I’ll get to that soon enough.
As you can see here, the cases of the two .30-caliber magnums are about the same length. However, the .300 PRC (left) has a much longer “head height.” It does require a proper magnum-length magazine. The .300 Win. Mag. (right) will fit and function through a .30-06-length action.
Let’s start with the most important characteristics and work down. Foremost, at least in this man’s opinion, is the fact that from the ground up the .300 PRC was engineered to provide optimal performance with long, heavy-for-caliber, high-BC bullets.
Hornady’s cartridge gurus (they’ve dreamt up and introduced the three most successful new cartridges of the 21st century) gave the .300 PRC a generous “head height.” Head height is the distance between the cartridge case mouth and the end of the magazine. It dictates how much bullet can stick out of the end of the cartridge case and still allow the whole cartridge to fit into a rifle magazine.
Traditionally, powder capacity was valued more than head height, so bullets were given short, blunt ogives (the curve from the tip of the bullet to full diameter) and seated deep into the case. Cartridge shoulders were positioned far forward so that the case would hold as much propellant as possible. That bullet bases would protrude way down into the propellant chamber was accepted as a necessary evil.
Not necessary, claimed the .300 PRC’s architects.
Case in point (if you’ll forgive the horrible pun): The thunderous .300 RUM and the .300 PRC have nearly identical overall cartridge lengths. Both require true long rifle actions. However, the shoulder on the RUM is much farther from the cartridge base. The RUM holds considerably more powder, yet the .300 PRC will shoot flatter at long range.
How? Because Hornady’s engineers optimized the efficiency of the internal combustion chamber and gave the cartridge plenty of head height. You can comfortably load .300 PRC cartridges with extremely sleek, aerodynamic bullets that have long, fine-entry noses. In the .300 PRC, bullet bases don’t protrude down into powder capacity. Projectiles start slower than the blunter bullets from the .300 RUM but hold their speed better and quickly overtake them. At extreme range, there’s just no contest.
But we’re not here to compare the .300 PRC with the .300 RUM. So how does it stack up to the .300 Win. Mag.? I love the old Winchester cartridge, so it hurts my feelings a little to say this, but the .300 PRC walks all over it, ballistically.
Why? Because the .300 PRC shoots those long, high-BC bullets that won’t fit and feed from .300 Win. Mag. magazines, and it starts them nearly as fast as the .300 Win. Mag. shoots normal bullets.
Spring of 2018 found the author in Africa, hunting free-range plains game with the yet-to-be-announced .300 PRC. It proved extraordinary. Here, von Benedikt was after mountain reedbuck, hunting with Crusader Safaris.
In addition to cartridge head height optimal for modern, extreme-BC bullets, the .300 PRC features a chamber spec’d with very tight tolerances. You’ll rarely, if ever, see a .300 PRC rifle that won’t shoot due to a sloppy chamber. Plus, the chamber throat and rifling leade areas are engineered for ideal compatibility with those sleek-nosed, high-BC bullets we’re making such a big deal about.
Crucially important in making all these cutting-edge puzzle pieces fit together is fast rifling. Most .300 PRC rifles have a twist rate of 1 turn in 9 inches or faster; some are as fast as 1:8. Either will properly stabilize most of today’s extreme-range superbullets.
The .300 Win. Mag. (and basically all the other .30-caliber magnums) have a 1:10 twist rate that will not adequately stabilize today’s best long-range projectiles.
Let’s move on. In the world of internal combustion, the .300 PRC has a much different chamber shape than the .300 Win. Mag. It contains more gunpowder, so one might think it crosses the cusp into overbore territory.
Nope. Not quite. Thanks to the way it holds that propellant in a broader, slightly shorter cylindrical shape, it burns a tad more efficiently than the .300 Win. Mag. When ignited from one end, a fatter, shorter column of powder burns more instantly and efficiently than a long, skinny column.
Before listing the .300 PRC’s disadvantages, let’s take a look at a ballistic comparison between it and the .300 Win. Mag.
I’ve crunched ballistics using the best high-BC factory loads listed on Hornady’s website.
Dedicated hunting with Crusader Safaris turned up the holy grail of free-range nyala—a bull with perfect lyre-shaped horns that stretched nearly 30 inches. The .300 PRC worked its magic, dropping the bull with a Hornady 212-grain ELD-X bullet.
In the .300 Win. Mag., the 200-grain ELD-X projectile has a G1 BC of 0.597 and a G7 BC of 0.301—really pretty darned good. It’s rated to exit the muzzle at 2,850 fps. It is, candidly, a fantastic load.
In the .300 PRC, the 225-grain ELD Match bullet has a G1 BC of 0.777 and a G7 BC of .391. That’s nearly unearthly, and it doesn’t hold a candle to the extreme-BC projectiles handloaders like me get all giddy about, such as the 250-grain A-Tip.
But I digress. The 225-grain projectile is rated to exit the muzzle at 2,810 fps, just 40 fps slower than the .300 Win. Mag. bullet.
I’ve included a chart to display long-range performance out to 1,500 yards. The ballistics were calculated using standard sea-level atmospherics, a 200-yard zero, and a 10-mph full-value crosswind.
.300 PRC Cons
The .300 PRC’s disadvantages are minuscule and don’t reflect specifically on the cartridge, but they must be considered nonetheless.
Worst is the current very limited selection of factory-loaded ammunition. As I write this, only Hornady offers factory ammo—and just two loads. This is changing fast, and I predict that within a year we will see factory-loaded .300 PRC ammo from Federal, Barnes, Winchester, Browning, and others. Many rifle companies now list the .300 PRC in their top-five sellers, and ammo companies can’t ignore numbers like that.
For now, though, non-handloaders have their pick of…Hornady and Hornady. The good news is Hornady makes great ammo.
For handloaders, the world is their .300-PRC oyster. Dies and data are readily available, and the cartridge shoots well with darn near any combination you put in it.
I can’t even list limited rifle selection as a disadvantage. Not anymore. Most of the big rifle manufacturers and all of the boutique makers worth their salt offer several excellent models in .300 PRC.
How about recoil? Well, that’s subjective. Because the .300 PRC is usually loaded with heavy-for-caliber bullets, it does kick more than the average .300 Win. Mag. load. However, if you load them both with the same bullet weight, the difference is negligible. The way I see it, that extra recoil is symbolic of the enhanced performance you get by shooting those extreme-BC projectiles. But, yes, the .300 PRC does kick.
Inhabiting a vast variety of African terrain, common reedbucks like this are a low-pressure plains-game animal that are extremely fun to hunt. We stalked this mature buck on a rocky ridgeline, hunting him like a big alpine mule deer. A single Hornady 212-grain ELD-X reached out and dropped it cleanly.
So Which Is Better?
As I mentioned in the beginning, in the final analysis, only you can decide which cartridge better fits your needs. I can give you a little guidance, though.
If you’re a practical sort, who values proven performance and ready availability, I suspect the .300 Win. Mag. is your cuppa tea.
If you like finessing the last iota of performance out of your shooting setup, and you handload, and you rarely shoot factory ammo anyway, you owe yourself a .300 PRC.
Here’s the good news. As much fun as it is to weigh every aspect and characteristic, however slight, and endlessly debate the merits of one over the other, in the end you can’t go wrong with either.