There are several reasons people learn how to preserve a dead bird. It is often because they can’t bear to part with theirs or want to keep a dead bird to study.
Whatever the reason for preserving a bird is, it is crucial to do it right the first time. There is no room for trial and error here because, most times, you only have one specimen and one chance to do it.
This article will discuss some of the best ways to preserve a bird and why people do it. Read on.
How to Preserve a Dead Bird
It is hard to witness the death of a bird, even more so to decide what to do next. Fortunately, you have the option to preserve the bird and keep them in shape close to how they were before.
Is it hard to preserve birds? The answer is no. Luckily, it is easy to do the preservation process on your own. In addition, you can find most of the items and tools you need around your home.
Here are two ways you can proceed with bird preservation.
Bird Preservation With Borax
Things To Prepare:
Step 1: Wear your safety gear and prep the bird
Slip on your gloves and goggles. Collect the bird and remove any debris or dirt from it.
Step 2: Coat the bird inside the bag with borax
Coat the inside of the garbage bag with a bit of Borax. Put the bird in and sprinkle enough Borax to coat the bird. Adjust the amount according to the size of the bird.
Step 3: Place the bird in the shoebox and rub more borax
Transfer the bird to the shoebox. Check for any part without Borax and rub them with the powder.
Step 4: Let it dry and dust the Borax off the bird
Once the bird is thoroughly covered in borax, leave it to dry for a month. After four weeks, use a paintbrush to remove the powder. It is then ready for display.
Bird Preservation With Salt and Bleach
Things To Prepare:
Step 1: Suit up for safety and clean the bird
Wear your mask and gloves before removing the dirt from the bird. Carefully sand its feet and legs.
Step 2: Create a water and bleach mixture for the bird
Change your gloves. Mix a part of bleach with two parts of water. Place the bird in the container and add the mixture, making sure that it covers the whole bird.
Step 3: Let it soak, then add the salt mixture
Leave the bird with the mixture for a whole day. Once finished, remove the bird and clean the container. Concoct another mixture with half a gallon of water and 2 cups of salt. Return the bird to the container and add the liquid to preserve it.
Step 4: Soak again before air drying
Let the bird soak again for another 24 hours. Next, remove the bird and air dry. Make sure it dries thoroughly before displaying it.
FAQs
The Benefits Of Preserving Dead Bird
Why do people preserve dead birds? It is because one wants to save a dead bird of paradise they found and keep their beauty for a long time. Pet owners also preserve their beloved birds to remember them.
Preserving birds can be traced back several centuries ago. In the days of Charles Darwin, preservation was done to keep the specimen in a state where the following generations could admire and study them. This way, people can get to know rare and endangered avians.
Other Types Of Bird Preservation Methods And How To Choose One
We shared with you two bird preservation methods: using borax and using salt. Aside from these, there are other ways to preserve a dead bird for display. You can try:
Deciding which one works best for you will depend on several factors. Getting rid of the bird’s internal organ and stuffing its body with cotton balls or straw, a method called taxidermy, is the perfect technique for lifelike results.
On the other hand, the freeze-drying methods are what most pet owners go for because of their realistic outcomes. However, freezing a dead bird requires patience, as it is a long process that takes approximately seven months.
To those who cannot afford the waiting, skinning the bird is faster as it takes only a few days. The only downside is, you cannot preserve dead bird bones or the whole bird, but only its skin or hide.
Another procedure used for taxidermy is embalming. This is a widely used approach to preserving the bird and is one of the top choices alongside taxidermy and freeze-drying. Embalming takes less time, but it demands focus and attention.
Egyptians used this last method and worked perfectly in preserving your bird. It can keep a bird in excellent condition even after decades or even a hundred years.
The Cost To Preserve Dead Bird
If you want to reach out to a professional taxidermist to preserve your pet bird, the service will cost you $500 to $2,000.
The number varies depending on the size of the bird, if you want fast service, and other factors. For a small bird, you can expect to spend $500 as a starting point. It is always best to ask for the pricing before anything else.
How to preserve feathers from a dead bird?
You can preserve dead bird wings in four steps!
How to preserve bird feet?
If you want to preserve turkey feet, follow Borax’s bird preservation tutorial. Other methods you can try are:
Remove feathers from a dead bird before proceeding with preserving its feet.
Conclusion
We hope that with this article; you learned how to preserve a dead bird and understand its importance. Now, you have an option other than burying a dead bird.
Whether you want to preserve a dead songbird or your favorite pet, come back to this and refer to it as your guide. If you know someone interested in learning how to preserve a deceased bird, share this with them.
Have you done bird preservation before? How was your experience? How did it turn out? We want to hear about it, so comment below for us to read!
It’s common to come across a dead bird on the ground, but have you ever wondered what it could mean? please take a look at this article and see now 7 steps to dispose of a dead bird.
Coming from the eastern whitetail woods and objectively entered my first broken country western elk hunt I looked at glassing as a simplistic way to locate animals. Find a vantage point, setup, and scan the mountain sides. I focused having the best gear I could afford when it came to glassing but overlooked the actual art. I very quickly learned that there’s more to being successful behind glass than just spending time looking through a spotter or binoculars. While I continue to hone my western skill set I’ve come a long ways over the last 4 years.
Being a successful western hunter, at some point will entail working glass as long as the habitat allows for the opportunity. Glassing is an planned and learned skill. In this article I’ll cover all the mistakes I’ve made and lessons I’ve learned glassing out west.
Have a Plan
As I mentioned in the opening paragraph, spending hours behind glass does not guarantee anything but time spent. With most western hunts being plan around a 5-7 day hunt, eastern guys heading west need to be efficient with time. It’s difficult to find animals in new vast territory and locating animals to hunt is often where hunters will spending the most of their time. However, it’s also where the least amount of planning is spent for most new hunter.
When it comes to glassing, there’s more to planning than just marking vantage points on onX. You need to identify glassing points based on where elk will be, sun position, access, and vantage points. Morning, afternoon, and evening glass spots will likely all be different. Once you have boots on the ground be sure you use your tracking tool on onX to find your way out in the dark….Yes, I’ve made that mistake and found myself “cliffed” out resulting in a longer hike out and little sleep.
Morning Glassing Spots – Focus on areas that elk will be moving back from feeding areas. From my experiences of hunting elk with a bow in September, it takes time for elk to transition from major destination food sources back to bed. Sometimes hours! Find destination food sources and transition routes back to bed that have broken ground. Mark these areas on onX with a specific color. Next find vantage points that are in a workable distance with the glass you have. Lastly, you need to think about where the sun will be. I’ve made the mistake of doing the first two steps to only be blinded by staring into the sun. Keep the sun to your back.
Afternoon Glassing Spots – Focus on bedding areas. At times this can be difficult as from my experience, elk enjoy dark timber as the September sun is high in sky. Also, keep in mind, as hunting pressure increases elk will shift accordingly. In my opinion, while elk are not as cagey as a whitetail they will shift when pressured. Attempt to identify bedding areas with broken timber or pockets of timber and focus your efforts on the edges. Considering you’re probably not an elk expert if you’re reading this, picking a bedding area off a map is highly unlikely. I’ve found good success locating bugling elk in the mornings and simply following them back to bed while maintaining some distance. Location bugles are your best friend here. Keep in mind, the distance between food and bed will vary. I’ve witnessed elk moving less than .5 mile up into a drainage off an alfa field and I’ve also seen where elk move 5 miles back to a bedding area. Anyway you can locate a bedding area, mark it on your map and plan to spend the afternoons, which are typically slow, glassing to gain intel for an evening hunt or even a hunt the follow morning. Again, find your vantage point and maintain a safe distance based on the wind.
Evening Glassing Spots – Much like morning spots you’ll be focusing on the bed to food pattern. If you’ve been glassing bedding areas during the afternoon, it may make sense to stay put if your vantage point still works. If you’re taking a blind stab and it’s your first setup glassing, focus on transition areas and pick a vantage point that offers the most coverable ground while keeping the setting sun at your back. Points, saddles, and openings not far from bedding have all worked for me in the past. Use your tracker on the way in to have a clear cut access plan for the way out under the stars.
Before you go into the hunt, it does pay to have vantage points marked on your map with areas of focus for each part of the day. It will likely change once you lay your eyes on the first herd of animals but that’s the game. Without a plan you’ll start to feel the pressure of filling your tag and end up doing more work than needed during your time in the field. Creating a glassing plan is a necessity for western rookies, I’ve went into hunts with plans and without plans. Each hunt is different but it seems the more prep and work committed to the hunt the better and more enjoyable the trips turn out.
Sun Direction
I’ve discreetly mention sun direction in with your glassing plan but it very well deserves it’s own place in this article. It’s not rocket science but it does need to be top of mind. I’ve learned this lesson the hard way, spending entire afternoons climbing to a marked vantage point only to find it totally useless because I was blinded by the sun. The real issue here is simply wasted time. When you’re in vast territory spending countless calories and time climbing you can’t just jump over one ridge and make it work….at least not in my experience. You don’t always need the sun to your back but you DEFINITELY do not want it directly at your face. If you take one thing from this article, this is it!
Comfort and Steady Base
The entire point of glassing is to breakdown an area by spending TIME observing from a distance. Glassing is a skill and it’s not something you learn without doing. The majority of the time when you do spot an animal you will only be catching glimpses of movement if you lucky. More often than not, you’re trying to locate something out of place, an antler, leg, etc. To pull that off you need to go slow and create a systematic approach to cover an area. I personally like to break areas down into a grid and cover it horizontally first before moving back down or up. For example, I’ll start at A1 move to F1 and then return back to A1 before moving vertically and repeat the process over and over and over.
The point here is that to be successful you’ll need to go slow, which takes time. So you need to get comfortably. When you first get setup, take the time to dig out a spot to sit and get a decent backrest, even if you have to carry a few rocks or logs to create it. In effort to save weight in my pack, I usually do not carry a glassing pad because I typically have layers of clothing with me. I’ll use those layers to sit on.
Having a solid tripod is one of the things I personally overlooked on my first couple elk hunts. You cannot be effective behind glass without a solid base. It’s really that simple. Beyond having quality gear, you need to learn how to get it setup solid. Once you begin to glass you WILL inevitably bump your tripod leaving you wondering where you were looking. Diggin in your tripod legs or setting something of weight (rocks, sticks, pack, etc) on each leg will save you some frustrations. In addition to having a solid base, get familiar with your fluid head and it’s adjustments. You don’t want to have them too loose but you also don’t want them cranked too tight. The perfect medium is where you can loosen your pan or tilt with one head without torque on the tripod so much that you’re moving it.
Binos or Spotter or Both?
As I continue to grow as an elk hunter I reflect back to earlier hunts. Things I did wrong, things I did right, lessons I’ve learned and often wondered about how each hunt would play out if I executed things differently. One of the biggest mistakes I make during glassing is going to fast and taking my eyes away from my spotter. For someone who has never spent hours in one place behind glass, it may seem easy. It’s not! It’s mentally exhausting and your eyes will be strained. Something I picked up from Cliff Gray, a lifetime guide and elk hunter, is to use both binoculars and a spotter. Utilize your binoculars to scan and then use your spotter to get a better look at whatever you see. This one thing has drastically increased my glassing success.
While the thoughts of glassing up a giant muley or elk may seem like easy work for those who have never done it, those who have know better. Just like the digital scouting we do for whitetails, creating a plan and considering these tips to glass will pay dividends in aiding to a successful western hunt. I can almost guarantee you won’t be good at it the first go round but with conscious efforts through preparation and execution you can find success and become better with each western experience. You may even find yourself implementing glassing more and more in the whitetail woods!
Looking for inspirational quotes about hunting? We have rounded the best collection of hunting quotes, sayings, captions for Instagram, status, and messages (with images and pictures) which all hunters who have a love for animals and the outdoors might relate to.
True hunters and outdoorsmen say that they see the sport as a tradition that tests their skills and abilities. To a hunter, it isn’t about the act of killing but rather survival and outwitting their prey. They are passionate about nature and wildlife.
Some animal advocates, might think, it’s just about killing the animal, but a real hunter respects its prey and follows the laws and regulations. Some popular hunting includes deer, duck, goose, rabbit, bear, and more.
Hunting Quotes
“Keep calm and go hunting.” Hunting Quotes
“I like big bucks and I cannot lie.”
“If it flies, it dies. If it hops it drops.”
“There’s no season like deer season.”
“My family tree has a deer stand in it.”
“I’ll never apologize for being a hunter.” Short Hunting Quotes
“If I’ve gone missing, I’ve gone hunting.”
“Every day is a good day when you hunt.” Hunting Captions For Instagram
“Life is short. Call in late and go hunting.”
“Love has 4 letters. So does deer and hunt.” Deer hunting Sayings
“Country girls don’t retreat, they just reload.”
“Hunting is about the journey not the outcome.” Quotes About Hunting
“Father and daughter. Hunting partners for life.” Family Hunting Quotes
“Everybody wants to eat but few are willing to hunt.” Hunting Quotes About Life
“Not all those who wander are lost.” – J.R.R. Tolkien
“Lions don’t dream of hunting, they just go and hunt.” Hunting Quotes Wallpaper
“Sometimes hunting is the only thing that makes sense.”
“Some men are merely hunting; others are turkey hunting.”
“Hunting is not a hobby. It’s a post apocalyptic survival skill.”
“Fishing solves most of my problem. Hunting solves the rest.” Funny Hunting Quotes
“Opening day of hunting season should be a national holiday.”
“Hunting is not a “Blood Sport” it is a sport that is in my blood.” Best Hunting Quotes
“Rifles, racks and deer tracks, that’s what little boys are made of.”
“Fishing poles and hunting gear, dreams of bass and big ole deer.”
“Nothing clears a troubled mind like shooting a bow.” – Fred Bear
“Jingle bells, shotgun shells, time to kill a buck.” – Earl Dibbles Jr.
“A gun is like a woman, son — it’s all how you hold her.” – Rhett Atkins
“Imagine life without hunting. Now slap yourself and never do it again.”
“The history of the bow and arrow is the history of mankind.” – Fred Bear
“You let me hunt is like saying you let me breathe.” – Jase (Duck Dynasty)
“I don’t always tell people where I hunt, but when I do, it’s a lie.” – Dos Equis
“The No. 1 rule of duck hunting is to go where the ducks are.” – Jose Robertson
“Girls who like hunting, fishing and guns aren’t weird. They’re a gift from God.”
“To hunt successfully, you must know your ground, your pack and your quarry.” Famous Hunting Quotes
“The couple that hunts together stays together… or kills each other, one of the two…”
“Wildlife and its habitat cannot speak, so we must and we will.” – Theodore Roosevelt
“If you are not working to protect hunting, then you are working to destroy it.” – Fred Bear
“It’s better to sit in a tree thinking about God than to sit in Church thinking about hunting.”
“You must not only aim right, but draw the bow with all your might.” – Henry David Thoreau Greatest Hunting Quotes
“My biggest fear is that when I die, my wife will sell my hunting gear for what I said I paid for it.”
“In hunting – as in life – sometimes the things you need most isn’t the thing you went looking for.” Hunting Sayings
“Don’t get much better than fall. Bring on the camo, ammo, ducks, and bucks.” – Earl Dibbles, Jr.
“Sunday for me always use to be father’s day, it was the day when both of us went hunting all day.”
“Hunting is not a sport. In a sport, both sides should know they’re in the game.” – Paul Rodriguez
“I’m an outdoors girl – I like to go fishing, riding four-wheelers and hunting.” – Miranda Lambert
“Going to war without France is like going hunting without an accordion.” – Norman Schwarzkopf
“You know, if you need 100 rounds to kill a deer, maybe hunting isn’t your sport.” – Elayne Boosler
“You can see the true heart of a man when you’re out in the woods with a weapon.” – Jase Robertson
“A hunt based only on trophies taken falls far short of what the ultimate goal should be.” – Fred Bear
“There is a passion for hunting something deeply implanted in the human breast.” – Charles Dickens
“I vow to always love hunting season… I mean I vow to always love you. Even during hunting season.”
“You can learn more about bow hunting a deer in a week than a gun hunter will learn in his entire life.”
“If God wanted us to be vegetarians, he would have made broccoli more fun to shoot.” – Earl Dibbles, Jr.
“The only reason I ever played golf in the first place was so I could afford to hunt and fish.” — Sam Snead
“A duck call in the hands of the unskilled is one of the conservation’s greatest assets.” – Nash Buckingham
“A hunter should be well acquainted with his hunting backgrounds, one miss and he could suffer a fortune.”
“Hunting, fishing and archery occupied my every moment. Cared I knew not and cared naught about them.”
“Vegetarians are cool. All I eat are vegetarians — except for the occasional mountain lion steak.” — Ted Nugent
“The lazy do not roast any game, but the diligent feed on the riches of the hunt.” — Proverbs 12:27 (Bible Verse)
“I never knew a man that hunted quail that didn’t come out of it a little politer by comparison.” — Robert Ruark
“Immerse yourself in the outdoor experience. It will cleanse your soul and make you a better person.” – Fred Bear
“Perhaps I should not have been a fisherman, he thought. But that was the thing that I was born for.” — Ernest Hemingway
“If some animals are good at hunting and others are suitable for hunting, then the gods must clearly smile on hunting.” – Aristotle
“In this family, we aim for the game, we wear camo, we respect our rifles, we prey before meals, we lock and load and we never miss.”
“The fascination of shooting as a sport depends almost wholly on whether you are at the right or wrong end of the gun.” – P.G. Wodehouse
“In race between lion and deer, many times deer wins. Because lion runs for food and deer for life. “Purpose is more important than need.” Inspirational Hunting Quotes
“If there is a sacred moment in the ethical pursuit of game, it is the moment you release the arrow or touch off the fatal shot.” – Jim Posewitz
“If I feel free when I hunt, then when I write about hunting I genuinely reproduce that pleasant feeling. I am almost free.” – Miguel Delibes
“The truth is… I’m always saddened when I kill an animal. It’s not remorse I feel, I know why I’m a hunter. It’s out of respect.” – Donnie Vincent
“A true conservationist is a man who knows that the world is not given by his fathers, but borrowed from his children.” – John James Audubon
“It’s about the adventure of being in the center of nature and wildlife, and being grateful to be alive and awake in God’s cathedral.” — Eva Shockey
“Hunting is a relic of barbarism that once thirsted for human blood, but is now content with the blood of animals.” — Christian Nestell Bovee
“Fortunately, as it pertains to guns, my dad and uncle introduced me to guns the way it needs to be done: smart, slow and safe.” — Ted Nugent
“I am my father’s daughter. It was not up to me growing up. I was his hunting and fishing buddy, so I’ve been shooting my whole life.” — Amber Heard
“God grant me serenity. To accept the things I cannot change, courage to change the things I can and the wisdom to know when to just go hunting.”
“Now, therefore take, I pray thee, thy weapons, thy quiver and thy bow, and go out to the field, and take me some venison.” — Genesis 27:3, (Bible Verse)
“Respect your prey: Many native American tribes would forbid a hunter from celebrating his kill, it was thought to insult the animals spirit and would bring bad luck.”
“When a hunter is in a treestand with moral values and with the proper hunting ethics and richer for the experience, that hunter is 20 feet closer to God.” – Fred Bear
“There is no hunting like the hunting of man, and those who have hunted armed men long enough and like it, never care for anything else thereafter.” – Ernest Hemingway
“The hunting partnership between man and dog developed thousands of years ago and from it came a deep bond of affection. I suspect it was the dog’s idea.” – Aaron Fraser
“The old man used to say that the best part of hunting and fishing was the thinking about going and the talking about it after you got back.” — Robert Ruark, The Old Man and the Boy
“When he was young, I told Dale Jr. that hunting and racing are a lot alike. Holding that steering wheel and holding that rifle both mean you better be responsible.” — Dale Earnhardt
“”We wake up while everyone is sound asleep, walk through the mud and water carrying our gear, sit in the freezing rain for hours all for just moments of madness.” We are waterfowlers.”
“You might as well learn that a man who catches fish or shoots game has got to make it fit to eat before he sleeps. Otherwise it’s all a waste and a sin to take it if you can’t use it.” — Robert Ruark
“When done under the rules of good sportsmanship duck hunting is a culmination of art, skill, and scientific endeavor. It is also an act of love, for who loves the birds more than the hunter?” – Bob Hinnan
“Go afield with a good attitude, with respect for the wildlife you hunt and for the forest and fields in which you walk. Immerse yourself in the outdoor experience. It will cleanse your soul and make you a better person.” – Fred Bear
“’The best thing about hunting and fishing,’ the Old Man said, ‘is that you don’t have to actually do it to enjoy it. You can go to bed every night thinking about how much fun you had twenty years ago, and it all comes back clear as moonlight.’” — Robert Ruark
“But love of the wilderness is more than a hunger for what is always beyond reach; it is also an expression of loyalty to the earth which bore us and sustains us, the only home we shall ever know, the only paradise we ever need – if only we had eyes to see.” – Edward Abbey
“A Hunter’s Prayer: We pray our sight be straight and our aim be true. We pray for no pain to the game we pursue. We thank thee Lord for this land. We thank thee for the sights in our stands. We pray for safety one and all. We pray we may return next fall.” – S. Elliot
“A peculiar virtue in wildlife ethics is that the hunter ordinarily has no gallery to applaud or disapprove of his conduct. Whatever his acts, they are dictated by his own conscience, rather than that of onlookers. It is difficult to exaggerate the importance of this fact.” – Aldo Leopold
“I did not mind killing anything, any animal, if I killed it cleanly, they all had to die and my interference with the nightly and the seasonal killing that went on all the time was very minute and I had no guilty feeling at all. We ate the meat and kept the hides and horns.” – Ernest Hemingway
“Deep in the guts of most men is buried the involuntary response to the hunter’s horn, a prickle of the nape hairs, an acceleration of the pulse, an atavistic memory of his fathers, who killed first with stone, and then with club, and then with spear, and then with bow, and then with gun, and finally with formulae.” — Robert Ruark, Horn of the Hunter
I have always tempered my killing with respect for the game pursued. I see the animal not only as a target, but as a living creature with more freedom than I will ever have. I take that life if I can, with regret as well as joy, and with the sure knowledge that nature’s way of fang and claw and starvation are a far crueler fate than I bestow.” – Fred Bear
“I am proud to have been born in Iowa. Through the eyes of a 10-year-old boy, it was a place of adventure and daily discoveries – the wonder of the growing crops, the excitements of the harvest, the journeys to the woods for nuts and hunting, the joys of snowy winters, the comfort of the family fireside, of good food and tender care.” – Herbert Hoover
“Death by violence, death by cold, death by starvation, – these are the normal endings of the stately and beautiful creatures of the wilderness. The sentimentalists who prattle about the peaceful life of nature do not realize its utter mercilessness;…Life is hard and cruel for all the lower creatures, and for man also in what the sentimentalists call a “state of nature.” – Theodore Roosevelt
Hunting and fishing involve killing animals with devices (such as guns) for which animals have not evolved natural defenses. No animal on Earth has adequate defense against a human armes with a gun, a bow and arrow, a trap that can maim, a snare that can strangle, or a fishing lure designed for the sole purpose of fooling fish into thinking they have found something to eat.” – Marc Bekoff
“In a civilized and cultivated country wild animals only continue to exist at all when preserved by sportsmen. The excellent people who protest against all hunting, and consider sportsmen as enemies of wild life, are ignorant of the fact that in reality the genuine sportsman is by all odds the most important factor in keeping the larger and more valuable wild creatures from total extermination.” – Theodore Roosevelt
“The true trophy hunter is a self-disciplined perfectionist seeking a single animal, the ancient patriarch well past his prime that is often an outcast from his own kind… If successful, he will enshrine the trophy in a place of honor. This is a more noble and fitting end than dying on some lost and lonely ledge where the scavengers will pick his bones, and his magnificent horns will weather away and be lost forever.” – Elgin Gates
“Maybe stalking the woods is as vital to the human condition as playing music or putting words to paper. Maybe hunting has as much of a claim on our civilized selves as anything else. After all, the earliest forms of representational art reflect hunters and prey. While the arts were making us spiritually viable, hunting did the heavy lifting of not only keeping us alive, but inspiring us. To abhor hunting is to hate the place from which you came, which is akin to hating yourself in some distant, abstract way.” ― Steven Rinella
Which of these hunting quotes and sayings do you relate the most to? Do you have any other favorite quotes to add? Let us know in the comment section below.
Feel free to share these quotes and sayings on Facebook, Twitter, Instagram, Pinterest, with friends and family.
The most eye-opening learning experiences that I had in my early years were when I started branching out from my home state of Wisconsin. Falling on my face a few times while trying to improve and manage new deer hunting properties taught me very swiftly that few things work everywhere. Deer all have their own personalities, the habitat changes from fence line to fence line and the specifics of each area are quite different. Combine that all and I’ve found it a bit risky to make blanket statements about whitetails, habitat and even the best habitat improvements. Too often, what’s best for one is an utter disaster for another.
That applies to food plot plantings to a great extent, as well. Go to the northwoods of Minnesota, the Upper Peninsula of Michigan or any other large, exclusively wooded area. The same plantings that are ignored in the farm belt can be true deer magnets in the big woods, simply due to a lack of better options.
Go to the dry, sand country of the Southwest and try growing clover in the desert-like conditions without irrigation. It really doesn’t matter that the deer would love it — if it simply won’t grow.
There are a whole bunch of factors that play into these types of things. Still, the longer that I focus on habitat improvements, I keep coming back to the same five crops that find their way into my various food plots. No, I don’t have any great solutions for the desert, but these will do well for almost everyone else, as they are easily my top five deer plantings.
1. Cereal Rye
Cereal rye is such a backbone of my food-plotting methods that I recently wrote an entire article on it. If you’re not well versed on the benefits of cereal rye, I strongly recommend reading that piece carefully. Cereal rye truly is a food plot and deer-feeding workhorse.
After frost seeding clover into cereal rye, the author leaves the plot alone until the following late August, a few weeks after this photo, when he mows it for the first time that summer.
The highlights are that it does extremely well at building the health of the soils, while being very easy to grow, offering superior weed control properties and it merely goes dormant during freezing temperatures. The dormancy is important since not only is cereal rye a powerful draw during deer season, it also is during any portion of winter that snow depths allow deer to paw through the snow to the feed. At the same time, any temperature thaws result in a near instant snap back to growth mode. This 15% protein source that’s highly digestible two to four weeks before spring green up can be a tremendous aid to whitetail survival and health, as well as a big antler builder.
Rather than go any deeper on the subject, please read the entire article. Basically, cereal rye is a tremendously productive planting for both deer and soil health.
2. Clover
My second choice really depends on one’s latitude and the severity of the region’s winters. If it’s in Wisconsin and points north, clover would actually drop to my third choice. With that being said, for Iowa, Illinois, Indiana and states experiencing similar winters, clover is a solid No. 2. Due to their comparatively mild winters, clover is a year-round food source in such states.
A really nice thing about clover is that it’s easy and low maintenance to grow. You’ll notice that in all but two of these seed types, I am not mentioning product names. With that being said, in both the clover and brassica sections, I feel that I have to. While working as a sunflower breeder’s research assistant for a large seed company for three years while in college, I learned fast that there are all sorts of different types of sunflowers. There are the general varieties, such as dwarfs, multi-headed and the standard, tall sunflower, but you can breed strains of each for virtually any trait imaginable.
Clover can truly be the land manager’s workhorse, because it supplies high volumes of very nutritious foods. Photo courtesy of Antler King.
I explain this because many food plotters realize that deer tend to prefer white clover. The catch is that every white clover available has been bred for varying traits. Some are more desirable to deer than others and their hardiness will vary wildly.
For that reason, I feel the need to point out that when I’m talking about clover, I’m specifically referring to Antler King’s Trophy Clover. I have conducted many field trials with this seed, as closely as I could to those that I conducted for the seed company in college. Antler King’s Trophy Clover, as well as their Honey Hole brassica mix, consistently come out on top for the criteria that I value the most. So, when discussing clover and brassicas, those are the specific seed blends that I’m referring to. This is important to note, as results with others may vary.
With that in mind, here is how I consistently get more than seven years of production out of my clover plots.
It all begins with soil testing and properly amending the soil for clover. I usually plant cereal rye the fall before in the selected plot. Doing so enables me to return in late February or March to frost seed clover into last year’s annual crop. When doing so, I seed at 125% the suggested rate and the cereal rye serves as its cover crop. Its ability to allelopathically control weed competition helps combat grasses and broadleaf weeds, but doesn’t impact the clover.
I let that grow until late summer, when I mow the crop for the first time. After that, I merely frost seed each late winter, now at 50% of the suggested rate, spray a grass-only killer once in late spring/early summer, then mow several weeks later and once again in late summer, and apply fertilizer every second year. I continue repeating that cycle until I swap the plot out for something else or when too many weeds start taking over.
When one considers its highly digestible protein levels, the raw tonnage of forage it produces, its comparatively low cost and maintenance, as well as its year-round ability as a food source, and even its eight to nine month production in the harsh winter regions, clover is a heck of a good choice.
3. Brassicas
The differences in varieties are significant in the brassica family of plants, as well. This large family of plants has the reputation as being a great late-season option, as frosts bring the sugars up from the roots of many of its members. When that occurs, the deer can go from ignoring them, to wiping out brassicas in the time that it takes for a hard frost to hit.
But, for as good as brassicas can be as a late-season option, the right mix of strains can result in season-long drawing power for a brassica plot.
To get maximum growth from most members of the brassica family, including volleyball-size turnips, the plants need plenty of elbow room, and going heavy on the nitrogen fertilizer is a good idea. Photo courtesy of Antler King.
This was made painfully obvious to me than when managing ground in southeast Minnesota. Within a half-mile of a 2-acre food plot location, deer could find corn, beans, alfalfa, clover, acorns and a surplus of apples, just to name the bigger draws. Still, the 2 acres of Antler King’s Honey Hole that I planted was completely wiped out by before the first week in October. With the germination and growth rates being optimal, I was shocked.
When troubleshooting the situation with the owner, he suggested the brand that he’d always used, as the deer didn’t touch them until after a couple of frosts. When I planted 1/2 acre in that same location the following year, the plot wasn’t touched before November and lasted beyond the end of the season.
The reason for that stark difference was merely the specific brassica strains used. Most brassica mixes contain varieties that peak in desirability after frosts, whereas Antler King’s Honey hole was specifically designed to offer highly attractive early-, mid- and late-season varieties.
Honey Hole also tests extremely well all winter long. As Todd Stittleburg, founder and developer of Antler King Products for the last 30 years recently told me, “I sent random samples of Honey Hole that I collected from a farm in Wisconsin in February to be tested. If you can offer added energy and protein in January it is important, but it is critical in February. If we can turn deer on to a food source with energy close to and with protein three times higher than corn, that’s a really big and helpful deal! That can make a big difference in animal health, survival, reproduction and rack sizes — and we have just that with Honey Hole.”
In fact, it tested at 25.4% protein, in February, well after the plants fully matured.
To get added production in brassica plots, once they reach 4 to 8 inches high, I top seed about 100 pounds per acre with a mix of three parts cereal rye and one part oats into the brassica plot. Since those seeds will just be spread on top of the dirt, timing this before an all-day soaking rain is best.
By letting the brassicas germinate first, they have a head start on growth, allowing them to stay ahead of the mix. That is, until the deer start hammering the brassicas. Then, as the brassicas are browsed down, the mix of rye and oats continues feeding the deer.
Finally, although I’ll go higher than the suggested seed rate on most all other plantings, I won’t on brassicas. The brassica family has a high tendency for preferring elbow room. If you want to grow big brassicas they need space. It’s the one seed blend that I’d rather plant light than heavy, as production really suffers when planted too thick.
4 and 5. Corn and Soybeans
Frankly, I use as little corn and soybeans as I can get away with each year. As often as not, I’m buying corn and beans back from farm renters at their input costs. Depending on the quality of the crop produced, the input costs per acre of corn range from $300 to $450 an acre. For soybeans they run from $150 to $300 per acre.
That right there is why I plant and/or buy back as little corn and beans as needed to reach the property owners’ goals. They are expensive crops to plant for deer food plots, considering that I can plant any of the other crops listed in this article at a small fraction of those costs.
With that being said, soybeans are good at feeding deer from a few weeks after emergence until the pods are finally wiped out by deer, hopefully in the middle of, or later in winter. Beans and their greenery offer good nutrition that entire time.
Corn is high in energy, which can be very important to prep for the rut and then survive winter, but otherwise it’s rather low in nutritional benefits. At the same time, corn isn’t nearly as consistent of a deer food source. They’ll feed on the young stalks, but lay off as they mature. Then, they hit the dried corn again.
The biggest reason that I plant corn and soybeans is to allow the deer to feed on both, without the need to leave the property. When a property has a lot of acres of food plots to use, that’s when I’m adding corn and beans.
When planting the beans or corn specifically for deer, my first step is to try to score free seeds. Various wildlife organizations often give them away. Another option is to become friends with the local seed co-ops. They can’t or won’t sell seed produced the year before. Get to be good enough friends with them and one can get lucky and have them save those seeds for you.
When the seeds are free or cost very little, it becomes much easier to do what I’m about to suggest. That’s to double plant corn and beans that will be left for the deer. After doing the north/south rows like normal, go back over the same plot with east/west rows. If you put that in a good location for deer, you can pretty much bank on them thinning out your crop. Double planting allows for smaller acreages to survive heavy deer browsing and still often produce an acceptable crop.
Then, as the cherry on top, top seed the same 3:1 ratio mix of cereal rye and oats right into the standing crops in late summer or early fall. Do that and you just greatly extended the life of and tonnages produced by the plot, while also building soils and offering more of a smorgasbord feeding option.
Conclusion
Just as I mentioned at the beginning of this article, next to nothing in the habitat improvement or hunting worlds will work best for everyone, in every situation. After having personally broken dirt for food plots all over the Midwest and points north, these are the five plantings that I’ve found to work best for me, in my specific situations in accomplishing my specific goals. I sure can’t promise that you will be as thrilled with all of these plantings as I have been. But, if you aren’t happy with your plots’ production rates, these are good places to start your search for something that will produce the results you are looking for.
— Steve Bartylla has been a Deer & Deer Hunting contributor for more than 25 years. He is cohost of Deer & Deer Hunting-TV on Pursuit Channel, and host of DeerTopia and two top-rated online shows: Grow ’em Big and Hunt ’em Big at www.deeranddeerhunting.com.
Focus is often placed on a bow’s poundage, draw length, overall design and an arrows length, weight, the broadhead used, and components of the spine. With all this information there seems to be very little attention given to where the actual arrow needs to rest on the bow.
Not only is an arrow rest an integral part of a bow setup, but it can also directly affect the flight and accuracy of the arrow.
Let’s analyze two of the more unique arrow rests, the whisker biscuit and the drop-away rest.
Whisker Biscuit
The introduction of the whisker biscuit in 2003 sent shock waves through the bow hunting industry as it was viewed as a revolutionary piece of equipment that was so simple, so obvious, and yet entirely unique when compared to other arrow rests.
A whisker biscuit’s design is made for simple insertion of the arrow for nocking while providing it with complete stability, there is almost no movement in the arrow’s position.
The “whiskers” that hold the arrow in place are synthetic bristles that form a complete perimeter holding the arrow firmly.
Having the arrow completely encased means the archer can shoot from almost any angle or position. It was this benefit alone that catapulted the whisker biscuit to becoming a firm favorite amongst many tree stand hunters.
Another simple, yet masterful, piece of engineering, was the V-shaped cut into the biscuit called the quick shot – an entry slot that allows the arrow to be loaded with efficiency and ease.
Drop Away Rest
There are many varieties and adaptions when it comes to drop-away rests, but essentially, they all operate in a similar fashion and have a unique feature that distinguishes them from the static rests, such as the whisker biscuit.
The drop-away rest holds your arrow in an upright position through the draw cycle and then falls out of the way as the arrow leaves the bow.
The falling away action of the rest means there is nothing impacting the arrow’s flight. The idea is that there is no external influence on the arrow once it receives the bow’s energy.
With the very nature of hunting being unpredictable, most of the drop-away rests geared for hunters have a full-containment system which holds the arrow firmly in place during full draw.
There are three types of drop-away rests:
Cable-driven rests: These use a cord that connects to the down cable of a compound bow. Once the bow is drawn, the cable pulls down on the cord, which raises the rest into position. When the arrow is released, the cord flies up and the rest falls.
Limb-driven rests: With this type of rest the cord attaches to the top or bottom limb. The cord holds the rest in the down position. When the bow is drawn, the cord relaxes, and the rest rises into position. At the release of the trigger, the limb goes back to its normal position, pulling the cord tight and the rest down.
Inertia rests: Here the cord is attached to the don cable or limb, but they can be cocked in the upright position which will help if the bow is drawn and then let down without shooting, the arrow will stay in the shooting position. Only once the string is released will the inertia fall away.
Pros and Cons of the Whisker Biscuit
Pros:
Simplicity
No moving parts, means zero chance of mechanical failure and repetitive maintenance
The arrow is firmly held regardless of how the bow is angled
Comes in three different sizes to accommodate small to large arrow spines
Not affected by varying weather conditions
Cons:
Although very slight, the whisker biscuit does reduce speed and accuracy of the arrow. The difference is minuscule which should not affect hunters, but it is something to consider for competition shooters
Whiskers will put stress on the arrow vanes, and they will need to be re-fletched after a while
Adds a noise to the bow. Again, a minor issue but many bow hunters want their setup to be as quiet as possible
Pros and cons of the Drop Away Rest
Pros:
Allows for better accuracy and tighter groupings for those hunters who want to be specific in their target shooting
Minimal friction on the arrow which turns out a higher arrow velocity
Quieter as the arrow does not have to pass through any bristles
Cons:
Prone to failure with moveable parts, constant maintenance must be done
Pricing of a drop away rest on average can be higher than a whisker biscuit
The arrow may fall off from the rest while moving or crawling to get closer to an animal
Moveable parts tend to be affected by extreme weather conditions
Attaching the cords to the limbs or strings may take time or be forgotten by the hunter
Which is Faster?
Speed is on every bowhunter’s mind, and many have questioned whether an arrow rest affects the speed of an arrow? The short answer is yes, but which arrow rest is faster and by how much?
Various chronograph tests on arrows fired from a whisker biscuit versus one fired from a drop-away rest have consistently shown that the arrow from a whisker biscuit is on average 3 – 6 feet per second slower than a drop-away rest.
It is simple physics that the more drag created on a moving object, the slower its speed and momentum will be.
What is interesting however, was the variation in speed of arrows with different vanes when fired from a whisker biscuit.
4” Vanes slower by 1 – 2 feet per second
5” Vanes slower by 5 – 7 feet per second
5” Vanes with a 6-degree helical slower by 12 – 15 feet per second
How to Choose the Right Rest?
In order to choose the correct arrow rest, it is best to match the rest with the type of archer you are.
A hunter that prefers to put a stalk on through wooded areas or has no problem crawling over rocky ground to close in the distance on an animal would want their arrow to be held firmly in place and not have to fiddle with cables or drop plates just before letting an arrow fly.
Hence, they would be inclined to choose the whisker biscuit.
Then you have a competition shooter that needs every part of their bow to be perfectly in tune and adapted to pinpoint accuracy.
Competitive shooters will scrutinize every inch of their equipment and wouldn’t settle for bristles that may influence the accuracy of the arrow by as little 1/16th of an inch. This accuracy comes from the drop-away rests.
Some questions that may help with decision making:
Are you happy to sacrifice a small amount of speed for arrow stability?
Is the risk of mechanical failure a concern?
Are you ok with replacing vanes on a regular basis?
Conclusion
Although these points can be seen as minor or easily managed through the correct maintenance of your equipment, they are none the less still issues which many archers would need to consider when deciding on a whisker biscuit vs drop-away rest.
You need a good swimbait to catch fish consistently. There are so many types of swimbait out on the market, making it tough to know what swimbait to use and when to use it. I have found the 5 swimbaits listed below to be great for “Kraken” bass, helping me have great success after several years of trial and error. This article will walk you through what you need to look for in a swimbait. Plus, it’ll give you a strong baseline of swimbaits to use to consistently outperform all the others. Hopefully, this information on soft plastic swimbaits will help eliminate some confusion for you. In addition, there are several tips and a video of each of these swimbaits in action to help you become a better swimbait fisherman. Enjoy the post!
What Makes A Good Swimbait
A swimbait can be one of the best lures to use for bass fishing. They allow you to cover a lot of water and-best of all-bass crush them! Unfortunately, not all swimbaits are created equal. Almost every fishing brand has one kind of swimbait or another. What separates the effectiveness of a swimbait is its size, swimming action, and the colors.
Fortunately, I’ve spent a lot of time on the water, and boiled the mass amount of products down to 5 good swimbaits that will consistently catch you big bass all year long. Feel free to leave a comment below if you disagree with any of the swimbait listed. I’m always open to try new gear and techniques. Plus, don’t forget to check out the video at the bottom of the post to see these swimbaits in action and see proof of why these are the best. Soak in the stoke!
Keitech Easy Shiner Swimbait
One of the all-time best swimbaits is the Keitech Easy Shiner. This swimbait is awesome because the tail will wobble perfectly without barely any movement on the retrieve. Plus, the thin body is a perfect baitfish imitator. The best way to fish this swimbait is with a 1/8oz. darter jig head on a light spinning rod. You can cast it a mile and the darter jig head will help keep the swimbait horizontal as you retrieve it through the water. Prepare to reel in the bites with this awesome lure.
Rigging Up Keitech Easy Shiner Swimbaits
4″ Ayu Keitech Shiner
1/8oz. Gamakatsu Darter Jig Head
7′ Medium Heavy Spinning Rod & Reel Size 30
Basstrix Paddle Tail Swimbait
I have found the Basstrix Paddle Tail to be a great swimbait on the market. Its action is incredibly unique compared to any other swimbait. The entire body wobbles as the tail kicks. This extra vibration in the water from the Basstrix swimbait’s body wobble helps draw some serious strikes. The Basstrix needs to be retrieved a little faster than other swimbaits to get the right action, but it still crushes bass. Plus, the hollow body enable some cool rigging options to keep the bait from catching in the weeds. This swimbait is a definite must-have in your arsenal.
Rigging Up Basstrix Paddle Tail Swimbaits
1/4oz. gamakatsu swimbait jig head
5″ Basstrix Ayu Paddle Tail Swimbait
7′ Medium Heavy Baitcasting Rod & Reel
Jackall Rhythm Wave Swimbait
The Jackall Rhythm Wave is one of the best swimbaits because of its perfect finesse presentation. I love how the Rhythm Wave’s tail will kick on the slowest of retrieves. Plus, the body has a good rocking action to give it a little more presence in the water. Another cool feature about this swimbait is the scale imitation body style stripes that go down across the entire swimbait. This helps give it a natural baitfish appearance in the water. The bass never fail to choke this swimbait down with some serious stoke!
Rigging Rhythm Wave Swimbaits
3.8 Prims Shad Jackall Rhythm Wave
1/8 Oz Gamakatsu Darter Jig Head
7′ Medium Heavy Spinning Rod & Size 30 Reel
Megabass Spark Shad Swimbait
I like the Megabass Spark Shad swimbait for a variety of reasons. It swims incredibly straight and the body style is a perfect representation of a small fish with the extra front fins. The tail will kick easily on a slow retrieve, and this swimbait comes in some awesome natural colors. The only downside to this swimbait is the eyes will fall off; however, this doesn’t detract the bass from chomping it down. The holes in the top of the bait also help make sure you get the bait rigged up perfectly straight every time. The Spark Shad swimbait really gets those bass “Kraken.”
Rigging Megabass Spark Shad Swimbaits
4″ Real Megabass Spark Shad
3/8oz. Megabass Body Balance Jig Head
Baitcasting 7″ Medium Heavy Rod & Baitcasting Reel
Keitech Fat Swing Impact Swimbait
The Keitech Fat Swing Impact Swimbait is really useful to keep ’em biting. I love the action on this swimbait. It is incredible. The body kick and the tail wag is perfect at the slowest of speeds. This swimbait works amazing as a trailer on a spinnerbait or a swim jig. Traditionally, this swimbait is used a lot on umbrella rigs too. Yet, it still crushes sitting straight on a lead jig head, slowly retrieved through the water. This swimbait is a bass-killer all season long.
Rigging Keitech Swing Impact Fat Swimbaits
4.8″ Ayu Keitech Fat Swing Impact1/4oz. Dirty Jigs Bluegill Swimbait HeadBaitcasting 7″ Medium Heavy Rod & Baitcasting Reel
Swimbait Fishing Video Demonstration
Here’s some footage of these 5 effective swimbaits being tested by me in one morning of fishing. Each of these swimbaits produced some decent bass. Hopefully, you can pick up a few tips from these clips on how to fish these lures as well. A good swimbait and some nice lures are, hands down, one of my favorite ways to catch bass. I hope these videos get you stoked to see how well a swimbait can work for you. Enjoy the vid!
Hopefully, this video and information will help you level up your game to catch more bass on a swimbait. Don’t forget to subscribe to the blog and follow @Krakenbass on all the main social media accounts to keep you up to speed with new posts and information to help you catch more big bass! I’d love to hear from you in the comments below to learn some of your favorite soft plastic swimbaits. There is something magical about these swimbaits that really get those bass “Kraken!”
Most modern bows have a complex method to adjust the draw length, and most require a bow press.
However, Bear compound bows are generally very easy to adjust and do not require the use of a bow press.
For this reason, Bear compound bows are one of the best bows for beginners.
Bear Adjustment System
Bear bows are one of the most beginner-friendly compound bows on the market.
This is because Bear archery made their bows completely adjustable for the draw weight and even the draw length.
There are some variations between the models, but the concept is generally the same.
Adjusting the Draw Length
Adjusting the draw length on your Bear compound bow is quite simple and can be done in less than ten minutes.
There are two steps to adjusting the draw length of a compound bow. First, we will adjust the module; this will set the draw length to your desired length.
Second, we must set the stop; this will ensure that the cams stop turning when you drawback.
Tools Needed
Adjusting a Bear compound bow is so easy that there are no tools needed other than the right size Allen keys.
This varies from model to model, so I like to have an Allen key set.
Fitting the small screws can also be a bit tricky, so I like to put my bow in a bow vice when adjusting it; however, this isn’t necessary.
Adjusting theModule
A compound bow module determines the draw length of a compound bow.
Many modules have only a limited range, allowing the bow to be adjusted in only small increments or in some cases, not at all.
However, the modules found on a Bear compound bow have a wide range of adjustments and, in most cases, do not need to be swapped for any size draw length.
To adjust the draw length on the bear compound bow module:
Find your draw length number. Once you know your draw length, you can find it’s corresponding number on the bear compound bow cam. For example: on a Bear Wild compound bow a 28 inch draw is number 4 on the module.
Secure the bow in a position that is comfortable to work on.
Locate the module. This is usually located on the cam on a single cam bow. On a dual cam bow the module is typically located on the tom cam.
Unscrew the two screws on the back of the module. Be careful not to lose the screws as the module will fall once the two screws are undone.
Slide the module to the number that corresponds with your draw length.
Locate the two holes that perfectly align between the module and the bow and redo the screws. Hand tighten the screws and be careful not to overtighten.
Adjusting theStopper
Now that the draw length is set, we have to set the stopper to align with the draw length.
Locate the stopper. Typically on a single cam bow, the stopper is located on on the outside of the cam.
On a dual cam bow, there are two stoppers, and it is important that both are set equally to ensure your bow is firing evenly.
Undo the stopper and set it to the same number as what you set the module to.
Drawback your bow to check your draw length.
Important Things to Remember
Ensure that you are using the proper tools. Some bow manufacturers use metric measurements, and others use imperial. Find the one that fits your bow perfectly to prevent damaging the screws.
Double-check that you are undoing the proper screws. There are a lot of screws around the cams of a bow, so it’s important to double and triple-check that you have the correct screw.
Undoing the wrong screw could cause damage to the bow and injury to you.
Final Thoughts
Adjusting the draw length on a Bear compound bow is straightforward.
Once you find your corresponding number on the module to match your draw length, it’s only a matter of moving the module and the stopper to that number.
The whole process takes less than ten minutes, and you’re back up shooting again.
It’s easy to mistake the screws, so double-check that you have the right screw before undoing it to prevent damage and possible injury.
From left to right: Three sizes of coyote trap: No. 1.75 with 5 inches of jaw spread; No. 2 with 5-1/2 inches; No. 3 with 6-1/2 inches.
It’s a perennial question—how big of a trap do I need for coyotes? Seems like someone at every trapping convention I attend asks if he can catch coyotes with the No. 1.5 footholds he already owns and sets for fox and coon, and I hear countless tales of coyotes caught in No. 1.5 traps, all of which are no doubt true.
But if you set out to be a coyote trapper with a bunch of No. 1.5 traps, you’re just setting yourself up for disappointment. The trap is simply too small to be a reliable coyote catcher.
If you want to move up to coyote trapping, you need something a little bigger. That would be the No. 1.75 class of traps. Give or take a little, 1.75 traps have an inside jaw opening of about 5 inches. Some people think this still is too small for coyotes. I disagree. In fact, I catch a lot of coyotes with these traps. I do concede they are the smallest I would want to use for coyotes, and the relatively small jaw spread must be considered when making sets. If a coyote’s foot isn’t pretty much centered in a No. 1.75 when the trap fires, it isn’t going to get a good grip. I take precautions to prevent this.
Solid trap bedding is important with any trap, even more so when setting a trap of this size for a coyote. There’s a good chance the coyote might not step exactly on the trap pan, and if it steps on a jaw, instead, I don’t want that trap to wiggle, or, worse yet, flip up out of the bed.
A coyote is a heavy animal, and its foot exerts a lot of pressure. When I’m checking a bedded trap for stability, I don’t push gently on it, I push hard. If the trap moves, I adjust the bedding until it doesn’t. If a trap moves underfoot, a curious coyote is likely to stop working the set and instead dig up that trap.
I also make the trap bed as small as possible, so I don’t have to repack a lot of loose dirt outside the trap jaws. If this dirt isn’t packed in really well, a heavy-footed coyote may sink into the loose dirt, back off and start digging.
Truth is, you are going to have some misses with these small traps, when the coyote’s foot isn’t centered on the pan within the small radius of the jaws. The trick is not to arouse the coyote’s curiosity, or worse yet, spook it with a poorly bedded trap. If you don’t spook it or educate it, you might catch it on the next step or the next visit. The trick is to make sure everything stays in place until the coyote steps squarely on the trap pan.
I also put a significant amount of tension on the trap pan. If a trap is set exclusively for coyotes, I don’t want it to fire until 4 pounds of downward pressure is being applied by the animal’s foot.
If you’ve never set a trap with 4 pounds of pan tension, you may think it way too much. Four pounds is a lot of weight. You can set a half-gallon plastic jug of water on a trap pan with 4 pounds of tension, and it may not fire. But trust me, when the coyote shifts its weight to that foot, it will be pressing down harder than 4 pounds, and the trap will fire.
If I want to also have a shot at catching a fox, I may back off to 2 or 3 pounds.
This heavy pan tension serves two purposes. First, it prevents the trap firing if perchance the coyote just brushes the pan with the edge of its foot. No. 1.75 traps have a small enough jaw radius that a coyote’s foot may straddle a jaw and still touch the pan. You don’t want the trap to fire at that point, because it won’t get a good hold on the coyote’s foot, if it gets a hold at all. You not only want the coyote’s foot centered on the pan, you also want that foot to be pushing down hard before the trap fires.
Think of it like the diving board at the old swimmin’ hole. If the board is so rotten it breaks when you first touch it with a toe, you’ll still be balanced with your weight on your back foot and probably won’t fall in. But if the board has a little strength left, and you step all the way onto it before it breaks—down you go.
With heavy enough pan tension, by the time the pan breaks free, the coyote has committed enough weight that the foot falls, and the coyote can’t react quickly enough to pull that foot back out. It literally falls into the trap, which helps the little jaws get a better grab on its paw.
Foot guides are the final thing I apply at the set to get the coyote’s foot squarely centered in the trap. Foot guides are small objects placed outside of the set trap’s jaws to help steer the coyote’s foot directly onto the pan. Foot guides should be just big enough that a coyote would be uncomfortable stepping on top of them.
Don’t overdo it and build a wall around the trap. The foot guide is more a subtle hint, something the coyote notices and processes in the back of its mind, just as it does every other time it takes a step.
At a dirthole set, small clods in the dirt pattern make natural foot guides. Otherwise, stones no bigger than a golf ball, small sticks or other debris from nearby the set can be used.
I typically place three foot guides in a triangle around the trap, being careful not to locate any of them above the jaws or over the levers of the trap. Sometimes it’s helpful to put the guides in place before sifting the final covering of dirt or chaff over the set trap.
If a No. 1.75 gets a good grip on a coyote’s paw, it should hold that coyote. You can soup the trap up with four coils and other modifications, but a stock two-coil No. 1.75 should catch the average coyote and also make a pretty good trap for red fox, too, though it may be a little too much for the smaller grays.
If I’m trapping where I’m fairly certain I’m only going to catch coyotes, especially if I am being commissioned to remove said coyotes, I’m going to set a No. 2 trap, the next size up. In general, the No. 2 is a 5-1/2-inch trap as opposed to the No. 1.75, which is a 5-inch trap. A half-inch may not sound like much, but it can make a big difference in the way trap jaws catch and hold a coyote.
Just be aware that there is no industry-wide standard to the numbering system. Some No. 2 traps have a jaw spread no greater than some No. 1.75 traps.
You need to check for yourself.
Here, we also begin to hit legal restrictions on jaw spread. In Ohio, we are not allowed to set a trap on dry land that has an inside jaw measurement greater than 5.625 inches. I check to make sure each No. 2 trap has an inside jaw spread of at least 5.5 inches but no more than 5.625.
Again, buyer beware.
With the No. 2, we enter the realm of dedicated coyote traps, and since I set these traps specifically for coyotes, some of mine are outfitted with Paws-I-Trip, a replacement pan and dog system that produces 3 to 4 pounds of pan tension. It works on mechanical advantage. There is no bolt to tighten, and there is nothing to go out of adjustment.
Yes, it is slightly more tension than I want for a fox, but again, these traps are dedicated to coyotes, and I am not trying to catch fox with them.
When setting this larger trap, I still follow the same rules for careful bedding and foot guides as I follow when setting the No. 1.75. The half-inch of extra jaw spread just provides a bigger working area and an increased chance at getting a good across-the-pad catch on a coyote.
On the upper end of the range of coyote traps are the 6- to 6-1/2-inch traps. The numerical size means even less with traps of this size. It seems trap makers assign No. 3 and No. 4 designations almost at random. Some No. 3 traps are actually larger than some No. 4. Perhaps because of this, some manufacturers instead designate their traps by the actual measured jaw spread, for example 650 for a 6.5-inch trap.
I certainly applaud that choice.
I follow the same setting procedures and don’t think there is much need for a coyote trap larger than 6.5 inches. So, for me, that runs the gamut of coyote traps.
The No. 1.75 is as small as I want to go, but used carefully, it can make a very serviceable trap for coyote and also fox. Bigger traps are less appropriate for fox but better suited for coyotes. Know the law and then decide what is the best fit for you—as well as the local coyotes.
The first shot I ever took of APEX TSS Turkey hunting ammunition put 297 pellets into a 10″ at 40 yards. Before the morning was through, I found a choke tube that would give me 378 pellets in that same circle at the same range. To put that into perspective, that is a dinner plate with almost 400 holes in it, we are talking about devastating effectiveness. Most lead turkey loads do not even have that many pellets in the shell!
The APEX TSS Turkey loads have demonstrated the best pattern efficiency of any turkey load I have ever shot as of this writing. The patterns are amazing. And as I understand it, others have gotten even tighter patterns with tighter chokes. Now there does come a point where the pattern can be too tight but more on that later.
The bottom line is this ammo is impressively effective and I could not rate it any more highly. But there is more to it than that. If you are considering this ammo or any TSS turkey shells, this review will provide you with insights and data from my firsthand first tests.
If you are looking for more info on turkey hunting shotguns, ammo, and chokes, check out these podcast episodes I have done on the subject:
Turkey Hunting Guns and Ammo For Beginners
Turkey Hunting Shotguns | Is Bigger Better?
Turkey Hunting Shells, Shot, & Chokes
Should You Hunt Turkeys With Tungsten Shot?
The Big TSS Questions.
The two most asked questions regarding turkey hunting ammo of this caliber are:
Is that level of performance really necessary?
Is this TSS Ammo worth the price?
After having done some tests with the APEX and hunting with TSS in general, those are easy questions to answer. For the first question, yes, this kind of performance is absolutely necessary IF you plan to hunt beyond 40 yards. Is it worth the price? Yes, IF you plant to hunt beyond 40 yards.
Tungsten Super Shot gives you increased range and lethality at range. That is its greatest strength. If you plan to hunt at 25-35 yards, it just is not needed. You can use much cheaper lead shot, like Winchester Long Beard XR to easily and efficiently take birds at close to mid-range. TSS shot gives you the ability to punch out further, to hunt at truly extended ranges. And if you want that flexibility, there is no substitute for the power and patterns that APEX brings to the hunt.
How Many Pellets Do You Need?
My rule of thumb that I use for all turkey hunting ammo of all sizes and densities is 100 pellets in a 10″ circle at the range you plan to shoot. At close range, almost anything will work for turkey hunting, lead target loads, steel, bismuth, anything. When you get to the 40 yard line however, your choices are very few if you want to get 100 pellets in a 10″ circle. There are a handful of lead loads that are up to the task, like the Winchester Long Beard.
If you want to hunt beyond 40 yards, lead quickly drops below the pattern density threshold. Even though the marketing sometimes quotes things like “Putting twice the pellets in a 10″ circle than comparable turkey loads out to 60 yards” you need to ask what are they really claiming? They are saying their lead turkey ammo is twice as good as others, but none of them live up to the standard of 100 pellets in a 10″ circle at 60 yards. But APEX TSS Turkey does.
Pattern & Ballistics Gel Test Results
I put APEX to the test at 40 yards and at 60 yards with the same Carlson’s 0.670 turkey choke and here is what I saw: 378 pellets of #9 shot at 40 yards with 170 pellets at 60 yards. This means that at 60 yards, the APEX is more effective than almost every lead load on the market is at 40 yards. These shells easily give you the ability to punch out to 70 yards, perhaps more if you have a tighter patterning choke than I did.
You might wonder if these tiny #9 TSS pellets still pack enough punch to get the job done. Well from my field testing, the #9 TSS has about 32% more power at 40 yards than lead #6, which gives it almost as much ballistics gel penetration as lead #4. And at 50 yards, the APEX TSS still had 3.26″ of gel penetration. Which is mind blowing. That is a lot of numbers, but what it means is that at range the TSS #9 packs similar power to the largest lead shot that is legal to use in my state.
I tested the APEX TSS Turkey in 3″ shells with 2.25 oz of #9 tungsten shot going at 1150 FPS using a Mossberg 940 Pro Turkey shotgun with a 24″ barrel topped with a Holosun 507k red dot. For even more, check out my video where I pattern tested multiple chokes with the APEX TSS Turkey ammo:
Can A Pattern Be Too Tight?
It can be easy to get the impression that a tighter pattern is always better, and with TSS you can actually get to the point where a pattern can be too tight. Of course, pattern density is relative to range, so if you go far enough even the tightest pattern becomes perfect. But at close range, a pattern can be so tight that you are able to miss a turkey.
If your pattern is softball sized at 20 yards so you can have a tight pattern at 60 yards, then it can be like trying to hunt turkeys with a slug gun or a rifle when you are only aiming for head shots.
I personally still want to have some margin of error at 20 and 30 yards so I can take birds that come in that close. So for me, the patterns I got with the Carlsons .670 turkey choke were ideal. Some people aim for even tighter patterns to be able to shoot even further, and that is cool, but I cannot see myself needing to shoot past 70 yards where I hunt. For my hunting area, a good realistic long-range shot is about 50-55 yards. I cannot see much further than that.
Here are some additional videos I’ve done on turkey hunting ammo to help you take things to the next level.
The 4 Types Of Turkey Hunting Ammo
8 Turkey Hunting Ammos Put To the Test
The Truth & Lies About Tungsten Shot
How Much Difference Do Turkey Chokes Make
Cons & Concerns
So, it is not all rainbows and sunshine with these loads, there are a couple of cons. First, the recoil is major. For one or two shots under the adrenaline of hunting conditions, its ok. But for pattern testing at the range, the kick is brutal. I would recommend sizing down from the 2.25 oz to the 2.0 oz 12-gauge version to trim off some recoil energy.
Just shedding that 0.25 oz of shot cuts recoil from about 66 foot-pounds of recoil energy to 54 foot-pounds. That is a major help to the shoulder. A semi-auto shotgun can also help, check out this article I did on the subject: Do Semi-Auto Shotguns Have Less Recoil REALLY? All TSS that is hotly loaded will have the same concerns, thankfully APEX has enough load options that you can pick how much shot and recoil you want.
Second, the cost is high on TSS shells, coming in at nearly $13 per shell. You can save some if you step down to 2.0 oz version as well. They are about the same price as other TSS loads on the market, if not a little less expensive. They compare well, but TSS turkey ammo in general is expensive.
As I said early on, it is worth it if you are going to use it to its full potential. Most hunters shoot one or two shells a year in the field so a box of 5 shells may last you 3 years or more once you are sighted in, that is not a bad investment for the best turkey ammo on the market. But if you are going to hunt at short range with it, save the money and buy lead.
Conclusion & Recommendation
The APEX TSS Turkey loads are just devastatingly effective. So much so that a 20 gauge is probably more than enough for most hunting scenarios. There is really no need for the more heavily loaded 3.5″ 12-gauge shells either. In fact, this ammo really does make a 28-gauge shotgun viable for turkey hunting, those shells still have 477 pellets of #9 TSS in them.
In conclusion, I also really like APEX as a company. It is a veteran owned American company with a great story and high quality. These TSS turkey shells demonstrate outstanding performance at a good market price, and they are viable on their own merits. Being able to support a great company is just another big benefit in my book.
Be sure to listen to The New Hunters Guide Podcast and check us out on YouTube.
Till next time. God bless you, and go get em in the woods!
George Konetes Ph.D. – Founder and Host of the New Hunters Guide.
The New Hunters Guide is simply what George wishes he would have had when learning how to hunt; a single place to get practical hands on knowledge about different kinds of hunting, gear, strategy, and tips that can improve your comfort and fun factor in the woods.
Like with any hobby, shopping for gear can be just as fun and exciting as the activity itself.
This is why lots of people end up with multiple tools, especially if their hobby benefits from upgrading and replacing their old stuff.
This is the case for anglers and fishing enthusiasts, so many also wonder what to do with old fishing rods.
If you’re one of these folks who want to declutter and get rid of your old fishing gear without tossing them to the bin, you’re in luck.
We have just rounded up 5 ways to recycle these stuff, so make sure to read on.
What to Do with Old Fishing Rods
1. Turn them into decor.
If you have old fishing gear on hand, it would be highly likely that you’ll thoroughly enjoy the activity and you wouldn’t mind if others knew about your hobby.
If you’re thinking of introducing some elements of this hobby into your interiors, then you easily use your old fishing rods as decor.
Some mount their vintage rods as is to add some rustic vibe to their space.
Others use them as an accent to wall hangings to add more personality and humor to their decor.
If you’re quite creative, you can also come up with your own way of displaying them around your home.
2. Re-use them for gardening.
If your old rods are still in great shape, you can easily repurpose them around the house. Most folks use them as gardening stakes as their flexibility comes in handy for such an outdoor use.
3. Re-use them as shelter rods.
Another way to repurpose old fishing rods is by turning them into shelter rods.
So if you like to set up your own little shelter when you spend some time outdoors, you don’t have to purchase rods that are specifically made for such purposes anymore.
4. Use for spare parts.
In case you’re the handy type and you would want to have a go at tweaking and tuning the mechanisms of your fishing gear, it would be ideal to hold on to your old fishing rods and reels. This way, you’ll have on hand spare parts for your projects.
Even faulty old rods can still find a lease on new life through this method, so it can be worth a shot.
The only downside is that you might end up hoarding old gear instead of decluttering your collection.
5. Donate them.
Last but definitely not least is donation. There are several organizations that accept old fishing rods, even the ones that don’t work anymore, so they can hand them down to folks who need them but can’t afford them.
These groups often work with the youth, so if you want to inspire younger generations to enjoy this beautiful sport, you should take this option into consideration.
Conclusion
There are lots of great reasons why you should find out what to do with old fishing rods.
Not only will this help you cut down the waste you create through your hobby but it will also let you help others as well.
Unveiling the truth behind dry firing a Gamo air rifle, this intriguing headline delves into the possibility of safely practicing without ammunition. Join us...





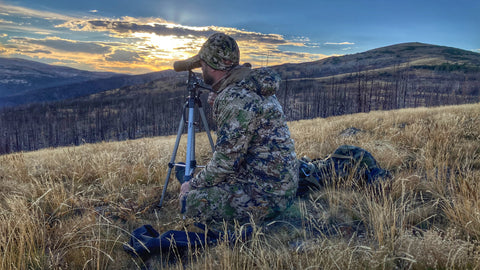
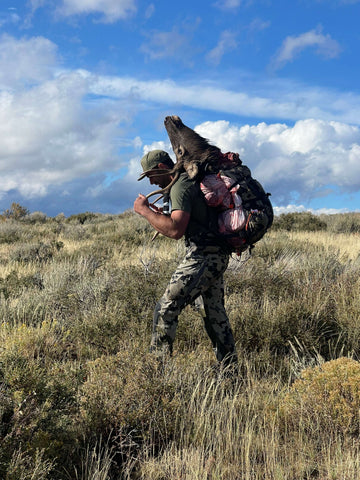


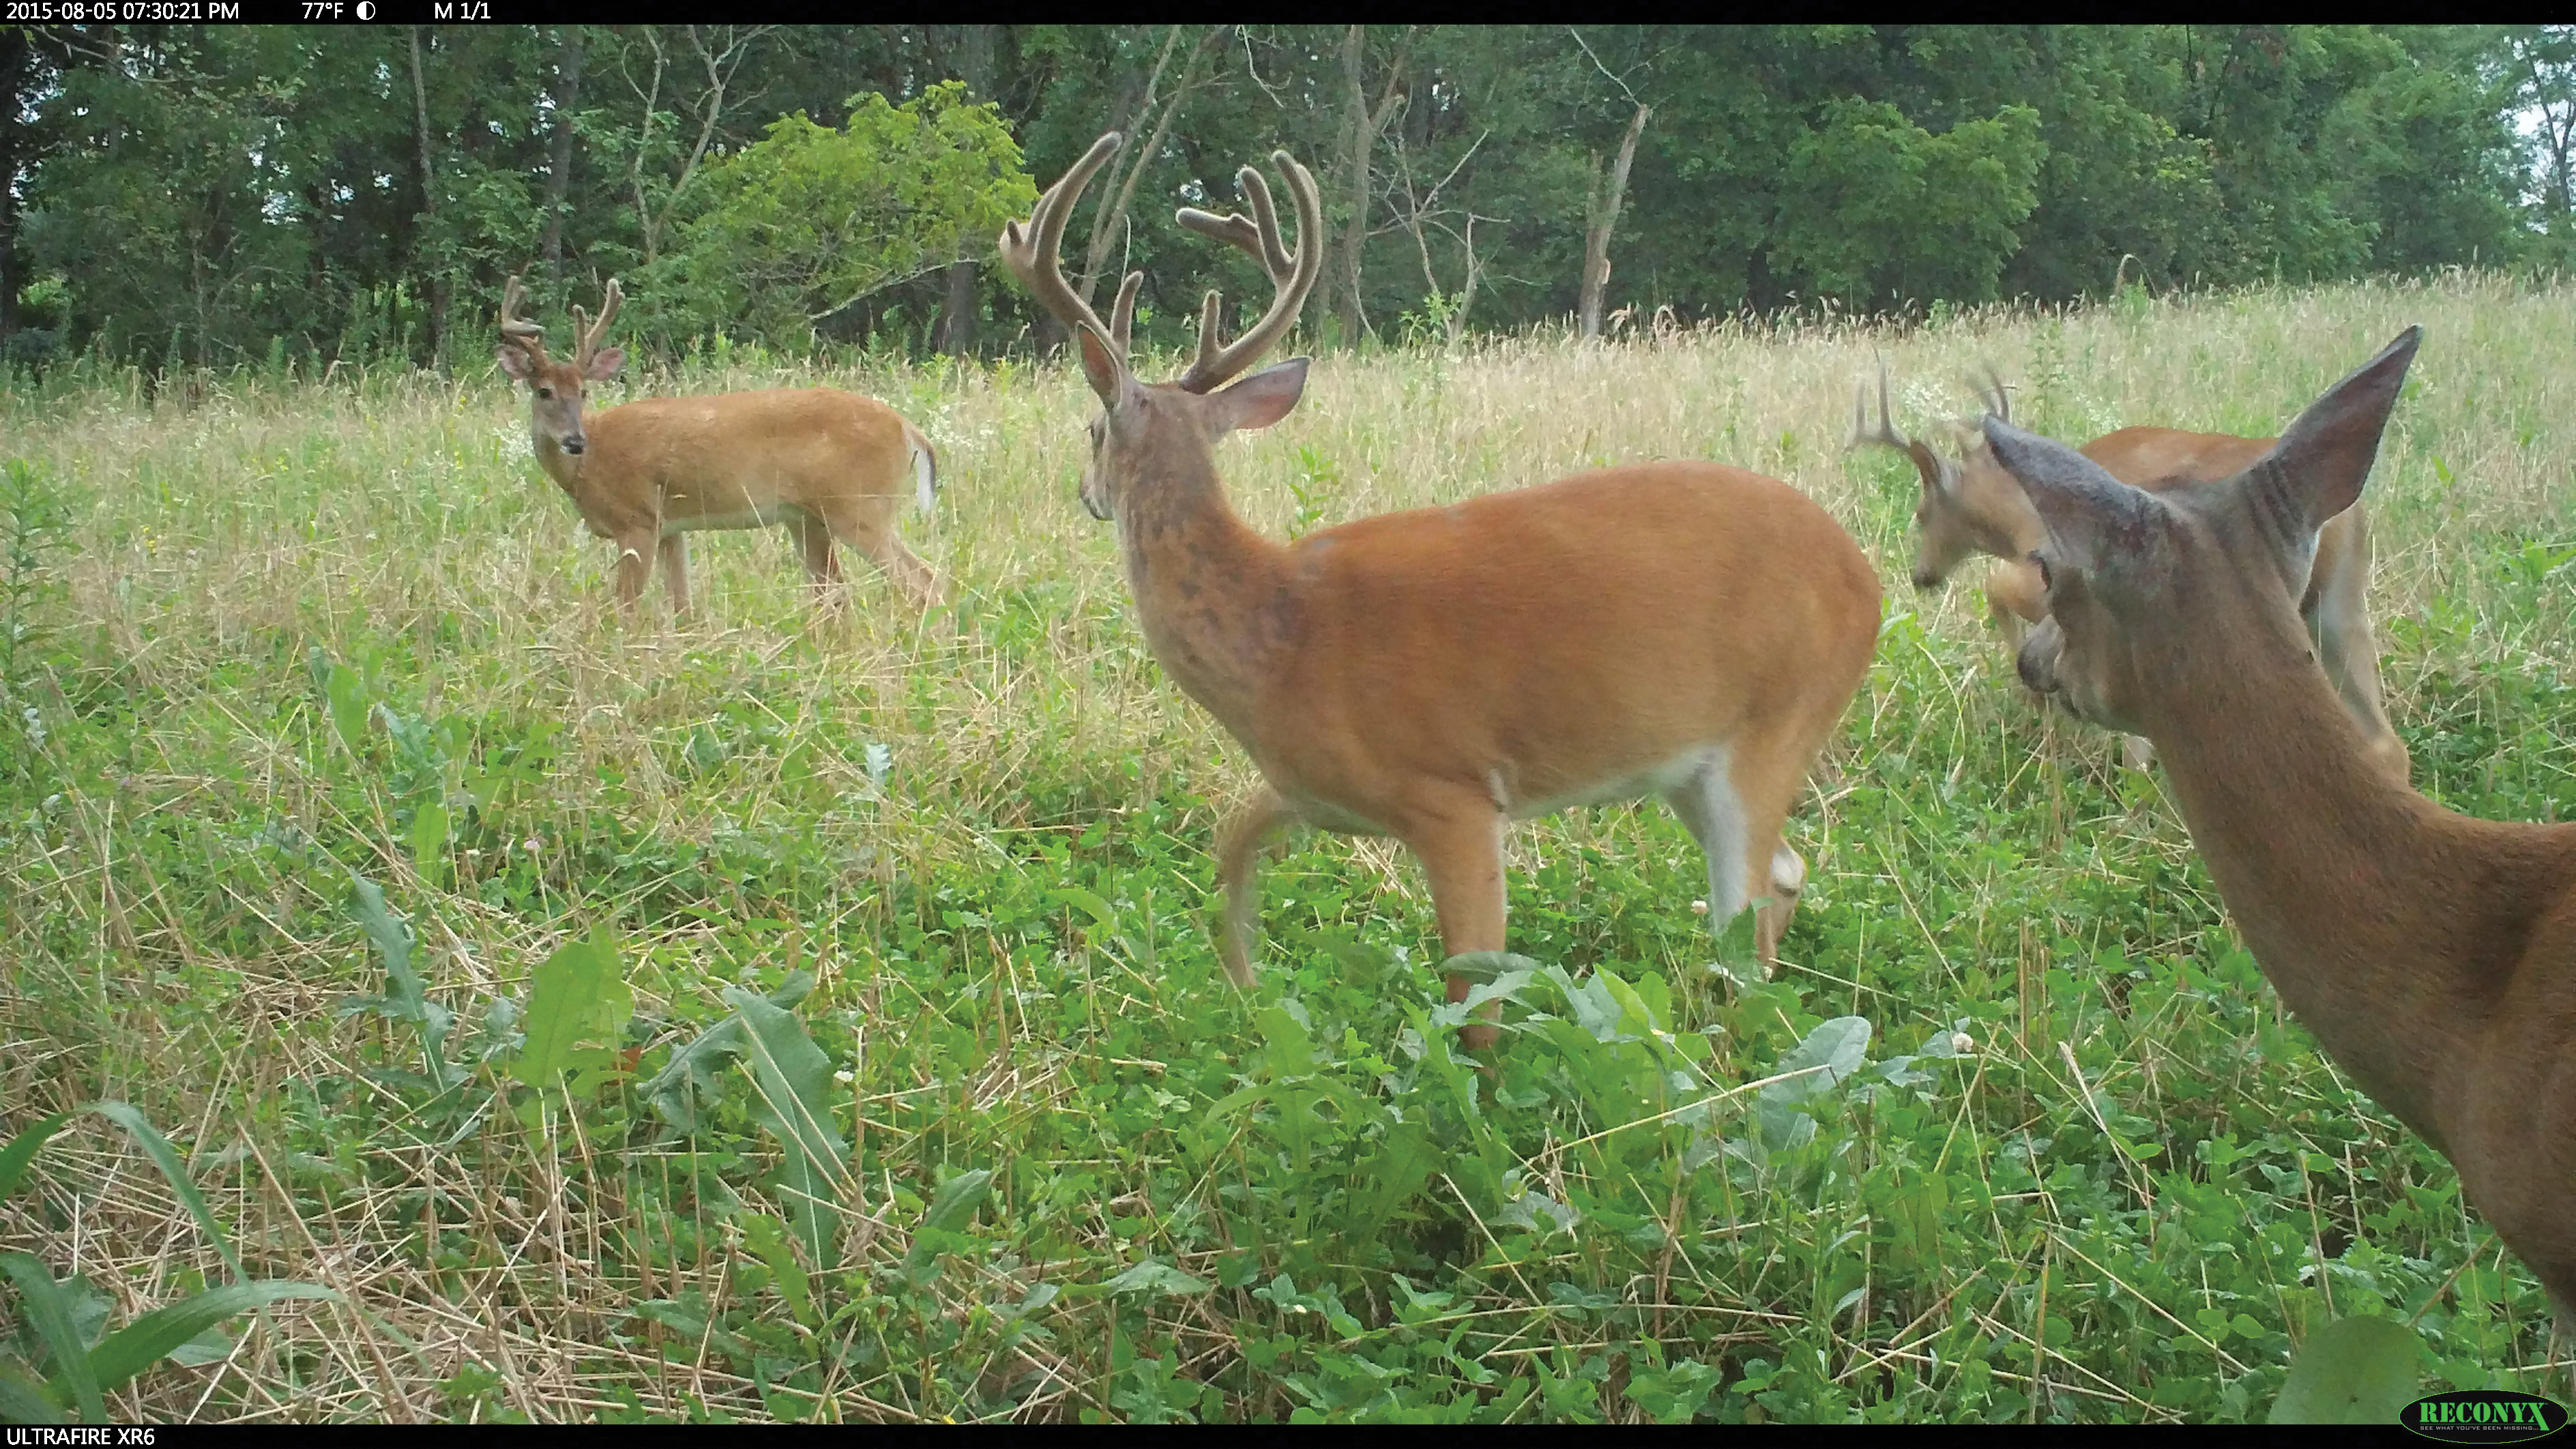
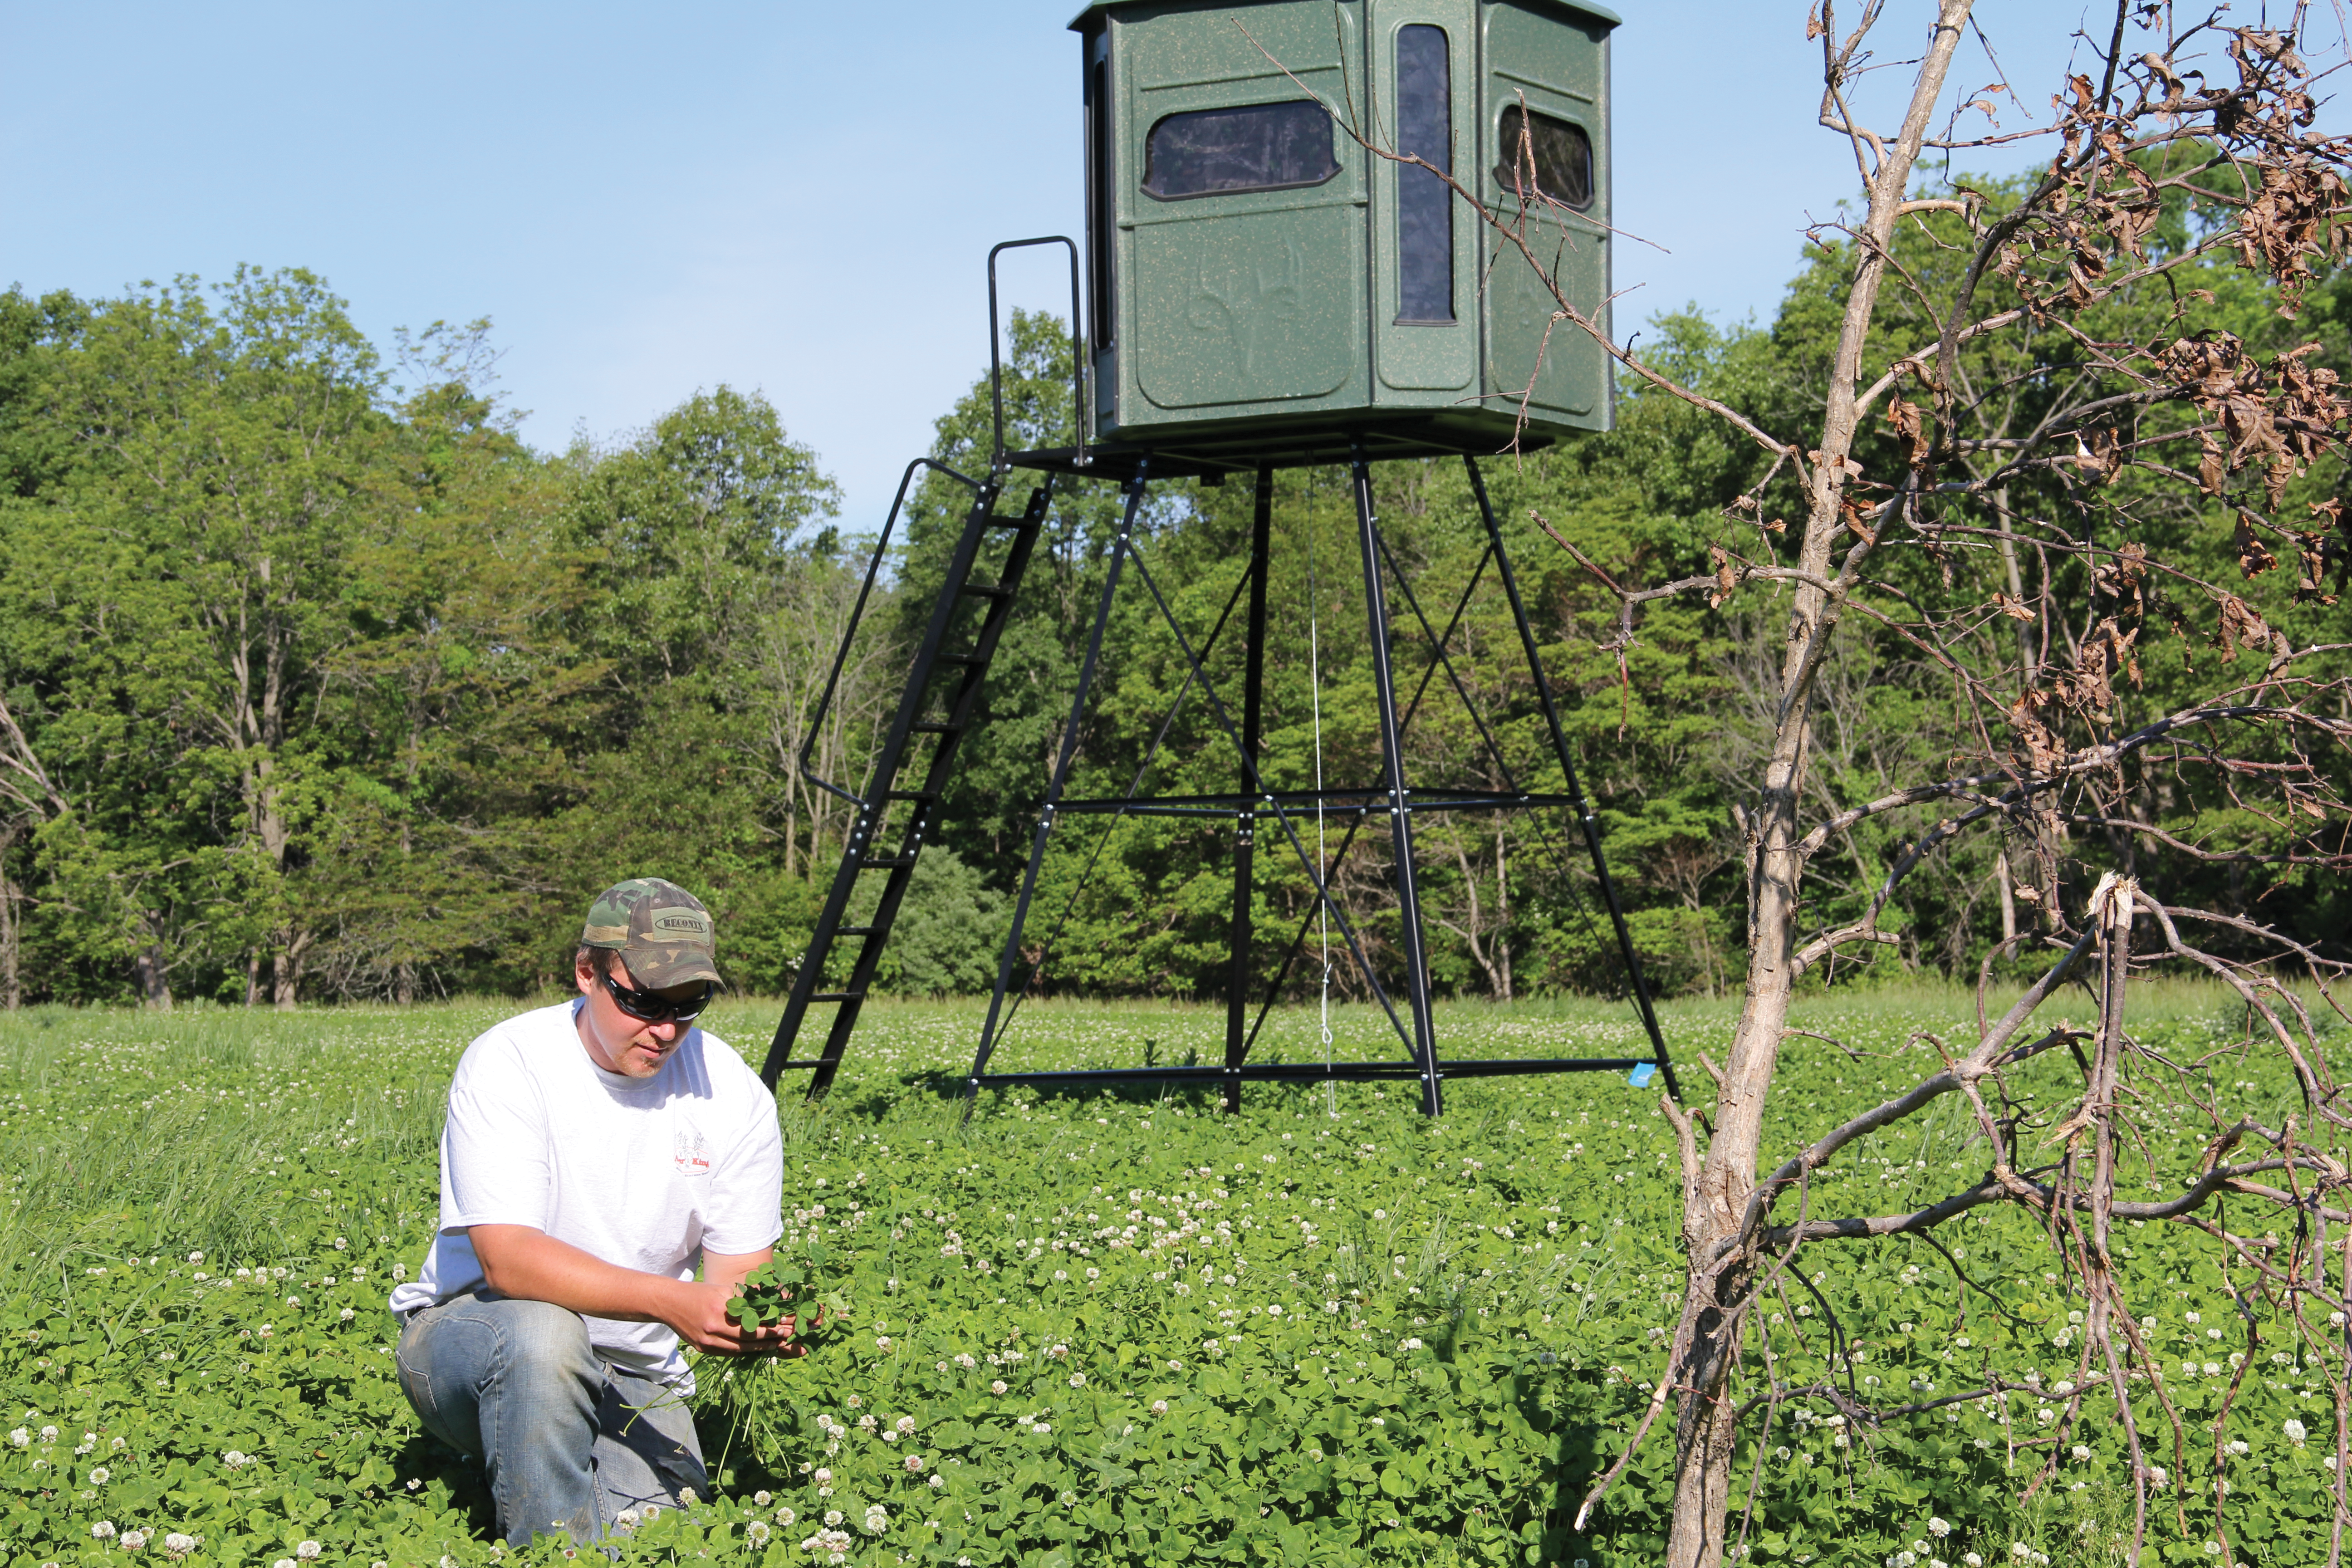
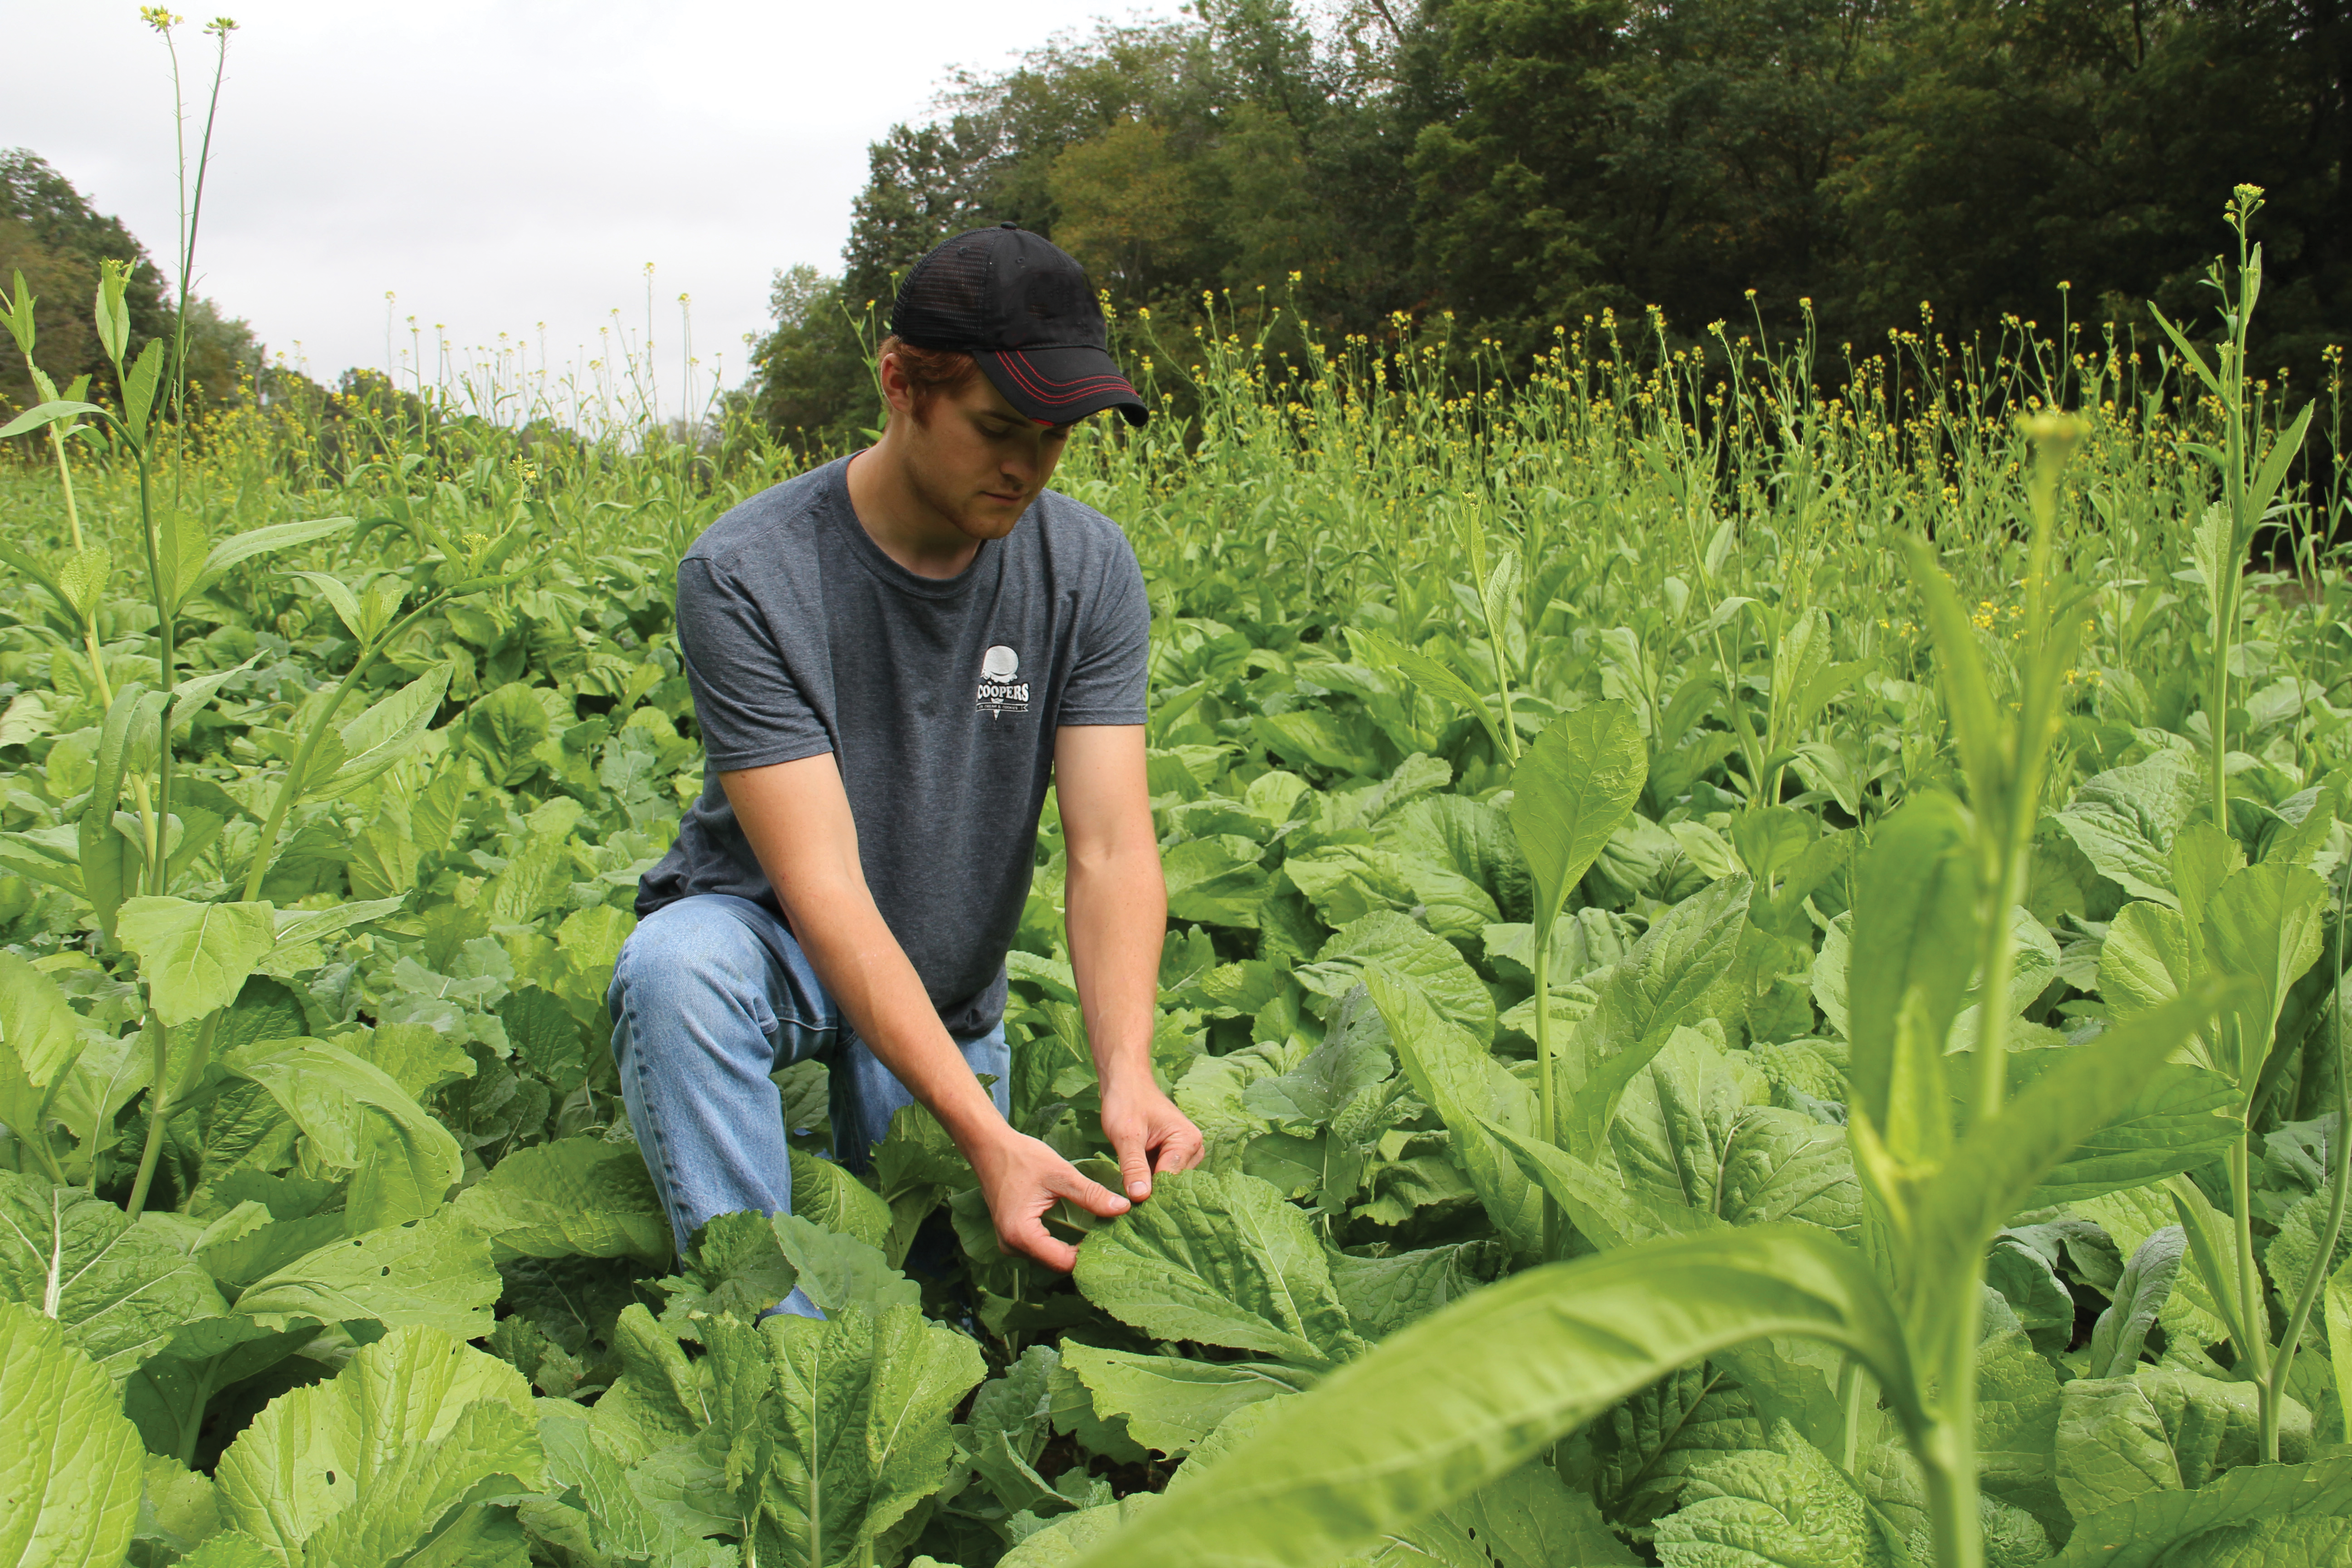


 Like with any hobby, shopping for gear can be just as fun and exciting as the activity itself.
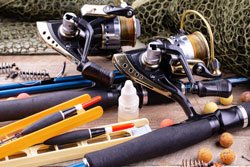 Another way to repurpose old fishing rods is by turning them into shelter rods.


