In today’s article, Beyond Seclusion uses a Springfield Armory SAINT Victor to try to determine what the effective range of a 9mm carbine is. While a 9mm pistol is suitable at 0-25 yards, the ballistics of the cartridge make shooting the handgun at 50 or 75 yards a trickier proposition. Yet, rifles and carbines are expected to provide excellent accuracy at 100 yards or 100 meters. Does shooting a 9mm round from a carbine offer a significant long-range advantage over a pistol?
How far can a 9mm carbine shoot effectively? The author shows a reasonably long range of hits on steel at 100 yards, 200 yards, 300 yards and 400 yards.
When it comes to guns and shooting, what do most of us like to do? Sure, we all consider self-defense, but what do we truly like to do more than anything? Send rounds down range, “BANG THE STEEL”, test our skills, have a reason to spend time with friends outside, and just enjoy shooting without breaking the bank.
Many of us also like the challenge of shooting at distance, not just up close at 50 yards and under. But what if we took a pistol caliber carbine (PCC), which is normally intended for closer-in distances, and pushed it out to longer ranges? Springfield’s SAINT Victor 9mm may just be the solution we are looking for regarding this project.
Let’s see just how far we can shoot a 9mm carbine.
Why the SAINT Victor 9mm? This is where the time-tested 9mm chambering comes into play. It has been in service with militaries around the world for more than 100 years in pistol, carbine and submachine gun forms. It is also a very pleasant-shooting round. You can carry a lot of rounds and accurately put them on target quickly, efficiently, and most important, accurately. The FBI even went back to the 9mm after many years with the .40, an endorsement particularly attractive to the civilian market.
The author sighted in his Primary Arms GLx 2X Compact Prism scope at 50 yards. With the BDC reticle, ringing steel was quick and easy.
The Springfield SAINT Carbine is an excellent gun that feeds reliably from industry-standard stick magazines. It uses top quality materials and construction. As an industry-leading pistol-caliber carbine, it should be an excellent platform to test the maximum effective range of the 9mm.
We are not here to debate the effectiveness of the 9mm hollow point compared to other calibers — that is an entirely different debate. I will say it is my preferred choice for concealed carry and home/self-defense. Remember, we are not talking in the military sense here folks; we are talking about the civilian world. So, with that in mind, addressing the desires mentioned above regarding going to range, practice, fun, accuracy, cost of ammo, distance, etc., the 9mm is definitely a top contender in my opinion.
From a rest, the author was accurate out to 300 yards and beyond with the Springfield SAINT 9mm rifle.
For most of its history with the military, the 9mm was primarily chambered in pistols and submachine guns. It was about 20-30 years ago we started really seeing PCC’s introduced into the civilian market. They really took hold and are now incredibly popular. The reasons why are everything we just mentioned. One of the biggest reasons is the cost and availability of ammo, not to mention accuracy out of a rifle and the extra velocity you get with the longer barrel.
I typically get at least an extra 200+ fps of muzzle velocity from a 16” rifle barrel compared to a pistol-length barrel. That also typically gets you 100+ ft/lbs of energy from the rifle and puts us in and around 500+ ft/lbs of energy, which is nothing to turn your nose up at. It’s shy of a 5.56 NATO carbine’s power, but easily surpasses that of the standard 115 gr. 9mm ammo.
So What Is the Effective Range of a PCC?
So, what does that mean for us? We can have our cake and eat it too.
We can shoot more for less than any other caliber other than the .22 LR, and we get an audible “BANG” on the steel out to 200 yards — and even 300. I actually tested this once — I was able to punch through 3” of pine wood and ring the steel at 400 yards with 16”-barreled PCC with a scope. That’s pretty reasonable penetration for a pistol caliber past 100 yards.
The Primary Arms optic allows the shooter to get on target fast at close ranges. When properly sighted in, the reticle allows you to adjust for ranges quickly.
At 50 yards, we can achieve MOA groups and easily bang the steel out to 200 yards.
Not long ago, Springfield introduced the SAINT VICTOR 9mm Carbine. Their SAINT line has been very successful with an outstanding reputation for quality and accuracy. It made perfect sense to add the 9mm to that line.
With a 16” barrel and SAINT AR quality, we should easily be able to reach out to 200 yards. I included the link below to the SAINT Carbine for all the specs & tech. With an optic with a bullet drop compensator (BDC) reticle, I was actually able to reach out to 300 yards. I will be completely honest, it is a real challenge at 300. The hold-over is somewhere around 6-12 feet depending on the ammo and bullet weight. With absolutely no wind, it is very repeatable. The bullet is going really slow at that distance, and any wind will really move it. 200 is ridiculously easy and with little hold-over with a 50-yard zero.
I used a Primary Arms GLx 2x Compact Prism Scope with the ACSS Gemini reticle and BDC. It was absolutely perfect for this gun. We zeroed at 50 yards just like described in the manual, and the BDC took us out to 200 yards without difficulty.
The author was able to keep rounds on steel at 200 yards without support. From the bench with a magnified optic, the effective distance doubled.
The SAINT 9mm is light and streamline. It just feels comfortable in the hands both for bench shooting and standing. If you are shooting from the bench with a bag, you may find the 32-round mag challenging. You will have to have a pretty tall bag, or simply get a 10- or 20-round mag so it is not digging into the table. I was very surprised how easily I was able to consistently hit the steel at 200 yards standing. The 16” barrel really helps with that.
Conclusion on 9mm Bullets from the AR Platform
The 9mm PCC has very little recoil. You literally could shoot all day with no notable effect on your shoulder — maybe your wallet, but not your shoulder. It’s just fun to shoot and, with the ability to reach out to 200 yards, which compared to a pistol, offers a better experience. What’s not to like?
The bottom line? 9mm is cheap, and you can shoot more for less. That lends the pistol cartridge to be a very fun shooter that is still practical and effective. And, as I’ve hopefully demonstrated here more accurate than many people would assume.
Editor’s Note: Please be sure to check out The Armory Life Forum, where you can comment about our daily articles, as well as just talk guns and gear. Click the “Go To Forum Thread” link below to jump in and discuss this article and much more!
Whether you’re an experienced shooter seeking to unlock your AR-15’s full potential or a novice just looking to upgrade their firearm, customizing your AR-15 can be exciting and rewarding. With the right tools, guidance, and knowledge, there is no limit to what kind of unique modifications you can make that will transform your rifle into one that is truly yours. This blog post will discuss what you need to know about customizing your AR-15 so that you can create a weapon explicitly tailored for use in any situation.
As any gun enthusiast will tell you, an AR-15 is a customizable firearm. There are many ways to tweak, tune, and fine-tune this modern classic to suit your tastes, when it comes to achieving that perfect, personalized look, it’s all about the accessories. Whether you want to add a sleek, low-profile carrying handle to your rifle or beef up your grip with a rugged, ergonomic forend, the right accessories can take your AR-15 to the next level. In terms of the former, choosing between detachable carry handles or fixed ones means weighing the pros and cons of each – while detachable handles offer more flexibility, they can also add extra weight to your rifle. Fixed carry handles are often considered the superior choice for a slim-line look. Choose the right one, and you’ve got comfort and style covered while keeping your firearm secure when you’re moving.
Upgrade the trigger
As the popularity of AR-15s continues to grow, more and more gun enthusiasts are looking for ways to customize their rifles. An easy and effective upgrade you can make is to the trigger. A better trigger can significantly improve the accuracy and ergonomics of your AR-15. You can shoot more accurately and consistently by replacing the factory trigger with a lighter pull weight and a crisper break. Whether you’re a competitive shooter or just looking to improve your hunting game, upgrading your AR-15’s trigger is a simple and cost-effective way to get the most out of your rifle.
Upgrade the charging handle too
One upgrade to consider is the charging handle. Not only does this part give your rifle a distinct look, but it also has a practical purpose. Upgrading the charging handle can result in a smoother action when chambering rounds, saving you valuable time and effort. With a range of options available, from larger handles for easier grip to ambidextrous models for left-handed shooters, finding the perfect fit for your needs is easy.
Add an extended magazine release for easier reloading
Whether you have experience in shooting or just starting, changing your firearm can make it feel like it was tailor-made just for you. One easy and affordable customization option is to add an extended magazine release. This simple addition can make reloading your AR-15 a breeze, allowing you to quickly and easily swap out magazines in the heat of the moment. The extended release also offers a more comfortable grip, reducing the strain on your fingers and making it easier to operate your firearm in high-pressure situations. So if you’re looking for a simple way to customize your AR-15, consider adding an extended magazine release – it may just make all the difference when it counts.
Add a muzzle brake as well
Adding a muzzle brake or flash suppressor helps reduce recoil, making it easier to stay on target and minimizing the visual disruption caused by muzzle flash. Some muzzle devices also provide the added benefit of redirecting gasses to reduce felt recoil even more. With so many options on the market, it’s worth considering adding one of these attachments to your AR-15 to enhance your shooting experience.
Change out the handguard for improved grip and customization options
The AR-15 is a versatile firearm that can be customized in numerous ways to fit the needs and preferences of its owner. One popular way to customize this rifle is by changing out the handguard. This component provides improved grip and comfort and opens up a world of customization options. Different materials, colors, and textures can be chosen to create a unique look for the firearm. Additionally, handguards can come in various lengths, allowing accessories such as bipods, lights, and lasers to be added. With so many options available, changing out the handguard is a great way to tailor an AR-15 to fit both form and function.
Customizing an AR-15 can be enjoyable to make the firearm fit the shooter’s desired needs and preferences. It is a fun and rewarding experience, so explore your options to create your own tailored rifle. You may even discover some new accessories or upgrades along the way. And in the end, you’ll be left with a custom AR-15 that looks and functions exactly how you want it to.
I reviewed over 30 bushcraft axes and hatchets and found that the Council Tool Woodcraft Pack Axe is the top choice.
An axe seems like a simple tool. However, to select the best bushcraft axe, there are many things to consider. We cover all of these in this extensive buying guide.
When I was a child, we used firewood for heat and cut it from our own property. I learned how to use an axe at a young age and have nearly 40 years of experience using them. During bushcraft trips and even just quick camping trips, a good bushcraft axe is essential. Around my property, I also use my bushcraft axe quite often.
I took my experience along with my team and others in the bushcraft community to put together this review. We looked at over 30 axes that met our criteria and narrowed them down to this list. I own a few of these axes for my personal use and only recommend the ones I think have good value.
Keep reading to find my tips on picking the best bushcraft axe for you!
Quick Comparison of Our Favorite Bushcraft Axes and Hatchets
The Best Bushcraft Axe
Council Tool Woodcraft Pack Axe – Best Overall
Type: Pack/Camp Axe
Head Weight: 2 lb
Handle Length: 19”
The Council Tool Woodcraft Pack Axe is our choice for the best bushcraft axe. It is part of Council Tool’s Woodcraft line of axes designed specifically for Bushcraft. This is a true multipurpose axe that is made in the USA.
Council Tool has made axes and other similar tools in southeast North Carolina since 1886. All of their axes are drop forged by hand, using similar methods that are used by the European manufacturers.
The head is made from 5160 high carbon steel and is guaranteed for life. This steel is perfect for a bushcraft axe due to its toughness. While it will dull quicker than other steels, it is easy to sharpen and can handle tough hardwoods and cold conditions without chipping.
Both the bit and the poll of the head are heat treated, allowing me to use the poll as a hammer for driving other metal objects like tent stakes. The bit comes extremely sharp right out of the box, and the flat 25-degree Scandi grind makes it easy for me to sharpen.
The handle is made from Appalachian Hickory, and the grain is aligned with the head as it should be. The handle comes lightly treated with linseed oil. This can be good or bad, depending on your personal preference. Some people like to finish and treat their own handle, while others do not. Personally, I like to treat my own.
I like that the Handle is secured to the head with a metal wedge. The handle and wedge are cut off smooth above the head, a surprising attention to detail.
My axe came with a few rough spots on the handle that I took care of with some fine grit sandpaper. I then treated it with linseed oil to keep it from drying out too much. See our guide below for how often you should treat your axe handle.
I like the custom leather sheath that comes with the axe, it fits very well. It is a must-have since the edge is so sharp. The book that comes with the axe is also a nice touch. The history of the company and the old photos are interesting.
This axe feels great and swings nicely with one or two hands. The weight and balance are perfect. The affordable price along with being made in the USA, pushed it past the competition to be our top pick.
Recommended for:
The Council Tool Woodcraft Pack Axe is for someone wanting a high-quality bushcraft axe that is made in the USA. The head design, weight, and material are the best for the variety of tasks that I do at camp.
Granfors Bruks Small Forest Axe – Best Swedish Made Bushcraft Axe
Type: Pack/Camp Axe
Head Weight: 1.5 lb
Handle Length: 19”
The Gransfors Bruks Small Forest Axe is thought by many to be one of the best. Gransfors Bruks makes some of the finest axes in the world and have been since at least 1902. They are handmade in Sweden by skilled craftsman. This allows them to monitor the full production process to ensure every axe has no defects. The axe head has a 20-year guarantee, so they stand behind their work.
The axe head is forged from high-carbon steel. It is then ground, hardened, and tempered by hand through the same process the company perfected years ago. It comes very sharp, much sharper than any axe I have found in a hardware store. The steel used is recycled steel, but quality control measures have been established to ensure high quality.
The handle is made from Hickory and is shaped so the grains are aligned with the head. It is attached to the head with a traditional wooden wedge. The handle is soaked with linseed oil and then treated with beeswax to protect it from dirt and water.
Grunsfors Bruks only uses steel wedges for their splitting axe handles. Steel wedges offer extra head security for axes that experience higher forces. Keep in mind that this axe is not meant for heavy duty splitting since it has a wood wedge.
This axe comes with a custom leather sheath that is vegetable tanned, a process that dates back thousands of years.
I like how the axe feels. The head weight and handle length are perfectly balanced. I also like the axe book that comes with the axe that details how to properly maintain it. Be sure to study it!
I would personally prefer that the head weighed closer to 2 lb and had a steel wedge to secure it. Also recycled steel is not the best choice in my mind. However, this axe is made for light-duty work around the campsite.
Recommended for:
The Grunsfors Bruks Small Forest Axe is for someone looking for a high-quality, ready-to-go bushcraft axe. If you want an axe that is ready for a long stay in the woods, this axe is the best choice. If you need something for heavy work, this axe may not be the best for you.
Hults Bruk Aneby Axe
Type: Pack/Camp Axe
Head Weight: 2 lb
Handle Length: 20”
The Hults Bruk Aneby Axe is the perfect sized bushcraft axe. Hults Bruk has been making axes in Sweden since 1697, over 300 years. They even say there are artifacts on their manufacturing site of stone axes. Let’s just say they have some experience with axes.
The head is a Scandinavian design using Swedish steel. The steel and hardness level is balanced to result in a tough yet sharp axe. The head is a little thicker with a convex grind, so it lends itself to splitting more than cutting. The head has a finger notch for one-handed carving and a rounded poll for skinning.
The axe comes fairly sharp, but I found it really needs to be touched up with a stone to get it to the level of the other axes. The center of the bit tends to be duller than the edges.
The handle is American Hickory and is treated with linseed oil at the factory. A steel ring wedge is used to attach the handle to the head, ensuring a secure fit.
I like the leather sheath that comes with the axe and the book that details how to care for it as well.
The weight of this axe feels just right for bushcraft. The upper part of the handle is a little thicker, which makes it feel more precise for detail work.
Recommended for:
The Hults Bruk Aneby Axe is for anyone looking for the perfect sized Swedish made bushcraft axe. This axe is a handcrafted piece of art, and it is something you can hand down to younger generations.
Helko Werk Rheinland Pack Axe
Type: Pack/Camp Axe
Head Weight: 1.5 lb
Handle Length: 20”
The Helko Werk Rheinland Pack Axe is made in Germany by Helko Werk. They have been making axes since 1844, so they certainly have experience.
The axe heads are hand-made through a drop forge process. The craftsman works the hot C50 steel through the forming process, controlling the temperature and time to ensure a tough axe head. The head is then tempered based on their many years of experience to achieve a perfect level of hardness.
The head is a German-wide bit, which is similar to a Scandinavian head and a Hudson Bay head, but a little bigger.
I feel that, on one hand, it makes it a good bushcraft axe since it will handle a variety of tasks, from cutting and splitting to fine carving as well. On the other hand, it does add some weight to the front of the head, so it throws the balance off some. At just 1.5 pounds, it is a little on the light side.
The handle is made from American Hickory and coated in linseed oil. It is secured with a metal wedge, so the head coming loose is not an issue. The handle does feel a little bit bigger to me than the other axes. It may be OK for someone with bigger hands but seemed a little off to me.
I like the vegetable tanned leather sheath that comes with the axe. It has an adjustable buckle strap that holds it in place well. Even if it loosens over time, you can use the next hole in the strap. I also like the fact that it comes with a bottle of protective oil for the head, something that the other axes do not come with.
Recommended for:
The Helko Werk Rheinland Pack Axe is a great-looking axe for someone looking for a high-quality axe that is right up there with Swedish manufacturers. The handle is a little on the big-side, and the overall balance is not as good as some of the others. The larger head is nice though for a variety of tasks.
Snow & Nealley Hudson Bay Axe – Best Budget Bushcraft Axe
Type: Pack/Camp Axe
Head Weight: 1.75 lb
Handle Length: 24”
The Snow & Nealley Hudson Bay axe is made by the Amish in Maine. The Amish are known for their quality craftmanship, and they have been making axes since 1864.
The head is a traditional Hudson Bay style head made from 1080 steel, which I like for cold weather Bushcraft work. At a little less than 2 pounds, it is still heavy enough to do some light splitting without weighing my pack down.
The head is hand-tempered and ground, but it does not come with a final edge on it. I found that it took quite a bit of hand work to get a good edge on it. The Hardness is on the lower end of most axes, so it is durable yet easy to sharpen.
Since this is a traditional Hudson Bay head, it could loosen over time since the length of the eye is short. This is not a defect in manufacturing but rather just a result of the design.
I like to soak the head in linseed oil when I feel it getting loose. This helps to keep the handle from shrinking in the head. In an emergency in the woods, I have also soaked it in water, but only as a last resort. This makes it loosen even more when it dries.
The handle is American Hickory and is 24” long. This is a little longer than a typical camp axe, and it allows me to get a little more power into cutting wood. The balance is a little farther down the handle, which also lends itself to cutting.
I did not like that the head and handle were coating a lacquer/clear coat finish. I prefer to finish my handle and oil my axe heads. I found that it did come off during use, so eventually, I have to either treat the areas where it came off or remove it from the entire axe.
The clear coat is good for someone that wants a low-maintenance axe, just throw it in your truck and don’t worry about it.
This axe is the most affordable on our list, so it is a big plus. It is half the cost of some others, so it is significant. It also comes with a leather sheath, so there are no worries about them leaving this key item out to get the price down.
Recommended for:
The Snow & Nealley Hudson Bay axe is for someone looking for a low-cost bushcraft axe. The longer handle makes it feel more like a felling axe without the heavy weight. The lacquer finish is a personal preference. Just keep in mind that you will need to put the final edge on this axe.
The Best Bushcraft Hatchet
Council Tool Hudson Bay Belt Hatchet – Best Overall Bushcraft Hatchet
Type: Belt Hatchet
Head Weight: 1.25 lb
Handle Length: 14”
The Council Tool Hudson Bay Belt Hatchet is a great choice for bushcraft. It is made by the same company as our top pick for axes and has many of the same qualities.
The head is made from 5160 steel, the best choice for a bushcraft axe. It is a Hudson Bay style head, which is great for not only processing wood but also for carving and skinning. The larger curved toe of the head lends itself to more detail work.
Both the bit and poll are hardened, so I can use the poll to hammer tent stakes. The head is guaranteed for life.
The handle is made from Grade A Appalachian Hickory. It has been lightly treated with linseed oil but still should be treated regularly to maintain it. The length is perfect for a hatchet and is balanced with the head.
Hudson Bay axes are known for the head to loosen from the handle over time since the eye length is short. Council Tool has solved this issue by redesigning the eye with ribs to create more contact area with the handle. This makes the head more secure on the handle a solves the loosening condition that used to be common. A metal wedge is also used to secure it.
A very nice leather sheath is included with this hatchet, which makes it easy to carry on my belt or pack.
Recommended for:
The Council Tool Hudson Bay Belt Hatchet is our top pick for the best bushcraft hatchet. It is for anyone looking for a smaller hatchet with all of the qualities of a camp axe. It is also more affordable than its European counterparts.
Gransfors Bruks Wildlife Hatchet
Type: Belt Hatchet
Head Weight: 1 lb
Handle Length: 13.5”
The Gransfors Bruks Wildlife Hatchet is a smaller version of its big brother, the small forest axe.
This hatchet is made of the same materials and craftsmanship as the small forest axe but is a hatchet length and weight for use with one hand.
It comes with a vegetable-tanned leather sheath custom-made for the hatchet.
The steel on this hatchet can be a little on the hard side, so it may not be the best for hardwood in the wintertime. Hard blows can cause the edge to chip, and the harder steel makes it harder to sharpen.
Since this is a lighter hatchet, it should only be used for light-duty work around the campsite. It is not the best for splitting large pieces of firewood.
This hatchet felt a little small to me. But if you are looking for a lightweight hatchet to keep on your belt, this is a good choice.
Recommended for:
The Gransfors Bruks Wildlife Hatchet is for someone that wants a premium handmade hatchet from a company with a great reputation. It is small and lightweight, perfect for hanging on my belt.
Hults Bruk Almike Hatchet
Type: Hatchet
Head Weight: 1 lb
Handle Length: 16”
The Hults Bruk Almike hatchet is hand forged in Sweden, so the quality is top-notch.
The head on this hatchet is a little lighter than most, so I found it is perfect when I need to save save weight in my pack. It is made from Swedish steel and holds an edge well. I like my bits super sharp (a sharp axe is a safe axe), so I had to put in a little stonework after I received it.
The handle is made from American Hickory and is treated in linseed oil. I treated mine when I received it and then I reapply regularly (see our guide below). The handle is secured by a metal wedge, which I like.
This axe feels great, and the lighter head with a longer handle allows me to swing it with less effort than the other hatchets. The undercut near the head makes it easy to control for detail work.
The leather sheath is custom-made and covers the entire head. I like the leather pull cord that holds the sheath in place, but over time it can tend to get loose. When I hang it on my belt, I am sure that the sheath is snug.
Recommended for:
The Hults Bruk Almike hatchet is great for anyone looking for a high-quality, Swedish-made hatchet that is lightweight for their belt or packs. This one is less than 2 pounds overall, so great for anyone looking to save weight where they can.
Helko Werk Rheinland Hatchet
Type: Hatchet
Head Weight: 1.25 lb
Handle Length: 14”
The Helko Werk Rheinland Hatchet is a smaller version of Helko Werk’s Pack Axe. It is made from the same quality materials and hand-made by craftsmen in Wuppertal, Germany. They also have their own North American distribution center, so getting them is easy, and customer service is US based.
Like the Pack Axe, the head has a wide German style bit. This is mostly a personal preference, but for a hatchet, it lends itself more to carving and skinning and less to splitting. If you plan to have an axe and a hatchet, this would be a great option.
The large bit can have some inconsistencies since it is hand sharpened. I noticed that the center was not as sharp as the edges out of the box, but easily took care of it with a stone.
The handle is American Hickory and secured with a metal wedge. It is lightly finished with linseed oil, which does need to be reapplied a few more times.
I like the head weight of this hatchet, and the overall feel is good. I also like the knob at the end of the handle. For light work, it swings well one-handed.
The leather sheath is nice, and they have a leather handle collar also available. This helps to protect the handle from misplaced strikes and is a great option.
Recommended for:
The Helko Werk Rheinland Hatchet is great for someone looking for a quality hatchet with a broad head for carving, skinning, and general light woodwork. It goes great with a pack-axe combo.
Snow & Neally Outdoorsmans Belt Axe
Type: Hatchet
Head Weight: 1.25 lb
Handle Length: 15”
The Snow & Neally Outdoorsmans Belt Axe is made in Maine by the Amish, just like the Hudson Bay axe above.
This hatchet has a forged head made from 1080 steel. Snow & Neally outsources the forging process and brings the heads in-house to hand temper and grind them. In the early 2000s, they were sourcing heads from China but have since changed back to a US supplier.
The handles are made in Tennessee from Appalachian Hickory and finished by hand in Maine. There has been concern from some customers on the grain of the handle properly aligning with the axe head.
I found that Snow & Nealley is planning to move handle production in house to better control this issue. In the meantime, they are monitoring the fitment closely to make sure the handles have been made correctly.
The weight of this axe and the handle are balanced well for one-handed use. I found that it works well for splitting kindling.
This hatchet comes with a lacquer/clear coat coating like the Hudson Bay Axe. As I mentioned, this is a personal preference, if you like it or not. We also found we needed to put the final edge on the axe and could choose if we wanted a flat scandi grind or more of a convex grind.
A custom leather sheath that is handmade in Maine is included also. The quality of the sheath is outstanding.
Recommended for:
The Snow & Neally Outdoorsmans Belt Axe is for someone looking for an American-made Bushcraft Hatchet that is lower cost. Since the forged head is finished to a lower hardness, it is great for very cold weather and is easy to sharpen to your preference.
Prandi German Style Hatchet – Best Budget Bushcraft Hatchet
Type: Hatchet
Head Weight: 1.35 lb
Handle Length: 14.25”
The Prandi German Style Hatchet is made by Prandi in their facility in Northern Italy. They have been making over 150 models of axes and hatchets there since 1969. In 2004 they achieved ISO certification, which means they have documented their entire process to ensure the same results with every axe.
The head on this hatchet is forged from C45 steel – then hardened and polished by hand. The head design is a traditional German hatchet, so it has a wider curved blade. This makes this hatchet great for light splitting and cutting but also for carving and skinning.
The Handle is made from American Hickory and is secured to the head with a metal ring wedge. Some have found that the head becomes loose after heavy use or throwing but is easily reset by driving the wedge further into the handle slightly.
Note that the price of this hatchet is great, less than half the price of some of the others on our list. However, it will require some maintenance and some initial sharpening to get it bushcraft pack-ready.
A leather sheath is included with this hatchet. It is an Ok sheath, but not one of the best.
The balance and weight of this hatchet are good. I think a slightly longer handle would make it even better for delimbing and other light work. It is a good length for carving, though.
Recommended for:
The Prandi German Style Hatchet is for someone looking for a budget Bushcraft Hatchet that has a quality forged head and Hickory handle. This hatchet tends to be better for carving but also works well for light cutting and splitting around the campsite. It would make a nice combo with a camp axe.
Bushcraft Axe Buying Guide
There are many different types of axes on the market today. You can walk into any hardware store and find a few different shapes and sizes of axes. Often, I find that none of these are the best axes for bushcraft specifically.
A Bushcraft axe is somewhat of a personal decision depending on the area you plan to camp, what you plan to do at camp, and how much weight you want to carry. It may be that you need two axes, or possibly none at all.
One thing is for sure though. Whenever I am on a long trip out in the woods, I find that I really need an axe. Just take a look at the winners of Alone, they all selected an axe as one of their 10 items. It is an essential bushcraft and survival tool.
What Makes the Best Bushcraft Axe?
I have found that the Best Bushcraft axe mostly depends on the type of work I am planning to do, what I want to carry, what is legal where I am camping, and my personal preferences.
In my experience a pack style or boy’s axe that has a two-pound head and about a 20” handle is the best choice. This is the best size for most work that I need to accomplish on a bushcraft or camping trip. This is also a good size to just keep around my home for utility work when I don’t need a big axe.
When I plan to camp where cutting down trees is not allowed, a smaller bushcraft type hatchet is sometimes better. It is lighter to carry and allows me to process smaller pieces of wood easier.
Over time, as I gained experience with my bushcraft skills, I found that I needed both a larger pack axe and a hatchet. I have talked to some people that camp when they are hunting and like the utility that a pack axe and tomahawk offers.
Using this guide as a basis, helping you pick what is best for you is our goal.
The Bushcraft Axe Head
The head is the working end of the axe, and there are many different configurations on the market. Some are good for more general bushcraft work, while others are dedicated.
Material
The head of a bushcraft axe should be made from some type of Carbon steel. Carbon steel will hold an edge while still being tough enough to withstand impacts. 5160 high-carbon steel is one of the best choices because of its durability.
Cheap axes are made from low carbon recycled cold or hot rolled steel and can have pits and voids internally. They will not hold an edge and can break with heavy impacts.
The hardness of the steel is also important, and many manufacturers consider it part of their trade secret. There is a delicate balance between too hard and too soft. A soft bit will be tougher but lose its edge quickly, while a harder bit will be more likely to crack and chip.
I have found when using my axe in sub-freezing temperatures, a lower hardness is better. The higher the hardness, the more brittle the steel becomes at low temperatures. Overall, I look for a hardness between 52 and 56 HRC.
Weight
A heavier axe head will generate more force when it strikes the wood. It also takes less inertia to get it moving. In general, I find need more room to use a heavier axe. However, a heavier axe head means a heavier axe to carry.
For felling trees over about 6” in diameter, a 3-pound axe head is a good size. For general bushcraft work where I am not processing large trees, a 2-pound axe head like on a boy’s axe is my top choice. For smaller hatchets, around 1.5 pounds or so is a good weight.
Size and Shape
There are many different sizes and shapes of axe heads. Most were designed years ago and named for the place they were first used or the type of head. The major difference between them is polled single bit and double bit.
In my experience, polled single-bit heads are the best for bushcraft. They have a cutting edge on one side and a pole or flat face on the other. Often the poll is also hardened and can be used as a hammer for driving tent stakes or wedges.
For general bushcraft work, I find that a Hudson Bay or Scandinavian-style head works well since it is a multi-purpose shape and can do both cutting and splitting.
Edge Type or Grind
There are a few different grinds that you will see on axes. For bushcraft axes, there are really two that should be considered.
A Convex edge is more of a round profile from the tip of the bit back to the bevel. In general, this type of edge is the strongest. For any structural shape, a curve is better than a flat since it distributes the forces. A corner is where forces concentrate and can cause failure.
A Convex edge is better at splitting wood and not so much for cutting wood. I find that it may not penetrate damp or frozen wood and will take more energy to use. Also, a convex edge is harder to sharpen since it is a gradually curved surface.
A flat or Scandi edge basically forms a triangle at the point. This edge is better at cutting but is not quite as durable as a convex edge. It is a good multipurpose grind for both cutting and splitting and finer work such as making stakes or cutting notches. I find that it is easier to sharpen since I have a flat, fixed angle to grind.
The Bushcraft Axe Handle
The handle of a bushcraft axe is just as important as the head. The handle should be strong, comfortable, and made for the main tasks that the axe will be used for.
Material
When I walk into my local hardware store, I see axes with wood, metal, and fiberglass handles.
Metal handles are certainly durable, but I find they transmit too much shock into my hands and arms.
Fiberglass handles absorb shock a little better but are not any more durable than wood and cannot be replaced.
Wood handles are the best choice for a bushcraft axe handle. They absorb shock well and can be replaced easily. I can make a replacement in the woods if I had to. Hardwoods like Hickory and Ash are the best.
When selecting my bushcraft axe, I make sure the grain of the wood in the handle is perpendicular to the axe head. Wood is the strongest when loads are perpendicular to the grain. An easy way to remember this is to think of how a tree grows. The grains are going straight up, and this is what keeps trees from easily falling.
Shape and Length
In general, the heavier the axe head, the longer the handle should be. A handle around 18” to 20” is best for a bushcraft axe. This length is long enough to do some heavier work with two hands but short enough for finer detail with one hand as well.
If I know that I don’t need to fell any trees (in some areas, it is not allowed), then I find a shorter hatchet length handle of around 12” to 15” is better. It takes up less room and is lighter in my pack.
The shape of the handle can either be straight or curved with a knob at the end. I find that a straight handle gives me a little better control for detail work, while a curved handle gives me more cutting power. For larger axes and multipurpose bushcraft axes, a curved handle with a knob at the end is best.
Alignment of the Handle to the Head
Bushcraft axe handles that are curved should be aligned with the head of the axe. This allows me to accurately strike with the bit hitting the wood perpendicular and not glancing off. This is very important for both safety and the effort required to process wood.
I make sure the knob on the lower end of the handle curves out parallel to the head. I can check this by laying the axe on a flat surface. I found that after having experience using an axe, it was easy to tell when I picked up any axe.
This is checked on higher quality axes since they are hand crafted. On mass-produced axes, the handle may be pressed into the head by a machine, which could result in an incorrect alignment. With my experience as an engineer in the manufacturing business for 30 years, believe me, you don’t want an axe made by a machine.
The attachment of the head to the handle is also important. Metal ring or spike wedges are more secure than just wood wedges.
Balance
The balance of a finished axe is important for safety and how much effort I must expend while using it. The overall center of gravity should be a few inches from the head on the handle. This allows me to both swing it efficiently and hold it near the head for detail work.
Lower-quality axes made from inferior materials I find are not be balanced and are awkward to handle. I can pick up a bushcraft axe and immediately know if they are well-balanced or not.
Cover or Sheath
The best bushcraft axes will come with a leather cover for the head. This is very important for both storage and safety. The edge of the axe should be maintained and kept sharp. The sharper, the better. It is easy to damage a sharp edge when it comes into contact with other metal objects, especially at odd angles.
Of course, any sharp edge can cut you if you contact it accidentally. I always keep my axe covered when I am not using it. It both protects me and my axe and is a necessary accessory.
Quality
Like most things, you get what you pay for. Most of the axes you find in hardware stores are made overseas in a factory from cheap materials. While these are OK for the homeowner who needs to cut an occasional tree limb, they are not what you want to be counting on deep in the woods on a bushcraft trip. Even worse, they can come apart and injure you or someone nearby.
The absolute best axes are hand forged in Sweden. These are the standard for axes, and they have been made there for hundreds of years. Drop-forged heads in the US and Germany are good also and can serve you well. Avoid any axe made in China.
Bushcraft Axe Accessories
Here are some accessories that I have and recommend.
File – for taking care of any large nicks to the bit.
Sharpening Puck – to sharpen your axe periodically.
Wedges – to use when you are splitting larger lengths of wood.
Linseed oil – used for treating the handle. Treat a new handle every day for a week, every week for a month, and every month for a year. Then touchup depending on use.
How to Sharpen your Bushcraft Axe
This video from Council Tool shows some methods to keep your axe in top shape.
Bushcraft Axe Safety
Here is a great video by Ray Mears on Selecting a Bushcraft Axe and Bushcraft Axe Safety.
Choose your Bushcraft Axe
Now that you understand what to look for, which will you choose? Our top pick, the Council Tool Woodcraft Pack Axe, is the best all-around bushcraft axe. However, you may prefer a bushcraft hatchet or want both for your next trek in the woods. It all depends on where you will be camping and what type of tasks you like to accomplish with your axe.
Now that you have selected an axe to process some firewood, check out our guides on bushcraft shelters and wool blankets to keep you warm at night. Our Bushcraft Guides and Gear Reviews also has a ton of great info to help you on your next tramp in the woods!
Before we start, I have another plug about the Friday Facebook event from 10 to 11 a.m., Eastern. I’ll be answering airgun questions on Facebook on this Pyramyd AIR Facebook page. To see the discussion, you must have a free Facebook account. You do not have to be a recognized Friend of Pyramyd AIR to ask a question.
If you want to set up a Facebook account, register on the link provided above. Once you have an account, sign in and then click on the link above once more to go to the page. Please join me on Friday, if you’re able!
Today, I want to explore some of the basic facts about precharged pneumatic operations, because I sense the time is right. Let me begin with the term precharged pneumatic.
What is a precharged pneumatic airgun?A precharged pneumatic (PCP) is an airgun that is filled with air and then shot many times before refilling. Compare that to a multi-pump pneumatic that is pumped many times by a built-in pump and then fired just once. To take another shot, the multi-pump has to be pumped up all over again.
Big boresHow many shots each precharged pneumatic gets on a single fill of air depends on just one thing: How much of the stored air is used for each shot? Big bore airguns use incredible amounts of air and, therefore, get very few shots per fill. A Quackenbush .457 Long Action rifle gets two good shots per fill; on mine, the max fill pressure is 3,500 psi. After the second shot, the gun is down to 2,200 pounds per square inch (psi). My rifle gets about 560 foot-pounds of muzzle energy on the first shot and 490 foot-pounds on shot two.
A .50-caliber Career Dragon Slayer can get 5 good shots on a 3,000 psi fill. That rifle generates just under 200 foot-pounds on the first shot and drops off to about 120 foot-pounds by the final shot. And, once again, the pressure in the reservoir will be down to somewhere around 2,000 psi when you’re finished. Exactly where it will be depends on how many shots have been fired.
That should answer another question that’s often asked: Should you get a scuba tank or a hand pump to fill a big bore? The answer is “neither.” To fill a big bore airgun, you really need a carbon fiber tank. I will explain all of this, but right now I need to back up, because this is report is supposed to be basic.
What is a hand pump?A modern high-pressure hand pump is a mechanical pump that enables a shooter to fill a pressure vessel with air compressed to a very high level by muscle power, alone. Being mechanical, the pump requires effort; and, as the pressure increases, the pumping effort increases with it. From zero up to somewhere above 1,500 psi, the effort is relatively easy and most able adults will have no difficulty pumping. Above about 1,500 psi is where the effort starts to become noticeable. When I say that, I shudder because people come in all shapes and sizes and there is no such thing as a standard person. So, perhaps I should say that above 1,500 psi is where I begin to notice an increase in effort. I once watched an adult woman struggle to pump over 1,600 psi, so please take what I say in that light.
Also, hand pumps fill guns slowly. Think of this. At the tire store the hydraulic lift hoists your car rapidly and with great ease. Now, you try to do the same thing at home with a hydraulic hand pump bought at the hardware store. It goes a little slower, wouldn’t you say? That is the difference between filling an airgun from a tank and filling it from a hand pump. If all you need to do is change one flat tire, a hydraulic hand pump is a great little tool. But if you’re running a tire store, you want to have five or six bays, each with its own hydraulic lift. If you’re going to be a serious PCP shooter, you will need serious air.
It can take 100 to 150 pump strokes of a hand pump to fill a big bore air rifle reservoir. It all depends on the size of the rifle’s reservoir.
A big bore gets two to five shots from a fill and drops down to 2,200 psi in the reservoir, then it has to be filled up to between 3,000 and 3,500 psi to shoot again. That happens to be the hardest place for a hand pump to operate; and if it takes 100-150 pumps to refill the gun, what do YOU think about using a hand pump on a big bore? Maybe, only if it’s your absolute last alternative? And, yes, I have done it a couple times.
Refilling a smallbore PCPA smallbore air rifle comes in any of four calibers: .177, .20. .22 or .25. While there are still a great differences among these guns in the amount of air they use per shot, none of them uses anywhere near the amount used by a big bore. So, a smallbore gets many more shots per fill than a big bore. The most powerful guns of the bunch get the fewest number of shots because they use the most air. The AirForce Condor is one of the most powerful factory-made smallbores and has a special valve to extract the maximum number of powerful shots per fill. It also has one of the largest air reservoirs on the market. A Condor can get about 20 shots on a single fill when the power is set to its maximum.
Stepping down in power to an Air Arms S410, you may get up to about 35 or even 45 shots on full power. The actual number depends on the distance at which you’re shooting and the velocity variation you can tolerate. Given that many shots, a hand pump may be a viable option for the shooter who is in shape, doesn’t mind a little work and takes a while to shoot all those shots.
But in 2008, Benjamin brought out the Discovery rifle. It’s a low-cost PCP that operates on just 2,000 psi. It’s much easier to fill from a hand pump than most of the guns on the market. The Discovery gets about 25 shots from its fill. Not only is the work easier, but there are also a decent number of shots when you’re done. The Discovery is a PCP that’s designed to be filled by a hand pump. But if you use a scuba tank to fill one, you’ll still be able to fill your Discovery all the way after other PCPs have drained the tank to the point that it needs to be refilled. That’s another bonus.
A scuba tankWe talk about scuba tanks as though they are all the same, and they aren’t. They come in different sizes and have different fill pressures, all of which affects the amount of air they contain. One very common scuba tank is an aluminum 80-cubic-foot tank. That means that the tank holds 80 cubic feet of air, not that the tank has an internal volume of 80 cubic feet. Since air compresses, what they are talking about is the number of cubic feet of air at sea-level pressure that is being filled into the tank. Since this particular scuba tank is rated to 3,000 psi, it can hold 80 cubic feet of sea-level air, when that air is compressed to 3,000 pounds per square inch (psi).
The pressure of air at sea level is about 14.56 psi. That number divides into 3,000 just about 206 times, so each cubic foot of air is being compressed about 206 times to get 80 of them into this scuba tank. By the way, that’s where the pressure unit bar comes from. So, 206 bar equal 3,000 psi.
There are other types of scuba tanks. I have a couple little ones that hold only 6 cubic feet of air at 3,000 psi. They’re used just to top off a gun during a match or when hunting. There are 120 cubic-foot, 3,500 psi steel tanks that aren’t much larger than an 80 cubic-foot aluminum tank. Because they’re steel, they hold higher pressure safely, so the same volume holds half again as much air (120 cubic-feet compared to 80 cubic-feet). I used to own a scuba tank that held air pressurized to only 2,200 psi. It was useless for filling most PCPs, with the exception of the Benjamin Discovery. So, don’t think that all scuba tanks are the same.
Carbon fiber tanksA carbon fiber tank is a breathing tank that is not for underwater. They’re used mostly by rescue workers such as firefighters. Like scuba tanks, they also come in sizes, although their fill pressures tend to not vary as much. An 88 cubic-foot, 4,500 psi carbon fiber tank holds only 8 cubic-feet more air than an 80 cubic-foot scuba tank, but it does so with a very important difference. Since the carbon fiber tank is pressurized to a higher level than a scuba tank, it has more high-pressure air available. Consequently, there are a great many more full fills for any given gun in one of these carbon fiber tanks than in a scuba tank. You might be able to fill a PCP to 3,000 psi two times from a 3,000 psi scuba tank, and after that the next fill might end at 2,975 psi. After that you’ll stop at 2,925 psi, then 2,850 psi and so on.
But, a carbon fiber tank that’s pressurized to 4,500 psi will continue to fill a PCP to 3,000 psi many times. Perhaps, as many as 18-20 times, depending on the gun. So, we say the carbon fiber tank has about nine times more full fills in it than in a typical scuba tank. That’s why the carbon fiber tank is so valuable.
Carbon fiber tanks have an aluminum bladder inside the carbon-fiber winding. Since the carbon fiber strengthens the bladder so much, the aluminum can be thinner and yet withstand even greater pressure. Therefore, an 88 cubic-foot carbon fiber tank weighs only about half as much as a scuba tank. That’s a lot more full fills for your guns at half the weight. What’s not to like? Well, there’s the additional cost of the more expensive carbon fiber tank; but if you can get past that, there are very few reasons not to get one.
Why higher air pressure doesn’t make your PCP shoot any fasterThink of a PCP gun as a car. Put in the correct fill, let’s say 3,000 psi, and the gun shoots fine. As the pressure drops it still shoots fine because that is how it is engineered to operate. Fill a car with gas and it will go far and fast. But, try though you might, you cannot put in five more gallons of gas than the tank is designed to hold. Even if you could, the car would still go the same speed. It’s not designed to go any faster.
Put a longer barrel on a PCP and it probably will shoot faster, just as taller tires will make a car go faster. But there are limits. Too long a barrel is ungainly, just as too-tall tires handle poorly.
How many shots can I get?This question commonly comes from someone who is looking at their first purchase of a PCP with the same enthusiasm as an insurance underwriter looks at smokers’ lives. Do you want the baritone to sing a moving song or are you just interested in how much of the alphabet he can burp?
What I mean by that is this. Shooting accurate shots is a goal. Hunting with clean kills is a goal. Shooting a PCP for as long as it will still poop out a pellet is a college prank. There’s no useful purpose to that number, but a nickel-sized 75-yard group is appreciated by everybody. Find out what the gun you want will really do by asking those who really do it on a regular basis. Forget the online wizards with their tin-can technology and witches-brew lubricants that promise you Nirvana for $89, plus shipping.
Now, it’s time for all of you readers who are prospective first-time buyers of precharged airguns to do your part. I really want to hear your questions about PCP guns, Don’t worry about embarrassing yourselves because you don’t know everything. Around here, we wait until you’re an old hand and comfortable with us before we start embarrassing you.
Black tip reef sharks and white tip reef sharks are commonly seen at reefs. There have been few reports of human attacks. Scuba divers tend to seek them out rather than avoid them. See Sharks
There are many species of predator in the reef. Sometimes they prey on the smallest of fish and it is hard to think of them as predators. Squirrel fish are predators that spend much of the day in reef crevasses. Trevallies, or jacks are medium-size predators that travel in schools. Reef skimmers and snappers have piranha-like teeth.
Several species of fish are often seen in the company of large predators. Pilot fish are small- to medium size fish with black stripes are that are often swim with fish such as sharks and rays. The large fish help the pilot fish by protecting them from potential predators and the pilot fish return the favor by feeding on parasites on the sharks.
Remoras use their suckers to hitch rides on sharks, whales, turtles, rays, dolphins almost any fish or sea mammal that is large enough to carry them. The they have a sucking disk under their head The sucker allows the fish to save energy. It is not used to suck blood like a lamprey, its is merely a fastening devise Its host provided with transport and gill venilable and protection from predators and food scraps. In return the remora cleans off parasites from its host’s skin.
Related Articles: Groupers: Characteristics, Behavior and Big Species ioa.factsanddetails.com ; Groupers in the Atlantic, Caribbean and Gulf of Mexico ioa.factsanddetails.com ; Reef Sharks: Blacktip, Whitetip and Grey Reef Sharks ioa.factsanddetails.com ; Lemon Sharks: Characteristics, Behavior, Feeding, Mating ioa.factsanddetails.com ; Nurse Sharks: Characteristics, Behavior, Feeding, Mating, Attacks ioa.factsanddetails.com ; CORAL REEFS ioa.factsanddetails.com ; CORAL REEF LIFE ioa.factsanddetails.com REEF FISH ioa.factsanddetails.com
See Sharks
Websites and Resources: Animal Diversity Web (ADW) animaldiversity.org; National Oceanic and Atmospheric Administration (NOAA) noaa.gov; Fishbase fishbase.se ; Encyclopedia of Life eol.org ; Smithsonian Oceans Portal ocean.si.edu/ocean-life-ecosystems ; Woods Hole Oceanographic Institute whoi.edu ; Cousteau Society cousteau.org ; Monterey Bay Aquarium montereybayaquarium.org ; MarineBio marinebio.org/oceans/creatures
Grunts, Hawkfish, Snappers and Jacks
Spanish grunts, snappers, porkfish and French grunts hunt the reef alone looking for crustaceans and small fish. Spanish grunts sometimes feed on sea urchins, whose spines leave behind a purple stain on the grunts’s face.[Source: Walter A. Stark II, National Geographic. December 1972 ╆]
Bluestriped grunts sometimes approach each other with their mouths wide open, looking as if they about to kiss or swallow each others face. No one is sure why these foot-long fish do this although scientist speculate it is a male territorial thing.╆
The 35 species of hawkfish are found in tropical waters and tend to lie on the sea bottom around coral and rocky reefs, waiting for prey come by, snatching them when they do. They feed mainly on crustaceans and small fish. If they feel threatened they use their pectoral fins to lodge themselves in a crevice making it difficult for predators to get at them and extract them. The fish tend to live on their own. Sometimes males form harems in their territory.
Jacks swim in schools during the day for protection against barracuda and other predators and separate at night to hunt smaller fish. Sometimes they rotate in near perfect gyres when they school.
Red snappers can are among the more aggressive predators on the reef, The have need sharp teeth and a voracious hunger and reach lengths of 70 centimeters. unless provoked. Red snapper is a name used to describe many species of fish served up at restaurants. They are not necessarily the ones you find at the reef. The American red snapper reaches a weigh of 35 pounds but is usually eaten when it weighs 10 pounds. Adults live around rocky reefs. Juveniles along sandy or muddy bottoms. They are often caught by dredges on shrimp trawlers.
Groupers
Groupers are generally solitary predators. Like other predatory fish such as barracuda, they are most active at dawn and dusk. Some prefer deep waters. Others are found in warm, shallow coastal waters, often in coral reefs and sometimes in estuaries. Groupers have been described as patient hunters because they like to lurk in caves or crevices and wait for a crustacean or slow-moving fish to pass their way and then lunge, open their large mouth and suck in the prey. Coral groupers catch fish with the suction created when it opens its huge mouth.
Groupers live for a long time and reproduce for short periods. Some species gather in large groups to spawn. Groupers tend to be fond of spiny lobster and also frequently eat crabs, small fish and juvenile sea turtle. When they are young they are fed on by other predators but if they manage to make it to adulthood the only real threat they face comes from humans.
There are several species of grouper. The giant grouper, which lives in the Indian Ocean and the western and central Pacific, is one of the largest species and is known to occasionally feed on small sharks. Other large species include the jewfish and goliath grouper. Many kinds of groupers can change their color to match their surrounding. Some species register victory or defeat by changing color.
See Separate Articles: GROUPERS: CHARACTERISTICS, BEHAVIOR AND BIG SPECIES ioa.factsanddetails.com GROUPERS IN THE ATLANTIC, CARIBBEAN AND GULF OF MEXICO ioa.factsanddetails.com
Trevallies
Trevallies are large marine fish in the Carangidae jack family that often travel in schools. They are is classified within the genus Caranx, that includes of a number of groups known as jacks. Caranx itself is part of the larger jack and horse mackerel family Carangidae, which in turn is part of the order Carangiformes. [Source: Wikipedia]
Trevallies are relatively big fish with a wide body. They have ovate, moderately compressed bodies with the dorsal profile more convex than the ventral profile, particularly anteriorly. The dorsal fin of the giant trevally is in two parts, the first consisting of eight spines and the second of one spine followed by 18 to 21 soft rays. The anal fin consists of two anteriorly detached spines followed by one spine and 15 to 17 soft rays. The pelvic fins contain 1 spine and 19 to 21 soft rays. The caudal fin is strongly forked, and the pectoral fins are falcate, being longer than the length of the head. The lateral line has a pronounced and moderately long anterior arch, with the curved section intersecting the straight section below the lobe of the second dorsal fin.
Giant Trevally
The giant trevally (Caranx ignobilis), also known as the lowly trevally, barrier trevally, giant kingfish or ulua, It is found throughout the tropical waters of the Indo-Pacific region, from South Africa in the west to Hawaii in the east, Japan in the north and Australia in the south.[Source: Wikipedia]
The giant trevally is distinguished by its steep head profile and strong tail scutes. It is normally a silvery colour with occasional dark spots. Males are sometimes black once they mature. The largest fish in the Caranx genus, it reaches lengths of 170 centimeters (67 inches) and a weight of 80 kilograms (176 pounds). The fish inhabits a wide range of marine environments, from estuaries, shallow bays and lagoons as a juvenile to deeper reefs, offshore atolls and large embayments as adults. Juveniles tend to live in waters of very low salinity such as coastal lakes and upper reaches of rivers, and tend to prefer turbid waters.
The giant trevally is an apex predator in most of its habitats, and is known to hunt individually and in schools. It mainly eats fish of various kinds but also preys on crustaceans, cephalopods (octopus, squid and cuttlefish) and molluscs, making up a significant portion of its diet in some regions. Among its interesting hunting strategies are following monk seals to pick off escaping prey and using sharks to ambush prey.
Footage shown in the 2017 documentary series “Blue Planet II”, shot in the Farquhar Atoll in the Seychelles, shows a group of approximately 50 giant trevally hunting fledgling terns learning to fly and crash landing and the fish taking birds, including adults, that flew low enough over the water for the fish to grab them.
The giant trevally reproduces in the warmer months, with peaks differing by region. Spawning occurs at specific stages of the lunar cycle, when large schools congregate to spawn over reefs and bays. The fish grows relatively fast, reaching sexual maturity at a length of around 60 centimeters at three years of age.
The giant trevally is both an important commercial fish and sport fish, with 4,000-10,000 tonnes of the fish caught in the the Asian region. The taste of the fish varies from poor to excellent depending on the source. Despite having relatively low numbers in some places,the fish has been designated as a species of least concern by the International Union for Conservation of Nature (IUCN).
Bluefin Trevally
The bluefin trevally(Caranx melampygus) is also known as the bluefin jack, bluefin kingfish, bluefinned crevalle, blue ulua, omilu, and spotted trevally. It is found throughout tropical waters of the Indian and Pacific Oceans, ranging from Eastern Africa in the west to Central America in the east, Japan in the north and Australia in the south. The bluefin trevally is sought after by both commercial and recreational fishermen. It has been designated as a species of least concern by the IUCN.[Source: Wikipedia]
The bluefin trevally reaches the length of 117 centimeters (46 inches) and a weight of 43.5 kilograms (96 pounds), however ones over 80 centimeters (31 inches) are rare. It is easily recognized by its electric blue fins, tapered snout and numerous blue and black spots on their sides and inhabits both inshore environments such as bays, lagoons and shallow reefs, as well as deeper offshore reefs, atolls and bomboras. Juveniles prefer shallower, protected waters, even entering estuaries for short periods in some places.
The bluefin trevally is a powerful predatory fish that mainly eats fish but also consumes cephalopods and crustaceans as an adult. It uses a wide array of hunting techniques ranging from reef ambushes, midwater attacks and foraging on prey missed by larger species (See Above). The bluefin trevally reproduces at different periods throughout its range, and reaches sexual maturity at 30-40 centimeters in length and around two years of age. It is a multiple spawner, capable of reproducing up to 8 times per year, releasing up to 6 million eggs per year in captivity. The fish reaches 19.4 centimeters in its first year, 34 in the second and 45.6 centimeters in the third year.
Trevally’s Extraordinary Hunting Skills
Trevallies are fast swimmers and feed mainly on fish. Two studies of adult giant trevallies in Hawaii found fish to be the main food type, making up over 95 percent of the trevally’s stomach contents. Most of the fish were small reef-dwelling wrasses (Labridae), goatfishes (Mullidae), parrotfish (Scaridae) and bigeyes (Priacanthidae). Trevallies seem to have a preference for fish of a specific size, which depends on their own length and age.
Trevally displays a wide and innovative array of hunting techniques, ranging from midwater attacks to ambushs to working with other species of fish. fish. The bluefin trevally hunts during the day, particularly at dawn and dusk as a solitary individual and in groups of up to 20 members. Most prefer the lone wolf approach. In groups, they fish rush their schools of prey fish, breaking up the school and picking off isolated individuals. Giant trevallies in captivity have been observed doing the same thing. In some instances, only one individual in a group attacks the prey school. When hunting in midwater, trevally swim both against and with the current but mostly with it,
The stealthy barcheek trevally sometimes hides behind large non-threatening fish such as triggerfish and darts out from its hiding place to snag prey unafraid of the clown triggerfish. When in ambush attack mode the blue trevally change colour to a dark pigmentation state and hides behind large coral lumps close to where the aggregations (often spawning reef fish) occur. Once the prey is close enough to the hiding spot, the fish ram the base of the school, before chasing down individual fish. Bluefin trevally also enter lagoons as the tide rises to hunt small baitfish in the shallow confines, leaving as the tide falls. The species is also known to follow large rays, sharks and other foraging fish such as goatfish and wrasse around sandy substrates, waiting to pounce on any disturbed crustaceans or fish which are flushed out by the larger fish.
Barracuda
Barracuda are strong, fast-moving predators that have few enemies other than large sharks. They have a long muscular body, a large head, long snout, a forward-projecting jaw and scary-looking spike-like teeth. They are found in all the world’s oceans, although they seem to be biggest and most plentiful in the Caribbean.
Barracuda can reach lengths of two meters and weigh up to 50 kilograms although usually they are around one meter or a little more in length. They tend to stay close to the surface in warm waters and are rarely seen in cold water or below a depth of 100 meters. Juveniles are sometimes found in large groups but most of the time adults are found in small groups or alone. Many fisherman used to think that barracudas were closely related to pikes because of the similarity in their body form.
Barracuda look menacing and are very curious. They often follow divers around, but they rarely attack anyone. Fish don’t have it so easy. When a barracuda clamps its jaws around a snapper divers have said they heard the crunching of bone under water.
If you go snorkeling or diving in waters with barracuda, don’t wear glimmering metal objects like jewelry or a watch; barracuda are attracted to these things and you. Also don’t provoke the, A barracuda bite can cause serious injury. often her stories about women wearing anklets whose feet were attacked when they dangled in the water. Such attacks often occur in murky eater when the barracuda mistakes the jewelry for a fish.
Barracuda’s long body and sharp teeth are adapted for swimming fast for short periods of time and biting. attacks by lying relatively motionless and then suddenly lunging forward. To grab prey. They are most active at dawn and dusk. Barracudas catch prey by circling round a school and choosing a moment when they might be confused, especially around dusk to dawn and biting a skalsing and hoping to snag a confused fish
Some people like the taste of Great barracuda meat but ciguaterra is an issue with the fish. Large individuals in particular can cause ciguatera poisoning,a serious illness that can result in some severe nausea and other nasty symptoms, sometimes even death. Very little barracuda meat is eaten in the United States.
The barracuda belong to the genus Sphyraena, which contains 29 species. Among them are the Sharpfin barracuda, Arabian barracuda, Pacific barracuda, Great barracuda, Northern sennet, Yellowstripe barracuda, Mexican barracuda, Yellowtail barracuda, Bigeye barracuda, Pelican barracuda, Japanese barracuda, Australian barracuda, Red barracuda, Sawtooth barracuda, European barracuda and Yellowmouth barracuda,
Great Barracuda
Great barracuda (Scientific name: Sphyraena barracuda) have an average lifespan in captivity is 14 years. They are found in tropical waters in the Indian Ocean, Atlantic Ocean and western Pacific Ocean. They have been found in the Red Sea and as far north as Massachusetts in the Atlantic. They are often seen in the Caribbean Sea and prefer clear water with temperatures between 23 and 28 degrees C (74 and 82 degrees F), although they have been found in much colder water. Few people like to fish them although they can put up a good fight. Great barracudas can be dangerous and have attacked snorkelers and divers.[Source: Brianne Fuller, Animal Diversity Web (ADW) /=]
You can typically find great barracudas in reefs or other coastal areas. Adult live in and around the edges of coral reefs and tend to avoid brackish water unless they are preparing to spawn. Post-larvae live on the margins of and in the estuaries where they are protected. When they get large enough to protect themselves, they head to open ocean and later to the margins of the coral reefs./=
Great barracuda at all ages eat other fish. Their large teeth are quite useful for snagging prey. They hunt using both sit-in-wait and active predator styles. As juveniles, they fish compete with needlefishes and small snapper for food, which consists of killifishes, herrings, sardines, gobies, silversides, anchovies small mullets, and lizardfishes. As the barracuda get older and bigger, they may compete with larger fish like mackerel, or even dolphins, depending on their habitat. Then great barracuda feed on both bottom-dwelling species as well as species of the higher water column, They been observed herding schools of fish into shallow water and guarding them and eating them when their last meal is digested and they are hungry again
Great Barracuda Characteristics and Behavior
Great barracuda are large, long fish with two widely separate dorsal fins. They can reach a length of around two meters. Their average weight is 40 kilograms (88.11 pounds). According to Animal Diversity Web: They have large scales and a pointed head with a large mouth and long knife-like teeth. Great barracuda have a large gape, which allows them to feed on very large fish by chopping them in half. Their lower jaw project forward more than the upper one and this is helpful in biting. Their bodies are grayish brown above and silvery below.They often have dark ink-like spots that are arranged in no pattern on their sides. The young have dark crossbars on their backs and blotches on their sides. The young also have a soft dorsal fin and the anal and caudal fins can be blackish. Males and females are roughly the same in size, shape and coloration. [Source: Brianne Fuller, Animal Diversity Web (ADW) /=]
Great barracuda sense using touch and chemicals usually detected with smell. They tend to be solitary fish as adults, especially at night. But juveniles and adults are often observed traveling in schools during the day. Groups of hundreds and even thousands of great barracudas have been observed but are rarely seen. They kill compulsively and destroy more than they eat. Most often, great barracudas attack humans only when provoked. /=
Great Barracuda Mating
barracuda Great barracuda oviparous (young are hatched from eggs) and iteroparous (offspring are produced in groups). Reproduction is external, meaning the male’s sperm fertilizes the female’s egg outside her body. On average females reach sexual or reproductive maturity at age 1460 days while males do so in 730 days. [Source: Brianne Fuller, Animal Diversity Web (ADW) /=]
According to Animal Diversity Web: It is still unclear about the timing and location of spawning of great barracuda. Some research reports that they spawn in the spring. Others claim that they spawn in association with particular phases of the moon. Still others claim that great barracudas spawn throughout the year with the exception of the winter months when it is cooler. It may be that great barracudas show different spawning patterns in different areas of the world. /=
Great barracuda do not care for their fertilized eggs. They are left to drift out into the ocean and eventually take form. When the fish spawn they enter shallow waters such as estuaries. The larvae hatches and seeks shallow weedy areas on the margins of clear-water estuaries. When the larvae reach a length of about 80 millimeters they move to the deeper waters of adjacent reed beds. At about 300 millimeters they move to open waters and eventually they move out of the estuaries completely at about 500 millimeters in length.
Text Sources: Animal Diversity Web (ADW) animaldiversity.org; National Oceanic and Atmospheric Administration (NOAA) noaa.gov; Wikipedia, National Geographic, Live Science, BBC, Smithsonian, New York Times, Washington Post, Los Angeles Times, The New Yorker, Reuters, Associated Press, Lonely Planet Guides and various books and other publications.
What comes to your mind when you think of snake sounds? Venomous (poisonous) snakes, right?
It’s true that venomous snake species, like cobras and rattlesnakes, produce a range of sounds as a defense measure.
However, non-venomous species like bull snakes can also create different sounds and noises.
But why do they produce these sounds? Well, continue to the next section for the answer.
Purpose of the Snake’s Sounds and Noises
Snake vocalizations are not just random wild noises; they have a purpose, including:
Communication: Perhaps the primary reason snakes produce distinct sounds and noises is for communication. But here’s something interesting: Snakes don’t use their unique auditory cues for communicating with other snakes. These sounds are meant for potential snake predators. As a fact, the frequency of snake sounds like hissing is too high for other snakes to hear. That means, a snake cannot hear another snaking hissing.
Defense Mechanism: Snake sounds can also act as a defense mechanism. By hissing or producing growls or spine-tingling rattles, the snake can warn predators to stay away.
To Show Aggression: The “sssssss” snake sound could also show aggression, especially in ball pythons. If provoked, snakes might hiss and flicker their tongue quickly to defend themselves.
Territorial Display: Snake sounds can also help them define their territory. A snake might hiss at humans and animals who encroach on their space to ward them off. The sound act as a deterrent, effectively telling intruders to back off.
Types of Noises and Sounds Snakes Make
1. Hissing
A snake’s hiss is unmistakable and super terrifying. Like a dog’s growl, the hiss warns invaders, prey, and predators.
However, wild snakes usually hiss more than snakes in cages. The reason is that the former is exposed to dangers more frequently than the latter. So, they often react to danger or uncertain situations by hissing?
How Does a Snake Produce the Hissing Sound?
Have you ever tried hissing before?
It’s easy! Place your tongue behind your teeth and force air between the opening.
However, that’s not how hissing works in snakes.
These creatures can’t make a lot of different shapes with their mother. As a result, they can produce a lot of different noises.
But they have a secret weapon: the glottis. This is a little hole right underneath the snake’s tongue that connects to the windpipe.
The glottis allows the animal to breathe when swallowing its meal. It also helps the snake produce the sound of a hiss, thanks to a small piece of cartilage inside it.
When a snake exhales through the glottis, the cartilage vibrates, creating a hissing sound. It also gives the hissing extra volume.
Even interesting:
Some snake species like the bullsnake can change their hiss to mimic a rattle. Because the snake is non-venomous, the rattling noise helps them intimidate predators.
While hissing, snakes also poke out their tongues to smell the predator and take the safest route to escape.
When Do Pet Snakes Hiss?
When Startled: If you catch a pet snake off guard, it might hiss out of fear. It’s normal for baby snakes to hiss more because they are still getting used to the environment and human owners. To prevent this, first touch the snake softly to alert it you are about to pick it up.
When Annoyed: Sometimes, snakes want to enjoy their peace undisturbed. If you try to pick one up, it might hiss back at you to express displeasure. So, leave it alone until it’s in a merry mood.
When Digesting Food: Experts recommend allowing the snake to relax after ingesting a large meal. This can take 3 to 5 days, depending on the snake’s size and amount of food. If you lift the snake after the meal, it will probably hiss to express dissatisfaction.
When It’s About to Shade: Snakes shed their skin about four times annually. So, leave it alone during this time to avoid upsetting it. If you attempt to touch or pick it up during the shedding process, it may feel nervous and hiss to express itself.
2. Rattling
You can identify rattlesnakes by their distinctive rattle sound, particularly the Western Diamondback Rattlesnake.
But did you know rattlesnakes are not the only snakes that shake their tails?
We have other dangerous snakes, including:
Cottonmouths
Copperheads
Terciopelos
Cantills
Bushmasters (These snakes even have spine-like scales at the tip of their tails for a louder sound)
Here’s a list of non-venomous snake species that also shake their tails:
Corn snakes
Gopher snakes
Rat snakes
Kingsnakes
These snakes produce rattling sounds by shaking their tails, which consist of interlocking segments made from keratin. Yes! The stuff that makes up your finger and toenails.
These interlocking segments are loosely attached. As a result, they move back and forth when the snake shakes its tail, producing a rattle.
As the snake grows and sheds its skin, a new segment forms and is added to the rattle, causing it to lengthen over time. But a long rattle doesn’t necessarily mean a loud sound. That would be the speed and intensity of the tail vibration.
For venomous snakes, the tail shaking serves as a warning to predators. It also serves as a diversion, directing the attacker’s attention to the tail. This can lead to confusion and prevent an attack.
As for non-poisonous snakes, tail vibrations help them mimic dangerous snake species and shield themselves from predators. This is what is called Batesian mimicry.
3. Bellowing
The bull, gopher, and pine snake can produce bellows when threatened or attacked by a predator. Unlike hisses, bellows are distinctively loud and can leave you frozen in your tracks.
These snakes bellow by forcing air via the larynx. Within the larynx is the laryngeal septum (vocal coder), which vibrates to produce the spine-chilling bellowing sound.
Usually, this sound has a short period of high amplitude (loud noise) followed by a long period of low amplitude (quieter noise).
4. Growling
You would think a bellow is the most unique snake vocalization. But wait till you learn that some species have evolved to growl when agitated. One such snake is the king of cobra.
The king cobra is considered one of the largest venomous snake species in the world. While it might look intimidating, it’s usually timid unless it feels threatened.
When a king cobra spots a threat, it might slither to safer areas. It might also inflate its hood, which comprises several air sacs to look bigger and intimidate the attacker.
Additionally, it may produce a scary growl that sounds like it belongs to a lion or dog instead of a snake.
Additional Snakes Sounds and Noises
Besides the vocalizations mentioned above, here are some creepy snake sounds worth checking out:
Puffing: It is no surprise to hear your pet snake puff and huff at night or when feeding. This rings true for snake species, like boas and carpet pythons. The puffs and huffs could also show the snake’s frustration.
Shrieking: Snakes that bellow like the pine snake can also produce a shriek in response to danger. All thanks to its distinctive vocal cord.
Whistling: Some snakes like Russel vipers and corn snakes whistle.
Rasping: Some snakes produce rasping sounds by rubbing their scale together. For example, saw-scaled vipers (native to Africa and Asia), will assume an “S” shape and rub their scale together to make a noise similar to a hiss. The purpose of the sound is to scare away predators.
What To Do During a Snake Encounter
Snakes are typically timid and avoid human contact and confrontation whenever possible. So, if you encounter one on your property, it is more likely the snake is scared of you than you are of it.
Below, we’ve provided you with the best ways to deal with a hissing snake and ensure the safety of both parties.
Stay Calm: Panicking only increases the likelihood of sudden movements. This can disturb or frighten the slithering creature. As a defense response, the snake might hiss or even attack you.
Note the Sound: Snake species make sounds, such as hissing, rattling, or growling. Identify the type of sound and, if possible, try to identify the snake and the threat level. This information might guide your next actions.
Allow the Snake Some Space: Snakes frequently make sounds as a defensive mechanism, signaling a threat. Respect the snake’s personal space and avoid approaching or handling it. Maintain a safe distance to prevent snake bites and lower the risk of escalating aggression.
Back Away: If you encounter a snake and it makes noises, it’s best to back away from the scene. Also, maintain eye contact with the snake, as it will be aware of your movements. Create distance by retreating slowly and smoothly while avoiding sudden or threatening gestures.
Seek Professional Help: In certain situations, it’s wise to call your local animal control or professional snake removal service. These experts possess the skills and equipment to handle and relocate the snake, safely.
Closing Thoughts
Snakes have a fearsome reputation. But surprisingly, these creatures are typically shy and often avoid human interactions. They naturally keep their distance when they sense human or predator presence.
However, when threatened or cornered, they can produce a lot of different sounds to warn, intimidate or divert the attention of invaders or predators.
Most individuals are familiar with the snake’s hiss. But these animals can also growl, buzz, rattle, shriek, whistle, and rasp. This shows the remarkable diversity of snake vocalizations.
Overall, learning about snake sounds and noises helps you better appreciate their communication methods. This way, you can prevent dangerous encounters, especially with venomous species.
Thank you for stopping by! If you have any questions, inform us in the comment section.
Do you like to fish for walleye with leeches? If so, you may want to take the time to create your own leech traps. They are easy and inexpensive to make. Most will take you less than 10 minutes to build. Here’s how to make five of them:
Soda Bottle Leech Trap
You can create a quick and easy leech trap with just a pair of scissors, a roll of duct tape, a rock and a 2 liter, clear, plastic soda bottle. Start by removing the soda bottle’s cap. Next, cut the top off of the soda bottle just above the label line. Place a piece of chicken liver or stew meat into the bottom of the bottle along with a good size rock. The meat will act as bait and the rock will help to keep the trap from moving too much in the current.
Proceed by inverting the top of the bottle so it looks like a funnel. Then insert your makeshift funnel, tapered end down, into the bottom of the soda bottle. Duct tape the funnel into position. When you are ready to use the leech trap, simply set it in the water on its side. Hopefully the leeches will be enticed by the bait and crawl into the bottle.
Wood Leech Trap
One of the easiest leech traps to make is a leech board. All you’ll need to make one is an old piece of porous wood and a bottle of fish oil. You can buy the fish oil through a pharmacy or health food store. In most cases a large bottle of fish oil will cost you around $35. In order to make the wood attractive to the leeches you will need to soak it in fish oil.
Some anglers prefer to make a mixture of fish oil and blood. You can get blood for your mixture from draining off packets of meat from your local butcher shop. After the wood has absorbed the oil and blood, place it into the water. The leeches will attach themselves to the wood. Once they do, remove the wood and pick the leeches off of it.
Coffee Can Leech Trap
You can also make a leech trap out of an old coffee can. To do so you’ll need bait, a hammer, a sharp screw driver and a pair of vise grips. Use the screw driver and hammer to poke holes in the bottom of a coffee can. Continue by placing the bait into the bottom of the can. Finish the leech trap off by squeezing the top of the can shut with a vise grip. Leave just enough room for the leeches to get into the can. Place the baited coffee can into the water and wait for the leeches to arrive.
Dunk Bag Leech Trap
I have found that a dunk bag also works well as a leech trap. You can typically pick one up through most outdoor outfitters for less than $5. Soak the bag in fish oil, place a piece of bait inside the bag and add a rock for weight so the bag won’t float away. Submerge the bag into the water and wait. The leeches will swim into the bag through the holes. Once the leeches are in the bag pull it out of the water and remove them.
Jute Pouch Leech Trap
If you don’t want to use a dunk bag, a jute or burlap pouch will also work. You can typically buy a case of jute pouches through craft stores or online for less than $20. That way you can place leech traps in multiple locations. Treat the jute pouch the same way as the dunk bag. Soak it in fish oil and then add the bait as well as a rock.
When John Feazell stood in the hunting department at Wal-Mart prior to the 2009 hunting season, he was faced with perhaps the biggest decision of his life. Okay, not really. But he was faced with the decision of whether or not to buy a new grunt call, not just any grunt call, the new Flextone Bone Collector. “I have about 20 different grunt calls at home, so I don’t think I need another” said John, as he put the call back on the shelf and began to meander through the aisles. As he was walking away, however, he recalls, “Something in my head just told me to go back and buy it, so I bought it. I figured that call, capable of the snort-wheeze sound, would work on a mature dominant buck.” Little did John know that his impulsive acquisition of a new grunt call would lead to a new state record in the state of Virginia.
John Feazell harvested this monster Virginia whitetail last fall. With over 220 inches of bone, he is easily the largest whitetail ever taken by bow in Virginia.
Saturday November 7th, 2009 was the second Saturday of the Virginia Muzzleloader season. The evening prior, John headed afield with his Muzzleloader to a spot where he usually experienced good deer activity. Luck was on his side that day, as he harvested a “solid 8 pointer.” The following day he and his father decided to head to their hunting property in Botetourt County, Virginia. Since he had just harvested a nice buck the day before, he lent his Muzzleloader to his father, who does not own one. “I figured I would let my dad use my Muzzleloader since I just shot a good buck. I told him that I had plenty of time left to get a good buck with a bow,” says Feazell.
As much as John Feazell loves whitetail hunting, he says it’s not his favorite animal to hunt. “Turkey hunting is my bread and butter, I live for Spring Gobbler Season,” says Feazell. However, when bow season comes around, he takes the sport very seriously. “I wouldn’t call myself a serious bowhunter, but when I bow hunt, I’m serious,” Feazell aptly describes. “I’m extremely cautious when it comes to my scent, especially. I like to wash my clothes in unscented detergent, dry them in earth scented dryer sheets, then they immediately go in my scent free tote. I leave little room for error when it comes to the whitetail’s nose,” he says. So with bow in hand, Feazell headed to one of his bow stands, since the rest of his hunting party were carrying muzzleloaders. Perched just below the crest of a mountain, Feazell made mention of this being a good place to experience activity as two giant rock formations funnel deer to two different saddles in the ridgeline.
John Feazell with his new state record.
After settling into his stand well before daylight, Feazell sees his first deer at 7:45 a.m. “I see it’s a big bodied deer, but I can’t make out what it is. It takes 5 steps and I see antlers. Oh man, golly what a deer!” The buck, then in the open, broadside at 50 yards and Feazell remembers thinking, “There is no way I am taking the shot, I am not screwing up this deer.”
But just as quickly as he came he was gone. The monster buck had topped over the mountain and out sight. Feazell recalls two sobering thoughts, “First of all, no one is going to believe when I tell them of the buck I just saw, and I just wish I had my muzzleloader.” A little over an hour goes by, and Feazell jokingly remembers contemplating going back to camp and getting a Muzzleloader and “sitting on that mountain for a month, or however long it takes for me to get that buck.” In the meantime a doe and a half racked 4 pointer make their way to Feazell’s location. “That doe came by at 20 yards, and for a split second I thought about drilling her. But I thought don’t be stupid, don’t shoot this doe,” he says.
A truly once-in-a-lifetime buck! From drop tines, to mass, to bladed brow tines, this buck has it all.
Feazell’s will power proved to be strong as he elected to pass on the doe. With the doe and 4 pointer still in sight, he noticed the young buck staring off in one direction, “looking shaky.” Feazell then turns and sees the big buck coming back from behind a Chestnut Oak tree. “No way, there is no way it’s that buck. You just don’t get second chances like this. No way, I’m going to shoot this deer,” Feazell recalls. As the big buck makes his way back towards the younger buck and doe, the doe beds down and Feazell remembers, “I just KNEW that as soon as that doe bedded down, the buck would do the same thing. And, 5 seconds after the doe laid down, the buck plopped down 30 yards behind me.”
Sitting in his ladder stand, Feazell had a limited viewing window of this buck. The bowhunter had to stand for nearly 45 minutes, peaking around the tree his ladder stand was hung on. After time, the younger buck, which had been browsing on acorns, angles from Feazell’s left towards his stand. This grabs the attention of the larger buck, and feeling threatened that this youngster is going to steal his doe, stares down the younger buck before they both eventually shift their attention to the doe.
It was then that Feazell remembered about his grunt call. “If it would ever work in a million years, it will work right now,” he says. Grabbing his Flextone Bone Collector, Feazell calls, and on the second snort-wheeze the larger buck comes to full posture on the younger buck. With ears back and hair bristled, the bruiser buck makes a false charge at the younger buck, and that’s all it took for the younger buck to “get out of dodge.”
The John Feazell buck officially scored 221 2/8″ as a non-typical and was believed to be at least 5 1/2 years old.
Making his way from the Chestnut Oak towards the doe the buck stops at 30 yards broadside. “I’d rather all my shots be 20 yards or less,” Feazell says. “But I’m comfortable out to 30.” With a window the size of a circular dining table to shoot through, Feazell had to bend his knees just a tad to fit the arrow through. He draws releases and misses! The arrow deflects off a small twig and harmlessly flies off. With his entire focus and attention on the doe, the missed shot confuses, but doesn’t alarm the buck. Unaware, of what just had happened the buck settled down, and the doe began to walk away.
Feazell, remembering of another call in his arsenal of gear, grabs his Primos The Great Big Can call and turns it over. The doe then comes back towards the tree stand within 25 yards in Feazell’s shooting lane, before angling back down the mountain. In the meantime, the monster buck began rubbing, or as Feazell put it, “thrashing and tearing up and down” a young Chestnut Oak. In the process the buck had lost sight of his doe.
What a gorgeous whitetail. Fortunately, this buck was harvested by an ethical, hardworking sportsman in John Feazell. Congratulations, John!
Remembering his Flextone Bone Collector call again, Feazell snort-wheezes twice in succession. Immediately the buck’s hairs bristle up and he goes into full posture walking stiff legged broadside. “Two more steps, two more steps,” Feazell recalls will put his buck at 18 yards. Feazell then draws his PSE Firestorm Lite and releases his Carbon Express arrow tipped with a Two-Blade Rage. Thawck! “You drilled him, you drilled him,” Feazell says. Watching his buck tear down the mountainside some 100 yards, Feazell saw his buck begin to stagger then fall down. An avid sportsman, Feazell said he simply couldn’t wait to claim his trophy. “I know about the 30 minute rule on even lethal hits, but I couldn’t help it. I let out a war holler and ran straight down to my buck, I saw him go down,” he says. With a 200+ plus inch deer on the ground within sight, I think we can all forgive Feazell’s eagerness to recover the fallen giant. After having sat and listened to John Feazell tell the story of his buck, I am convinced that it could not have happened to a better person. “I was just meant to kill that deer, it was 99% luck. All the cards had to fall together and they did, the Good Lord just wanted me to kill that deer,” he concluded. The John Feazell Buck ended up officially scoring 221 2/8 Pope & Young inches as a non-typical, making him the biggest buck ever taken by bow in Virginia. With 38 5/8 inches in non-typical points, the buck still grossed 189 2/8 inches as a typical.
Part 1 Part 2 Secrets of loading the Benjamin Marauder magazine
Benjamin Marauder
Today, I’ll begin a look at accuracy for the Benjamin Marauder precharged pneumatic air rifle. If the Marauder was a normal PCP, this would be one quick report, but it isn’t. The owner has the ability to change not only the rifle’s power, but also the fill pressure the reservoir will accept. That makes testing a Marauder potentially complex if you want to try everything, and we certainly do want to do that here. So, today will just be a first look at potential accuracy, after which I’ll determine the shot count the rifle now gets with the best pellet, and then tune it to a preselected optimum range and test it again to see if the shot count increases. Neat, huh?
I know I’m going to shoot this rifle a lot, so I selected one of the best scopes I have — a CenterPoint 8-32x with parallax adjustment. The scope I chose is an old one from the time when Centerpoint was having Leapers make all their scopes. It’s no longer available, but a close equivalent would be this UTG scope.
Where to begin the test Oh, boy, where do I start? I thought it would be good to test a number of premium pellets and try to find 1 or 2 that stand out for accuracy. Then, I’ll concentrate on those pellets, which will help me focus on what has to be done.
I shot at 25 yards indoors because that’s the distance at which things start to happen. If a pellet is going to be accurate, 25 yards is usually far enough for it to stand out.
This is one time where 5-shot groups come in handy. I decided to shoot all the pellets I’d selected in 5-shot groups and see if 1 or more of them stood out as exceptionally accurate. Five-shot groups save time, pellets and air; and when you’re faced with testing 8 different pellets, as I was, it makes a big difference.
If there was no favorite pellet, I would just have to pick a couple pellets and proceed to work with them. But as it turned out, this rifle does have a favorite. When I show you how much better it is than the others, you will probably say what my wife, Edith said when she saw the groups. She couldn’t believe that 1 pellet was so much better than all the rest, and exclaimed, “Woohoo,” involuntarily.
Marauder’s noise level But before I get to that, when I walked into her office to show her the groups, Edith asked me what airgun I was testing because she couldn’t hear it. She thought it was some low-powered air pistol. And our female cat, who normally runs around the house complaining whenever I shoot, slept through the whole session. As it stands right now, the Marauder I’m testing is about as loud as a politician volunteering to do something proactive in a non-election year.
Pellets tested I selected the following pellets to test:
Crosman Premier 10.5-grain Crosman Premier 7.9-grain JSB Exact Heavy (10.34 grain) JSB Exact RS RWS Superdome Beeman Kodiak JSB Exact Monster JSB Exact Express
I did sight-in the rifle, but not so it would hit the center of the target because that would destroy the aim point. Nevertheless, a couple pellets did do just that. Fortunately, it was at the end of the 5 shots and no harm was done.
Average groups The Marauder is accurate no matter what pellets it shoots. It’s better with some pellets than others. Take a look at some of the 5-shot groups.
Five RWS Superdomes made this 0.528-inch group at 25 yards.
Five 10.3-grain JSB Exact Heavys made this 0.376-inch group at 25 yards. It’s better than the Superdomes, but still not great.
Five JSB Exact Monsters made this 0.316-inch group at 25 yards. It’s the second-best 5-shot group of the test.
Okay, I could live with the JSB Monster group, and there were a couple other pellets worthy of further examination if that was the best the Marauder was going to do. But it wasn’t. When I shot 5 Crosman Premier lites, the whole test changed.
Five Crosman Premier lites made this 0.139-inch group at 25 yards. It is hands-down the best 5-shot group of the test.
It should be obvious that Crosman Premier lites are the best pellet of those tested. On the basis of the 5-shot group, they’re twice as accurate as the next best pellet. Now, it was time to shoot a 10-shot group with them and see where that took us.
Ten Crosman Premier lites made this 0.285-inch group at 25 yards. This is exactly what I was looking for.
Obviously the 5-shot group was no fluke. This rifle really likes this pellet.
What’s next? Where do we go from here? First, I’m going to fill the rifle again to 3,000 psi and shoot nothing but Premier lites to determine the total shot count with the gun as it’s currently tuned. You may remember that we found this rifle was tuned to the max when we did the velocity test in Part 2. While that high speed obviously doesn’t hurt the accuracy of the Premier lite pellet, wouldn’t it be nice to get several extra shots from a fill and keep the same accuracy? The rifle currently shoots Premier lites at an average 1,015 f.p.s., and I think an average 900 f.p.s. will be just as good. That’s where I’ll be adjusting the rifle. Several of you have asked how the power is adjusted on the Marauder, so this will give me the opportunity to show how it’s done.
Then, I’ll count the total number of shots at that new velocity, and we’ll see what reducing the velocity gains, if anything. I’ll also test the accuracy at the new lower velocity to see if the rifle is still just as accurate.
After that, I plan to adjust the maximum fill pressure of the rifle. I’ll experiment with the rifle operating at a lower fill pressure while still getting the same velocity. This will be at the new velocity of around 900 f.p.s. We’ll see what benefits there are to having a lower fill pressure.
I do plan on shooting the Marauder at 50 yards, too, but that will come after all the adjustments have been made and evaluated. By then, we should know the test rifle very well and be able to tune it for the best performance. There’s a lot more in store for this rifle!
")
")
")
")
")


 barracuda Great barracuda oviparous (young are hatched from eggs) and iteroparous (offspring are produced in groups). Reproduction is external, meaning the male’s sperm fertilizes the female’s egg outside her body. On average females reach sexual or reproductive maturity at age 1460 days while males do so in 730 days. [Source: Brianne Fuller, Animal Diversity Web (ADW) /=]
 Benjamin Marauder
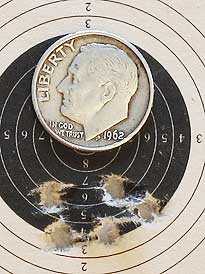 Five RWS Superdomes made this 0.528-inch group at 25 yards.


