Fly fishing in the winter can be challenging but, also, highly rewarding. Most people do not venture outside their homes so winter fly fishing keeps the crowds away, and often times you’ll have the water all to yourself.
Generally speaking, trout are a smidge sluggish in the winter as they become less active in, literally, wader freezing temperatures. In certain small streams, we don’t recommend that you fly fish in the winter because it only adds further stress to fish that have not recovered from the summer and spawning season. However, if you know that the stream holds a high abundance of food sources then go for it!
Streams fed by springs and reserviors usually means a constant and stable water temperature that provides a healthy environment for large insect populations.
Table of Contents
Table Of Contents
- Winter Strategies & Tips
- Midge Flies
- Egg Flies
- Blue-Winged Olive Flies
- Aquatic Worms
- Scuds & Sowbugs
- Streamer Flies
- How to use weight in the winter to catch more fish.
If you were to fly fish during the winter, here are our top 15 winter trout flies followed by our best tips and advice:
Midge Flies
When growing up, trout are always reminded by their cannibalistic parents to “eat your midges because they will make you big and strong.” Midges are, basically, the most important source of food for trout. In fact, midges are the bulk of a trout’s diet November thru February. Midges are a major food source year-round for trout.
They hatch in freezing temperatures and hatch by the thousands. Basically cockroaches. When aquatic insects are less inactive in the winter, opportunistic trout key in on drifting midge larvae. Because midges mature and develop year-round, trout depend on them for easy pick’ins.
Here are just a few of our favorite midge flies we recommend fly fishing for trout in the winter.

Griffith’s Gnat
Typically, you’ll find swarms of these guys over slack water. Be sure to use a light tippet and target the slow-moving water following a pool.

Tungsten Rainbow Warrior Midge
One of the most successful searching fly patterns for trout, the Tungsten Rainbow Warrior Midge fly pattern combines a tungsten bead with a bit of flash to produce spectacular results.
Zebra Midge
Zebra Midge flies have been around for decades and for good reason — they catch fish. We love incorporating the Zebra Midge within our nymphing rigs as the first nymph followed by a heavier tungsten beaded fly. Midge larva can be found in nearly every level of the water column at all times so we make sure to keep a good variety of this pattern in our boxes. Across the board, it is a reliable trout fly in streams, rivers, and stillwater.

JuJu Baetis Flashback
Technically, this is considered a mayfly nymph pattern but it easily doubles as a perfect midge imitation. This lightweight midge larva pattern is another wet fly we recommend for our nymphing rigs. While you can fish this fly near the bottom with great success, it is best fished near the surface in slack water. On some days, you may be able to visibility see trout feeding close to the surface and sipping adult midges on the top. A great tactic would be to drop the JuJu Bee off the back of a dry fly pattern and cast to trout feeding both off the top and just below the surface.

Use A Two-Fly Nymph Rig
The Two-Fly Nymph Rig is an important technique that not only helps present subsurface flies better but also improves your chances. Well, sure, with an extra fly in the water you have a higher probability of catching a trout, but let’s not make this into a numbers game. Trout don’t know numbers. It comes down to the presentation of each individual fly. Trout will only move a few inches to eat an insect so you have to make sure that your fly is presented within those few inches.
With the Two-Fly Nymph Rig, both flies work together to get down into those narrow feeding lanes. The heavier larva/nymph pattern pulling the lighter emerger/pupa down.
Eggs Flies
October thru December, brown and brook trout spawn. During this time, opportunistic trout will lie downstream of the reproductive activity for drifting egg clusters. CAUTION: Please do not target trout on a redd. Redd is the spawning bed and is characterized by turned over gravel (usually bright). Please leave these trout alone so we can expect future generations as they are making more trout.
Great Searching Patterns:
Beaded Egg Fly
This fly is extremely effective during the spawning season in heavily stocked streams. Fish this fly downstream of the spawning area to awaiting trout. Although, during an abundant midge or baetis hatch, these will often be ignored.

Beadhead Veiled Cabalerro
The two-toned body with a thin outer “shell” will blend together perfectly in the water to make a realistic offering that trout will find irresistible.
Baetis (Blue Winged Olive)
Baetis (BWO) nymphs are one of the most common nymphs across the United States. During the winter months, you may find BWO’s hatching during a few days of warmer temperatures.

BWO Foam Para Emerger
Foam emergers are great for selective trout, which is great for the winter because most of the activity is found in slower, slack water. These look great with the tapered segmented body and have an amazing profile from nearly every angle. Foam para emergers also sit low in the surface-film, just like the naturals. We love using these blue-winged olive flies in the winter in particularly small sizes and often adding more than one dry fly — a multi-dry fly rig.
Dirty Hipster
This barbless euro nymph is scattered across our entire site and recommended everywhere, and that is for good reason. It catches fish. In this particular case, the olive variation in small sizes is a fantastic blue-winged olive nymph pattern. You can use this however you like but, for us, we like to fish this under a small indicator with smaller midge nymphs tied in above it.

Beaded Soft Hackled Hare’s Ear
This is a variation of the classic Hare’s Ear nymph pattern you commonly know. Tied as a soft hackle, the Partridge Hare’s Ear fly pulsates and moves just like how emerging nymphs wiggle and squirm on their way up to the surface. On the other hand, you can also add a non-beaded version of the Hare’s Ear Soft Hackle into the top of your nymphing rigs or off the back of a dry fly.

WD40 Emerger
WD40 flies are fantastic un-weighted patterns that we fish anywhere in our nymphing rig. You can add it to the top, off a dry fly, or trailing off a heavier nymph, but as long as you have it in the water it works wonders.

Aquatic Worms
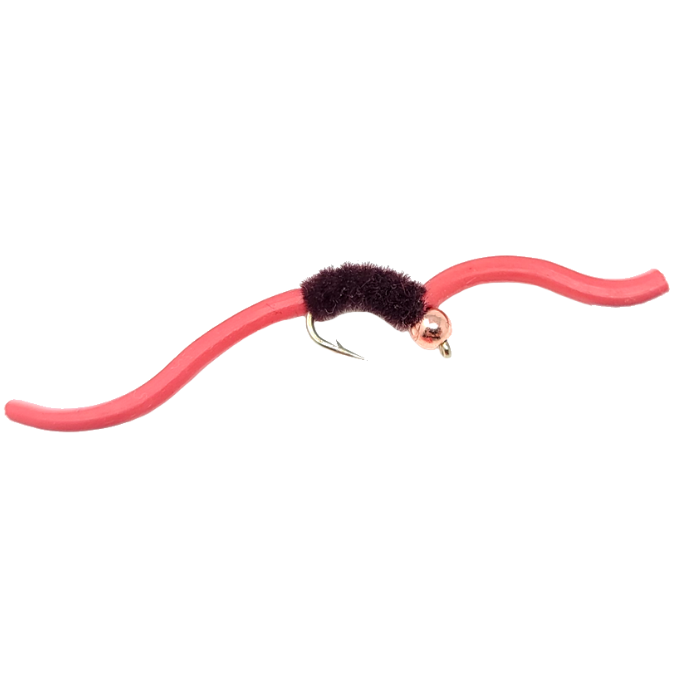
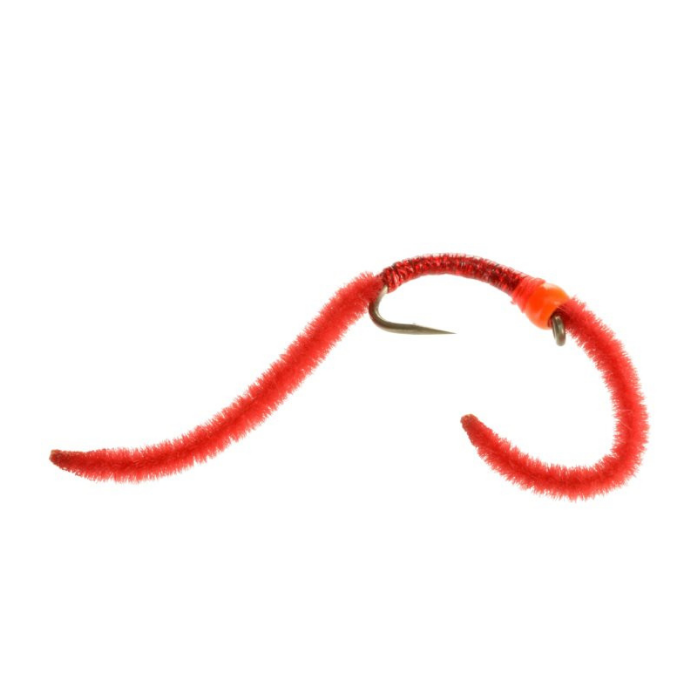
Aquatic worms are totally natural and are a select part of a trout’s diet. They are found in sediment on the stream bed and are constant year-round. We prefer the Squirmy Wormy over the San Juan Worm because its flexible body provides more motion. They may not be as durable, but when winter fly fishing gets tough, you call in the big guns. When scouting for trout we use flashy patterns like this to see if fish respond. Once trout become more selective, we switch to more natural-looking patterns like the Pheasant Tail.
Improved Squirmy Wormy
Squirmy Wormy flies are great — they wiggle and squirm like no other worm fly and catch fish like crazy — but the durability of the material they are made from is their downfall. They will degrade even when taking good care of them or even leaving them in mild heat. Trust me, we’ve recycled hundreds of dozens of these patterns before they ever hit the shelves. After speaking with a few fly designers on material options, we’ve made squirmy wormy flies that last longer by using micro chenille on the body rather than the soft plastic worm material.
Firebead Sparkle Worm
A heavy worm pattern we like to use in deep water for big browns and rainbows. The added flash and sparkle creates a wonderful contrast that sparks interest. Sometimes all it takes is a bright fly.
Scuds & Sow Bugs
Trout can be found eating scuds and sow bugs year-round. In streams with plentiful underwater vegetation these shrimp’y thingies usually take up most of the food pyramid (sorry carbohydrates). During winter months, trout heavily depend on scuds to make it through the winter. We tend to find that the most natural colors perform better in the winter: olives, browns, blacks, grays.
Beaded Scud
There are so many scud patterns out there to choose from but this simple design is incredibly effective. It features a streak of flash on the back and copper ribbing for added durability. The presentation of this scud pattern is enough to fool hardy winter trout holding deep. Just get this fly down rolling near the bottom.
Streamers & Baitfish
Trout are known not to chase during the winter. They try to exert as little energy as possible and still get what they need. That being said, you should refrain from stripping and, instead, dead-drift or swing your fly. Think like a baitfish, be the baitfish. Give slight twitches to the line so that it adds a little movement to your streamer. Most trout will not pass up streamers either due to hunger or territorial instincts if presented correctly. Tip: Cast above the pool and allow your line to swing down and across so it looks like your fly is trying to evade being lunch. Following the swing, let your line straighten out and troll your fly for a bit; this pause in motion will give impulsive trout a chance to take the fly.
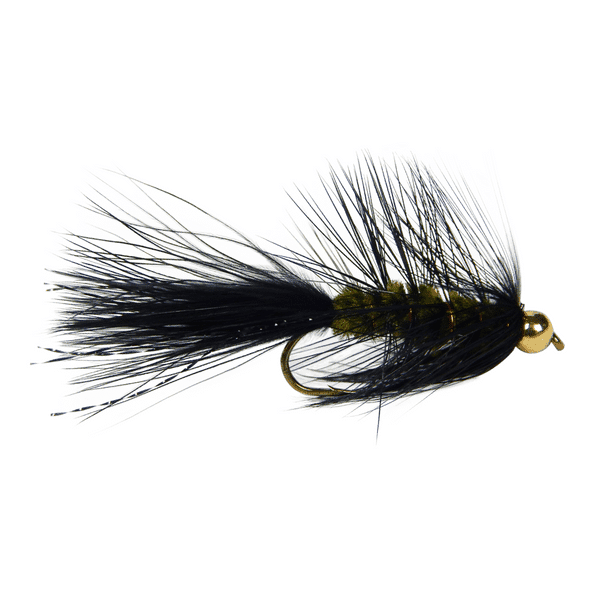
Beaded Woolly Bugger
Out of all the streamers available on the market, it is hard to beat the classic Bead-head Woolly Bugger. Typically, we like to fish a darker woolly bugger in black or olive in a smaller size by striping and swinging it through deep pools we know trout hold.
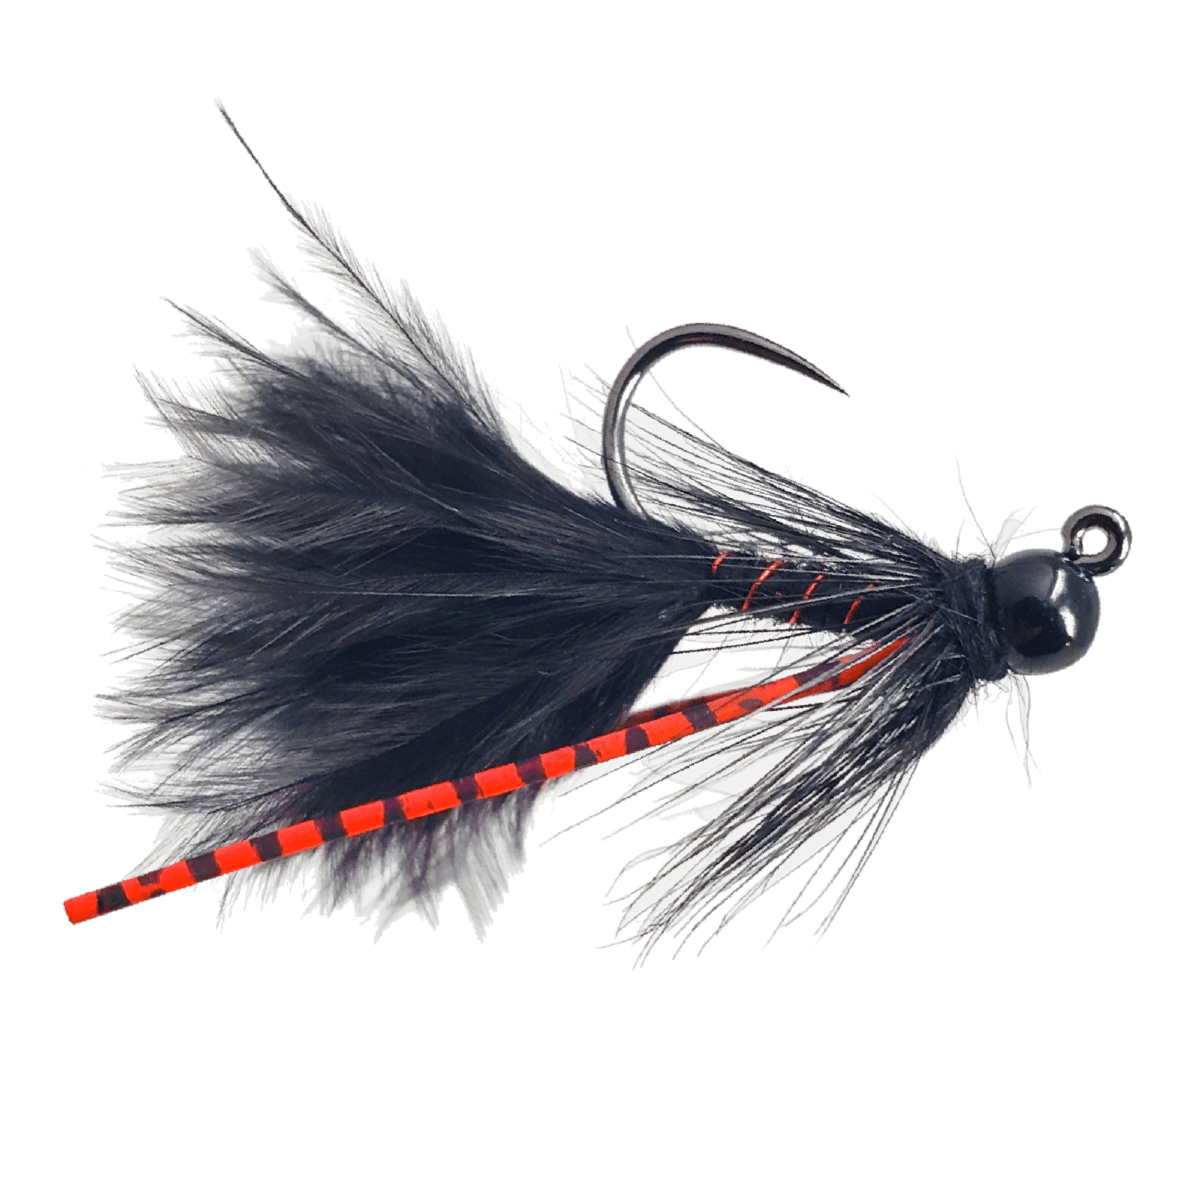
Euro Tungsten Jig Bugger
This super buggy jig pattern not only has the pulsating movement from the marabou tail but also the wiggling tags of rubber legs. Masterfully designed, the combinations that make up the Tungsten Jig Bugger makes this one of our favorite winter patterns and flies for our euro nymphing rigs. You can swing, strip, or dead-drift it anywhere.

Winter Fly Fishing & Strategies
- Target a specific fish out of a pod rather than fishing blind.
- Focus your fishing to actively feeding trout found along the edges, seams, and runs of slower deep pools.
- The majority of trout will be concentrated in just a few pools. Find those pools.
- Focus on fishing from around 10:00 am to about 3:00 pm. This is when trout become most active during the day.
- Best fishing occurs when water temperatures are around 40 degrees Fahrenheit.
- Test flies and don’t be afraid to switch patterns frequently.
- Dead-drift streamers as baitfish are more inactive.
Nymphs Are More Productive
First things first, winter is not the time of year to adopt the “Dry Fly or Die” mantra. Now, there is no doubt that dry flies are arguably the most fun way to catch fish, there isn’t an angler out there who doesn’t get an adrenaline rush after watching a trout rise to the surface and aggressive slurp your fly. However, there is a time and a place for all types of fly fishing, from dries to streamers and nymphs. Winter is guaranteed to be most productive when using nymphing techniques.
Nymphing can be extremely effective and relatively easy. By positioning yourself directly across from the fish-if you aren’t able to sight fish, place yourself where the fish are most likely to be feeding, you are setting your flies up to move through the water directly in front of hungry trout. All it takes is roll cast upstream and a proper drift for trout to notice your flies.
Fish Multiple Flies
Trout are significantly less active in the winter which is why it’s a good idea to offer the trout as many delicious food options as possible, this can be achieved by rigging up three flies below a tiny indicator.
Think of this as a juicy buffet line, start your nymph rig with 5x or 6x sized tippet because water in the winter can be low and clear and you don’t want to spook away the chance at a fish. Next, add a very small strike indicator, and micro weight, sometimes two. Add the first fly which should be an attractor pattern such as a San Juan worm. Then below the first fly, add a midge and then a second midge below that. Be sure to keep the heaviest weight midge on the very end, to avoid bird nesting your line.
The other benefit to nymphing 3 flies on a single line of tippet is the ability to try multiple colors and patterns all at once. Then you can dial in the pattern that is producing fish more quickly.

Preventing Frozen Guides
Before your rod even touches the water, spray it down with some PAM cooking spray. Chances are you have some in your pantry and if not you can pick some up for under five dollars at the nearest supermarket. This is a tried and true tactic, that will prevent guides from freezing quickly.
The one thing I never leave home without has major benefits on the water as well, chapstick! Rub a little chapstick on your guides to discourage ice build-up. I prefer either original Burt’s Bee’s or Carmex or any natural based lip balm will do the trick! Loon outdoors makes a non-toxic paste, its safe for the environment as well as your fly line. Just under ten dollars, you can pick up this ice off paste at your local fly shop.
These methods will only work for a short period of time. Your guides will eventually freeze over and more application of pastes and oils will be necessary.
The only true long-lasting method to prevent guides from icing over is to use very thin mono-rigs, such as euro nymphing leaders. Less water is collected on the retrieve with mono-rigs compared to thick fly lines so less water ever reaches the guides to freeze over. You won’t be able to do much dry fly fishing using mono-rigs, however, you’ll rarely ever need to during the cold winter. Give mono-rigs a shot and you’ll notice what we did, less ice and more fish. If you’re curious about using mono-rigs, read this article here about whether Euro Nymphing Leaders are worth it.
What To Wear
That’s the conundrum for so many anglers during the cold winter months. Sure, the fish are out there and probably willing to eat, but is it really worth it during that snowstorm that brings several inches of snow and freezing temperatures? The answer to that becomes much easier when you’re armed with the right gear and clothing to combat the harsh conditions of winter!
Hands
Of all the things that threaten to end the day early, cold hands and fingers is at the top of the list. The inability to comfortably tie on a new rig and the stinging of frozen fingertips grinds a day of fishing to a halt. During these winter months, I like to bring two pairs of gloves with me. The first pair is fingerless wool, which allows me to stay pretty warm and still maintain a level of function. For those extra cold days, the second pair is a wool mitten that flips down into gloves. When I’m casting, my off hand is in mitten mode for maximum warmth, but it’s still really easy to switch into the gloves for retying or unhooking a fish!
Feet
Keeping feet warm in winter is the toughest thing to achieve. Numb toes that feel more like blocks of ice than extremities is a miserable feeling, and it’s really hard to combat. When it comes to dressing for warmth, wear two pairs of socks. Typically my bottom layer is just a regular run-of-the-mill athletic sock followed by thick wool socks. Having two layers helps a ton, and walking around out on the stream keeps blood circulating, which is about the best you can do when water temperatures are hovering just above freezing.
Layers
Dressing in layers, and having more layers available in the car, is key to a day out in winter. Weather can change in an instant, and even a few degree drop can be debilitating to the cold weather angler. Companies like Simms make some fantastic layering options that are lightweight and warm. A classic winter layering system for me is a long sleeve tee, fleece quarter zip, hoodie, and then a jacket to cut the wind and, if necessary, repel precipitation. Another jacket, usually a puffy warmer option, extra hoodie, and fleece layer are stashed in the truck just in case it’s colder than anticipated or even worse, a fall in happens.

How to use weight to catch more fish.
Every fly fisherman, at some point in time, needs a tactical intervention. In my case, it happened to be a depth issue. I needed to properly understand the connection between the weight of my flies, the depth, and flow of the water I was fishing.
The most beneficial advice I have ever received when it comes to technical nymphing was to use more weight! This will help you identify the speed and depth of the current better. Not every hole or riffle should be fished with the same amount of weight or depth. Make sure you are properly evaluating and surveying the stretch you have chosen to fish and adjust accordingly.
A deep plunge pool requires more weight and depth for the flies to get down deeper, but that same approach might not work on a riffle. Less weight and less depth would much more likely cater to that type of water.
So, what does this do? As an avid angler, the most essential and helpful dynamic to technical trout fishing relies on the ability to gauge depth and flow. Take a minute to survey and prospect once you get to the water, don’t just rush into a spot. Look at the water and visualize where the bugs may be, where the fish may be, and where your flies need to be to directly replicate the mannerisms of the natural ecosystem.
Adding supplemental weight to your nymphing rigs is the difference between catching fish and not. Here’s why. The whole idea about split shots and using heavier beads is not only to get your nymphs down faster but to put your flies within the water column that fish most readily feed at—along the bottom.
Knowing when to add and remove weight is the most important thing you have to know when nymphing. Knowing how to use the weight is another.
Believe it or not, there are times when you’ll need to add weight to your nymphing rigs if you ever want a chance of hooking up.
- Water is high and fast
- Deep pools
- Flies are too light
- Not getting deep enough
- Current is too strong
2 Split Shots are sometimes better than one
One of the best methods of using split shots is to put 2 splits and never just one.
Just having one sinker pulls your nymphing rig down between rocks and boulders like an anchor. Use two sinkers instead. Attaching two allows them to work together and pull each other out of crevices that you would otherwise get stuck in. Water flow catches the sinkers at different angles and pushes them downstream with the current in a rolling motion.
Streamers and split shots
You can so add split shots above streamers to add a jigging – up and down action when retrieved. Placing two split shots above the fly a few inches apart will allow the streamer to roll along the bottom like how a dead minnow or baitfish would.
Add more weight if your flies are going by too fast.
Most flies are pretty light and don’t carry much weight to them. Of course, you can prepare ahead of time by keeping a steady supply of tungsten beaded nymphs and weighted flies. But, odds are that you don’t.
No matter what time of year it is, trout are always feeding along the bottom. It is the perfect place. There is plenty of food and little to no current on the bottom, which allows fish to use very little energy and still continue to scoop up insects floating by. In case you’re wondering, slower currents along the bottom are the result of the friction between the water and the streambed.
Someday you’ll be caught on the stream with a few handfuls of light nymphs and deep, fast water to work. Trout are always feeding along the bottom so this is a perfect time to use tungsten putty or split shots.
Take some weight off if you keep snagging up.
That is the simplest way to put it. If you keep snagging up, subtract some weight.
Now, if you are snagging up every dozen casts or so leave, the weight on. It’s not the best idea to take some weight off unless you’re getting stuck 2 casts out of 3. You can do this in one of two ways.
- Remove or replace a split shot with a smaller one
- Replace the flies that are the most weight
- Do both
Play around with adding weight and remember to always be adjusting. Conditions change from place to place so it’s totally normal to mess around with things to make it right.


