Superstitions (noun):: A belief or practice resulting from ignorance, fear of the unknown, trust in magic or chance, or a false conception of causation – Merriam Webster
I just returned home from a fishing trip and heard about the banana superstition for the first time. Apparently bringing a banana along is bad luck and some captains won’t even allow you on their boat if they are aware of you possessing the fruit. This was interesting to me and got me thinking about other fishing superstitions.
Here are 10 common fishing superstitions or “old wives’ tales:”
No bananas on the boat.
They bring bad luck, but pineapples bring you good luck. This is one of the most common and oldest superstitions in the sailing and fishing world. This tale is believed to have derived from sailors who experienced diseased pests from rotten fruits – particularly bananas. Another belief is that banana peeling acts as a natural fish repellent. Whatever the case may be, most captains are serious about not allowing bananas on their boats.
Bribing the water.
Fishermen throw quarters of half dollars over their shoulders to “buy up” some wind when crews are overworked. It is also believed that tossing a coin into the water will bring good luck and bountiful fishing. While I do not personally recommend anyone throwing anything into our waters – it is said bribing the ocean with a coin will bring good luck and a safe return home.
Cows laying down.
This fishing superstition means the fishing will be difficult but if they are standing, prepare for a good day of fishing. Many believe that cattle react to barometric pressure changes the same way that fish do.
The first cast omen.
If you catch a fish on the first cast, you will jinx yourself for the rest of the day. Some professional fishermen will purposely cast off to the side of their boat where they do not believe fish are in hopes of not catching a fish on the first cast.
Never tell an angler “good luck” before they head out.
This fishing superstition will bring them bad luck. “Tight lines” is a safer way to wish the angler well.
Never whistle while on a boat.
Whistling was believed to challenge the wind bringing in a storm therefore, whistling is frowned upon during fishing.
Avoid saying “rabbit.”
If you must talk about these cute floppy-eared animals, superstitious anglers refer to them as “the name of the beast” or “the animal with big ears.” A rabbit’s foot is considered lucky on land but not so much while on the water.
Don’t step over rods or bring them into the house before going fishing.
This is said to bring a bad day of fishing. A common belief is that either of these things will ruin a fisherman’s day.
Kissing the fish will bring you luck.
Some say this started as a sign of respect for the fish. Some say the fish will share and attract others. Whatever the reason, kissing fish especially the first catch is still done by many anglers.
My personal favorite…women onboard will bring bad luck.
Sailors believed that women onboard would anger the sea causing rough and stormy conditions. Coincidentally, a naked woman or one exposing bare chest would bring good luck which is why you may have observed the figure of a woman on the bow of ships. Sounds like a man made this one up. Kidding, kind of… 😊
Commonly Asked Questions About Fishing Superstitions:
What is the superstition about fish?
The superstition about fish revolves around the belief that speaking the word “fish” while on a fishing trip will jinx the chance of catching any. Anglers avoid mentioning the word to avoid bad luck.
What are good luck rituals for fishing?
Anglers have various good luck rituals, like spitting on the bait, wearing lucky fishing hats, or performing a “first catch” ritual. These practices are believed to bring luck and abundance.
Why is a pineapple good luck on a boat?
A pineapple is considered good luck on a boat because of its historical association with hospitality and prosperity. Carrying a pineapple on board is thought to attract good vibes and successful fishing trips.
What brings good luck on a boat?
Various items are believed to bring good luck on a boat, such as horseshoes, acorns, or certain coins. Additionally, the presence of dolphins or albatrosses is seen as auspicious signs for fishermen.
While these fishing superstitions may sound silly, I was amazed at how widely known these are and how so many still believe and practice these tales. I have to say, on this ladies’ fishing trip, we did adhere to each of these rules except for the women on the boat (obviously) and we had two days of very successful bass fishing on the well-known Guntersville Lake in Alabama.
This event organized by Wildlife Women who are some of the coolest and most encouraging outdoor women.
*If looking for a fishing guide on Lake Guntersville, I highly recommend Captain John Maner.
Introducing the Enigmatic Hybrid: Half Deer, Half Human – Unraveling the Mysteries of this Extraordinary Creature.
Exploring the Fascinating World of Half-Deer, Half-Human Creatures
The world of centaurs is vast and diverse, with each species calling themselves “tribes.” One intriguing tribe is the hippocentaurs, who are half-human and half-horse. They have a human-like upper body but possess horse-like qualities such as a slightly horse-like face with a longer jaw area, horse-like ears, a broad nose, and horse-like teeth and eyes. Their skin takes on the coloring of their horse half, and they have a mane that runs down the length of their human spine.
Another fascinating tribe is the onocentaurs, who are similar to hippocentaurs but are half-human and half-donkey. They have a smaller color pool compared to their hippocentaur cousins and possess longer ears and slightly slimmer physiques. On rare occasions, an onocentaur and hippocentaur may produce offspring called moularicentaurs.
Unicentaurs are another captivating tribe that is half-human and half-unicorn. They resemble hippocentaurs but have pure white coats and a large horn spiraling from their foreheads. Pterocentaurs are similar to hippocentaurs as well but feature wings growing from their waist just behind where their human body connects to their horse body.
Alacentaurs are centaurs that combine the features of unicentaurs (white coat, horn) with pterocentaurs (wings). Ephialticentaurs stand out with their pure black coat, fiery hair/mane/tail, red-hot hooves, fiery fetlocks, and fiery red eyes resembling nightmares.
Other tribes include zebracentaurs (half-human, half-zebra), kamilopardalocentaurs (half-human, half-giraffe), ichthyocentars (half-human, half-hippocamp), bucentaurs (half-human, half-bull/cow), criocentaurs (half-human, half-goat/sheep), elaphocentaurs (half-human, half-deer), and many more.
The world of centaurs is filled with an incredible variety of species, each with its own unique characteristics and appearances. From the majestic unicorn-inspired unicentaurs to the fierce and fiery ephialticentaurs, these half-deer, half-human creatures captivate our imagination and invite us to explore their fascinating world further.
Unveiling the Enigmatic Centaur Variation: Half-Deer, Half-Human Beings
Centaur tribes come in various shapes and species, each identifying themselves as unique “tribes.” One such tribe is the hippocentaurs, who are half-human and half-horse. However, there are several other intriguing variations within the centaur community.
Among these variations are the lesser-known deer-like centaurs known as elaphocentaurs. These centaurs possess a blend of human and deer features, with their upper bodies resembling humans while their lower halves resemble deer. They have slender arms, graceful deer-like eyes, and prominent antlers on the heads of adult males.
Another fascinating variation is the lupacentaurs, who are half-human and half-wolf. These centaurs exhibit wolf-like characteristics such as fur coloration, pointed ears, clawed fingernails, and wolf-like muzzles. Their presence adds a touch of wildness to the diverse centaur community.
Additionally, vulpecentaurs are centaurs that combine human and fox attributes. Similar to lupacentaurs, they possess reddish fur and large fox-like ears. However, they have smaller and more agile bodies compared to their lupine counterparts.
Lapicentaurs represent another unique variation among centaurs as they are half-human and half-rabbit. With rabbit-like muzzles adorned with whiskers and bucked teeth, long ears that stand tall above their heads, and rabbit eyes that exude curiosity, they bring a playful element to the world of centaurs.
These captivating variations highlight the immense diversity within the centaur community. Each tribe possesses its own distinct physical attributes that reflect their hybrid nature. From mythical creatures like unicorns to real-life animals like wolves and rabbits, these combinations create a rich tapestry of beings that captivate our imagination.
Discovering the Mythical Hybrid: The Human-Deer Centaur
The human-deer centaur, known as the Elaphocentaur, is a fascinating mythical creature that combines the features of a human and a deer. These centaurs have a unique appearance with their deer-like eyes, deer-like face, and antlers on the adult males. They also possess a lithe body and longer, thinner arms compared to other centaurs.
One of the most striking features of the Elaphocentaur is their antlers. These majestic appendages grow from the heads of adult male Elaphocentaurs and come in various shapes and sizes. The antlers are often seen as a symbol of strength and beauty among these creatures.
In addition to their physical attributes, Elaphocentaurs are known for their graceful nature. They move with elegance and agility, embodying the gracefulness of both humans and deer. Their presence in mythology often represents qualities such as gentleness, harmony with nature, and an appreciation for beauty.
The Elaphocentaur’s connection to deer symbolism extends beyond their appearance. In many cultures, deer are associated with traits like intuition, sensitivity, and spirituality. As such, these mythical creatures are often seen as wise beings who possess deep knowledge about the natural world.
Overall, the human-deer centaur or Elaphocentaur is a captivating creature that combines elements of humanity and nature. With their graceful movements, striking antlers, and symbolic significance, they continue to capture our imagination in myths and legends around the world.
The Intriguing Characteristics of Deer-Human Hybrids: A Closer Look
Deer-human hybrids, known as elaphocentaurs, possess fascinating characteristics that combine the features of both species. These centaurs have a unique appearance, with their upper bodies resembling humans and their lower bodies resembling deer. Their distinctive traits include lithe bodies, longer and thinner arms compared to most centaurs, deer-like eyes, and antlers on the adult males. Elaphocentaurs exhibit a graceful and agile nature, reflecting the elegance of deer in their movements.
In addition to their physical attributes, elaphocentaurs also display certain behavioral characteristics associated with deer. They are known for their keen senses, particularly their exceptional hearing and acute sense of smell. This heightened sensory perception allows them to navigate through dense forests and detect potential threats or sources of food from afar. Elaphocentaurs are often portrayed as gentle creatures who prefer a peaceful existence in harmony with nature.
Notable Features:
– Lithe bodies
– Longer and thinner arms
– Deer-like eyes
– Antlers on adult males
Behavioral Traits:
– Keen senses (especially hearing and smell)
– Graceful and agile movements
– Gentle nature
Elaphocentaurs hold a special place among the diverse array of centaur tribes due to their resemblance to one of the most iconic creatures in the animal kingdom – the deer. The fusion of human intellect and grace with the natural instincts and beauty of deer creates an intriguing hybrid that captivates our imagination.
Note: The above description is fictional and based on mythical creatures commonly found in fantasy literature.
Unraveling the Legends of Human-Deer Centaurs
Centaurs, mythical creatures with the upper body of a human and the lower body of a horse, have captivated our imaginations for centuries. Among the diverse tribes of centaurs, one intriguing group is the elaphocentaurs, also known as human-deer centaurs. These unique beings possess a striking blend of human and deer characteristics.
The elaphocentaurs exhibit a graceful and lithe physical appearance, reminiscent of their deer counterparts. They have slender bodies with longer and thinner arms compared to other centaur species. Their eyes mirror those of deer, exuding an air of gentleness and curiosity. Additionally, adult male elaphocentaurs boast majestic antlers crowning their heads.
These centaurs are often associated with nature and are believed to possess a deep connection with forests and woodland creatures. Their affinity for the natural world is reflected in their behavior and lifestyle. Elaphocentaurs are known to be agile runners, capable of traversing through dense vegetation with ease.
The folklore surrounding elaphocentaurs varies across different cultures. In some legends, they are depicted as guardians or protectors of forests, ensuring the balance between humans and nature is maintained. Other tales portray them as wise beings who possess ancient knowledge about herbal medicine and healing properties found in plants.
Despite their mythical nature, elaphocentaurs continue to capture our imagination as symbols of harmony between humanity and the natural world. Whether portrayed in folklore or modern literature, these enchanting creatures serve as a reminder of our connection to the animal kingdom and the importance of preserving our environment for future generations.
Notable Traits:
– Slender bodies with longer and thinner arms
– Deer-like eyes reflecting gentleness
– Majestic antlers on adult males
– Agile runners with a deep connection to nature
– Often depicted as guardians of forests and possessors of ancient knowledge
From Myth to Reality: The Wondrous Existence of Half-Deer, Half-Human Beings
The concept of half-human, half-animal creatures has fascinated humanity for centuries. From ancient mythology to modern fantasy literature, these fantastical beings have captured our imaginations. Among the many variations of these hybrid creatures, one particular species stands out – the centaurs known as elaphocentaurs.
The Unique Characteristics of Elaphocentaurs
Elaphocentaurs are a tribe of centaurs that are half-human and half-deer. They possess a unique combination of features from both humans and deer, making them truly remarkable creatures. These centaurs have lithe bodies and longer, thinner arms compared to other centaur species. Their deer-like eyes and a deer-like face give them an aura of grace and gentleness.
One distinguishing feature of elaphocentaurs is the presence of antlers on the adult males. These majestic antlers symbolize their connection to the natural world and their affinity for the wilderness. Additionally, their fur tends to take on the coloration and patterns commonly found in deer species.
A Life in Harmony with Nature
Elaphocentaurs embody a deep connection with nature and are often associated with forests and woodland areas. Their agility and speed make them excellent hunters as they navigate through dense foliage effortlessly. Due to their keen senses inherited from their deer half, they possess exceptional tracking abilities, making them skilled at locating food sources or potential dangers.
These centaurs are known for their peaceful nature and harmonious existence with other forest-dwelling creatures. They have been depicted in various tales as guardians or protectors of the woodland realm, using their strength and intelligence to maintain balance within ecosystems.
In conclusion, elaphocentaurs represent a fascinating blend of human and animal characteristics, specifically those of deer. Their graceful appearance and deep connection with nature make them a truly enchanting species. Whether in myth or reality, these half-deer, half-human beings continue to captivate our imaginations with their wondrous existence.
In folklore and mythology, the hybrid creature of a half deer and half human is commonly referred to as a “centaur.” This captivating creature has fascinated cultures around the world for centuries, embodying both grace and strength. Through its depiction in various legends and art forms, the centaur continues to captivate our imagination, representing the merging of human and animal qualities.
As someone who’s spent countless hours in the great outdoors, I’ve learned that understanding wildlife behavior is key to any successful interaction with nature. Today, we’re diving deep into the art and science of catching squirrels – whether you’re dealing with a backyard nuisance or trying to protect your campsite from these clever critters.
The Basics: Understanding Your Quarry
Before we get into the nitty-gritty of squirrel catching, let’s understand what we’re dealing with. Squirrels are some of the most adaptable and intelligent creatures in our forests and urban environments. They’re:
Highly agile
Excellent problem solvers
Active primarily during daylight hours
Territorial
Naturally curious
Opportunistic feeders
This combination of traits makes them both challenging and rewarding to catch, requiring a mix of patience, strategy, and understanding.
Let’s start with what you’ll need in your squirrel-catching toolkit:
Primary Equipment:
Live Cage Traps (16″ × 5″ × 5″ minimum)
Heavy-duty work gloves
HEPA filter mask (for attic work)
Protective eyewear
Sturdy footwear
Optional but Useful:
Trail cameras for monitoring
Bait stations
One-way exclusion doors
Repeating live traps
Transport containers
Location, Location, Location: Where to Set Your Traps
Success in squirrel catching often comes down to proper trap placement. Here’s what I’ve learned through years of experience:
Best Outdoor Locations:
Near established squirrel paths
Along fence lines
Near bird feeders (if attempting to relocate problem squirrels)
Base of frequently visited trees
Near known food sources
Rooftop and Structure Placement:
Near entry/exit points
Along commonly used routes
Near evident damage areas
On stable, flat surfaces
The Art of Baiting
Your choice of bait can make or break your success. Here’s my tried-and-true baiting strategy:
Top Bait Choices:
Peanut Butter
High success rate
Strong aroma
Stays fresh longer
Difficult to steal without triggering trap
Whole Peanuts
Natural food source
Creates interest trail
Visible from a distance
Attractive to squirrels
Fresh Oranges
Excellent for dehydrated squirrels
Natural sugar attraction
Water content appeal
Seasonal effectiveness
Baiting Technique:
Create a trail leading to the trap
Place small amounts before the trigger plate
Put main bait portion behind the trigger
Refresh bait daily for best results
Timing Your Trapping
Understanding squirrel behavior patterns is crucial for successful trapping:
Peak Activity Times:
Early morning (first 2-3 hours after sunrise)
Late afternoon (2-3 hours before sunset)
Clear, mild weather days
After rain when food is scarce
Seasonal Considerations:
Spring: Breeding season, increased activity
Summer: Regular feeding patterns
Fall: Food gathering, highest activity
Winter: Focused on stored food locations
The Catching Process
Let’s break down the actual catching process step by step:
Pre-Trapping:
Monitor squirrel activity
Identify primary routes
Set up and test traps without setting them
Pre-bait area for 2-3 days
Active Trapping:
Set traps during peak activity times
Check traps at least daily
Maintain fresh bait
Monitor for non-target animals
Post-Capture:
Approach trapped squirrel calmly
Cover trap with light cloth if needed
Transport carefully
Release in appropriate habitat
Safe Release Practices
Contrary to old wisdom about distant relocation, modern practice suggests:
Release Guidelines:
Stay within the local area
Choose similar habitat
Ensure food and water sources
Release during daylight hours
Avoid extreme weather conditions
Troubleshooting Common Problems
Even experienced outdoors people encounter challenges. Here are solutions to common issues:
Trap-Shy Squirrels:
Change bait types
Move trap location
Pre-bait longer
Use multiple traps
Try different trap sizes
Weather Issues:
Protect traps from elements
Adjust for seasonal changes
Monitor more frequently in extreme weather
Consider timing with weather patterns
Prevention Techniques
The best solution is often prevention. Here are my top prevention strategies:
Natural Deterrents:
Motion-activated sprinklers
Peppermint oil applications
Physical barriers
Habitat modification
Long-term Solutions:
Regular property maintenance
Food source management
Tree trimming
Entry point sealing
Safety First: Important Precautions
Safety should always be your primary concern:
Personal Safety:
Wear appropriate protective gear
Use proper lifting techniques
Maintain safe distances
Work with a partner when possible
Animal Safety:
Check traps regularly
Provide shelter from elements
Avoid extreme temperatures
Ensure humane handling
When to Call a Professional
Know your limits. Consider professional help when:
Dealing with multiple squirrels
Facing complex structural issues
Encountering mother/baby situations
Experiencing repeated failures
Working in dangerous locations
Legal and Ethical Considerations
Before starting any squirrel catching project:
Check local wildlife regulations
Obtain necessary permits
Understand relocation restrictions
Follow humane treatment guidelines
Advanced Techniques for Experienced Handlers
For those with experience, consider these advanced methods:
One-Way Exclusion Systems:
Custom door installations
Multiple-point systems
Monitoring cameras
Integrated prevention
Repeating Live Traps:
Strategic placement
Multiple-catch capabilities
Maintenance requirements
Monitoring protocols
The Impact on Local Ecosystems
Remember that squirrels play a role in their ecosystem:
Seed dispersal
Predator-prey relationships
Forest regeneration
Biodiversity maintenance
Conclusion: The Responsible Approach
Successful squirrel catching requires a blend of knowledge, patience, and respect for wildlife. Whether you’re protecting your property or managing a wilderness area, remember that these creatures play a vital role in our ecosystem. The goal should always be to solve human-wildlife conflicts while ensuring the animals’ wellbeing.
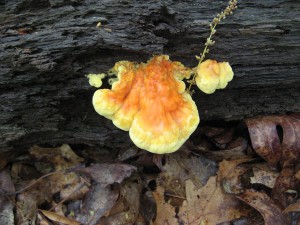
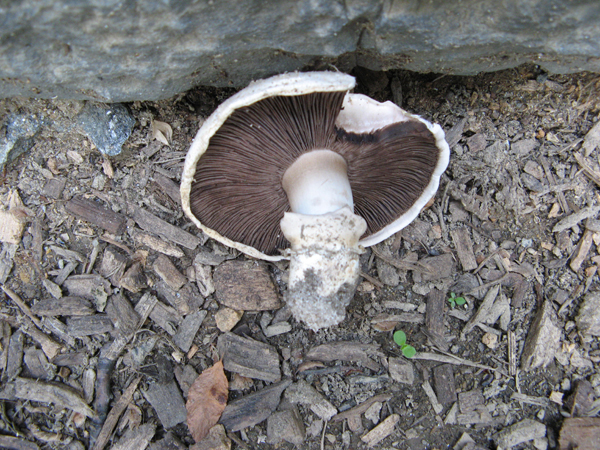
There are over 100 fairly common spring mushrooms in our area (NYC metro area) – that is, occurring between March 21 and June 21. Some of these occur in great numbers. Some are choice edibles. A few are poisonous. One is deadly. Most are just not edible or palatable 0r chewable. Learn them one at a time and you’ll see how quickly you can become familiar with much of our spring mushroom flora…………..
——————————————————-
CENTRAL PARK MUSHROOM HUNT – JUNE 14th
GILLED MUSHROOMS included AMANITA flavorubescens PLUTEUS cervinus, PSATHYRELLA candolleana, RUSSULA sp., SCHIZOPHYLLUM commune, STROPHARIA rugosoannulata, and a few still to be identified
DUNCE CAP – Conocybe lactea – not edible – common in grass in late May/early June
———————————————————-
LAWN MOWER’S MUSHROOM – Panaeolina foenisecii – not edible – common in grass in late May/early June
———————————————-
Baby INKY CAPS – Coprinus macaques complex – Edible, good in soup, as duxelles, etc. – on wood, base of stumps, wood chips
————————————————————-
DEADLY GALERINA – Galerina (autumnalis) marginata – a very common Little Brown Mushroom – on decayed logs – DEADLY POISONOUS
—————————————————————
FAWN MUSHROOM – Pluteus cervinus complex – edible when young – on wood or buried wood
————————————————————-
WINE CAP – Stropharia rugosoannulata – Good edible when young – always in wood chips
————————————————————
BOLETES
CRACKED CAP BOLETE – Xerocomellus chrysenteron – first bolete to appear (late May-early June) – edible – on the ground under oaks (mycorrhizal)
—————————————————————
JELLY FUNGI
WOOD-EAR – Auricularia auricula complex – edible, best in soup – one wood – common in late winter and spring
—————————————————————-
WITCHES’ BUTTER – Tremella mesenteric complex – edible but not incredible – on wood
———————————————————————-
SPRING MUSHROOMS 2017………………SPRING MUSHROOMS 2017…………………SPRING MUSHROOMS 2017
A MULTIPLE CHOICE TEST –
1, Name 3 gilled mushrooms that grow on wood: a) Agaricus bitorquis, b) Pleurotus ostreatus, c) Coprinus micaceus, d) Morchella esculenta, e) Flammulina velutipes, f) Ganoderma applanatum
2. Name 3 gilled mushrooms that grow on the ground: a) Agaricus bitorquis, b) Pleurotus ostreatus, c) Conocybe lactea, d) Panaeolina foenisecii, e) Pluteus cervinus, f) Stropharia rugoso-annulata
3. What color is the spore print of Pluteus cervinus: a) white, b) yellowish, c) pinkish brown or brownish pink, d) ochre brown, e) purple brown, f) black
4. Name one deadly Little Brown Mushroom: a) Agaricus bitorquis, b) Pleurotus ostreatus, c) Gallerina autumnalis (marginata) , d) Morchella esculenta, e) Pluteus cervinus, f) Flammulina velutipes
5. Name one spring lawn mushroom: a) Pluteus cervinus, b) Flammulina velutipes, c) Stropharia rugoso-annulata, d) Marasmius oreades, e) Morchella esculenta, f) Pleurotus ostreatus
6. Name one inky cap mushroom that is not safe to eat: a) Coprinus comatus, b) Coprinus micaceus, c) Coprinus atramentarius, d) Coprinus plicatilis, e) Coprinus disseminatus
7. What’s the name of the common cultivated mushrooms?: a) Agaricus campestris, b) Agaricus bitorquis, c) Agaricus bisporus, d) Agaricus arvensis, e) Agaricus placomyces
8. Name one spring species of Agaricus: a) Agaricus arvensis, b) Agaricus bitorquis, c) Agaricus crocodilians, d), Agaricus placomyces, e) Agaricus bernaradii
9. Where would I look to find Wine Cap mushrooms?: a) in lawns, b) on trees, c) in wood chip mulch, d) in manure, e) in deep conifer woods
10. Where would I look to find oyster mushrooms: a) in a lawn, b) in swampy ground, c) on trees and logs, d) in manure, e) on other mushrooms
11. Name one common spring polypore: a) Polyporus squamnosus, b) Grifola frondosa, c) Meripilus sumstinei
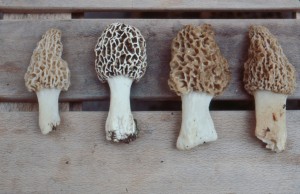
12. Where should I look to find morels? a) on elm trees, b) under elm trees, c) in manure piles, d) in swamps, e) only at Whole Foods
13. How can I tell a morel from a false morel?: a) only one is brown, b) only one comes up in the spring, c) only one has a hollow stem, d) only one smells like cherry vanilla, e) only one is an Ascomycete
14. Have you ever eaten wood-ear mushrooms? a) yes or b) no ????
15. What kind of mushroom is a Turkey-tail?: a) a jelly fungus, b) a gilled mushroom, c) a polypore, d) an Ascomycete, e) a puffball
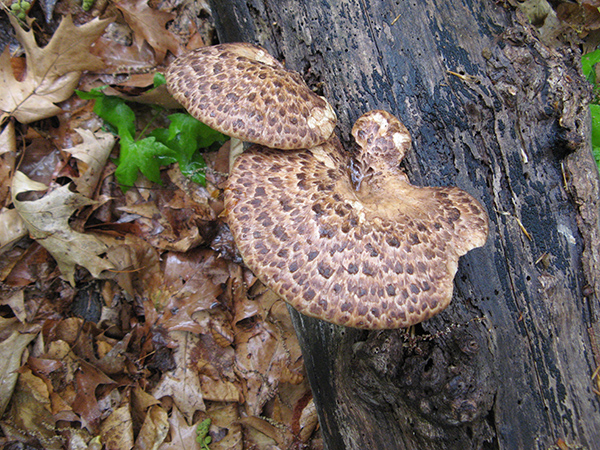
16. What kind of mushroom is a Reishi mushroom?: a) a gilled mushroom, b) a polypore, c) a jelly fungus, d) an Ascomycete, e) a puffball
17. Where would I look to find Chaga?: a) on an elm, b) on an oak, c) on a birch, d) on a pine, e) on a tulip-poplar
18. What is a Caterpillar Fungus, and is it edible?: Cordyceps is the traditional genus for these mushrooms that parasitize overwintering caterpillars, and it is edible but primarily used as a medicine
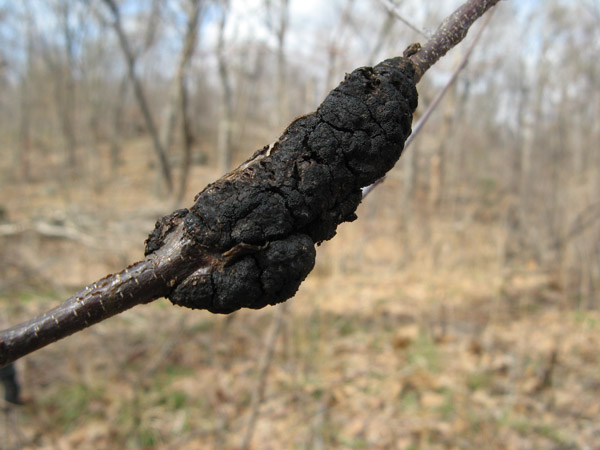
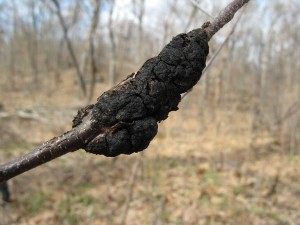
19. Where would I look to find Black Knot fungus?: a) on an elm tree, b) on an oak tree, c) on a cherry tree, d) on a poplar tree, e) on a ginkgo tree
20. Are mushrooms edible raw, and if not, why not?: NO (if very few exceptions, mushrooms are highly indigestible raw)
21. Give one example of one ectomycorrhizal mushroom?: a) Coprinus commatus, b) Agaricus bitorquis, c) Pleurotus osteratus, d) Pluteus cervinus, e) Boletus chrysenteron
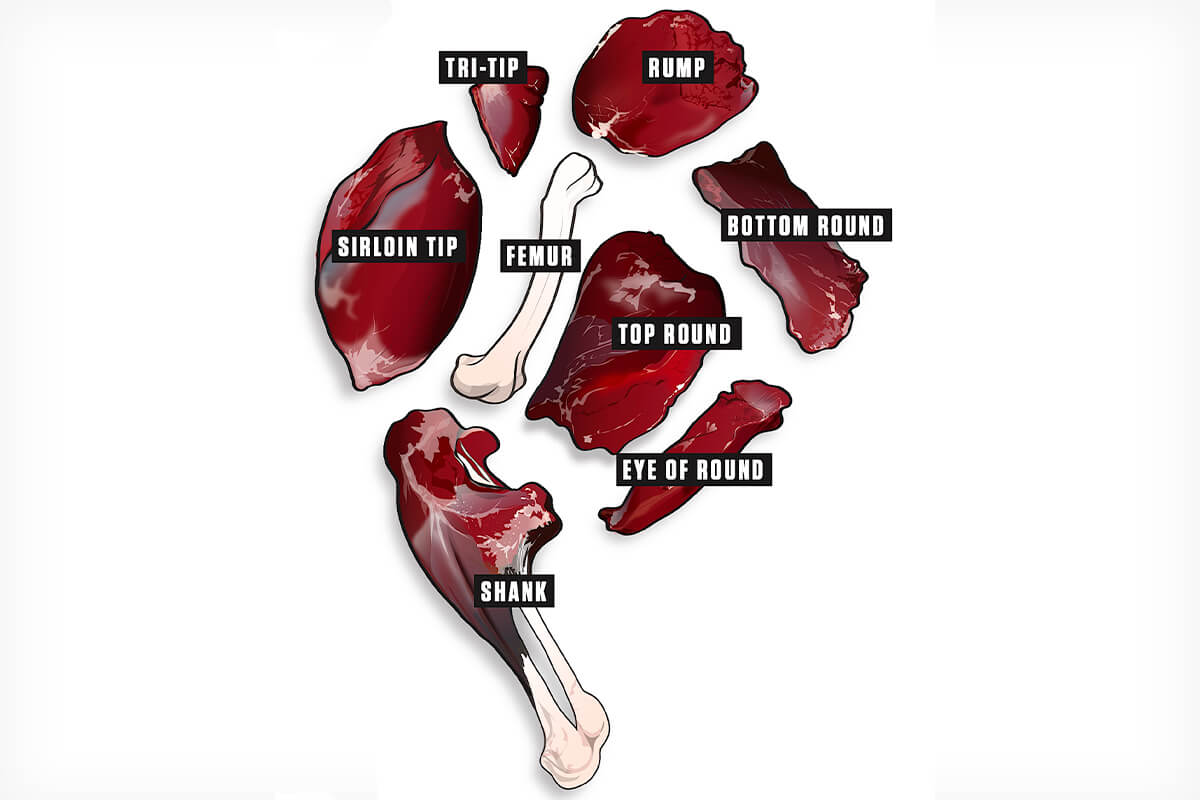
Most hunters know how to remove choice cuts like the backstraps and tenderloins from deer. Fewer are as familiar with the legs, particularly the hindquarters.
This is a shame, as the rear legs offer fantastic cuts fit for various cooking styles. They’re also not as difficult to break down as many perceive.
First, if possible, hang the deer at least a day or two in cool temperatures to allow rigor mortis to subside. Also consider dry-aging before butchering. Done correctly in safe temperatures (33 to 40 degrees), it yields more tender and flavorful meat.
When it’s time to start cutting, use an area that provides ample space for the hindquarter and your tools. Consider a curved, semi-stiff boning knife and a straight, more flexible fillet knife for separating connective tissue and trimming. You also want a large cutting board, gloves, paper towels, a meat-storage container and plastic sheeting to cover the work surface and make cleanup easier.
There are two main ways to butcher a hindquarter: by removing the leg bone before separating the cuts or by taking individual cuts directly off the bone. Both are correct and often involve simply separating muscles along natural seams of connective tissue. I do better when removing the bone first, so I’ll focus on that method.
THE PROCESS
Step 1
Remove any hair, dirt, blood-shot and excess fat on the skinned hindquarter. All can contaminate meat and negatively affect flavor. Removing fat also helps reveal lines of connective tissue you’ll use to separate muscle groups.
Step 2
Remove the shank by slicing along the sinew lines between it and the round. Do this on both sides of the hindquarter with the tip of a boning knife. Cut the ligament opposite the shank. Then work the knife tip gently around the joint at the knee (not sawing at the bone) while using your offhand to move and apply pressure to the joint. Slowly, you’ll separate the shank from the round without needing a saw. If intended for grinding or stews, remove the shank meat from the bone.
Step 3
Set the round down with the inside facing up. The femur’s ball should be visible. Starting here, make a straight, shallow cut along the nearby seam down to the kneecap. You should feel the femur running beneath the tip of your knife.
Step 4
Cut on both sides of the kneecap and pull the meat back with your free hand. Continue cutting to expose the length of the femur. Work the blade tight around the bone’s contours, alternating cuts along both sides. Keep the blade flat against the curve of the bone, and don’t cut into the meat below. While holding the kneecap up with your offhand, cut below it and along the femur toward the ball until the entire bone is clear and comes free.
READ MORE: 4 Steps to Field-Dress a Deer
Step 5
Pull the round apart with your hands. The still-connected individual cuts should lay flat on the cutting board in front of you. You’ll see a mass of connective tissue with a particularly thick concentration near the center of the round. Inside is a gland, which you should carefully remove by trimming the surrounding connective tissue. Left in place, it can taint the meat.
Step 6
Separate the cuts along connective tissue lines with your hands and knife tip. Seams are evident, so let nature be your guide. You should never have to cut into muscle. Trim excess fat and sinew, but leave the silverskin that surrounds muscles to protect meat during freezing. Leave cuts large to avoid exposing more meat to air.
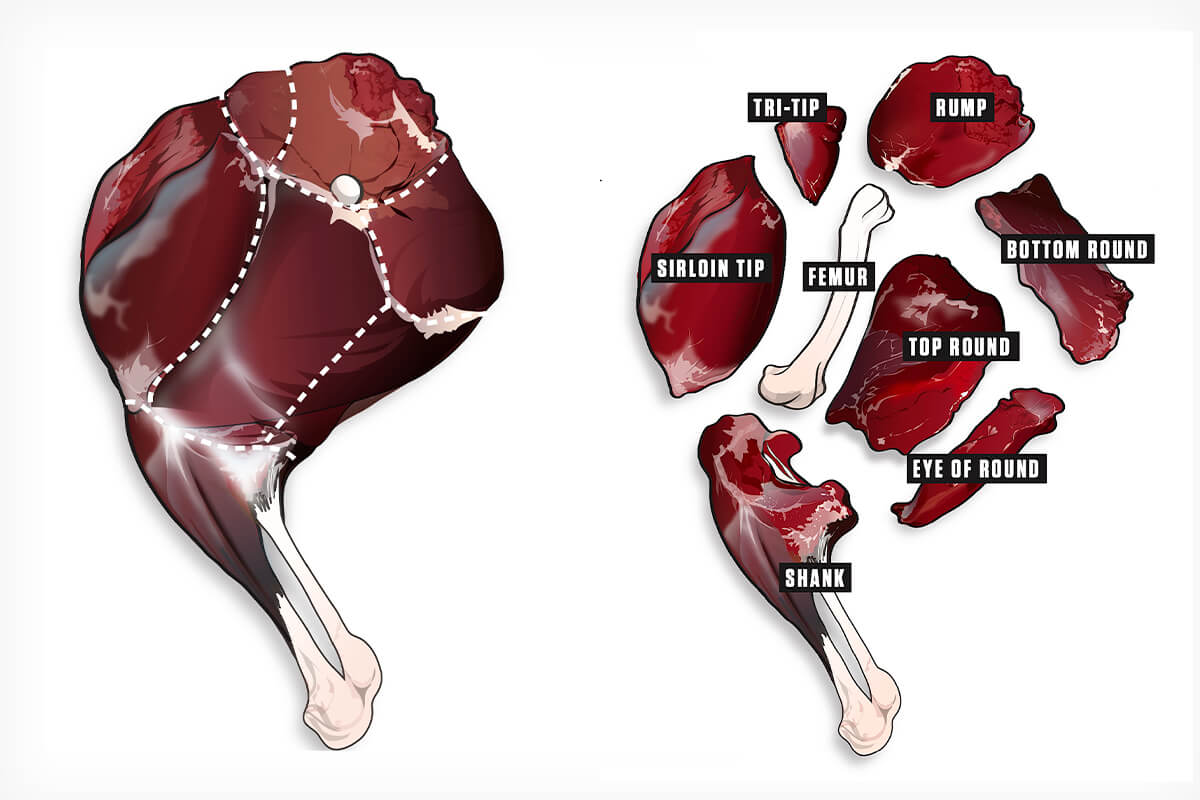
Illustration by Peter Sucheski
THE CUTS
Larger cuts include the top and bottom rounds, eye of round and sirloin tip. You also have the sirloin butt (rump), tri-tip and shank. All are great in their own ways.
Top and Bottom Rounds
Pulled from the deer’s hamstring area, these cuts are quite versatile. They’re tender enough for cutting into steaks and hardy enough for making roasts or enduring low-and-slow cooking methods, like smoking or braising. Cube them into kabobs or slice thin for jerky or stir-fry. Or butterfly and pound them out for chicken-fried steak or jagerschnitzel.
LEARN MORE: 15 of the Best Venison Sausage Recipes
Eye of Round
Called the hidden tenderloin because of its appearance, many cook them similarly. Pan-sear or grill whole, or as medallions. It’s also good as jerky or fajita meat, or it can be cured.
Sirloin Tip
Also called the sirloin, football or knuckle, the sirloin tip is tougher than the rounds but still makes great steaks, especially on young or aged deer. It’s perfect for a roast. Or it can be smoked, braised, ground up or turned into jerky.
Tri-Tip
A well-known beef cut, the tri-tip is mostly overlooked on venison hindquarters because of its small size and how it blends in with the sirloin tip. It’s great for flash-searing. Like tenderloins, lean toward rare and medium rare.
Sirloin Butt (Rump)
This cut’s size depends on how well you removed the hindquarter. It’s often small and used for pot roast, stew or grinding meat.
MORE RECIPES: 10 Most Popular Venison Dishes
Shanks
Shanks get a bad rap. They’re tough, sinewy muscles that deer use often. Cooked improperly, they’re almost inedible. Cooked right—low and slow in liquid—they’re delicious. Shanks are perfect for osso bucco, braising on the bone or simmering in a broth to produce succulent stew meat.
SEAL THE DEAL
Should you use an external or a chamber vacuum sealer for meat storage?
The most common vacuum-sealing device is the external vacuum sealer. Place the open end of a sealer bag into a tray, clamp the lid down and suck air out of the bag. The other option is a chamber vacuum sealer. The entire bag goes inside the machine, and the sealer removes all air within the chamber—inside and outside the bag.
MEAT! Chamber Vacuum Sealer (top) and Pro External Vacuum Sealer.
External vacuum sealers are inexpensive, and their design permits sealing larger cuts of meats. Chamber vacs excel at sealing liquids and other moist items. They’re great for marinating meats or for sous vide applications. They require more money upfront and are less portable.
With adjustable seal time and vacuum settings, and an integrated bag roll holder and cutter, the MEAT! Pro External Vacuum Sealer ($179.99; meatyourmaker.com) ups any hunter’s meat-preservation game. It’s also equipped with a removable drip tray for easy cleanup. For the hunter who freezes lots of meat or seals liquids often, there’s the MEAT! Chamber Vacuum Sealer ($799.99). This one also has adjustable seal time and vacuum settings, as well as a manual seal time mode. If you want professional-quality sealing, this is the ticket.
Known as the Land of 10,000 Lakes, Minnesota is a freshwater paradise. But more importantly, it’s a dream come true for every avid angler. If you’re wondering why that’s the case, the answer is simple – the entire state is brimming with record-breaking specimens! And no, we aren’t exaggerating. We’re probably selling it short. But we’ll let the Minnesota state record fish speak for themselves.
We could endlessly gush about Minnesota being the ultimate freshwater angling destination, but only facts testify to this. So, in this article, we’ll list the most sought-after fish species in Minnesota and give you an account of how they made the headlines. So without further ado, let’s see what all the hype is about.
Biggest Fish Caught in Minnesota by Species
As a freshwater fishing magnate, Minnesota boasts world-famous fish species such as Bass, Catfish, Crappie, Sunfish, and Perch. The list goes on and includes local VIPs like Walleye, Pike, Musky, and Sturgeon, too. But be it a local or global favorite (or both), one thing is certain – there isn’t a shortage of brag-worthy catches.
To see what Minnesota’s record for each headliner is, click on the species below. Bear in mind that the fish are listed in alphabetical order and not according to the latest record.
Bass (Largemouth)
Bass (Smallmouth)
Catfish (Flathead)
Crappie
Musky
Perch (Yellow)
Pike (Northern)
Sturgeon
Sunfish
Walleye
Bass (Largemouth)
Minnesota state record: 8 lbs 15 oz on Auburn Lake in 2005.
Largemouth Bass are, without a doubt, among the most popular freshwater game fish in the world. Minnesota is no exception. One reason they’re so much in demand is because they’re excellent opponents. They’ll strike your bait with explosive force. The other reason is their abundance. You’ll find them in over 2,000 lakes and almost all major rivers in Minnesota.
The weedy shorelines and underwater structures of Leech Lake, Lake Minnetonka, and Vermillion Lake make an ideal habitat for Largemouth Bass. Besides lakes, you can count on the Mississippi, St. Croix, Zumbro, and Cloquet Rivers to always provide you with a bragging story. From the regular 2-pounders to enviable 5-pounders, these hotspots won’t disappoint with their Largemouth Bass offer.
Curiously enough, the Minnesota state record Largemouth Bass didn’t come from any of these fisheries. The biggest Minnesota Bass was taken from Auburn Lake in 2005. The fish weighed 8 pounds 15 ounces and was 23.5 incheslong. And more impressively, its girth was 17.5 inches! This monster dethroned its predecessor, which had held the record for 11 years.
To make the entire story even more interesting, this beast was the first fish of the morning for Mark Raveling, a 54-year-old tournament angler. How about that?
Bass (Smallmouth)
Minnesota state record: 8 lbs on West Battle Lake in 1948.
If you thought that Largemouth Bass were all the rage, wait to see what Minnesota Smallmouth Bass have in store for you. Smallies are anything but small. While they weigh between 2 and 4 pounds on average, they can easily outgrow Largemouth and reach 8 pounds. What’s more, the Minnesota state record Smallmouth Bass caught on West Battle Lake in 1948 was an 8 lb brute!
West Battle Lake isn’t the only body of water stocked with Smallmouth Bass. Their population is vibrant in the upper Mississippi and St. Croix Rivers, as well as in all major drainages across the state. They also thrive in Rainy Lake, Mille Lacs Lake, and Basswood Lake. In fact, two of the biggest Minnesota Smallies were caught in these lakes – a Lake Mille Lacs 5-pounder landed in 2001 and a Basswood Lake 6-pounder hooked in 1997.
Long story short, it seems that it’s high time a new Minnesota state record for Smallmouth Bass was made! So, gear up with hard lures, soft tube baits, plastic worms, spinners, or jigs, and hit one of these lakes and rivers in late spring and score the next state record.
The rocky eddies of rivers and crystal-clear shallows of lakes will be your allies when outsmarting Smallies. Once hooked, however, they won’t go down without a fight. More aggressive than Largemouth, Smallies will make you break a sweat – and hopefully a record, too.
Catfish (Flathead)
Minnesota state record: 52.25 inches on the St. Croix River in 2017.
Speaking of hefty fellas that will spice up your angling endeavors, have you ever fished for Flathead Catfish? These massive creatures are the second largest fish in Minnesota, preceded only by Sturgeon. Their size and weight often surpass the Smallmouth and Largemouth Bass records combined!
If you haven’t battled these monsters before, it’s high time you added them to your bucket list. Not only are they size-inspiring, but they’re also fun and easy to catch. You just have to know where to look for them and how to lure them your way.
A usual stink bait, for example, doesn’t work for Flatheads as they prefer live bait. Also, stick to rootwad patches with moderate current, and a Catifsh will almost immediately grace the end of your line. To ensure they stay on the line, use a sturdy 7′ rod with at least a 30 lb test line.
When it comes to the exact spot, look no further than the St. Croix River and its Stillwater region. The St. Croix River has been the most reliable fishery for pulling out giants over the years. This is also the place where the first Minnesota Flathead Catfish record was made in 1970. It was none other than a 70-pounder! But that wasn’t the only jaw-dropping Flathead caught here. Mark Mosby hit the jackpot with a behemoth measuring 4.38 feet in 2017 after only 15 minutes of reeling!
Crappie
Minnesota state record: A 5 lb, 21″ Black Crappie on the Vermilion River in 1940.
Unlike Catfish, Crappie aren’t impressive in size. Yet, they rank pretty high on Minnesota’s list of favorite fish to pursue. What’s more, they come immediately after Walleye. So, what’s the catch (pun intended)?
The reasons to love Crappie are numerous. Apart from being delicious and available throughout the entire year, they’ll motivate you to experiment with your angling approaches. A minnow beneath a bobber and a beetle-spin casting lure is effective. But you’ll have to mix and match baits, lures, and techniques until you find the right combo.
Even though Crappie can be elusive, the good news is that they’re widespread. Minnesota’s lakes and rivers are stocked with Crappie. You can wet your line anywhere from Mille Lacs Lake, Minnetonka Lake, and Lake Winnibigoshish to Red Lake, Sand Lake, Lake Andrew, and Bowstring Lake. Wherever you, there, the chances are you’ll end up with a decent 12″, 1 lb specimen.
A record-breaking bruiser, however, was found in the Vermillion River in 1940. The fish in question was Black Crappie which measured 21 inches long and weighed 5 pounds! So now that you know where to look for Crappie and how to outwit them, you’re ready break the old Minnesota state Crappie record.
Musky
Minnesota state record: 58.25 inches on Mille Lacs Lake in 2022.
Muskellunge, better known as Muskies, are naturally large fish. They typically grow to be between 28 and 48 inches. Quite a catch, right? Now imagine how rewarding a 4.9-footer is. Well, that’s precisely what the latest Minnesota Musky record is!
The lucky angler who broke the previous record (a 4.8′ Musky caught in 2021) for the longest Musky in Minnesota is Eric Bakke of Princeton. He was trolling on Mille Lacs Lake with his fishing buddy Jon Blood when the trophy fish bit. They measured it, snapped a photo, and returned the fish to the water. Having in mind how Muskies can live 18 years on average, he released it hoping there would be still a chance for someone to clash with this titan.
If this sparked your interest in Musky fishing, then you know where to find the next Minnesota record. But Mille Lacs Lake isn’t the only place with a hot bite. The previous two Musky records were made on Lake Vermillion. With these two powerful bodies of water at your disposal, a superb Musky hunt is guaranteed!
One final tip for landing a prize catch is to align your pursuit with Muskies’ peak season. While the prime time to go after Muskies is in late summer, you’ll usually spot the largest specimens in October.
Perch (Yellow)
Minnesota state record: 3 lbs 4 oz on Lake Plantagenet in 1945.
Often overshadowed by their more popular neighbors such as Crappie and Walleye, Yellow Perch aren’t to be missed out on. Perky and tasty, Yellow Perch aren’t the biggest fish around and they most certainly aren’t the best fighters. They are, however, excellent ice-fishing targets. Sure, you can hunt them year-round, but wintertime is when they shine the brightest.
If you want the Perch to bite, you’ll first have to intrigue them. Start with a basic hook and slowly introduce spinner rigs and small jigs. And then boost your odds by adding live bait like worms or crayfish. If you’re ice fishing, use ice flies tipped with grubs as well. Of course, this is just a suggestion and the possibilities are endless.
All in all, you get the point – Yellow Perch are exciting to fish for. They’ll always keep you on your toes. And that’s another reason anglers find a thrill in going after Yellow Perch. Should you need any further motivation to pursue them, we can tell you that Minnesota’s waters are overflowing with Perch.
Lake Winnibigoshish, Leech Lake, Cass Lake, Lake of the Woods, Big Stone Lake, and Mille Lacs Lake are famous Perch fisheries. They’ll treat you to plenty of 10-ouncers. However, if you’re after the new Minnesota state record Perch, you might want to check out Lake Plantagenet. This is where the last record was caught, weighing an incredible 3 pounds and 4 ounces!
Pike (Northern)
Minnesota state record: 46.25 inches on Basswood Lake in 2021 and Mille Lacs Lake in 2024.
Next up, we present you Northern Pike. Formidable fighters and aggressive predators, Pike are a beloved sport fish in Minnesota. On top of being worthy rivals, Pike are available in almost all lakes across the state making them must-fish targets when angling in Minnesota. They’re on every angler’s list! With them being everywhere and everyone going after them, it’s no surprise then that the Minnesota state record Northern Pike is a tie!
Yes, you read that correctly – Minnesota has not one but two Pike records! The latest prize fish was caught by Brad Lila on Mille Lacs Lake in 2024 and it shares first place with the 2021 Pike reeled in by Brecken Kobylecky on Basswood Lake. Both creatures were 3.85 feet long! When compared to a common 26-inch keeper, these trophies sound amazing. Apart from quantity, Minnesota boasts quality Pike fishing as well.
To glorify Minnesota’s Pike fishing opportunities even further, we have to tell you that one state record was an ice fishing product, while the other was a summer angling outcome. So, be it summer or winter, a record-breaking Pike is waiting for you in Minnesota!
Mille Lacs Lake and Basswood Lake are the ultimate spots for you to chase that gigantic Pike, but so are the Rainy River, Leech Lake, Lake Winnibigoshish, and Lake Vermillion. Beware that it took 30 minutes and a helping hand for Brad Lila to pull his monster out of hiding. You’ll need serious muscle power and assistance if you want to break the current record.
Sturgeon
Minnesota state record: 78 inches on the St. Croix River in 2019.
Speaking of back-breaking action, you’ll most certainly need all the help you can get for these colossal beings. Sturgeon are “living dinosaurs of the fish world” for a reason. They can live over 150 years and weigh an unbelievable three digits! But what about Minnesota’s Sturgeon?
Lake Sturgeon are Minnesota’s largest fish and they can weigh more than 100 pounds. As for length, let’s say that a 3′ fish in the Rainy River is a common occurrence. Darren Troseth, however, was fortunate enough to stumble on what may be the biggest-ever fish in Minnesota! It was none other than a 6.5′ ice fishing catch! This makes the Minnesota state record Sturgeon quite the catch.
Darren, a seasoned angler and an experienced captain, said he had caught many beasts during his lifetime but he had never seen a fish that big! Since one regular hole wasn’t enough, he had to drill four more before he could brag about his trophy! He even immortalized his epic ice fishing moment on the St. Croix River in a video.
Although neither endangered nor threatened, Sturgeon are considered a species of special concern in order to be protected from overfishing and extinction. So, please have this in mind when chasing the Minnesota Sturgeon record.
Sunfish
Minnesota state record: 1 lb 12 oz on the Zumbro River in 1994 and Green Lake in 2022.
Slowly but surely, we’re wrapping up Minnesota’s line-up of the state record fish. Maybe they aren’t as mind-blowing as Sturgeon, but Sunfish deserve praise, too. Bluegill, Pumpkinseed, Green, and Hybrid, Sunfish are popular species to fish for in Minnesota. And each has its own record. But the latest Sunfish record was a 2022 Hybrid – and it was the same as the 1994 record. Yes, another tie!
Aaron Ardoff, the holder of the current Minnesota state record Sunfish, always hoped he’d get his hand on trophy Sunny. However, he was targeting Pike and Bass with spinnerbaits on Green Lake when he suddenly realized his dream was about to come true. And, as fate would have it, he landed a record-breaking Sunny that September in 2022.
Aaron’s Hybrid weighed in at 1 pound and 12 ounces! And this chubby fella tied the one reeled in from the Zumbro River back in 1994. For a Panfish that doesn’t always exceed half a pound, this was quite an accomplishment.
Mostly pursued due to their exquisite reputation as table fare, Sunfish are surprisingly good fighters, too. Whether you’re after a plump Sunny like Aaron’s or if you’re into a delicious dinner, Gull Lake, Green Lake, and the backwaters of the Mississippi River will always greet you with a healthy Sunfish population.
Walleye
Minnesota state record: 17 lbs 8 oz on the Sea Gull River in 1979.
We saved the best for last – Walleye. Big, mean, fast, furious, elusive, and unpredictable, Walleye are everything a game fish should be. It’s no wonder that Walleye are Minnesota’s state fish and that two counties, Garrison and Baudette, compete for the title of “Walleye Capital of the World!”
To pump things up further, it was Cook County and the Sea Gull River at Saganaga Lake that took the Walleye crown – not Garrison or Baudette. This is where the Minnesota Walleye state record of 17 pounds and 8 ounces was found by LeRoy Chiovitte in 1979. The specimen was almost 3 feet in length with a girth of 21.25 inches.
Don Mickel was on the verge of beating this record in 2012 but he had to release his catch and was unable to confirm its potential. But this is great news for you as it means there’s still room for snatching a true gem in one of Minnesota’s Walleye fisheries.
The average Minnesota Walleye ranges between 1 and 4 pounds, but 8-pounders regularly patrol the waters of Mille Lacs Lake and Lake of the Woods. And then, from time to time, a giant appears.
Minnesota State Record Fish: An Overview
Here’s a quick breakdown of the above-mentioned species, their measurements, and the angling hotspots that made history:
Species Pounds Ounces Length (in) Girth (in) Place Year Bass (Largemouth) 8 15 23.25 17.25 Auburn Lake 2005 Bass (Smallmouth) 8 0 N/A N/A West Battle Lake 1948 Catfish (Flathead) N/A N/A 52.25 32 St. Croix River 2017 Crappie (Black) 5 0 21 N/A Vermillion River 1940 Musky N/A N/A 58.25 N/A Mille Lacs Lake 2022 Perch (Yellow) 3 4 N/A N/A Lake Plantagenet 1945 Pike (Northern) N/A N/A 46.25 N/A Basswood Lake 2021 Pike (Northern) N/A N/A 46.25 23.5 Mille Lacs Lake 2024 Sturgeon N/A N/A 78 29.25 St. Croix River 2019 Sunfish (Hybrid) 1 12 11.25 12 Zumbro River 1994 Sunfish (Hybrid) 1 12 12 13 Green Lake 2022 Walleye 17 8 35.75 21.25 Sea Gull River 1979
Minnesota State Record Fish: A Neverending Story
You’ve reached the end of this article but the list of Minnesota’s state record fish is a neverending story. The records aren’t set in stone and each day brings us closer to a new jaw-dropping trophy that might dethrone its predecessor. After all, this is the Land of 10,000 Lakes and the possibilities are endless.
We’ll keep a close eye on Minnesota’s angling scene and update you as new brag-worthy fish emerge. Who knows, maybe someday we’ll write about you and your fish.
How did you like our Minnesota state record fish blog? What record surprised you? Do you have any Minnesota bragging stories of your own? Hit the button below and share your thoughts with us.
When I speak of my experience with squirrel hunting, I frequently receive strange looks from hunters who aren’t used to this particular type of small game.
However, squirrel hunting is pretty popular across the southeastern USA and other regions.
A Squirrel Dog preying on a squirrel climbing a tree
Good squirrel hunting dogs are essential for squirrel hunting, and while any dog can act as a squirrel dog, some dog breeds are born for this job.
History: What kind of dog is a Squirrel dog?
This is a dog breed trained to hunt squirrels scenting, tracking, and treeing them. While many household pets instinctively chase squirrels, they’re not trained to hunt them.
Even untrained canines chase after small animals with passion, which makes many people think that dogs hate squirrels. They’re just merely acting on their instincts to hunt.
Some breeds don’t have a strong prey drive, especially if they grew up with cats or other pets. Dogs and squirrels can even be friends! Just take a look at this video:
This is rare because most dogs chase squirrels without hesitation. This trait is handy in places where wild game and big game are hunted for food like venison and rabbit.
Did you know that squirrels have been a part of our diet for a long time? They say squirrel meat isn’t only sustainable, but it’s also tasty and healthy.
What is the best breed of dog for Squirrel hunting?
I am a subscriber of the theory that any dog can be trained to hunt, but some have better hunting instincts, so they’re easier to train.
The supreme squirrel dog breeds are Terriers, including those breeds with a bit of Terrier in their bloodlines, such as curs and feists.
Some people consider them mutts but these dogs are usually standardized and are bred for hunting bushytails for generations.
Good squirrel dogs are intelligent and have a strong prey drive, but they also need a great nose to be able to “wind” squirrels, meaning to detect squirrels by scent, through air currents.
Once the dog catches the squirrel, visually or by scent, it has to be able to follow it by sound.
They also need stamina and agility to keep up with their prey, the ability to tree the squirrel, and the willingness to stay treed until the hunter arrives.
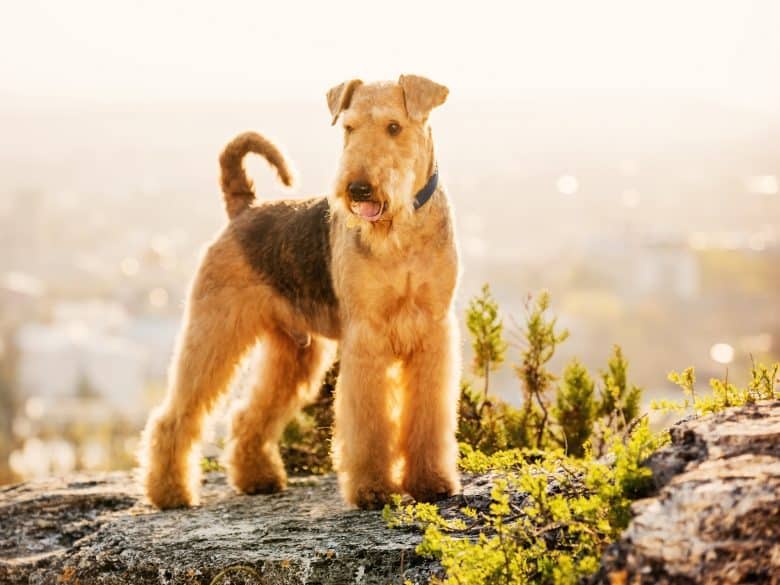
1. Airedale Terrier
An Airedale Terrier standing confidently on a rock
The Airedale Terrier, also known as Waterside Terrier and Bingley Terrier, is a dog breed from England with distinguished hunting instincts, and it’s one the largest terriers.
The colossal size, along with intelligence and treeing ability, makes this dog the “King of Terriers” and an excellent squirrel dog.
2. American Blue Gascon Hound
Source: @patterpawsanimalhospital / IG
The Grand Bleu de Gascogne or Big Blu is a loyal, protective breed known as a passionate hunter for raccoons and squirrels. Its loud baying and treeing ability separate him from other squirrel dogs.
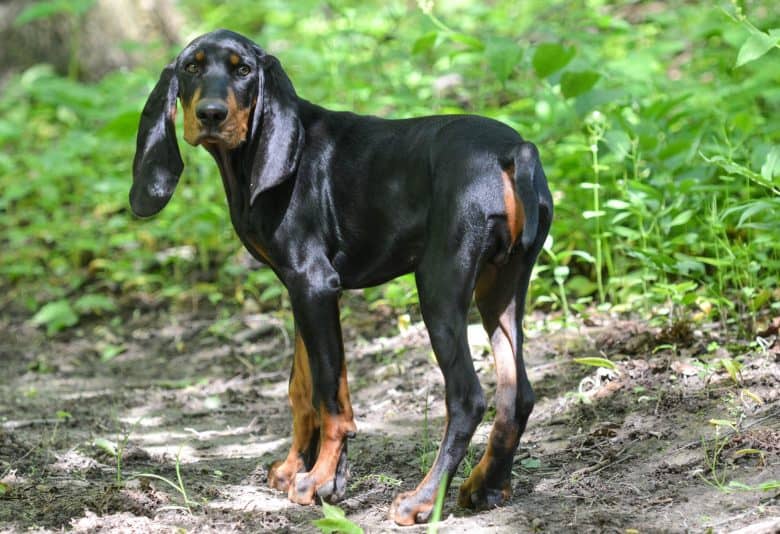
3. Black and Tan Coonhound
A Black and Tan Coonhound dog walking in the bush area
Derived from a foxhound and a bloodhound, this breed is well-known for its long ears and black and tan coat.
The Black and Tan Coonhounds are talented for many things, including tracking and treeing small and big game species.
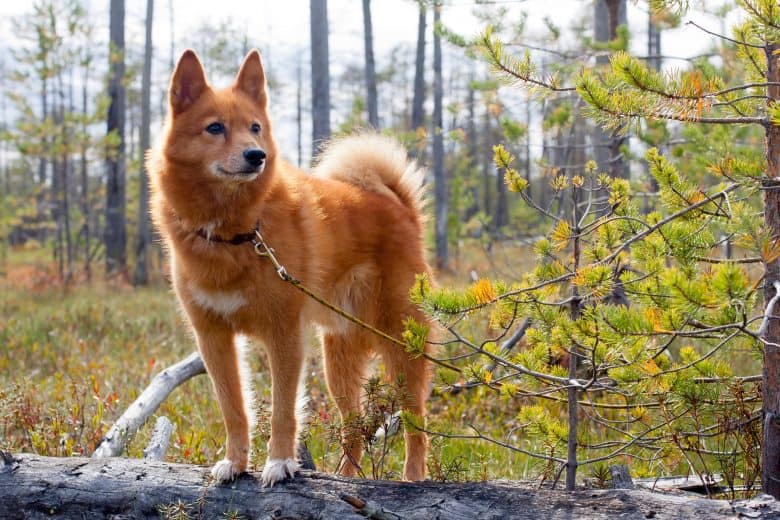
4. Finnish Spitz
A red Finnish Spitz dog being adventurous
Known by many names, such as Finsk Spets, Lulou Finnoi, and Suomenpystykorva, this dog breed looks similar to foxes with its long and fluffy reddish coat.
The Finish Spitz is famous for its vocal ability and hunting prowess, including big and small animals alike.
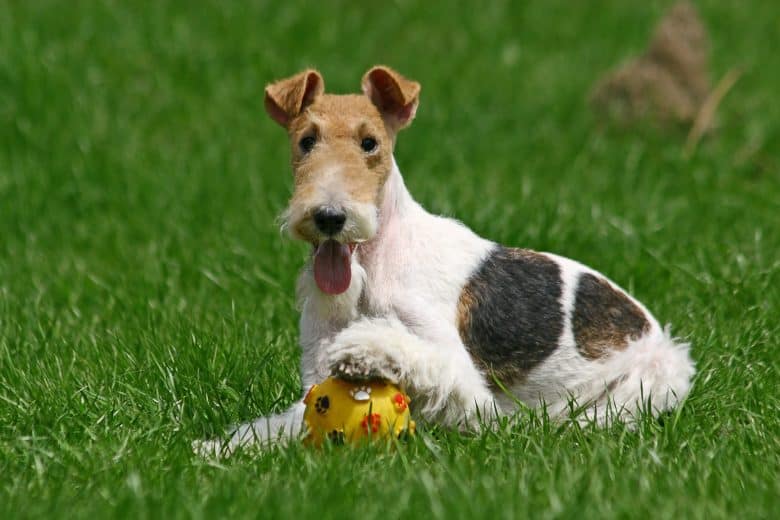
5. Fox Terrier
A Wire Fox Terrier smiling while holding a dog ball and laying down
Fox Terriers come in two variations, with the only difference being the type of coat – these are Wire Fox Terrier and Smooth Fox Terrier.
These smart dogs are mostly known for hunting foxes even though they excel at squirrel hunting too.
6. Mountain Cur
Source: @riley_the_mtncur / IG
Also referred to as Original Mountain Cur, this breed arrived in America from Europe, and it is one of the most adaptable hunting breeds.
They were bred explicitly for treeing and hunting small game, but they are often used for baying big animals and as water dogs.
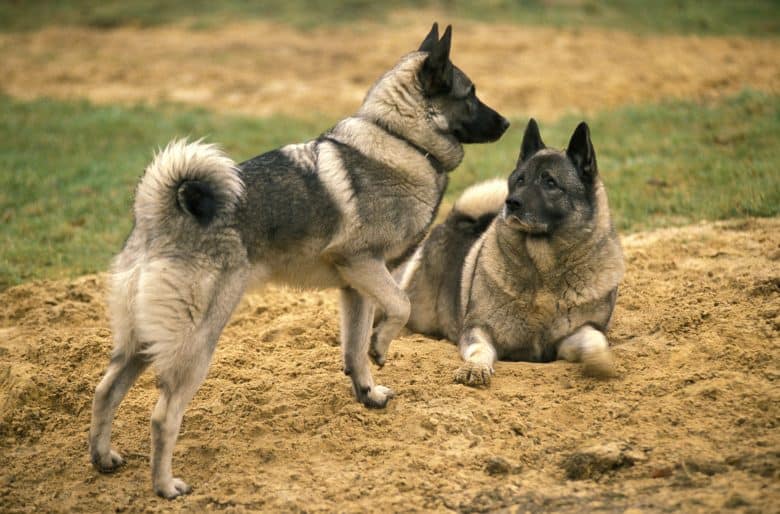
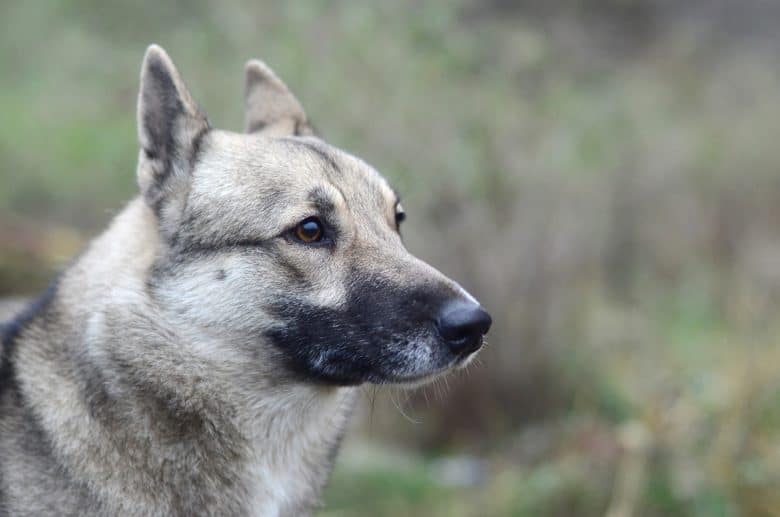
7. Norwegian Elkhound
Two full coated Norwegian Elkhound dogs enjoying the sand
The Norweigan Elkhound, which is the National Dog of Norway and rarely found in the USA, is also called Norsk Elghund Gra and Norsk Elghund Sort.
It is a Spitz type of breed known for hunting, herding, and protecting people and property.
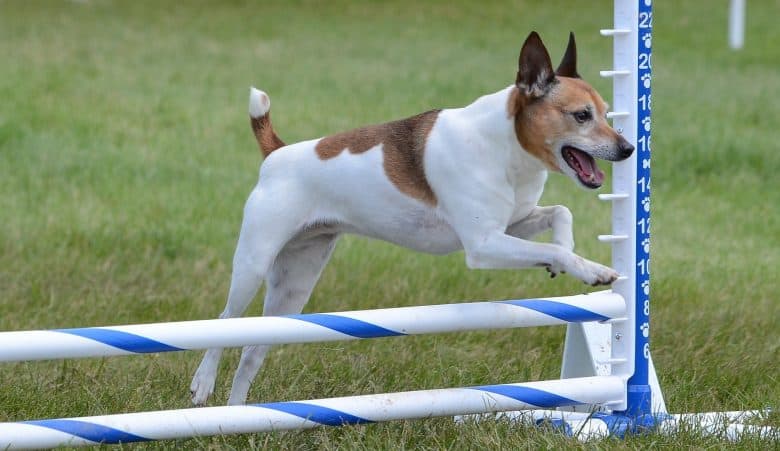
8. Rat Terrier
A Rat Terrier dog doing the agility trial
The Rat Terrier is an American small dog breed used predominantly for hunting rodents like rats and squirrels.
They are infamous farm dogs, which is why they are considered a rare breed today with the diminishment of family farms.
9. Treeing Cur
Source: @threejayeverayday / IG
These medium-sized size dogs have no restrictions regarding colors and markings, making it easier for breeders to focus on their hunting prowess.
Treeing Curs are fast, intelligent, and agile, and their treeing ability makes them quintessential for squirrel hunting.
10. West Siberian Laika
A portrait of an attractive West Siberian Laika dog
The West Siberian Laika is also known as Zapadno-Sibirskaia Laika and WSL, and it is a dog that looks a lot like a Husky and has a bit of wolf in the bloodline.
They are bark pointers, which is precisely the trait that squirrel dogs need to possess. These dogs are great hunters, but they can also be aggressive towards other pets and strangers.
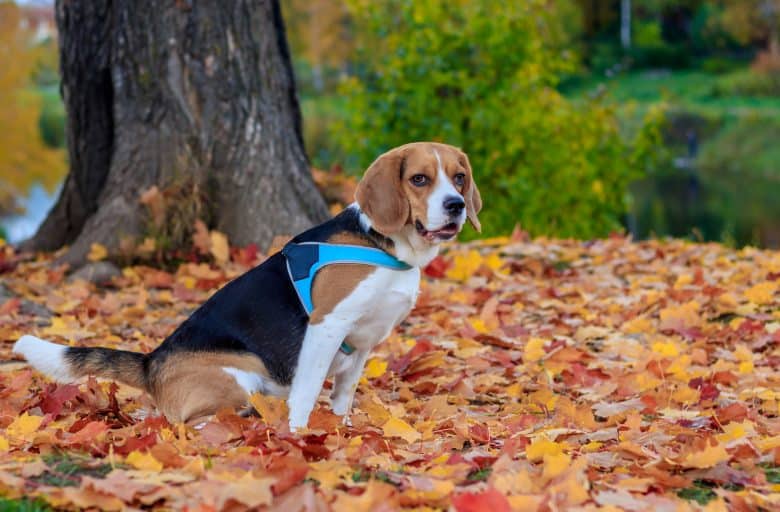
11. Beagle
An adorable Beagle dog in a park sitting on the fall leaves
Beagles are remarkable companions and family pets that also possess exceptional scenting ability since they were bred as scenthounds for tracking small game, like rabbits, hare, and squirrels.
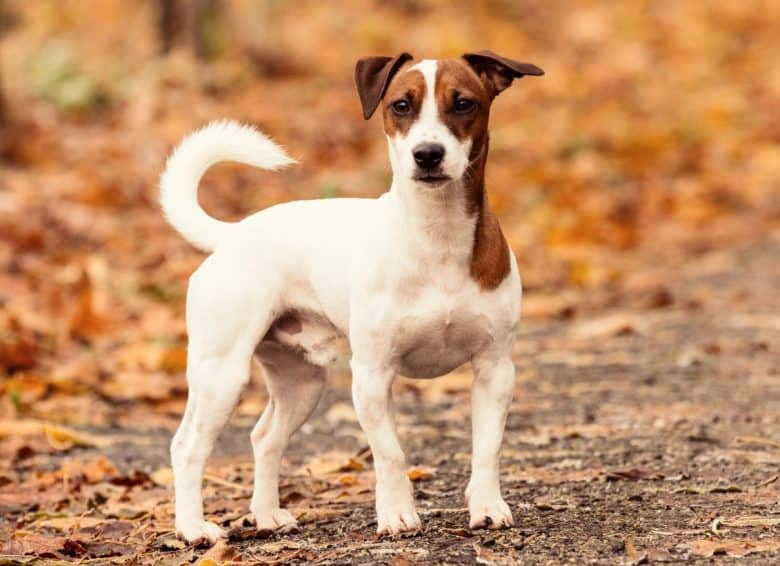
12. Jack Russell Terrier
A Jack Russell Terrier puppy enjoying day-out
Originally developed to hunt foxes, this small English breed is also known as the Parson Russell Terrier. They have considerable energy, so it can be challenging to keep up with them.
A well-trained Jack Russell Terrier is a great hunting dog with unparalleled agility and hunting instincts.
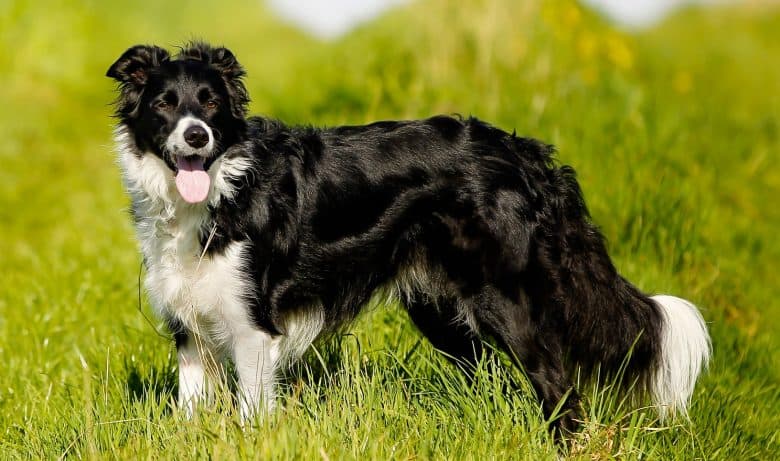
13. Border Collie
A purebred Border Collie dog enjoying the sunny day
Although Border Collies are famous as sheep-herding dogs, they can also become great at squirrel hunting since they are highly trainable and clever.
With their unlimited amounts of energy, exceptional stamina and agility, and highly developed sense of smell, Collies can be used for hunting any wild game.
14. Kemmer Cur
Source: @jolene.the.dog / IG
Kemmer Cur is also known as the Kemmer Stock Hybrid Dog or Cajun Squirrel Dog.
This hybrid dog is almost indistinguishable from the Mountain Cur since they come from the same bloodline and they are equally adept at squirrel hunting.
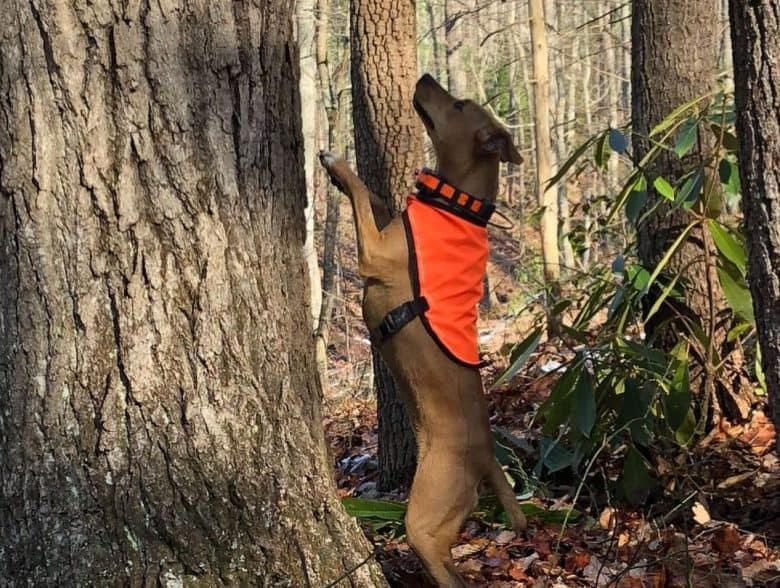
15. Black Mouth Cur
Source: @backtalkingcooper / IG
Easily recognizable due to its black muzzle and golden brown coat, the Black Mouth Cur is a loyal, affectionate pet and a fearless hunter.
These dogs are strong, adaptable, and highly intelligent, with a great ability for treeing.
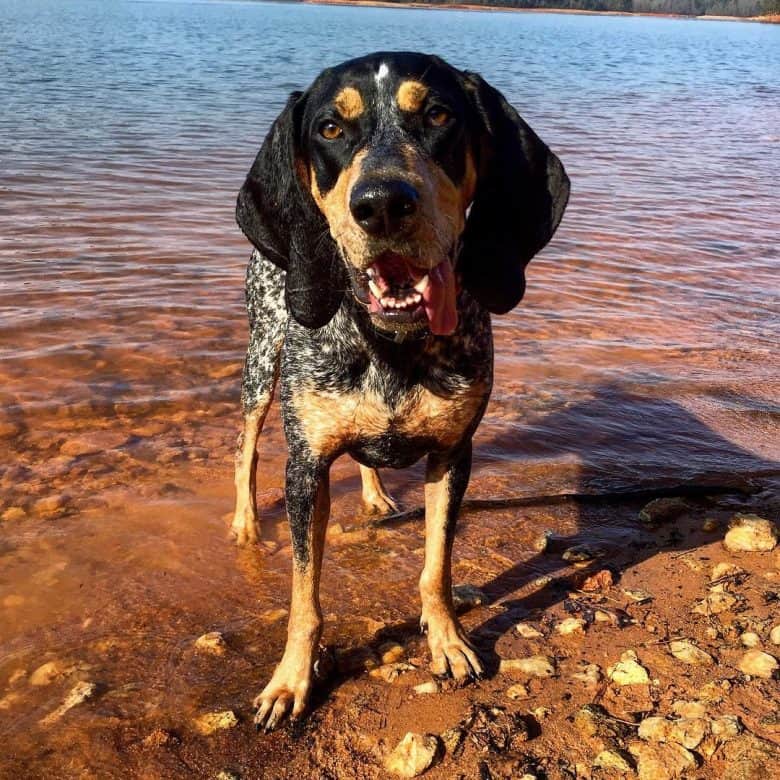
16. Bluetick Coonhound
Source: @dixie_thebluetick / IG
The beautiful Bluetick Coonhound is a large dog breed named for its mottled or ticked coat pattern of black and blue.
These dogs are muscled but also sleek and athletic, incredibly vocal, and with a high prey drive that needs to be adequately channeled.
17. Denmark Feist
Source: @pepper.depper / IG
This is a medium-sized breed that is a hybrid of Mountain Feists, along with Thornburg Feist, Kemmer Feist, and a few others.
Also called Denmark Treeing Feist or DenMark Treeing Feist, this dog is a champion when it comes to hunting small critters like squirrels and raccoons.
18. Leopard Cur
Source: @abersoldoutdoors / IG
Perhaps better known as the American Leopard Hound, this breed is one of the most versatile hunters out there. It is a medium to large dog that is highly energetic and outstandingly adaptable to weather conditions.
19. Treeing Tennessee Brindle
A Treeing Tennessee Brindle dog being the snow dog
The Treeing Tennessee Brindle is a type of cur dog that has a proficient nose and a powerful voice. These dogs are sturdy, intelligent, and dependable, with short and smooth brindle coats.
When should you start training a squirrel dog?
Squirrel dog training should start while they’re young, preferably three to six months of age.
It’s best to develop a bond with your fido as early as possible, and you can teach him basic commands that will be useful while hunting.
Take this time to introduce your pup to squirrels by tying a squirrel tail at the end of a stick or pole.
This will help him get familiar with the scent, then tie it to a tree to encourage him to bark whenever he’s treeing squirrels. Some owners use live bait.
Hunters have a saying: “A dog can’t learn to hunt in the kennel.” That means you have to take your dog for a live pursuit.
Start in an area with plenty of squirrels so that it’s easy for your dog and it will raise his confidence. Then try different locations later on.
Keep the sessions short and positive to produce the best results as a dog trainer.
How to Successfully Squirrel Hunt with Dogs?
Source: @hoofangler / IG
Squirrel hunting may sound simple – follow your dog while he locates the tree where a squirrel is hiding, or chase one up a tree – but in reality, it’s more complicated.
Before anything else, you should know that some squirrels are harder to spot, like gray squirrels.
You should also have a canine companion with a great nose to determine where the squirrel exactly is before you shoot it.
It’s also best that you learn these hunting terms before you and your squirrel dog hang out with fellow hunters:
Bark Treed – The sound that a dog makes when he locates the squirrel in a tree
Timbering – A term for a squirrel running through the trees, trying to escape
Toenailed – When a dog pins the squirrel by positioning himself on the bark of a tree
Has the Meat – When a squirrel is confirmed on the tree
Range – The distance between the hunter and the dog while searching for a squirrel
Frequently Asked Questions About Squirrel Dogs
What Time of Day Are Squirrels Most Active?
Squirrels are usually active all day, particularly in the fall and spring when they look for food. However, they are most active during dusk and dawn.
What Happens When a Dog Catches a Squirrel?
Source: @jack.the.squirreldog / IG
Well-trained squirrel dogs will kill the squirrel when they catch it, but they will not eat it. Untrained dogs might eat the squirrel after they catch it.
Will My Dog Get Sick from Eating a Squirrel?
If the squirrel is freshly killed, and your dog is healthy and on parasite control, he will most likely be fine. However, squirrels are hosts to many parasites, so the risk of transmission always exists.
What Diseases Can Squirrels Transmit to Dogs?
Some of the more common diseases transmitted from squirrels to dogs include plague, rabies, and Lyme disease. In some parts of the United States, squirrels can also carry a deadly disease called Leptospirosis.
Can a Squirrel Kill a Dog?
Squirrels can harm your canine with their sharp teeth and claws, but a dog getting killed by a squirrel is highly unlikely and borders on impossible.
Should I Let My Dog Chase Squirrels?
Unless you are training your dog for squirrel hunting, you should discourage such dangerous behavior in public places.
How Do I Stop My Dog from Chasing Squirrels?
Starting obedience training when the dog is young can be very helpful when you try to control his hunting instincts. Get your dog to concentrate on you during walks.
How Much Does a Good Squirrel Dog Cost?
Squirrel dogs from a good stock cost $100 to $200, but you can buy experienced treeing dogs with a price range of $500 to $5,000.
These amounts depend on the dog’s age, gender, whether it was trained, and if it’s squirrel season.
Verdict: Should you get a Squirrel Dog?
Source: @munchbeast / IG
If you plan to go squirrel hunting, it is critical to have a good squirrel dog and know how to utilize him.
Otherwise, it might be preferable to choose another breed – squirrel dogs are tremendously energetic and require a job to be healthy and satisfied.
Are you an avid squirrel hunter? Do you have something to add or contribute to more training tips? Let us know in the comments.
When it comes to bass fishing, it’s all about the sport of it. As you almost certainly know, bass anglers are out for a brain-bending hunt for big bass and what they want to eat, an unforgettable fight, and a stellar photo at the end of it.
However, before any bass angler starts to resuscitate their catch and watch it swim back off to fight another day, there’s one important detail that has to be gauged for any of it to mean anything: The size.
Any good fisherman will take plenty of pleasure in simply enjoying a nice fight and lipping a fish, but there’s something about the thrill of reeling in a massive bass after it has jumped all over the surface and put your equipment through the wringer.
Today, we’re going to talk about the top 15 largemouth bass ever caught; including where, when, and how they were caught. Using this information, and of course, building your own skills and intuition as an angler might just help you land the next record-shattering largemouth when you hit the water.
Buckle up, and let the history lesson begin.
1 – Current World Record – Lake Biwa, Japan
First up is the current world record. This impressive 22.311-lb bass was at Lake Biwa in Japan. This is the largest recorded largemouth bass ever caught, and what makes the catch even more impressive is the low number of largemouth in Japan. This is because they were introduced specifically for sport fishing. After a short time, they were labeled an invasive species, and they’re only found in a few select lakes that have now had their native ecosystems ravaged by the predators.
The angler that pulled this bad boy in is Manabu Kurita. He pulled the lunker in with a Deps Slide Swimmer 175 in 2009 at the age of 32. He has since tied his own record in 2022.
2 – Second Place – Lake Montgomery, Georgia
This one goes way back to 1932 when an angler by the name of George Perry caught a 22.25-lb largemouth at Lake Montgomery in Georgia. What makes this record so special isn’t that it’s a world record. Those are beaten by mere ounces across the fishing community all the time. No, this is special because it was the world record for largemouth bass from 1932 all the way until 2009 when Manabu Kurita nabbed the current world record at Lake Biwa. A little over two decades more, and he would have had a century-long world record. More importantly, this was from before sport fishing was big. It was a way to secure food, and anglers weren’t using the most advanced techniques and equipment back then.
Perry caught the monster on a Creek Chub Fintail Shiner; the only lure he and his friend had at the time of the catch.
3 – Third Place – Castaic Lake, California
This is the third-place record as of this writing, and it was made at Castaic Lake in California on March 12, 1991 by Robert Crupi. This whopper weighed 22.063 pounds, and it was just slightly shy of beating the 1932 record George Perry is famous for. Unlike the other records, Crupi didn’t use lures for this impressive catch. It was just good old-fashioned live bait on a basic float rig.
Being in the top three without using a fancy lure is a huge accomplishment, and you’ll be happy to know that Robert Crupi is still angling in the L.A. area now that he has retired as an LAPD officer.
4 – Castaic Lake, California – Michael Arujo
Another impressive catch was made at Castaic Lake in 1991; just seven days before Robert Crupi broke the 22-lb mark, Michael Arujo had caught a lunker weighing 21.75 pounds. That wasn’t quite close enough to George Perry’s long-standing record, but it was a massive breakthrough for the lake, and it is the fourth largest bass ever caught and officially recorded.
Arujo made the catch of his life with two different bummers attached to it. He was just shy of the world record, and a week after getting lauded for the second largest bass in the world, Robert Crupi came in and knocked him down to third place in the same watering hole. It’s a great catch, but you know that one had to sting a bit.
5 – Lake Dixon, California – Jed Dickerson
This 21.688-lb lunker was, like over half of this list, also caught in the Los Angeles area of California. A trend you’ll be noticing pretty quickly with the world record list.
While the bass is just shy of the 22-lb mark, it stood out for its unique spotted pattern and acquired the nickname “Dottie”. Dottie was caught in 2003.
6 – Lake Casitas, California – Raymond Easley
Raymond Easley’s 21.2-lb largemouth turned heads in 1980 as the first bass to breach the 20-lb range since George Perry’s legendary catch. While Easley’s catch isn’t the thing of legend, it is still a record holder. It’s the largest largemouth bass caught on an 8-lb line as of the time of this writing. It’s also worth noting that he wasn’t bass fishing at the time. He was teaching less experienced friends how to catch crawfish, and he happened to get lucky.
7 – Castaic Lake, California – Robert Crupi
Yes, the third-place world record holder is actually known for multiple catches. Just a year before he came close to dethroning George Perry’s age-old record, Robert Crupi caught a 21.1-lb largemouth bass at Castaic Lake, California; not far from where he’d later catch the 22 pounder he’s known for. Again, he’s one of the few world-record anglers to use live bait for their catches, and he’s one of the few with two records to his name.
8 – Miramar Reservoir, California – Dave Zimmerlee
Dave Zimmerlee caught a 20.938-lb largemouth at the Miramar Reservoir in California in 1973. This was not quite as close as Crupi’s catch in 91, but it was the first catch to get somewhat close in 40 years. Not only that, but it was the California state record and held its position for a fair amount of time.
9 – Castaic Lake, California – Leo Torres
Yet another Castaic Lake record, this catch by Leo Torres happened shortly before Crupi’s first 21-lb catch. Unfortunately, it wouldn’t last long as it was still in the 20-lb range at 20.86 pounds. Still, it was the catch of a lifetime shared by few anglers, and it’s yet another testament to the high catch potential of Castaic Lake.
10 – Lake Dixon, California – Mike Long
This 2001 catch was made at Lake Dixon, California by Mike Long. The catch was 20.75 pounds; just mere ounces behind the area’s top records, and it’s one of the top records at Dixon’s watering hole.
11 – Lake Hodges, California – Gene Dupras
This is Lake Hodges first appearance on this list, and it happens to be its largemouth bass record. Gene Dupras boated a 20.25-lb largemouth in 1985 on artificial lures and put the watering hole’s name on the map. While this is on the lower end of the 20’s, it’s still an important catch in the bass fishing world.
12 – Miramar Reservoir, California – Johnny Garduno
This 20.25-lb catch by Johnny Garduno in 1990 is tied with the number 11 spot placed by Gene Dupras, but it doesn’t hold the reservoir record as that was accomplished in 1973 with a 20.983-lb largemouth. Still it is the catch of a lifetime for the angler, and it’s just ounces off of the watering hole’s record; proving big bass aren’t just a fluke at Miramar.
13 – Big Fish Lake, Florida – Fritz Friebel
Florida is known for some good bass fishing, along with some unique species of bass besides largemouth. So, while this is the one and only largemouth record from Florida on our top 15 list, it’s worth noting that the state pops up frequently with longer, more lenient lists.
This one was caught by Fritz Friebel in 1923, and at 20.123 pounds, it held the world record until George Perry set his nearly 80-year-long record.
Again, keep in mind that sport fishing wasn’t really a thing back then, and neither George Perry or Fritz Friebel would be considered professionals nowadays. They were just good old boys enjoying a bit of fishing. That’s an important detail for later.
14 – Lake Mission Viejo, California – George Coniglio
This 2006 record isn’t the biggest in the world, country, state of California, or even Los Angeles county, but it is the Lake Mission Viejo record at 19.7 pounds. George Coniglio still holds the lake record, and there’s no denying that, even compared to the 20+ pound fish on this list, no angler would brush off a 19-pound hog.
15 – Castaic Lake, California – Mark Balloid
What’s a better way to finish our list off than to return to yet another 1990 beast from Castaic Lake? On March 30, 1990, just shortly after Robert Crupi’s first record fish, Mark Balloid caught a 19.5-lb lunker that, while still a bit smaller than Crupi’s catches at the lake, was a massive accomplishment.
How to Use This Information
Now, besides learning about some amazing largemouth, what good is this list for you, the average fisherman? Well, as it turns out, there’s quite a bit you can learn from it.
Here are the points we believe stand out the most.
It’s Not Restricted to Gatekeeping Pros
Did you notice that two of the earliest world-record catches, and several of the more modern catches, weren’t made by professionals on $40,000 bass boats with $700+ rods? Nope. They were caught by regular fishermen who, sometimes, weren’t even trying to catch record-breaking bass.
The point to understand the most from this is that the record holders involved knew how to react to the hard fights those 19 to 22-lb fish were putting them through, and even with the 1920s and 30’s equipment, they were able to work those basses back to their boats. George Perry, the man with the longest-lasting world record, and who is still in second place globally, caught his lunker in a homemade boat with the only lure he had on him. He stated that he wasn’t worried about losing the fish, but he didn’t want to lose his Creek Chub.
You don’t need a second mortgage and a very angry wife to pick up the big fish. You just have to know what you’re doing when they bite.
Water Counts
What makes the current record so impressive isn’t just that it broke George Perry’s almost century-old record. It’s that it happened in Japan where largemouth isn’t even native.
If you noticed, up until that point, the entire top 15 list is comprised almost entirely of Californian lakes and reservoirs, and a couple of names pop up several times to dominate the list. Notably, Castaic Lake shows up a lot.
If you want to catch big bass, you can do that anywhere there is bass. Kurita proved that by shattering George Perry’s long-standing record. However, your chances are quite a bit higher if you find the waters known for producing such abnormal bass specimens.
Unfortunately, that same concept can lead to higher pressure from other fishermen. Everyone wants the world record with sport fishing, and you won’t be the only one running to a well-known watering hole.
Pressure Increases, and Catches Go Down
If you notice, the predominant body of water on this list has basically all of its notable entrees set in the early 90’s. Not a single Castaic Lake record of real notability has cropped up since.
That doesn’t mean big fish aren’t found there, but it given its history of producing jaw-dropping trophy bass and the drop off, it’s safe to assume that “something” has put a damper on what the lake is producing.
That damper is typically waves of fishermen, both responsible and irresponsible, attempting to get in on the trophy-sized action.
This increases pressure and makes fish more finicky, and if the water is being overfished or the fish aren’t being released properly, numbers can drop; effectively ruining what the hole was known for.
Keep that in mind, and don’t always hunt your next trophy at a certain hole just because it’s famous.
This article contains affiliate links. We may earn a small commission if you purchase via these links.
If this is your budget, you need to do some serious digging before handing over any cash.
$500 is still a hefty chunk of change, but with brands like Vortex, Leupold, Vanguard, and Bushnell, you’ve got variety and quality on your side.
Let’s take a look and see which brand has the best spotting scope under $500.
Top Spotting Scopes Under $500 (Comparison)
When it comes to spotting scopes, often manufacturers either do it well or they don’t. Many of our top brands that are hunters’ go-to companies had some disappointing hits and misses – mostly misses – in this price range.
Because of this, when putting together the line-up for the $300-500 price range, it was tough to come up with the top three. So, you’ll have to forgive us if we throw in an option that slightly bends the rules – it’s just going to have to do.
We took into account the grade quality of the glass, any special coatings, and ability to see groupings clearly in the 200-400 yard range. Let’s take a look at what we came up with.
The 6 Best Spotting Scopes Under $500
1. Leupold SX-2 Alpine 20-60×80 – Best Overall
The SX-2 Alpine spotting scope is capable of providing clear and sharp resolution throughout all hours of the day and across its entire magnification range. It has a drawback or two, but it’s easily one of the best spotting scopes for its price point.
Pros:
HD Optics
Oversized eyepiece
Rugged construction
Fog/waterproof
Lifetime guarantee
Cons:
ED glass confusion
The SX-2 Alpine has Leupold’s Advanced Optical System with HD quality. Leupold lacks mentioning any ED elements, but the glass was made with calcium-fluoride (much like ED glass, right?) that helps to reduce the dispersion of lightwaves at the objective lens. So yes, while there will be some chromatic aberration, it might only be visible on the higher powers and in difficult light conditions that most spotting scopes struggle with too.
Helping to keep you longer behind the eyepiece by reducing fatigue and compensating for less-than-perfect eye alignment is the oversized 59.94mm eyepiece and the 19-18mm of eye relief. All-day glassing, big game hunts, and long-range spotting of groupings are tasks the Alpine HD is well suited to.
Build quality is covered with an impressively balanced speed-to-precision helical focus, fogproof and waterproof body, and it’s been tested to perform in extreme climate conditions from -40 to 160-degrees Fahrenheit.
If the name is any indication, you may have to put in for a hunting unit where you can test it to its limit. High mountain hunts for black bears, whitetails, mules, elk, and bighorn sheep are more productive when you have glass that can keep up with the harsh alpine conditions.
2. Athlon Argos HD 20-60×85 – Best Value
The Argos HD mustn’t be compared to more expensive scopes as it’s one of the cheapest in this price range. To get a colossal 85mm spotter for under $400, it’s a budget buy with value.
Pros:
85mm aperture
Advanced FMC coatings
Helical focus
Fog/waterproof
Extendable sunshade
Cons:
Optical quality vs marketing
It may be harsh to be so blunt about the optical quality of the Argos HD, but the marketing implies that it has a couple things that it, in fact, lacks. It does not have ED glass or additional elements that can be confirmed to provide high-definition optics. Athlon says the scope has “phase coated Porro prisms” but Porro prisms are inherently unaffected by beam splitting that occurs in roof prisms.
The gist of it is, Porro prisms are great at maintaining contrast and resolution and will perform better than roof prisms that lack PC coatings. As such, the Argos does well for its price point with or without the supposed PC coatings. It struggles with light loss past 40x and off-axis sharpness as do all spotting scopes at comparable price points.
Looking past the marketing gumbo, it has laudable resolution in lowlight conditions. It’s adequate for hunting, range use, wildlife observation, and amateur lunar observation.
The adjustable features of the spotter, i.e., magnification ring, multi-position eyecup, and extendable sunshade offer smooth responsiveness. The focus knob is touchy at max power, so for instant gratification for birdwatching when seconds count, the Argos might not work for you. For focusing in long-range in the field or the shooting range, you have time to be light-handed here.
For the average range shooter, causal outdoorsman, and spot and stalk hunter, the Argos offers big specs with better-than-average performance for its price point. Now that’s value.
3. Vortex Diamondback HD 20-60×85 – Best for Hunting
Overall, the Vortex Diamondback HD isn’t perfect, but for the money, it offers a lot more than the old series. The VIP warranty can’t be beat, so there’s no fear in taking it into wild country for the hunt. The bottom line is that it performs, it’s under $500, and it’s highly recommended.
Pros:
ArmorTek coating
Dual focus
Long eye relief
Argon gas
Arca-Swiss compatible
Cons:
Chromatic aberration
The Diamondback HD spotting scopes have an HD Optical System, but Vortex did not disclose any ED elements. It suffers from color fringing and can be distracting for birdwatching and lunar observation/digiscoping.
The optics will not hold a candle to the Viper HD let alone the Razor HD. But as the entry-level spotting scope line, the glass quality is more than acceptably functional for wildlife observation, range use out to 1000 yards, and Western deer hunting.
The Diamondback HD is rubber armored, waterproof, and has been purged with Argon gas that is usually seen in the high-end range. It has long eye relief of 20.3-18.3mm, has an adjustable eyecup and sunshade, and a rotating tripod ring.
A new feature is the dual focus for course and fine adjustments with the helical focus collar. It’s compatible with Arca-Swiss tripods without needing additional plates and can be mounted to standard ¼-20 tripods.
The HD models gained weight and the objective got larger. This model weighs 60.9oz, and it’s not a bad thing. The extra weight will help to stabilize the setup especially when you’re in the high mountains and big country where windy conditions are the norm.
The glass isn’t perfect and that’s okay. You can always spend more to get better, but for this price point, the Diamondback HD is a performer.
4. Vanguard Endeavor HD 82 Scope
Remember how we said we were going to bend the rules a little bit? This is where we show you how. The Endeavor is just above the $500 mark, but when it’s on sale, you can get it within this price range. We had to do a little tweaking because we only want to offer you the most reliable and high-performing spotting scopes there are. There’s no point in recommending a dud.
The Endeavor has a beast of an objective lens that can provide ultimate brightness and light collection. To take maximum advantage of the 82 mm lens, it’s been made with extra-low dispersion glass elements, been fully multi-coated, and has BaK4 prism glass. There’s more yet to spill about the Vanguard Endeavor, so keep your eyes peeled for the full review!
5. Visionking 30-90X100SS Spotting Scope
This spotting scope is huge, so it’s no joke to assume this thing will be the king of faraway vision. With extreme, high magnification and a huge 100 mm aperture, no distance will be out of your reach.
Pros:
Price
Extreme high magnification
Huge aperture
Dual focus
Weatherproof
Cons:
Heavy
If you think you can have these spotting scope specs without some serious poundage, you’re kidding yourself. With almost 6 pounds to tote and set up, this is a beast of an optic that you want to use with a quality tripod that can support its weight.
So, what’s the point of such extreme specs? To see more of course! The 100 mm aperture will allow in as much ambient light as possible throughout different times of the day whether it’s bird and wildlife watching or star gazing. With such high magnification, you’ll want to make use of the 2-speed dual focus dials to get the sharpest and clearest image possible.
The BaK4 prism glass is fully multi-coated, but there’s no mention of any phase/prism coatings or extra-low dispersion glass elements. The lack of these additional glass features is surprising for such a high powered scope, and it may mean clarity might not be the best as it reaches max magnification.
Even for a generic, off-brand spotter, it still covered its bases when it comes to durability. It has RainGuard HD water-repellent lens coating (sound familiar? Bushnell tech?), it’s O-ring sealed, nitrogen-purged, and 100% waterproof.
If you’re the type of spotter that likes to get set up and stay stationary, the Visionking scope will work for you. A tripod is included in the buy so you won’t have to immediately fork out for one.
6. Kowa TSN-601 Angled 60mm Spotting Scope
Kowa, a prestigious Japanese brand known worldwide for their quality optics, and we have a spotting scope that just barely fits this price range. Owning a Kowa for 500 bucks just might be the best bargain deal of the day.
Pros:
Price
Interchangeable eyepiece system
Made in Japan
Weatherproof
10-year warranty
Cons:
Scope body only
Typically, you won’t see spotting scopes sold by eyepiece and scope body separately until you’re spending over two grand. This is indicative of premium quality to ensure you’re purchasing the most appropriate eyepiece system for your spotting application. Want variety? You can buy and use an eyepiece with a different power range.
With the interchangeable eyepiece system, you also have access to see if Kowa compatible digiscoping accessories can work for photography, recording, and capturing rare once-in-a-lifetime moments that you won’t ever be able to duplicate.
Still, if you’re spending only 500 buckaroos on the scope body, you’ve got to wonder how much it costs to get the eyepiece. Expect to add at least a few hundred bucks to your budget.
The Kowa spotter is made in Japan, and they’re usually an excellent source of glass and quality when it comes to optics. When you buy this scope from an authorized dealership, you’ll get their lifetime warranty on it.
It’s nitrogen-purged and O-ring sealed for both fog and waterproof protection. It’s made with polycarbonate materials to keep weight to a minimum without compromising build quality.
What more is there to say? You’re getting a Kowa for 500 bucks!
What to Look for in a Spotting Scope in This Price Range
Spotting scopes in this price range should have a few premium perks thrown in – we’re talking about $500, it’s got to be worth it. However, you’ve got to be brand-specific to ensure you’re getting the best of what you can afford.
If you’re going with a high-powered and heavy scope, you’re going to want to add additional costs for quality, strong, and solid tripods and mounting systems. Just keep that in mind when you plan on spending every penny. Here’s what else you need to look for.
Glass & Coatings
Overall, we should start to see some ED (Extra-low Dispersion) enter the market. Some spotting scopes might have “HD quality” but it doesn’t guarantee ED elements. When it comes to coatings, we should see FMC and extra lens coating formulas to enhance light transmission and protect the lens.
On average, there will be a lot of 20-60×80 configurations at this price point. Considering the glass quality, this is a good configuration to stay within since more magnification will demand more performance from the glass.
Though most spotting scopes under $500 will have the eyepiece included with the scope, you may see some interchangeable eyepiece scopes available. Though rare to see it at this price point, it can happen.
Eye relief will tell you how comfortable the eyepiece will be to use and if you can keep your glasses on or not. I would say that 15 mm is the minimal amount of acceptable eye relief if you wear glasses, but it’s better to have at least 19-20 mm on the long side as it does get shorter at max power.
The field of view can indicate what applications the spotting scope could be good for. Though high magnification narrows the FOV, it can provide close-ups of the target that is good for long-range seeing. On the other hand, a wide FOV is good for watching moving targets while hunting or bird watching.
In general, weight and size can be a limiting factor of a spotting scope. They are obviously larger than binoculars, but they offer high and variable magnification with a huge objective lens. Compact scopes would be best for hiking, some hunting, and for fast glassing.
Full-size scopes are excellent performers when tripod-mounted for bird watching, wildlife observation, and amateur astronomy like lunar observation.
You should also consider overall weight, that is, combined weight with a tripod and any counterweights if needed.
Overall, you should expect good glass and solid performance out of a $500 spotting scope. They should be fog and waterproof at this point and come with a warranty that you can rely on in case the unexpected happens.
If you have the chance to shop in person, put your scope through the ringer to really see if it’ll work for you. If one promising purchase ends up being a dud, it’s one purchase too many.
Buying online eliminates the chance to give the spotting scope a test run before you buy, but that’s where counting on our expertise comes into play. If the masses are impressed, you just might be too. Since we’ve put ’em all through the ringer for you, you can rest assured that your money is well placed. It’s called buying confidence – you’re welcome!
Further Reading
Zeiss Victory Harpia Spotting Scope Review – 85mm Angled with Dual Speed Focus System
Zeiss Dialyt 18-45x65mm Spotting Scope Review (A True Hunters Tool)
Zeiss Conquest Gavia 85 T Spotting Scope Review (Ideal for Birders)
Vortex Viper HD 20-60×85 Angled Spotting Scope Review (Helical Focus)
Vortex Viper HD 15-45×65 Spotting Scope Review (Straight)
What is backlash & why do baitcasters suffer from it?
Backlash happens when the lure slows down after casting, but the spool does not—resulting in a tangled mess of line, also known as a “bird’s nest.”
It usually happens when you don’t have the spool and brake system set properly, it can happen if you aren’t using the right rod, and it can happen if you are not using the right line and lures.
The bottom line is that backlash with baitcasting rods is a mess that you absolutely want to avoid.
How to prevent backlash on your casting reel?
Backlash is what usually discourages people from using a baitcasting reel. However, there are many advantages to using a baitcaster rather than a spinning reel—such as allowing for more precision and control, giving you a more accurate cast. Then we will tell you a few ways to help prevent, or lessen backlash.
1. Choose the right (not expensive) equipment
When just starting, you want to choose the right fishing line to make it easier to untangle a bird’s nest.
Monofilament line causes the least backlash and is the easiest fishing line to untangle than a braided line or fluorocarbon line.
A heavy lure works better for baitcasting when you’re just beginning. The heavier lure will keep constant pressure on the line. When you go lighter you have to really pay attention to your arm/wrist position and how you are moving the rod. Normally, you snap the wrist with a Spinning Rod get the maximum distance but if you do that with a baitcaster rigged light, you will backlash every time. A baitcasting reel is more of a whole arm type of cast. If you could see in slow motion what happens when you snap your wrist with a bait caster, you would see a hump in your line heading out towards your lure and then traveling back to your reel. When it gets back (very quickly by the way) you get your backlash.
2. Adjust spool tension & the brake system & do a test cast
In the beginning, you need to ensure that your spool tension is set just right. You want your lure to fall at neither too high nor low of speed—but at a medium pace. There is no correct setting, so use trial and error to see where you feel most comfortable.
Just as important, you want to set the brake system to the highest setting. This gives you more control and allows less movement while you practice. When you become more comfortable, you can begin to lower the tension to allow longer baits.
3. Do not cast your lure against the wind
Casting against the wind will slow down your lure, but not your reel, resulting in backlash. As you become more comfortable with your reel and gain experience, you can begin casting into the wind.
If it’s possible, try practice casting in your backyard so you can have some control of your surroundings.
Once you’ve gotten the feel for your baitcaster, test it out on the water. You can experiment with different braking and tension settings to see which is most comfortable. When you feel that you are getting the hang of it, you can try investing in a more advanced bait caster. The most important: practice more, then you will handle it like a pro!
Unlock the Perfect Shot: Discover the Best Scope for Break Barrel Air Rifles. Enhance your shooting experience with precision and accuracy, as we delve...
"Understanding the Legalities: Felon Ownership of Air Rifles in Tennessee"
can a felon own an air rifle in tennessee?
In the state of Tennessee, the ownership...